Azure Database Services
Azure Database Services are here to simplify how you handle data, helping you focus on what truly matters: your applications. When you use these services, you get access to a suite of tools that ensure your database is always available, secure, and ready to scale with your needs. Whether you’re running a small app or a global service, Azure Database Services are designed to grow with you, fitting seamlessly into the broader Azure ecosystem.
In this Azure tutorial, I will cover the various service offerings, how they simplify data management with robust, built-in features, and why mastering these services is crucial for developing, deploying, and managing scalable and secure cloud applications. Boost your earning potential by 22% with in-demand Azure skills. Join our Free Azure Fundamental Training now!
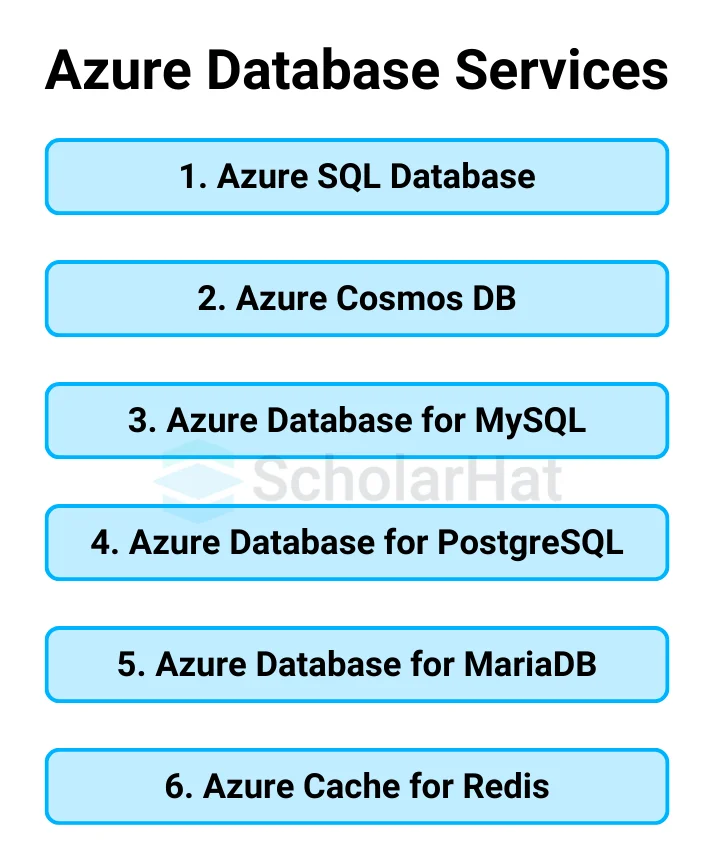
Types of Azure Database Services
Azure Database Services come in various forms, each tailored to specific use cases. Let’s dive into each of them so you can see which one fits your needs best.
1. Azure SQL Database
Azure SQL Database performs similarly to a fully managed SQL Server instance. If you've ever handled SQL Server on-premises, you'll appreciate the ease Azure offers. Azure provides infrastructure for you, so there's no need to manage it. It also includes modern technologies like AI and machine learning to boost performance.
Here’s a quick overview:
- Fully Managed SQL Server: Azure handles infrastructure management, so you don’t have to.
- Familiarity with SQL Server Users: If you’ve used SQL Server before, Azure SQL will feel similar but with added convenience.
- Advanced Optimization: Features built-in AI and machine learning to optimize performance automatically.
- Multi-Tenant Architecture: Operates on a shared-resource model but ensures you get the performance you need through resource governance.
- Service Tiers: These include general purpose, business-critical, and hyper-scale tiers to suit different performance needs.
- Ideal for Scalable Applications: Perfect for apps that require consistent performance and easy scalability.
- Flexible Pricing: Offers pricing models that allow you to scale and control costs as your needs grow.
2. Azure Cosmos DB
Azure Cosmos DB is a fully managed, globally distributed NoSQL database service. It is all about low latency and high availability, providing fast and reliable performance no matter where users are located. It has multimodel support and flexible scaling, making application needs varied.
Key Features of Azure Cosmos DB
- Global Distribution: Cosmos DB is a globally distributed database; hence, your data will be made available for users in other regions with low-latency performance.
- Multiple Data Models: It supports various models, such as key-value, document, graph, and column family representation of data, making it flexible with respect to different applications.
- Automatic Scaling: Cosmos DB can automatically scale to demand requirements for throughput and storage in your application and efficiently process volumes that are very high.
- Multi-Master Replication: This feature provides high availability through replication across multiple regions, ensuring consistency in data.
- Guaranteed SLAs: It comes with guaranteed SLAs where throughput, latency, consistency, and availability are guaranteed to provide predictable user experiences.
Why Choose Cosmos DB?
This makes Cosmos DB perfect for both global scalability and flexible data models, offering high availability with very good performance and cost efficiencies for a variety of applications.
3. Azure Database for MySQL
Setting up, running, and scaling MySQL databases on the cloud is made simple with Azure Database for MySQL, a fully managed MySQL database service. You may utilize your MySQL database just like any other, but much more conveniently, if you let Azure take care of the infrastructure, security, and patching. It offers excellent availability and is designed to grow with the needs of your application.
Key Features of Azure Database for MySQL
- Fully Managed: Azure will manage the infrastructure for you. It means that Azure is responsible for patching, doing backups, and other security-related tasks while you can focus on the development of your application.
- Intuitive MySQL Experience: Use the same MySQL database engine you are used to, complemented by managed services from Azure.
- High Availability: Be assured that MySQL databases are always up and running, with high availability and minimum planned downtime.
- Automatic Scaling: Easily scale up or down depending on the workload your application requires; flexibility when your needs change.
- Built-In Security: Includes encryption of data, security, and compliance with industrial standards to keep your data protected.
- Flexible Pricing: Offers different pricing tiers. Every customer pays for what they use and scales up when needed.
- Backup and Restore: Automate backups and make restoring them easy for those moments when you need your data safe and recoverable.
Why Choose Azure Database for MySQL?
Azure Database for MySQL is a great choice when applications need fully managed MySQL scaling and security in cloud computing.
4. Azure Database for PostgreSQL
A completely managed service built on top of the open-source PostgreSQL architecture is Azure Database for PostgreSQL. This solution streamlines PostgreSQL database deployment, administration, and scalability in the cloud. You can concentrate on developing your applications while taking advantage of enhanced performance, security, scalability, and high availability when your application needs to expand by using Azure infrastructure.
Overview of Key Features of Azure Database for PostgreSQL
- Fully Managed: Azure handles all infrastructure tasks such as updates, backups, and security, freeing up resources to build applications.
- Familiar PostgreSQL Experience: It's the same PostgreSQL engine you're used to, with additional Azure capabilities provided by the managed service.
- High Availability: The solution ensures PostgreSQL databases are always up and running with minimal downtime.
- Automated Scaling: Seamlessly scale your database up or down depending on application needs, ensuring flexibility and performance.
- Inbuilt Security: Encrypts your data, enhances security measures, and meets industry standards.
- Flexible Pricing: Offers multitiered pricing, pays for what you use and scales up as demand grows.
- Backup and Restore: Scheduled backups ensure data is safe, with quick and easy restoration options.
Why Choose Azure Database for PostgreSQL?
Azure Database for PostgreSQL is the database service of choice for applications that require PostgreSQL’s robust features, along with the added benefits of cloud scalability, high availability, and managed infrastructure.
5. Azure Database for MariaDB
Azure Database for MariaDB is a cloud-based MariaDB service that makes it easier to run, manage, and scale MariaDB databases. Azure handles infrastructure duties like backups, security, and upgrades so you can focus on developing and expanding your apps. It is designed to expand to meet the demands of your application while preserving performance and availability.
Key Features of Azure Database for MariaDB
- Fully Managed: Azure makes updates, backups, and patching, allowing you to focus on your development.
- Familiar MariaDB Experience: You will have the same MariaDB engine you are used to with Azure supporting its managed services.
- High Availability: High availability is not optional, which means that 99% of the time, there will be no downtime when accessing the MariaDB databases.
- Automatic Scaling: Scale in or scale out your database resources depending on the increase or decrease in the application workload.
- Data Security: It provides a wide range of security measures for blocking unauthorized access to the data, including encryption and adherence to the relevant regulations.
- Flexible Pricing: Take advantage of multiple pricing plans where you only pay for what you use and have the option of increasing it depending on demand.
- Backup and Restore: Automated backup and restore capabilities are provided to secure your data and ensure quick access after a loss.
Why Choose Azure Database for MariaDB?
If your application needs this level of MariaDB flexibility, then the Azure Database for MariaDB is the perfect answer, as it combines the benefits of the application with the power of the cloud.
6. Redis Cache in Azure
Azure Cache for Redis is a distributed, in-memory cache solution that provides faster and scalable caching to applications. The performance of an application is improved by storing the frequently accessed data in memory, which reduces the load on your backend to ensure data access with minimal latency while security and availability are maintained, scaling seamlessly into Azure.
Key Features of Azure Cache for Redis
- Fast In-Memory Caching: With low-latency, in-memory data storage, Redis enhances application performance.
- Scalability: Scale your Redis cache to meet the performance and availability requirements of your application.
- High Availability: Built-in redundancy and failover options ensure that your cached data is available even in case of failures.
- Persistence of Data: Offers data persistence options, allowing you to save your cache data to disk for backup and recovery.
- Security and Compliance: Provides encryption, advanced security, and compliance with industry standards to keep your cached data safe.
- Flexible Pricing: Offers month-to-month service with various pricing tiers, depending on your specific caching needs, and allows scaling as your application grows.
Why Azure Cache for Redis?
In general, Azure Cache for Redis is ideal for applications that require fast and scalable in-memory caching to reduce backend load. Performance improvement can be achieved thanks to the secure and scalable environment provided by Azure.
SQL Vs. NoSQL on Azure
When you're working with Azure, you might wonder whether you should use an SQL database or a NoSQL database. It is like choosing between structured and flexible ways of storing your data. Let's look at how they compare:
| Criteria | SQL (Azure SQL Database) | NoSQL (Azure Cosmos DB) |
|---|---|---|
| Data Structure | You work with structured data. It is like using tables with rows and columns, similar to spreadsheets. | You use unstructured or semi-structured data. It is more flexible and can handle things like documents, key-value pairs, and graphs. |
| Schema | You have a predefined schema, so you need to know your data structure beforehand. Changing it later can be complex. | It allows a dynamic schema. You can easily add or remove fields as your data evolves without worrying about predefined structures. |
| Query Language | SQL databases use SQL (Structured Query Language) for querying, which is standardized and easy to learn. | NoSQL databases often use flexible querying methods, depending on the type of data (e.g., JSON-based queries in document databases). |
| Scalability | SQL databases are vertically scalable. This means you scale by adding more power (CPU, RAM) to your server. | NoSQL databases are horizontally scalable. You can scale by adding more servers, which is more efficient for large-scale applications. |
| Consistency | SQL databases provide strong consistency. You always get the most up-to-date data when you query. | NoSQL databases often offer eventual consistency. It is like you might not get the latest data immediately, but the system eventually syncs up. |
| Use Case | Best for applications where relationships between data are important, like financial systems or inventory management. | Ideal for handling large volumes of data with varying structures, like social media platforms or IoT applications. |
| Azure Service | Azure SQL Database is the managed SQL service on Azure that supports relational databases. | Azure CosmosDBisthe NoSQL service on Azure, supporting multiple data models like documents, key values, graphs, and column families. |
To summarize, use SQL databases when you need strict structure and relationships in your data. Use NoSQL when your data is more flexible, and you need to scale quickly.
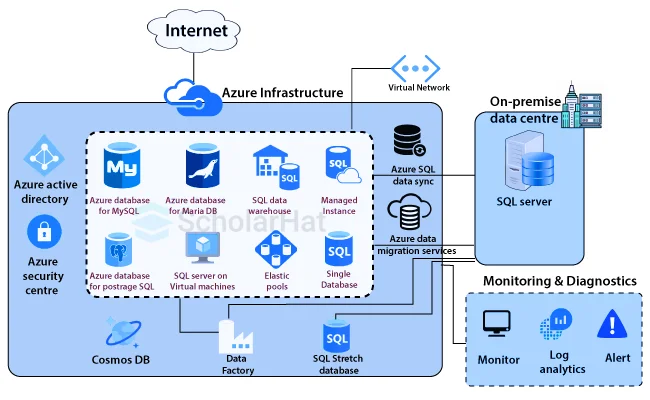
Azure Database Migration Service
Azure Database Migration Service is all about making the move of your databases easier from one place to another. It's the guide that shows the way so that the process can be much smoother and faster.
- You can use it to migrate your databases to Azure without having to worry about downtime.
- Think of it like a bridge that carries you over from older systems into newer ones in the cloud.
- It supports a number of databases, including SQL Server, MySQL, and PostgreSQL.
- It keeps your data safe during the relocation process, so you won't have to stress about misplacing anything.
- You can use it to automate the migration process; this way, you save time and reduce the chance of mistakes.
It's there to make your database migration as smooth as possible so that you can focus on what matters most.
Architecture and Scalability
When we talk about architecture in software, it is like the blueprint of how everything is structured. It shows how different parts of the system connect and work together. If you build a solid architecture, your system can grow smoothly when needed, which is what scalability is all about.
Architecture
- It is like the foundation of a building. If you plan it well, everything works smoothly.
- You can use different patterns like microservices to split your system into smaller, manageable parts.
- Good architecture helps you solve problems before they get too big, keeping everything efficient.
- You can design it so that adding new features or components doesn’t break the existing system.
- It’s about creating a structure that supports both current needs and future growth.
Scalability
- Scalability means your system can grow and handle more users or data as needed.
- It is like expanding a house. You don’t rebuild it from scratch; you just add more rooms.
- You can scale vertically by adding more power to existing servers or horizontally by adding more servers.
- A scalable system handles growth smoothly without slowing down or crashing.
- You can plan for scalability by designing flexible architecture from the start.
In short, a well-thought-out architecture lays the foundation, and scalability ensures that your system can grow easily when demand increases.
Hands-On with Azure Database Services
- Azure Database Services provide powerful tools to manage, store, and scale your data in the cloud.
- With Azure SQL Database, you get a fully managed relational database, while Cosmos DB handles NoSQL with global distribution and fast response times.
- Azure Database for MySQL/PostgreSQL supports open-source databases with automatic scaling and management.
- For a more advanced SQL Server experience, Azure SQL Managed Instance offers full SQL Server features in a cloud environment.
- Lastly, Azure Data Lake Storage allows you to store and process massive amounts of data for big data analytics.
Monitoring and Performance Optimization
Monitoring and performance optimization is like keeping an eye on your system to make sure everything runs smoothly and fixing issues before they become big problems.
- Monitoring helps you track how your app or database is performing in real-time.
- You can use tools like Azure Monitor to watch for any unusual spikes or slowdowns in performance.
- It is like having a dashboard that shows you how healthy your system is, letting you respond quickly to issues.
- Performance optimization means making adjustments to improve speed and efficiency, like tuning your database or refactoring code.
- Regular monitoring allows you to identify bottlenecks and optimize your system for better user experiences.
By combining monitoring with optimization, you can ensure your app stays fast, responsive, and reliable as it scales.
Security and Compliance
- Use Azure’s Security Features: You can secure your database using Azure’s built-in security features, like encryption at rest and in transit. It is like locking your data both when it's stored and when it's being sent, keeping it safe from unauthorized access.
- Implement Proper Access Controls: You should use proper access controls, such as Azure Active Directory authentication, to make sure only authorized users can access your database. It is like giving keys only to trusted people so no one else can get in.
- Follow Compliance Standards: You can rely on Azure to help you meet compliance standards like GDPR and HIPAA. It is like having a guide that helps you follow the rules, ensuring your database meets industry regulations.
Pricing and Cost Management
When working with Azure services, managing costs is as important as building your application. Azure provides flexible pricing models that let you pay only for what you use, but it’s essential to keep an eye on your spending.
- Pay-as-you-go: You only pay for the resources you use, making it easy to scale up or down based on your needs. It is like turning on the lights only when you need them so you don’t waste money.
- Azure Cost Management Tools: You can use tools like Azure Cost Management and Billing to monitor your spending and set budgets. It is like having a dashboard that shows you how much you’re spending in real-time.
- Reserved Instances: You can save costs by committing to long-term plans with reserved instances. It is like buying in bulk and paying less when you plan ahead.
- Scaling for Savings: You can adjust your resources to fit your current needs, scaling up when demand is high and scaling down to save costs when it’s low.
- Optimize Resources: You should regularly review your resource usage to identify any waste or underutilized resources. It’s like trimming unnecessary expenses to keep your budget in check.
By using these tools and strategies, you can effectively manage your costs while still getting the most out of Azure’s services.
Backup and Disaster Recovery
Having a solid backup and disaster recovery plan is like having a safety net for your data. It ensures that even if something goes wrong, you won’t lose your important information.
- Azure Backup: You can use Azure Backup to automatically save copies of your data. It is like having an automatic save button that protects your data from accidental loss or damage.
- Disaster Recovery with Azure Site Recovery: This tool helps you recover quickly from unexpected failures, like system crashes or natural disasters. It is like having an emergency plan that gets your system back up and running fast.
- Geo-Redundant Storage: You can store backups in multiple locations using Azure’s geo-redundant storage. It is like keeping copies of your data in different places so that even if one location has an issue, your data is still safe.
- Automated Backup Scheduling: You can set up regular backup schedules to ensure data is always up to date. It is like setting a reminder to back up your data regularly so you never forget.
- Cost-Effective Recovery Plans: You can choose disaster recovery options that fit your budget, balancing the need for quick recovery with the costs involved.
With Azure Backup and Azure Site Recovery, you can rest easy knowing your data is protected and you have a plan in place to handle any disasters that may come your way.
Integrating Azure Database Services with Other Azure Products
Integrating Azure Database Services with other Azure products is like connecting pieces of a puzzle to create a seamless and powerful solution. This helps you get the most out of the cloud by combining different services.
- Azure Logic Apps: You can automate workflows by integrating your database with Logic Apps. It is like setting up a chain reaction where one action triggers another automatically.
- Azure Functions: You can use serverless computing to run small pieces of code in response to database events. It is like having a mini-assistant that performs tasks for you when something changes in your database.
- Power BI: By connecting your database to Power BI, you can visualize your data and generate reports. It is like turning your raw data into easy-to-read charts and graphs that help you make better decisions.
- Azure Machine Learning: You can integrate your database with Azure Machine Learning to build AI models using your data. It is like feeding your database into a smart system that learns from your data and provides insights.
- Azure App Service: You can easily connect your database to web and mobile apps using Azure App Service. It is like linking your database to the front end, making data available to users in real-time.
By integrating Azure Database Services with these other Azure products, you create a powerful ecosystem that automates processes, visualizes data, and enables smart decision-making.
Summary
The Azure Database Services offer a robust set of cloud-based solutions for managing and storing data. These services enable you to easily deploy and scale databases, ensuring high availability and performance. With options like Azure SQL Database, Cosmos DB, and Azure Database for MySQL/PostgreSQL, you can choose the right database for your application needs. Azure’s built-in security features, automated backups, and disaster recovery options help you protect your data and maintain compliance. By leveraging Azure Database Services, you can streamline your data management processes, enhance application performance, and drive better decision-making through efficient data handling.


