API Apps are fully managed platform as a service feature of Azure. Listed under the Azure App Service section, it provides a robust offering for web APIs to be hosted in the cloud. As the client devices are diversifying like PCs, Mobiles, Tablets etc., it was needed to keep the backend API Services hosted in a different server and access via REST protocols. API apps become a right choice for developing and deploying this kind of REST APIs and exposing endpoints to connect in order to get and post data to the data source. API apps can also connect to different other Azure services easily to provide full proof working modal to be delivered. It also comes with an inbuilt swagger implementation which helps in API definition and creating client apps. To make things easier for you, Dot Net Tricks brings a comprehensive skill-oriented Azure Certification to the nitty-gritty of the Azure.
API apps and web apps share a set of common features like:
Scaling
We can scale up/down and out/in based on our requirement to support traffic on API apps. Auto Scaling option helps to scale automatically based on some metrics criteria like CPU utilization.
Deployment slots
We can have multiple deployment slots with each of them with a different endpoint. This is useful to test the API apps endpoint before it is pushed to the production. With this, a new version of APIs can also be pushed to production with minimum downtime by swapping production slot with another slot.
Language Choice
API apps also support applications built on many languages and framework like ASP.Net, .Net Core, Java, PHP, Python and Node.js. This is important because with Microservices architecture gaining limelight, each service in the cluster can be built in different technology stack.Security
These can be secured with any standard identity provider like Azure AD. For example, we can use Azure AD to federate user authentication using popular SSO protocols such as OAuth.
Step by Step: Create an API app
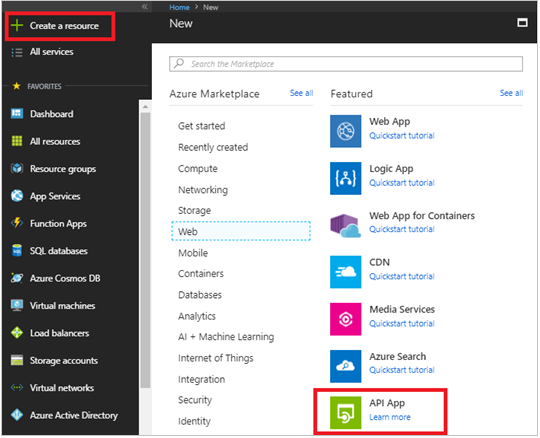
Click on Create a resource and select Web from the marketplace
Click on API App
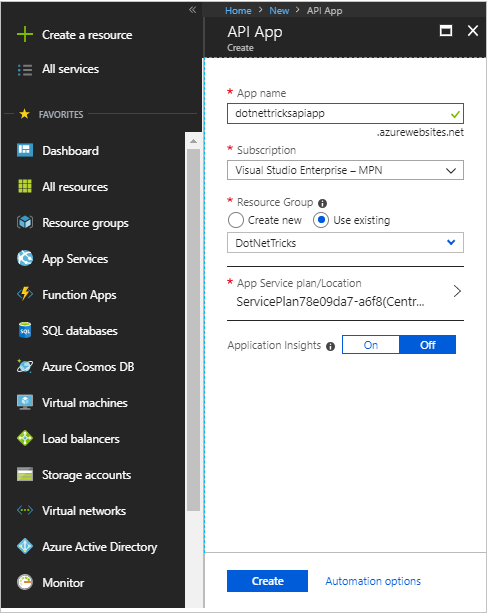
Provide name, resource group and app service plan details and click create button
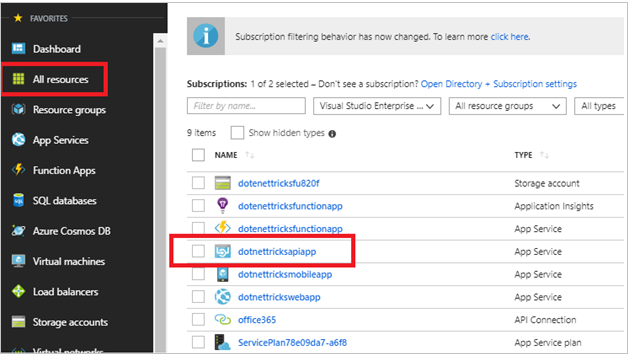
Go to All resources and click on the name of API app.
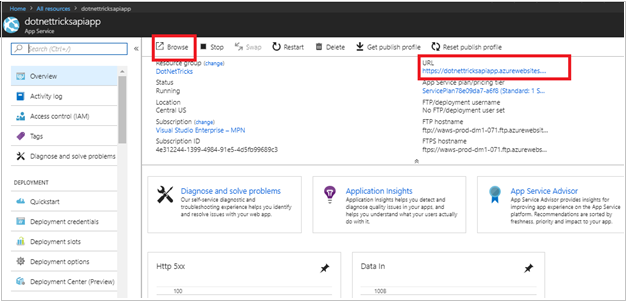
We can browse the default API app by clicking on Browse button or navigating to the URL on a browser.
Swagger
Swagger is an open source framework that provides an interactive UI display of API methods exposed by reading OpenAPI specification. This is very useful to be shared with teams who develop applications to consume the APIs. Swagger UI provides the sample data modal that will be returned from API and the type of parameters it takes as input. We can also pass authorization token to the secured APIs so as to validate the APIs.
Deploying an API App
We will now create an API application from Visual Studio and deploy it to API app.
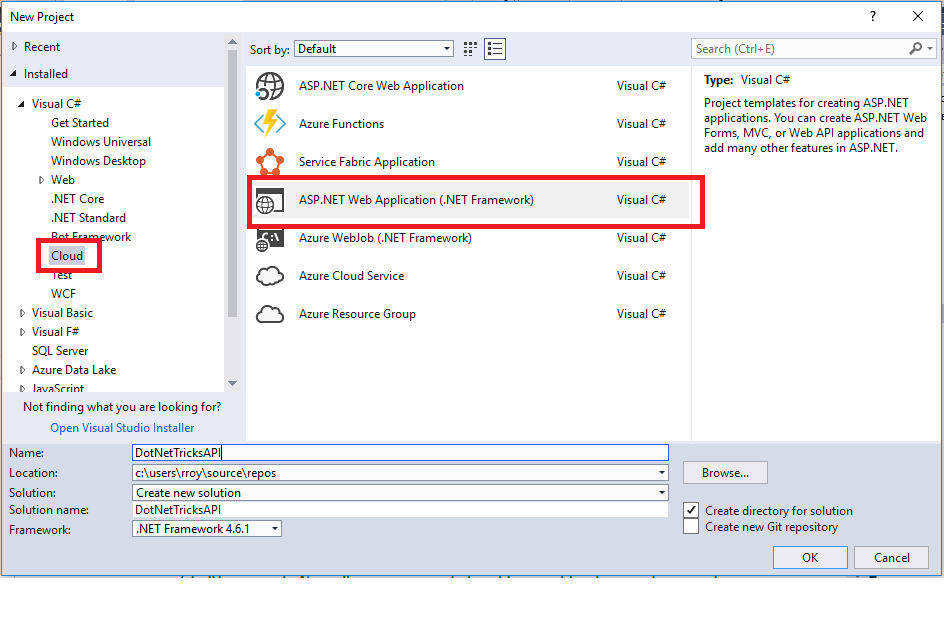
Open a new Asp.Net web application Project in Visual Studio.
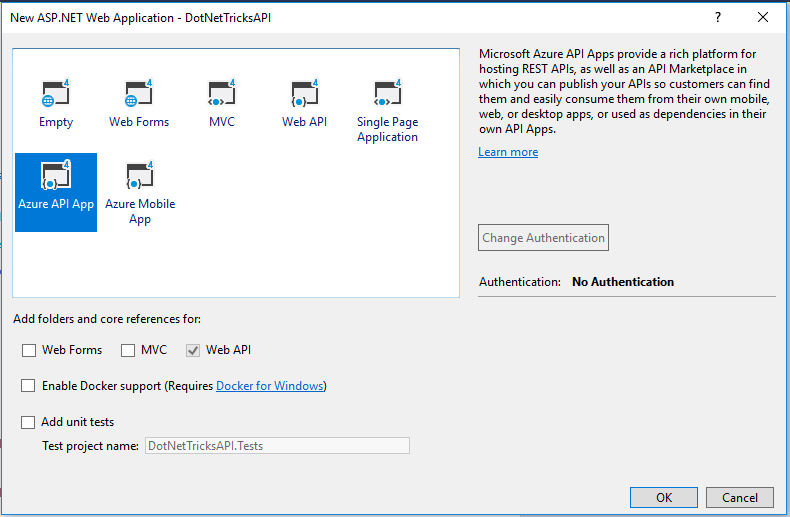
Select Azure API app template.
Compile and run the solution to see if the solution is ready to be deployed.
In order to enable the swagger documentation of APIs, check for the following code in SwaggerConfig.cs file. Uncomment the lines, if commented by default.

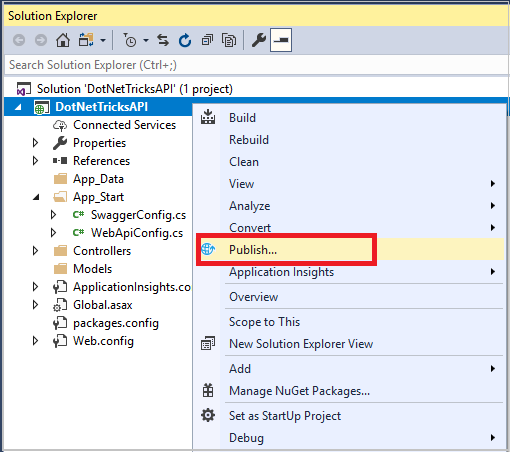
Right click on project file and select Publish.
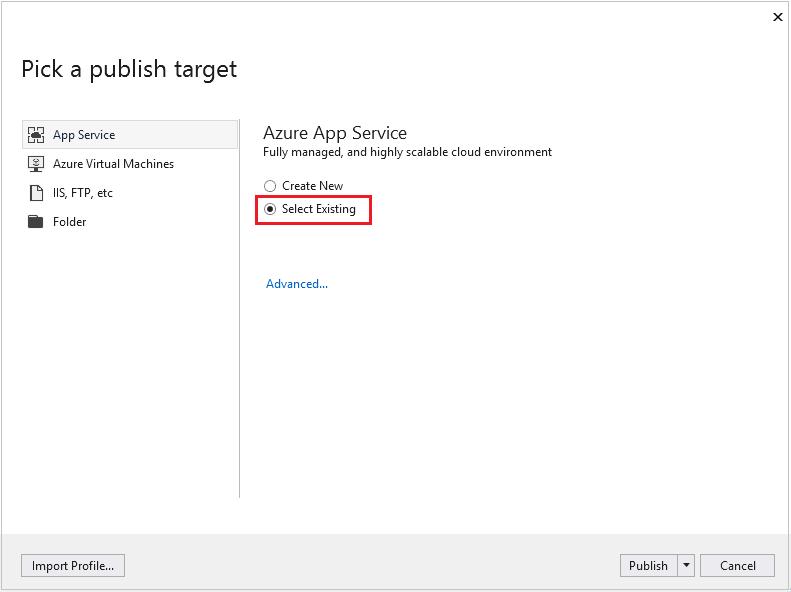
In the Publish Target Window, choose Select Existing option and click on Publish.
Login with Azure credentials, if prompted.
Select the API app from the listed resources and click Ok.
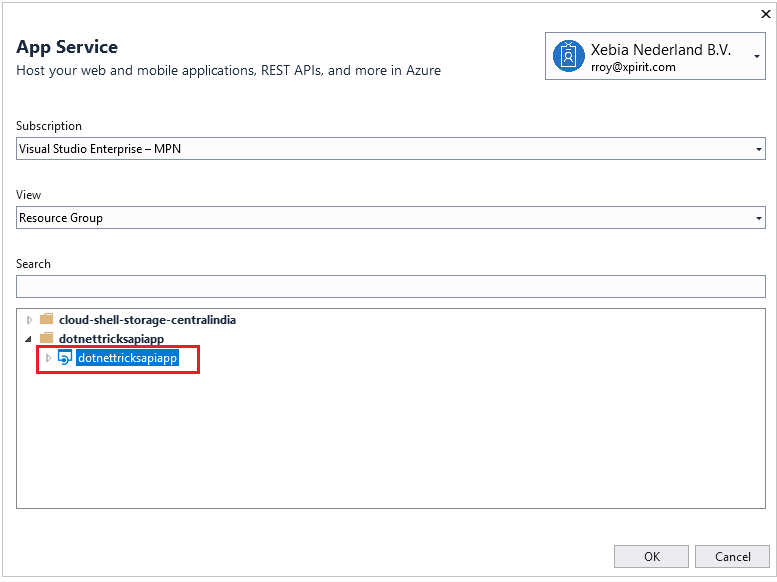
This will deploy the APIs to Azure and the following screen opens in browser.
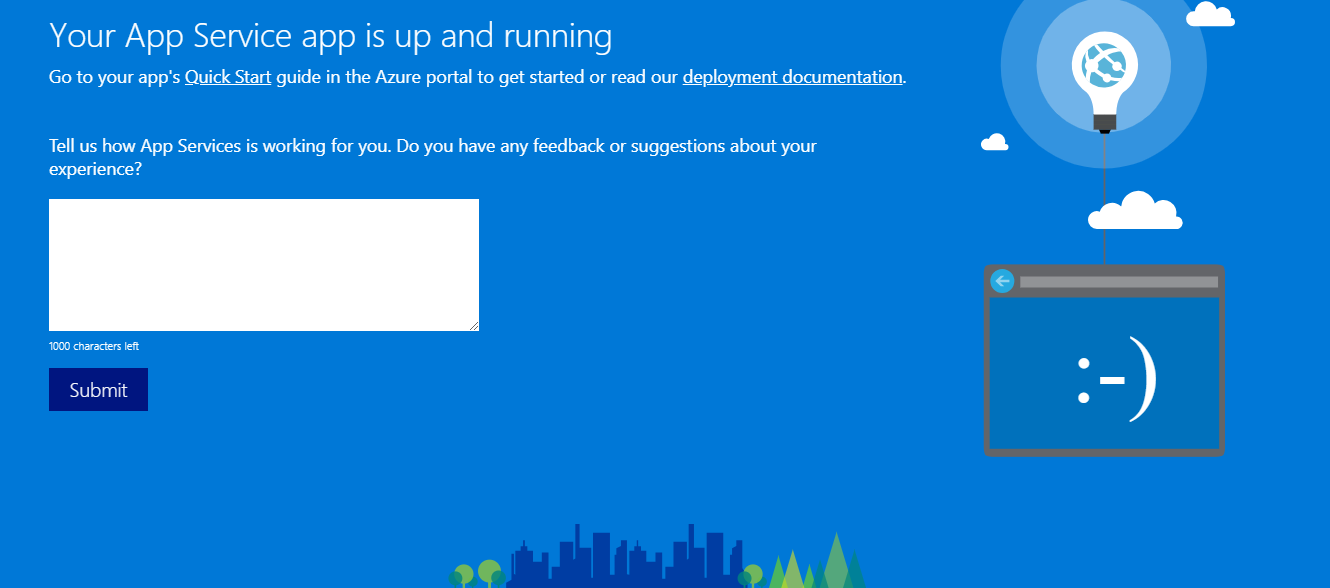
Next, we can view the swagger UI by navigating to the
/swagger. 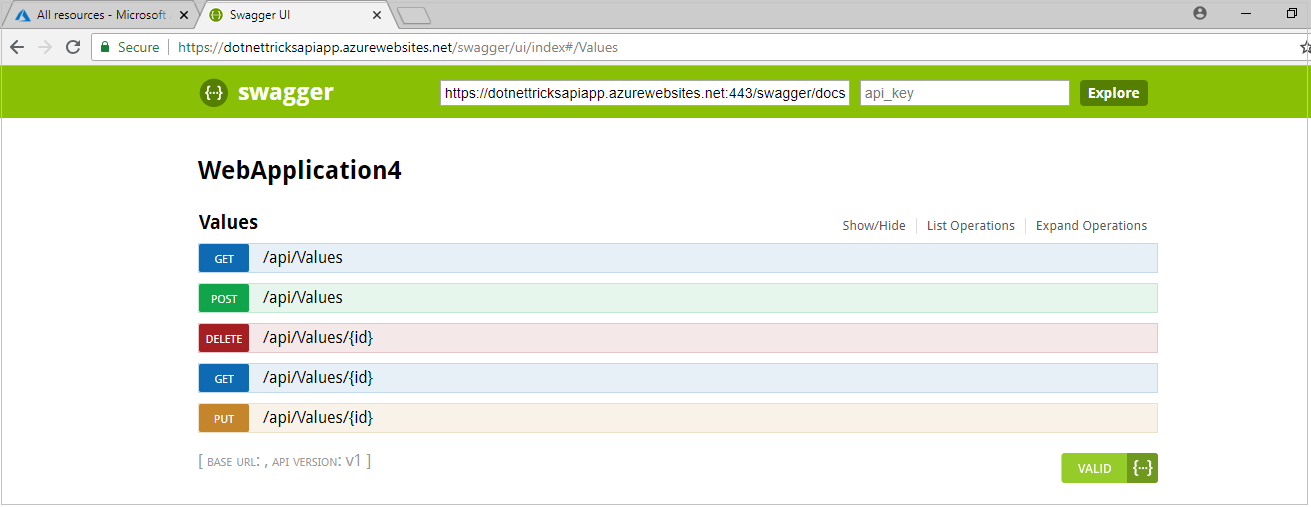
Remote Debugging API Apps
Yes, we can debug our API app running on Azure to troubleshoot issues. In order to make the API App available for remote debugging, it should be published in Debug mode instead of release mode. Also, we need to disable ‘Just my Code’ option from Visual Studio > Tools Menu > Options > Debugging > Just my code.
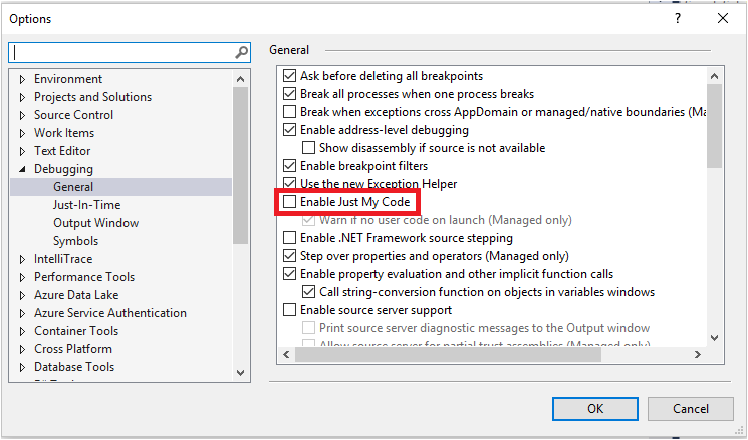
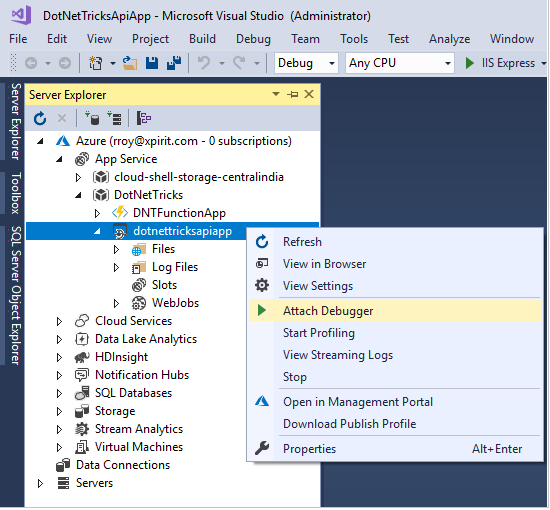
Then, Attach the Debugger from the Server Explorer window. This will first enable the remote debugging which will be off by default.
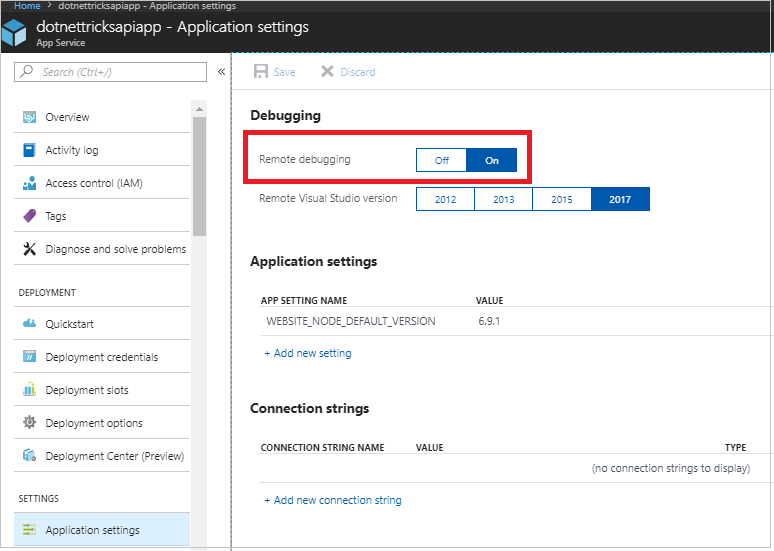
We can manually enable Remote Debugging from API Settings section in Azure portal API App window.
After attaching the debugger, all necessary files will load and we can place a breakpoint and test through swagger. One important point to take note here is that if a debugger is attached to the API app, it cannot further process any other requests. So, it is not advisable to debug production slots remotely as it may hamper regular behaviour of API app. The remote debugging will automatically go off after 48 hours.
Adding Custom Domain to API endpoints
API apps, by default has an URL in the format <API app name>. azurewebsites.net. But we can add custom domain names too. For this, we should buy a domain from one of the domain name service providers like Godadday.com.
Steps to Add Custom domain to web app
Go to the API App in Azure portal.
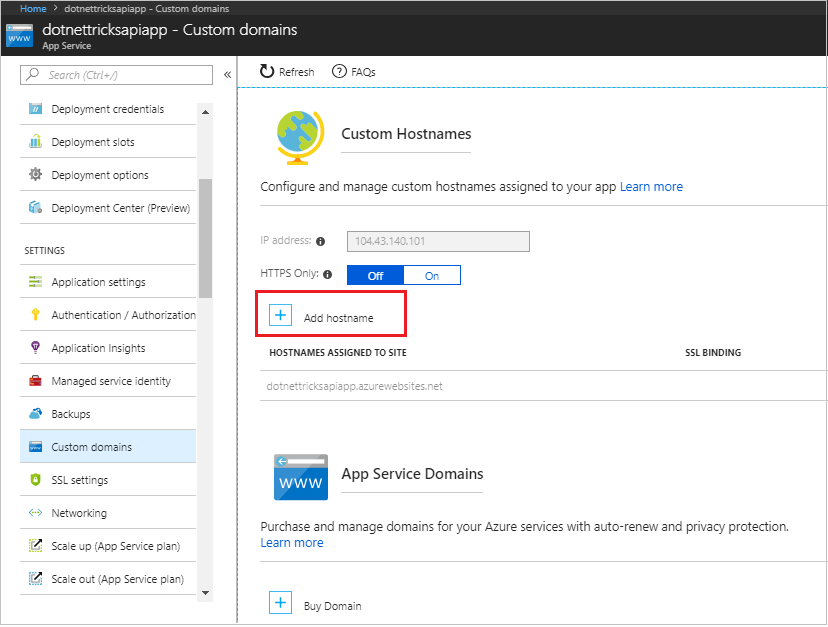
In Settings Section on the left-hand blade, Select Custom Domains and click on Add hostname.
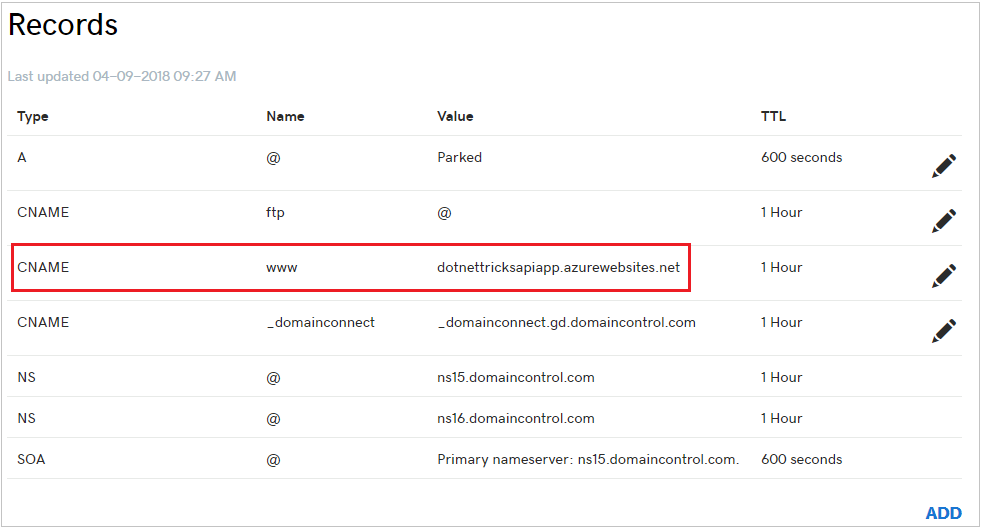
Go the DNS Provider site and manage DNS records section. Add an entry for a CNAME record and point to the Azure default API URL.
In the Azure Portal, Provide the hostname in Custom domain section and click on Validate.
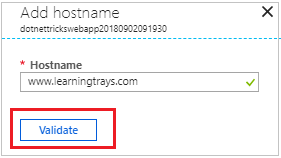
Once the Domain ownership is validated a green tick mark will appear. Click on Add hostname button.
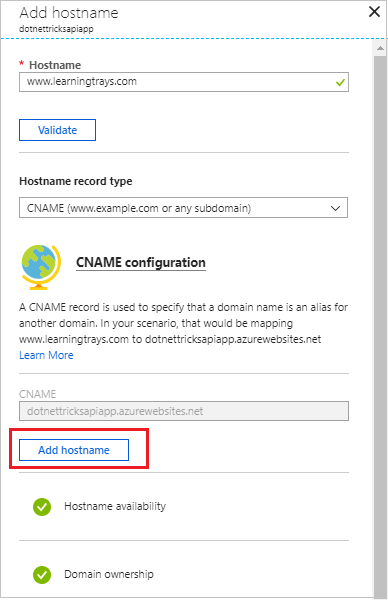
Go to browser and navigate to the custom URL mapped.
Other Important capability of API Apps
We can stop the API app from Azure portal but that will still incur charges.
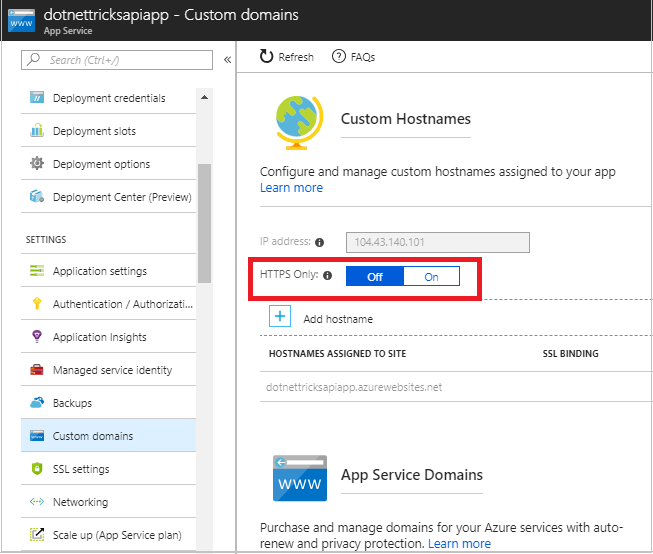
We can configure to use only HTTPS requests to API app.
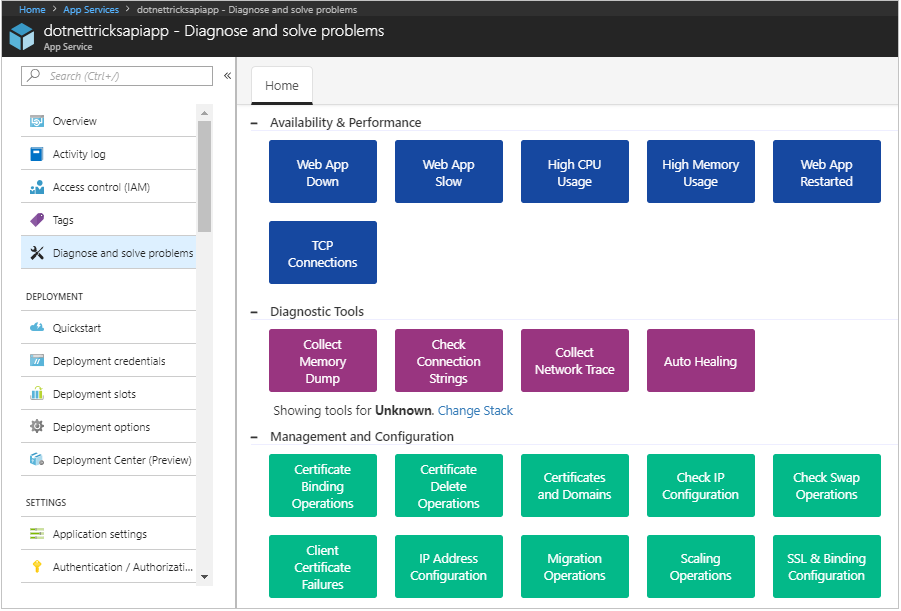
‘Diagnose and Solve Problems section’ on API page can be used to troubleshoot any kind of configuration, performance, availability or security related issues.

No comments:
Post a Comment