Sunday 25 June 2023

How To Create Your First Python AWS Lambda Function

 When creating a small Python script, the question that eventually comes up is where the code will be hosted and run. For some small scripts, you might be able just to run the code locally. But, what if you want the code to be run on a regular schedule, even when your laptop is off? Or, what if you want the script to be part of an endpoint that other scripts can access?

One option would be to set up a server and running the code there. You could spin up a droplet on Digital Ocean, set up the Python environment, and run your scripts there. But, what if, you do not want to have to set up and manage servers?

This is where serverless functions can help! Serverless functions are scripts that you can set up without needing to manage the underlying infrastructure. Additionally, these systems auto-scale so you can easily run the function a few times a year or thousands of times per day without you needing to figure out how to scale.

AWS's Lambda is a great serverless function system that tightly integrates with the rest of the AWS ecosystem. AWS Lambda allows you to create serverless functions in various environments, including Python, NodeJS, and Go. Even better, the AWS free tier includes 1 million Lambda requests per month!

Writing Your First Python Lambda Function

For the most part, Python code within AWS Lambda is almost the same as writing normal Python scripts. However, within Lambda, you will need to specify a handler function which is then called by the environment. In most of my Lambda functions, I call this something similar to handler or lambda_handler. This looks like this:

def handler(event, context):
    '''Gets called by the Lambda environment.'''
    return true

For the handler function, we have two parameters: event and context.

The "event" parameter is an object that contains data that was passed to the Lambda function. For example, if the Lambda was attached to an endpoint, then we could access the data sent to the endpoint with something like event['body'].

The "context" parameter is an object that contains data about the Lambda function itself and its runtime environment.

Let's go ahead and write a very basic Lambda function that will accept a value and then return its square root.

import math

def handler(event, context):
    '''Gets called by the Lambda environment.'''
    return math.sqrt(event)

Creating Your Lambda Function

To get started, you will need to sign in to your AWS account.

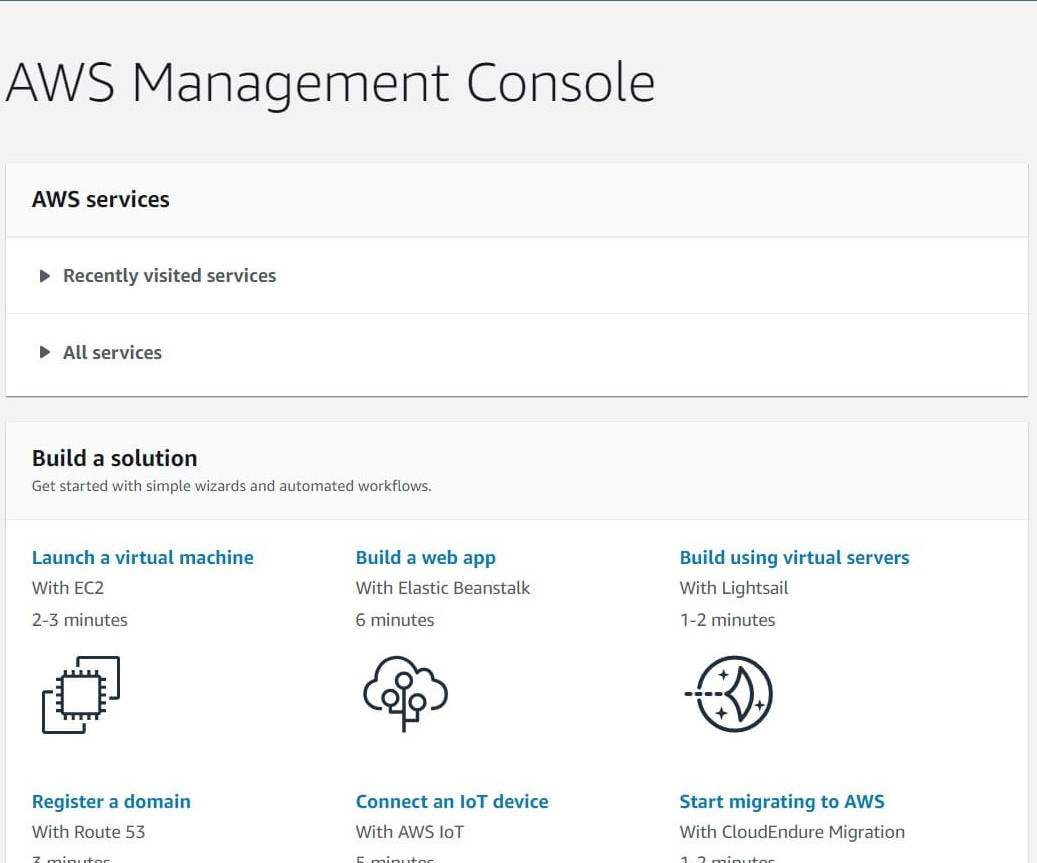
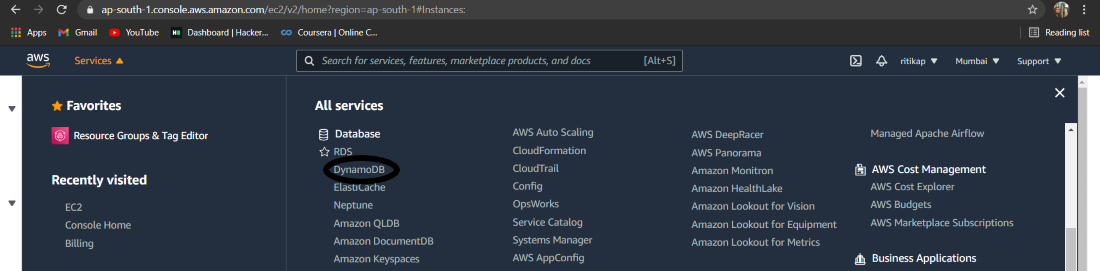
Once in your AWS console, you can either click on "Services" to go to "Compute"->"Lambda" or use their search bar to search for Lambda.

AWS console with focus on the top search bar with "lambda" entered.

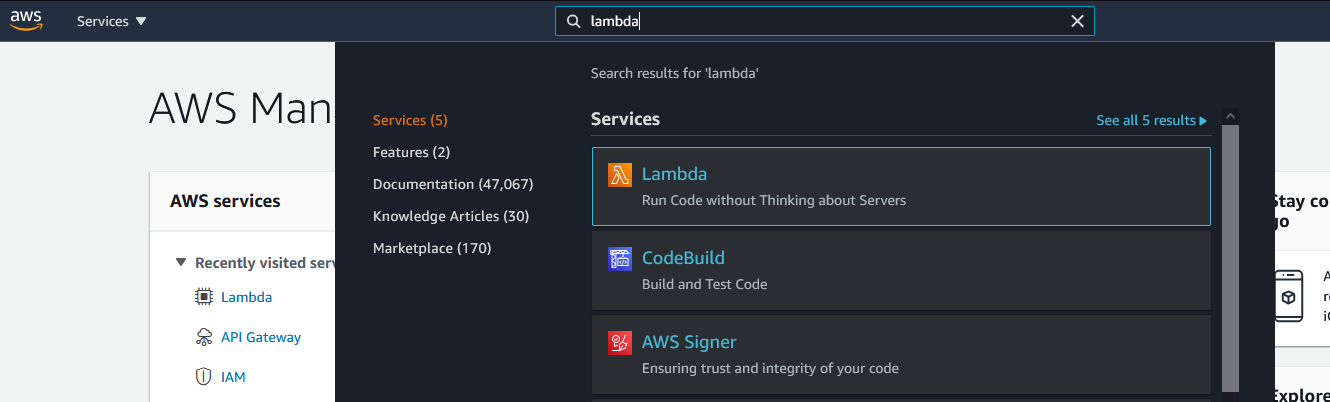
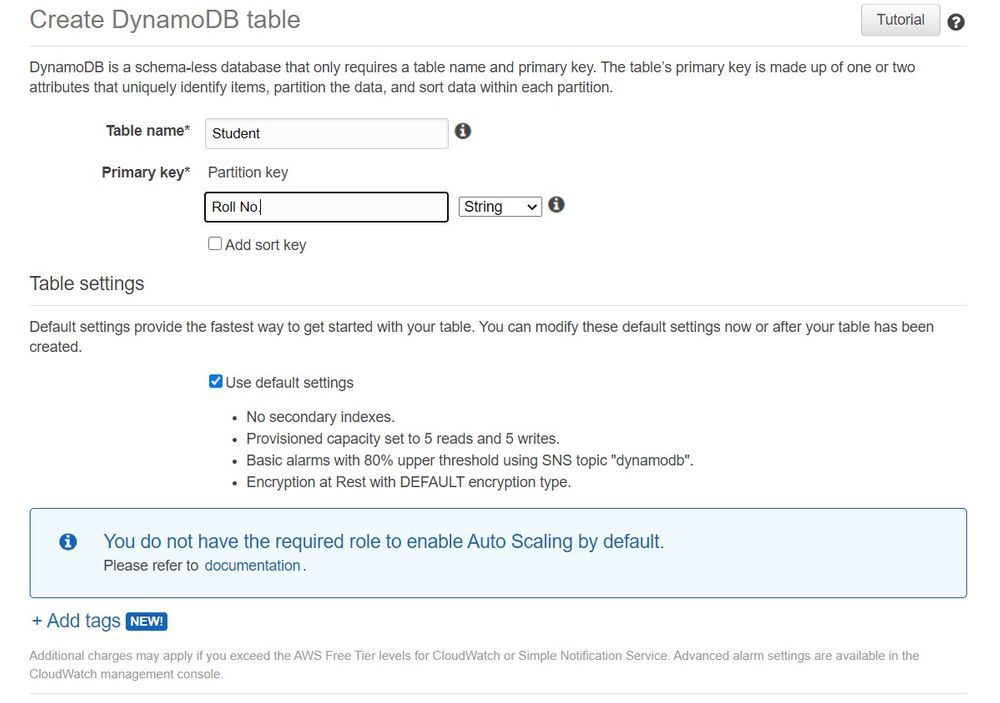
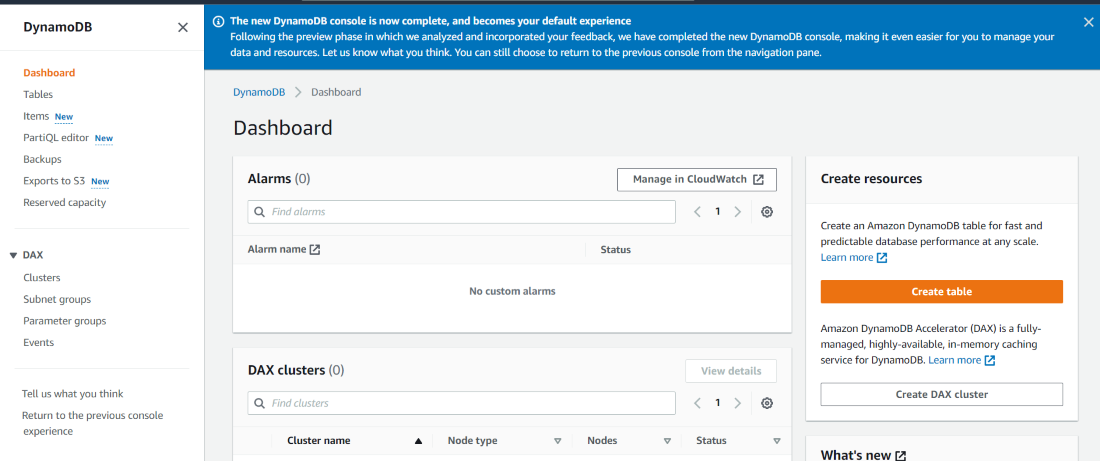
Once inside Lambda, you will find your Lambda dashboard as shown here:

AWS Lambda dashboard with navigation along the left side with links for dashboard, applications, and functions.

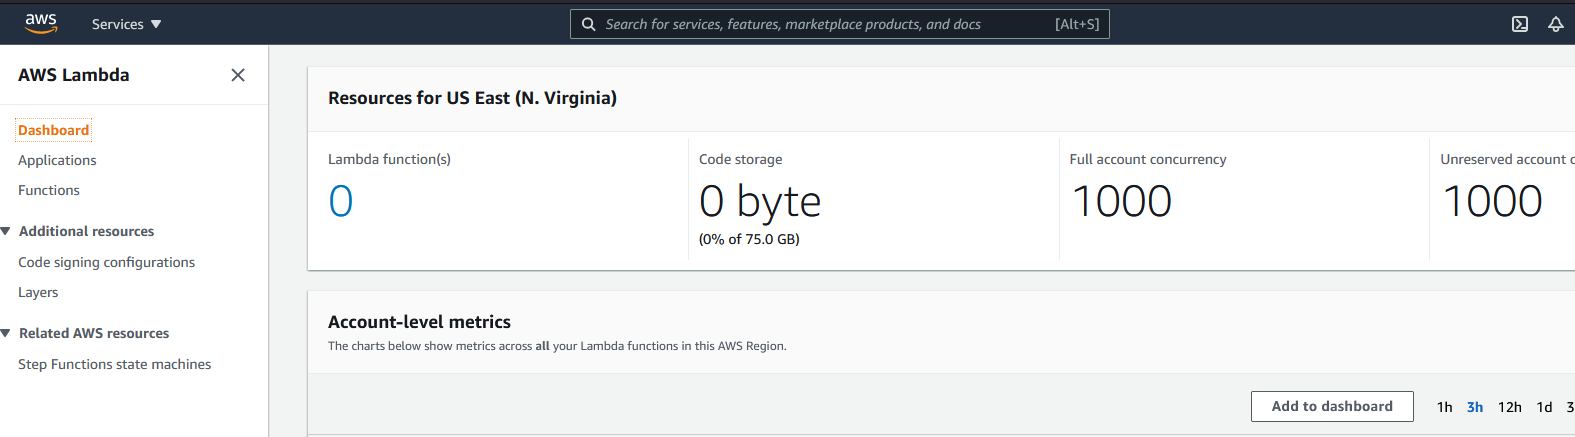
Click on the "Functions" page from within the menu to get to your functions.

AWS Lambda functions list with 0 listed. There is a button on the far right that says "Create function"

Next, click on the "Create function" button in the top right.

Create a new function screen with fields for function name and runtime. The "Author from scratch" option is selected.

Use the "Author from scratch" option. Name your function anything you want. For the runtime, select a version of Python.

If this function were interacting with other parts of the AWS ecosystem, we'd want to set up permissions or an AWS role. But, for this example, we can keep the defaults.

Next, click the final "Create function" button.

Once created, you will be taken to the function's overview and code. Here you can review any triggers or layers attached to the function. For this one, we will not be using these.

Scroll down to the code section and open the default lambda_function.py file. Copy and paste our basic Python code from above into the file. Then, click the "Deploy" button.

Code source section of the function with the lambda function file opened and some python code inside including a function called handler.

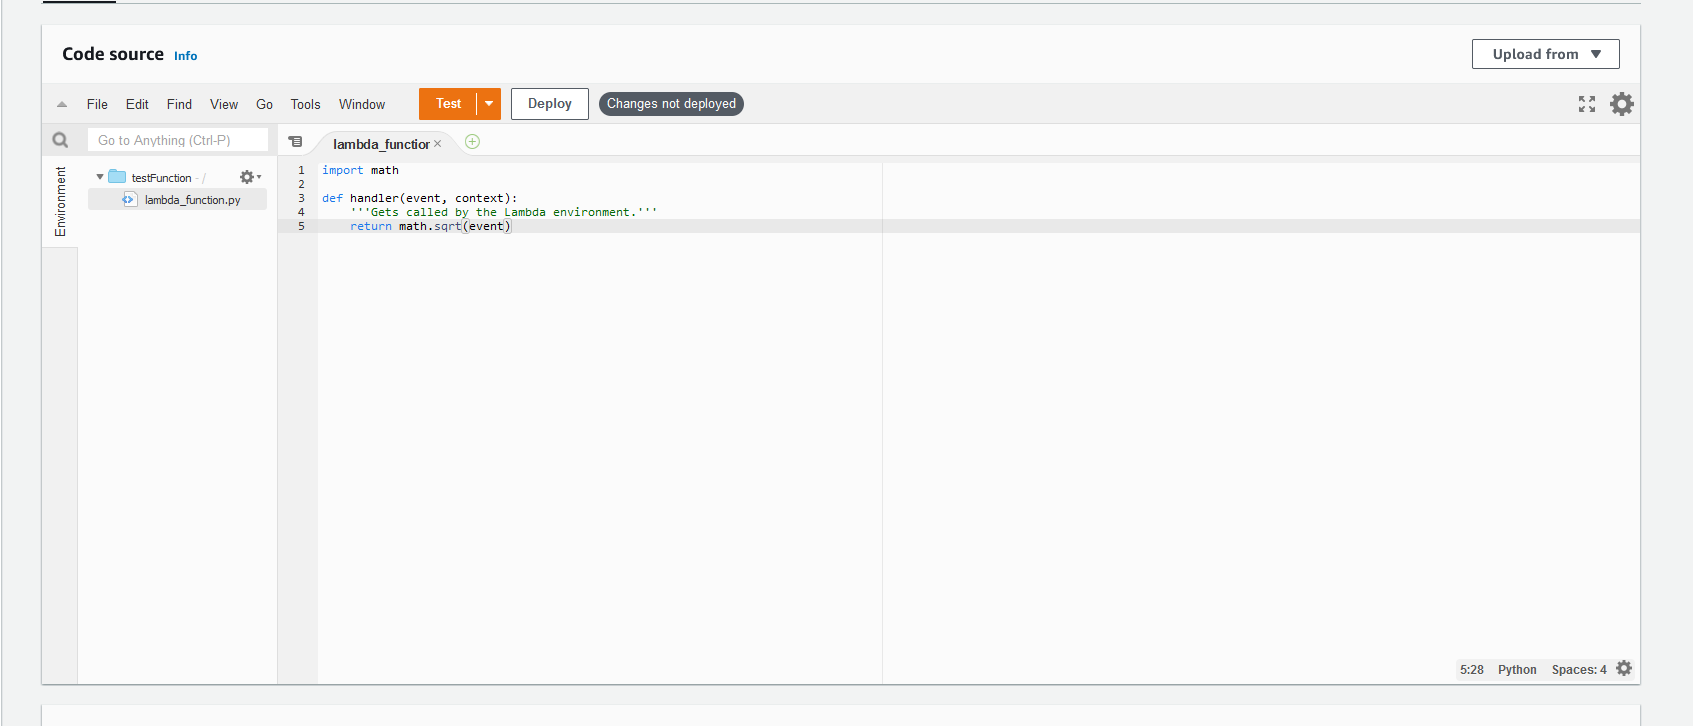
Next, scroll down to the "Runtime settings" section.

Runtime settings section with runtime set to Python 3.8 and handler set to lambda_function.handler

We want to edit the "Handler" field. This is how Python will try to import your function. So, it should be the file name followed by the function name. In this case, it should be updated to lambda_function.handler because we kept the default file but used our function called handler.

Now, scroll back up to the top and switch to the "Test" tab. Replace the example JSON with any number, such as 16. Next, click the "Test" button.

Test event with the number 16 entered as the value.

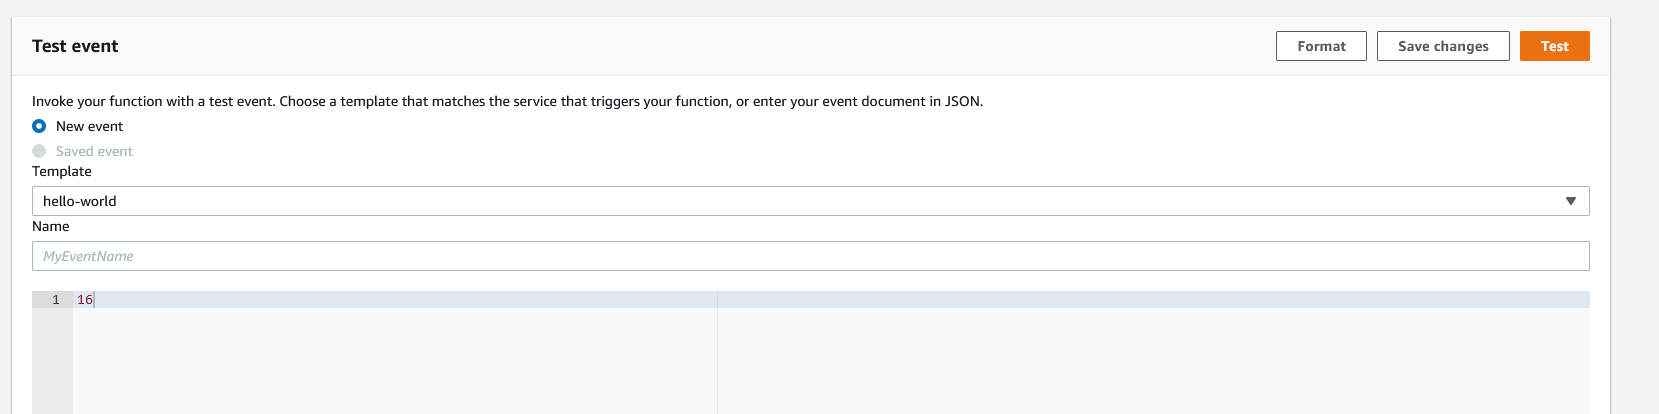
A box will appear with the execution results, which will include the square root value. This area will also display some information about the request, such as duration time.

Execution results with a "succeeded" message with the value of 4 shown as the result returned.

Congratulations! Your very first Lambda function has been created.

Next Steps

While it's useful to explore how the function works, you probably want to do a lot more with your Lambda function. In the next article in this series, I'll look at setting up a Lambda function on a recurring schedule. In future articles, I'll look at safely passing credentials to it and add other Python libraries to it.

Be sure to subscribe below to get notified when the next article is published!

Thursday 15 June 2023

AWS DynamoDB – Web Based Setup

 To use the Web-based services of AWS- DynamoDB the following steps need to be followed:

Creating AWS account:

  1. Visit the following website:- https://aws.amazon.com/dynamodb/
  2. Click on the “Get Started with Amazon DynamoDB” button, or the “Create an AWS Account” button.
  3. Fill in the required information for account creation.
  4. Choose the plan that best suits you and you are good to go.

After the above steps, you can sign in to the AWS console and then navigate to the DynamoDB console.

Getting an AWS Access Key:

Access keys are used to access DynamoDb either through the AWS CLI or through any computer program. Access keys have the following attributes:

  • Access key ID
  • Secret Access key

An access key can be generated using the AWS Management console.

Keep in mind that, you can only download the secret key once while generating an Access key and there is no other way to recover them back. However, you can create new access keys at any time by using the required IAM actions.

Note: You do not need an Access key if you are accessing DynamoDB through the AWS console.

Creating access keys for an IAM user:

To create an access key for an IAM user follow the following steps:

  • Sign in to the AWS Management Console and open the IAM console at https://console.aws.amazon.com/iam/
  • In the navigation pane, choose Users.
  • Choose the name of the user whose access keys you want to create, and then choose the Security credentials tab.
  • In the Access keys section, choose Create access key.
  • To view the new access key pair, choose Show. You will not have access to the secret access key again after this dialog box closes. Your credentials will look something like this:
Access key ID: AKIAIOSFODNN7EXAMPLE
Secret access key: wJalrXUtnFEMI/K7MDENG/bPxRfiCYEXAMPLEKEY
  • To download the key pair, choose Download .csv file. Store the keys in a secure location. You will not have access to the secret access key again after this dialog box closes.
  • After you download the .csv file, choose Close. When you create an access key, the key pair is active by default, and you can use the pair right away.

Now you are all set to access the AWS DynamoDB web-based console which is as shown below and start developing your application.

AWS DynamoDB – Working with Backups

 Amazon DynamoDB supports on-demand backup and restores features. Those features are available to the user independent of whether the user uses AWS Backup or not. Users can use the DynamoDB on-demand backup capability to create full backups of its tables for a long-term period and archival for regulatory observation needs. 

DynamoDB also removes the complexity of the operation involved in protecting sensitive data. While using DynamoDB, users don’t have to worry about cluster scaling, managing nodes, reputation, hardware supervising, etc.

Point-in-time recovery (PITR) provides continuous backups of the user’s DynamoDB table data. When enabled, DynamoDB maintains incremental backups of the user table for the last 35 days until the user intentionally turns it off.

Features of DynamoDB:

Following are the features of DynamoDB:

  • The backup process executes in seconds regardless of the size of user tables or data, so users do not have to worry about backup schedules or long-running processes.
  • Moreover, all backups are automatically encrypted, systematic, easily discoverable, and retained until deleted.
  • Users can back up data i.e tables from a few MB to hundreds of TB of data, with no impact on performance.

Advantages of DynamoDB:

Following are the advantages of using DynamoDB:

  • Fully Managed: It manages all kinds of responsibilities like encryption, performance, and workloads.
  • Easy to Use: Users can enable PITR(Point-in-time recovery) or create, restore, and delete backups easily with a single click.
  • Fast and Scalable: Users can easily enable PITR or create as many backups for tables of any size very fastly like in seconds.
  • No Performance Impact: Have no impact on the performance and availability of your production applications.

Point-in-Time Recovery for DynamoDB:

Point-in-Time Recovery for DynamoDB makes sure to protect your vital data in form of tables from any kind of read and delete functioning. Users don’t need to worry about all the other operations. Restore can be done at a point in time. 

Backing Up a DynamoDB Table:

Follow the below steps to backup a DynamoDB table:

  • Choose “Create backup” over the “backups” tab of the source table.
  • On the left side of the console, choose”backup” and then “Create backup”.
  • The backup status will show “creating”,  and after completion, it will change to “Available”.

Output:

{
"BackupDetails": {
    "BackupName":
    "WebSeriesBackup",
    "BackupArn": "arn:aws:dynamodb:us-east-1:123456789012: table/WebSeries/backup/1456781290135-73d8d5bc,
    "BackupStatus": "CREATING",
    "BackupCreationDateTime": 1456781290.135
    }
}

Restoring a DynamoDB Table from a Backup: 

Follow the below steps to restore a dynamo DB table from backup:

  • Firstly log in to AWS Management Console and open DynamoDB.
  • On the left side of the console, choose “Backups”.
  • Now choose your source table name.
  • Choose “Restore” and fill in your basic new table details.
  • Click on “Restore table” to start the restore process.

Output:

aws dynamodb restore-table-from-backup \
--target-table-name WebSeries\
--backup-arn arn:aws: dynamodb:us-east-1:123456789012: table/Music/backup/01581881483719-db9c1f91
--global-secondary-index-override '[]' \
--sse-specification-override Enabled=true, SSEType=KMS

Deleting a DynamoDB Table Backup: 

Follow the below steps to delete a DynamoDB table backup:

  • Firstly log in to AWS Management Console and open DynamoDB.
  • On the left side of the console, choose “Backups”.
  • Now choose your source table name.
  • Select “Delete” and confirm it by typing “delete”.

Output:

aws dynamodb delete-backup \
--backup-arn arn:aws: dynamodb:us-east-1:123456789012: table/Music/backup/01489602797149-73d8d5bc

Using IAM with DynamoDB Backup and Restore:

Users can easily use AWS Identity and Access Management (IAM) only when the data which need to be backup are in the same AWS account.

Example 1: Permit the “CreateBackup” and “RestoreTableFromBackup”:- Grant the access in both actions.

{
    "Version": "2022-02-23",
    "Statement": [
        {
        "Effect": "Allow",
        "Action": [
            "dynamodb: CreateBackup",
            "dynamodb: Restore Table FromBackup",
            "dynamodb: PutItem",
            "dynamodb:UpdateItem",
            "dynamodb: DeleteItem",
            "dynamodb: GetItem",
            "dynamodb:Query",
            "dynamodb: Scan",
            "dynamodb: BatchWriteItem"
            ],            
        "Resource": "arn:aws:dynamodb:us-east-1:123456789012: table/WebSeries"
        }
    ]
}

AWS DynamoDB – Working with Queries

 Amazon DynamoDB is a NoSQL managed database service provided by Amazon that stores semi-structured data like key-value pairs. A DynamoDB table consists of items. Each item consists of one partition key and one or more attributes. An example of an item is given below:

Example:
{
  "MovieID": 101,
  "Name": "The Shawshank Redemption",
  "Rating": 9.2,
  "Year": 1994
}

In the above example, MovieID is the partition key. 

A partition key is used to differentiate between items. A query operation in DynamoDB finds items based on primary key values. The name of the partition key attribute and a single value for that attribute must be provided. The query returns all items searched against that partition key value.

Create a table and add values :

A table say, Movies, with partition key as MovieID has been created already. No two items can have the same partition key. Add few items to query upon. A table has already been created with items in it. See the below image:

Query on the table :

To query upon items in the table, select Query from the dropdown in the items tab. By default, a query will always have a partition key as one of the search filters. We can add one or more attributes to refine the search. See the below image:

In the above image we see that when we enter 50 for primary key MovieID, we obtain 1 record which is shown above in the image.

Adding Filters to Query:

To refine our search we can add one or more filters. In filter, we select an attribute and provide value against it. The query results returned is determined by a filter expression. All of the other results are discarded. A filter expression is applied before the results are returned, but after a Query finishes. Hence, a Query consumes the same amount of Read capacity, regardless of whether a filter expression is present or not. See the below image:

In the above image, we see that in the filter, Rating has been provided and the condition is that it should be greater than or equal to 8. Thus, we get one search result.

Limiting the number of items in ResultSet:

The Query operation allows you to limit the number of items that it reads. To do this, set the Limit parameter to the desired number of items that you want. For example, suppose that you Query a table, with a limit value of 8, and without a filter expression. The Query result contains the first eight items from the table that match the key condition expression from the request. The limit can only be used in Amazon Command Line Interface (CLI).

Paging:

This feature is available on Amazon CLI (Command Line Interface). When data retrieved is larger than 1 MB in the result set, then the result set is divided into pages, each page containing up to 1 MB. For instance, if 3 MB data is retrieved then there will be at least 3 pages.

Counting Item in ResultSet:

If the size of the Query result set is larger than 1 MB, ScannedCount and Count represent only a partial count of the total items. You need to perform multiple Query operations to retrieve all items in the result set. 

Capacity Units Consumed:

A read capacity unit speaks for one strongly consistent read per second, or two eventually consistent reads per second, for an item up to the size of 4 KB. A scan operation does not return any data on how much the read capacity units are consumed. However, by specifying the ReturnConsumedCapacity parameter in a Scan request we can obtain this information or change the read capacity unit in the capacity tab of the table. See the below image:

Read Consistency: 

By default, a scan operation performs eventually consistent reads. Meaning, the scan results might not include changes due to the recently completed PutItem or UpdateItem request. If required strong consistent reads, as of the time that the Scan begins, then set ConsistentRead parameter to true in the Scan request. By doing so, it ensures that all the write operations that completed before the Scan began are included in the Scan result set.

How to query the table using attributes other than the primary key.:

Using concept of “secondary indexes” DynamoDB allows you to create one or more secondary indexes on a table, which can allow you to query the table using attributes other than the primary key. This can be useful if you want to perform queries on the table based on attributes other than the primary key, or if you want to support multiple query patterns on the same table. There are two types of secondary indexes in DynamoDB: global secondary indexes and local secondary indexes. Global secondary indexes allow you to query the table using an alternate key, while local secondary indexes allow you to query the table using an alternate key that is defined within the primary key. Both types of secondary indexes have their own provisioned throughput, which you can set when you create the index.

AWS DynamoDB – Query Data in a Table

 Amazon DynamoDB is a NoSQL managed database that stores semi-structured data i.e. key-value pair and document data. A table in DynamoDB stores data in form of an item and each item has a primary key. 

Example:
{
  "Color": true,
  "Director": "Christopher Nolan",
  "MovieID": 1,
  "Name": "Inception",
  "Rating": 8.7,
  "Year": 2010
}

The Query operation in Amazon DynamoDB finds items based on primary key values. You must provide the name of the partition key attribute and a single value for that attribute. The query returns all items with that partition key value. 

Create a table and add items: 

To query on data, create a table say, Movies with partition key as MovieID. No two items can have the same primary key. Add few items to query upon. A table has already been created with data in it. See the below image:

Query on the table :

 To query upon data in the table, navigate to the Items tab of the table and select Query from the dropdown. By default, a query has a partition key as one of the search filters. We can add more attributes to refine the search. See the below images:

In the above image we see that when we enter 200 for primary key MovieID, we obtain 1 record which is shown above in the image.

AWS DynamoDB – Creating a Table

 DynamoDB allows users to create databases capable of storing and retrieving any amount of data and comes in handy while serving any amount of traffic. It dynamically manages each customer’s request and provides high performance by automatically distributing data and traffic over servers. It is a fully managed NoSQL database service that is fast, predictable in terms of performance, and seamlessly scalable. It relieves the user from the administrative burdens of operating and scaling a distributed database as the user doesn’t have to worry about hardware provisioning, patching Software, or cluster scaling. 

In this article we will look into the process of creating a table in AWS DynamoDB. To create a table follow these steps:

Step 1:  Login to your AWS account and then you will see this screen. Select All services.

Step 2: In the database section select DynamoDB.

Step 3: Select the Create table option.

Step 4: Give a table name to your table. Name your primary key and select its data type and select Create table.

Step 5: After that, you will reach this screen where you can see your table information.

If you scroll down you can see your table details as follows:

You have successfully created a table in AWS DynamoDB.

AWS DynamoDB – Introduction to NoSQL Workbench

 This article intends to introduce you to the basics of NoSQL Workbench. NoSQL is basically a nonrelational database, with numerous other extra advantages too. NoSQL Workbench is nothing but a virtual development as well as a testing environment for developers anywhere in the world. It allows its users to test their data models over a large number of aspects of functionality and it also allows us to develop our software right from the scratch with a lesser amount of effort. Basically, the workbench is an IDE platform that includes data modeling, data visualization, and operation building. Let us dive deep into these categories.

  1. Data Modeling: Workbench enables us with the facility to build new data models right from scratch or even by using existing data models. We can define multiple patterns clubbed together for accessing data present on the dataset.
  2. Data Visualization: As the name suggests, it basically refers to the process of writing queries and deriving the data by its medium, rather than coding everything bit by bit.
  3. Operation Building: Workbench is a strong and reliable platform for building applications, along with it has a great graphical user interface which eventually makes the communication between the database and the user easier.

Now, let us go to the DynamoDB Management Console.

Once you click on it, DynamoDB listed in services under “Database Section”. You will be redirected to the DynamoDB Management Console. Please refer to the screenshot attached ahead.

From here, you can create tables and use all the services issued by DynamoDB. This was a small and brief introduction to the NoSQL Workbench.

In order to reduce the overall monthly bill amount of your AWS account, one should always ensure deleting all the services before logging out from your AWS Account.