AWS Lambda Tutorial
Today we’re going to talk about AWS Lambda. AWS Lambda is a compute service offered by Amazon. You must be curious as there are several other compute services from AWS, such as AWS EC2, AWS Elastic Beanstalk, AWS Opsworks etc., then why another compute service? In this AWS Lambda tutorial you will discover what is AWS Lambda, why it is used and in which use cases you should consider it.
Let’s see how Amazon defines AWS Lambda and then we will take a deep dive into the key concepts, understand a use case with a hands-on in the end.
What is AWS Lambda?
Amazon explains, AWS Lambda (λ) as a ‘serverless’ compute service, meaning the developers, don’t have to worry about which AWS resources to launch, or how will they manage them, they just put the code on lambda and it runs, it’s that simple! It helps you to focus on core-competency i.e. App Building or the code.
Where will I use AWS Lambda?
AWS Lambda executes your backend code, by automatically managing the AWS resources. When we say ‘manage’, it includes launching or terminating instances, health checkups, auto scaling, updating or patching new updates etc.
So, how does it work?
The code that you want Lambda to run is known as a Lambda function. Now, as we know a function runs only when it is called, right? Here, Event Source is the entity which triggers a Lambda Function, and then the task is executed.
Let’s take an example to understand it more clearly.
Suppose you have an app for image uploading. Now when you upload an image, there are a lot of tasks involved before storing it, such as resizing, applying filters, compression etc.
So, this task of uploading of an image can be defined as an Event Source or the ‘trigger’ that will call the Lambda Function, and then all these tasks can be executed via the Lambda function.
In this example, a developer just has to define the event source and upload the code.
Let’s understand this example with real AWS resources now,
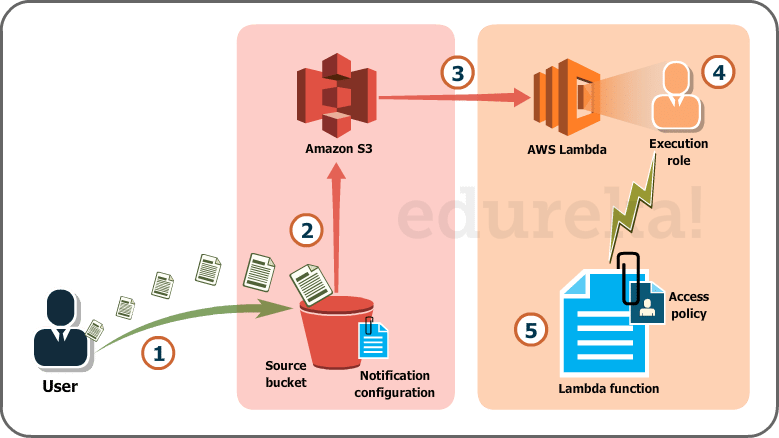
Fig. Lambda use case with S3
Over here we will be uploading images in the form of objects to an S3 bucket. This uploading an image to the S3 bucket, will become an event source or the ‘trigger’.
The whole process, as you can see in the diagram, is divided into 5 steps, let’s understand each one of them.
- User uploads an image (object) to a source bucket in S3 which has notification attached to it, for Lambda.
- The notification is read by S3 and it decides where to send that notification.
- S3 sends the notification to Lambda, this notification acts as an invoke call of the lambda function.
- Execution role in Lambda can be defined by using IAM (Identity and Access Management) to give access permission for the AWS resources, for this example here it would be S3.
- Finally, it invokes the desired lambda function which works on the object which has been uploaded to the S3 bucket.
If you were to solve this scenario traditionally, along with development, you would have hired people for managing the following tasks:
- Size, provision and scale up group of servers
- Managing OS updates
- Apply security patches and
- Monitor all this infrastructure for performance and availability.
This would have been an expensive, tedious and tiresome task, therefore the need for AWS Lambda is justified. AWS Lambda is compatible with Node.JS, Python and Java, so you can upload your file in a zip, define an event source and you are set!
You can read more about S3 AWS here for a deeper understanding.
We now know – How Lambda works and What Lambda does.
Now, let’s understand-
- Where to use Lambda?
- What purpose does Lambda serve, that other AWS Compute services don’t?
If you were to architect a solution to a problem, you should be able to identify where to use Lambda, right?
So, as an architect you have the following options to execute a task:
- AWS EC2
- AWS Elastic Beanstalk
- AWS OpsWorks
- AWS Lambda
Let’s take the above use case as an example and understand why we chose Lambda to solve it.
AWS OpsWorks and AWS ElasticBeanstalk are used to deploy an app, so our use case is not to create an app, but to execute a back-end code.
Then why not EC2?
If you were to use EC2, you would have to architect everything i.e. load balancer, EBS volumes, software stacks etc. In lambda you don’t have to worry about anything, just insert your code, and AWS will manage the rest!
For example, in EC2 you would be installing the software packages on your virtual machine which would support your code, but in Lambda you don’t have to worry about any VM, just insert plain code and Lambda will execute it for you.
But, if your code will be running for hours, and you expect a continuous stream of requests, you should probably go with EC2, because the architecture of Lambda is for a sporadic kind of workload, wherein there will be some quiet hours and some spikes in the no. of requests as well.
For example, logging the email activity for say a small company, would see more activity during the day than in the night, also there could be days when there are less emails to be processed, and sometimes the whole world could start emailing you! In both the cases, Lambda is at your service.
Considering this use case for a big social networking company, where the emails are never ending because it has a huge user base, Lambda may not be the apt choice.
You can read more about EC2 AWS here for a deeper understanding.
Limitations of AWS Lambda
Some limitations are hardware specific and some are bound by the architecture, let’s discuss all of them.
Hardware limitations include the disk size, which is limited to 512 MB, the memory can vary between 128 MB and 1536 MB. Then there are some other such as the execution timeout can be maximized to just 5 minutes, your request body payload can be not more than 6 MB and your request body is 128 KB. The request body payload is like the data that you send with a “GET” or “PUT” request in HTTP, where as the request body would be the type of request , the headers etc.
Actually, these are not limitations, but are the design boundaries which have been set in the architecture of Lambda so if your use case does not fit these, you always have the other AWS compute services at your disposal.
We discussed in this AWS Lambda Tutorial that how doing tasks in Lambda are “not” tedious and tiresome. Let’s now cover the expense part as well.
Pricing in AWS Lambda
Like most of the AWS services, AWS Lambda is also a pay per use service, meaning you only pay what you use, therefore you are charged on the following parameters
- The number of requests that you make to your lambda function
- The duration for which your code executes.
Requests
- You are charged for the number of requests that you make across all your lambda functions.
- AWS Lambda counts a request each time it starts executing in response to an event source or invoke call, including test is invoked from the console. Let’s look at the prices now:
- First 1 million requests, every month are for free.
- 0.20$ per million requests thereafter.
Duration
- Duration is calculated from the moment your code starts executing till the moment it returns or terminates, it is rounded up to the nearest 100ms.
- The price depends on the amount of memory you allocate to your function, you are charged $0.00001667 for every GB-second used.
Hands-on: AWS Lambda DIY
Let’s create a Lambda function which will log “An object has been added” once you add an object to a specific bucket in S3.
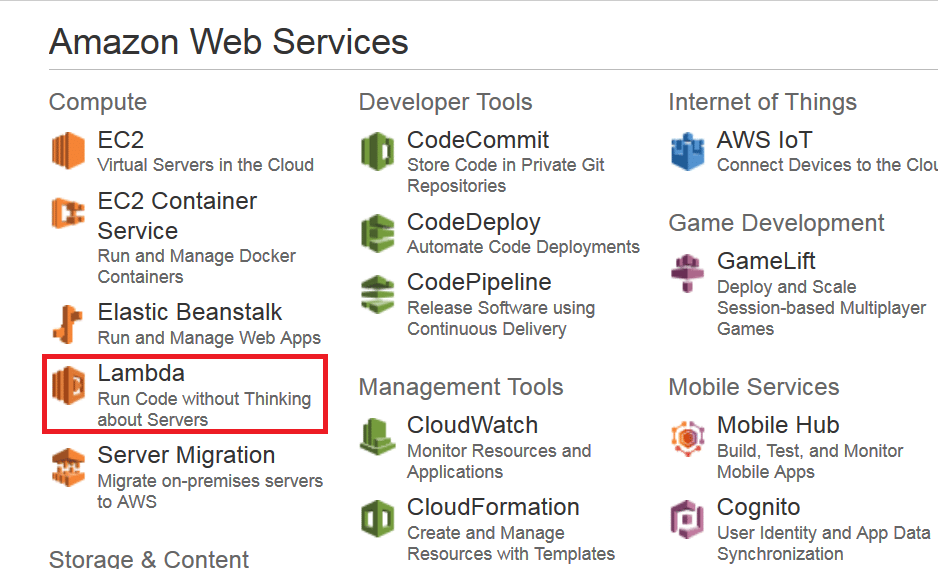
Step1: From the AWS Management Console under compute section, select AWS Lambda.
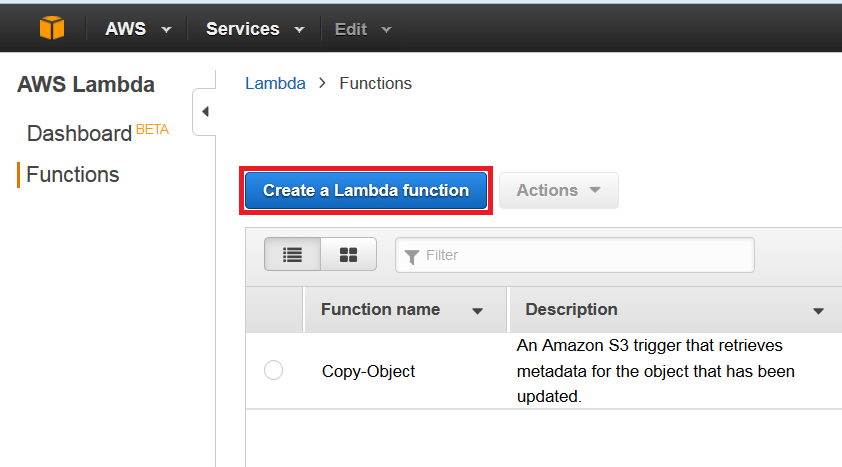
Step2: On the AWS Lambda Console, click on “Create a Lambda function”.
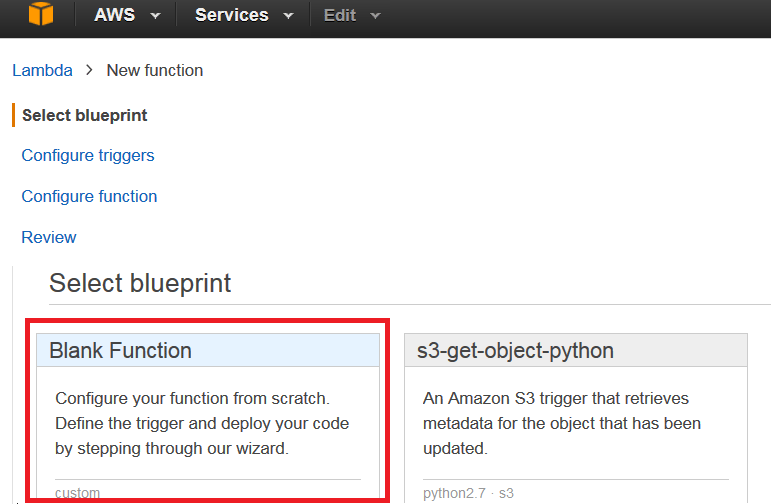
Step3: On the next page, you have to select a blueprint. For example, we will be selecting the blank function for our use-case.
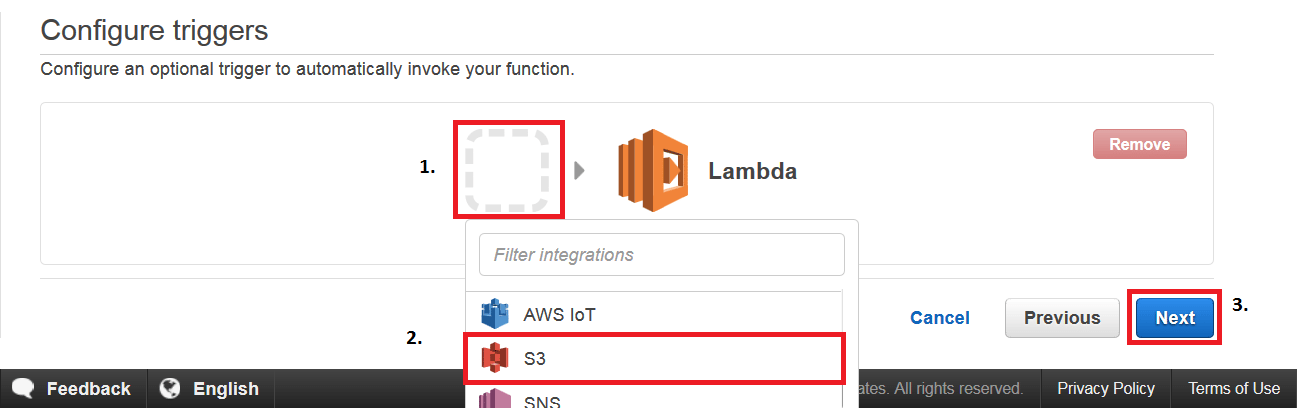
Step4: On the next page you will be (1) setting a trigger, since we are going to work on S3, (2) select the S3 trigger and then (3) click Next.
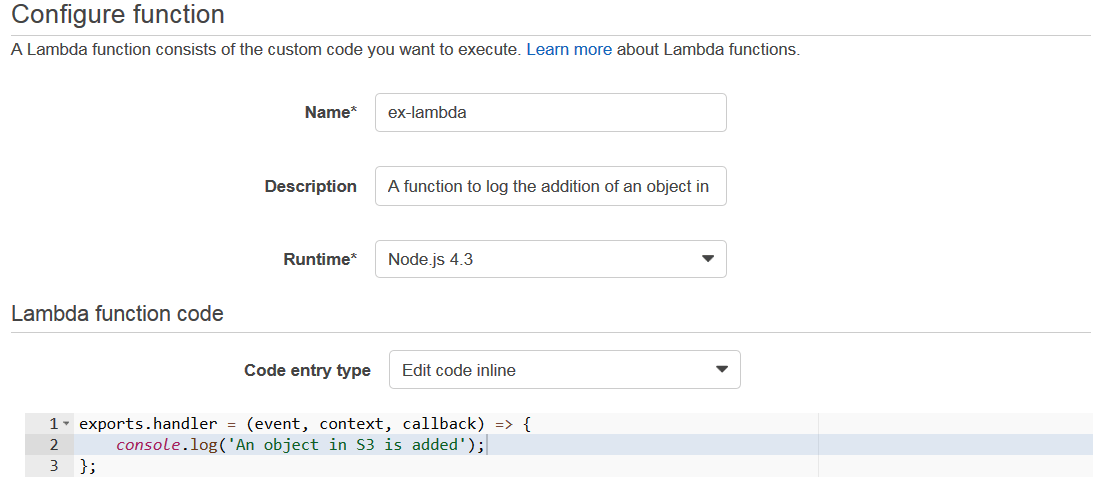
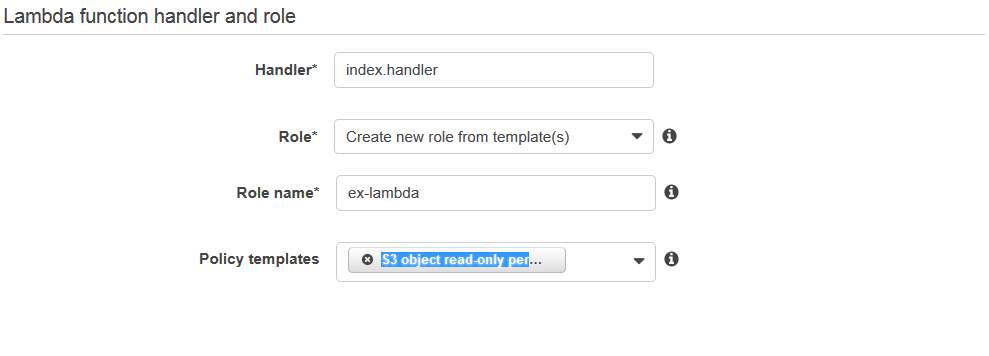
Step5: On the configuration page, fill in the details. You can put your own code, or you can copy the same code from this use-case. After that, fill the handler and role, leave the advanced settings as it is, in the end click next.
Step6: On the next page, review all the information, and click on “Create function”.

Step7: Now, since we created the function for S3 bucket, the moment you add a file to your S3 bucket, you should get a log for the same in CloudWatch, which is a monitoring service from AWS.
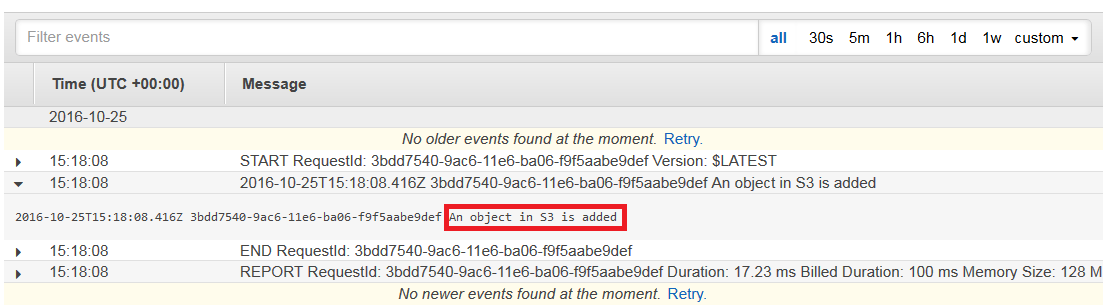
Congratulations! You have successfully executed the Lambda Function.
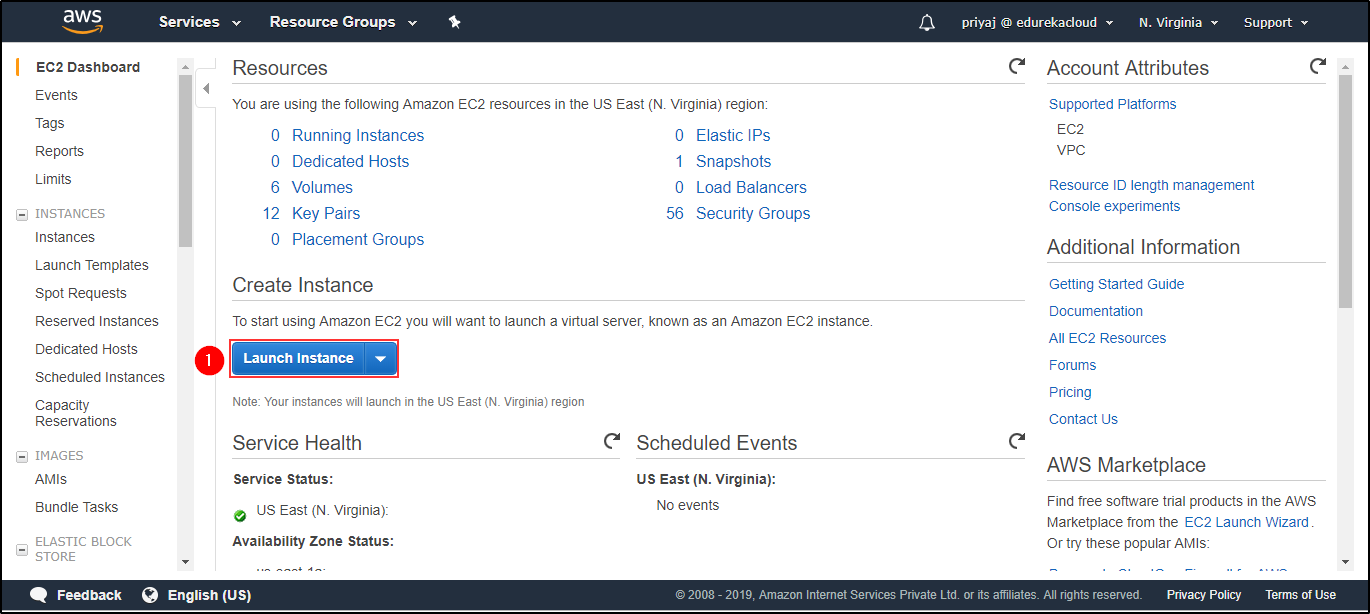 Launch EC2 Instance using AWS Console.
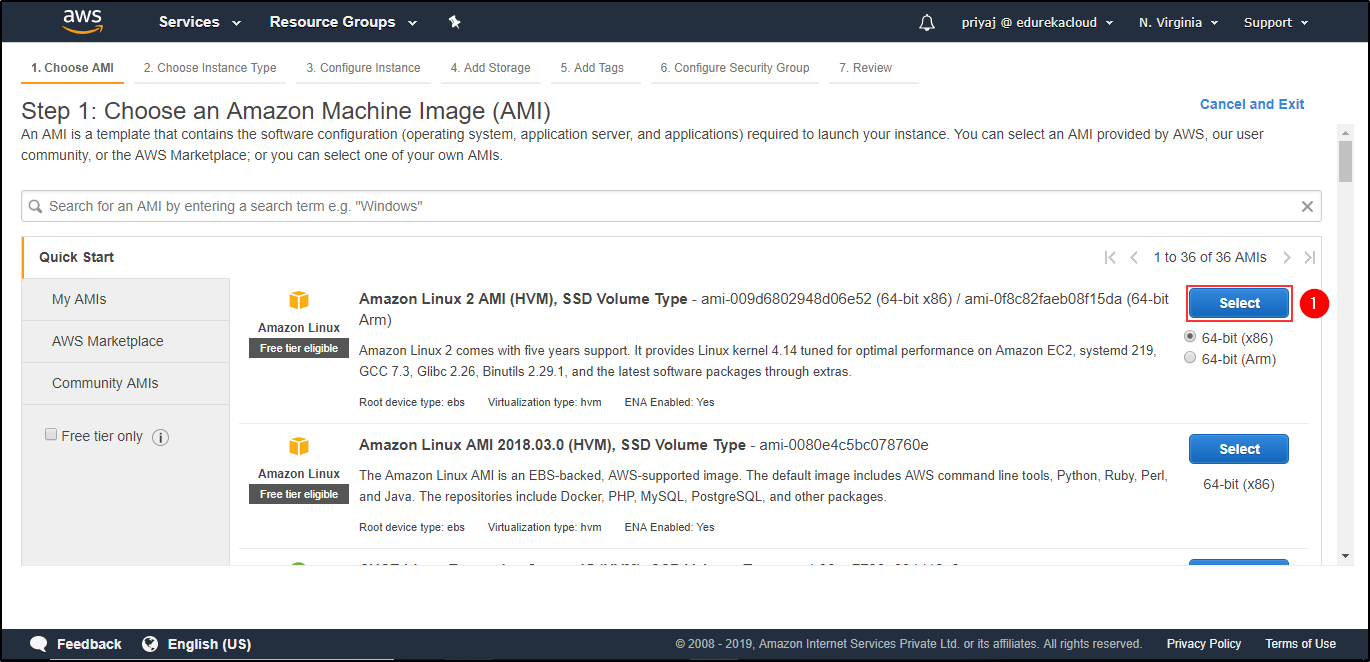 Select the type of Instance.
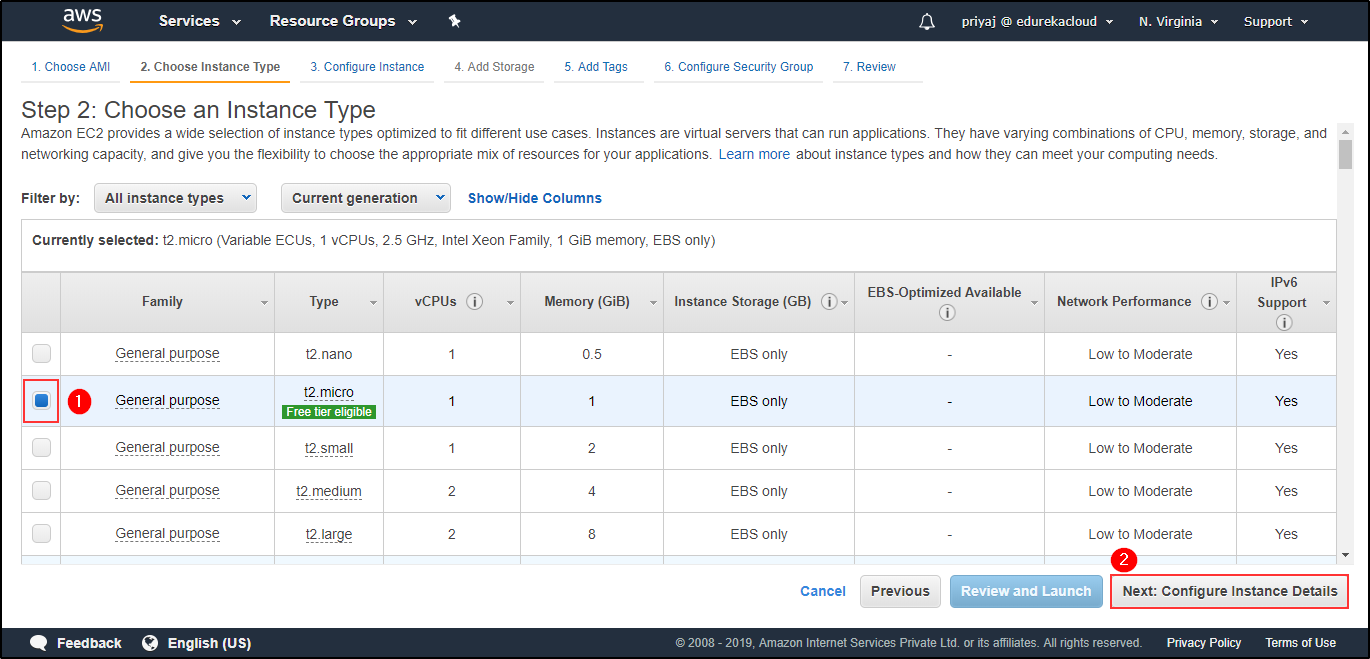 Select the Storage type.
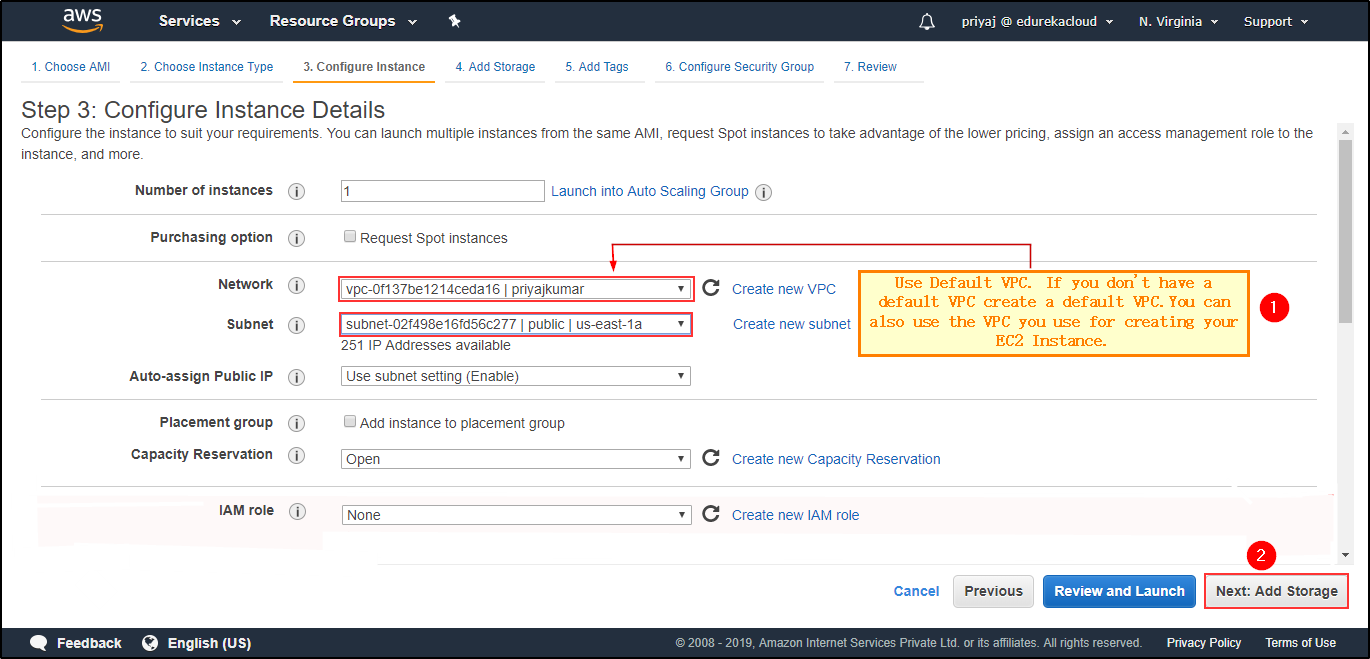 Select the VPC and Subnet in which you want your Instance.
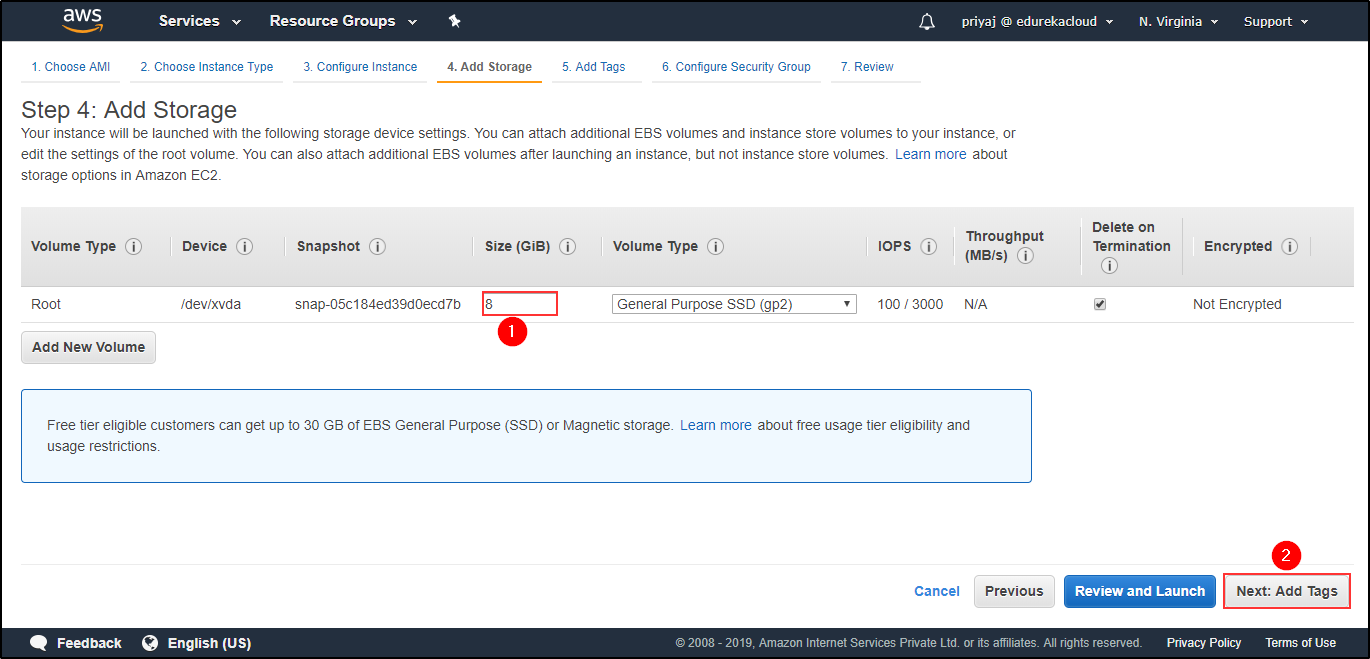 Add storage.
 Add Tags to your Instance.
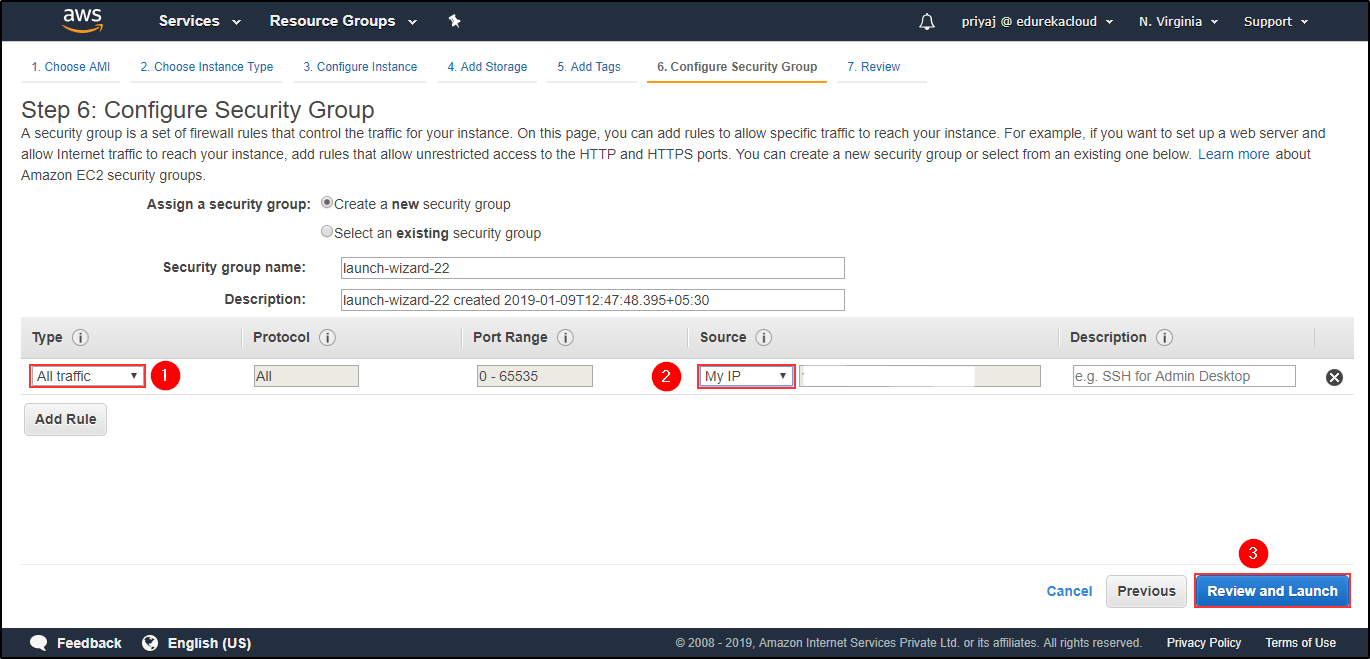 Configure the Security Group.
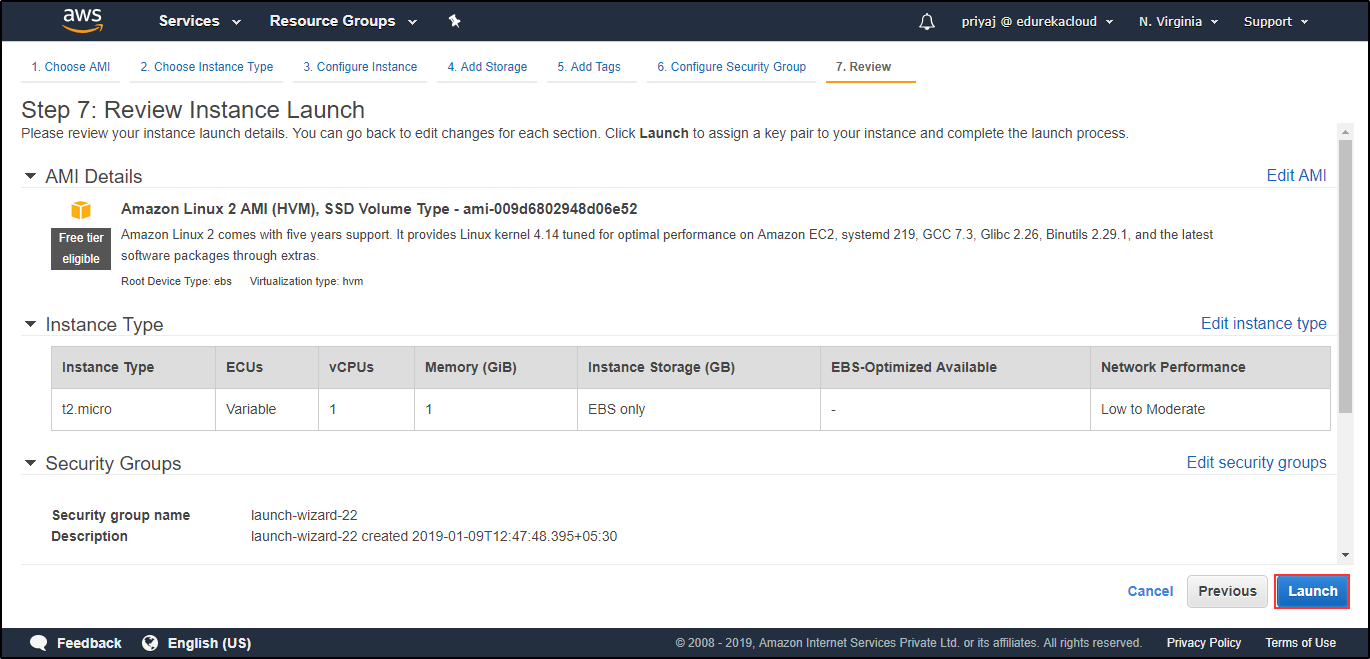 Verify the details. Click on Launch.
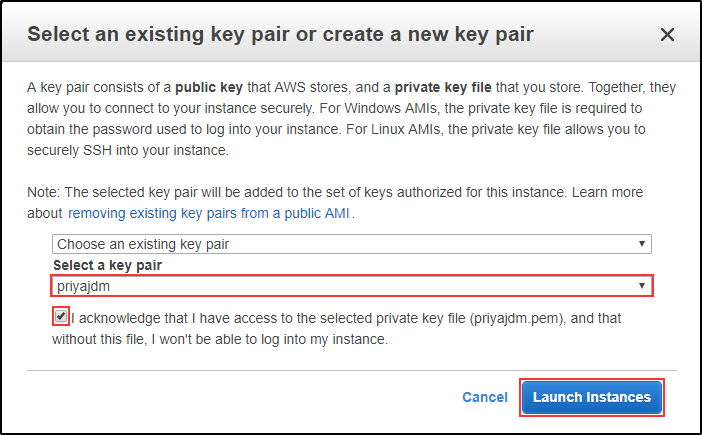 Select the key-pair to access your Instance.
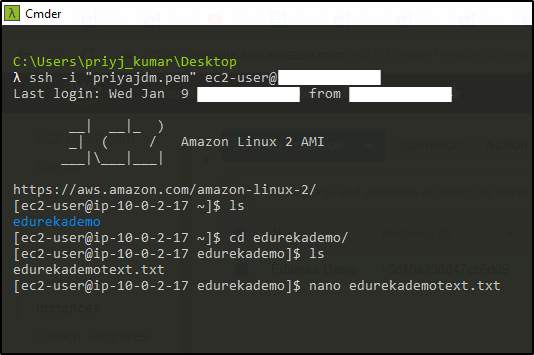 Create a Directory named EdurekaDemo. Move to the directory. Create a file named edurekademotext.txt. Open the text file.
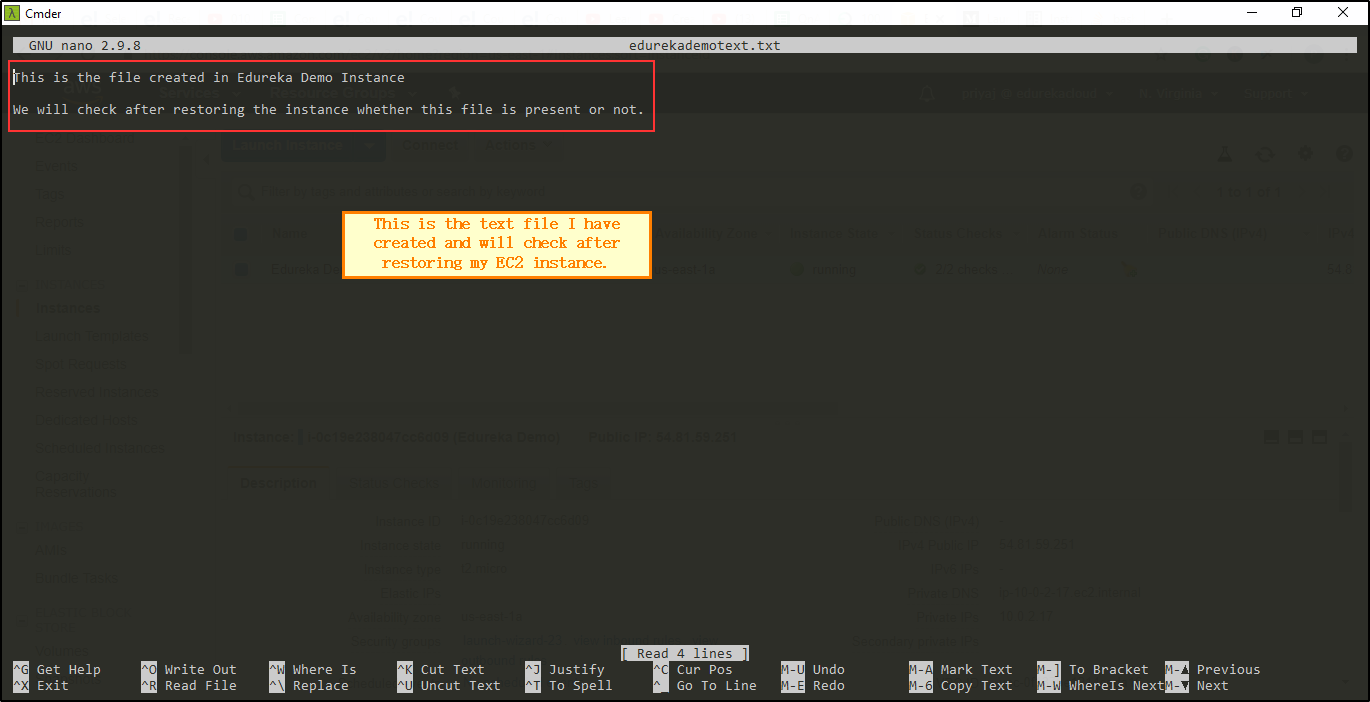 Write some text so that you can verify.

 Terminate the Instance.
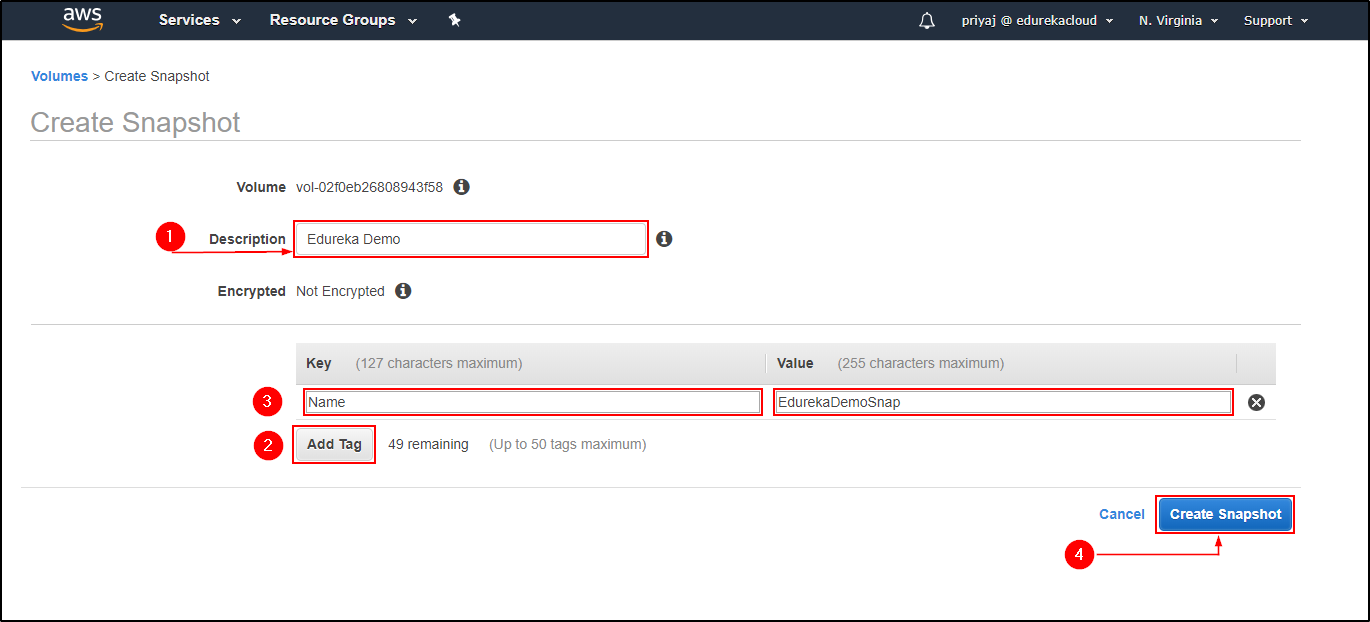
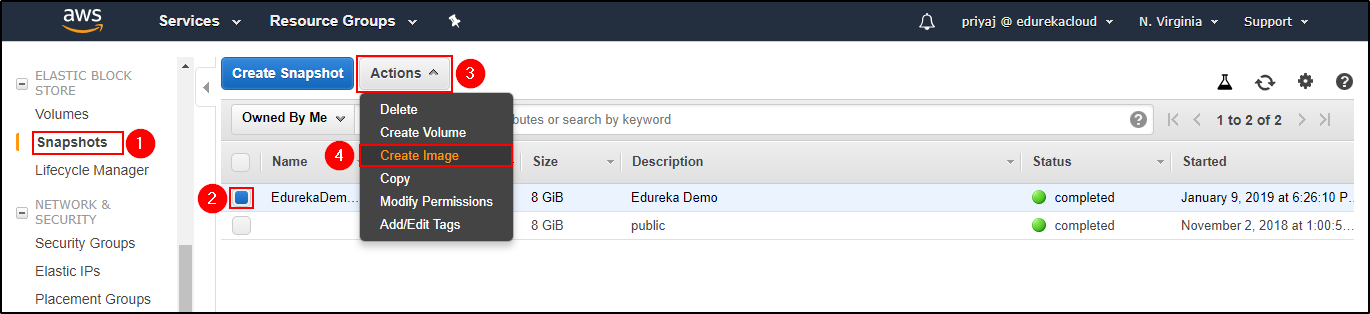 Create Image from the EBS Snapshot.
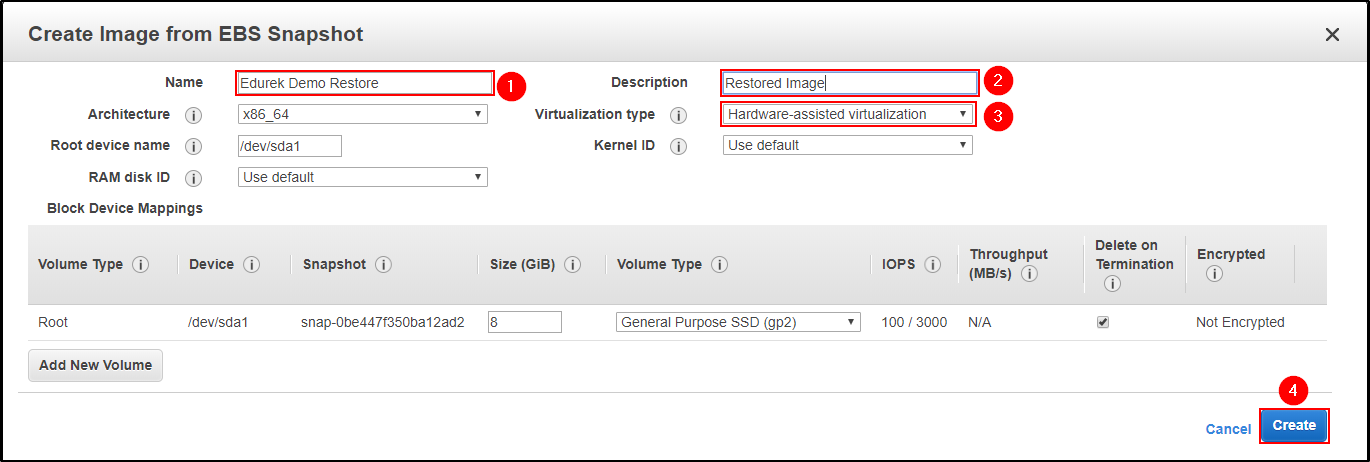 Select a Name and Description and don’t forget to select Hardware-assisted Virtualization.
 Your image creation request is processed and will be cre
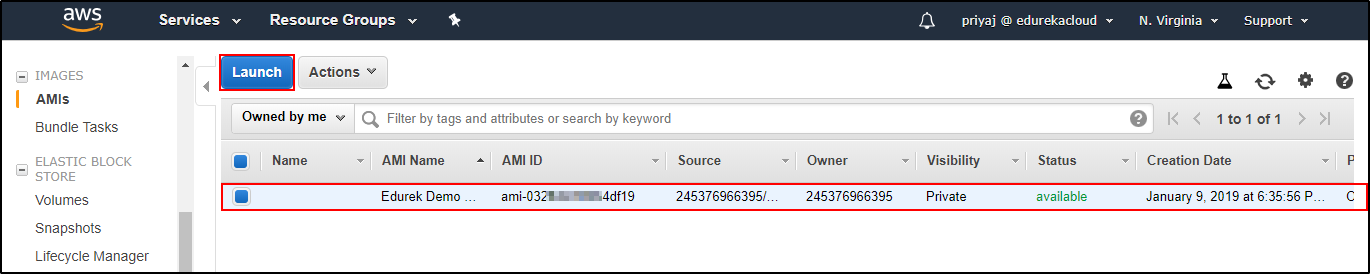 Create on Launch and redo all the steps done while creating
 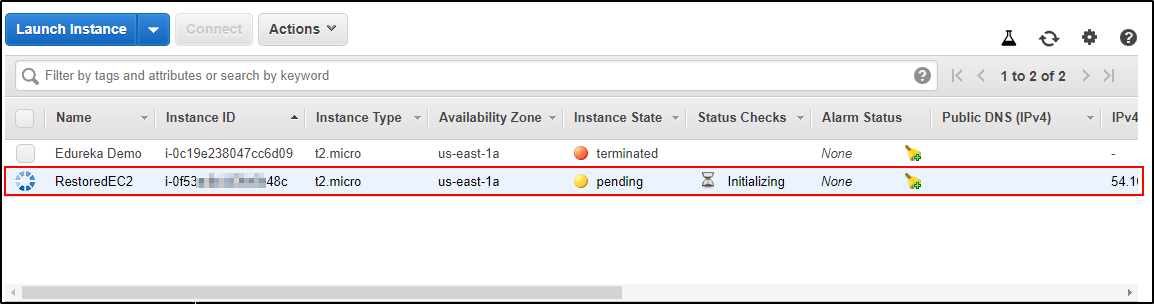 Your EC2 Instance is restored.
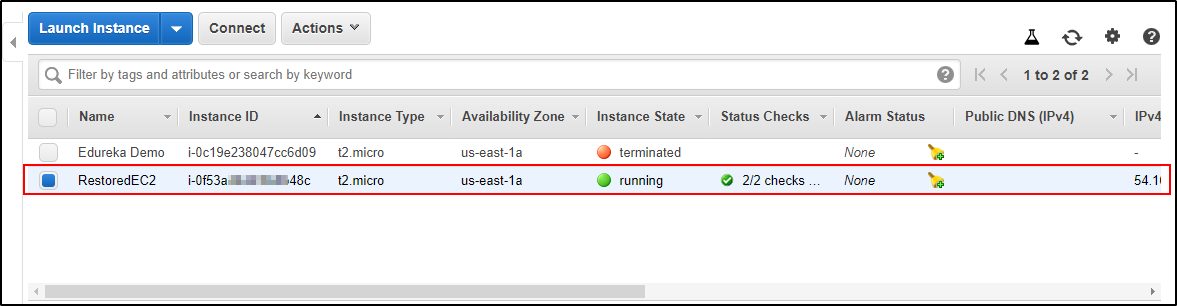 Your EC2 Instance is Created.
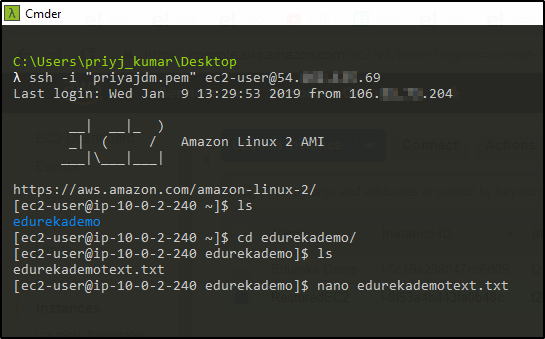
 Verified, the directory and file I created