Configuring Site to Site VPN tunnels to Azure VPN Gateway
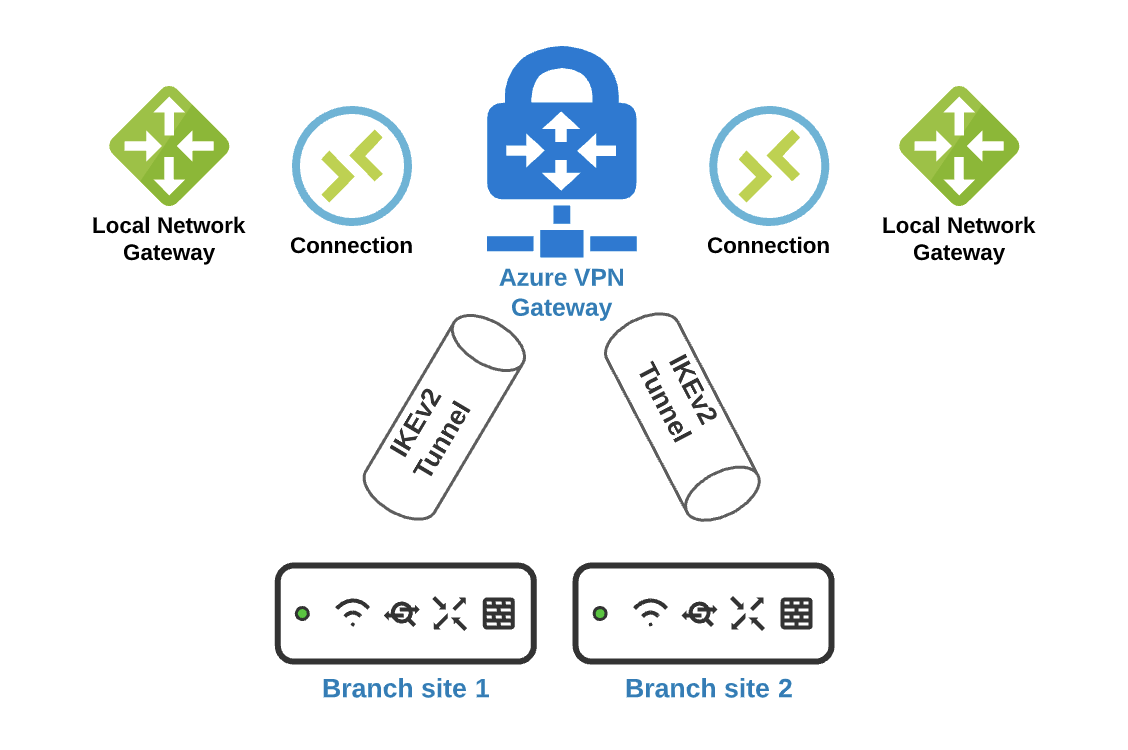
Architecture
Prerequisites
- Each branch MX must be on firmware 15 or greater to take advantage of IKEv2.
- Virtual Network (VNET) with GatewaySubnet subnet.
Deployment Steps
To establish an IPSec tunnel to Azure, configurations must be made on both Azure Portal and Meraki Dashboard.
Azure Portal
Deploy Azure Virtual Network Gateway (if one is not created)
- In the Azure portal, in the Search the Marketplace field, type 'Virtual Network Gateway'. Locate Virtual network gateway in the search return and select the entry. On the Virtual network gateway page, select Create. This opens the Create virtual network gateway page.
On the Basics tab, fill in the values for your virtual network gateway.
.png?revision=1&size=bestfit&width=794&height=783)
Deploy Azure Local Network Gateway
You give the site a name by which Azure can refer to it, then specify the IP address of the on-premises VPN device to which you will create a connection. You also specify the IP address prefixes that will be routed through the VPN gateway to the VPN device. The address prefixes you specify are the prefixes located on your on-premises network. If your on-premises network changes or you need to change the public IP address for the VPN device, you can easily update the values later.
From the Azure portal menu, select Create a resource
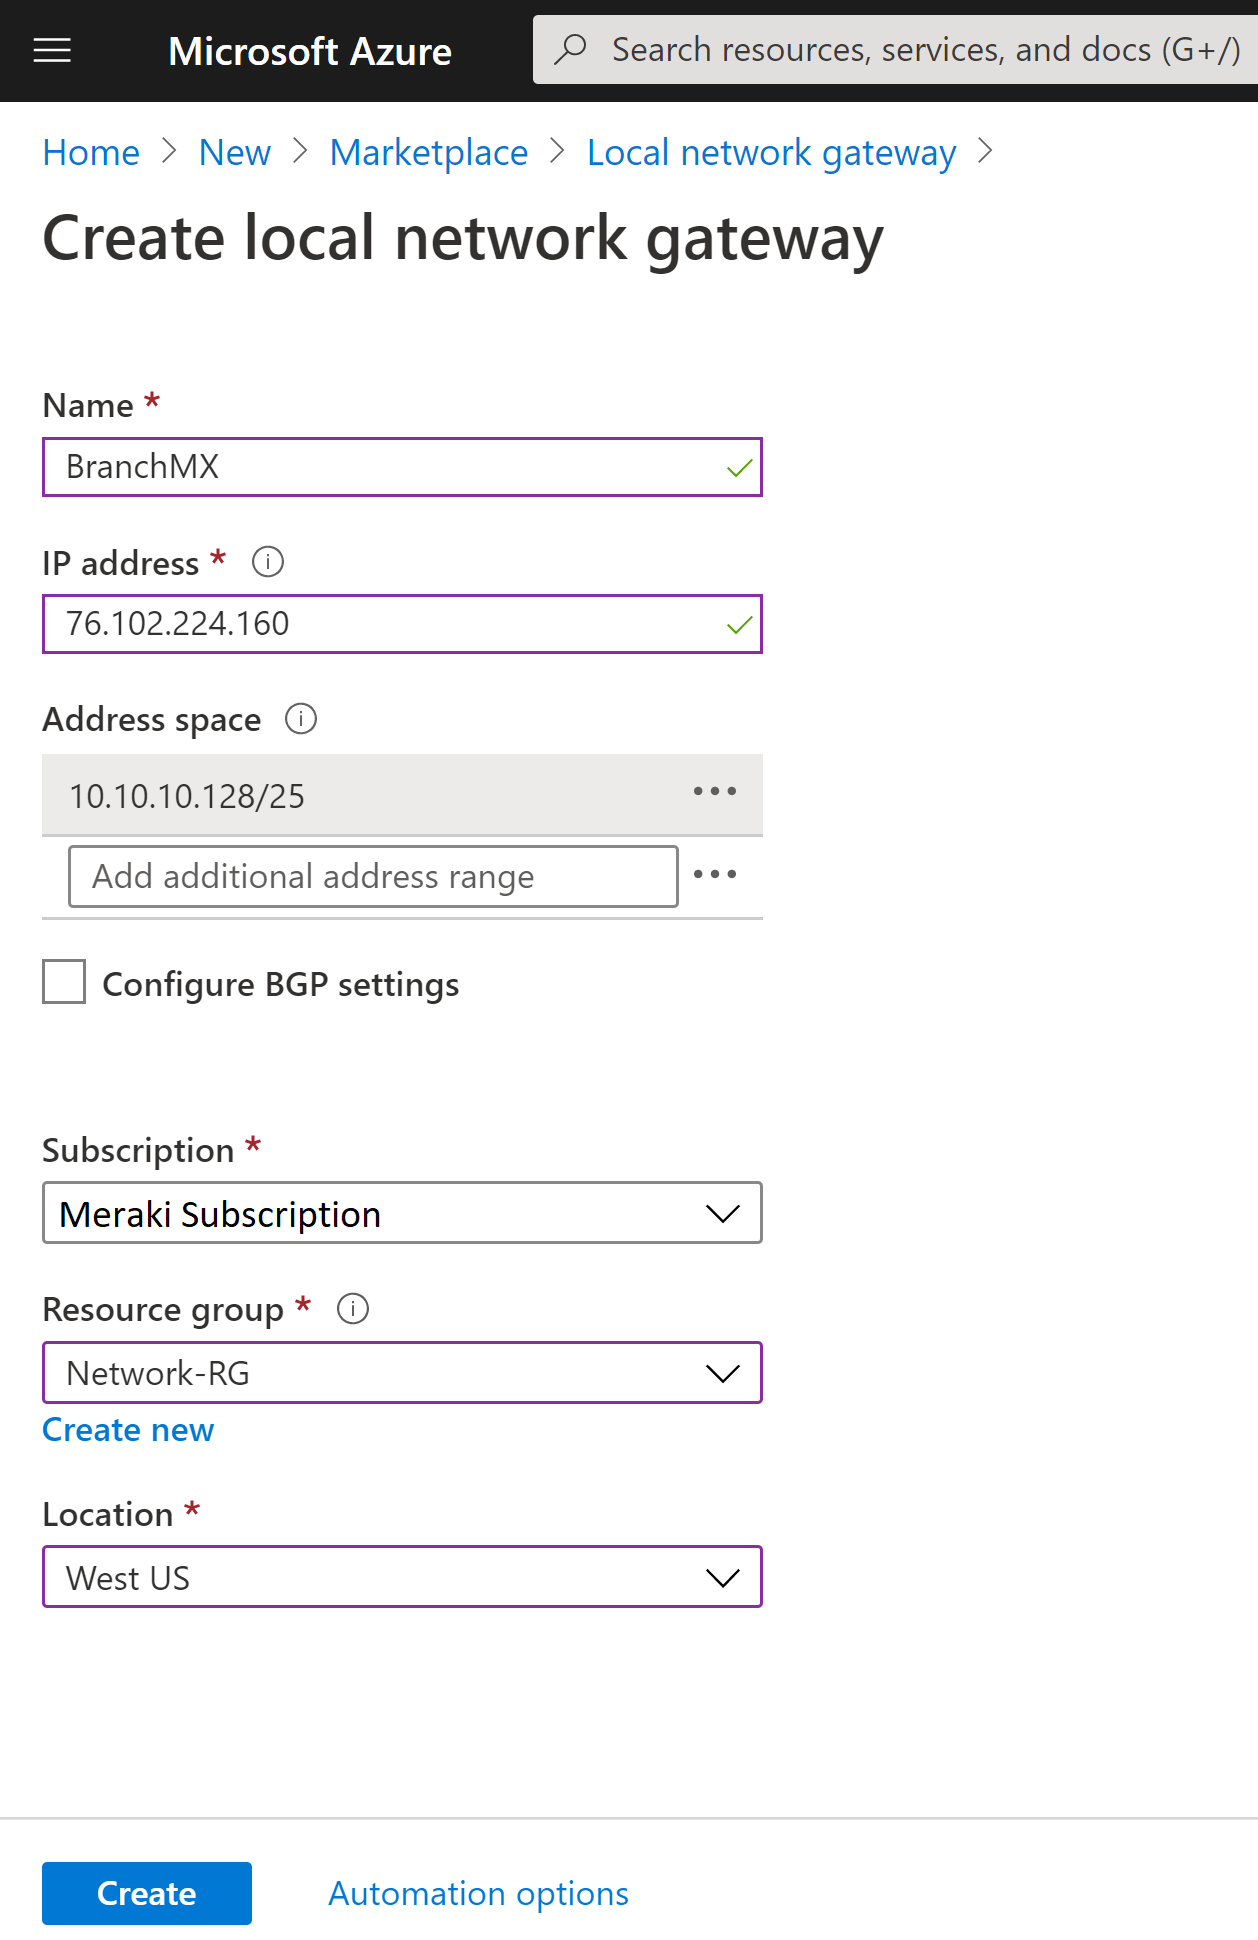
In the Search the marketplace field, type Local network gateway, then press Enter to search. This will return a list of results. Click Local network gateway, then click the Create button to open the Create local network gateway page
On the Create local network gateway page, specify the values for your local network gateway.
- Name: Specify a name for your MX branch site.
- IP address: This is the public IP address of the MX device, which can be found under the appliance status page in dashboard.
- Address Space refers to the address ranges for the network that this local network represents. This is located under the addressing and vlans page on the Meraki dashboard.
- Subscription: Verify that the correct subscription is showing.
- Resource Group: Select the resource group that you want to use. You can either create a new resource group, or select one that you have already created.
- Location: The location is the same as Region in other settings. Select the location that this object will be created in. You may want to select the same location that your VNet resides in, but you are not required to do so.
- When you have finished specifying the values, click the Create button at the bottom of the page to create the local network gateway.
Configure the MX Security Appliance VPN information
- A shared key. This is the same shared key that you specify when creating your Site-to-Site VPN connection. In our examples, we use a basic shared key. We recommend that you generate a more complex key to use.
- The Public IP address of your virtual network gateway. You can view the public IP address by using the Azure portal, PowerShell, or CLI. To find the Public IP address of your VPN gateway using the Azure portal, navigate to Virtual network gateways, then click the name of your gateway.
- In addition, you will need to specify the vnet subnets under the private subnet field in the Meraki dashboard located on the site to site vpn page.
Create connection resource
Create the Site-to-Site VPN connection between your virtual network gateway and your on-premises VPN device.
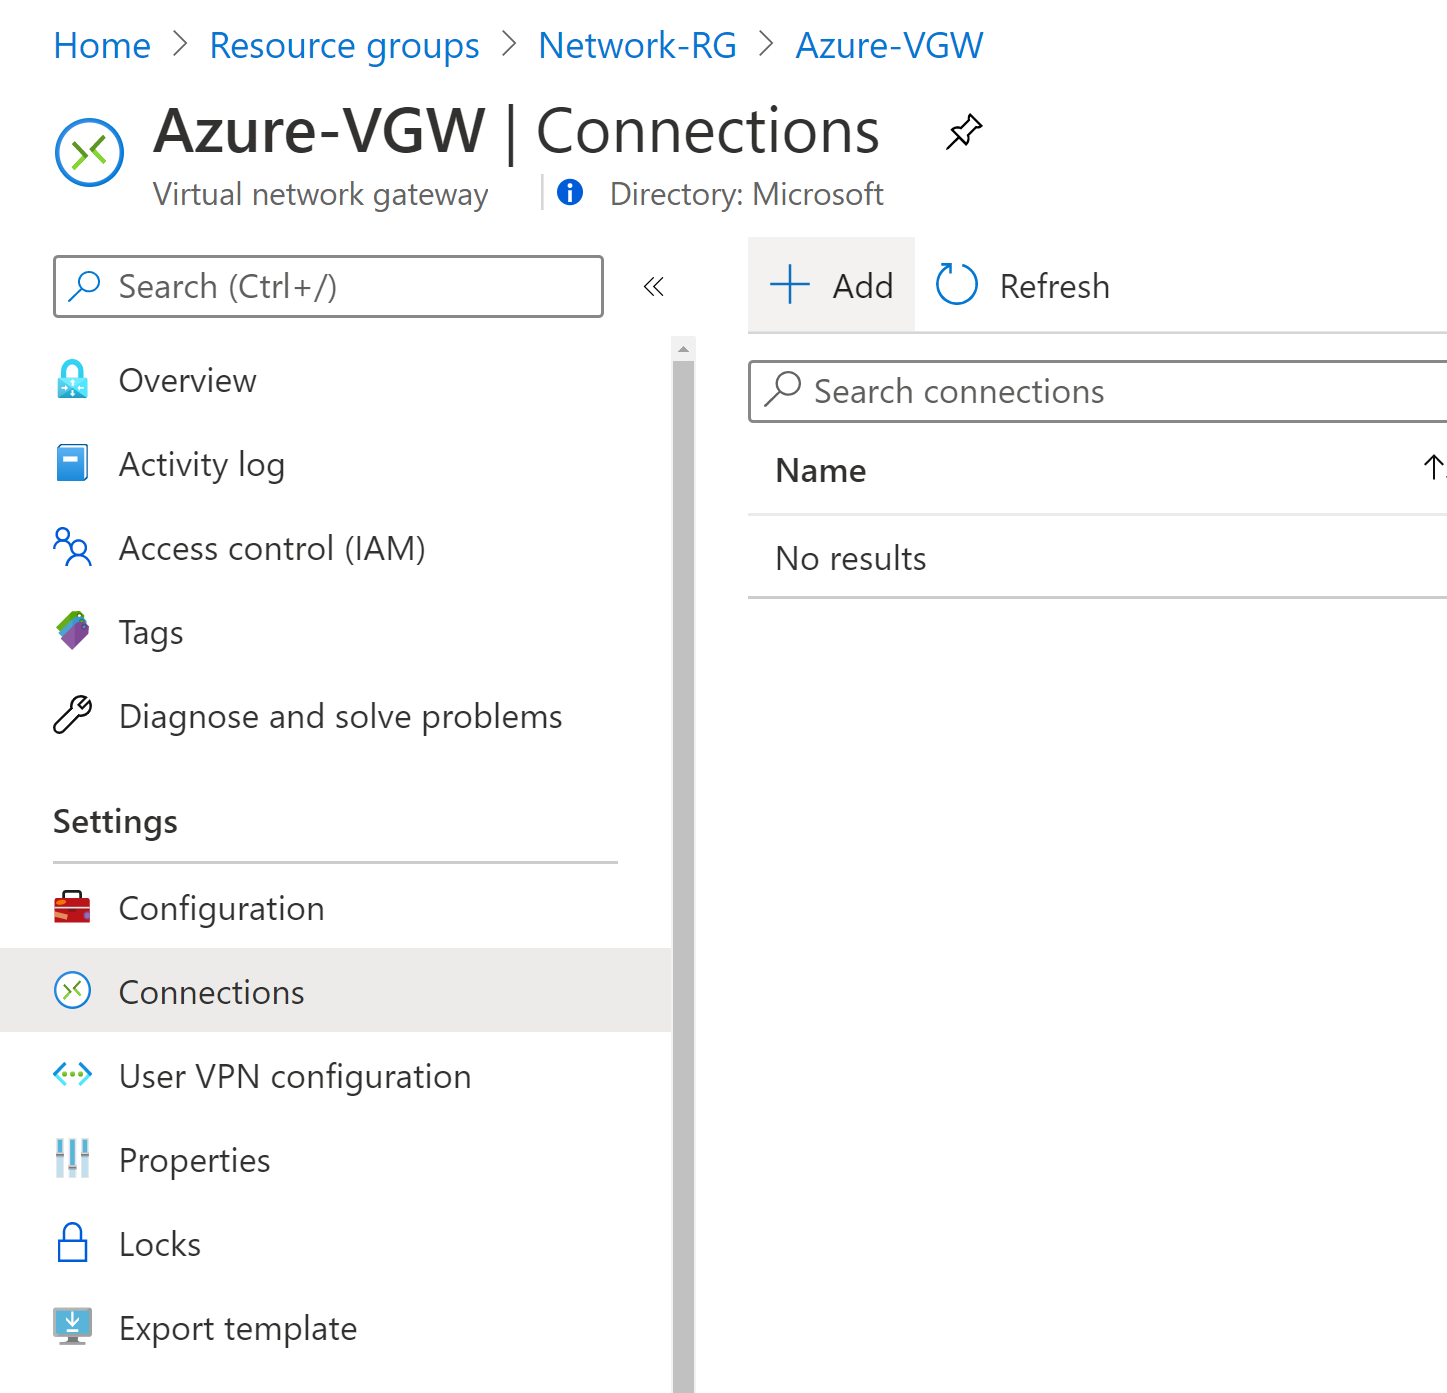
Open the page for your virtual network gateway. There are multiple ways to navigate. You can navigate to the gateway by going to Name of your VNet -> Overview -> Connected devices -> Name of your gateway.
On the page for the gateway, click Connections. At the top of the Connections page, click +Add to open the Add connection page
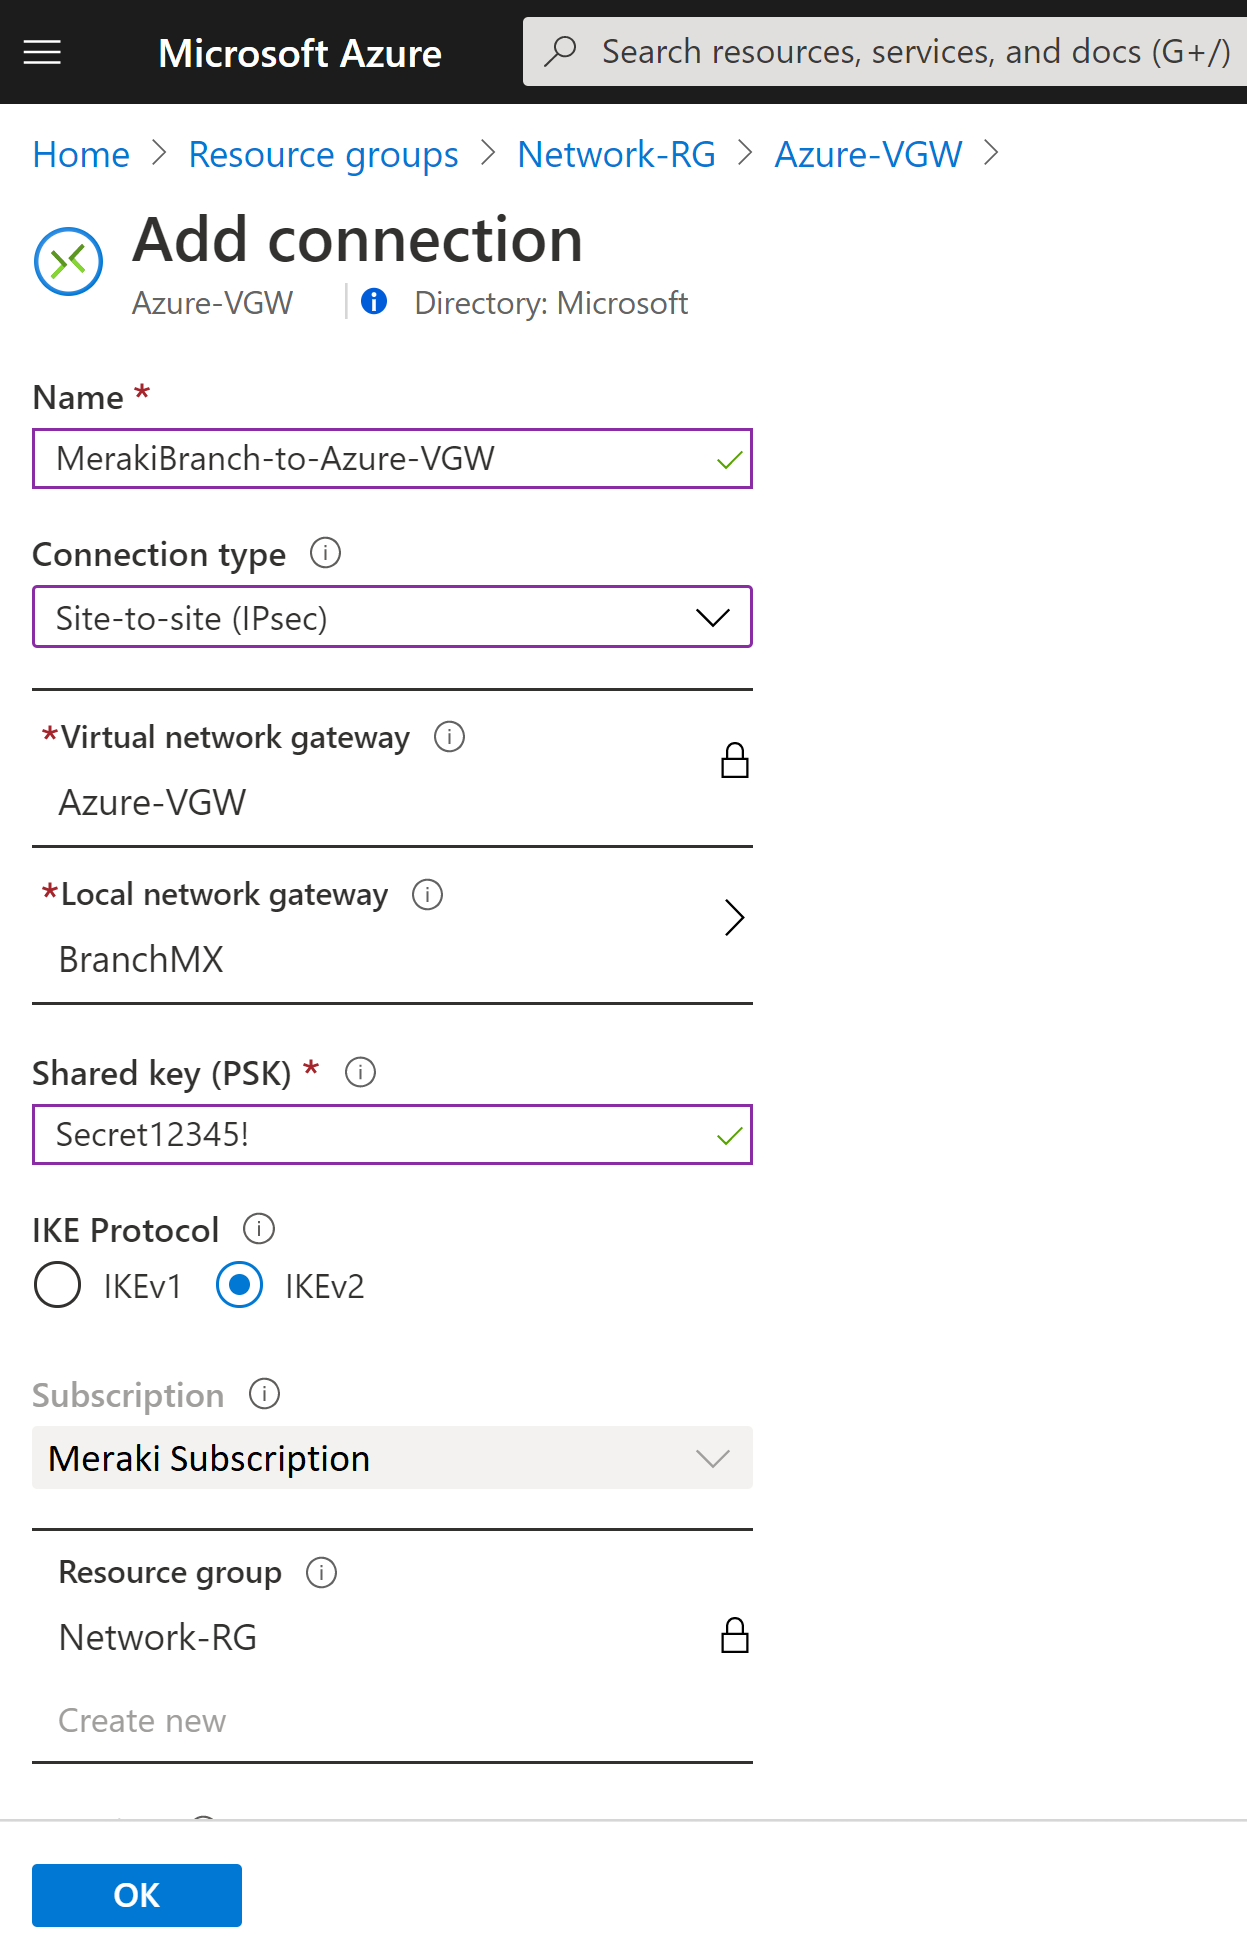
On the Add connection page, configure the values for your connection.
- Name: Name your connection.
- Connection type: Select Site-to-site(IPSec).
- Virtual network gateway: The value is fixed because you are connecting from this gateway.
- Local network gateway: Click Choose a local network gateway and select the local network gateway that you want to use.
- Shared Key: the value here must match the value that you are using for your local on-premises VPN device. The example uses 'Secret12345!', but you can (and should) use something more complex. The important thing is that the value you specify here must be the same value that you specify when configuring your VPN device.
- IKE Protocol: Select IKEv2
- The remaining values for Subscription, Resource Group, and Location are fixed.
Click OK to create your connection. You'll see Creating Connection flash on the screen.
You can view the connection in the Connections page of the virtual network gateway. The Status will go from Unknown to Connecting, and then to Succeeded.
Verify the VPN connection
In the Azure portal, you can view the connection status of a Resource Manager VPN Gateway by navigating to the connection. The following steps show one way to navigate to your connection and verify.
In the Azure portal menu, select All resources or search for and select All resources from any page.
Select to your virtual network gateway.
On the blade for your virtual network gateway, click Connections. You can see the status of each connection.
Click the name of the connection that you want to verify to open Essentials. In Essentials, you can view more information about your connection. The Status is 'Succeeded' and 'Connected' when you have made a successful connection.
In the Meraki dashboard, each Meraki network has its own event log, accessible under Network-wide > Monitor > Event log. In a combined network, click the drop-down menu at the top of the page and select the event log for one of the following options:
- for security appliances to display information about the MX security appliance in this network.
Once there, you will be able to verify that the IKEv2 tunnel was established with a timestamp as seen below:
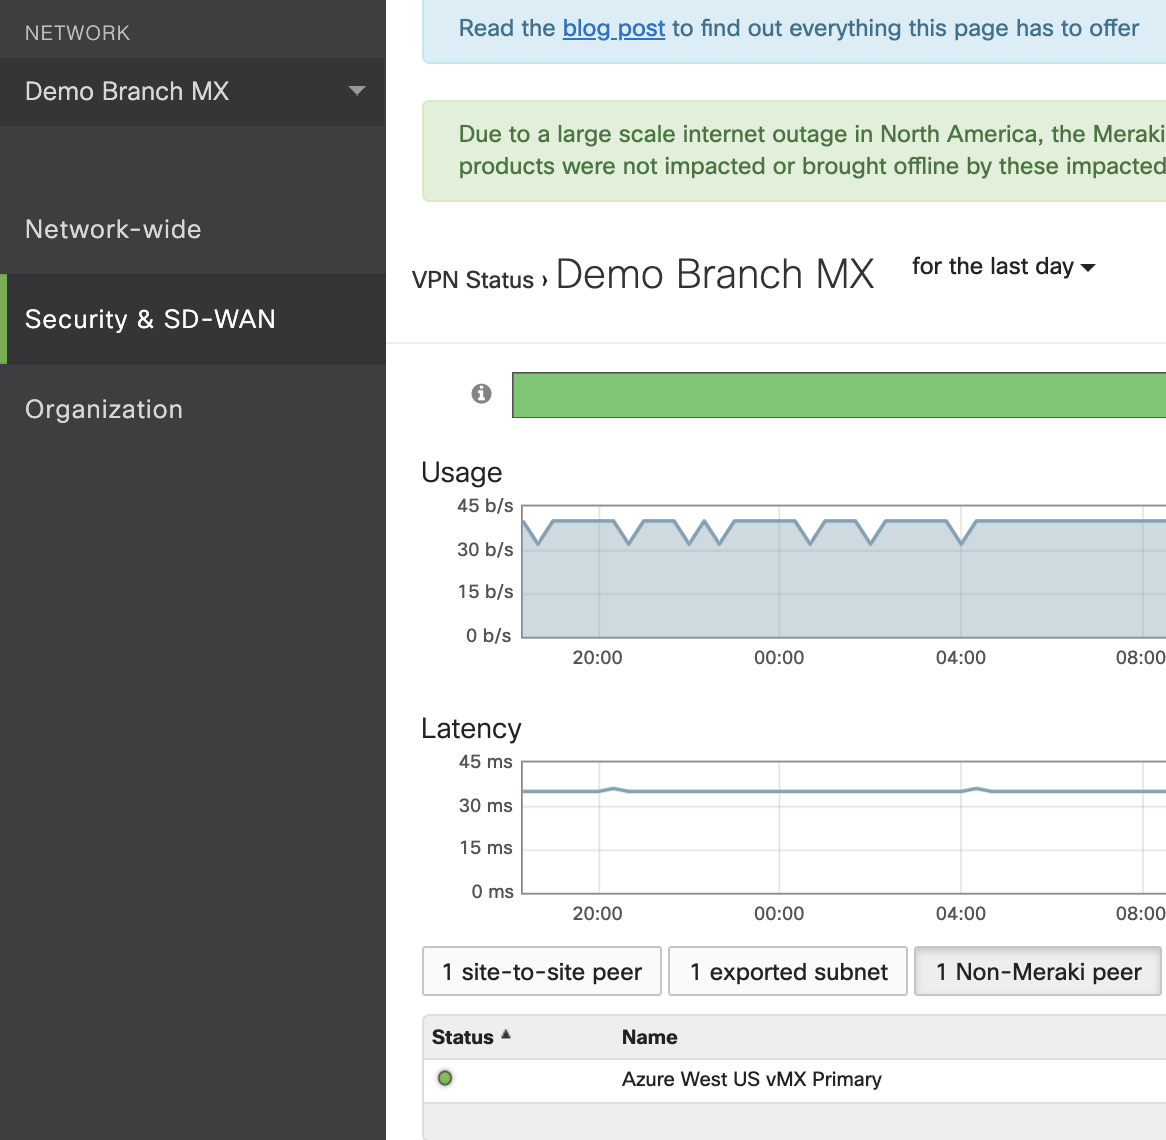
Additionally, you can access the VPN Status page by navigating to the Organization > Monitor > VPN Status tab, or by navigating to the Security & SD-WAN > Monitor > VPN Status tab. On the non-Meraki peers tab, the following information is available:
Status - whether the peer is currently reachable or not.
Name - Name of the non-Meraki peer configured on the Security & SD-WAN > Configure > Site-to-Site VPN page.
Public IP - Pubic IP configured for the non-Meraki VPN peer.
Subnets - All subnets configured under the "Remote Subnets" field on the Security & SD-WAN > Configure > Site-to-Site VPN page.



No comments:
Post a Comment