Run end-to-end tests at scale with Microsoft Playwright Testing Preview
Prerequisites
- An Azure account with an active subscription. If you don't have an Azure subscription, create a free account before you begin.
- Your Azure account needs the Owner, Contributor, or one of the classic administrator roles.
- A Playwright project. If you don't have project, create one by using the Playwright getting started documentation or use our Microsoft Playwright Testing sample project.
Create a workspace
To get started with running your Playwright tests at scale on cloud browsers, you first create a Microsoft Playwright Testing workspace in the Playwright portal.
Sign in to the Playwright portal with your Azure account.
If you already have a workspace, select an existing workspace, and move to the next step.
Tip
If you have multiple workspaces, you can switch to another workspace by selecting the workspace name at the top of the page, and then select Manage all workspaces.
If you don't have a workspace yet, select + New workspace, and then provide the following information:
Field Description Workspace name Enter a unique name to identify your workspace.
The name can only consist of alphanumerical characters, and have a length between 3 and 64 characters.Azure subscription Select the Azure subscription that you want to use for this Microsoft Playwright Testing workspace. Region Select a geographic location to host your workspace.
This is the location where the test run data is stored for the workspace.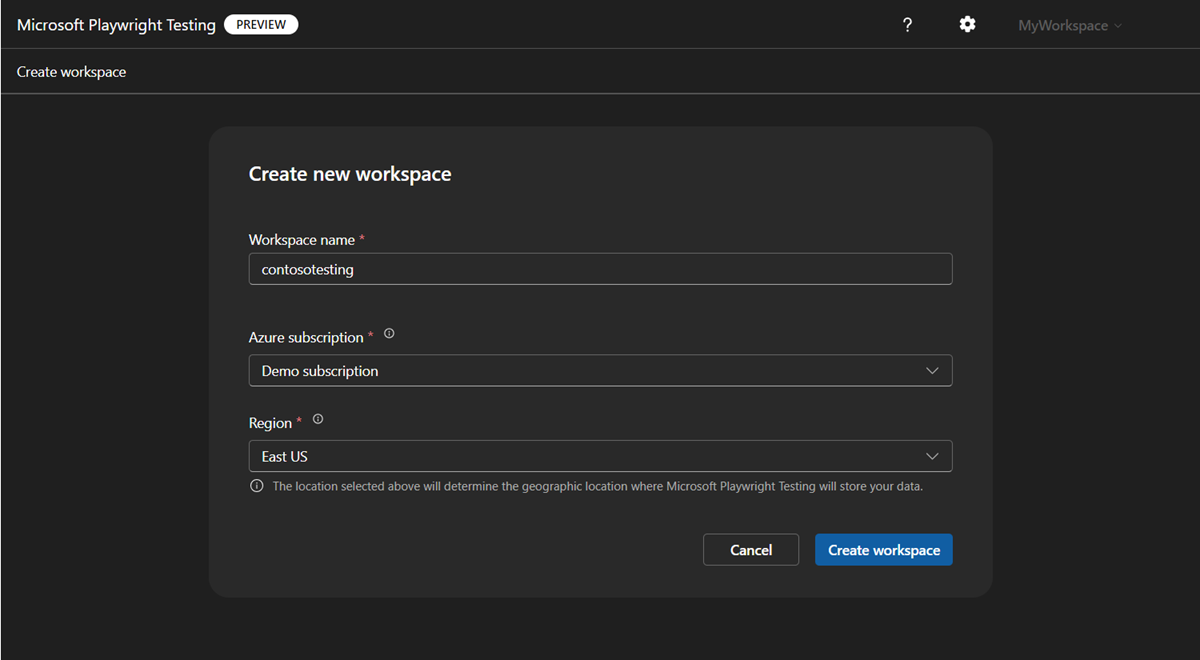
Select Create workspace to create the workspace in your subscription.
During the workspace creation, a new resource group and a Microsoft Playwright Testing Azure resource are created in your Azure subscription.

When the workspace creation finishes, you're redirected to the setup guide.
Create an access token for service authentication
Microsoft Playwright Testing uses access tokens to authorize users to run Playwright tests with the service. You first generate a service access token in the Playwright portal, and then store the value in an environment variable.
To generate the access token, perform the following steps:
In the workspace setup guide, in Create an access token, select Generate token.
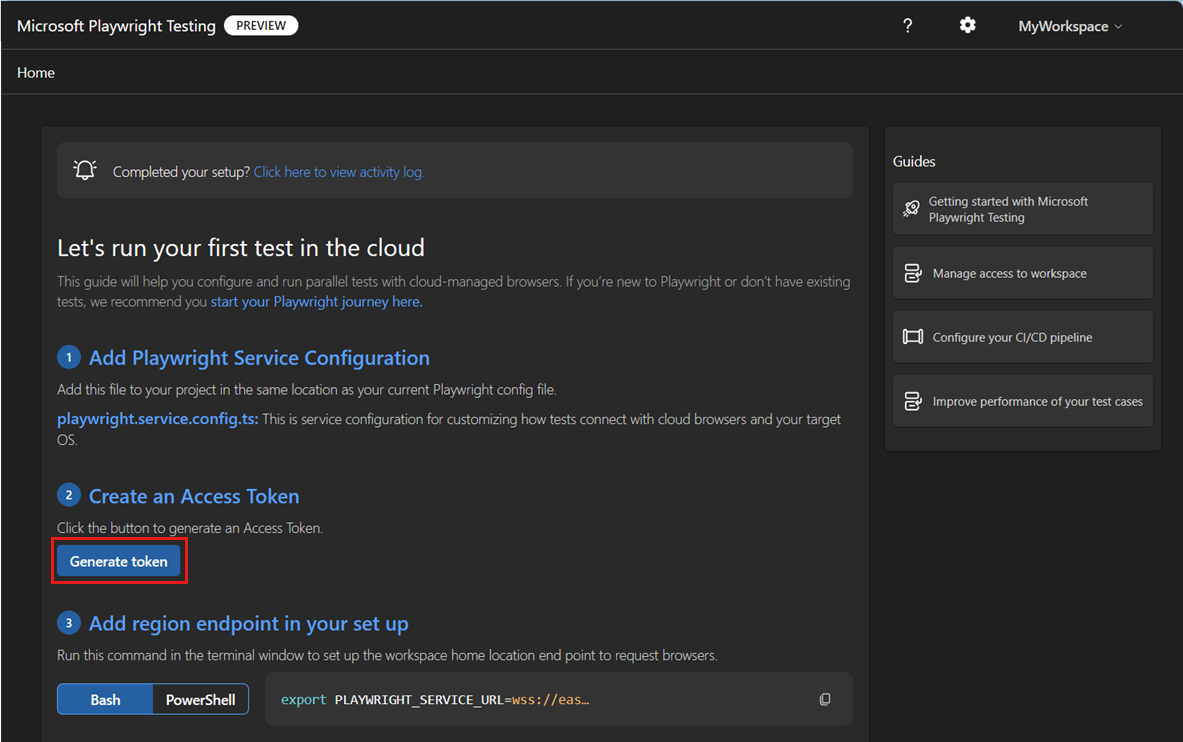
Copy the access token for the workspace.
You need the access token value for configuring your environment in a later step.


Configure the service region endpoint
In the service configuration, you have to provide the region-specific service endpoint. The endpoint depends on the Azure region you selected when creating the workspace.
To get the service endpoint URL, perform the following steps:
In Add region endpoint in your setup, copy the region endpoint for your workspace.
The endpoint URL matches the Azure region that you selected when creating the workspace.


Set up your environment
To set up your environment, you have to configure the PLAYWRIGHT_SERVICE_ACCESS_TOKEN and PLAYWRIGHT_SERVICE_URL environment variables with the values you obtained in the previous steps.
We recommend that you use the dotenv module to manage your environment. With dotenv, you define your environment variables in the .env file.
Add the
dotenvmodule to your project:shellnpm i --save-dev dotenvCreate a
.envfile alongside theplaywright.config.tsfile in your Playwright project:PLAYWRIGHT_SERVICE_ACCESS_TOKEN={MY-ACCESS-TOKEN} PLAYWRIGHT_SERVICE_URL={MY-REGION-ENDPOINT}Make sure to replace the
{MY-ACCESS-TOKEN}and{MY-REGION-ENDPOINT}text placeholders with the values you copied earlier.
Add a service configuration file
To run your Playwright tests in your Microsoft Playwright Testing workspace, you need to add a service configuration file alongside your Playwright configuration file. The service configuration file references the environment variables to get the workspace endpoint and your access token.
To add the service configuration to your project:
Create a new file
playwright.service.config.tsalongside theplaywright.config.tsfile.Optionally, use the
playwright.service.config.tsfile in the sample repository.Add the following content to it:
TypeScript/* * This file enables Playwright client to connect to remote browsers. * It should be placed in the same directory as playwright.config.ts. */ import { defineConfig } from '@playwright/test'; import config from './playwright.config'; import dotenv from 'dotenv'; // Define environment on the dev box in .env file: // .env: // PLAYWRIGHT_SERVICE_ACCESS_TOKEN=XXX // PLAYWRIGHT_SERVICE_URL=XXX // Define environment in your GitHub workflow spec. // env: // PLAYWRIGHT_SERVICE_ACCESS_TOKEN: ${{ secrets.PLAYWRIGHT_SERVICE_ACCESS_TOKEN }} // PLAYWRIGHT_SERVICE_URL: ${{ secrets.PLAYWRIGHT_SERVICE_URL }} // PLAYWRIGHT_SERVICE_RUN_ID: ${{ github.run_id }}-${{ github.run_attempt }}-${{ github.sha }} dotenv.config(); // Name the test run if it's not named yet. process.env.PLAYWRIGHT_SERVICE_RUN_ID = process.env.PLAYWRIGHT_SERVICE_RUN_ID || new Date().toISOString(); // Can be 'linux' or 'windows'. const os = process.env.PLAYWRIGHT_SERVICE_OS || 'linux'; export default defineConfig(config, { // Define more generous timeout for the service operation if necessary. // timeout: 60000, // expect: { // timeout: 10000, // }, workers: 20, // Enable screenshot testing and configure directory with expectations. // https://learn.microsoft.com/azure/playwright-testing/how-to-configure-visual-comparisons ignoreSnapshots: false, snapshotPathTemplate: `{testDir}/__screenshots__/{testFilePath}/${os}/{arg}{ext}`, use: { // Specify the service endpoint. connectOptions: { wsEndpoint: `${process.env.PLAYWRIGHT_SERVICE_URL}?cap=${JSON.stringify({ // Can be 'linux' or 'windows'. os, runId: process.env.PLAYWRIGHT_SERVICE_RUN_ID })}`, timeout: 30000, headers: { 'x-mpt-access-key': process.env.PLAYWRIGHT_SERVICE_ACCESS_TOKEN! }, // Allow service to access the localhost. exposeNetwork: '<loopback>' } }, // Tenmp workaround for config merge bug in OSS https://github.com/microsoft/playwright/pull/28224 projects: config.projects? config.projects : [{}] });Save the file.
Run your tests at scale with Microsoft Playwright Testing
You've now prepared the configuration for running your Playwright tests in the cloud with Microsoft Playwright Testing. You can either use the Playwright CLI to run your tests, or use the Playwright Test Visual Studio Code extension.
Run a single test at scale
With Microsoft Playwright Testing, you get charged based on the number of total test minutes. If you're a first-time user or getting started with a free trial, you might start with running a single test at scale instead of your full test suite to avoid exhausting your free test minutes.
After you validate that the test runs successfully, you can gradually increase the test load by running more tests with the service.
Perform the following steps to run a single Playwright test with Microsoft Playwright Testing:
To use the Playwright CLI to run your tests with Microsoft Playwright Testing, pass the service configuration file as a command-line parameter.
Open a terminal window.
Enter the following command to run your Playwright test on remote browsers in your workspace:
Replace the
{name-of-file.spec.ts}text placeholder with the name of your test specification file.Bashnpx playwright test {name-of-file.spec.ts} --config=playwright.service.config.tsAfter the test completes, you can view the test status in the terminal.
OutputRunning 1 test using 1 worker 1 passed (2.2s) To open last HTML report run: npx playwright show-report
You can now run multiple tests with the service, or run your entire test suite on remote browsers.
Run a full test suite at scale
Now that you've validated that you can run a single test with Microsoft Playwright Testing, you can run a full Playwright test suite at scale.
Perform the following steps to run a full Playwright test suite with Microsoft Playwright Testing:
When you run multiple Playwright tests or a full test suite with Microsoft Playwright Testing, you can optionally specify the number of parallel workers as a command-line parameter.
Open a terminal window.
Enter the following command to run your Playwright test suite on remote browsers in your workspace:
Bashnpx playwright test --config=playwright.service.config.ts --workers=20Depending on the size of your test suite, this command runs your tests on up to 20 parallel workers.
After the test completes, you can view the test status in the terminal.
OutputRunning 6 tests using 6 workers 6 passed (18.2s) To open last HTML report run: npx playwright show-report
View test runs in the Playwright portal
Go to the Playwright portal to view the test run metadata and activity log for your workspace.

The activity log lists for each test run the following details: the total test completion time, the number of parallel workers, and the number of test minutes.
View test results in the Playwright portal
Microsoft Playwright Testing now supports viewing test results in the Playwright Portal. This feature is only available as an invite only feature.
Once you have access to the reporting tool, use the following steps to set up your tests.
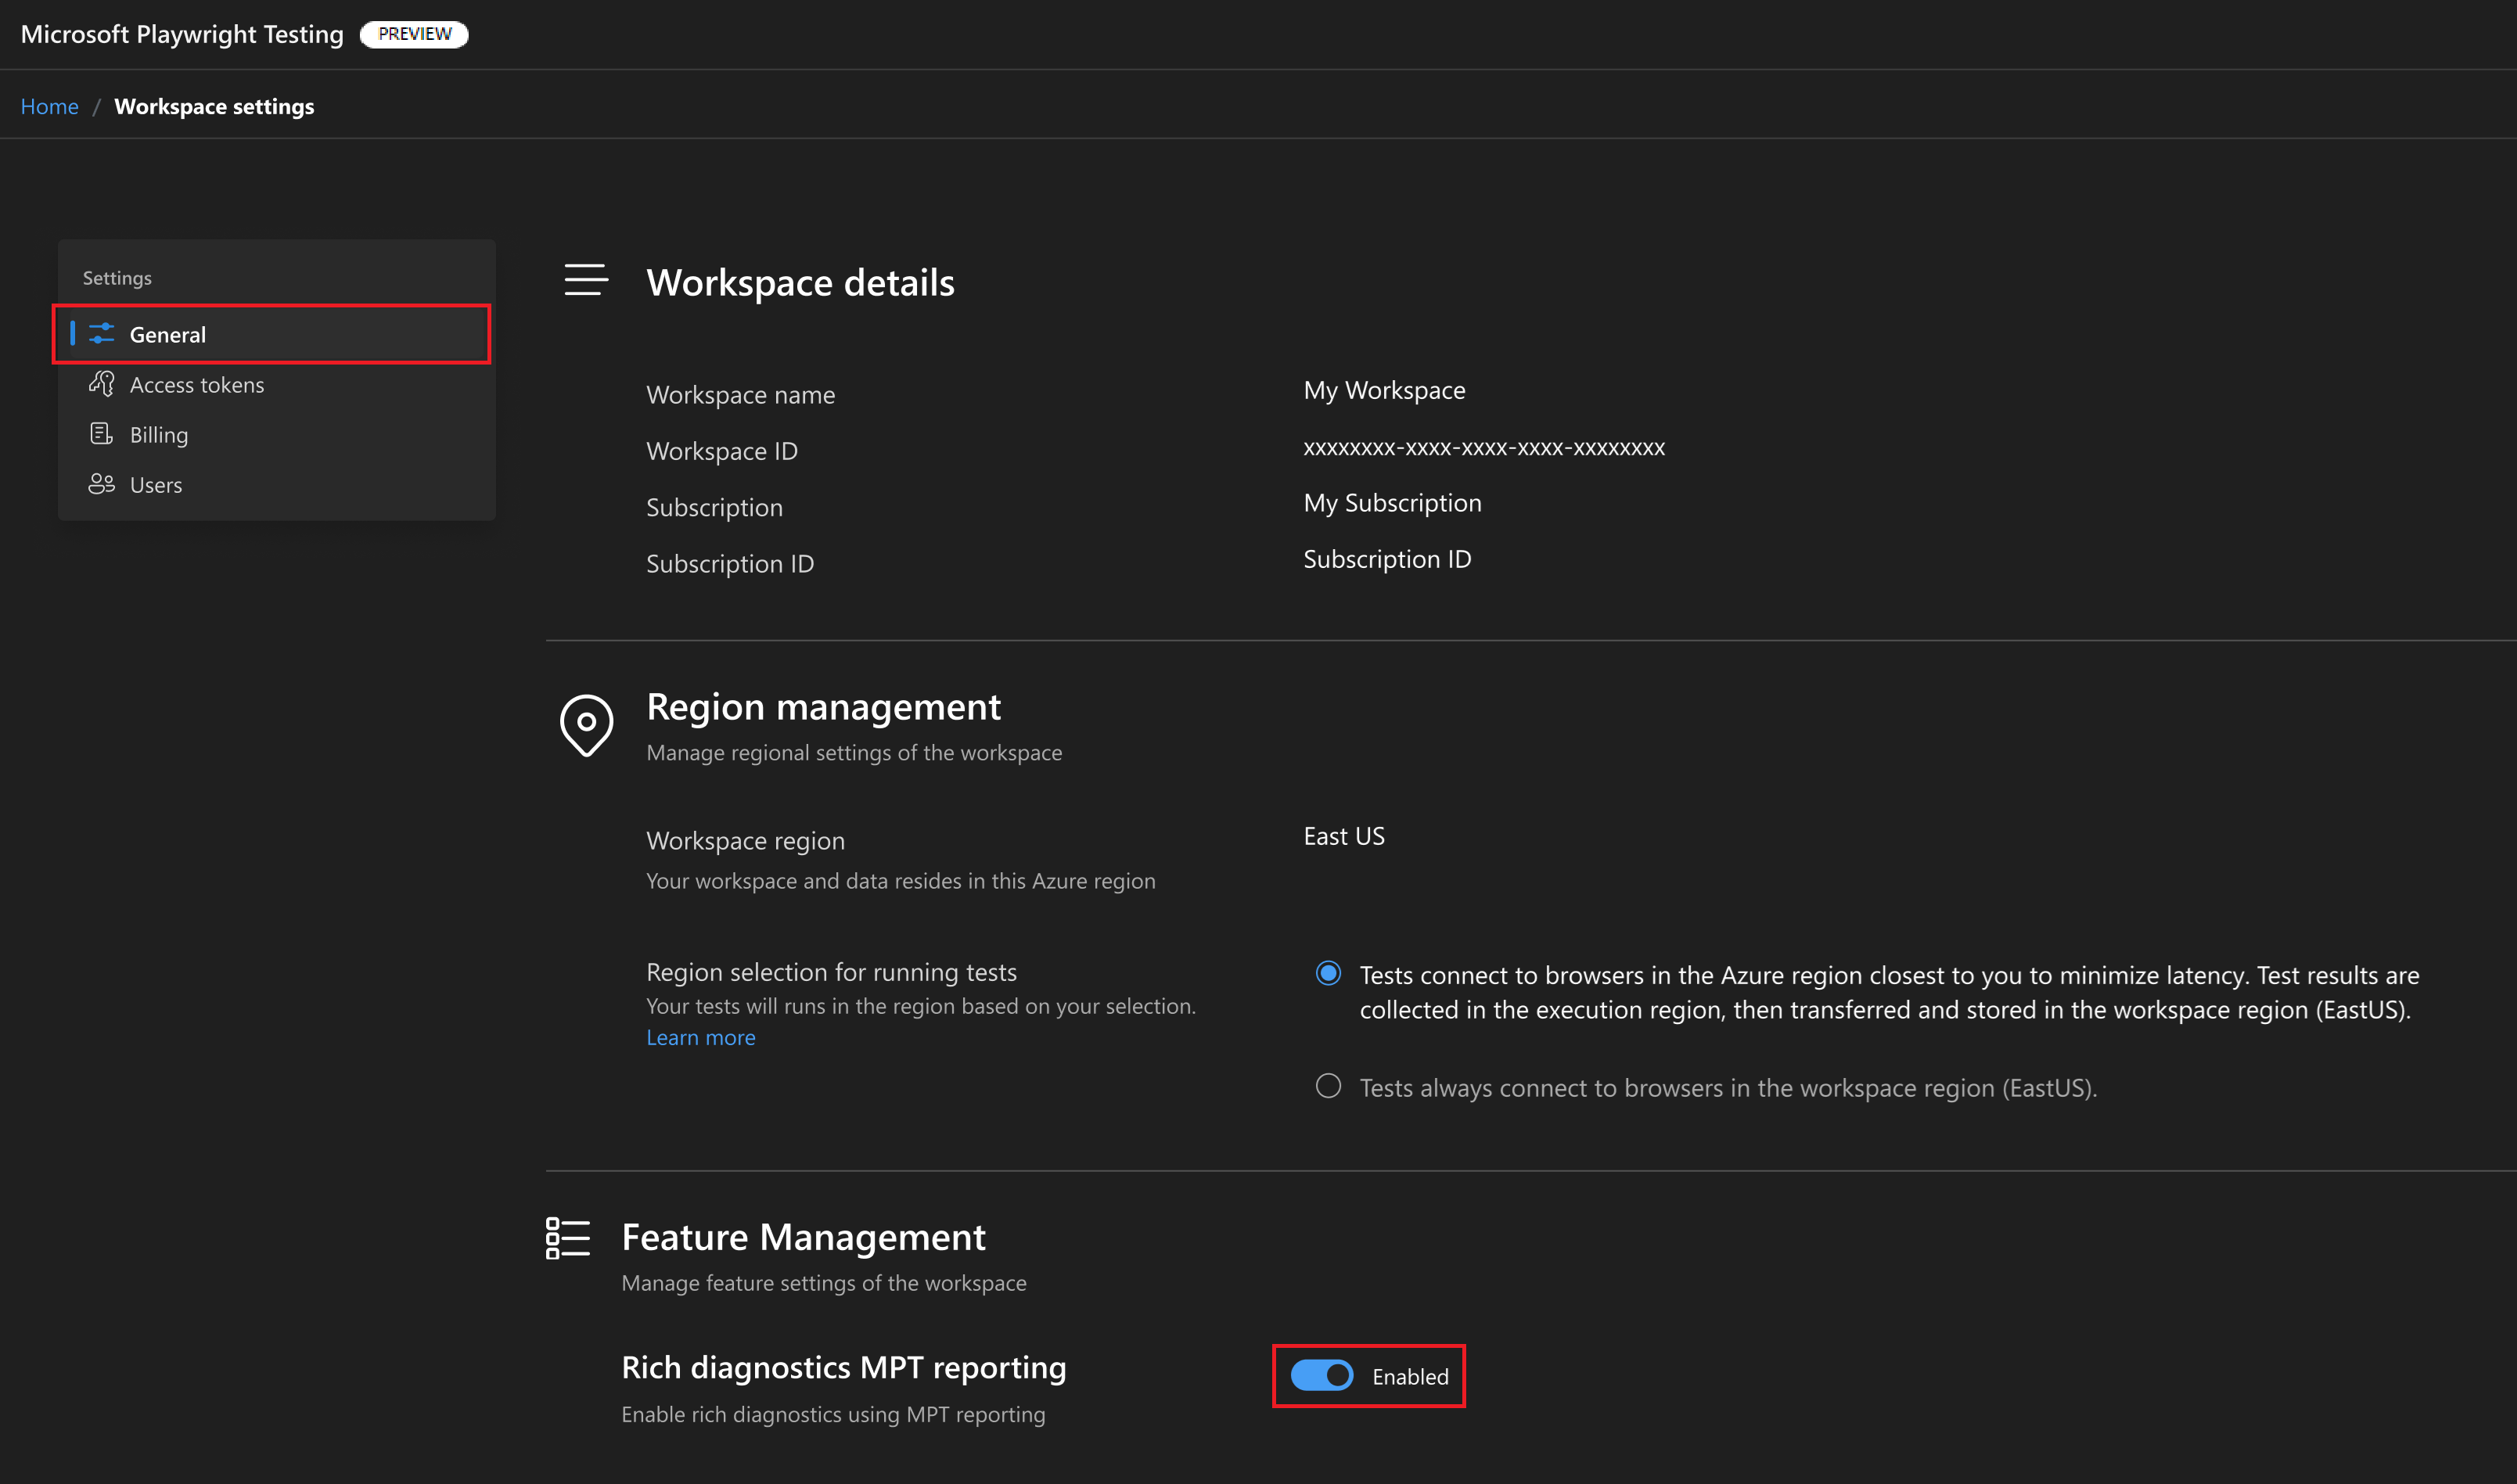
From the workspace home page, navigate to Settings.

From Settings, select General and make sure reporting is Enabled.
Make sure the environment is set up correctly as mentioned in the section Set up your environment.
Install reporting package
Since the feature is currently not public, you need to perform a few extra steps to install the package. These steps won't be needed once the feature becomes public.
Create a file with name
.npmrcat the same location as your Playwright config file.Add the following content to the file and save.
Bash@microsoft:registry=https://npm.pkg.github.comCreate a GitHub Personal Access Token by following these steps.
You need to provide
read:packagespermissions to the token. This token is referred to asPAT_TOKEN_PACKAGEfor the rest of this article.Run the following command in your terminal, at the location of your Playwright config file. Replace
PAT_TOKEN_PACKAGEwith the token generated in the previous step.Bashnpm set //npm.pkg.github.com/:_authToken PAT_TOKEN_PACKAGEUpdate package.json file with the package.
JSON"dependencies": { "@microsoft/mpt-reporter": "0.1.0-19072024-private-preview" }Run
npm installto install the package.
Update Playwright.config file
Add Playwright Testing reporter to
Playwright.config.tsin the same way you use other reporters.TypeScriptimport { defineConfig } from '@playwright/test'; export default defineConfig({ reporter: [ ['list'], ['json', { outputFile: 'test-results.json' }], ['@microsoft/mpt-reporter'] // Microsoft Playwright Testing reporter ], });Make sure that the artifacts are enabled in the config for better troubleshooting.
TypeScriptuse: { // ... trace: 'on-first-retry', video:'retain-on-failure', screenshot:'only-on-failure', }Run Playwright tests
You can run
npx playwright testcommand and view the results and artifacts on Playwright Testing portal.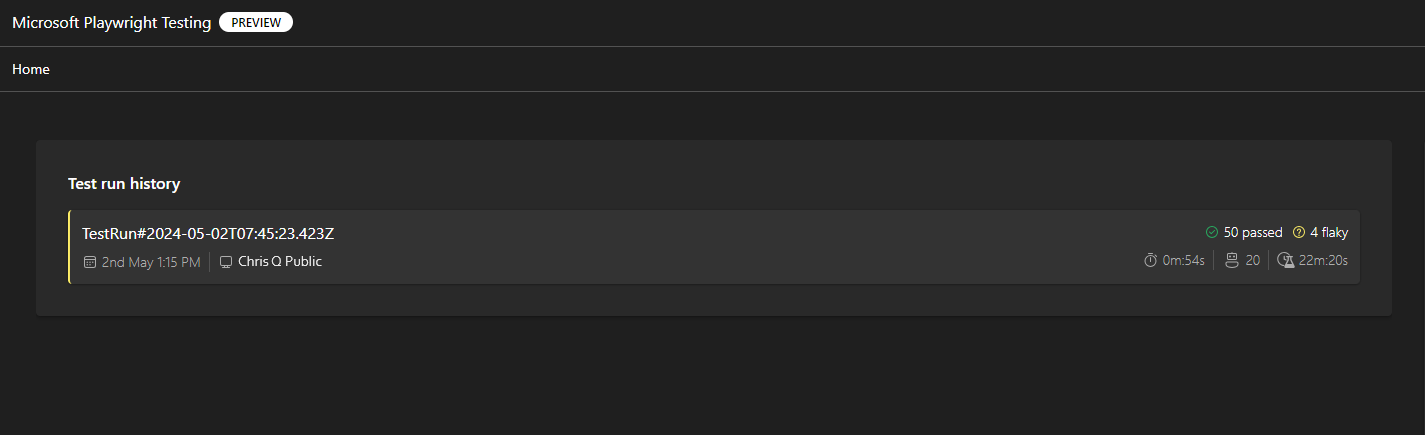


No comments:
Post a Comment