What is Azure Private DNS?
Azure Private DNS provides a reliable and secure DNS service for your virtual network. Azure Private DNS manages and resolves domain names in the virtual network without the need to configure a custom DNS solution. By using private DNS zones, you can use your own custom domain name instead of the Azure-provided names during deployment.

Using a custom domain name helps you tailor your virtual network architecture to best suit your organization’s needs. It provides a naming resolution for virtual machines (VMs) within a virtual network and connected virtual networks. Additionally, you can configure zones names with a split-horizon view, which allows a private and a public DNS zone to share the name.
Benefits of Azure Private DNS
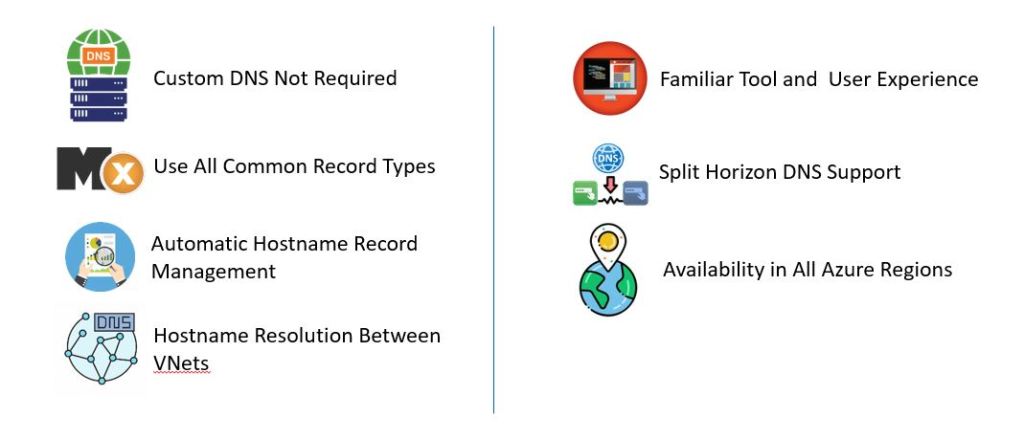
1. Removes the need for custom DNS solutions. Previously, many customers created custom DNS solutions to manage DNS zones in their virtual network. You can now manage DNS zones using the native Azure infrastructure, which removes the burden of creating and managing custom DNS solutions.
2. Automatic hostname record management. Along with hosting your custom DNS records, Azure automatically maintains hostname records for the VMs in the specified virtual networks. In this scenario, you can optimize the domain names you use without needing to create custom DNS solutions or modify applications.
3. Hostname resolution between virtual networks. Unlike Azure-provided hostnames, private DNS zones can be shared between virtual networks. This capability simplifies cross-network and service-discovery scenarios, such as virtual network peering.
4. Familiar tools and user experience. To reduce the learning curve, this service uses well-established Azure DNS tools (Azure portal, Azure PowerShell, Azure CLI, Azure Resource Manager templates, and the REST API).
5. Available in all Azure regions. The Azure DNS private zones feature is available in all Azure regions in the Azure public cloud.
Azure DNS Provides the Following Capabilities
- Automatic registration of virtual machines from a virtual network that’s linked to a private zone with auto-registration enabled. Virtual machines get registered to the private zone as A records pointing to their private IP addresses. When a virtual machine in a virtual network link with auto-registration enabled gets deleted, Azure DNS also automatically removes the corresponding DNS record from the linked private zone.
- Forward DNS resolution is supported across virtual networks that are linked to the private zone. For cross-virtual network DNS resolution, there’s no explicit dependency such that the virtual networks peer with each other. However, you might want to peer virtual networks for other scenarios (for example, HTTP traffic).
- Reverse DNS lookup is supported within the virtual-network scope. Reverse DNS lookup for a private IP associated with a private zone will return an FQDN that includes the host/record name and the zone name as the suffix.
Configure the Azure DNS
In this section, you will learn how to create an Azure Private DNS Zone using the Azure portal. A DNS zone contains the DNS entries for a domain. To start hosting your domain in Azure DNS, you create a DNS zone for that domain name.
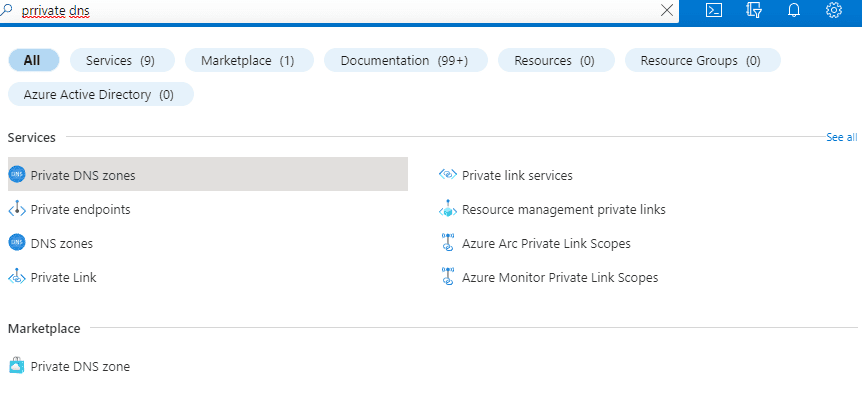
1. In the Azure portal, search for Private DNS zones and select Private DNS Zone.
2. Click on +Create to create a new Private DNS zone.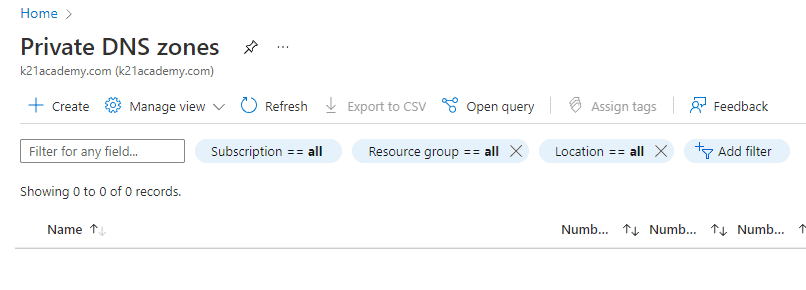
3.On the Create Private DNS zone page, type or select the following values:
Resource group: Select Create new, enter MyAzureResourceGroup, and select OK. The resource group name must be unique within the Azure subscription.
Name: Type private.contoso.com for this example.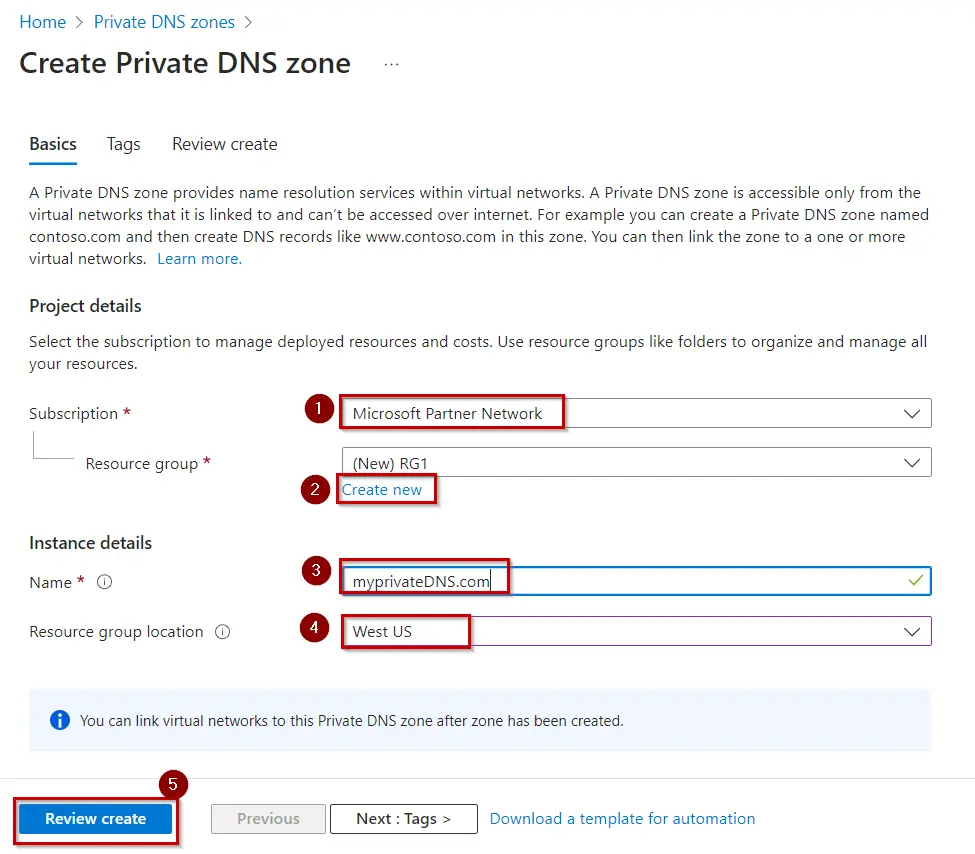
4.Select Create Once validation is passed.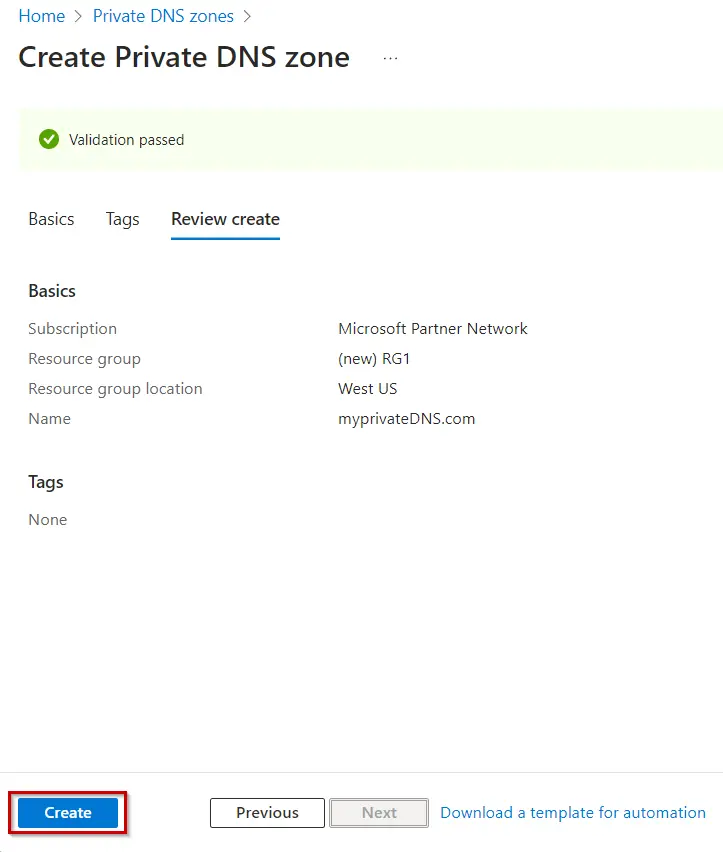
5. Click on Go to Resource.
6.Now we will create Create the virtual network and subnet
| Setting | Value |
|---|---|
| Project Details | |
| Subscription | Select your Azure subscription |
| Resource Group | Select Create new, enter <resource-group-name>, then select OK, or select an existing <resource-group-name> based on parameters. |
| Instance details | |
| Name | Enter <virtual-network-name> |
| Region | Select <region-name> |
7.Select the IP Addresses tab or select the Next: IP Addresses button at the bottom of the page. In the IP Addresses tab, enter this information:
| Setting | Value |
|---|---|
| IPv4 address space | Enter <IPv4-address-space> |
8.Under Subnet name, write any name. In Edit subnet, enter this information:
| Setting | Value |
|---|---|
| Subnet name | Enter <subnet-name> |
| Subnet address range | Enter <subnet-address-range> |
9.In Create virtual network, enter or select this information in the Basics tab:
10. Click on Create.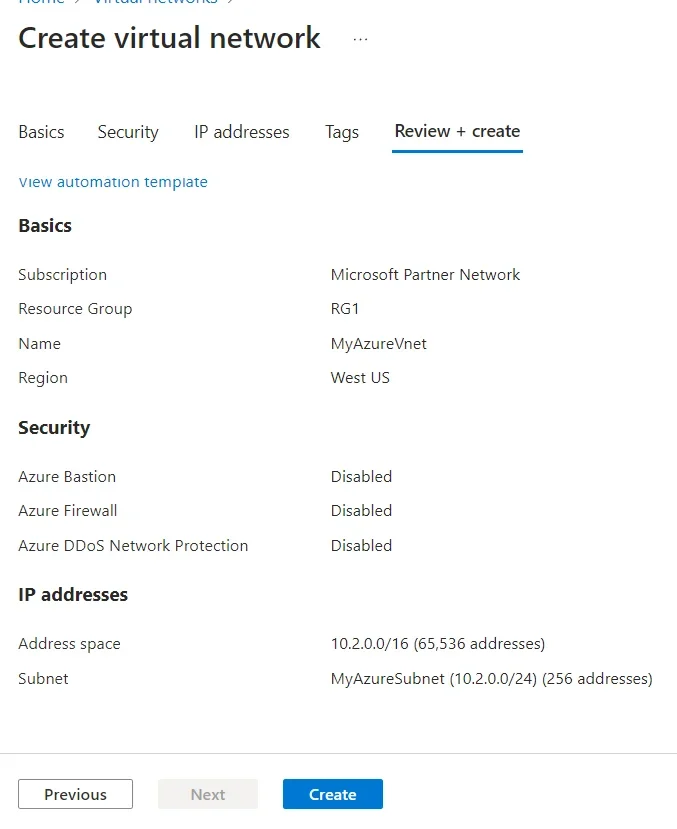
11.Now we will link the Virtual Network.
12.Open your Private DNS Zone.
13.On the left pane, select Virtual network links then Select Add.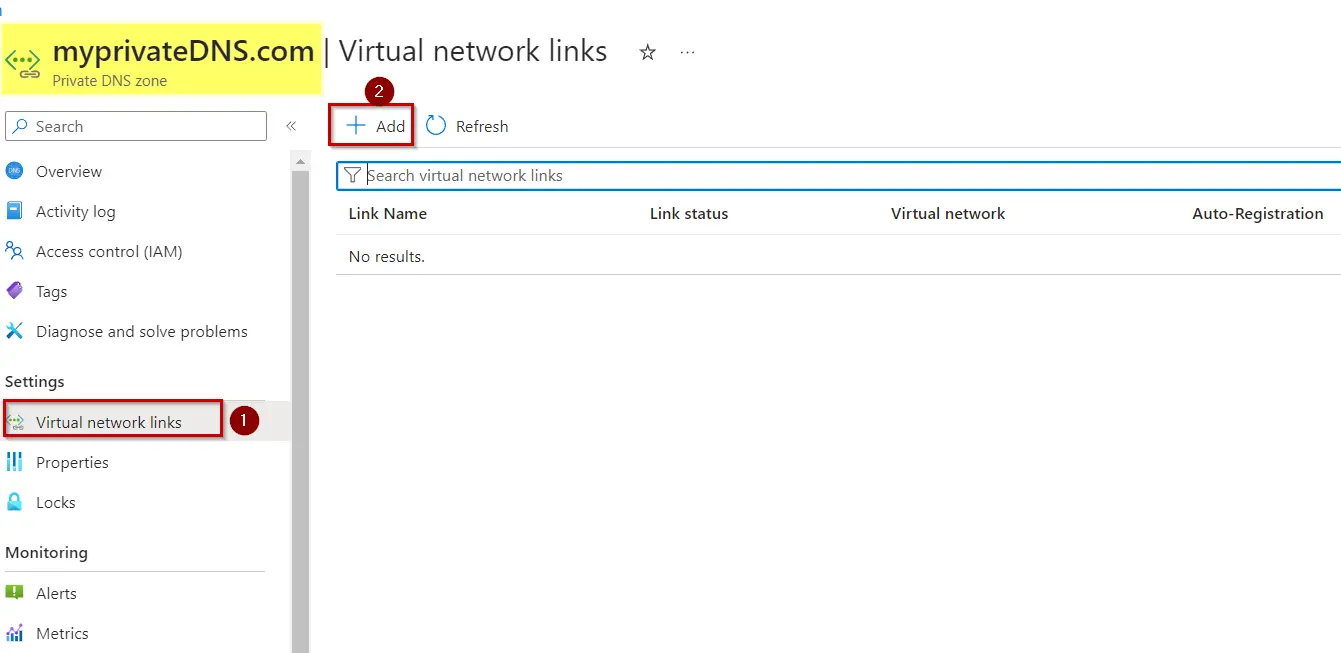
14. Type myLink for the Link name & For Virtual network, select myAzureVNet. Select the Enable auto registration check box & select OK
Create the test virtual machine.
Create a Windows Virtual Machine of Windows Server 2019 Image of 2vcpu with in the same Virtual network.
You can checkout the detailed Azure Windows VM Blog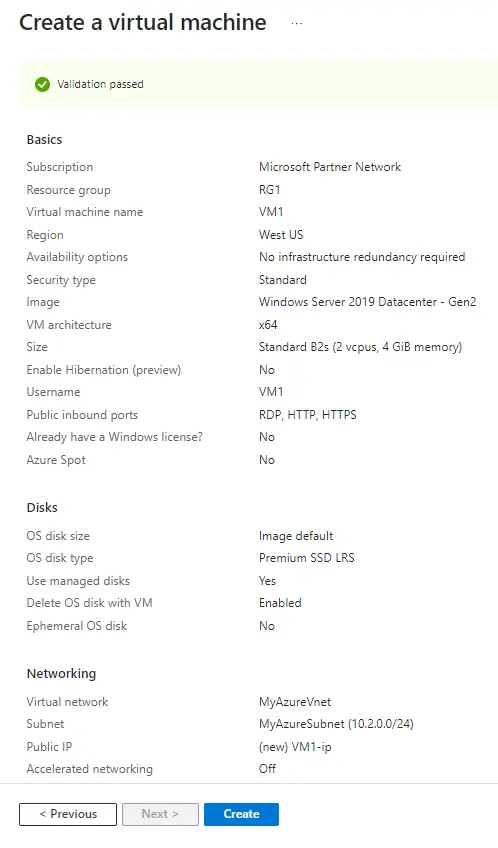

Creating DNS Records
DNS entries or records for your domain inside the DNS zone. Create a new address record or ‘A’ record to resolve a hostname to an IPv4 address.
1. Go back to Portal > Private DNS zone > select +Record set to create a Recordset in Private DNS Zone.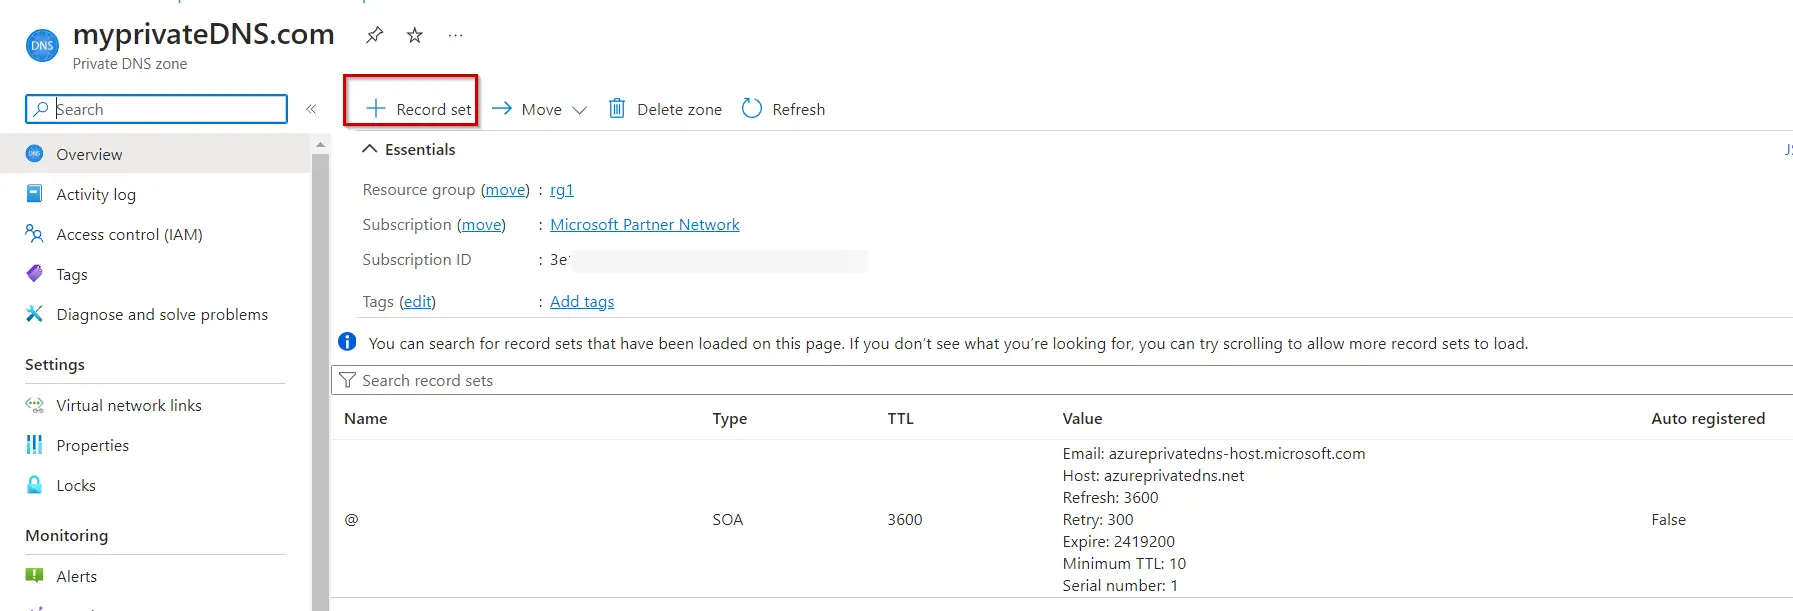
2. Give the name APP10 and IP 10.2.0.4 which is the IP address of VM with Web Server Role configured previously.
- Name: The record name is the hostname that you want to resolve to the specified IP address.You can give APP10
- Type: Select A. ‘A’ records
- TTL: Type 1. Time-to-live of the DNS request specifies how long DNS servers and clients can cache a response.
- TTL Unit: Select Hours. This is the time unit for the TTL value.
- IP address: This value is the IP address the record name resolves to. Enter the Private Ip of your VM.

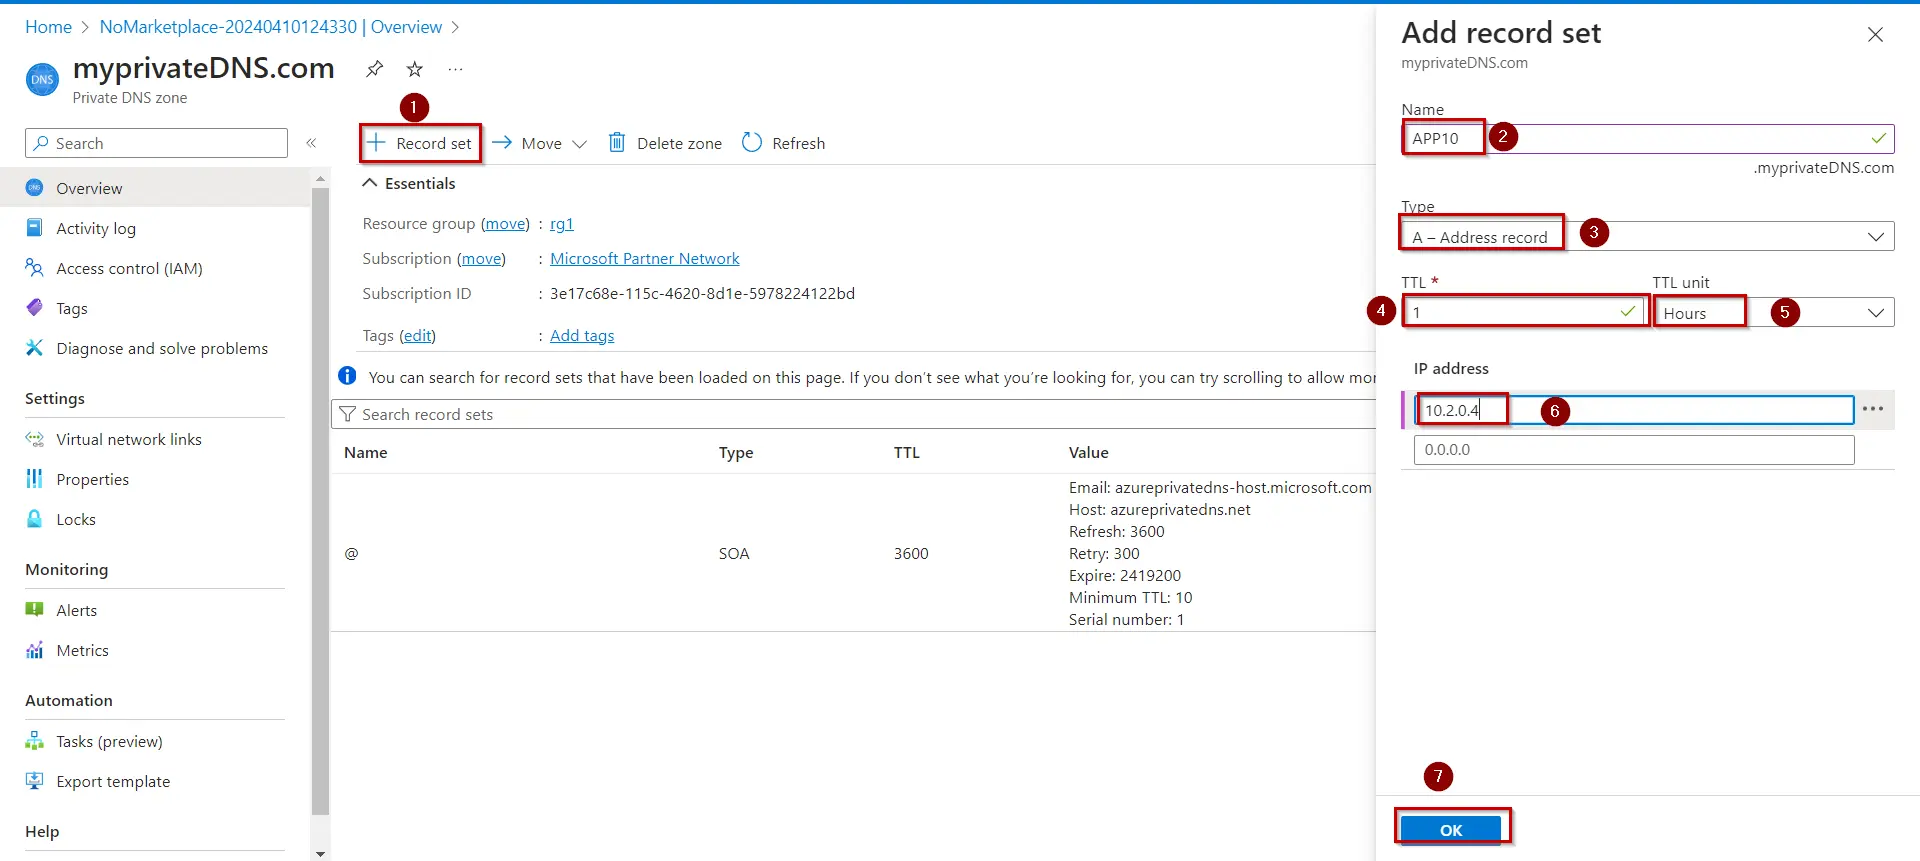
3.Your DNS record is set now
Test the private zone
- Connect to your VM1, and open a Windows PowerShell window with administrator privileges.
- Run the following command to configure firewall:
New-NetFirewallRule –DisplayName “Allow ICMPv4-In” –Protocol ICMPv4 - Now ping your VM01 using your registered host name:

No comments:
Post a Comment