Amazon DynamoDB Tutorial for Beginners – Creating a Table
After accessing your CLI, run the following command to create a profile called “dct-prod”. This will help if you have more than one user. If this is the first AWS user on your computer you can simply run “aws configure”.

Enter your Access Key ID and Secret Access Key as prompted. You’ll then insert your default region. This can be found by clicking on your region toward the top right of the AWS Management Console.

Run the following command to check for any S3 buckets in your account. If you logged in successfully and had S3 buckets previously they should appear here. This proves that the AWS CLI is successfully configured with the credentials we supplied.

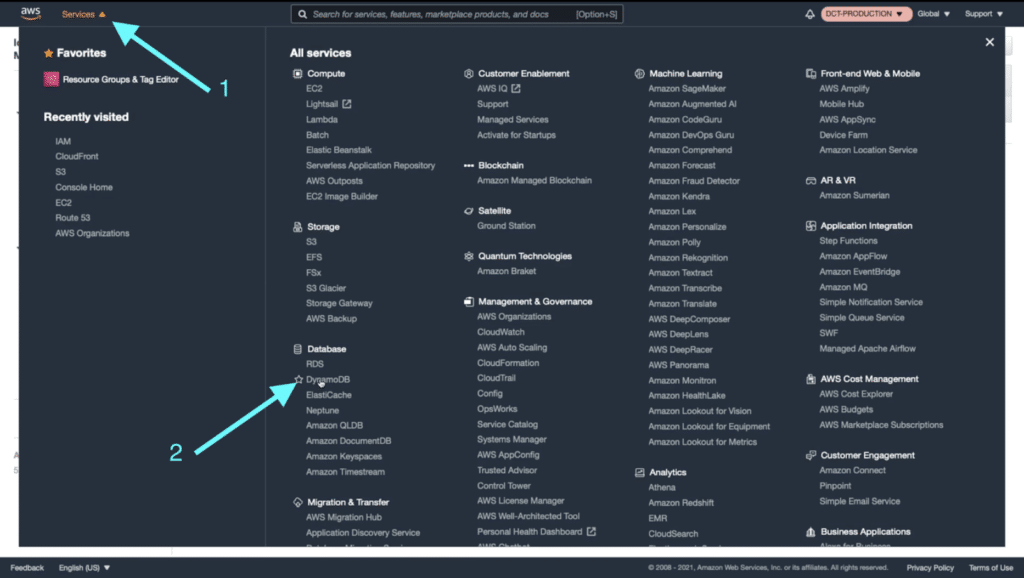
Now let’s navigate to DynamoDB by clicking on “Services” and then “DynamoDB”.
Click on “Create Table”.
Give your table a name. We named ours “mystore” because the JSON file has items you’d find in a shop.
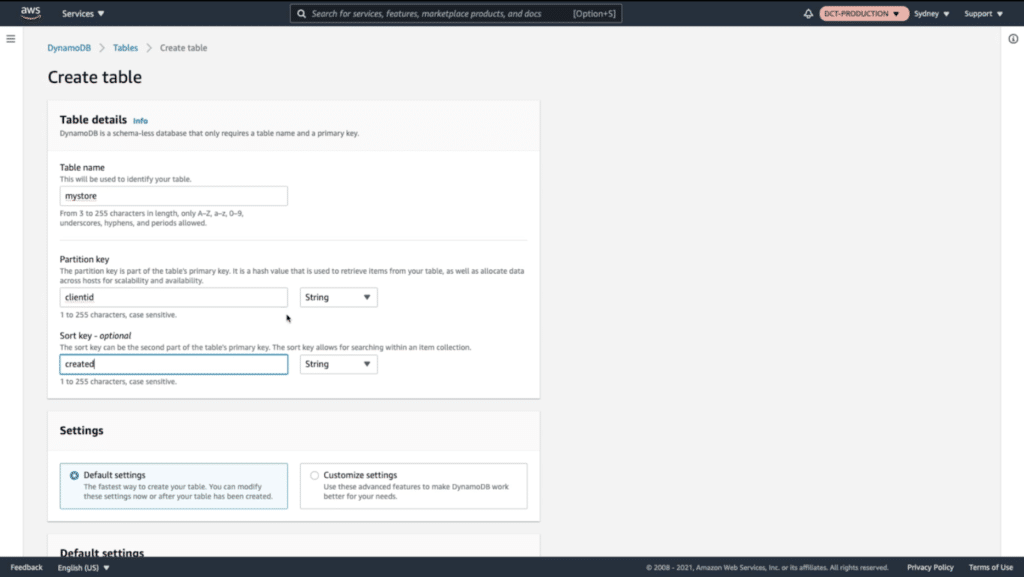
Next, you’ll want to set your table up with keys. For the Partition key enter “clientid”. For the Sort Key write “created”. These keys are a way of organizing items in our database.
We’ll now want to customize our database configuration. Click on “Customize Settings”. Also, click “Provisioned” as this will allow us to configure our database in more detail.
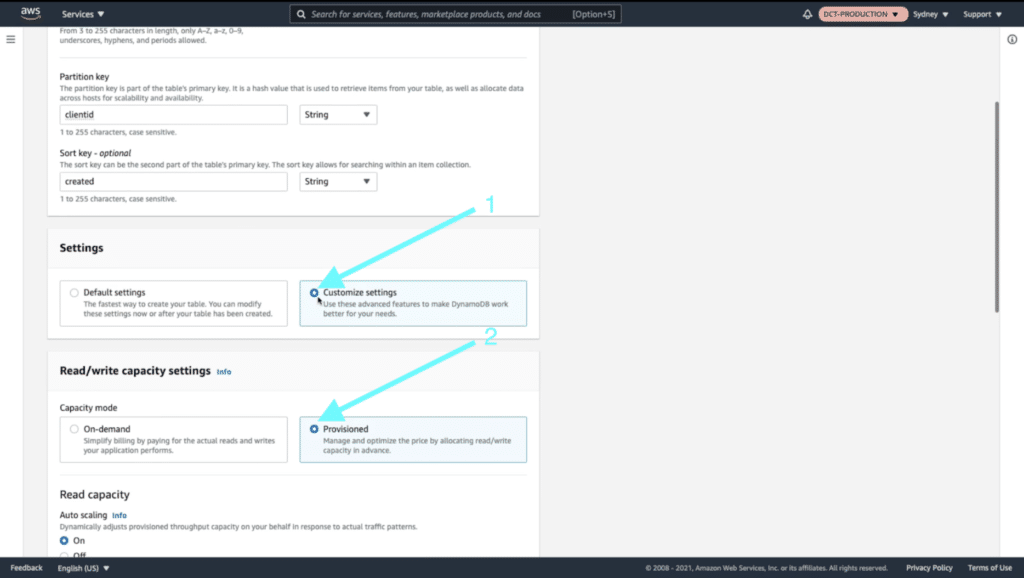
It’s good to note that target scaling policies can be configured at the creation of a DynamoDB table. Here we give our DynamoDB service a minimum of 1 unit, a maximum of 4 units, and a target utilization goal of 70%.

No need to enter anything under “Secondary indexes.” For “Encryption at rest” click on “owned by Amazon DynamoDB”, then click on “Create Table”.
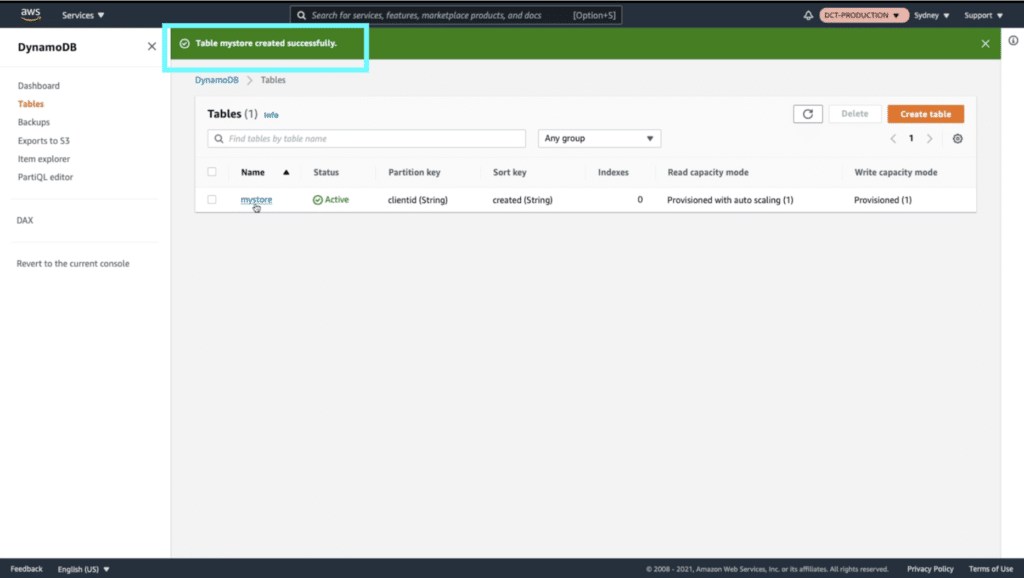
Upon successful creation, you should see your table “mystore” appear.
Now, let’s switch over to a command-line interface. Here we’ll run the following command to request items from the JSON file we downloaded at the beginning of the tutorial.
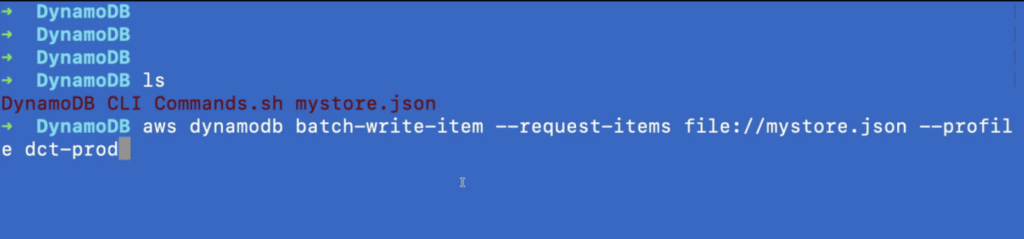
The following output indicates that things are running correctly.

Let’s scan our table by running the second command listed below.
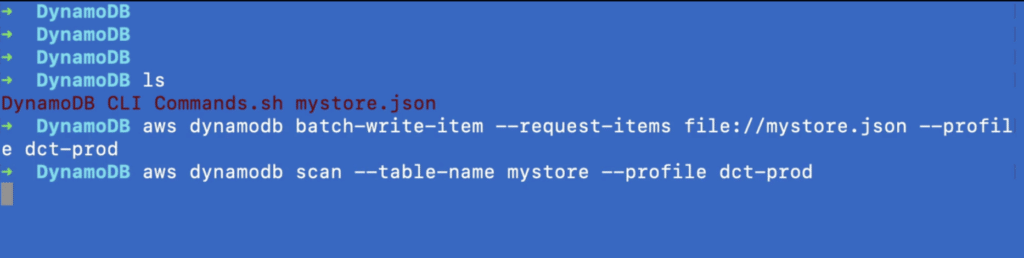
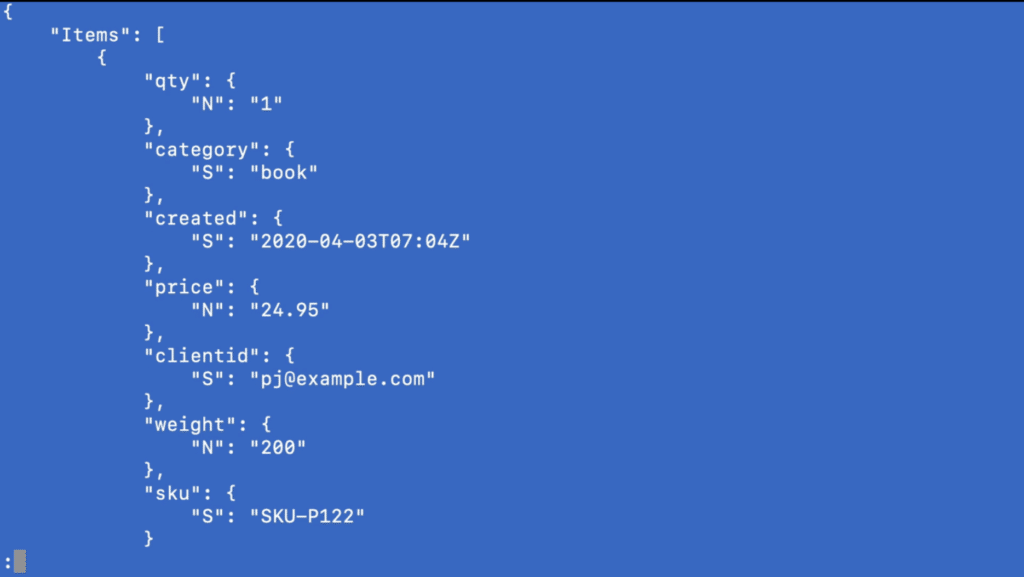
You’ll see a scan of the document for data to be uploaded. This is being copied to your DynamoDB table.
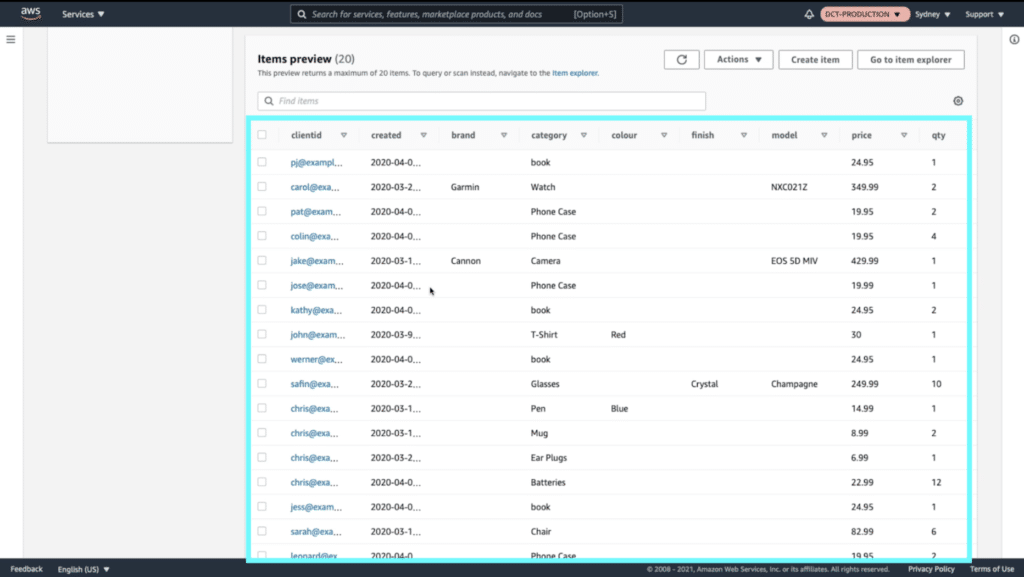
Return to your DynamoDB table. Click on “Items” and then refresh the page.
If the commands ran successfully you should see a list of items stored in the “mystore” table.
Enable Point-in-time Recovery
Under your table click on “Backups” and then under “Point-in-time recovery” click on the “Edit” button.
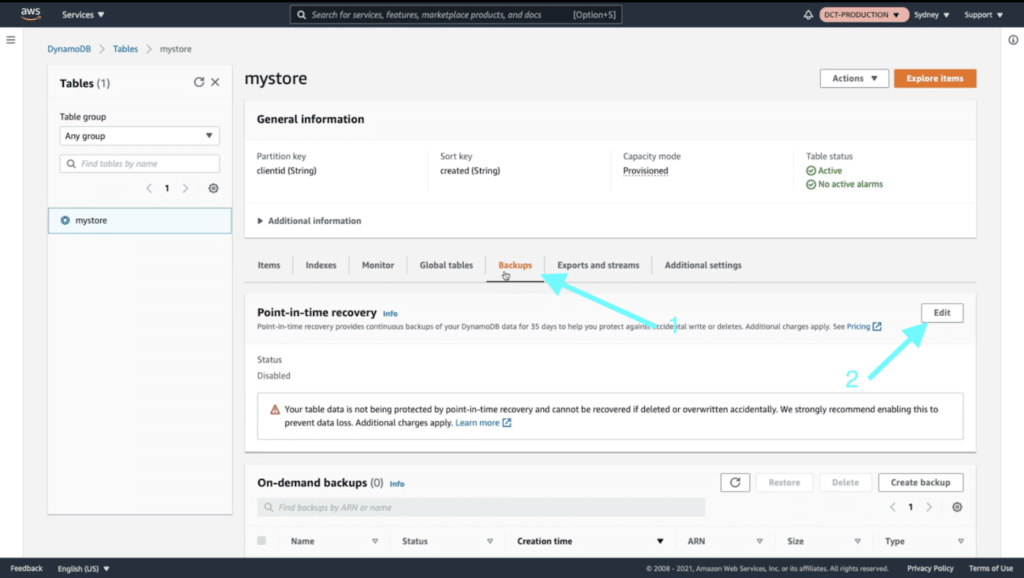
Click on “Enable Point-in-time-recovery” and then “Save Changes”. You’re now able to restore your DynamoDB to a previous point-in-time. Use this for rolling back from accidental deletions or errors.
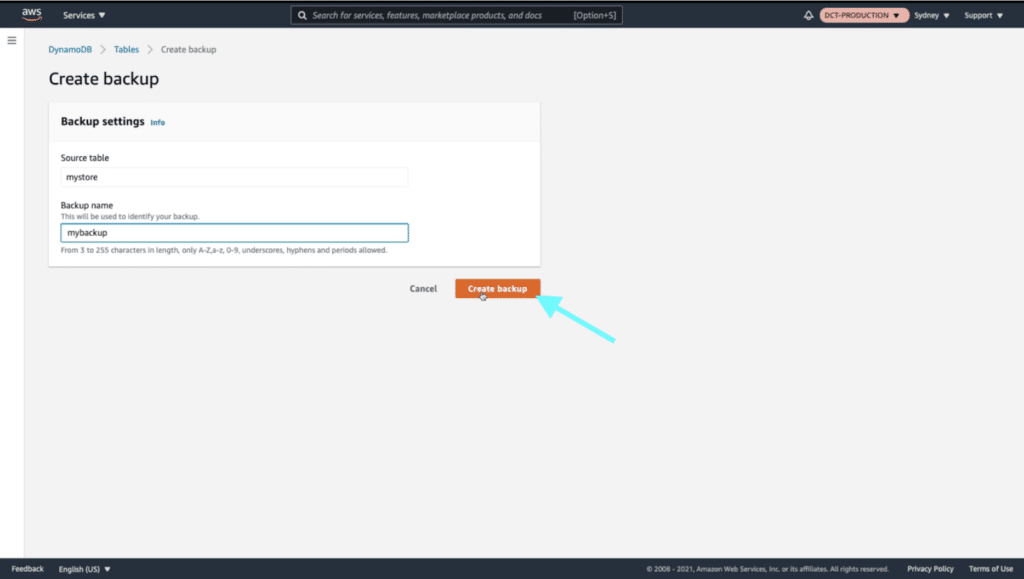
Create a Backup
Navigate to “Backups”. Under “On-demand backups”, click on “Create backup”.
For “Source table” select the table you created earlier and give your backup a name. Then click on “Create backup.”
No comments:
Post a Comment