What is Azure Application Gateway?
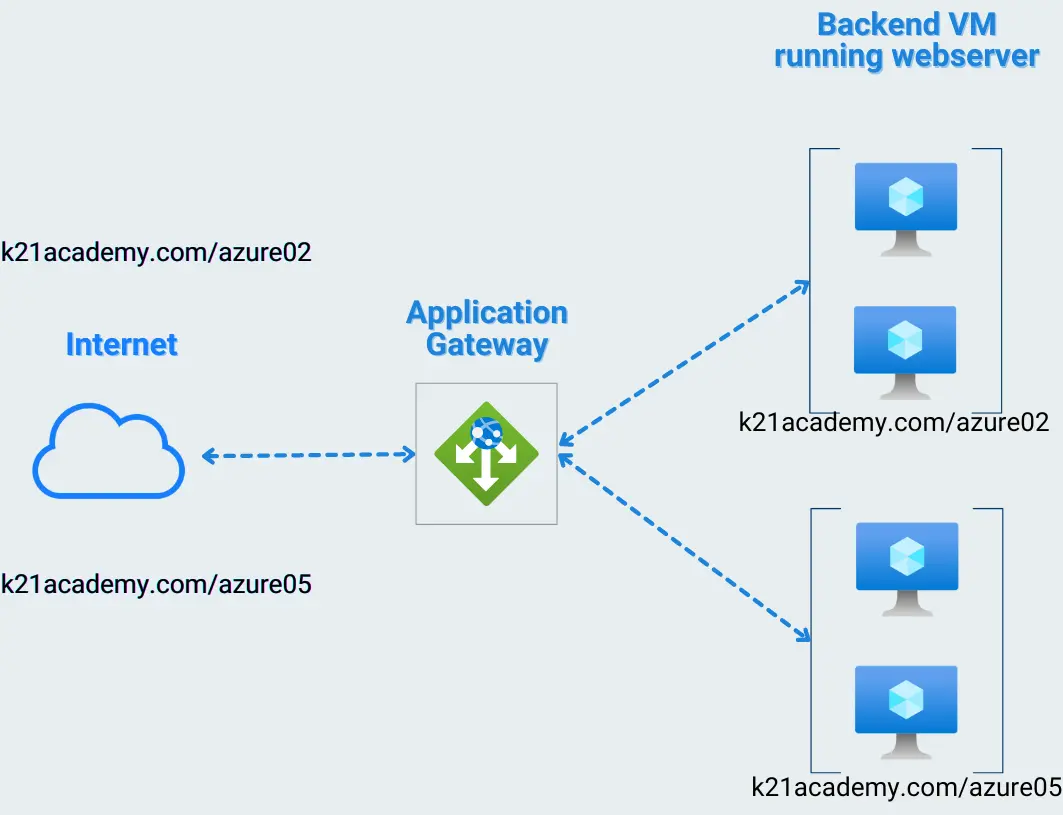
Azure Application Gateway is an advanced web traffic load balancer that operates at the OSI model’s application layer (layer 7). Unlike traditional load balancers that route traffic only based on IP addresses and ports, it can make routing decisions based on additional attributes of an HTTP request, such as URI path or host headers. This capability allows for more sophisticated traffic distribution mechanisms, essential for optimizing modern application deployments.
Core Components of Application Gateway
The functionality of Azure Application Gateway hinges on several components:
- Gateway: Acts as the entry point for all client requests.
- Listeners: These are responsible for monitoring incoming traffic on specified ports and protocols.
- Rules: Direct the traffic from the listener to appropriate backend pools based on predetermined conditions.
- Backend Pools: Groups of servers that receive forwarded traffic.
- Health Probes: Used to monitor the health of backend servers to ensure traffic is only routed to available servers.
Key Features and Configurations
SSL Termination
Azure Application Gateway supports SSL/TLS termination at the gateway, whereby it decrypts incoming SSL/TLS sessions from clients, relieving backend servers from decryption tasks. This offloads a significant CPU burden from the backend servers, thereby enhancing the overall throughput and performance of the application.
Autoscaling
One of the strongest features of Azure Application Gateway is its built-in autoscaling capability, which adjusts resources automatically based on traffic load. This ensures that the application remains responsive, regardless of traffic spikes, without any manual intervention.
Web Application Firewall (WAF)
The integrated WAF protects your applications from web vulnerabilities and attacks, adhering to a set of rules that cover the top 10 threats identified by the Open Web Application Security Project (OWASP). These include protection against SQL injection, cross-site scripting, and other prevalent security risks.
Custom Routing Rules
Application Gateway offers detailed routing rules configuration, such as:
- URL Path-Based Routing: Distributes traffic to different backend pools based on URL paths.
- Multi-site Hosting: Allows hosting of multiple websites behind a single instance.
- Redirection Rules: Supports redirection within sites, which can be used for URL rewriting and other advanced routing needs.
Monitoring and Management
Azure Monitor and Log Analytics provide deep insights into Application Gateway performance and health metrics, enabling proactive management and tuning. Key performance indicators include throughput, healthy and unhealthy host count, response time, and more.
Real-World Use Cases for Application Gateway:
- Modernizing Legacy Applications: Integrates seamlessly with existing on-premises or cloud-based backend infrastructure, facilitating a smooth migration to the cloud.
- Microservices Architecture: Routes traffic to individual microservices based on specific paths or headers, supporting a modular application development approach.
- API Management: Acts as a secure entry point for APIs, enforcing access control and routing requests to appropriate backend services.
- Global Web Applications: Balances traffic across geographically distributed backend servers, ensuring optimal performance for users in different regions.
Step-by-Step Setup Guide
Creating an Application Gateway
You need to configure various tabs for creation. You should create 2 VMs (VM1, VM2) with IIS server installed in it. Now lets start creating gateway.
- In the Azure portal’s navigation pane, select Create a resource. The New window appears.
- Select Networking and then select Application Gateway in the Featured list.
- On the Basics tab, enter these values for the following settings:
- Resource group: Select myResourceGroupAG for the resource group. If it doesn’t exist, select Create new to create it.
- Application gateway name: Enter myAppGateway for the name.
- Region: Select the region in which you want to deploy the resource.
- Tier: Select the StandardV2 tier.
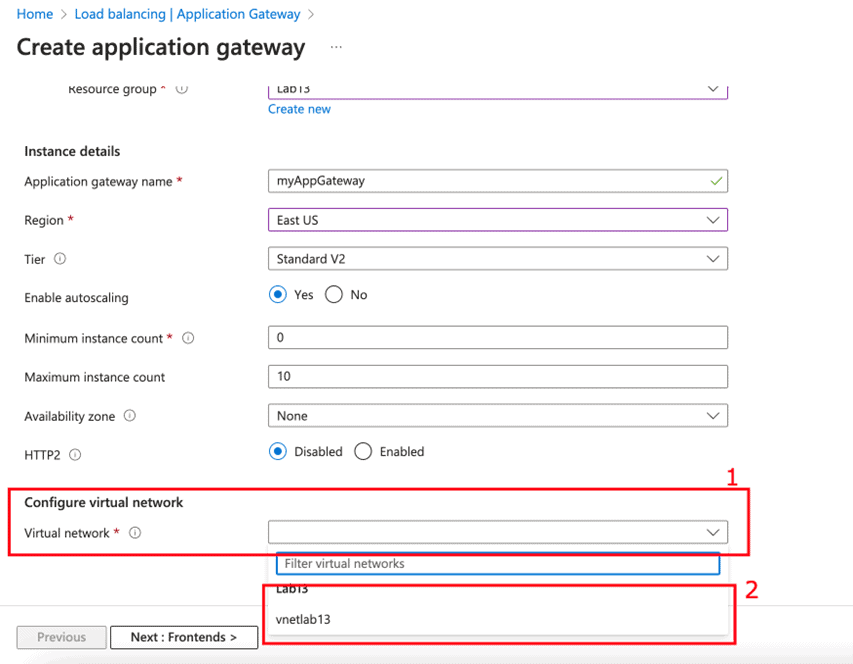
Leave rest options till HTTP2 to their default values and options.
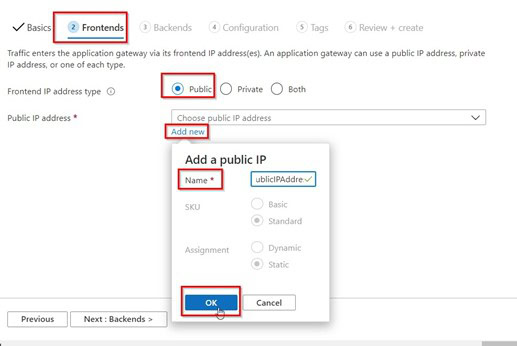
- On the Frontends tab, verify Frontend IP address type is set to Public. Choose Create new for the Public IP address and enter myAGPublicIPAddress.
- On the Backends tab, select +Add a backend pool and enter a backend pool name.
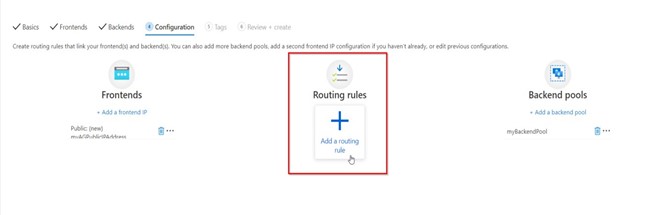
- On the Configuration tab, you’ll connect the frontend and backend pool you created using a routing rule. Select Add a rule in the Routing rules.
- On the Backend targets tab, select myBackendPool for the Backend target.

- Next click on Review + Create.
- Once it is created, Open Application Gateway page and select backend pools

- Under Backend targets, Target type, select Virtual machine from the drop-down. Under Target, select the myVM and myVM2 virtual machines created in the starting.
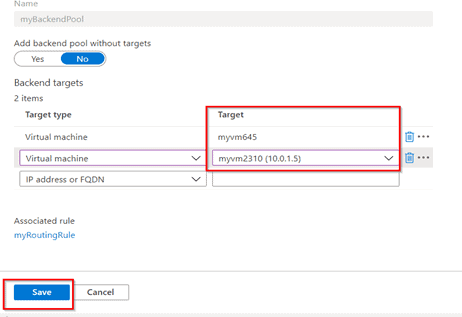
- Once you set backend, test the it by browsing to the URL of under overview tab.
No comments:
Post a Comment