Create a project in Azure DevOps
Create an Azure DevOps project to establish a repository for source code and to plan and track work. You can manage and structure your project to support your business needs. Each project provides boundaries to isolate data from other projects. For more information, see About projects and scaling your organization.
Important
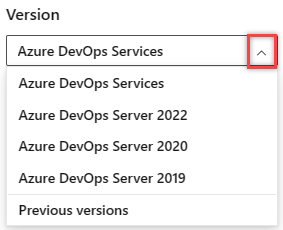
Select the version of this article that corresponds to your platform and version. The version selector is above the table of contents. Look up your Azure DevOps platform and version.
Prerequisites
- You need an organization before you can create a project. If you don't have an organization, create an organization.
- You must be a member of the Project Collection Administrators group or have the collection-level "Create new projects" permission set to Allow. If you're the Organization owner, you're automatically added to the Project Collection Administrators group. For more information, see Change project collection-level permissions.
Important
To create a public project or to make a private project public, see the information in Make a private project public. You must enable additional policy settings to work with public projects. Then, return to this article to create your project.
Create a project
You can create up to 1000 projects within an organization in Azure DevOps. For more information, see Work tracking, process, and project limits.
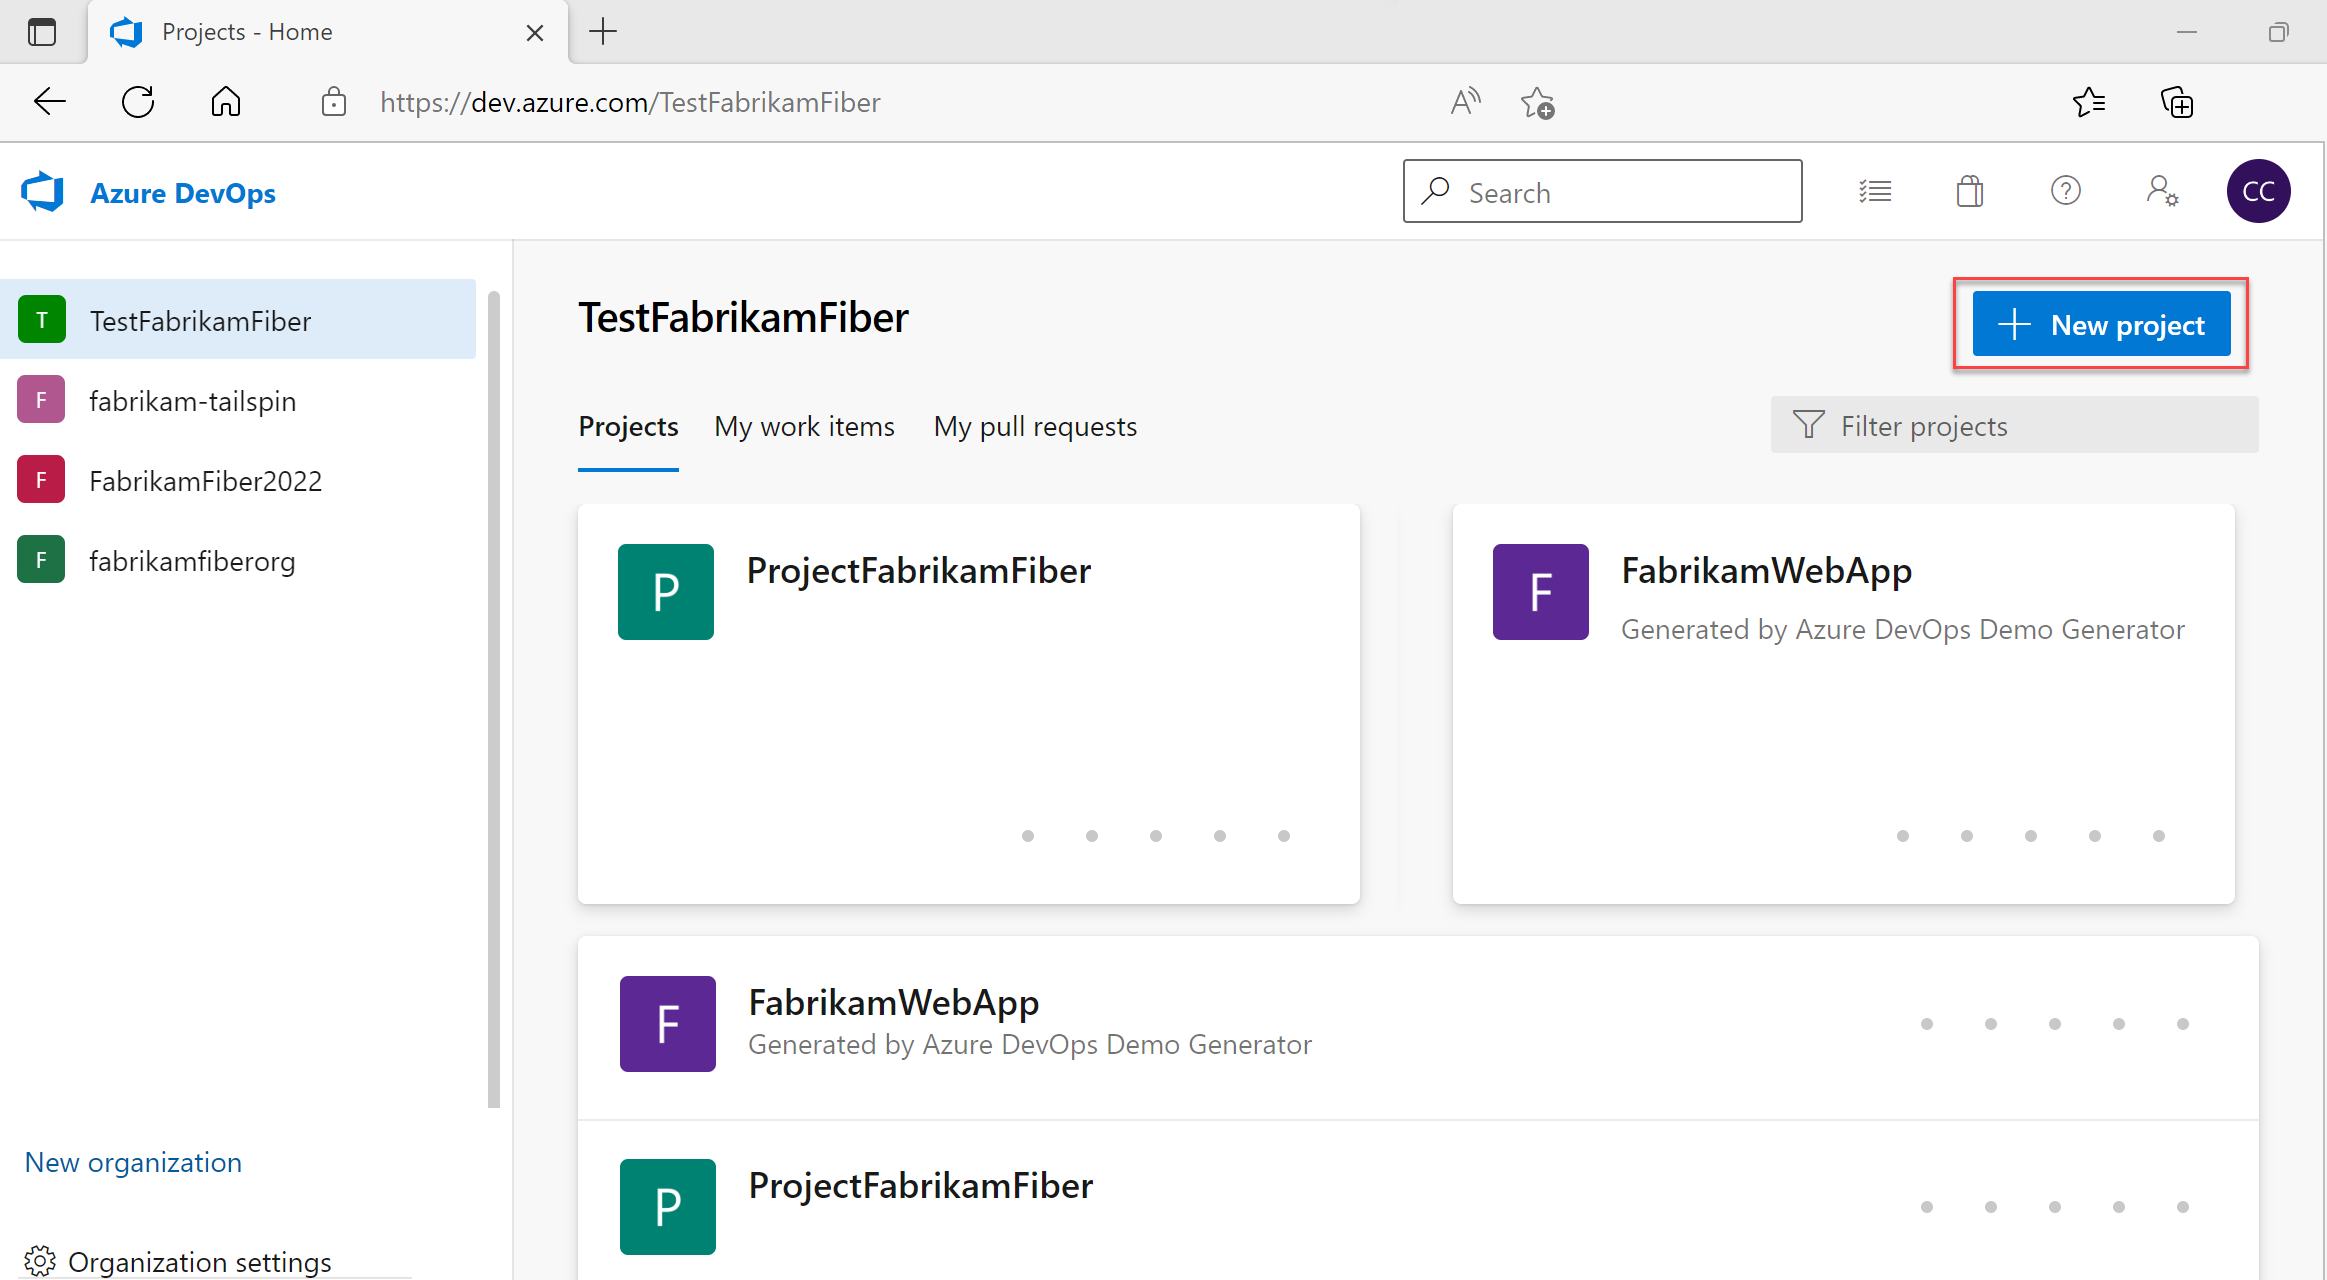
Sign in to your organization (
https://dev.azure.com/{yourorganization}).Select New project.
Enter information into the form provided.
- Provide a name for your project. Your project name can't contain special characters, such as
/ : \ ~ & % ; @ ' " ? < > | # $ * } { , + = [ ], can't begin with an underscore, can't begin or end with a period, and must be 64 or fewer characters. - Enter an optional description.
- Choose the visibility, initial source control type, and work item process. For more information, see Choosing the right version control for your project and Choose a process.
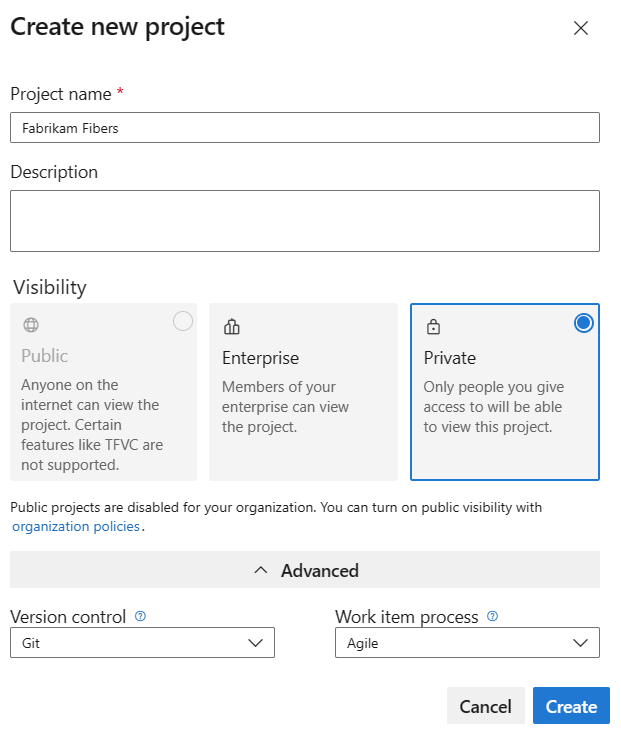
When you choose public visibility, anyone on the internet can view your project. With private visibility, only users you give access to can view your project. For more information about features and access levels for public projects, see Make a private project public. If the Public option isn't available, you need to change the policy.
- Provide a name for your project. Your project name can't contain special characters, such as
Select Create. Azure DevOps displays the project welcome page.
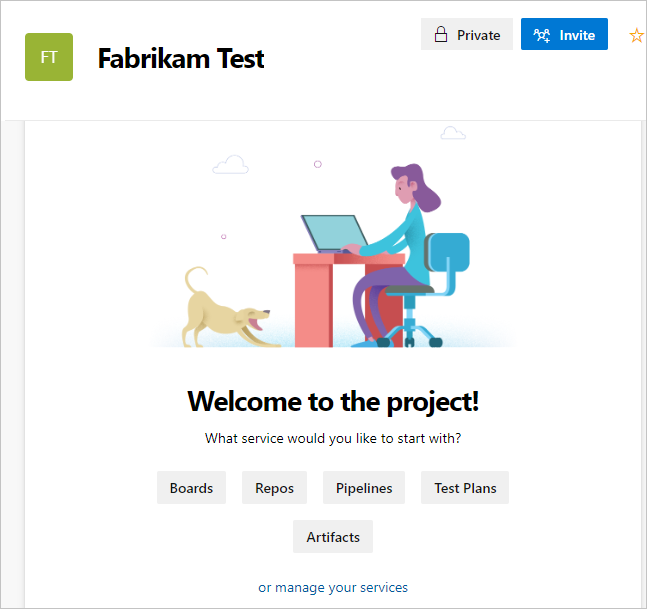
Select one of the following options to continue:
- Invite: Add others to your project. See Add users to a project or team. You can only invite users who are already in your organization. For more information, see Add users to a project.
- Boards: Add work items. See View and add work items using the Work Items page.
- Repos: Clone or import a repository or initialize a README file for your project summary page. See Clone an existing Git repo.
- Pipelines: Define a pipeline. See Azure Pipelines documentation.
- Test Plans: Define test plans and test suites. See Create test plans and test suites.
- Artifacts: Discover, install, and publish NuGet, npm, and Maven packages. See the Azure Artifacts overview.
- manage your services: Disable the visibility of services. See Turn a service on or off.
List projects
View a list of projects from your web browser.
Sign in to your organization (
https://dev.azure.com/{yourorganization}).Select Organization settings and then select Projects.

Open your desired project. For more information, see About settings at the user, team, project, or organization-level.
No comments:
Post a Comment