Create, change, or delete a network security group
Prerequisites
If you don't have an Azure account with an active subscription, create one for free. Complete one of these tasks before starting the remainder of this article:
Portal users: Sign in to the Azure portal with your Azure account.
PowerShell users: Either run the commands in the Azure Cloud Shell, or run PowerShell locally from your computer. The Azure Cloud Shell is a free interactive shell that you can use to run the steps in this article. It has common Azure tools preinstalled and configured to use with your account. In the Azure Cloud Shell browser tab, find the Select environment dropdown list, then pick PowerShell if it isn't already selected.
If you're running PowerShell locally, use Azure PowerShell module version 1.0.0 or later. Run
Get-Module -ListAvailable Az.Networkto find the installed version. If you need to install or upgrade, see Install Azure PowerShell module. RunConnect-AzAccountto sign in to Azure.Azure CLI users: Either run the commands in the Azure Cloud Shell, or run Azure CLI locally from your computer. The Azure Cloud Shell is a free interactive shell that you can use to run the steps in this article. It has common Azure tools preinstalled and configured to use with your account. In the Azure Cloud Shell browser tab, find the Select environment dropdown list, then pick Bash if it isn't already selected.
If you're running Azure CLI locally, use Azure CLI version 2.0.28 or later. Run
az --versionto find the installed version. If you need to install or upgrade, see Install Azure CLI. Runaz loginto sign in to Azure.
Assign the Network contributor role or a Custom role with the appropriate Permissions.
Work with network security groups
You can create, view all, view details of, change, and delete a network security group. You can also associate or dissociate a network security group from a network interface or subnet.
Create a network security group
There's a limit to how many network security groups you can create for each Azure region and subscription. To learn more, see Azure subscription and service limits, quotas, and constraints.
In the search box at the top of the portal, enter Network security group. Select Network security groups in the search results.
Select + Create.
In the Create network security group page, under the Basics tab, enter or select the following values:
Setting Action Project details Subscription Select your Azure subscription. Resource group Select an existing resource group, or create a new one by selecting Create new. This example uses myResourceGroup resource group. Instance details Network security group name Enter a name for the network security group you're creating. Region Select the region you want. 
Select Review + create.
After you see the Validation passed message, select Create.
View all network security groups
In the search box at the top of the portal, enter Network security group. Select Network security groups in the search results to see the list of network security groups in your subscription.
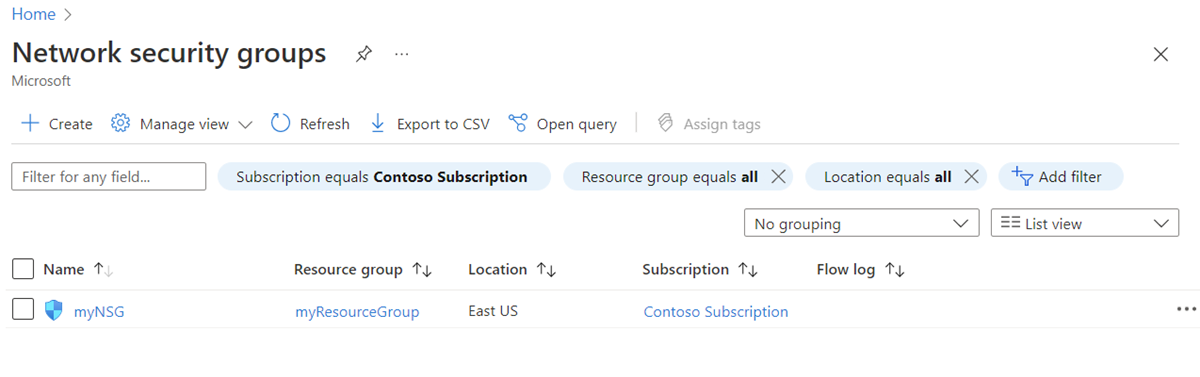
View details of a network security group
In the search box at the top of the portal, enter Network security group and select Network security groups in the search results.
Select the name of your network security group.
Under Settings, you can view the Inbound security rules, Outbound security rules, Network interfaces, and Subnets that the network security group is associated to.
Under Monitoring, you can enable or disable Diagnostic settings. For more information, see Resource logging for a network security group.
Under Help, you can view Effective security rules. For more information, see Diagnose a virtual machine network traffic filter problem.

To learn more about the common Azure settings listed, see the following articles:
Change a network security group
The most common changes to a network security group are:
Associate or dissociate a network security group to or from a network interface
Associate or dissociate a network security group to or from a subnet
Associate or dissociate a network security group to or from a network interface
For more information about the association and dissociation of a network security group, see Associate or dissociate a network security group.
Associate or dissociate a network security group to or from a subnet
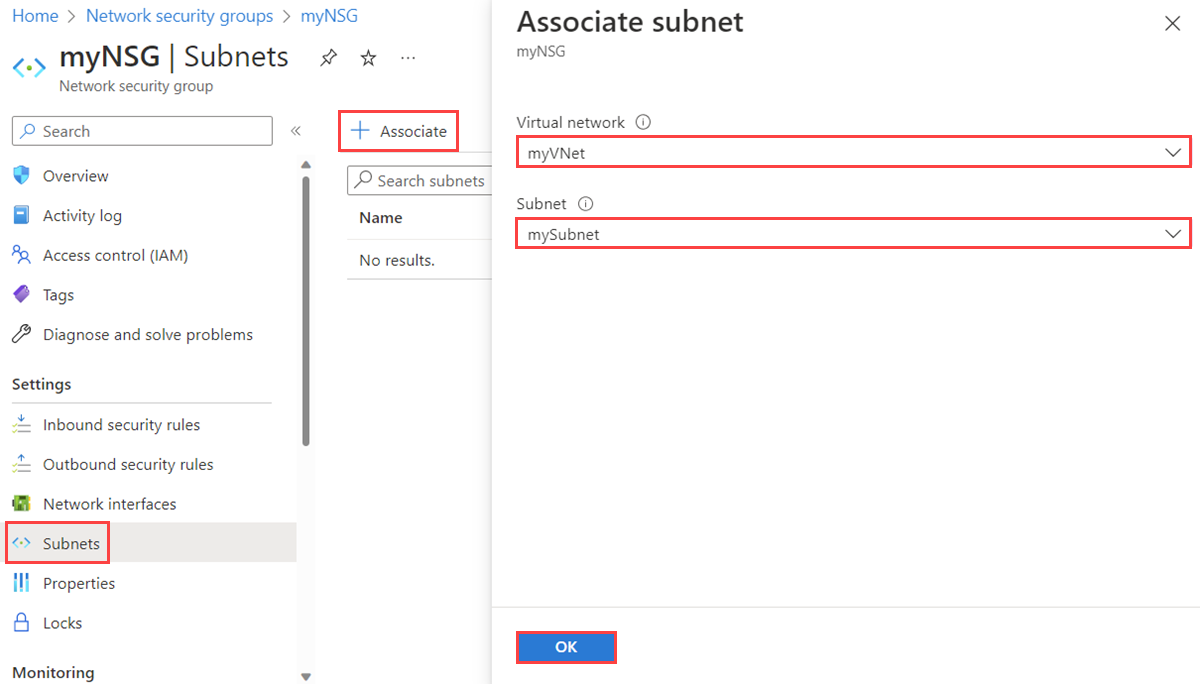
In the search box at the top of the portal, enter Network security group and select Network security groups in the search results.
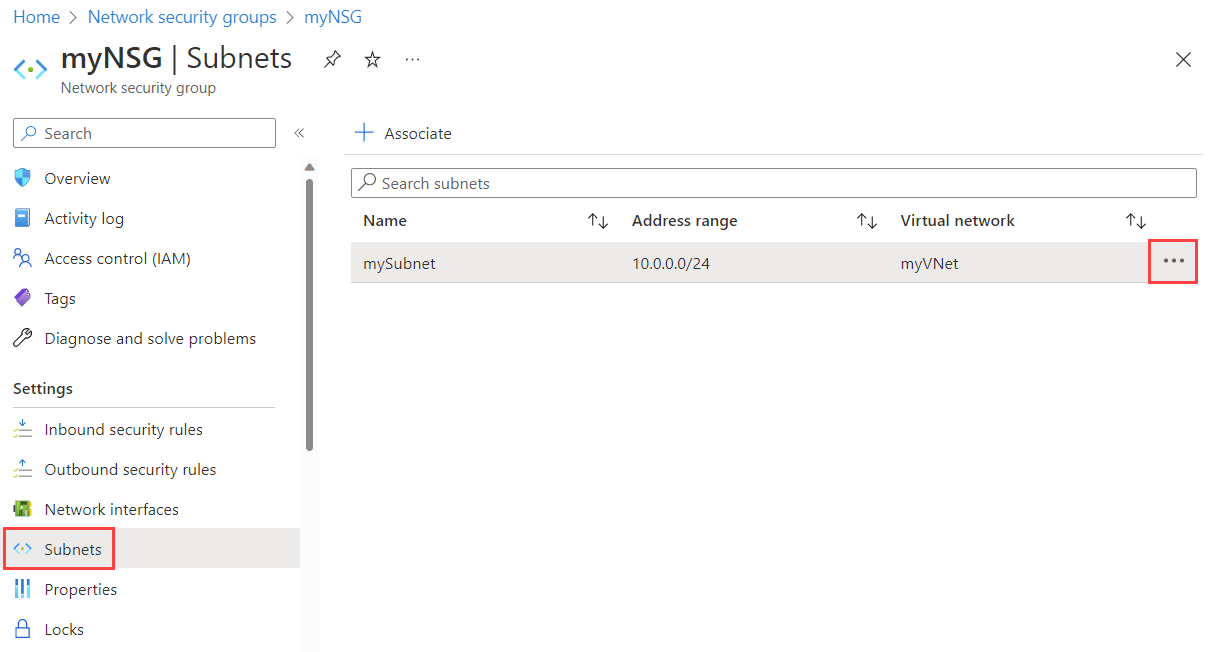
Select the name of your network security group, then select Subnets.
To associate a network security group to the subnet, select + Associate, then select your virtual network and the subnet that you want to associate the network security group to. Select OK.
To dissociate a network security group from the subnet, select the three dots next to the subnet that you want to dissociate the network security group from, and then select Dissociate. Select Yes.
Delete a network security group
If a network security group is associated to any subnets or network interfaces, it can't be deleted. Dissociate a network security group from all subnets and network interfaces before attempting to delete it.
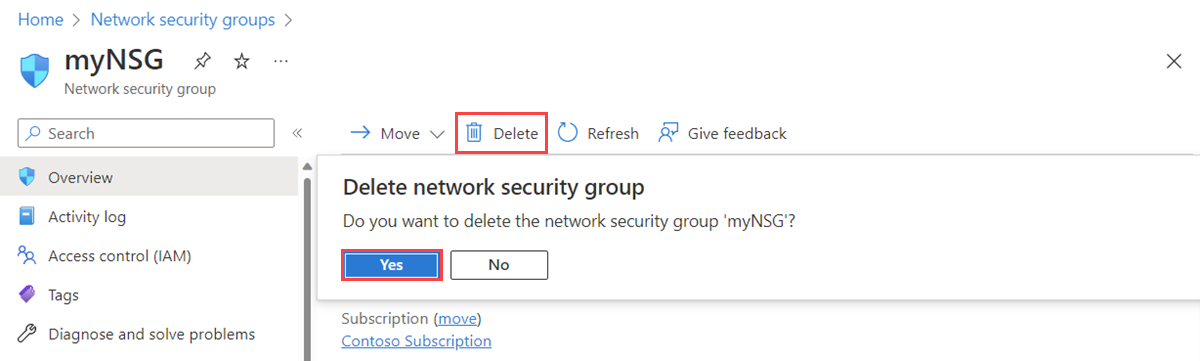
In the search box at the top of the portal, enter Network security group and select Network security groups in the search results.
Select the network security group you want to delete.
Select Delete, then select Yes in the confirmation dialog box.
Work with security rules
A network security group contains zero or more security rules. You can create, view all, view details of, change, and delete a security rule.
Create a security rule
There's a limit to how many rules per network security group you can create for each Azure location and subscription. To learn more, see Azure subscription and service limits, quotas, and constraints.
In the search box at the top of the portal, enter Network security group and select Network security groups in the search results.
Select the name of the network security group you want to add a security rule to.
Select Inbound security rules or Outbound security rules.
Several existing rules are listed, including some you may not have added. When you create a network security group, several default security rules are created in it. To learn more, see default security rules. You can't delete default security rules, but you can override them with rules that have a higher priority.
Select + Add. Select or add values for the following settings, and then select Add:
Setting Value Details Source One of: - Any
- IP Addresses
- My IP address
- Service Tag
- Application security group
If you choose IP Addresses, you must also specify Source IP addresses/CIDR ranges.
If you choose Service Tag, you must also pick a Source service tag.
If you choose Application security group, you must also pick an existing application security group. If you choose Application security group for both Source and Destination, the network interfaces within both application security groups must be in the same virtual network. Learn how to create an application security group.
Source IP addresses/CIDR ranges A comma-delimited list of IP addresses and Classless Interdomain Routing (CIDR) ranges This setting appears if you set Source to IP Addresses. You must specify a single value or comma-separated list of multiple values. An example of multiple values is
10.0.0.0/16, 192.188.1.1. There are limits to the number of values you can specify. For more information, see Azure limits.If the IP address you specify is assigned to an Azure VM, specify its private IP address, not its public IP address. Azure processes security rules after it translates the public IP address to a private IP address for inbound security rules, but before it translates a private IP address to a public IP address for outbound rules. To learn more about IP addresses in Azure, see Public IP addresses and Private IP addresses.
Source service tag A service tag from the dropdown list This setting appears if you set Source to Service Tag for a security rule. A service tag is a predefined identifier for a category of IP addresses. To learn more about available service tags, and what each tag represents, see Service tags. Source application security group An existing application security group This setting appears if you set Source to Application security group. Select an application security group that exists in the same region as the network interface. Learn how to create an application security group. Source port ranges One of: - A single port, such as
80 - A range of ports, such as
1024-65535 - A comma-separated list of single ports and/or port ranges, such as
80, 1024-65535 - An asterisk (
*) to allow traffic on any port
This setting specifies the ports on which the rule allows or denies traffic. There are limits to the number of ports you can specify. For more information, see Azure limits. Destination One of: - Any
- IP Addresses
- Service Tag
- Application security group
If you choose IP addresses, you must also specify Destination IP addresses/CIDR ranges.
If you choose Service Tag, you must also pick a Destination service tag.
If you choose Application security group, you must also select an existing application security group. If you choose Application security group for both Source and Destination, the network interfaces within both application security groups must be in the same virtual network. Learn how to create an application security group.
Destination IP addresses/CIDR ranges A comma-delimited list of IP addresses and CIDR ranges This setting appears if you change Destination to IP Addresses. Similar to Source and Source IP addresses/CIDR ranges, you can specify single or multiple addresses or ranges. There are limits to the number you can specify. For more information, see Azure limits.
If the IP address you specify is assigned to an Azure VM, ensure that you specify its private IP, not its public IP address. Azure processes security rules after it translates the public IP address to a private IP address for inbound security rules, but before Azure translates a private IP address to a public IP address for outbound rules. To learn more about IP addresses in Azure, see Public IP addresses and Private IP addresses.
Destination service tag A service tag from the dropdown list This setting appears if you set Destination to Service Tag for a security rule. A service tag is a predefined identifier for a category of IP addresses. To learn more about available service tags, and what each tag represents, see Service tags. Destination application security group An existing application security group This setting appears if you set Destination to Application security group. Select an application security group that exists in the same region as the network interface. Learn how to create an application security group. Service A destination protocol from the dropdown list This setting specifies the destination protocol and port range for the security rule. You can choose a predefined service, like RDP, or choose Custom and provide the port range in Destination port ranges. Destination port ranges One of: - A single port, such as
80 - A range of ports, such as
1024-65535 - A comma-separated list of single ports and/or port ranges, such as
80, 1024-65535 - An asterisk (
*) to allow traffic on any port
As with Source port ranges, you can specify single or multiple ports and ranges. There are limits to the number you can specify. For more information, see Azure limits. Protocol Any, TCP, UDP, or ICMP You may restrict the rule to the Transmission Control Protocol (TCP), User Datagram Protocol (UDP), or Internet Control Message Protocol (ICMP). The default is for the rule to apply to all protocols (Any). Action Allow or Deny This setting specifies whether this rule allows or denies access for the supplied source and destination configuration. Priority A value between 100 and 4096 that's unique for all security rules within the network security group Azure processes security rules in priority order. The lower the number, the higher the priority. We recommend that you leave a gap between priority numbers when you create rules, such as 100, 200, and 300. Leaving gaps makes it easier to add rules in the future, so that you can give them higher or lower priority than existing rules. Name A unique name for the rule within the network security group The name can be up to 80 characters. It must begin with a letter or number, and it must end with a letter, number, or underscore. The name may contain only letters, numbers, underscores, periods, or hyphens. Description A text description You may optionally specify a text description for the security rule. The description can't be longer than 140 characters. 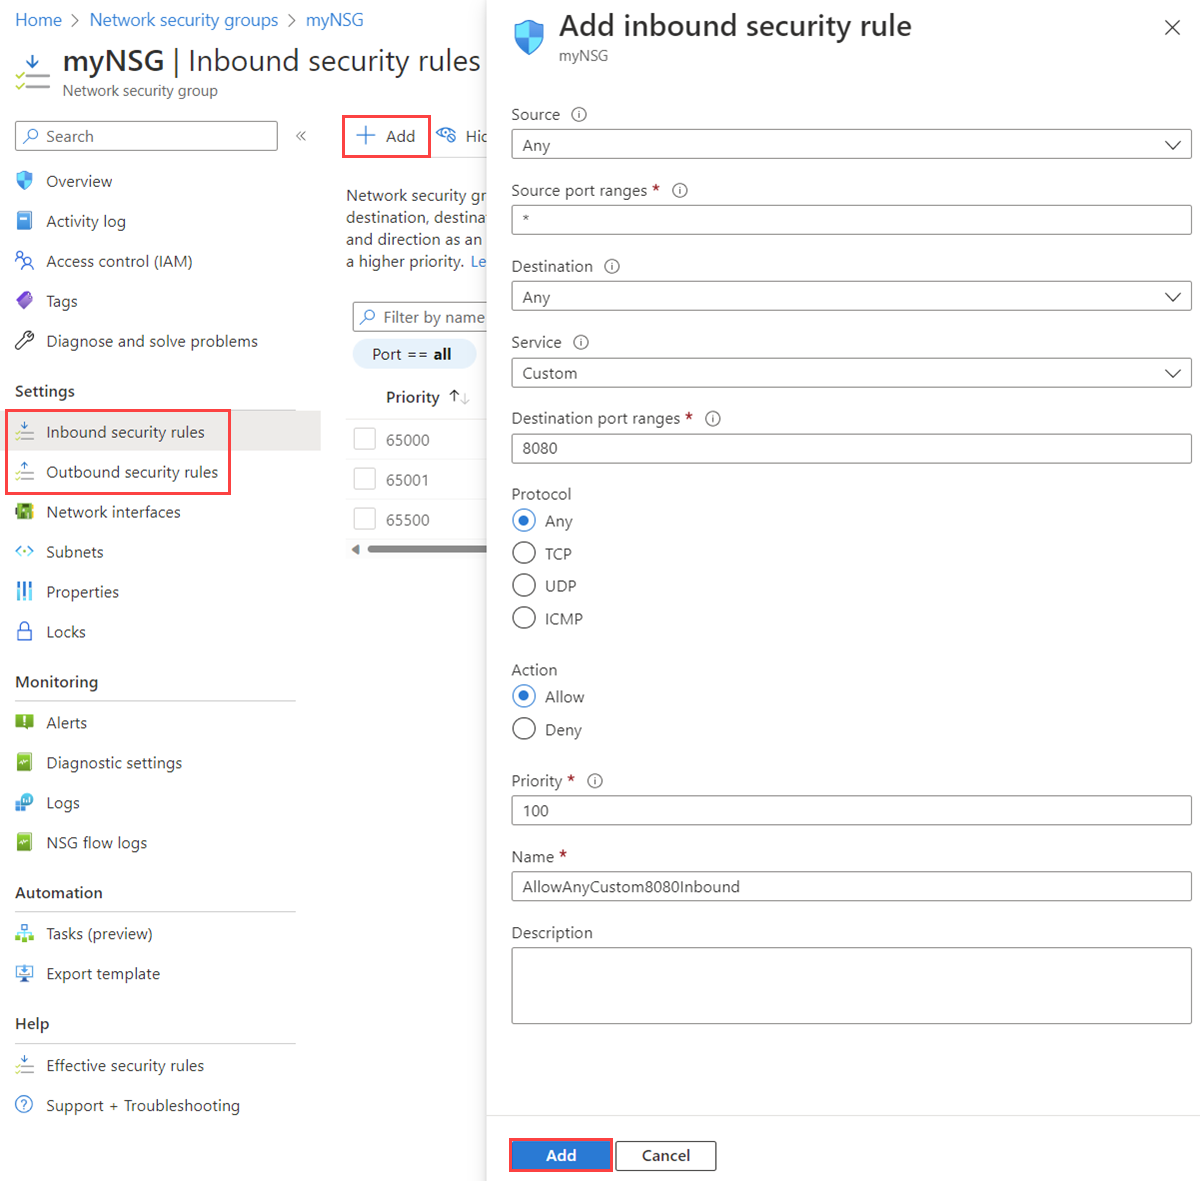
View all security rules
A network security group contains zero or more rules. To learn more about the information listed when viewing rules, see Security rules.
In the search box at the top of the portal, enter Network security group and select Network security groups in the search results.
Select the name of the network security group that you want to view the rules for.
Select Inbound security rules or Outbound security rules.
The list contains any rules you've created and the default security rules of your network security group.

View details of a security rule
In the search box at the top of the portal, enter Network security group and select Network security groups in the search results.
Select the name of the network security group that you want to view the rules for.
Select Inbound security rules or Outbound security rules.
Select the rule you want to view details for. For an explanation of all settings, see Security rule settings.
Note
This procedure only applies to a custom security rule. It doesn't work if you choose a default security rule.
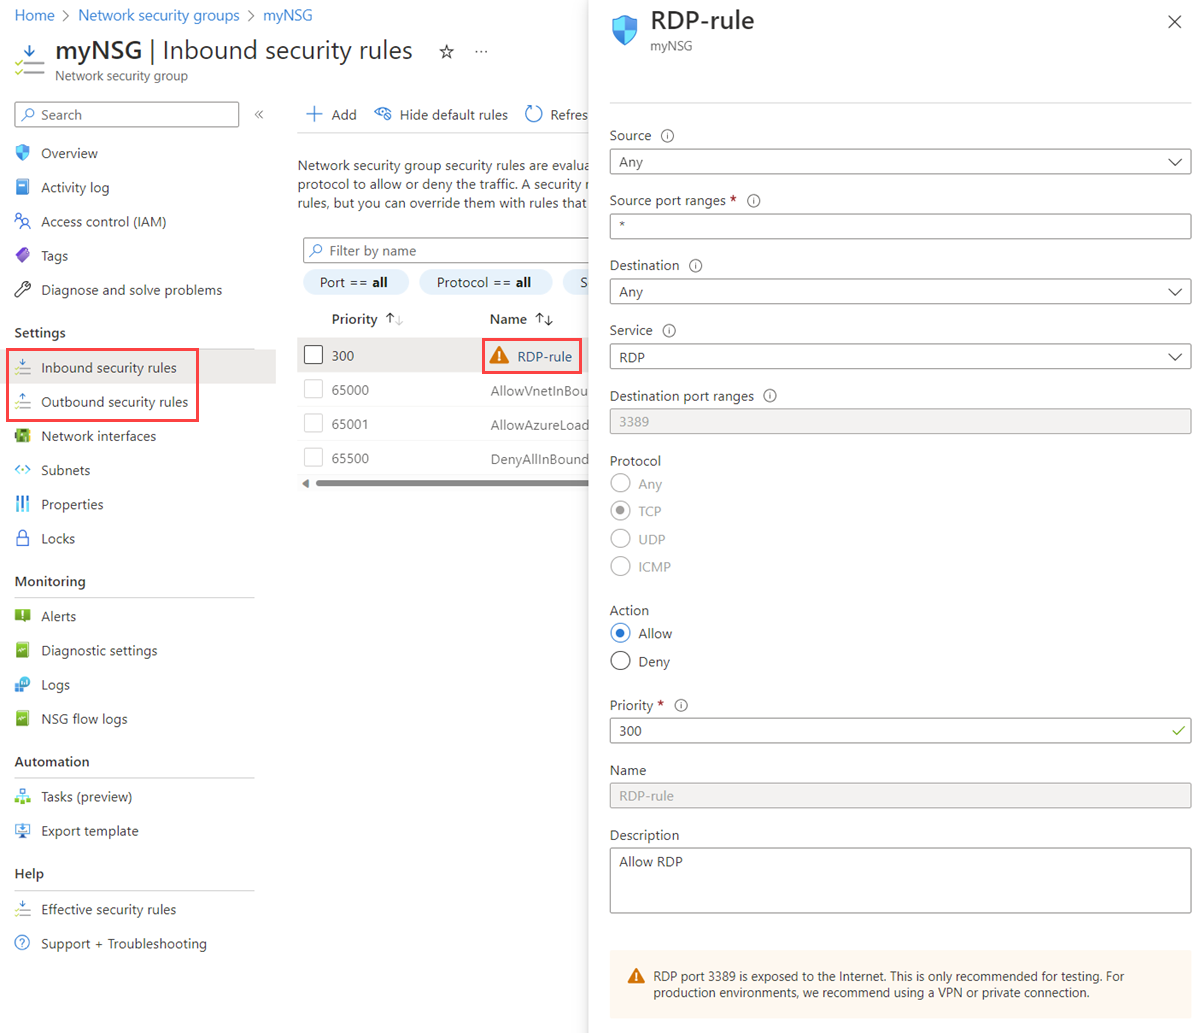
Change a security rule
In the search box at the top of the portal, enter Network security group and select Network security groups in the search results.
Select the name of the network security group that you want to view the rules for.
Select Inbound security rules or Outbound security rules.
Select the rule you want to change.
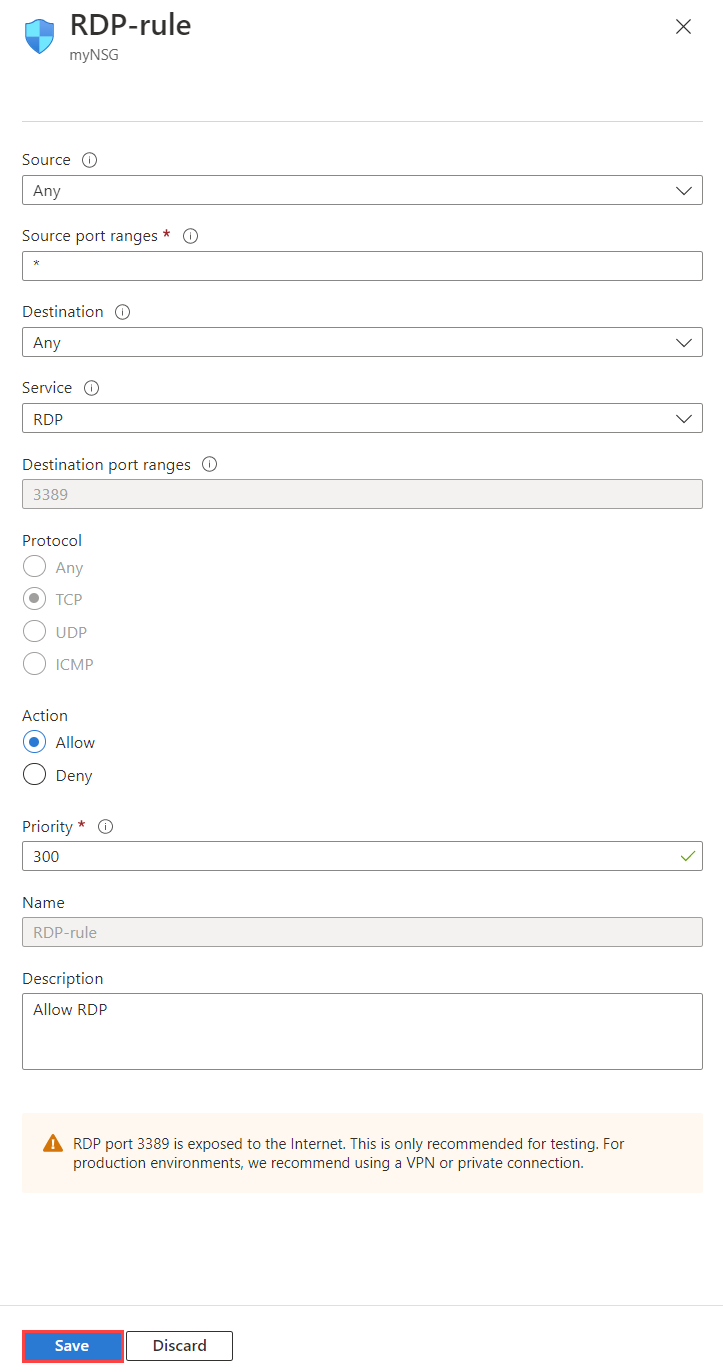
Change the settings as needed, and then select Save. For an explanation of all settings, see Security rule settings.
Note
This procedure only applies to a custom security rule. You aren't allowed to change a default security rule.
Delete a security rule
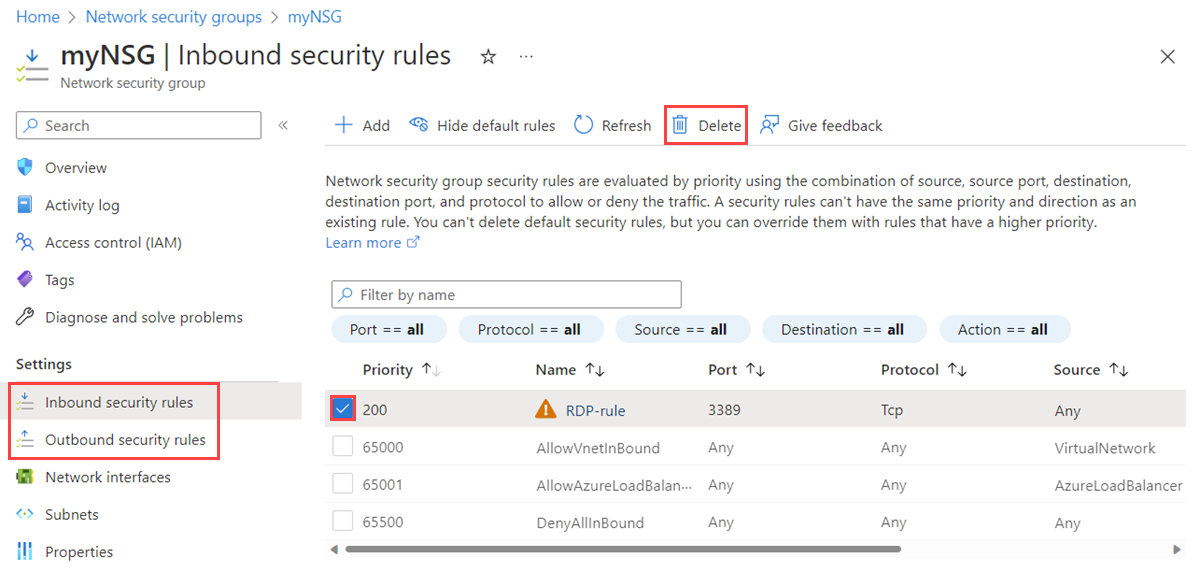
In the search box at the top of the portal, enter Network security group and select Network security groups in the search results.
Select the name of the network security group that you want to view the rules for.
Select Inbound security rules or Outbound security rules.
Select the rules you want to delete.
Select Delete, and then select Yes.
Note
This procedure only applies to a custom security rule. You aren't allowed to delete a default security rule.
Work with application security groups
An application security group contains zero or more network interfaces. To learn more, see application security groups. All network interfaces in an application security group must exist in the same virtual network. To learn how to add a network interface to an application security group, see Add a network interface to an application security group.
Create an application security group
In the search box at the top of the portal, enter Application security group. Select Application security groups in the search results.
Select + Create.
In the Create an application security group page, under the Basics tab, enter or select the following values:
Setting Action Project details Subscription Select your Azure subscription. Resource group Select an existing resource group, or create a new one by selecting Create new. This example uses myResourceGroup resource group. Instance details Name Enter a name for the application security group you're creating. Region Select the region you want to create the application security group in. 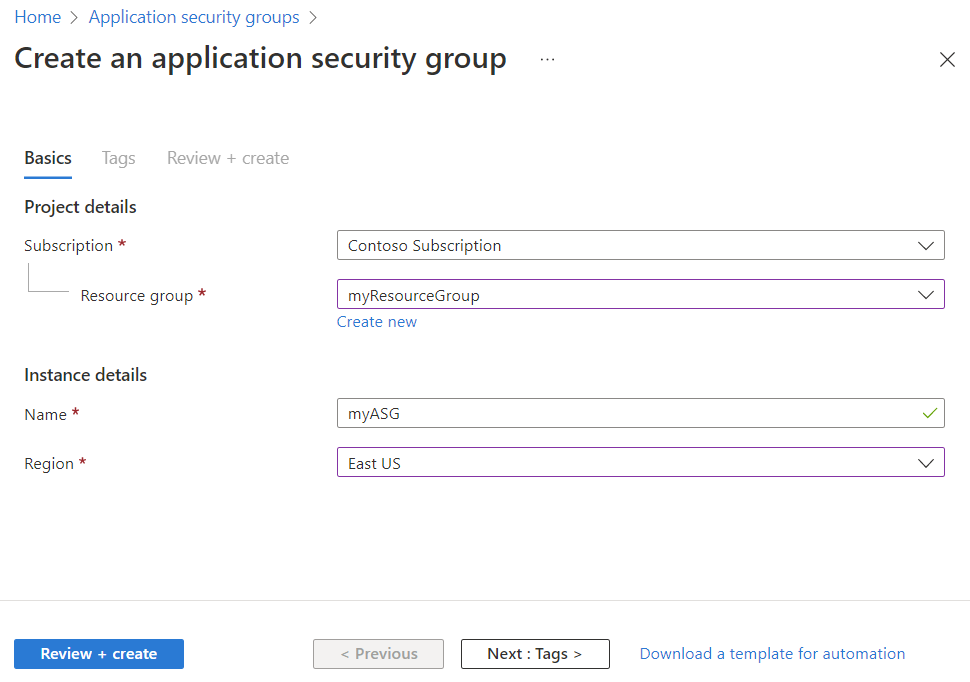
Select Review + create.
After you see the Validation passed message, select Create.
View all application security groups
In the search box at the top of the portal, enter Application security group. Select Application security groups in the search results. The Azure portal displays a list of your application security groups.

View details of a specific application security group
In the search box at the top of the portal, enter Application security group. Select Application security groups in the search results.
Select the application security group that you want to view the details of.
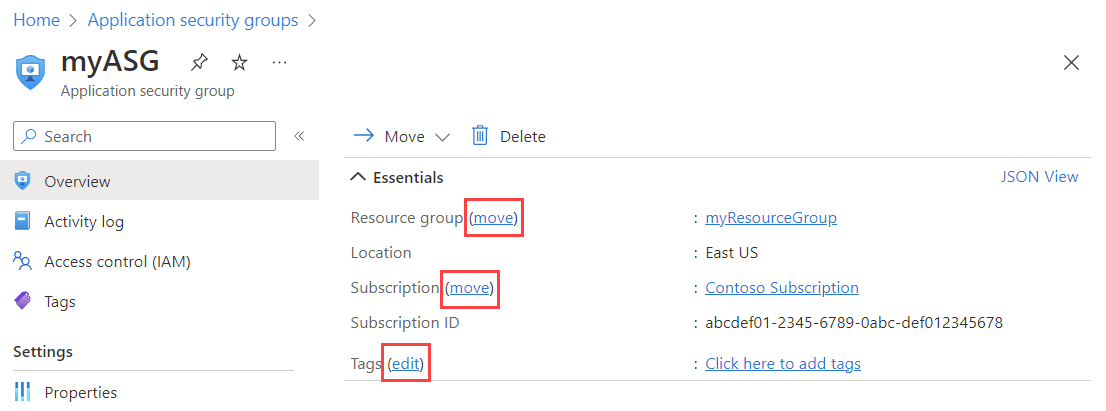
Change an application security group
In the search box at the top of the portal, enter Application security group. Select Application security groups in the search results.
Select the application security group that you want to change.
Select move next to Resource group or Subscription to change the resource group or subscription respectively.
Select Edit next to Tags to add or remove tags. to learn more, see Use tags to organize your Azure resources and management hierarchy
Note
You can't change the location of an application security group.
Select Access control (IAM) to assign or remove permissions to the application security group.
Delete an application security group
You can't delete an application security group if it contains any network interfaces. To remove all network interfaces from the application security group, either change the network interface settings or delete the network interfaces. To learn more, see Add or remove from application security groups or Delete a network interface.
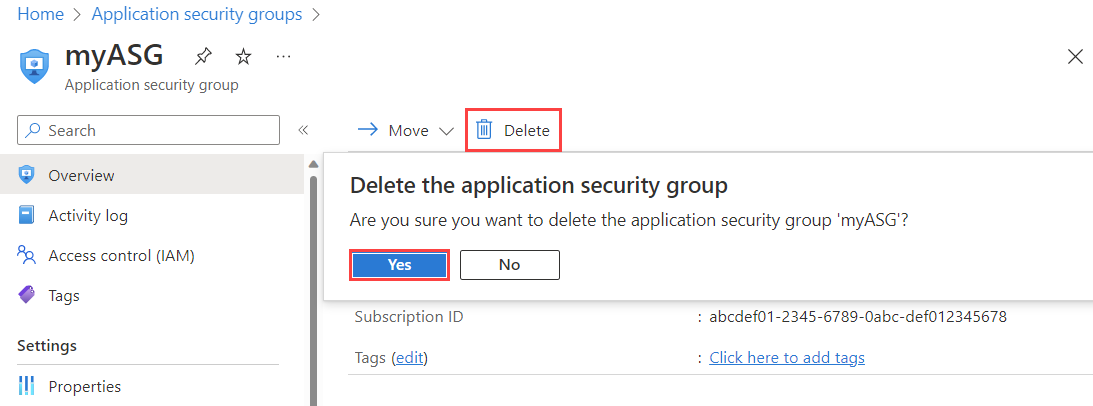
In the search box at the top of the portal, enter Application security group. Select Application security groups in the search results.
Select the application security group you want to delete.
Select Delete, and then select Yes to delete the application security group.
No comments:
Post a Comment