How to Protect your Azure resources from Distributed Denial of Service attacks
Distributed denial of service (DDoS) attacks are some of the largest availability and security concerns facing customers that are moving their applications to the cloud. A DDoS attack attempts to exhaust an application's resources, making the application unavailable to legitimate users. DDoS attacks can be targeted at any endpoint that is publicly reachable through the internet.

What is DDoS Protection? Protecting applications from DDoS attacks has been one of the top security concerns for Azure customers. Azure DDoS protection service is an Azure Networking offering aimed at protecting publicly accessible endpoints from DDoS attacks. The offering gives customers access to the same protection that is used to protect Microsoft's online assets, such as Xbox Live and Office 365. Azure DDoS protection service provides constant network flow monitoring of the protected endpoints, and when detecting a DDoS attack, automatically applies traffic scrubbing to make sure only legitimate requests are forwarded to the application.
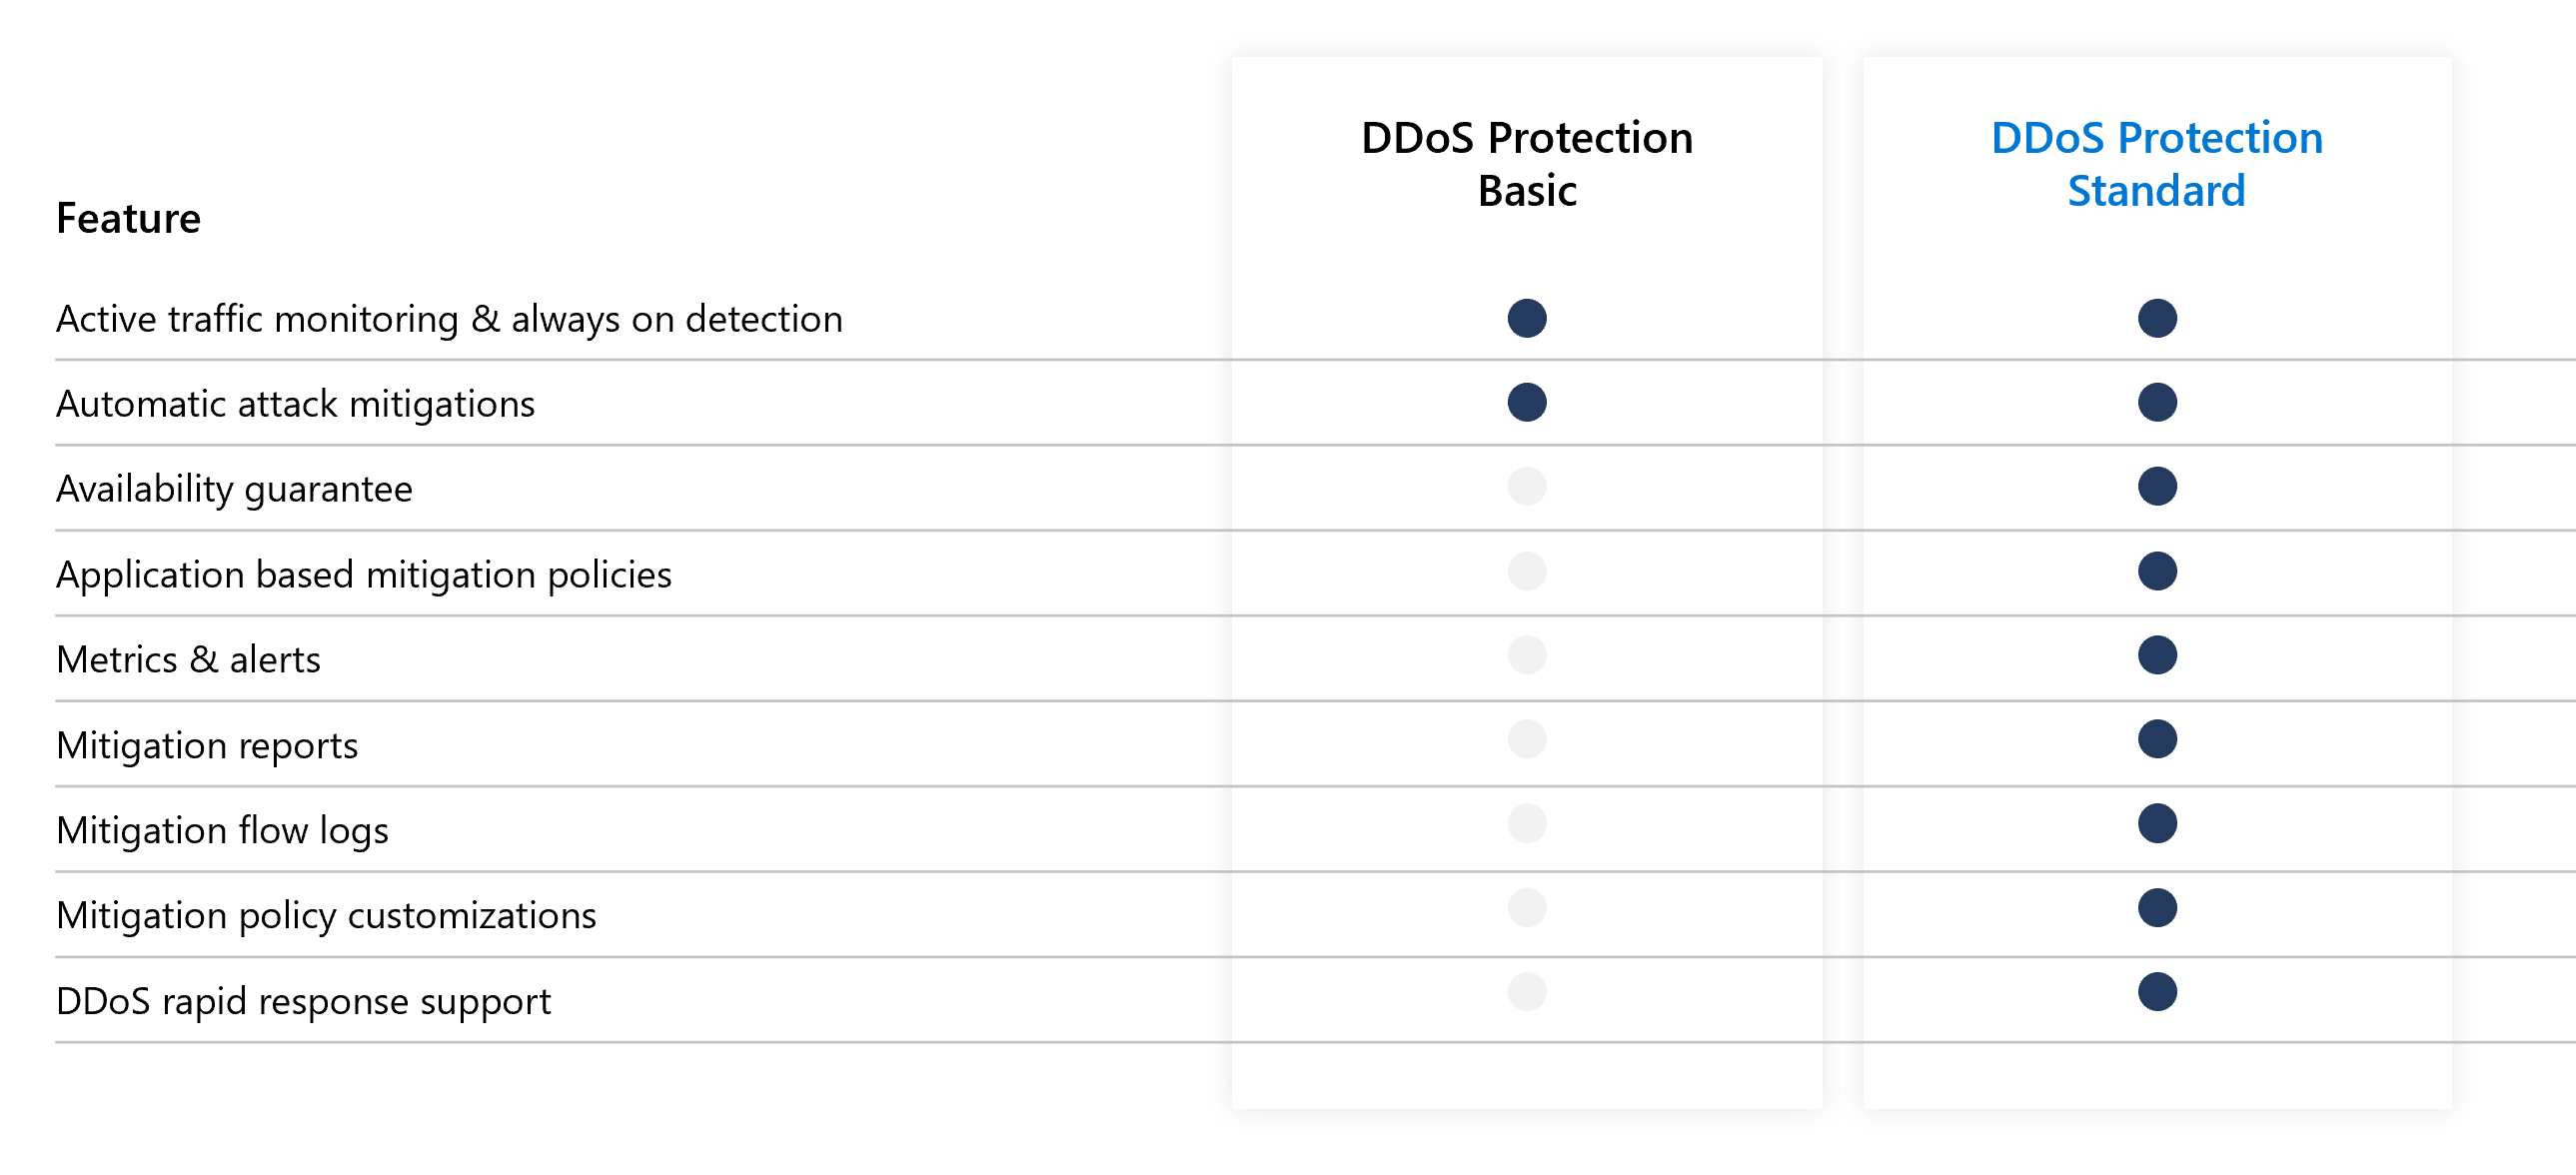
Azure DDoS protection, combined with application design best practices, provide defense against DDoS attacks. Azure DDoS protection provides the following service tiers:
- Basic: Automatically enabled as part of the Azure platform. Always-on traffic monitoring, and real-time mitigation of common network-level attacks, provide the same defenses utilized by Microsoft's online services. The entire scale of Azure's global network can be used to distribute and mitigate attack traffic across regions. Protection is provided for IPv4 and IPv6 Azure public IP addresses.
- Standard: Provides additional mitigation capabilities over the Basic service tier that are tuned specifically to Azure Virtual Network resources. DDoS Protection Standard is simple to enable, and requires no application changes. Protection policies are tuned through dedicated traffic monitoring and machine learning algorithms. Policies are applied to public IP addresses associated to resources deployed in virtual networks, such as Azure Load Balancer, Azure Application Gateway, and Azure Service Fabric instances, but this protection does not apply to App Service Environments. Real-time telemetry is available through Azure Monitor views during an attack, and for history. Rich attack mitigation analytics are available via diagnostic settings. Application layer protection can be added through the Azure Application Gateway Web Application Firewall or by installing a 3rd party firewall from Azure Marketplace. Protection is provided for IPv4 Azure public IP addresses.
So how to start with DDoS in Azure.
First go to the Virtual Networks.

Next selecting the Network and in the left pane there is a section DDoS Protection.

Selecting the DDoS Protection there is the Basic and the Standard Setting

Pricing Details
There the Basic is the default and comes with free pricing.
The Standard is a different option and Cost you some real money! and these are monthly costs. For a demo I turned it on and forget to turned it of and spend 10K in 4 months so keep a track on your Azure costs.

The DDoS Protection service will have a fixed monthly charge, as well as a charge for data processed. The fixed monthly charge includes protection for 100 resources. Protection for additional resources will be charged on a monthly per-resource basis.
Monthly price for DDoS Protection (includes protection for 100 resources): €2,483/month
Overage charges (more than 100 resources): €25 per resource per month
When Enabling the DDoS Standard we need to create a DDoS protection plan first, if you have already one you can add the ID.

Check the create DDoS protection Plan

Now that we created a plan witch is more a resource place holder, we can add this to the DDoS protection plan


Now that the DDoS and the plan is in place we can create an alert rule in case we have a DDoS attack.
In the Azure Monitor we can create the alert rule and we can see the logging.

To see telemetry for a DDoS attack, log into the Azure Portal and navigate to the “Monitor” blade.
Within the monitor blade, click on “Metrics”, select the appropriate subscription, resource group, resource type of “Public IP” and the Public IP that was the target of the attack. After selecting the resource, a series of Available Metrics will appear on the left side. These metrics are selected and then will be graphed.
The metric names are relatively self-explanatory and the basic construct is that there are tag names on each metric as follows: • Dropped tag name (e.g. Inbound Packets Dropped DDoS): The number of packets dropped/scrubbed by the DDoS system
• Forwarded tag name (e.g: Inbound Packets Forwarded DDoS): The number of packets forwarded by the DDoS system to the destination VIP – traffic that was not filtered • No tag name (e.g: Inbound Packets DDoS): The total number of packets that came into the scrubbing system – representing the sum of the packets dropped and forwarded

The traffic shown in the Monitor dashboard.

Email Alerting To configure an email alert for a metric, click on the “Click to add an alert” text. An email alert can be created on any metric, but the most obvious metric to create an alert on is “Under DDoS attack or not”. This is a boolean value 1 or 0. “1” means you are under attack. “0” means you are not under attack. To be emailed when under attack, set the Metric for “Under DDoS attack or not” and “Condition” to “Greater than” zero (0) over the last 5 minutes. Similar alerts can be set up for other metrics. An example screenshot is provided below.


To divine the Severity I keep this as this is also be used in SCOM
Azure Monitor Alert Severity Levels
Sev 0 = Critical
Sev 1 = Error
Sev 2 = Warning
Sev 3 = Informational
Sev 4 = Verbose

Last part in selecting the email for this alert.

With this setup you got a good protection against DDoS attacks. below is the workflow how DDoS protection works.

No comments:
Post a Comment