Azure Private Link endpoint
This guide is for Azure tenants intending to establish connectivity to SHIP-HATS services via Azure Private Link service.
Overview of Azure Private Link setup
Following are the steps involved when you set up Azure Private Link endpoints.
| Step | Task | Owner |
|---|---|---|
| 1 | Create Azure Private Links | User |
| 2 | Submit Approval Request | SA or PA |
| 3 | Create Private DNS Zones | User |
| 4 | Verify Azure private link endpoint connectivity | User |
| 5 | Switch endpoint. This is applicable only if you are upgrading your IPsec Tunnel to Azure Private Link. | User |
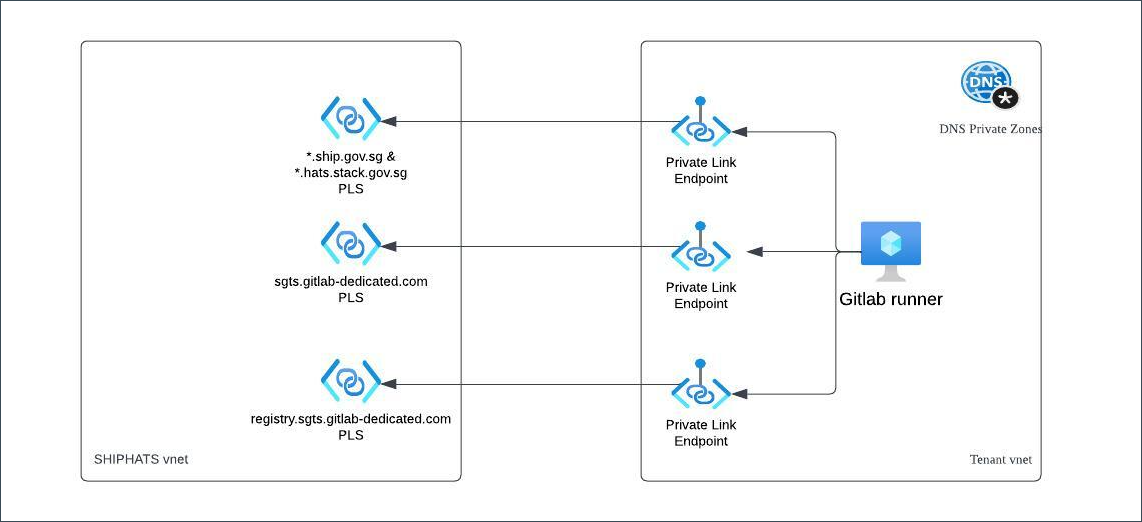
Following is the high-level architecture diagram for this.
Step 1: Create Azure Private Links
This section guides you to create Azure private links for the required.
This section guides you to create private link endpoint for services such as Nexus and SonarQube.
On the Azure console, go to Private Link > Private Endpoints.
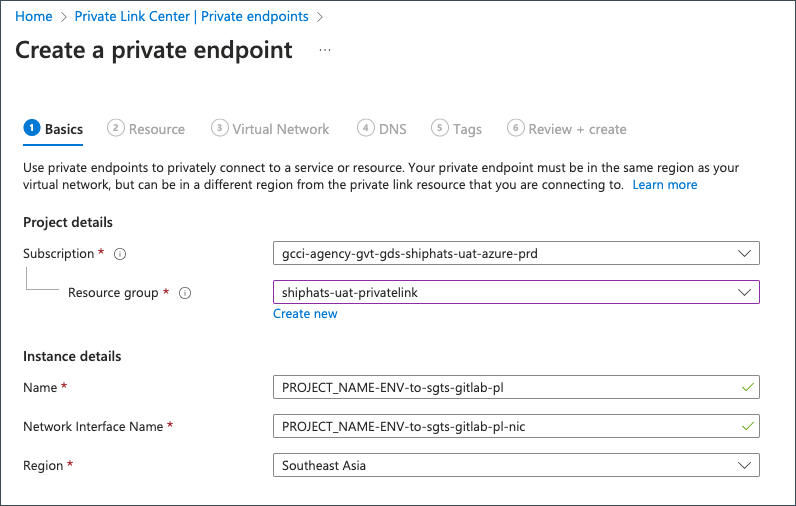
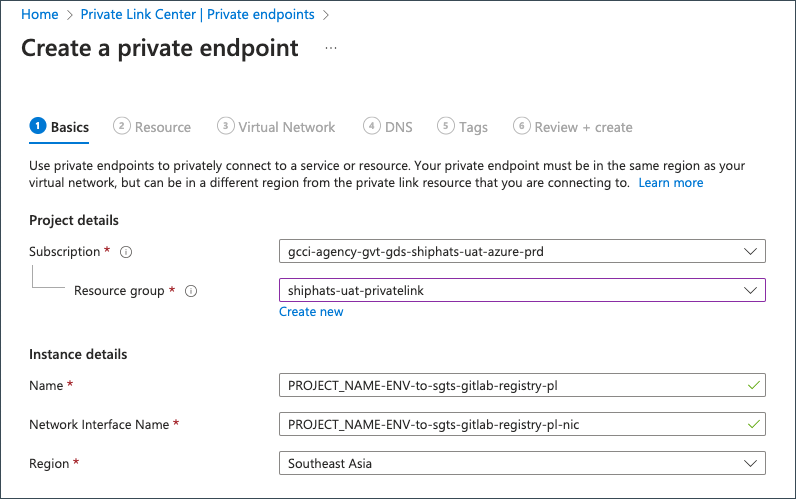
Provide the following details on the Basics tab.
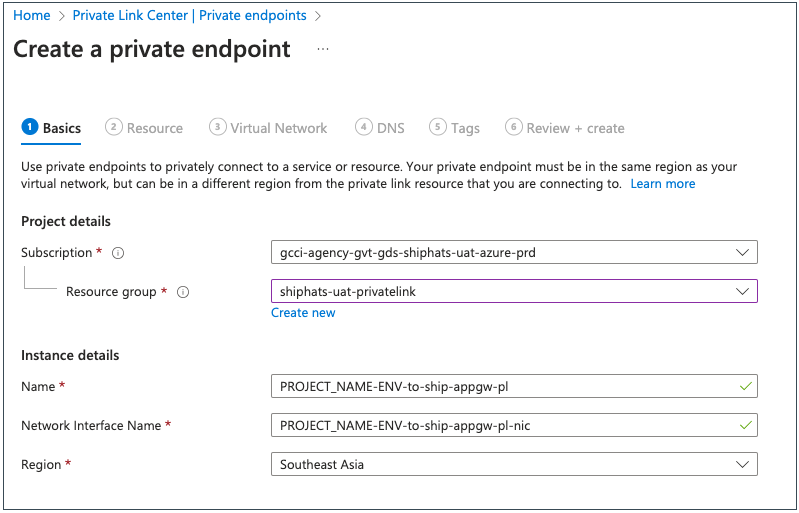
Field Information Resource group Select the required resource group. Name Specify your <PROJECT_NAME>-<ENV>-to-ship-appgw-pl. This is necessary for approving the request.Region Select Southeast Asia.Click Next: Resource.
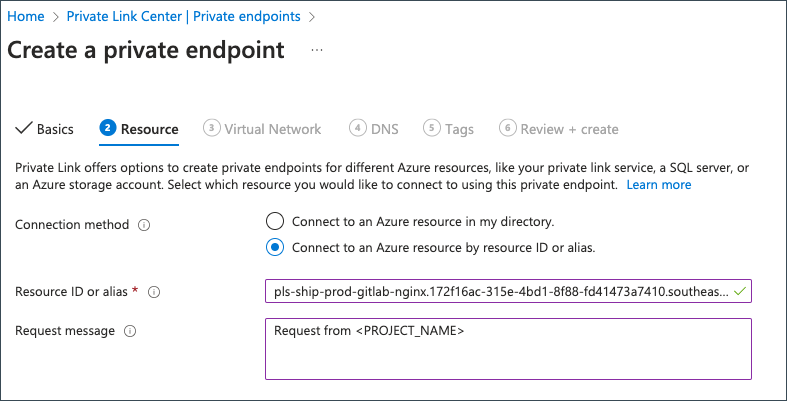
Provide the following details on the Resources tab.
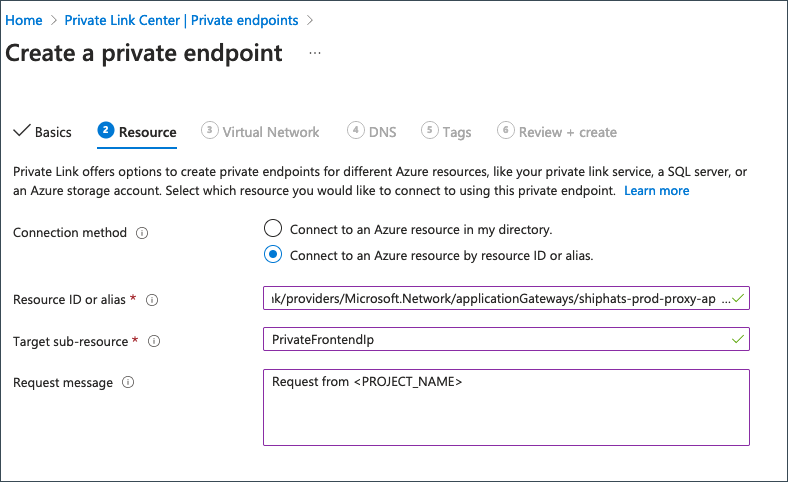
Field Information Connection Method Choose Connect to an Azure resource by resource ID or alias.Resource ID or Alias Specify /subscriptions/0bf6396d-d121-42c6-aa7f-37f39cc52de7/resourceGroups/shiphats-prod-privatelink/providers/Microsoft.Network/applicationGateways/shiphats-prod-proxy-appgw.Target Sub-Resource Specify PrivateFrontendIp.Request Message Specify Request from <PROJECT_NAME>.Click Next: Virtual Network.
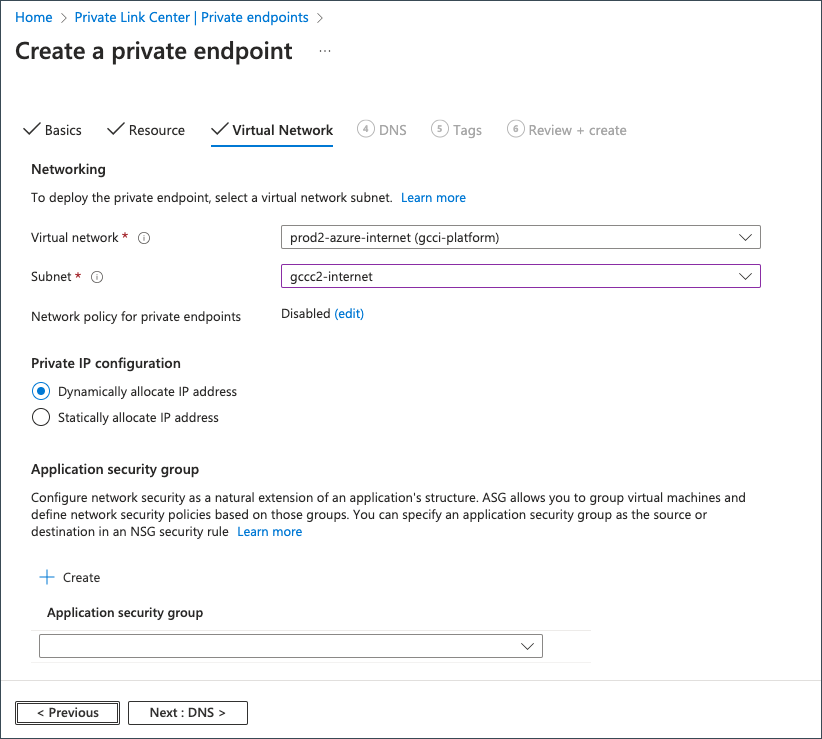
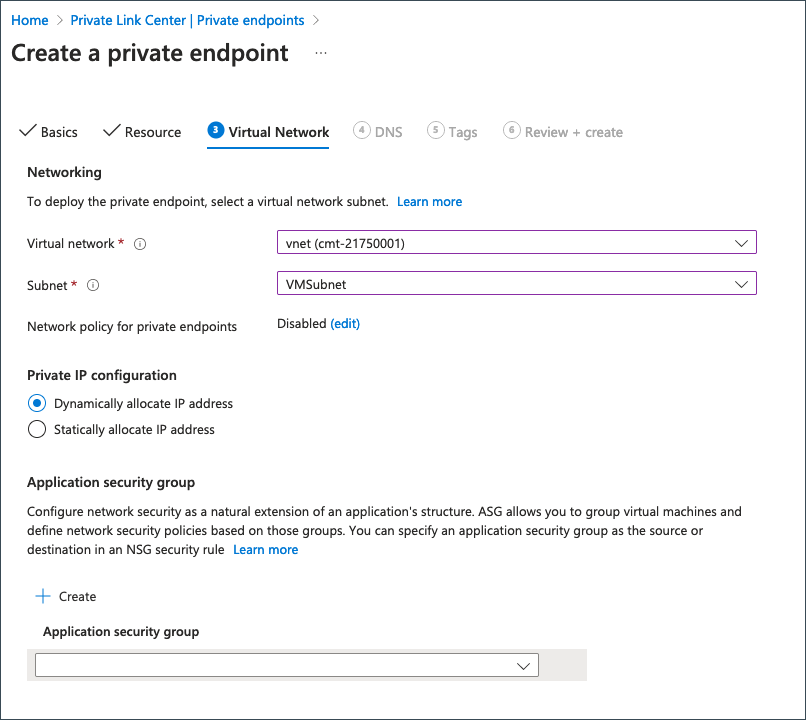
Provide the following details on the Virtual Network tab.
| Field | Information |
|---|---|
| Subnet | Select the required subnet to provision the private endpoint. |
| Private IP configuration | Choose Dynamically allocate IP address. |
- Click Next:DNS and specify the required details for DNS and Tags tabs.
- Proceed to Review + Create to review the details.
- Click Create.
- At this stage, status of the private links will be pending.
- Submit the SHIP-HATS 2.0 Azure Private Link Approval request as a technical support request.
- After approval, proceed to Create Private DNS zones.

Step 2: Submit Approval Request
SA or PA must submit the SHIP-HATS 2.0 Azure Private Link Approval request as a technical support request. If they are unable to submit the request directly, ensure an approval from either of them is attached to the request.
Step 3: Create Private DNS Zones
The Azure Private DNS zone is required to resolve the subdomains to the Private Link endpoint IP in the linked virtual network.
Prerequisite
- Get Private IP of the Azure Private Endpoints. To get this, go to Private Link > Private endpoints. Take note of the Private IP of the Private endpoints that you had created.
- Your Azure Private Link request must have been approved.
- Azure Private Link request must have been approved.
To create private DNS zone
- On the Azure console, click Private DNS zones > Create.
- Provide the following details on the Basics tab.
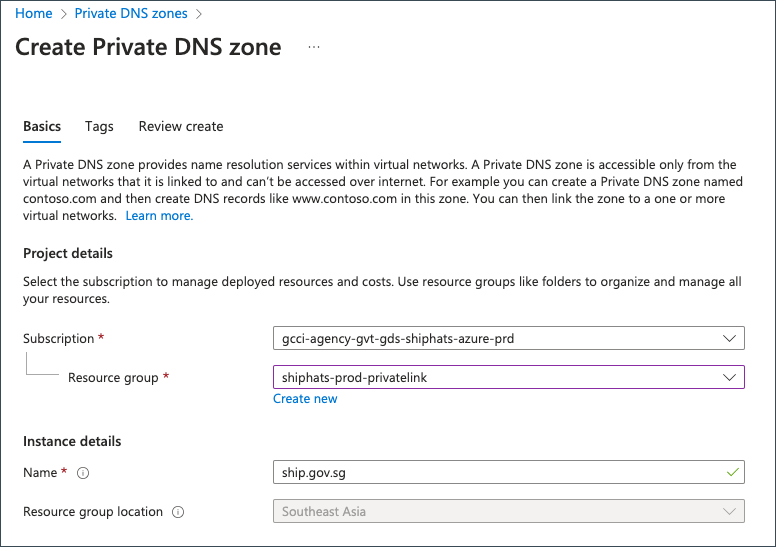
| Field | Information |
|---|---|
| Resource Group | Select the required resource group. |
| Name | Enter ship.gov.sg. |
[Optional] Specify the required details in Tags and proceed to Review create.
Click Review create to create the private DNS zone.
After creating the
ship.gov.sgDNS zone, go to the created private DNS zone and click + Record set.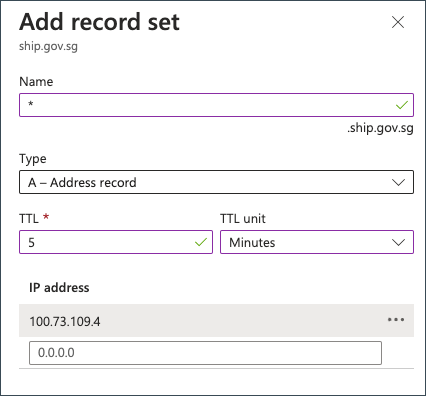
Specify the appropriate record Name based on the information provided in the following table.
DNS Zone Name ship.gov.sg * hats.stack.gov.sg * sgts.gitlab-dedicated.com registry sgts.gitlab-dedicated.com @
Using wildcards * for ‘ship.gov.sg’ and ‘hats.stack.gov.sg’ in the record sets simplifies the process by creating a flexible mapping for all subdomains under these domains. For instance, employing the wildcard * for ‘ship.gov.sg’ allows the Private DNS zone to dynamically resolve subdomains like nexus.ship.gov.sg and https://sonar1.hats.stack.gov.sg (sonarqube Enterprise) to their respective private link endpoints.
- Specify the private IP of the corresponding private link.
The IP 100.73.109.4 shown in the screenshot is for illustrative purposes.
- Click OK.
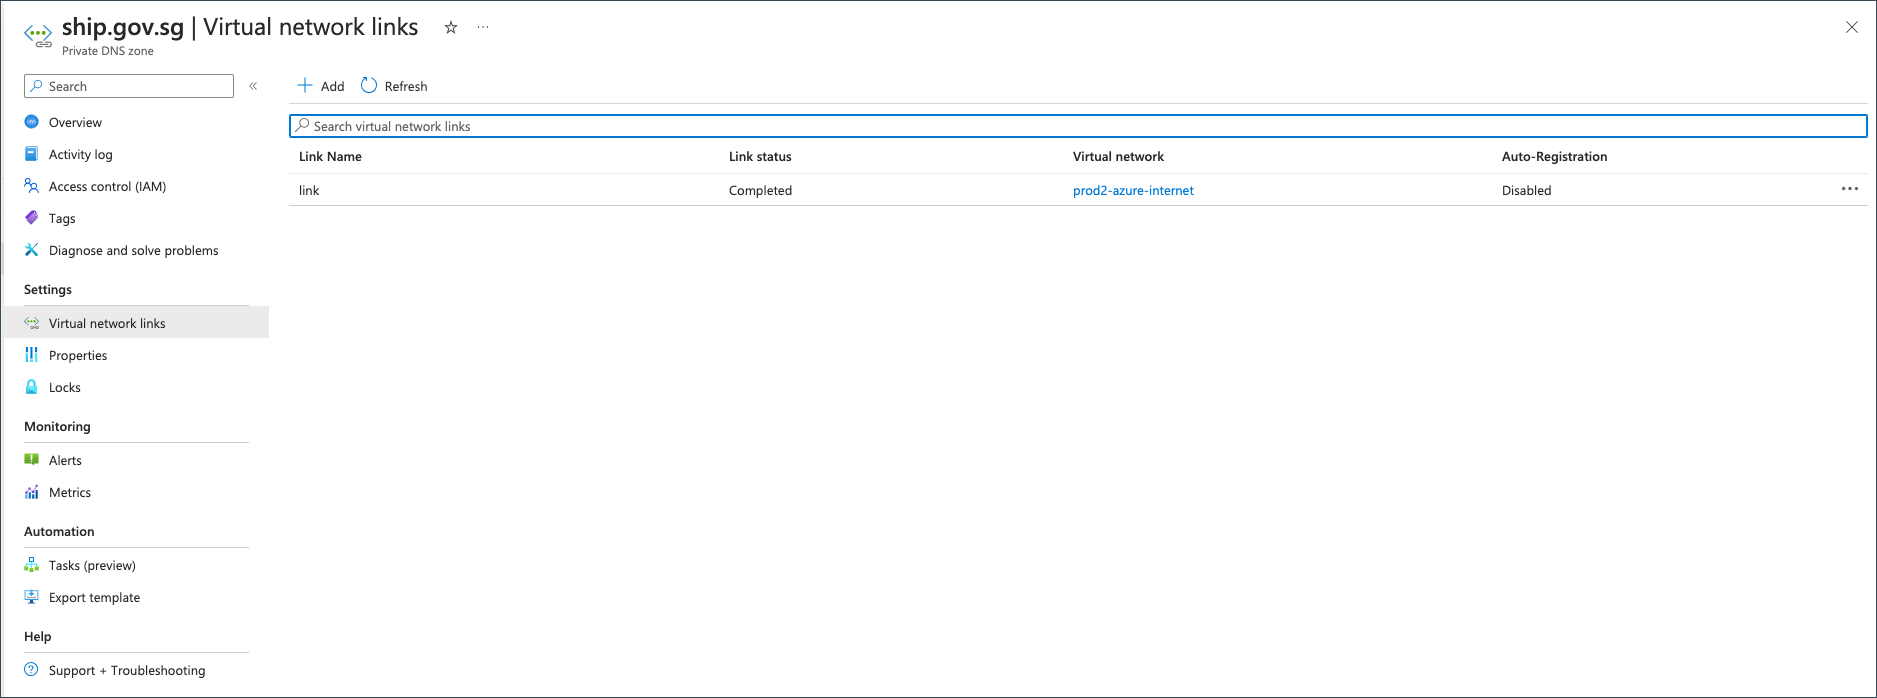
- Link the GitLab Runner VNet to the private hosted zone.
- Repeat steps 6-9 for the following domains:
- hats.stack.gov.sg
- sgts.gitlab-dedicated.com
Step 4: Verify Azure Private Link endpoint connectivity
This step is applicable for users who are creating a new Azure Private Link endpoint. If you are upgrading your existing IPsec Tunnel to Azure Private Link endpoint, refer to Switch endpoint.
Verify your connectivity to ensure if it is resolving to Azure Private Link endpoint IP and getting a response.
To verify Azure Private Link endpoint connectivity
- Log in to a virtual machine.
- Verify connectivity with the following curl commands:
- Confirm the pipeline jobs are working as expected.
Step 5: Switch endpoint
The following steps are applicable only if you’ve upgraded your IPsec Tunnel to Azure Private Link endpoint.
This step will cause downtime in the CI/CD pipelines. Please switch the endpoint during planned maintenance.
- Remove the SHIP-HATS nameservers from the VM’s network interface and restart the VM to take effect.
- Create Azure Private DNS zone to point the hostnames to the Private Link endpoint IP.
- Log in to a virtual machine.
- Verify connectivity with the following curl commands:
- Confirm the pipeline jobs are working as expected.
No comments:
Post a Comment