Deploying OpenShift on Azure
Azure Red Hat OpenShift, a jointly engineered, managed, and supported service by Red Hat and Microsoft, inherits Azure’s compliance features and offers seamless billing integration. Deploying OpenShift on Azure is swift, easy, and delivers a fully managed service, allowing users to prioritize their applications without concerning themselves with the underlying infrastructure management.
In this demonstration, our focus is specifically on Azure Red Hat OpenShift “ARO”, a service jointly engineered, operated, and supported by Microsoft and Red Hat, offering an integrated support experience.
Get a Red Hat pull secret
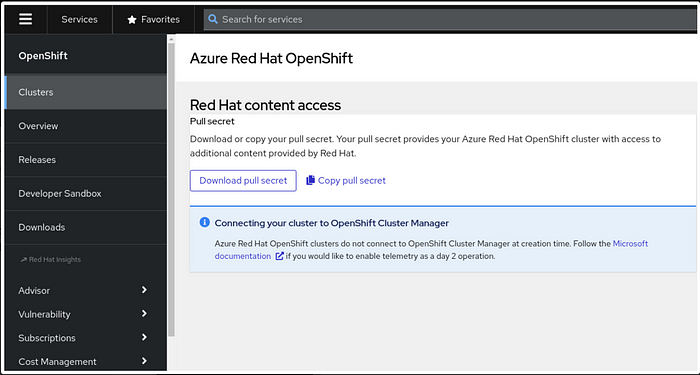
- To begin, Log in to the Red Hat Hybrid Cloud Console to access the Azure Red Hat OpenShift pull secret page.
- Click Download pull secret and save the pull secret in a secure place as a .txt file. You’ll reference it later.

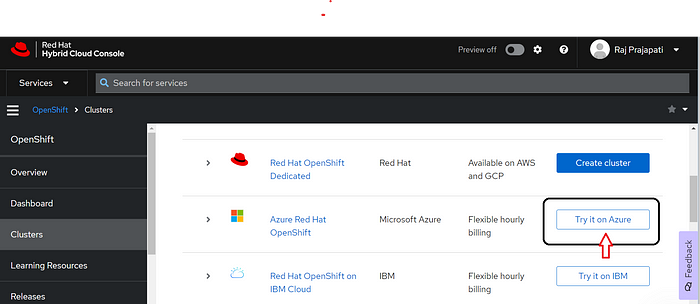
Navigate to the Red Hat Cluster Manager to kickstart your journey with Azure Red Hat OpenShift. This service, being an Azure first-party offering, ensures seamless integration and innovation. Clicking on the “Try it on Azure” link within the OpenShift Cluster Manager leads you to detailed instructions for swiftly setting up a production-grade OpenShift cluster on Azure.

Before diving into creating the cluster on Azure, a few prerequisites must be met. Ensure that Azure Red Hat OpenShift is available in your region. Additionally, you’ll need a pay-as-you-go Azure account, preferably not the entry-level free account, and sufficient quota for the standard DSv3 family of vCPUs. If you lack the necessary quota, follow the standard Azure process to request an increase.
# Verify you have the correct number of Azure resource quotas, in this case Total Regional vCPUs. Change the location if you’re not using “East US.”
# Azure Red Hat OpenShift requires at least 40 cores to create and run a cluster. The default Azure resource quota for a new Azure subscription is only 10.
az vm list-usage --location "East US" -o table
# If you have multiple accounts, specify the subscription ID you want to work with by running:
az account set --subscription <SUBSCRIPTION ID>
Preparing Azure for Installation:
Firstly, register the required resource providers against your subscription. Resource providers grant access to Azure’s resources, and while some are registered by default, others, like those for OpenShift on Azure, need manual registration. This can be done easily via the CLI.
Variables and resource groups
- Sign into the Azure CLI by running
az loginand following the steps to authorize your account. - Set the following environment variables. You can change the values to suit your environment, but these defaults should work.
AZR_RESOURCE_LOCATION=eastus # the location of your cluster
AZR_RESOURCE_GROUP=openshift # the name of the resource group where you want to create your cluster
AZR_CLUSTER=cluster # the name of your cluster
AZR_PULL_SECRET=~/Downloads/pull-secret.txt # the download file of your Red Hat pull secret
3. Creating a Resource Group:
Establish a logical grouping of Azure resources by creating a resource group. Define the location for this group, which determines the default location for resources deployed within it.
az group create \
  --name $AZR_RESOURCE_GROUP \
  --location $AZR_RESOURCE_LOCATION
Setting Up Networking:
Create a virtual network within the resource group, containing dedicated subnets for the control plane and worker nodes. Additionally, configure a service endpoint for secure and direct routing.
- Create a virtual network with two empty subnets. Create the virtual network.
az network vnet create \
  --address-prefixes 10.0.0.0/22 \
  --name "$AZR_CLUSTER-aro-vnet-$AZR_RESOURCE_LOCATION" \
  --resource-group $AZR_RESOURCE_GROUP
2. Create the control plane subnet.
az network vnet subnet create \
  --resource-group $AZR_RESOURCE_GROUP \
  --vnet-name "$AZR_CLUSTER-aro-vnet-$AZR_RESOURCE_LOCATION" \
  --name "$AZR_CLUSTER-aro-control-subnet-$AZR_RESOURCE_LOCATION" \
  --address-prefixes 10.0.0.0/23 \
  --service-endpoints Microsoft.ContainerRegistry
3. Create the machine subnet.
az network vnet subnet create \
  --resource-group $AZR_RESOURCE_GROUP \
  --vnet-name "$AZR_CLUSTER-aro-vnet-$AZR_RESOURCE_LOCATION" \
  --name "$AZR_CLUSTER-aro-machine-subnet-$AZR_RESOURCE_LOCATION" \
  --address-prefixes 10.0.2.0/23 \
  --service-endpoints Microsoft.ContainerRegistry
4. Disable network policies on the control plane subnet. This is required for the service to be able to connect to and manage the cluster.
az network vnet subnet update \
  --name "$AZR_CLUSTER-aro-control-subnet-$AZR_RESOURCE_LOCATION" \
  --resource-group $AZR_RESOURCE_GROUP \
  --vnet-name "$AZR_CLUSTER-aro-vnet-$AZR_RESOURCE_LOCATION" \
  --disable-private-link-service-network-policies true
Building the Cluster:
Utilize the ‘aro create’ command to initiate the cluster build process. Specify crucial details such as the resource group, cluster name, virtual network, subnets, and reference your OpenShift pull secret. The installation typically takes around 35 to 40 minutes, which can be tracked via the Azure console or CLI.
az aro create \
  --resource-group $AZR_RESOURCE_GROUP \
  --name $AZR_CLUSTER \
  --vnet "$AZR_CLUSTER-aro-vnet-$AZR_RESOURCE_LOCATION" \
  --master-subnet "$AZR_CLUSTER-aro-control-subnet-$AZR_RESOURCE_LOCATION" \
  --worker-subnet "$AZR_CLUSTER-aro-machine-subnet-$AZR_RESOURCE_LOCATION" \
  --pull-secret @$AZR_PULL_SECRET
Connecting to the Cluster:
Utilizing another command, we retrieve cluster details. Notably, we could have used our domain name during the initial setup to have a personalized URL for our cluster. However, in this instance, a random URL was generated for our cluster access.
- Get the OpenShift console URL:
az aro show \
  --name $AZR_CLUSTER \
  --resource-group $AZR_RESOURCE_GROUP \
  -o tsv --query consoleProfile
2. Get your OpenShift credentials.
az aro list-credentials \
  --name $AZR_CLUSTER \
  --resource-group $AZR_RESOURCE_GROUP \
  -o tsv
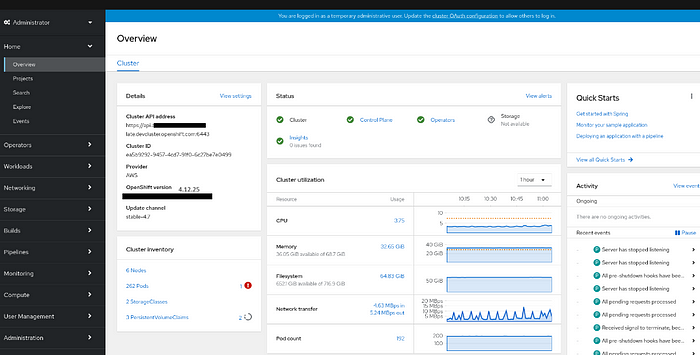
Use the URL and the credentials provided by the output of the last two commands to log into OpenShift via a web browser. Here, you can monitor and update your cluster as needed.
Once these steps are complete, your cluster is ready for application deployment, which you can do in the OpenShift console or via the CLI.
You can use your own domain name with the — domain flag on the ‘az aro create’ command and then we would just set it up.

With OpenShift on Azure, gaining full cluster admin access allows for advanced customization and management. This access provides control over upgrades, lifecycle management, direct integration with Azure services like storage and compute, and scalability through multi-AZ setups. Accessing the cluster from the command line remains just as straightforward.
Deleting the Cluster:
Deleting a cluster is as effortless as creating one — a simple ‘az aro delete’ command removes the entire resource group and its associated resources, including the cluster.
az aro delete -y \
  --resource-group $AZR_RESOURCE_GROUP \
  --name $AZR_CLUSTER
Increasing Operational Efficiency:
The focus remains on enhancing operational efficiency. With ARO Managed Services, Red Hat and Microsoft handle the complexities of deploying, managing, and updating the platform. This offloading of management tasks empowers businesses to concentrate on their core operations, relying on the expertise of the platform’s managers.
In summary, Azure Red Hat OpenShift simplifies the deployment process, streamlines management tasks, and ensures a hassle-free experience, allowing users to concentrate on their applications while leveraging the platform’s managed services.

No comments:
Post a Comment