Create a storage account to use with Microsoft Azure Blob Storage
An Azure storage account contains all of your Azure Storage data objects, including blobs, file shares, queues, tables, and disks. Create a storage account and enable access to the storage account using the shared key or shared access signature.
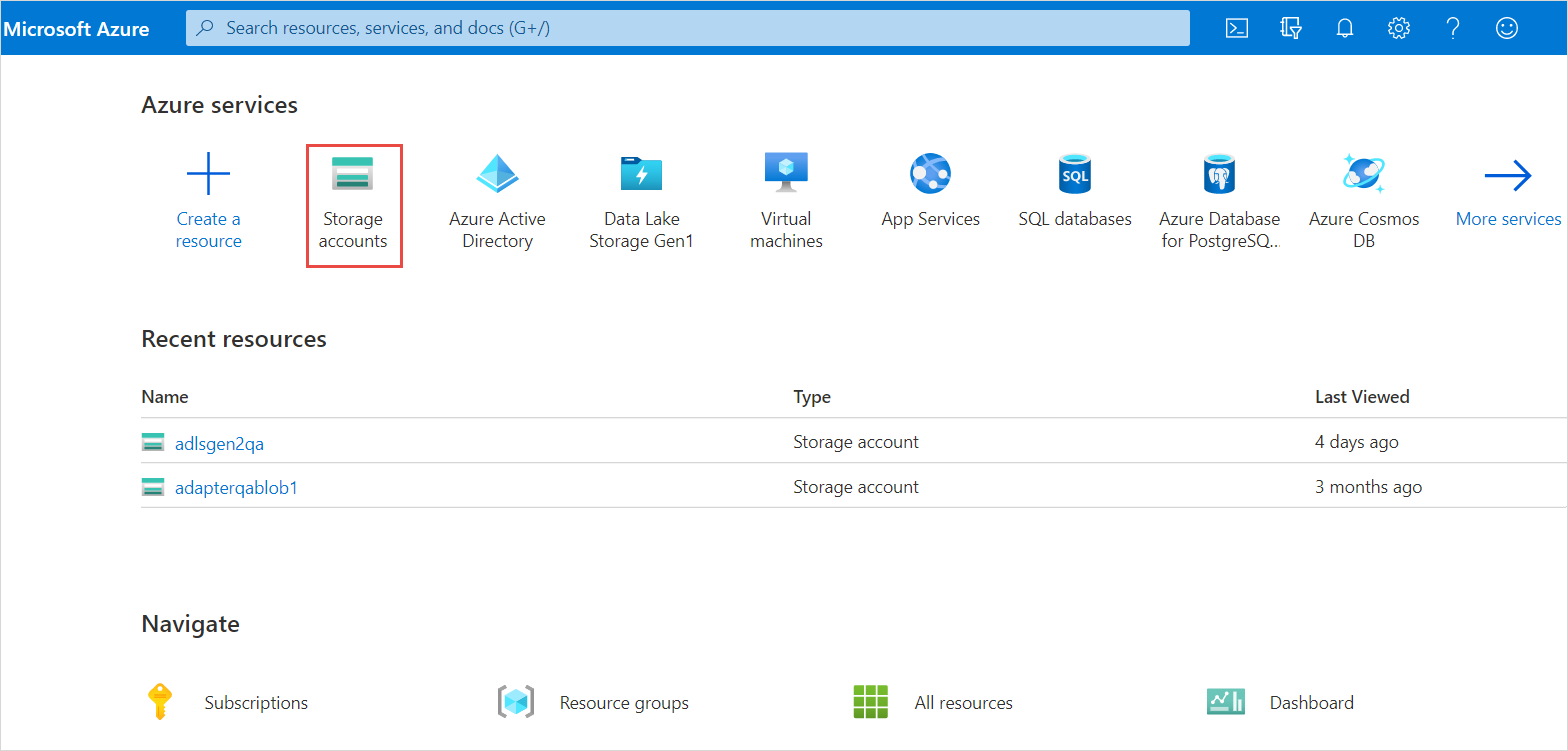
- Under Azure Services, clickStorage accounts.

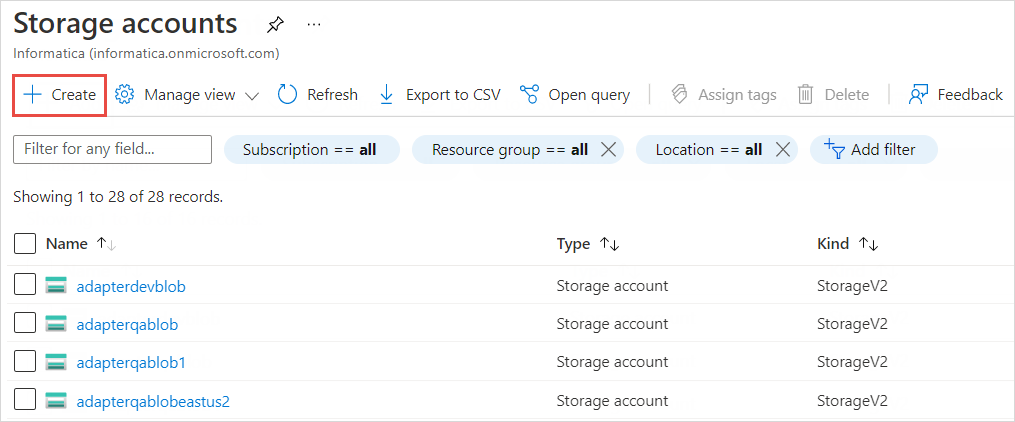
- On theStorage accountspage, clickCreateto create a new storage account.

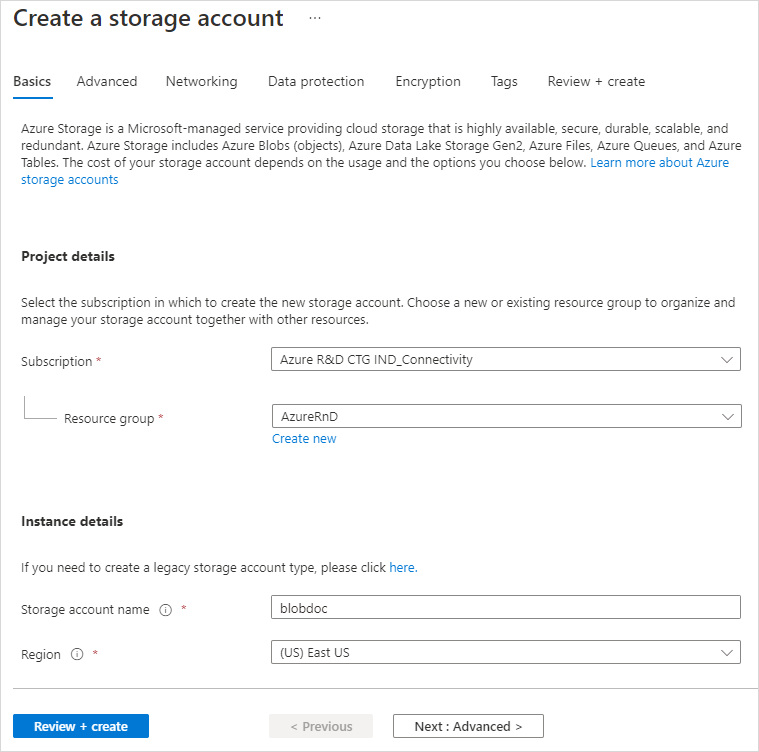
- On theBasicstab, enter the project and instance details.

- In theSubscriptionfield, select the subscription for which you want to create the storage account.
- In theResource groupfield, select the resource group in which the Azure resources are deployed and managed.
- In theStorage account namefield, enter a name for your storage account.The name must be unique across Azure, between 3 and 24 characters in length, and can include only numbers and lowercase letters.
- In theRegionfield, select a location for your storage account, or use the default location.
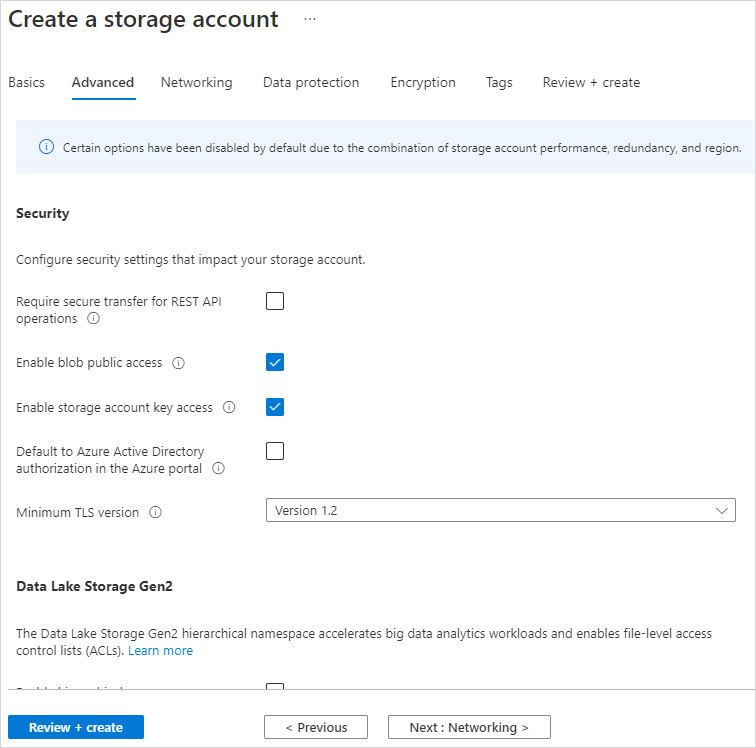
- On theAdvancedtab, configure the security settings.

- Disable theRequire secure transfer for REST API operationsoption.
- SelectEnable blob public accessto allow anonymous access to blobs within the storage account.
- SelectEnable storage account key accessto allow access to storage account using the shared key or shared access signature.
- Click .

No comments:
Post a Comment