Azure - Container Instances

Introduction
I’ve tried the service Azure Container Instances for the very first time at the starting point of an attempt to get Container, which are hosted on premise, to a running state within the Azure Cloud. Finally, for getting a successfull deployment of the ACI, I was facing some obstacles and the intention of this post is to summarize a best practice approach (at least it worked for me) of this service including all pitfalls I’ve faced.
Prerequisites
According to be well prepared, there is IMHO just a simple rule to consider: If you are capable of pulling your Container Image and getting your Container in a running state outside of your usual network or if you are able to push your Container Image to an Azure Container Registry, then nothing more can block your establishment of an Azure Container Instance deployment. Also be aware of any prerequistes, which you need to run your e.g.: application inside the Container, e.g.: License Server, Shares, etc…
Btw.: Taking into account that you’ve a proper Azure subscription available ;)
Choice of the Container Registry
You can dedicde whether you’d like to access your Container Image from a private or public Container Registry - in case of the private Registry ensure you get the proper credentials and that the necessary permissions (read/write) are set. Another option would be to choose the Container Registry of Azure - the Azure Container Registry
https://azure.microsoft.com/en-us/services/container-registry/
Private Container Registry vs. Azure Container Registry
Reasons for using a Private Container Registry
- You don’t need to re-tag and push your new Container Image to the Azure Container Registry if you would like to create a new Container Instance refering to the new Container Image - you are ready as your Container Image is available at your already established Container Registry
- There may exist some security related reasons, that the Container Image has to be managed within your private Registry, which is hosted/managed by yourself.
- A different Container Registry, e.g.: the Azure Container Registry would be an additional service for which you’ve (probably) to pay
Reasons for using the Azure Container Registry
- Container Images, which are already provided at the Azure Container Registry can be easily during the set up of an Azure Container Instance (will be explained in more detail)
- Longer waiting period as the Container Image needs to be pulled to establish an Azure Container Instance deployment in contrast to the Azure Container Registry - during my attempts its faster to pull from the Azure Container Registry. During my different deployments, it took ~5 minutes more time to get the same Image pulled from my private Registry in contrast to the Azure Container Registry.
Azure Container Instances Deployment Step by Step
Example Container Image
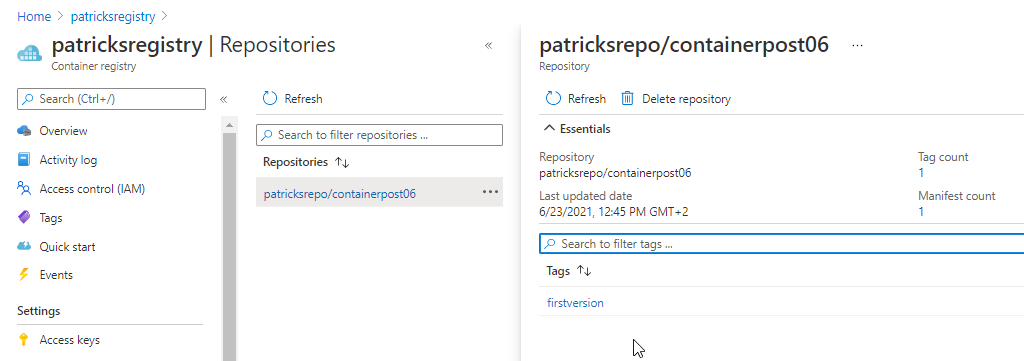
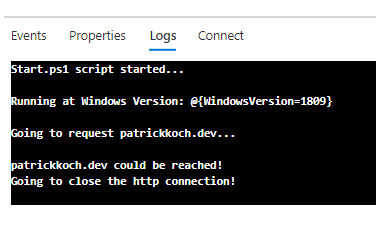
I’ve prepared a self-made Container Image, which will be used for creating an Azure Container Instance. It is available at my own Container Registry “patricksregistry” (see picture below). The Container is Windows based and after running it, a simple http-request to this webside is done (can be observed at the logs).
The content of the Dockefile can be seen in the snippet below:
FROM mcr.microsoft.com/dotnet/framework/runtime:4.8-windowsservercore-ltsc2019

WORKDIR "C:/Scripts"

ADD "Scripts/Start.ps1" "C:/Scripts"

ENTRYPOINT powershell -File Start.ps1
The mentioned http-request in implemented within the “Start.ps1” Powershell script.
The corresponding Dockerfile can be downloaded at:
https://github.com/patkoch/blog-files/tree/master/post6
Basics
Let’s start to create a Container Instance within Azure, by using the simple Example Container Image.
After choosing the Container Instances from the Azure Portal:
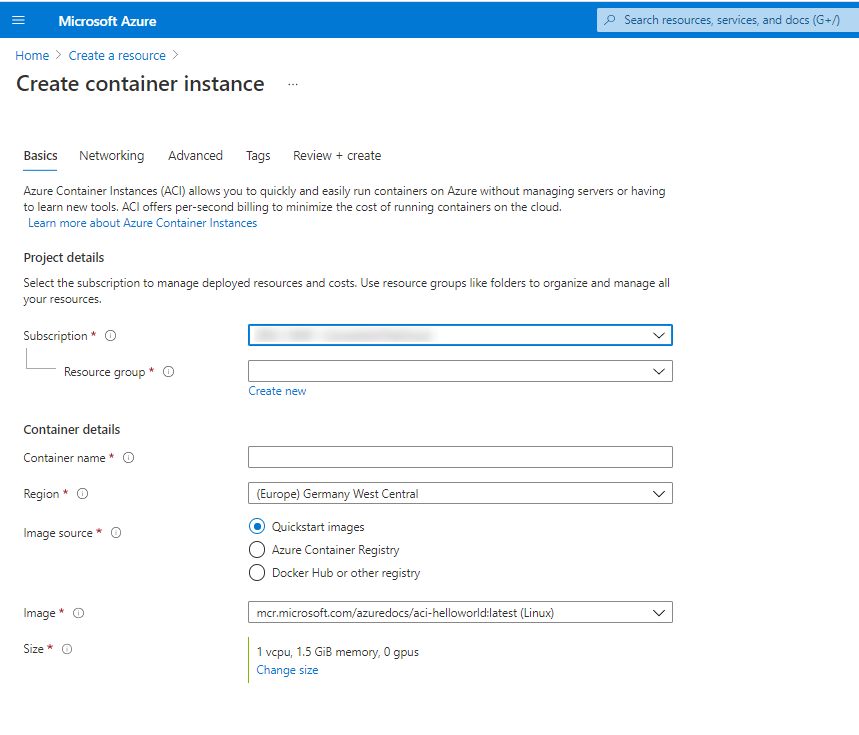
the Azure Portal already suggests to use some available Quickstart images (see picture below).
- Subscription: Your subscription should already be selected
- Resource group: Choose a resource group of your choice or create a new one
- Container name: Provide an arbitray name of your Container: just be aware of the naming convention
- Region: Select a region, which is close to your location
- Image source: As already mentioned: you’ve to decide whether you’d like to use a private/public registry (Docker Hub or other registry) or the Azure Container Registry
- Image: If Azure Container Registry was choosen, then you can select already available images from the menu (if you’ve provided some). If Docker Hub or other registry was choosen, then you’ve to manually enter the image
- OS type: Select Linux if your Container has a Linux Image as Base Image or Windows if it is a Windows based system.
- Size: Provide proper resources concerning CPU and Memory so that your Container can achieve a running state after the ACI deployment
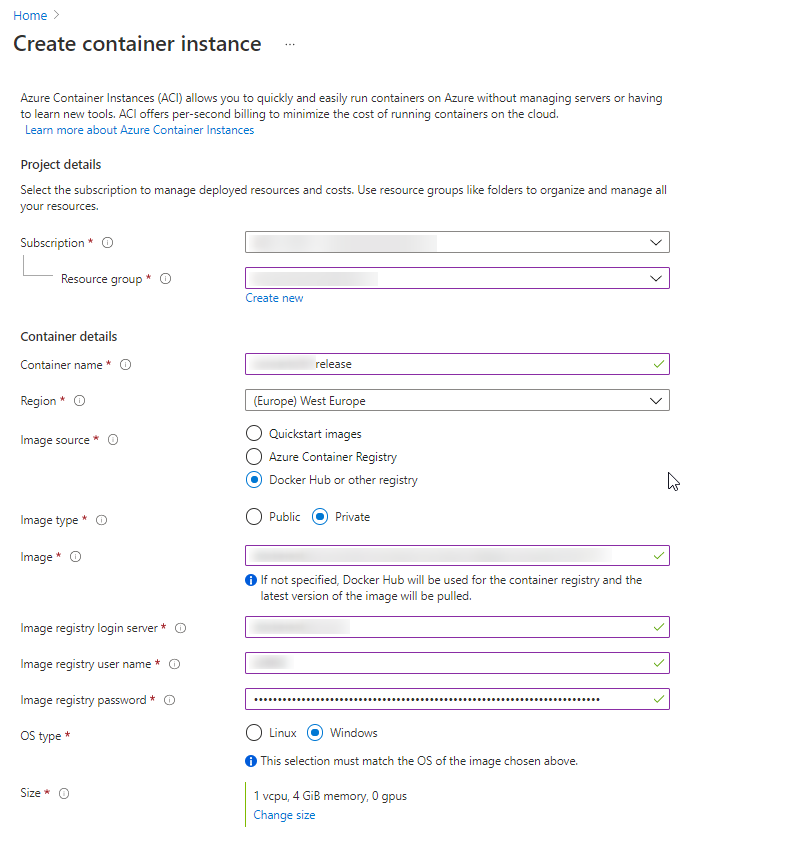
In addition if *Docker Hub or other registry" was selected: in that case you again have to distinguish whether the source of your Container Image is a public or a private registry. For the second choice, you’ve to provide the proper values for the login server and the corresponding user name and password, which can be seen below:
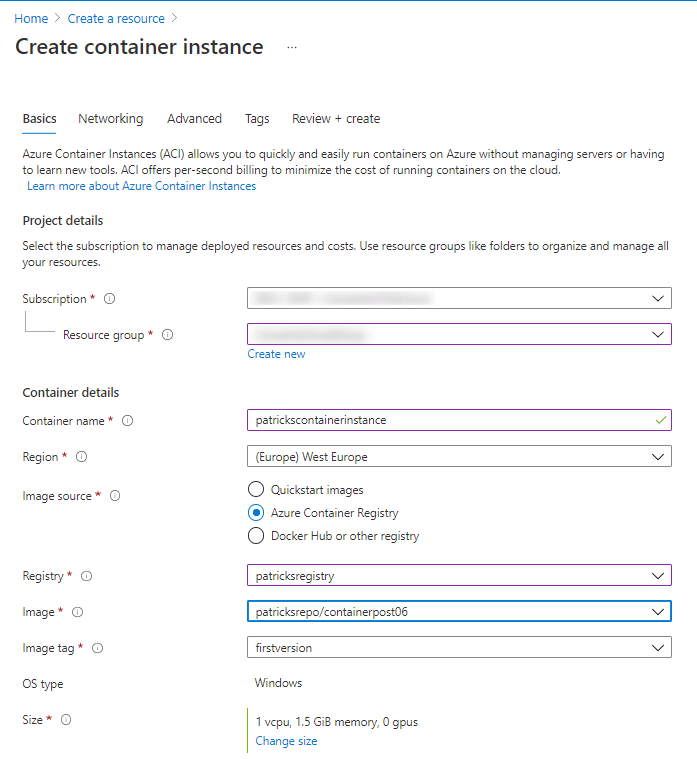
Let’s insert the proper data related to my Example Container Image: I’m going to name the Container Instance “patrickscontainerinstance”, which is stored - of course - at my own mentioned Container Registry named “patricksregistry. The Image is named “patricksrepo/containerpost06”, the Image Tag is “firstversion”. As OS type, I’ve to choose “Windows”. As the Container Image is managed at an “Azure Container Registry”, I don’t have to provide some credentials.
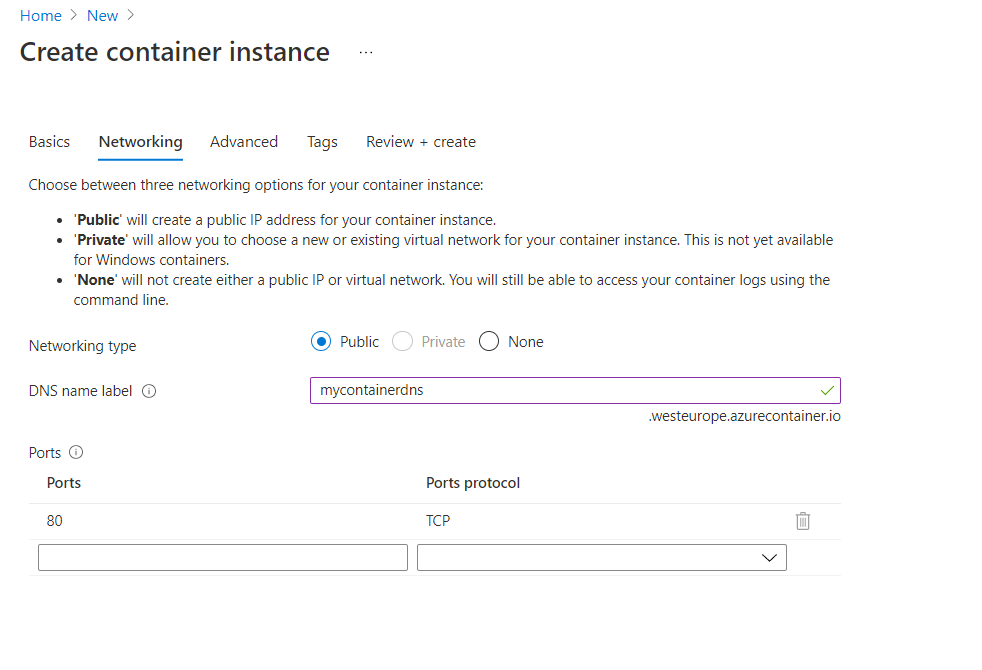
Networking
The next tab Networking provides a form to enter ports, which you’d like to reveal and whether your Container should get an IP address or not. I suggest to choose “public”, so that the Container gets an IP. If the Container needs to access e.g.: a File share, this won’t work without choosing “public” (“private” option does not work for Windows Container).
Advanced
At this section, you’ve to provide the proper Command override command string. According to my Example Container, it fits by providing following information:
- Shell Environment: At my example, I’m using “Powershell” as Shell Environment
- Full Path to the “Start.ps1” Script: Script, which is called at the Entrypoint of the Dockerfile
The documentaton for the Command override can be found here:
https://docs.microsoft.com/en-us/azure/container-instances/container-instances-start-command
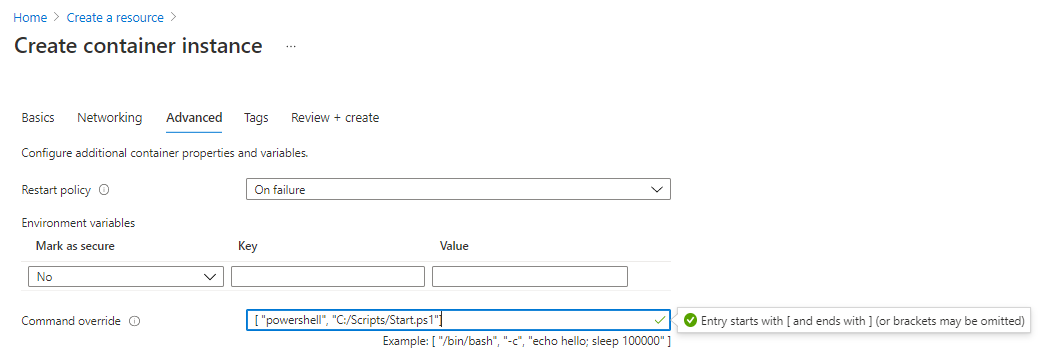
The working Command override string for my Container can be seen below:
[ "powershell", "C:/Scripts/Start.ps1" ]
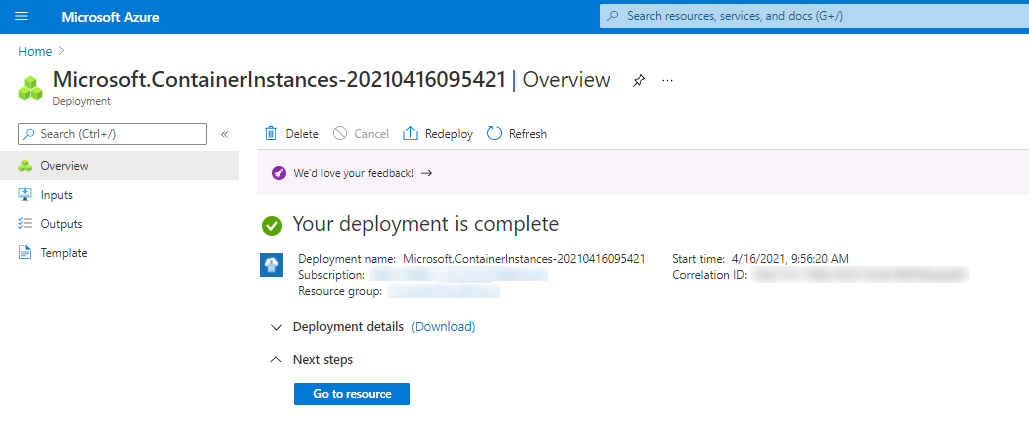
Deployment
After applying the settings and waiting for a few minutes for getting the image pulled, the Azure Container Instance is ready.
You can access the Container by choosing “Connect” and entering “cmd” (for Windows Container), respectively by choosing “Logs” you’d see the related outputs, which are implemented within the Powershell Script File “Start.ps1”
No comments:
Post a Comment