In this article, we will look into the process of creating an Amazon Machine Image on AWS in detail. An Amazon Machine Image (AMI) is a type of virtual appliance that is used to create a virtual machine within the Amazon Elastic Compute Cloud (EC2). To create an Amazon Machine Image (AMI) first log in to AWS Account. Then go to Services Section and Click on EC2. Then click on Launch instances and complete the seven steps.
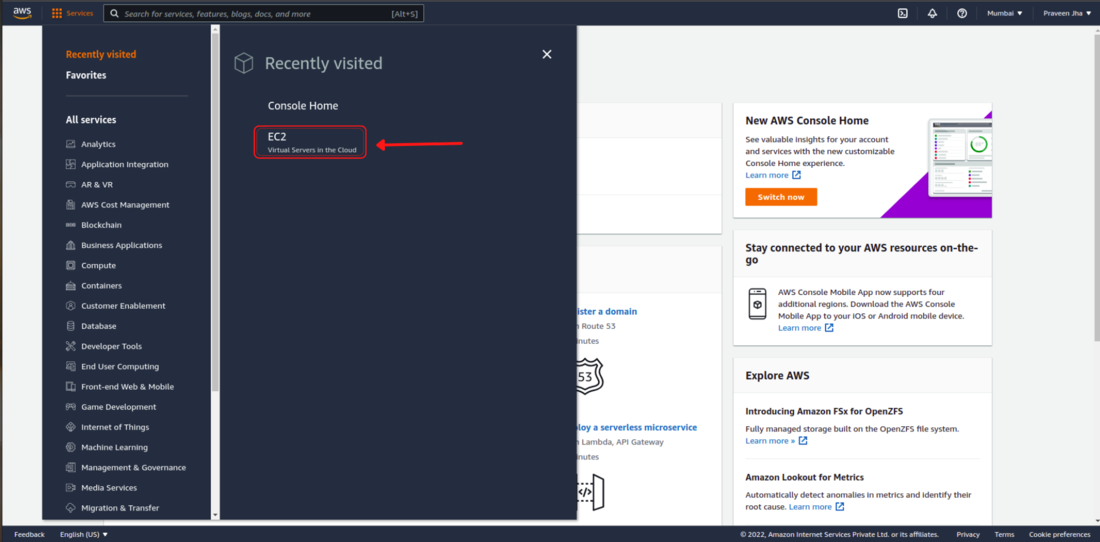
Follow the below steps to create an AMI on AWS:
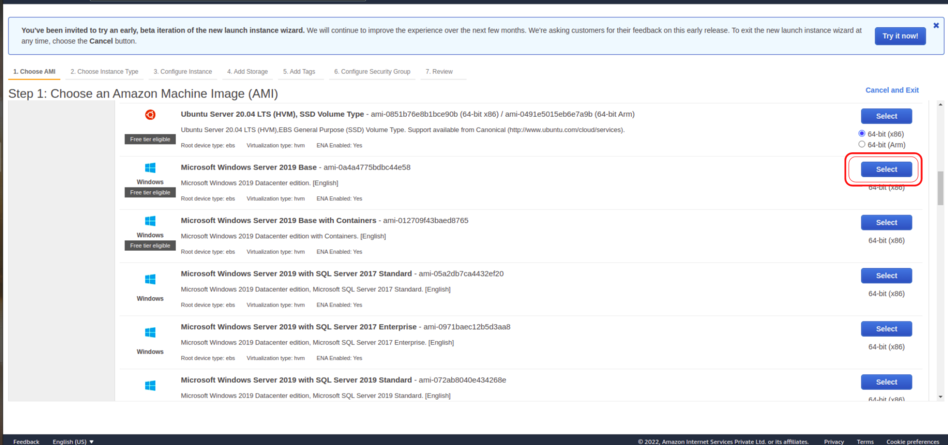
Step 1: Choose an Amazon Machine Image (AMI).
An Amazon Machine Image (AMI) is a template consisting of operating system, application server, application. When you create an Instance you have to select the Operating System which you want to use.
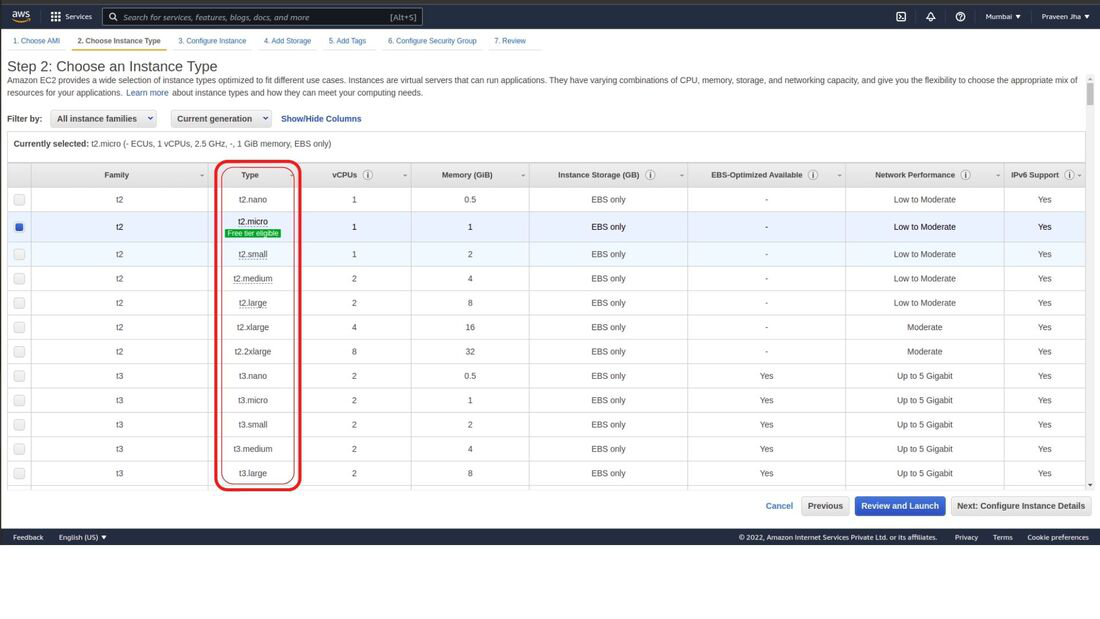
Step 2: Choose an Instance Type.
- Instances are virtual servers that can run applications.
- Instance Type is all about selecting the hardware Configuration of the machine which you are creating on AWS.
These are some Configurations you will get to select in Instance Type:
- What will be the type of Instance?
- How many Processors will be there?
- How much RAM will be there?
- what will be the type of Instance storage?
- what will be the network performance?
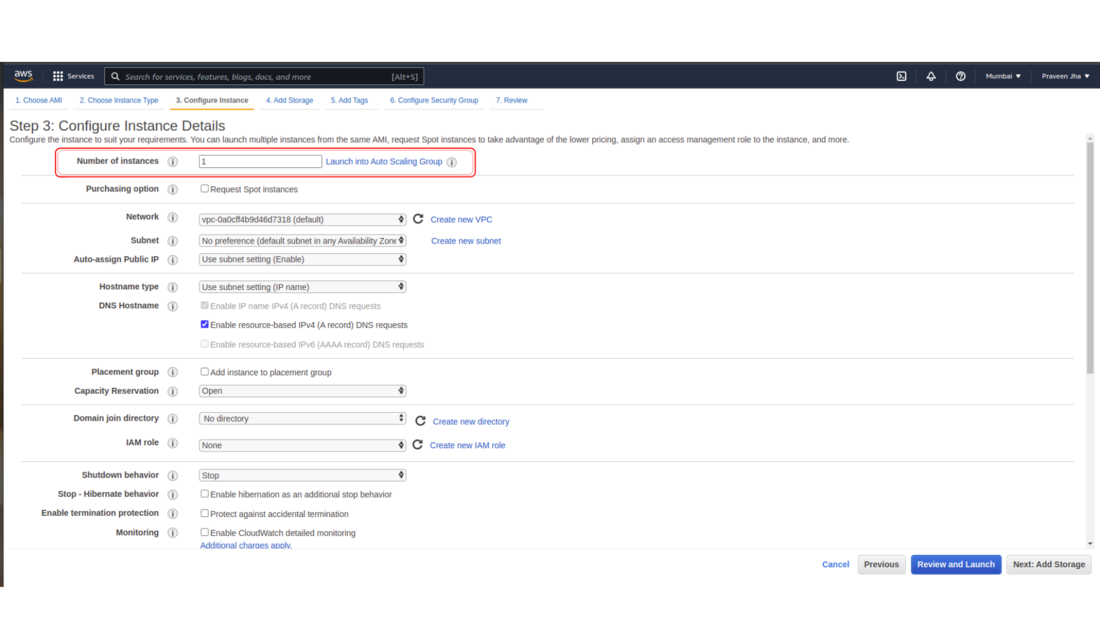
Step 3: Configure Instance Details
Configure the instance to suit your requirements. You can launch multiple instances from the same Amazon Machine Image (AMI) at a time.
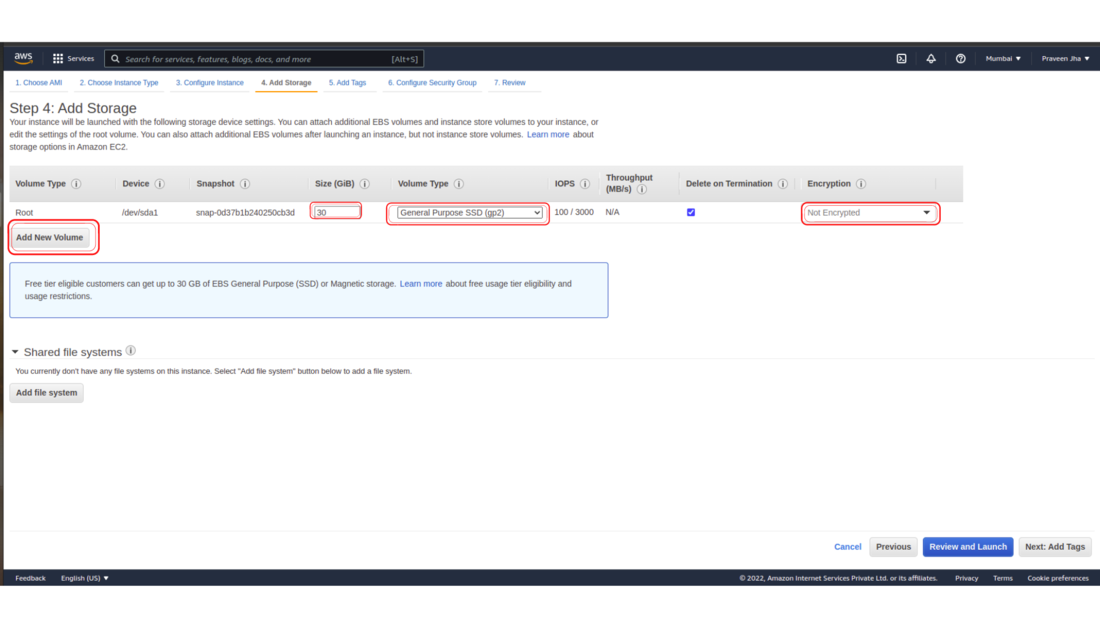
Step 4: Add Storage.
You can attach additional EBS volumes to your instance, edit the settings or increase the size of the root volume. You can also attach additional EBS volumes after launching an instance, but not instance store volumes. You can change the volume type and can add the Encryption.
Step 5: Add Tags.
Tags help you manage your instances, images, and other Amazon EC2 resources, you can assign your own metadata to each resource in the form of tags. Tags enable you to categorize your AWS resources in different ways.
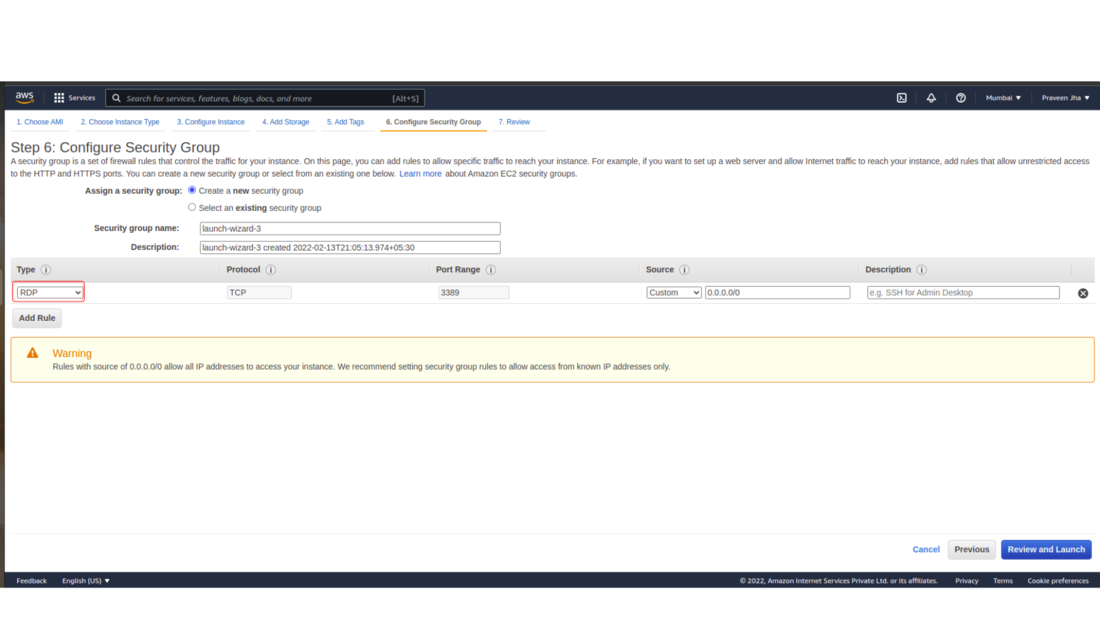
Step 6: Configure Security Group.
A security group is a set of firewall rules that control the traffic for your instance. On this page, you can add rules to allow specific traffic to reach your instance. Once an AWS machine is created, From your personal laptop/pc you should be able to connect and able to work with that instance. You can successfully connect to the windows machine only when the port is open.
Port: A port is nothing but a point to contact. For windows, you need to open the RDP port.
Step 7: Review Instance Launch.
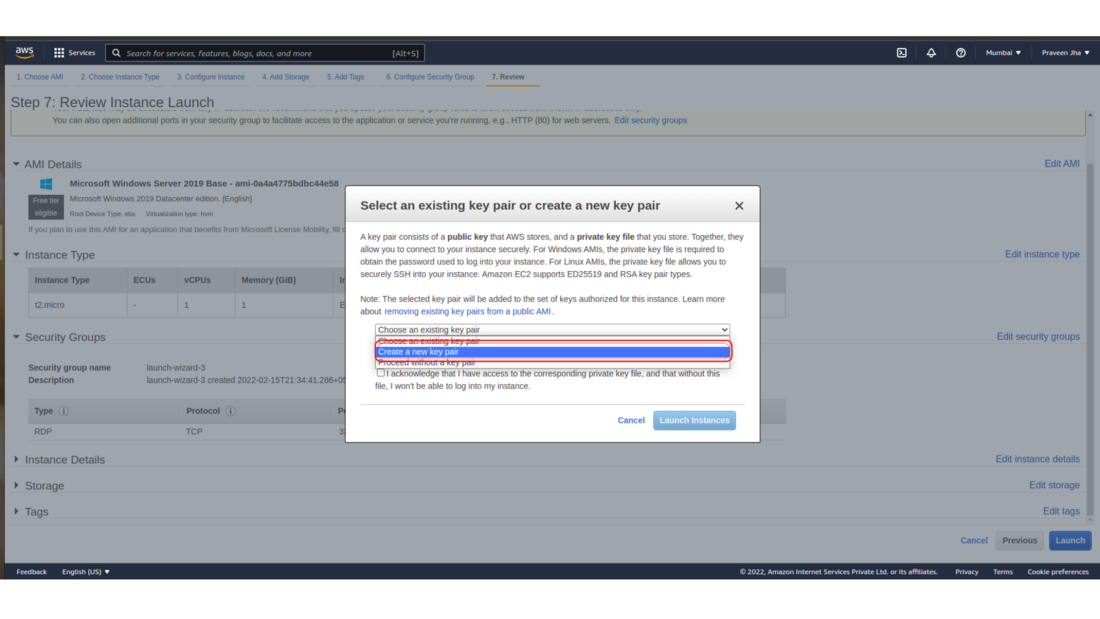
- Here you can review your instance launch details. You can go back to edit changes for each section.
- Once you clicked on the Launch button you need to select or download the key pair.
- After clicking on the Launch Instance button your Instance will be in running status.
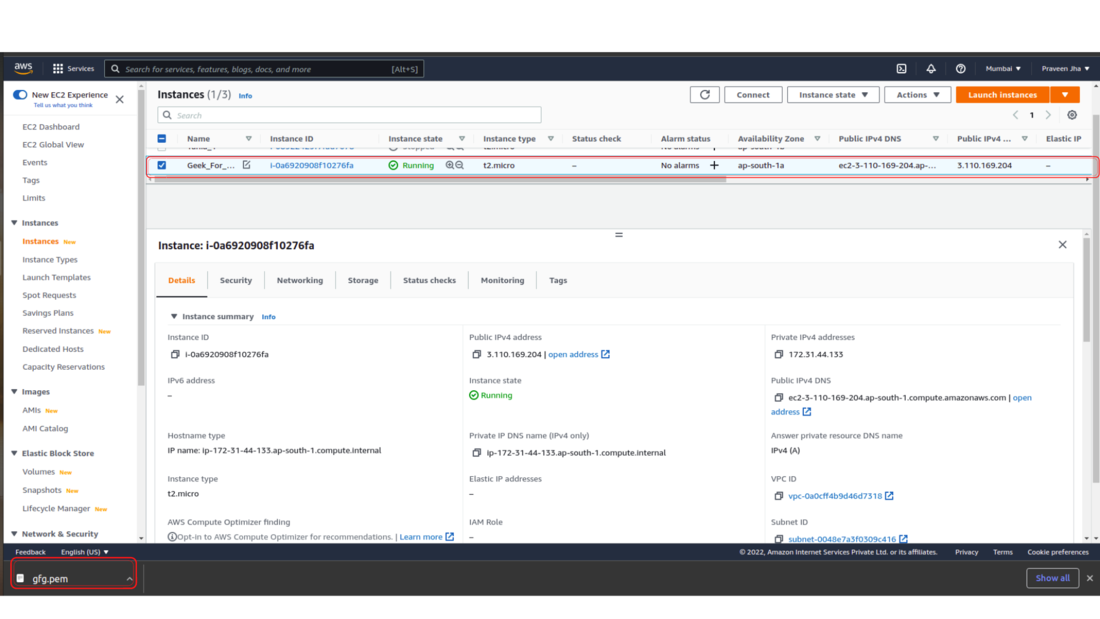
Now you have successfully Created an Instance on AWS.

No comments:
Post a Comment