Steps To Deploy Web Application Using AWS CodePipeline
We will be performing 4 steps to deploy a web application
Step 1: Create an S3 bucket for your application
Note: If you don’t have an AWS account check our blog on how to create
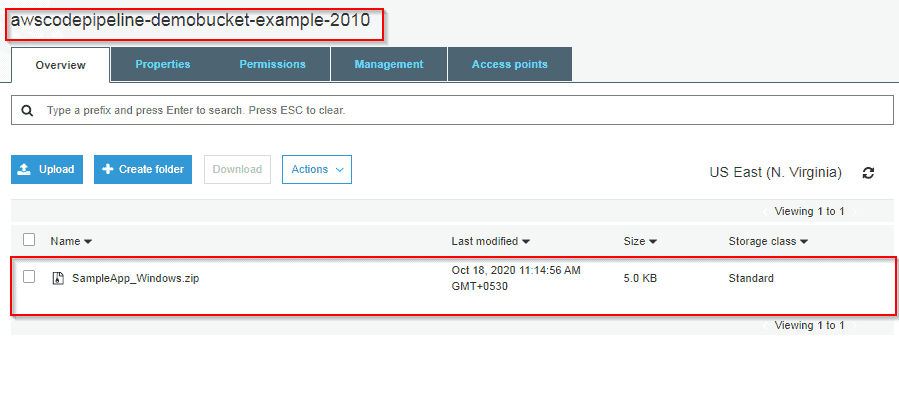
1) Open the Amazon S3 console and Choose Create bucket and In Bucket name, enter a name for your bucket, and also don’t forget to enable Versioning.
2) Next, download the sample code and save it into a folder or directory on your local computer.
Choose one of the following. Choose SampleApp_Windows.zip if you want to follow the steps in this tutorial for Windows Server instances. (Do not Unzip the file while Uploading)
–> If you want to deploy to Amazon Linux instances using CodeDeploy, download the sample application here:
–> If you want to deploy to Windows Server instances using CodeDeploy, download the sample application here:
3) In the S3 console, Upload code in the bucket you created.

Step 2: Create Amazon EC2 Windows instances and install the CodeDeploy agent
1) Create an IAM role that will be required to grant permission to EC2 instance. Select the policy named AmazonEC2RoleforAWSCodeDeploy to create.

2) Launch instance on which our code will be deployed.
3) Just remember to add the IAM role that we have created. and In Auto-assign Public IP, choose Enable. Expand Advanced Details, and in User data, As text selected, enter the following:
<powershell>
New-Item -Path c:\temp -ItemType “directory” -Force
powershell.exe -Command Read-S3Object -BucketName bucket-name/latest -Key codedeploy-agent.msi -File c:\temp\codedeploy-agent.msi
Start-Process -Wait -FilePath c:\temp\codedeploy-agent.msi -WindowStyle Hidden
</powershell>
4) On the Configure Security Group page, allow port 80 communication so you can access the public instance endpoint. Then follow the default configuration and launch the instance

Step 3: Create an application in CodeDeploy
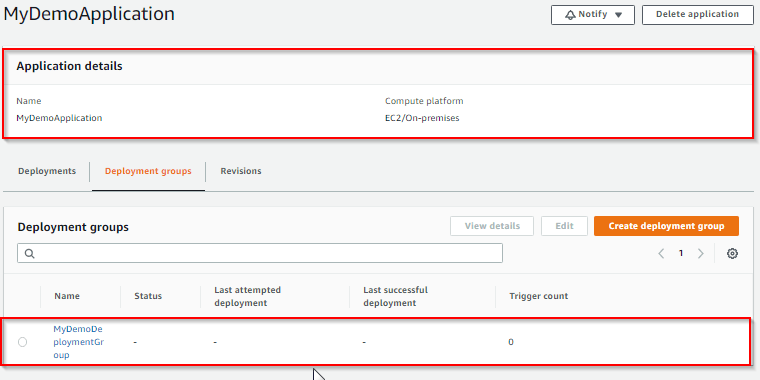
1) Initially create an application in CodeDeploy, and In Compute Platform, choose EC2/On-premises.Choose to Create application.
2) On the page that displays your application, choose to Create a deployment group. In service, role creates an IAM role under code deploy category. Under Deployment type, choose In-place.
3) Under Environment configuration, choose Amazon EC2 Instances.
4) Under Deployment configuration, choose CodeDeployDefault.OneAtaTime.
5) Under Load Balancer, clear Enable load balancing, leave the defaults then choose to Create a deployment group.

Step 4: Create your first pipeline in CodePipeline
1) Open the CodePipeline console. Choose pipeline settings, Enter your desired name and in Service role, Choose New service role to allow CodePipeline to create a new service role in IAM. To know more about AWS IAM refer to our blog on IAM.
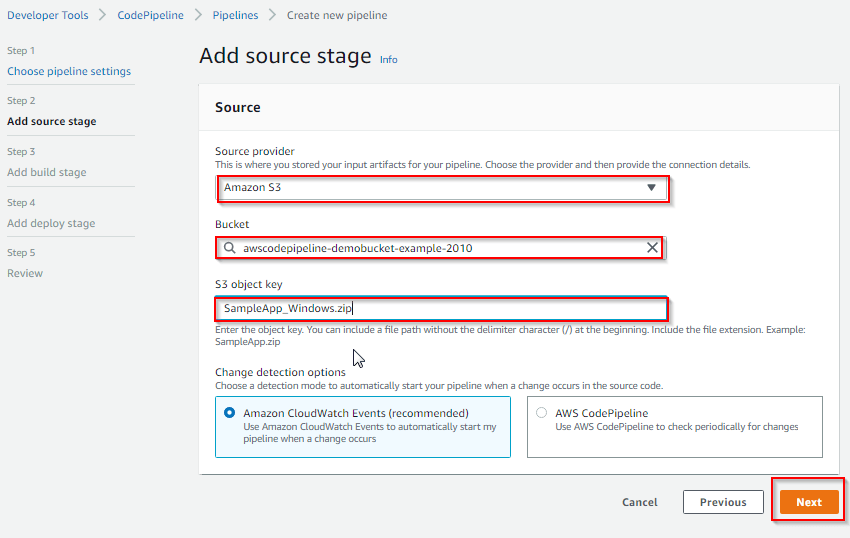
2) In the Add source stage, select Source provider, choose Amazon S3. Under the S3 object key, enter the object key with or without a file path, and remember to include the file extension.
3) In the Add build stage, choose to Skip build stage, and then accept the warning message by choosing Skip again. Choose Next.
4) In the Add deploy stage, in Deploy provider, choose AWS CodeDeploy.Then enter your application name or choose the application name from the list. In the Deployment group, enter MyDemoDeploymentGroup, or choose it from the list, and then choose Next.

Congratulations! You just created a simple pipeline in CodePipeline. you can verify that by coping EC2 Public DNS address and then past it into the address bar of your web browser

No comments:
Post a Comment