APPLICATION GROUPS :
Create a RemoteApp group
If you've already created a host pool and session host VMs using the Azure portal or PowerShell, you can add application groups from the Azure portal with the following process:
Sign in to the Azure portal.
Search for and select Azure Virtual Desktop.
You can add an application group directly or you can add it from an existing host pool. Choose an option below:
Select Application groups in the menu on the left side of the page, then select + Add.
Select Host pools in the menu on the left side of the screen, select the name of the host pool, select Application groups from the menu on the left side, then select + Add. In this case, the host pool will already be selected on the Basics tab.
On the Basics tab, select the Subscription and Resource group you want to create the app group for. You can also choose to create a new resource group instead of selecting an existing one.
Select the Host pool that will be associated with the application group from the drop-down menu.
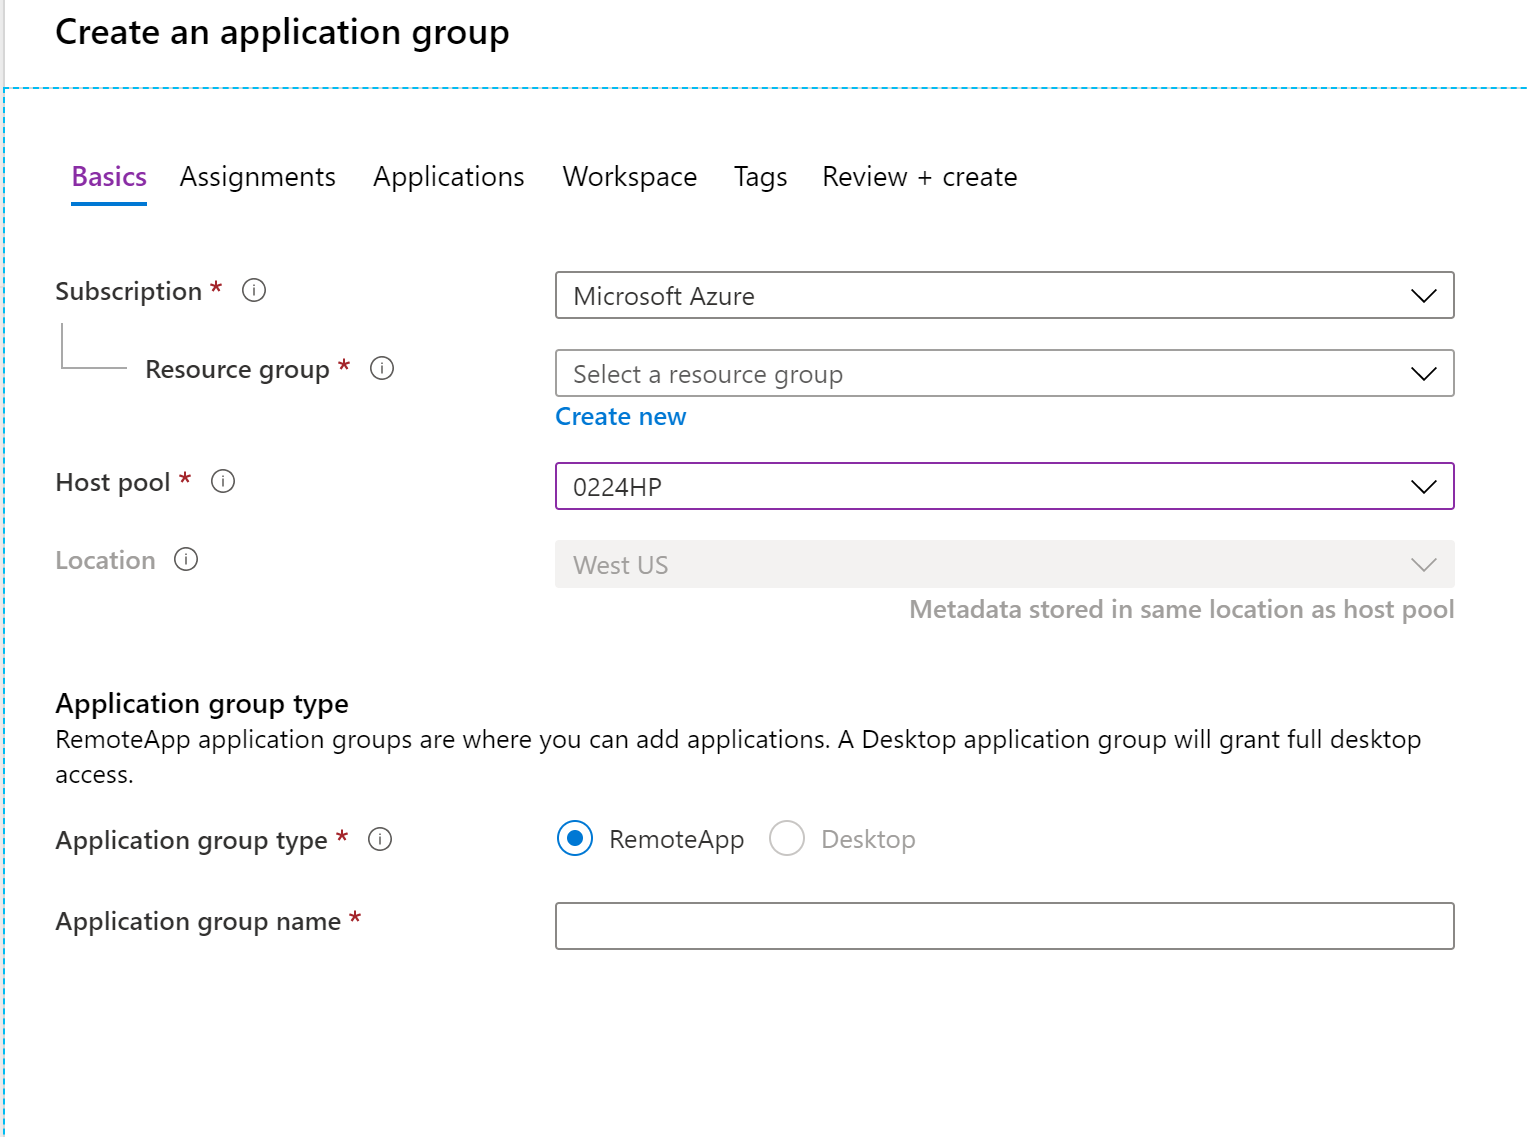
Select RemoteApp under Application group type, then enter a name for your RemoteApp.

Select Next: Assignments > tab.
To assign individual users or user groups to the app group, select +Add Azure AD users or user groups.
Select the users you want to have access to the apps. You can select single or multiple users and user groups.
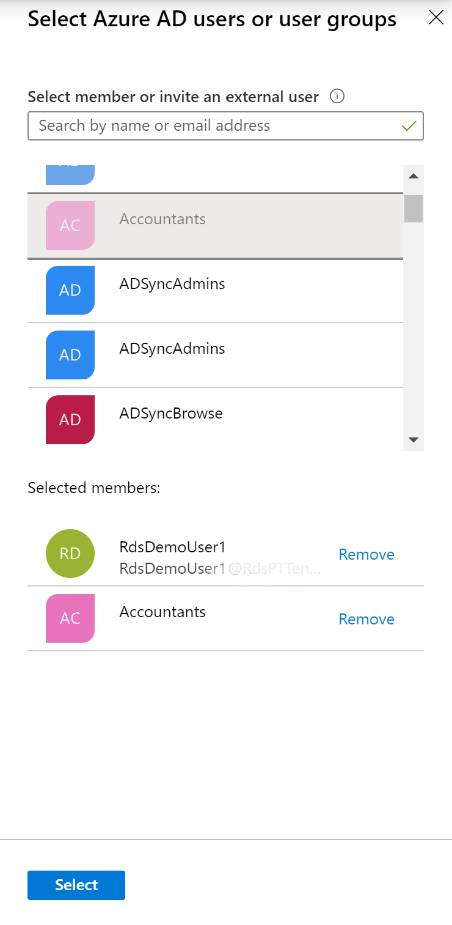
Select Select.
Select Next: Applications >, then select +Add applications.
To add an application from the start menu:
- Under Application source, select Start menu from the drop-down menu. Next, under Application, choose the application from the drop-down menu.
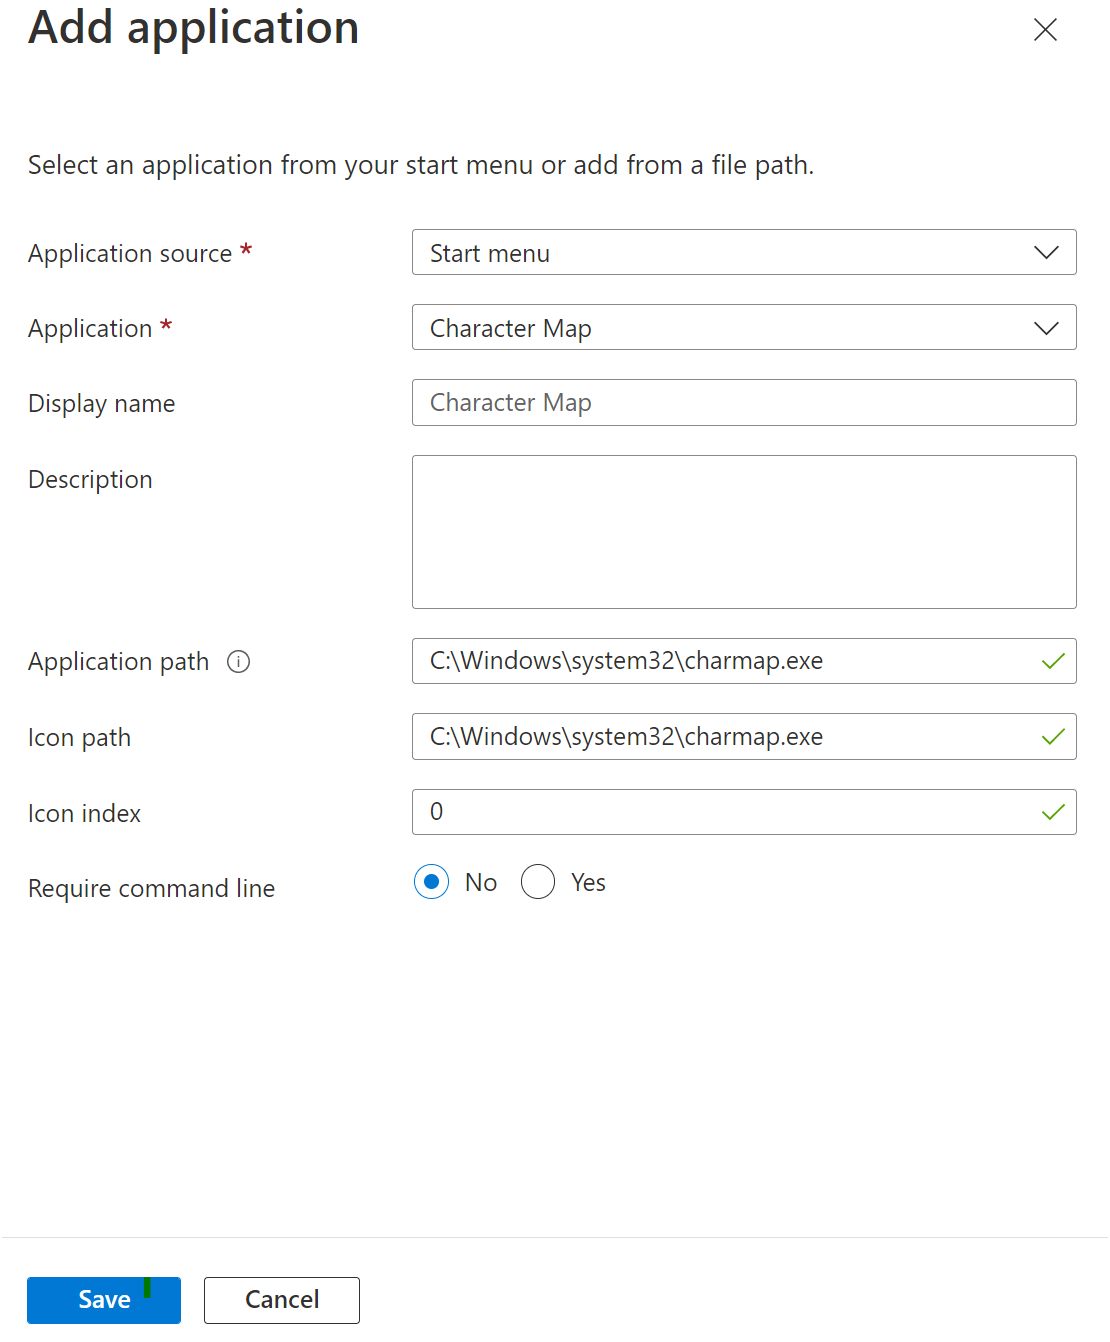
In Display name, enter the name for the application that will be shown to the user on their client.
Leave the other options as-is and select Save.
To add an application from a specific file path:
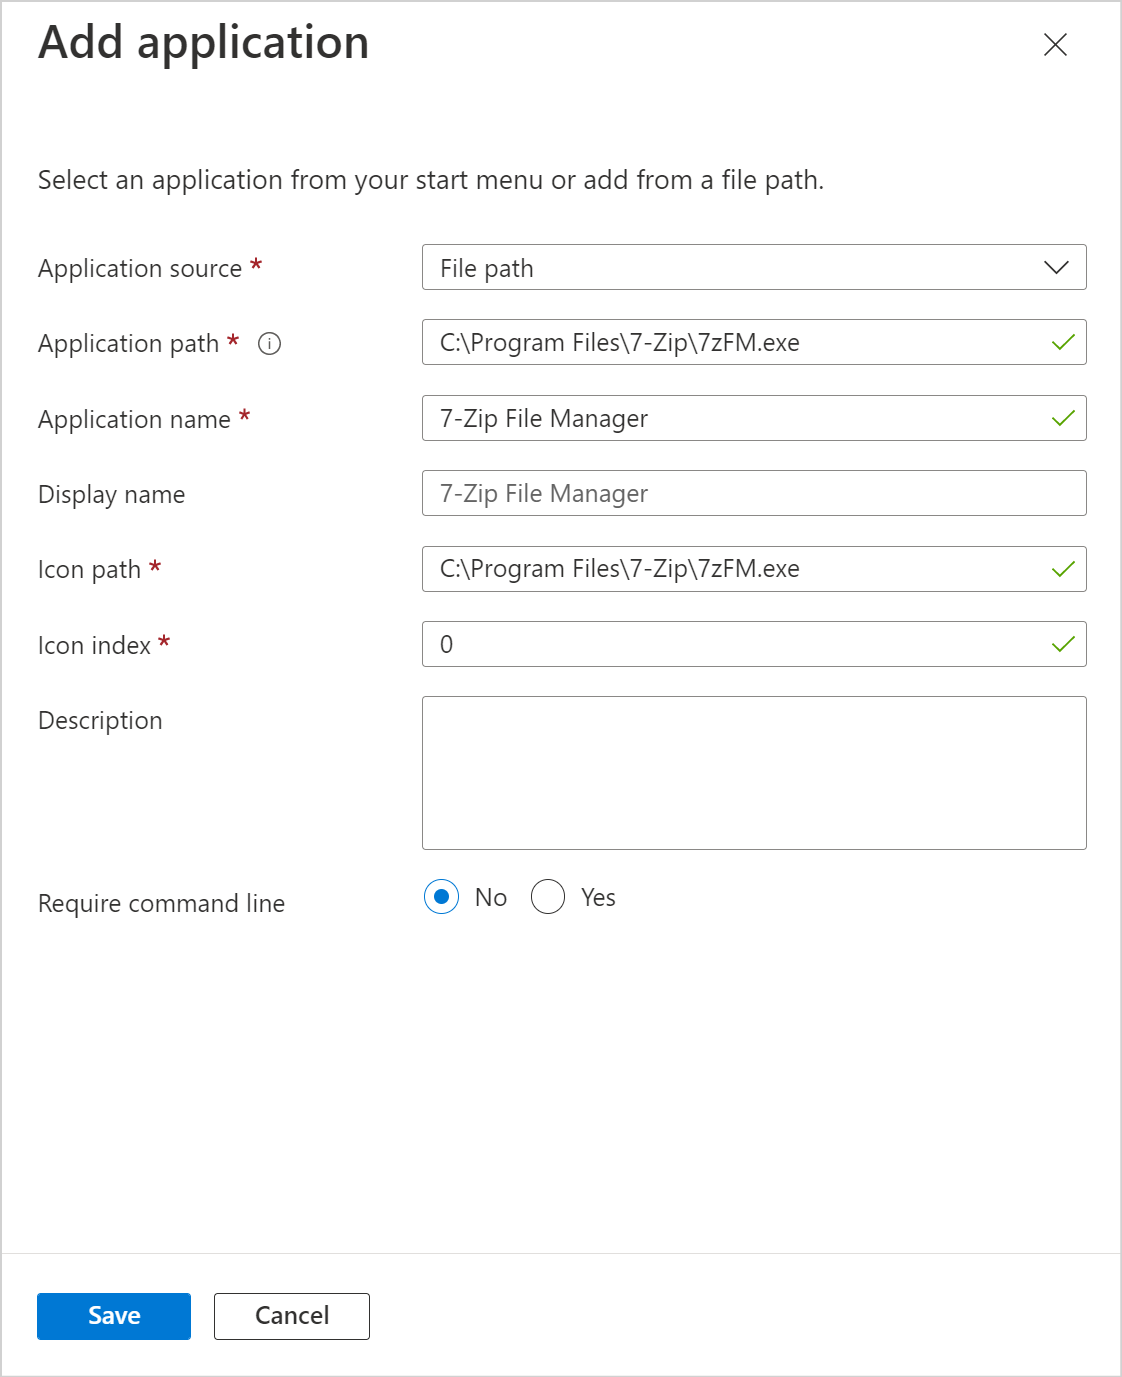
Under Application source, select File path from the drop-down menu.
In Application path, enter the path to the application on the session host registered with the associated host pool.
Enter the application's details in the Application name, Display name, Icon path, and Icon index fields.
Select Save.
Repeat this process for every application you want to add to the application group.
Next, select Next: Workspace >.
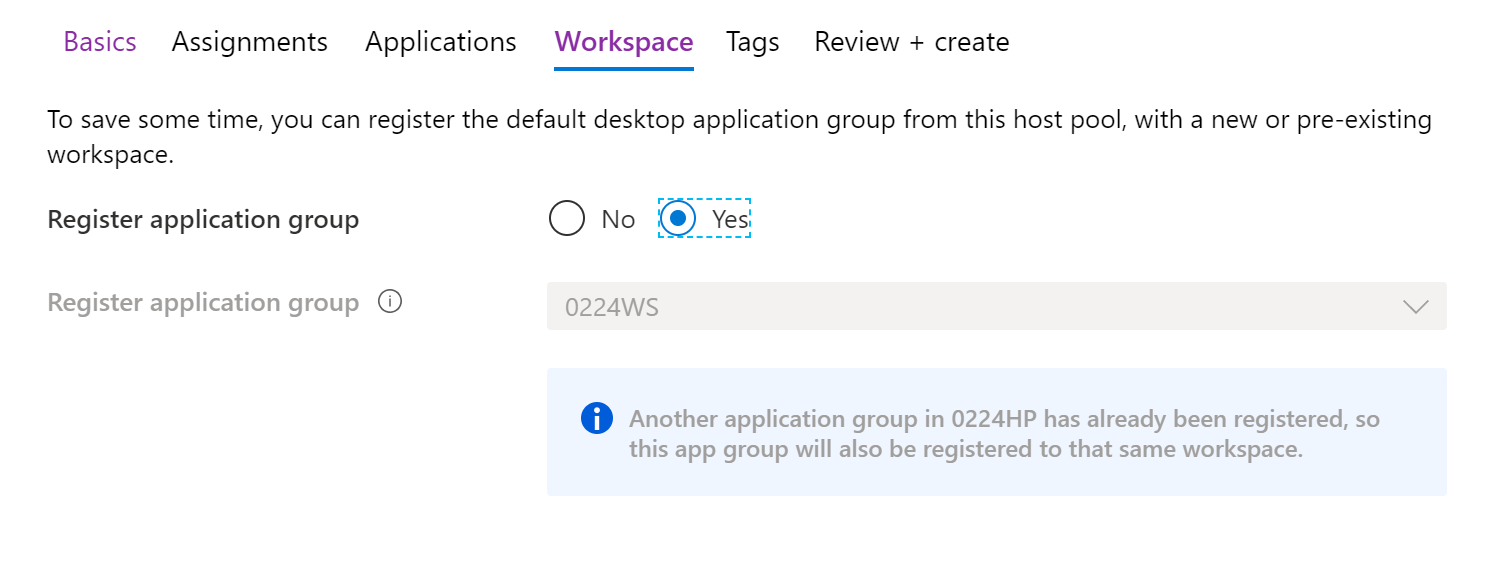
If you want to register the app group to a workspace, select Yes for Register application group. If you'd rather register the app group at a later time, select No.
If you select Yes, you can select an existing workspace to register your app group to.
Note
You can only register the app group to workspaces created in the same location as the host pool. Also. if you've previously registered another app group from the same host pool as your new app group to a workspace, it will be selected and you can't edit it. All app groups from a host pool must be registered to the same workspace.
Optionally, if you want to create tags to make your workspace easy to organize, select Next: Tags > and enter your tag names.
When you're done, select Review + create.
Wait a bit for the validation process to complete. When it's done, select Create to deploy your app group.
The deployment process will do the following things for you:
- Create the RemoteApp app group.
- Add your selected apps to the app group.
- Publish the app group published to users and user groups you selected.
- Register the app group, if you chose to do so.
- Create a link to an Azure Resource Manager template based on your configuration that you can download and save for later.
Important
You can only create 500 application groups for each Azure Active Directory tenant. We added this limit because of service limitations for retrieving feeds for our users. This limit doesn't apply to app groups created in Azure Virtual Desktop (classic).
Edit or remove an app
To edit or remove an app from an app group:
Sign in to the Azure portal.
Search for and select Azure Virtual Desktop.
You can either add an application group directly or from an existing host pool by choosing one of the following options:
- To add a new application group directly, select Application groups in the menu on the left side of the page, then select the app group you want to edit.
- To edit an app group in an existing host pool, select Host pools in the menu on the left side of the screen, select the name of the host pool, then select Application groups in the menu that appears on the left side of the screen, and then select the app group you want to edit.
Select Applications in the menu on the left side of the page.
If you want to remove an application, select the check box next to the application, then select Remove from the menu on the top of the page.
If you want to edit the details of an application, select the application name. This will open up the editing menu.
When you're done making changes, select Save.

No comments:
Post a Comment