Storage account and Blob service configuration
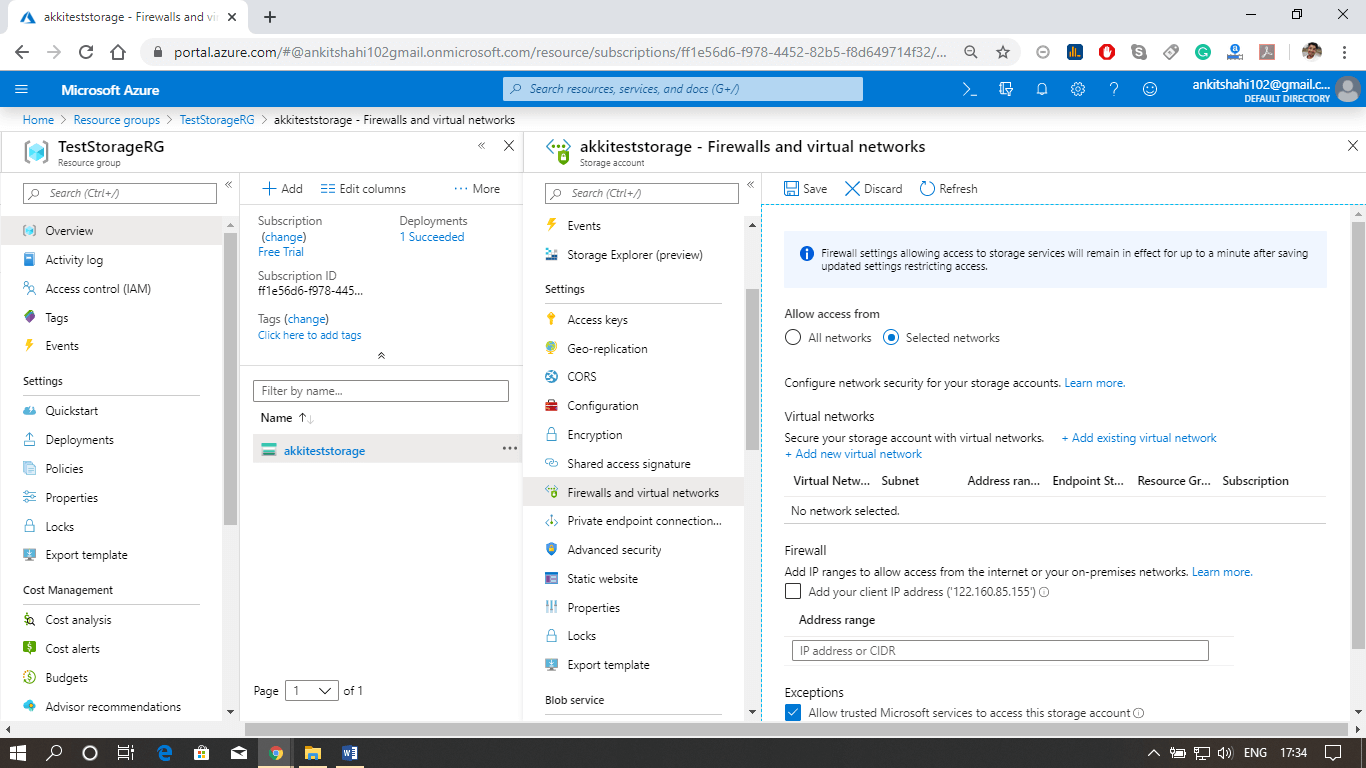
The first key configuration area is related to the network, which is a storage firewall and virtual networks. Every storage account in Azure has its storage firewall. Within the firewall, we can configure the following rules.
- A set of rules that we can configure is to allow connection from a specific virtual network. If we have an Azure virtual network, we can configure it here to enable the connections from the workloads.
- The second area of a rule is IP address ranges. We can specify an IP address range from where we won't allow the connections to the storage account to access the data.
- The third one is enabling connections from certain Azure services. So, we can specify exceptions in such a way that the connections from trusted Azure services are allowed.
We need to remember that there is a storage firewall associated with the storage account in which we can configure three types of rules.
- We can specify the virtual networks from which the connections are allowed.
- We can specify allowed IP range from where the connections are allowed.
- We can define some exceptions.
Custom Domain
We can configure a custom domain for accessing the block data in our storage account. The default endpoint will be the storage account name ".blob.core.windows.net". But in place of that, we can have our domain for the default storage account URL. We can configure our custom domain also. We need to specify our custom domain as "customdomain/container/myblob" to access the specific blob.
There are two fundamental limitations that we need to understand when we are using custom domains.
- All Azure storage does not natively support HTTPS with the custom domains. We can currently use Azure CDN access blobs by using custom domains over HTTPS.
- Storage accounts currently support only one custom domain name per account. So we can use only one custom domain for all the services within that storage account.
Content delivery network
The Azure content delivery Network (CDN) caches static content at strategically placed locations to provide maximum throughput for delivering content to users. So the most crucial advantage of CDN is providing the content to the users in the most optimal way. So let's see how this works.
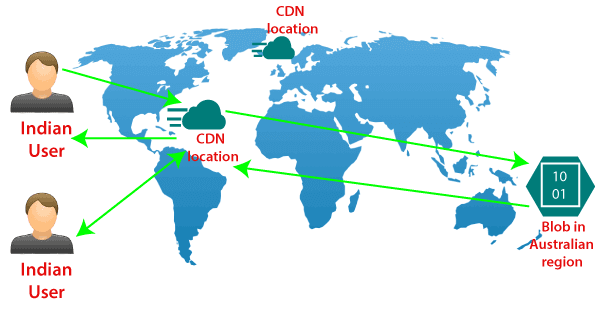
We are assuming that we have the blob storage located in the Australia region. So we have most of the users in North India and South India. In that case, we can configure a CDN profile for North India and South India. For example - let's say a North Indian user is trying to access our blob located in the Australia region. So first of all, the request goes to the CDN location. And from the CDN location, the request will further go to blob in the Australian region. For the first user, the block content will be copied to the CDN location, and then eventually delivered to North Indian users. However, when the next North Indian user tries to access that block, they will be redirected to CDN location, and the content will directly be delivered to them from that location in North India itself because the block content is already cached in CDN location.
So from the second user onwards, the content delivery latency is significantly reduced.
Other Configuration areas:
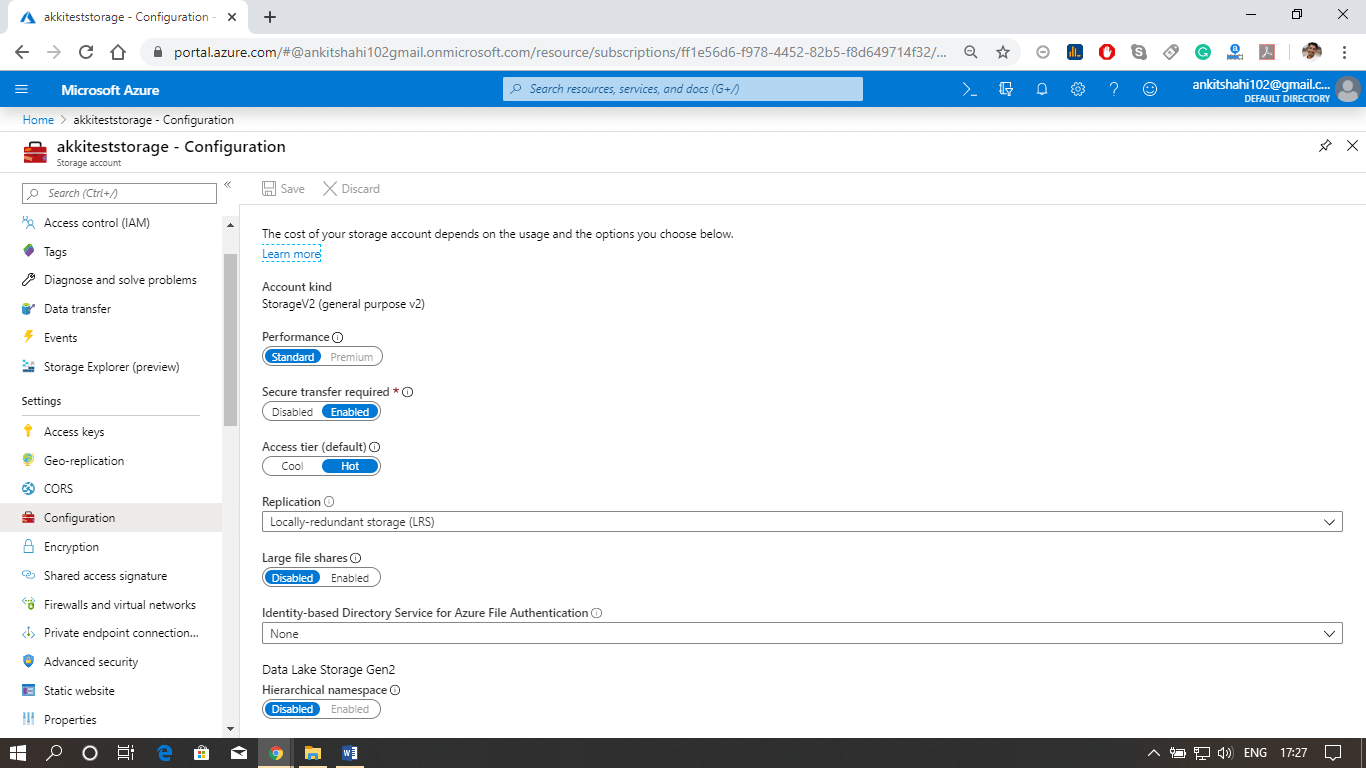
There are some different configuration areas such as performance tier, Access tier, replication strategy, secure transport required, etc.
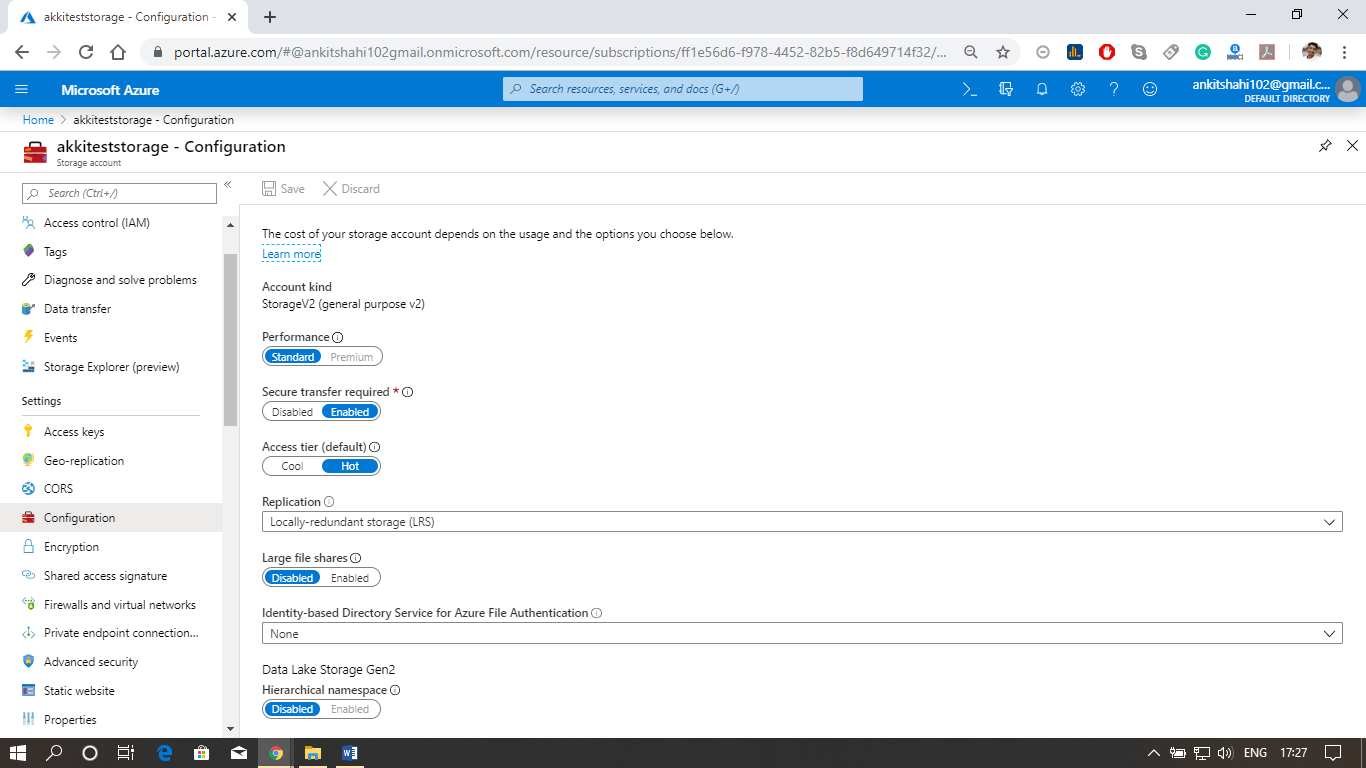
Some of them cannot be changed once the storage account is created. For example- performance tier, data lake generation 2 enabled or disabled. But we can switch on/off secure transport required, and we can change from hot to cool and cool to hot access type. We can change the replication strategy and Azure active directory authentication for Azure Files. So there are specific configuration settings that we can change.
Configuring Custom Domain for the storage account.
Let us see how to configure a custom domain for the Azure storage account, and also see some of the configuration settings we discussed above.
Step 1: Log into your storage account. Click on resource group then click on the storage account that you created
Step 2: The first thing we discussed above is firewalls and virtual networks. Here you can configure the virtual network from which you want to accept the connections to the storage account, or you can configure the IP address ranges from where you want to accept the connections and also you can specify some exceptions. For E.g., if you're going to allow the trusted Microsoft services to access this storage account to place the logs or to access the records. So, in that case, you can tick this, and also, if you want to allow read access to storage logging from any network, you can tick this. So there are some exceptions that you can make here.
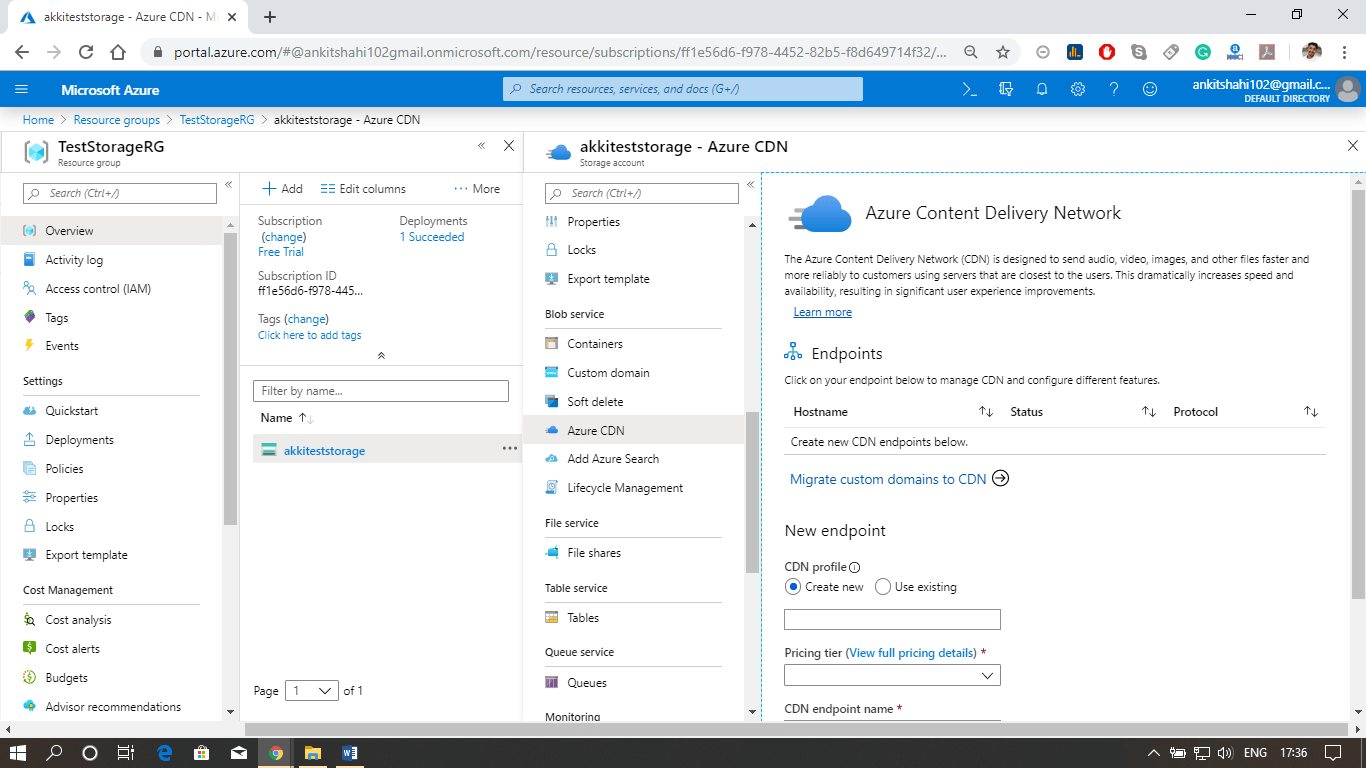
Step 3: Secondly, we discussed Azure CDN also. This is where you can configure the content delivery network endpoint. You can configure a CDN profile and map that CDN endpoint to the storage icon.
Custom domain
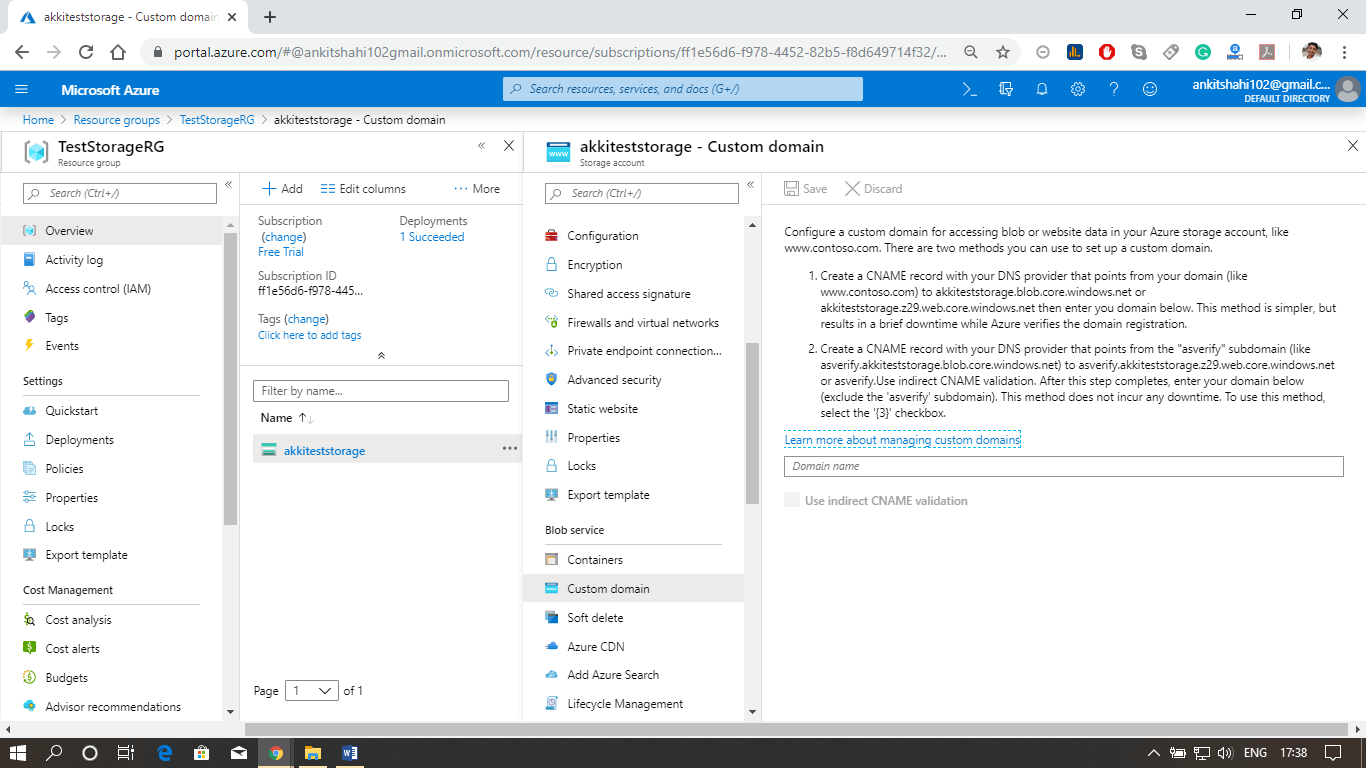
Step 1: Open your resource group, then your storage account, and click on the custom domain tab, as shown in the figure below.
Step 2: Log in to your domain provider Web-site then click on domain DNS settings and create a Cname record.
There are two ways to do it:
You can use normal Cname, or you can use asverify also.
Step 3: Select a Cname and assign a subdomain name and after that copy and paste your blob storage link that points from your domain (like www.smaple.com) to akkiteststorage.blob.core.windows.net
Step 4: After that, fill your subdomain name inside the Domain text box in the Custom Domain window of your Storage account. Then click on Save.
Step 5: Open the browser and fill your custom domain name
You can now see the image you stored in the blob storage.

No comments:
Post a Comment