Azure DevOps
Azure DevOps provides developer service to support team to plan work, collaborate on code development, build and deploy the application.
For example - We have a very simple application, and the only developer can make changes to that application. Once the changes are completed, the application will be submitted to testing, and once the testing has been done successfully, it will be published into production. However, if our application is a very complex application with multiple modules, and we have different developers working on the enhancement of various modules within the application. Then it will become very complex to merge changes done by different developers and also take it through testing and finally building the application and deploying the application into production. The more developer we have, the more complicated the process is going to be; precisely that complexity can be addressed using Azure DevOps. We can use Azure DevOps to deploy both infrastructure and code into Azure.
Services of Azure DevOps
Azure DevOps has a number of services that we can take advantage of to manage our code development, building the application, deploying the applications, and also making our developers collaborate.
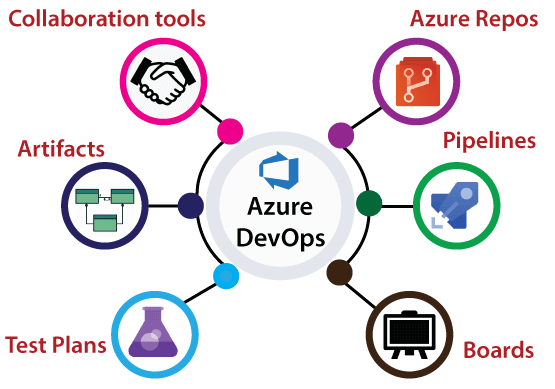
- Azure Repository: It is a set of version control tools that we can use to manage our code. We can either use Git repositories or team foundation version control for source control of our code. In Azure repositories, we can create multiple branches, and each branch represents a version of code, and we can provide access to a particular branch to a specific developer.
- Azure pipeline: It is a fully-featured continuous integration and continuous delivery service. It works with our preferred Git provider and can deploy to most major cloud services, which includes Azure services also. Using Azure pipelines, we can able to define a build pipeline to build our code and also a release pipeline to carry out release into a specific destination.
- Boards: It provides a rich set of capabilities, including native support for Scrum and Kanban, customizable dashboards, and integrated reporting. We can create different activities, track activities, and we can move activities between different buckets like Dun bucket, backlog bucket, in progress bucket, etc.
- Test Plan: It provides a browser-based test management solution with all capabilities required for planned manual testing, exploratory testing, etc.
- Artifacts: It is very important because most of our application will have some dependency on different packages, for example, NuGet package, npm, Maven package, etc. It also supports universal Packages, which can store any file or set of files.
- Collaboration tools: It includes a customizable team dashboards with configurable widgets to share information progress and trends. We can create Wiki packages for sharing information, and also we can configure some notifications.
Structure of DevOps
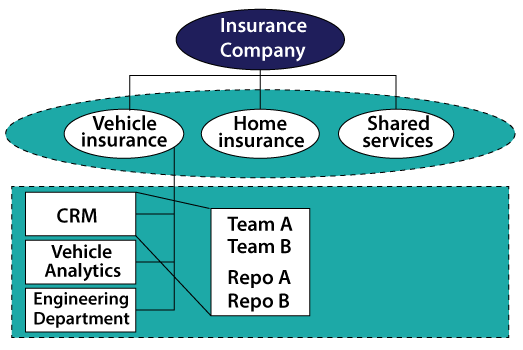
Organization: An organization in Azure DevOps is a mechanism for organizing and connecting groups of related projects. For example - business divisions, regional divisions, or other enterprise structures.
Projects: A project contains a following set of features in Azure DevOps:
- Boards and backlogs for agile planning
- Pipelines for continuous integration and deployment.
- It contains repositories for version control, management of source code, and artifacts.
- It keeps continuous test integration throughout the project life cycle.
Azure DevOps Portal
Azure DevOps portal is a centralized portal where we can manage all the Azure DevOps services. We need to create an account on the Azure portal to avail of all of the facilities. For the training purpose, we will take the free services. To create an Azure portal, organization, and project follow these steps carefully.
Step 1: Go to https://Azure.microsoft.com/en-in/services/devops/ and click on Start Free.
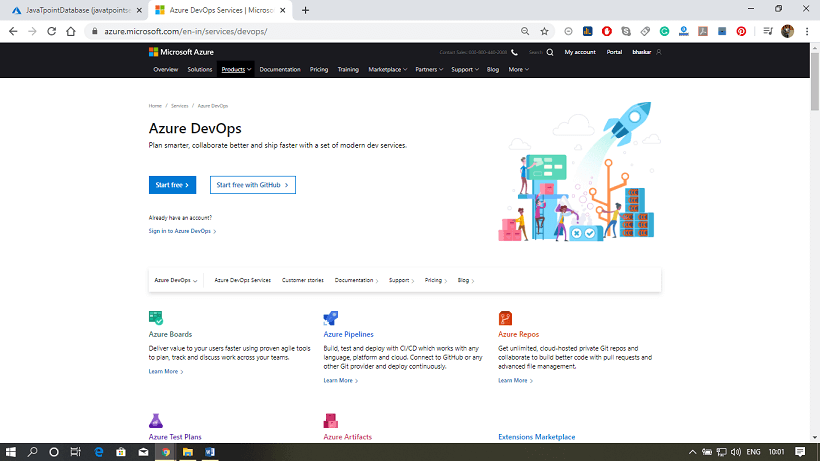
Step 2: After that, it will ask you to fill the details and region. Fill the details and click next.
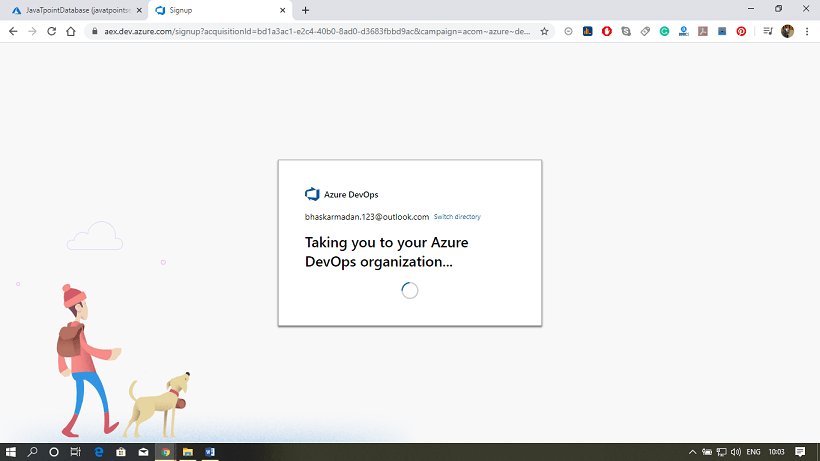
Step 3: Your Azure DevOps account has been created. And now, we will create an organization and create a project inside the organization.
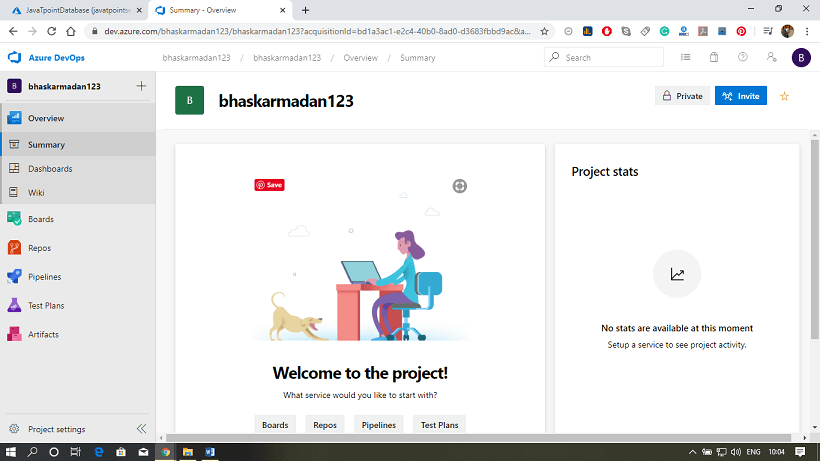
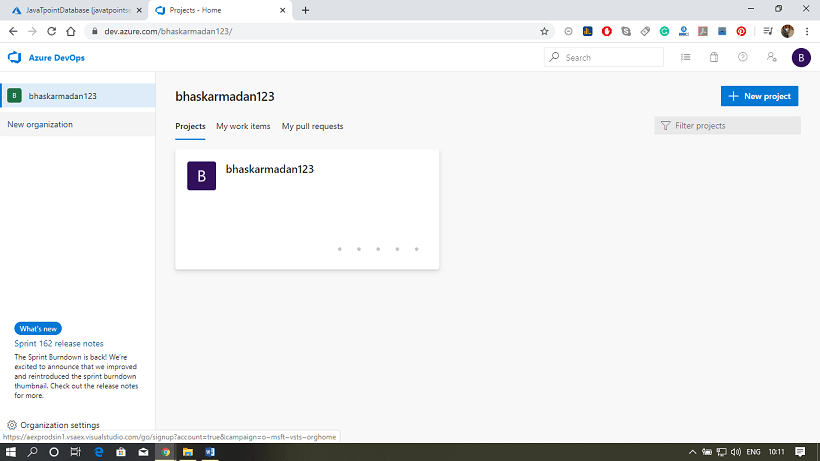
Step 4: Click on New Organization.
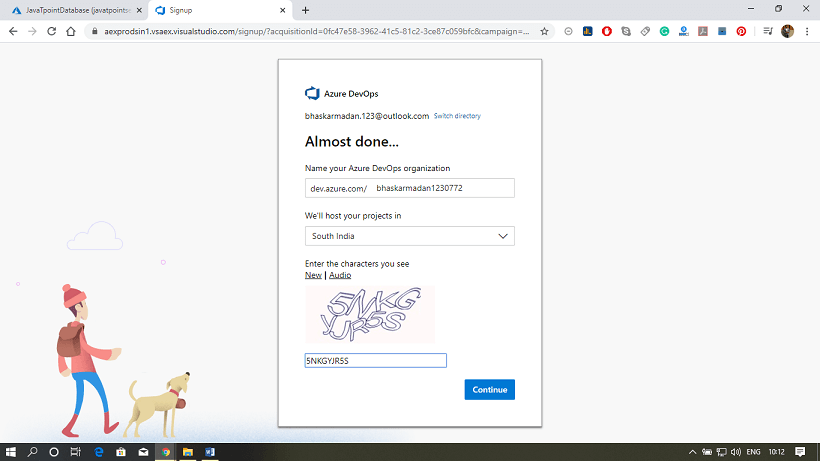
Step 5: Provide a name to your organization and select the location from where you want to get hosted your organization.
Step 6: Your organization has been created. Here you will see the Create a project page.
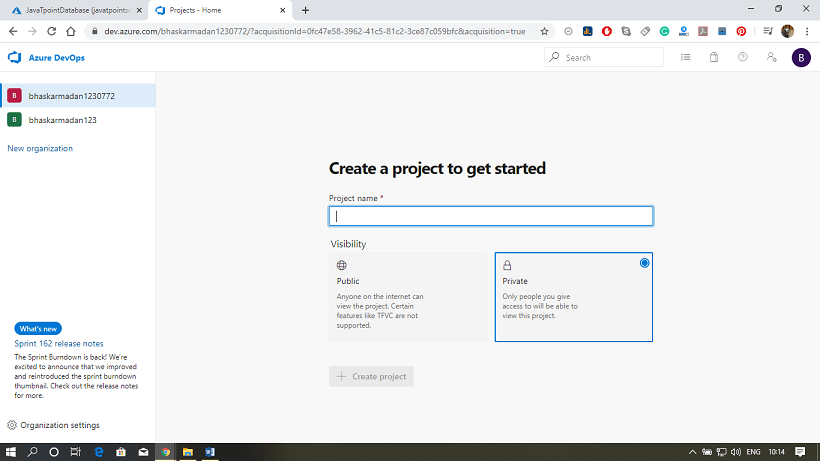
Step 7: Provide a name to your project. After that, click on advanced, then select the version control and work item process.
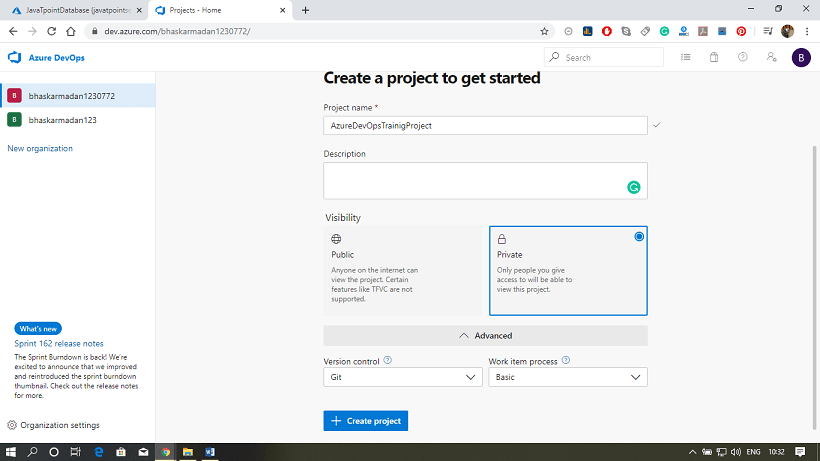
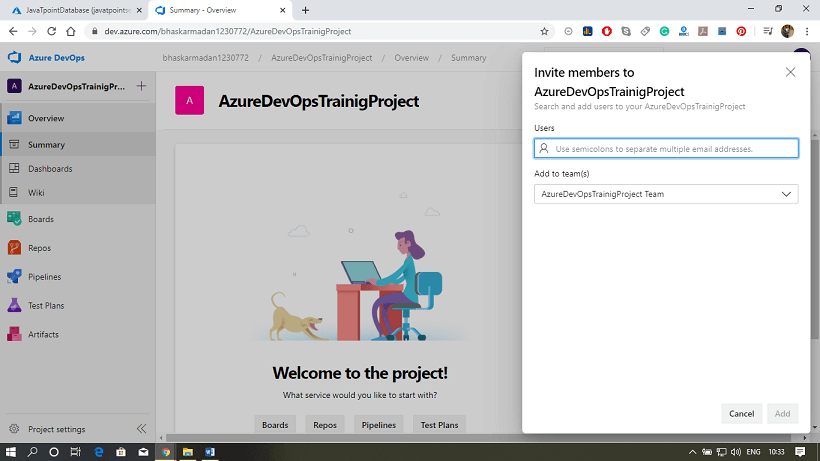
Step 8: Finally, click on the create project button. Your project has been created. Now, you can invite members to your project.

No comments:
Post a Comment