Shrink A Volume
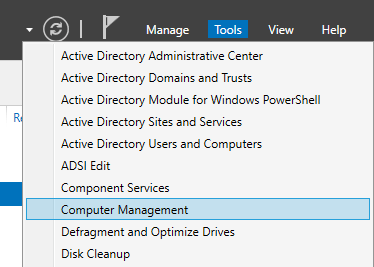
We’ll begin by opening Server Manager, selecting the Tools menu, followed by Computer Management as shown below.
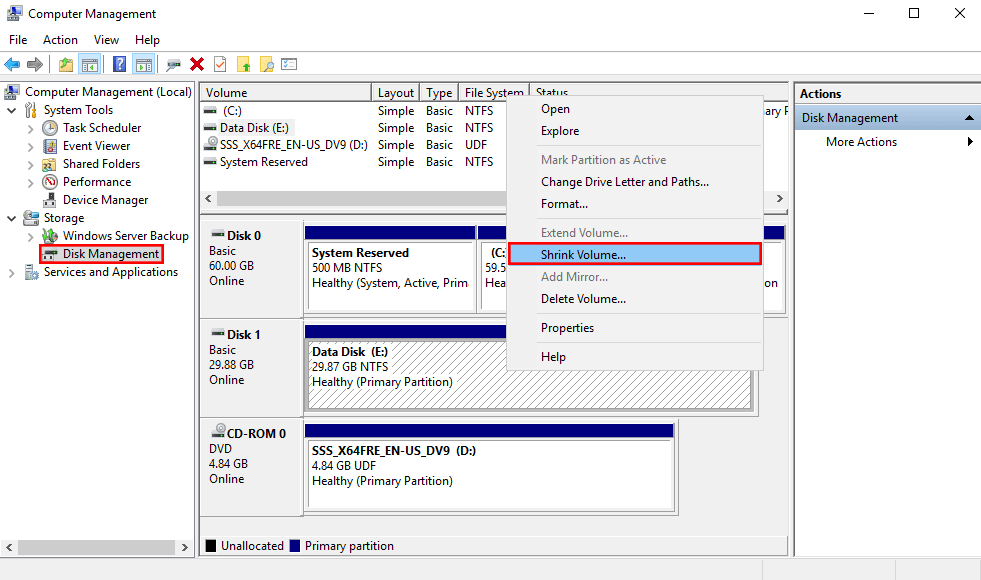
When the Computer Management window opens, select Disk Management which can be found underneath Storage. From here simply right click the disk that you want to shrink, followed by “Shrink Volume…”.
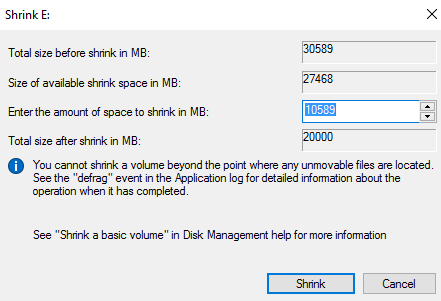
A new window will appear allowing you to adjust how much space you want to free up. In this case, I shrink enough space so that the total size after the shrink is 20GB. The amount available to shrink depends on how much data is detected on the disk, if you’re not able to shrink as much as you like be sure that you have deleted enough data first.
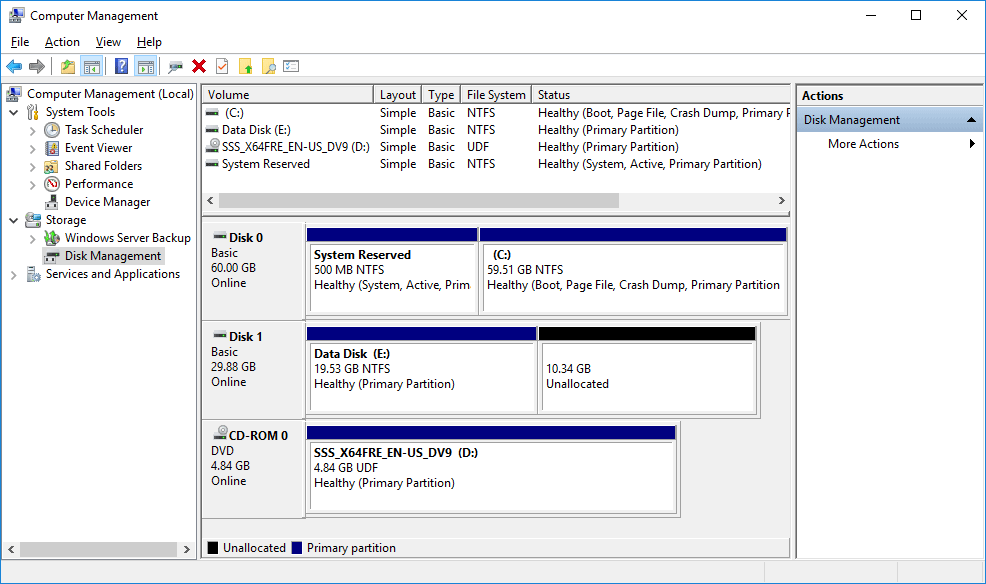
After the shrinking process has completed we’ll be able to see that our disk now has unallocated space available.
The unallocated space can now either be used as a new partition, or depending on your virtualization software can even be reclaimed allowing you to decrease the size of the virtual disk if this action is supported.


Awesome! Thank you so much for sharing these kinds of information. Keep writing and updating something on MAV Shrink Disc.
ReplyDelete