Protect your application gateway with Azure DDoS Network Protection
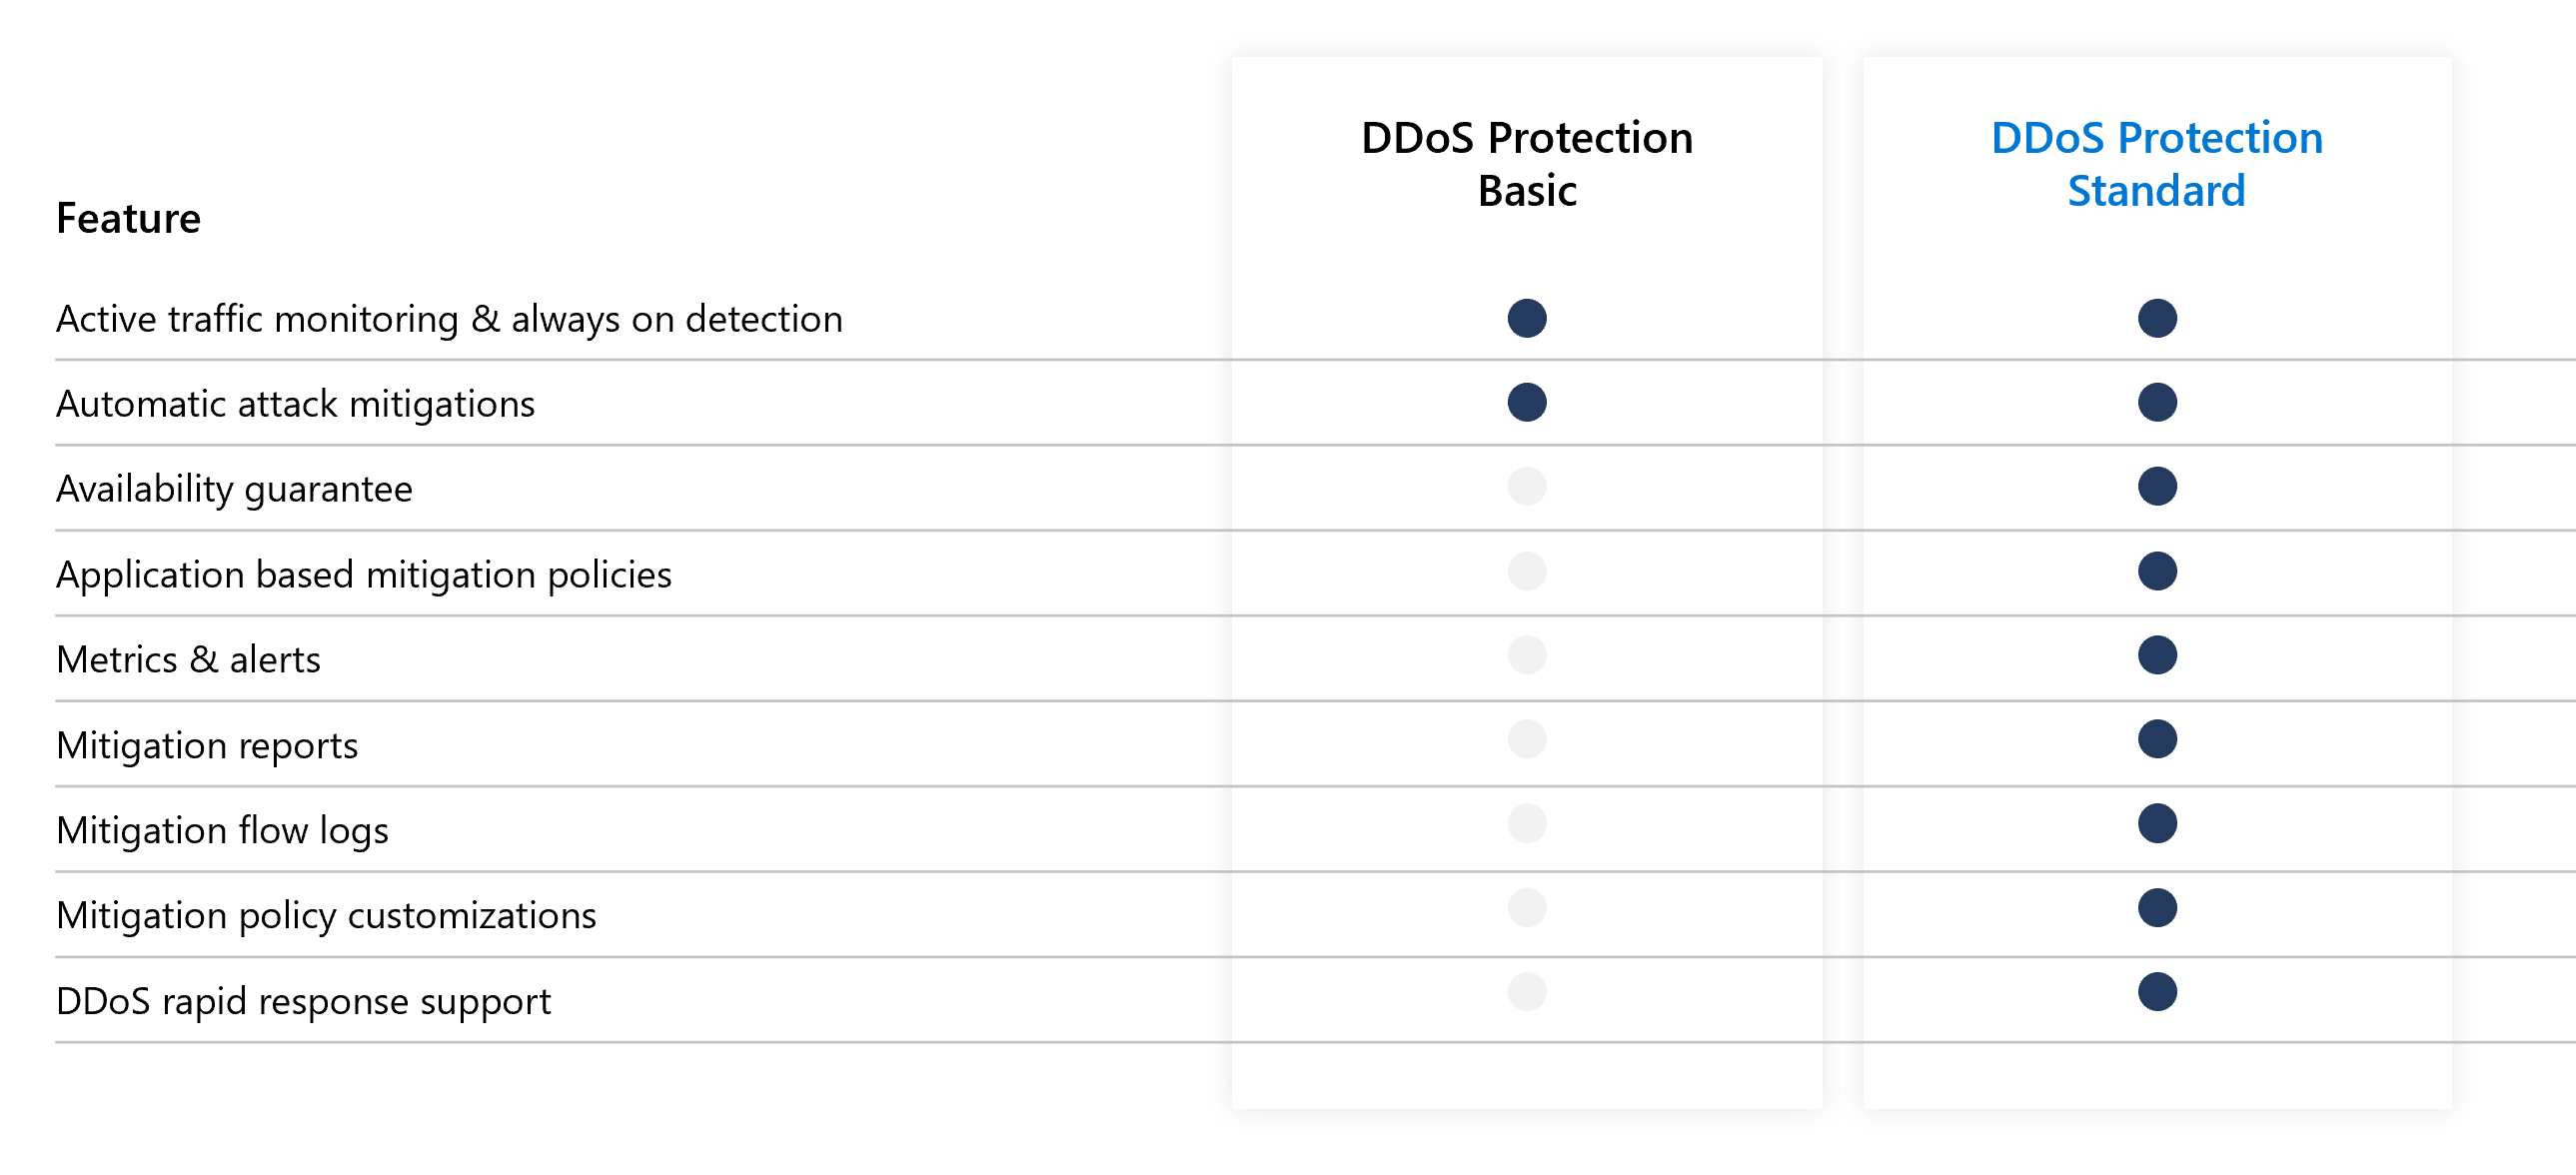
This article helps you create an Azure Application Gateway with a DDoS protected virtual network. Azure DDoS Network Protection enables enhanced DDoS mitigation capabilities such as adaptive tuning, attack alert notifications, and monitoring to protect your application gateways from large scale DDoS attacks.
Important
Azure DDoS Protection incurs a cost when you use the Network Protection SKU. Overages charges only apply if more than 100 public IPs are protected in the tenant. Ensure you delete the resources in this tutorial if you aren't using the resources in the future. For information about pricing, see Azure DDoS Protection Pricing. For more information about Azure DDoS protection, see What is Azure DDoS Protection.
In this tutorial, you learn how to:
- Create a DDoS protection plan
- Create an application gateway
- Associate a DDoS Protection plan to the virtual network
- Add VMs to the backend of the application gateway
- Test the application gateway
Prerequisites
An Azure account with an active subscription is required. If you don't already have an account, you can create an account for free.
Create a DDoS protection plan
Sign in to the Azure portal.
In the search box at the top of the portal, enter DDoS protection. Select DDoS protection plans in the search results and then select + Create.
In the Basics tab of Create a DDoS protection plan page, enter or select the following information:
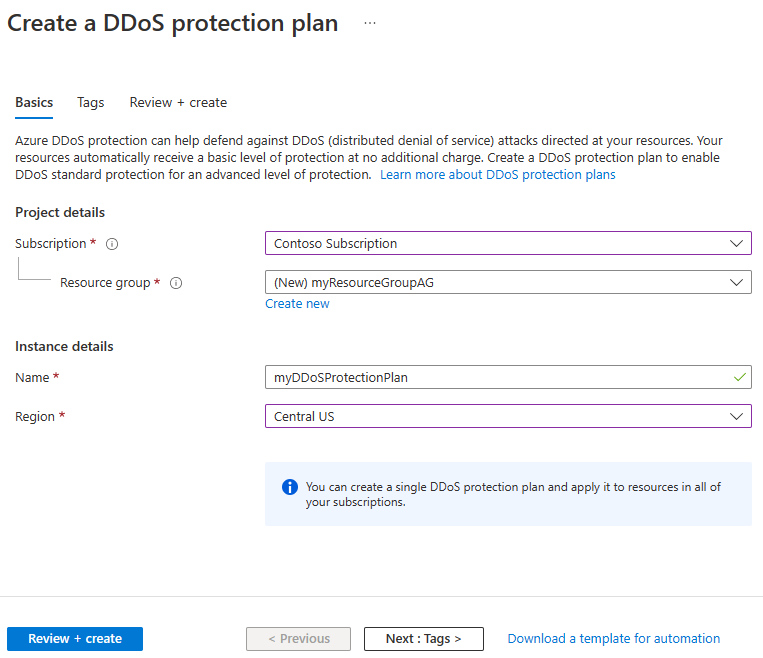
Setting Value Project details Subscription Select your Azure subscription. Resource group Select Create new.
Enter myResourceGroupAG.
Select OK.Instance details Name Enter myDDoSProtectionPlan. Region Select Central US. Select Review + create and then select Create to deploy the DDoS protection plan.
Create an application gateway
You'll create the application gateway using the tabs on the Create application gateway page.
- On the Azure portal menu or from the Home page, select Create a resource.
- Under Categories, select Networking and then select Application Gateway in the Popular Azure services list.
Basics tab
On the Basics tab, enter these values for the following application gateway settings:
Resource group: Select myResourceGroupAG for the resource group. If it doesn't exist, select Create new to create it.
Application gateway name: Enter myAppGateway for the name of the application gateway.
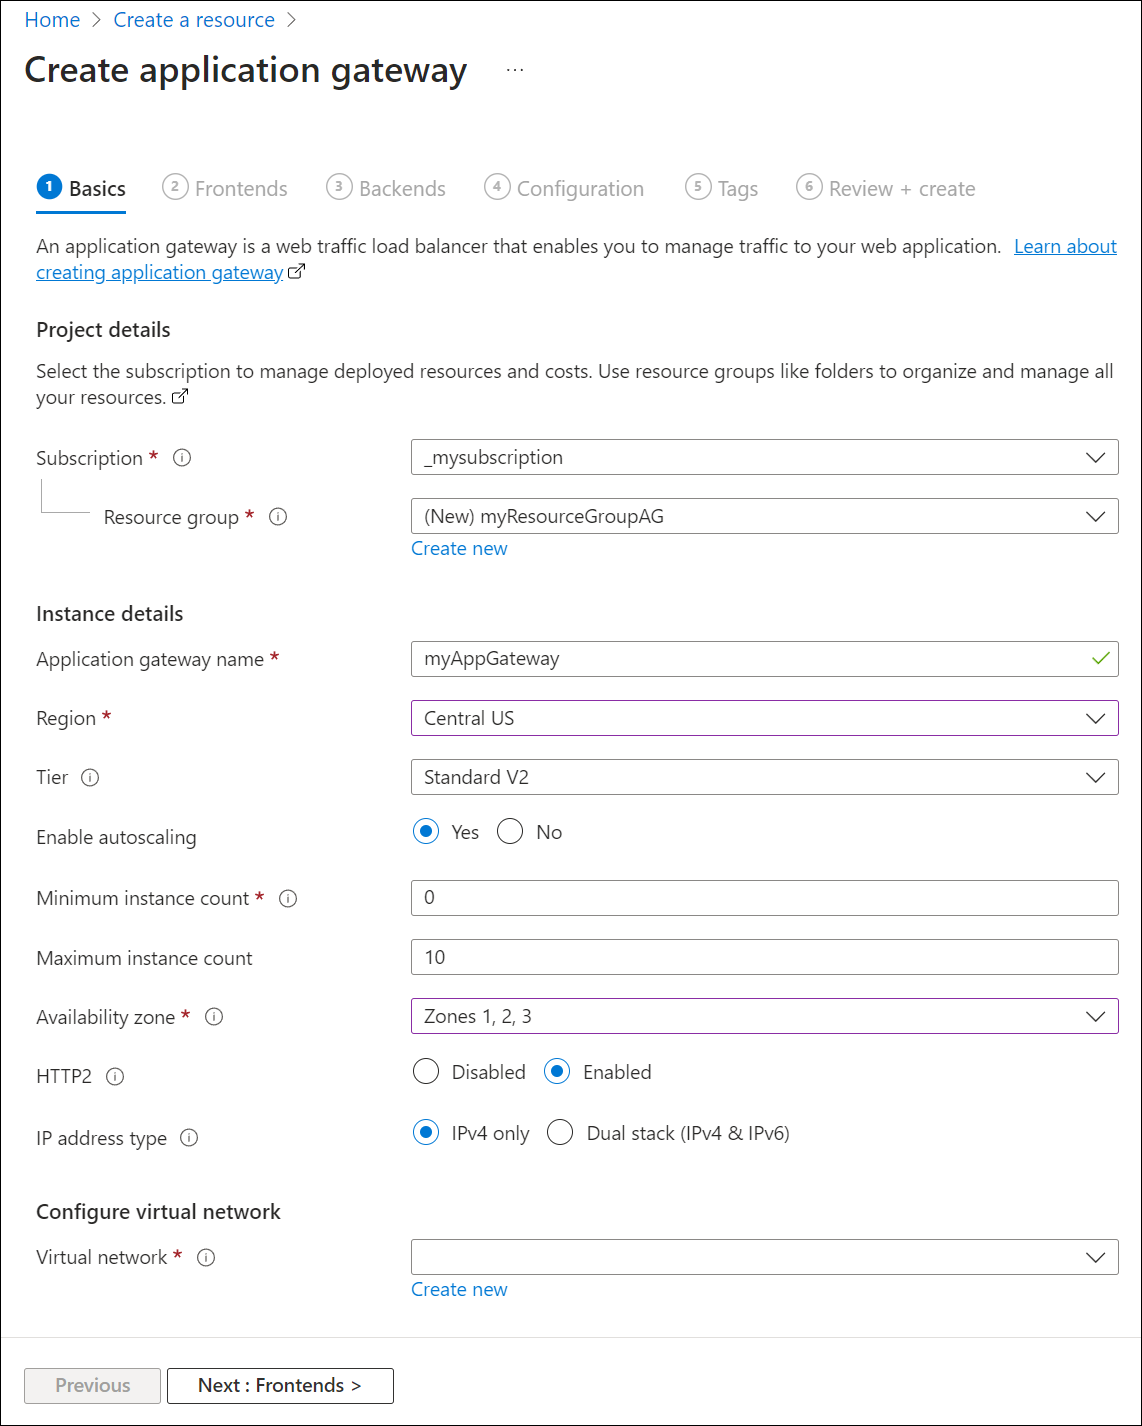
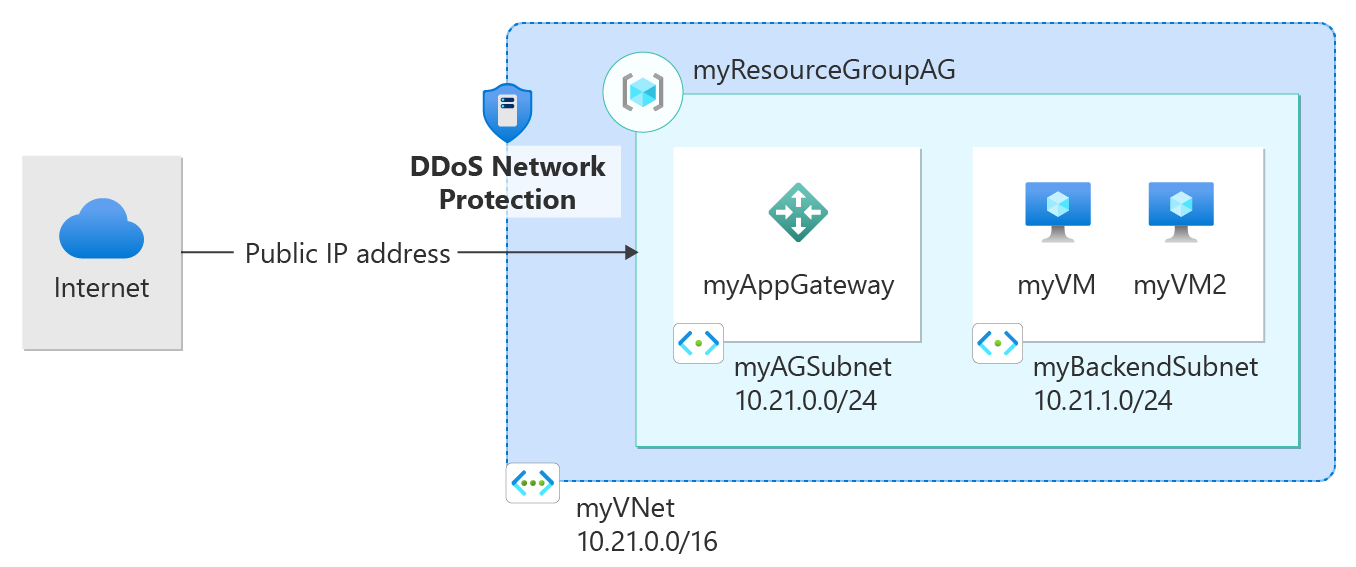
For Azure to communicate between the resources that you create, a virtual network is needed. You can either create a new virtual network or use an existing one. In this example, you'll create a new virtual network at the same time that you create the application gateway. Application Gateway instances are created in separate subnets. You create two subnets in this example: One for the application gateway, and another for the backend servers.
Under Configure virtual network, create a new virtual network by selecting Create new. In the Create virtual network window that opens, enter the following values to create the virtual network and two subnets:
Name: Enter myVNet for the name of the virtual network.
Subnet name (Application Gateway subnet): The Subnets grid will show a subnet named default. Change the name of this subnet to myAGSubnet.
The application gateway subnet can contain only application gateways. No other resources are allowed.Subnet name (backend server subnet): In the second row of the Subnets grid, enter myBackendSubnet in the Subnet name column.
Address range (backend server subnet): In the second row of the Subnets Grid, enter an address range that doesn't overlap with the address range of myAGSubnet. For example, if the address range of myAGSubnet is 10.0.0.0/24, enter 10.0.1.0/24 for the address range of myBackendSubnet.
Select OK to close the Create virtual network window and save the virtual network settings.

On the Basics tab, accept the default values for the other settings and then select Next: Frontends.
Frontends tab
On the Frontends tab, verify Frontend IP address type is set to Public.
You can configure the Frontend IP to be Public or Private as per your use case. In this example, you'll choose a Public Frontend IP.Note
For the Application Gateway v2 SKU, there must be a Public frontend IP configuration. You can still have both a Public and a Private frontend IP configuration, but Private only frontend IP configuration (Only ILB mode) is currently not enabled for the v2 SKU.
Select Add new for the Public IP address and enter myAGPublicIPAddress for the public IP address name, and then select OK.

Select Next: Backends.
Backends tab
The backend pool is used to route requests to the backend servers that serve the request. Backend pools can be composed of NICs, Virtual Machine Scale Sets, public IP addresses, internal IP addresses, fully qualified domain names (FQDN), and multi-tenant backends like Azure App Service. In this example, you'll create an empty backend pool with your application gateway and then add backend targets to the backend pool.
On the Backends tab, select Add a backend pool.
In the Add a backend pool window that opens, enter the following values to create an empty backend pool:
- Name: Enter myBackendPool for the name of the backend pool.
- Add backend pool without targets: Select Yes to create a backend pool with no targets. You'll add backend targets after creating the application gateway.
In the Add a backend pool window, select Add to save the backend pool configuration and return to the Backends tab.
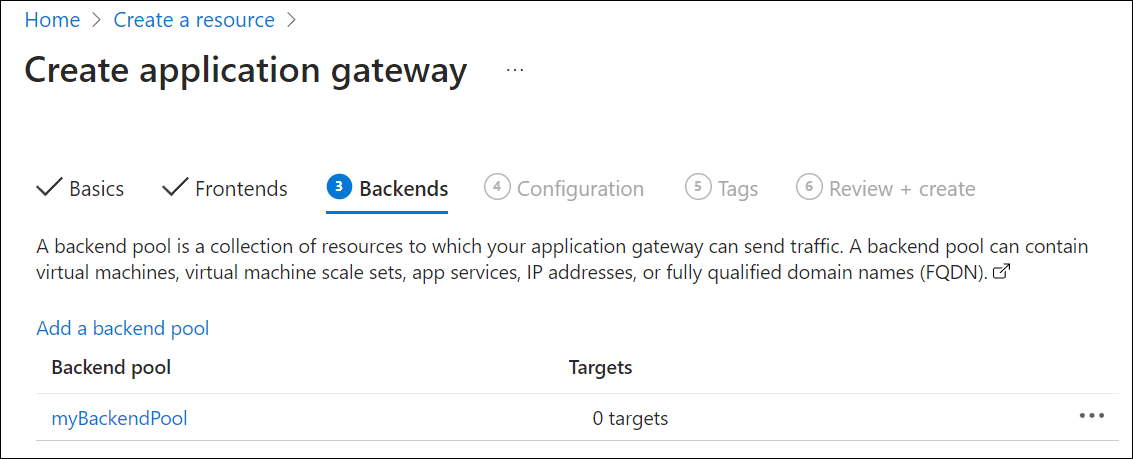
On the Backends tab, select Next: Configuration.
Configuration tab
On the Configuration tab, you'll connect the frontend and backend pool you created using a routing rule.
Select Add a routing rule in the Routing rules column.
In the Add a routing rule window that opens, enter the following values for Rule name and Priority:
- Rule name: Enter myRoutingRule for the name of the rule.
- Priority: The priority value should be between 1 and 20000 (where 1 represents highest priority and 20000 represents lowest) - for the purposes of this quickstart, enter 100 for the priority.
A routing rule requires a listener. On the Listener tab within the Add a routing rule window, enter the following values for the listener:
Listener name: Enter myListener for the name of the listener.
Frontend IP: Select Public to choose the public IP you created for the frontend.
Accept the default values for the other settings on the Listener tab, then select the Backend targets tab to configure the rest of the routing rule.
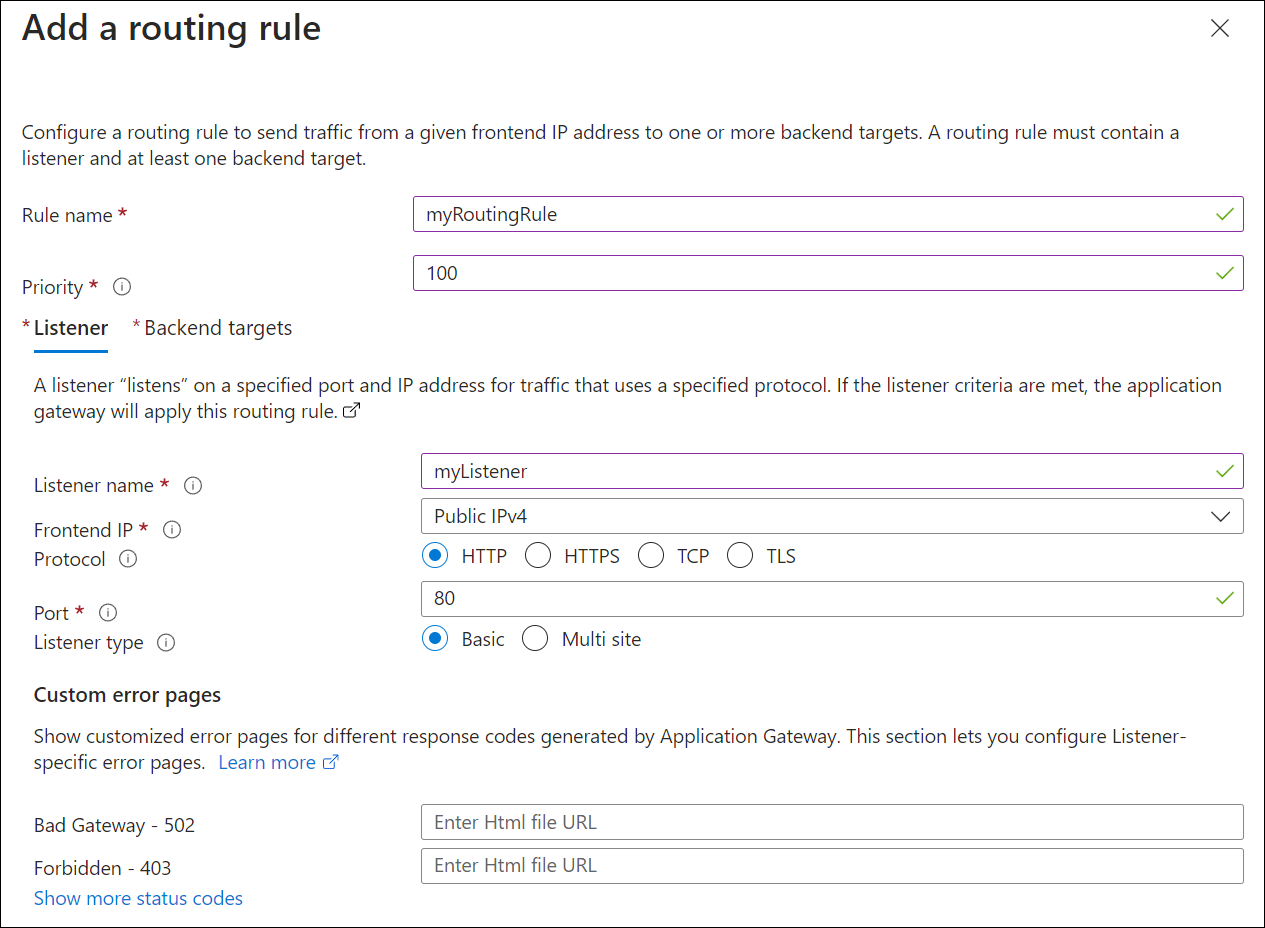
On the Backend targets tab, select myBackendPool for the Backend target.
For the Backend setting, select Add new to add a new Backend setting. The Backend setting will determine the behavior of the routing rule. In the Add Backend setting window that opens, enter myBackendSetting for the Backend settings name and 80 for the Backend port. Accept the default values for the other settings in the Add Backend setting window, then select Add to return to the Add a routing rule window.
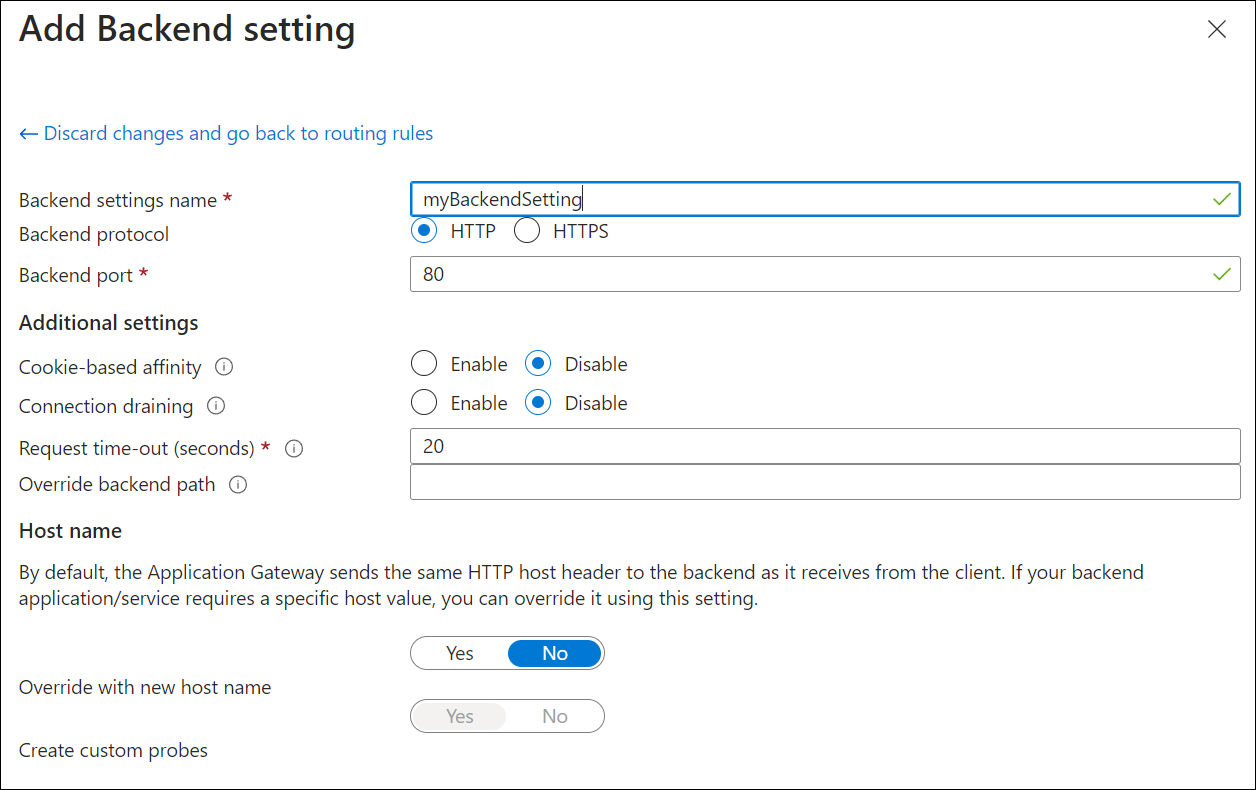
On the Add a routing rule window, select Add to save the routing rule and return to the Configuration tab.
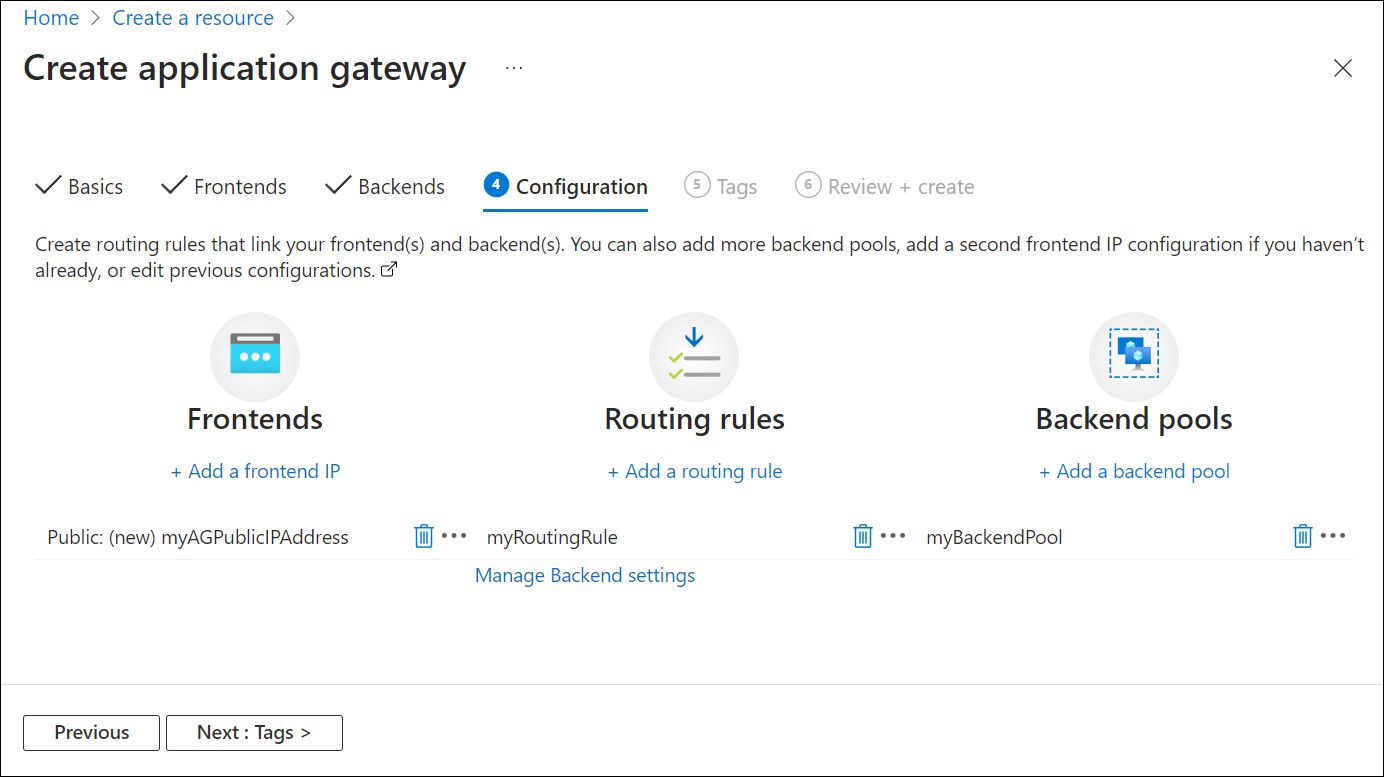
Select Next: Tags and then Next: Review + create.
Review + create tab
Review the settings on the Review + create tab, and then select Create to create the virtual network, the public IP address, and the application gateway. It may take several minutes for Azure to create the application gateway. Wait until the deployment finishes successfully before moving on to the next section.
Enable DDoS protection
Azure DDoS Network Protection is enabled at the virtual network where the resource you want to protect reside.
In the search box at the top of the portal, enter Virtual network. Select Virtual networks in the search results.
Select myVNet.
Select DDoS protection in Settings.
Select Enable.
In the pull-down box in DDoS protection plan, select myDDoSProtectionPlan.
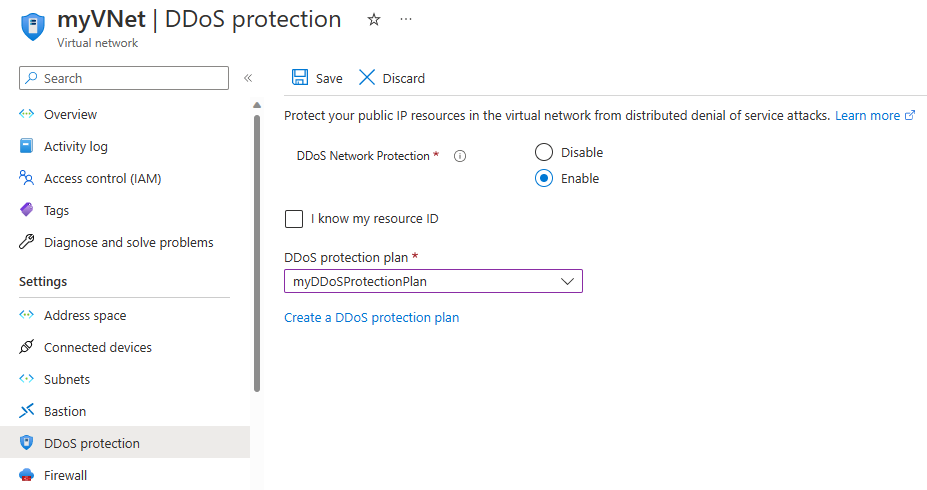
Select Save.
Add backend targets
In this example, you'll use virtual machines as the target backend. You can either use existing virtual machines or create new ones. You'll create two virtual machines as backend servers for the application gateway.
To do this, you'll:
- Create two new VMs, myVM and myVM2, to be used as backend servers.
- Install IIS on the virtual machines to verify that the application gateway was created successfully.
- Add the backend servers to the backend pool.
Create a virtual machine
On the Azure portal menu or from the Home page, select Create a resource. The New window appears.
Select Windows Server 2016 Datacenter in the Popular list. The Create a virtual machine page appears.
Application Gateway can route traffic to any type of virtual machine used in its backend pool. In this example, you use a Windows Server 2016 Datacenter virtual machine.Enter these values in the Basics tab for the following virtual machine settings:
- Resource group: Select myResourceGroupAG for the resource group name.
- Virtual machine name: Enter myVM for the name of the virtual machine.
- Region: Select the same region where you created the application gateway.
- Username: Type a name for the administrator user name.
- Password: Type a password.
- Public inbound ports: None.
Accept the other defaults and then select Next: Disks.
Accept the Disks tab defaults and then select Next: Networking.
On the Networking tab, verify that myVNet is selected for the Virtual network and the Subnet is set to myBackendSubnet. Accept the other defaults and then select Next: Management.
Application Gateway can communicate with instances outside of the virtual network that it is in, but you need to ensure there's IP connectivity.On the Management tab, set Boot diagnostics to Disable. Accept the other defaults and then select Review + create.
On the Review + create tab, review the settings, correct any validation errors, and then select Create.
Wait for the virtual machine creation to complete before continuing.
Install IIS for testing
In this example, you install IIS on the virtual machines to verify Azure created the application gateway successfully.
Open Azure PowerShell.
Select Cloud Shell from the top navigation bar of the Azure portal and then select PowerShell from the drop-down list.
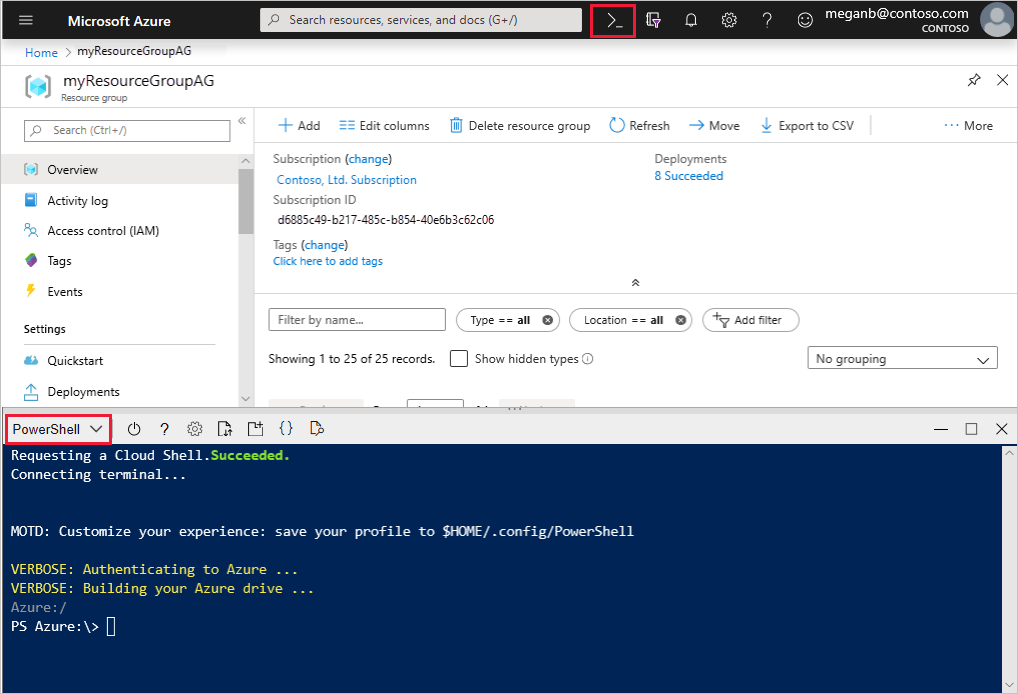
Run the following command to install IIS on the virtual machine. Change the Location parameter if necessary:
Create a second virtual machine and install IIS by using the steps that you previously completed. Use myVM2 for the virtual machine name and for the VMName setting of the Set-AzVMExtension cmdlet.
Add backend servers to backend pool
On the Azure portal menu, select All resources or search for and select All resources. Then select myAppGateway.
Select Backend pools from the left menu.
Select myBackendPool.
Under Backend targets, Target type, select Virtual machine from the drop-down list.
Under Target, select the myVM and myVM2 virtual machines and their associated network interfaces from the drop-down lists.
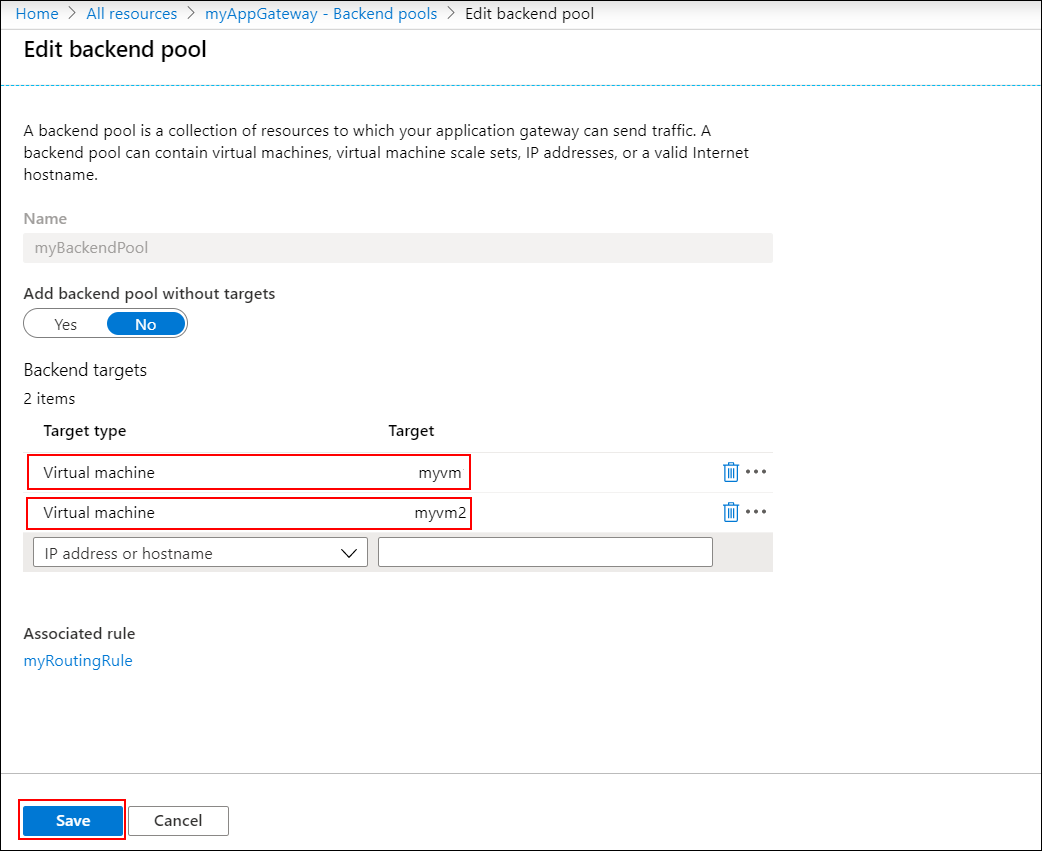
Select Save.
Wait for the deployment to complete before proceeding to the next step.
Test the application gateway
Although IIS isn't required to create the application gateway, you installed it in this quickstart to verify if Azure successfully created the application gateway.
Use IIS to test the application gateway:
Find the public IP address for the application gateway on its Overview page.
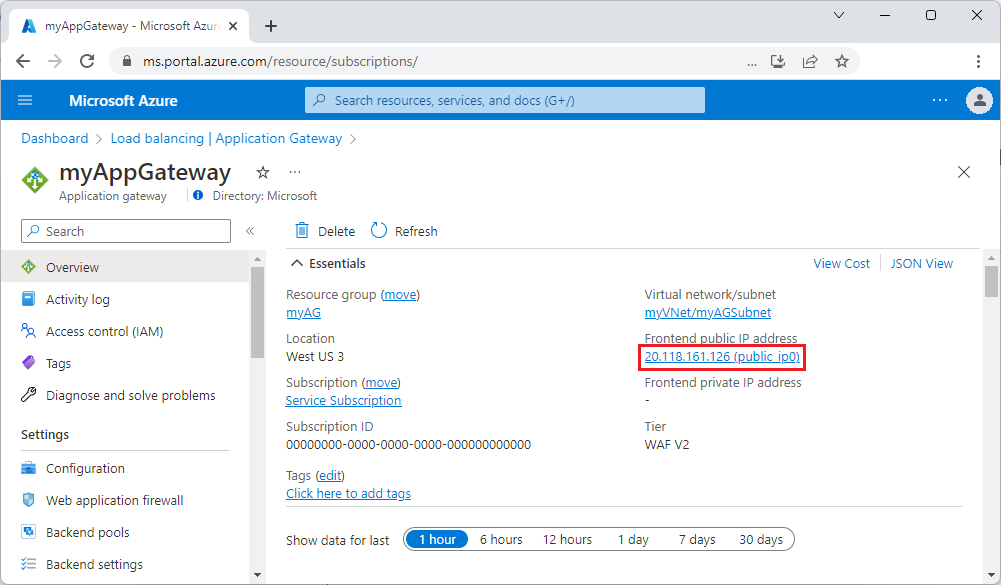 Or, you can select All resources, enter myAGPublicIPAddress in the search box, and then select it in the search results. Azure displays the public IP address on the Overview page.
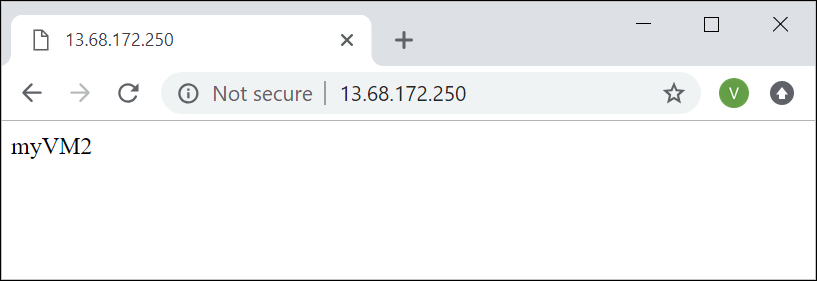
Copy the public IP address, and then paste it into the address bar of your browser to browse that IP address.
Check the response. A valid response verifies that the application gateway was successfully created and can successfully connect with the backend.
