Friday, 31 May 2024

Testing out Azure Storage Mover


Testing out Azure Storage Mover

I recently noticed that Azure Storage Mover is now Generally Available. This is a service I’ve not used before, but migrations of Storage to Azure is something I am often involved with, so I was keen to test out this service, and explore the setup and usage with a test migration.  In this post I will run through an overview of Storage Mover, how it is setup, and also run through a simple test migration.


What is Azure Storage Mover?

Azure Storage Mover is a service that enables the migration of files and folders to Azure Storage, whilst minimizing downtime for your workload. Storage Mover can be used for a variety of migration requirements and scenarios.

Azure Storage Mover is a Hybrid Cloud Service – so it comprises both a Cloud and Infrastructure component, and to use it we need to deploy both components.


What are the Supported Sources and Targets for a Move?

At the current time Azure Storage Mover enables the migration of NFS shares to an Azure Blob Container. For an overview of the supported sources and targets, see here: https://learn.microsoft.com/en-gb/azure/storage-mover/service-overview#supported-sources-and-targets.


Setup & Testing

To test out the Service, I will be using a simple setup, comprising of:

  • An Azure Subscription
  • AN Azure Storage Account with a Blob Container
  • An NFS Share hosted on a Windows Virtual Machine (within my Lab)
  • A Storage Mover Agent deployed within my Lab

To start testing – I will first browse to my NFS share, and show that there is some data within:

NFS Share - showing data within.
NFS Share – showing data within.

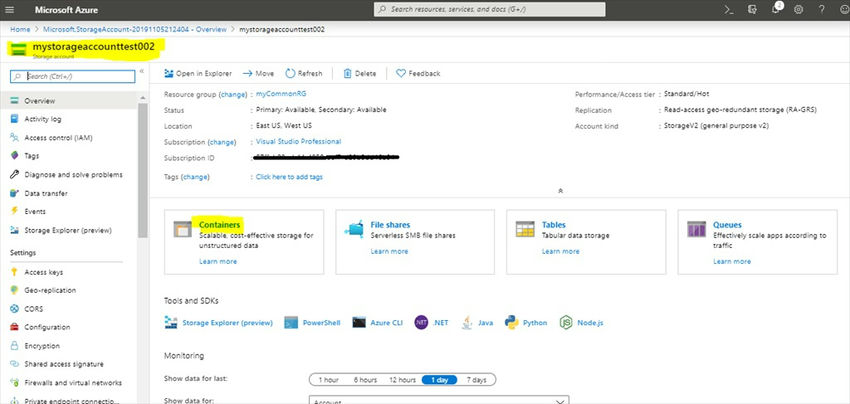
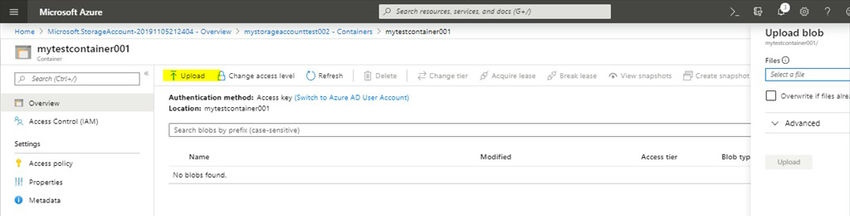
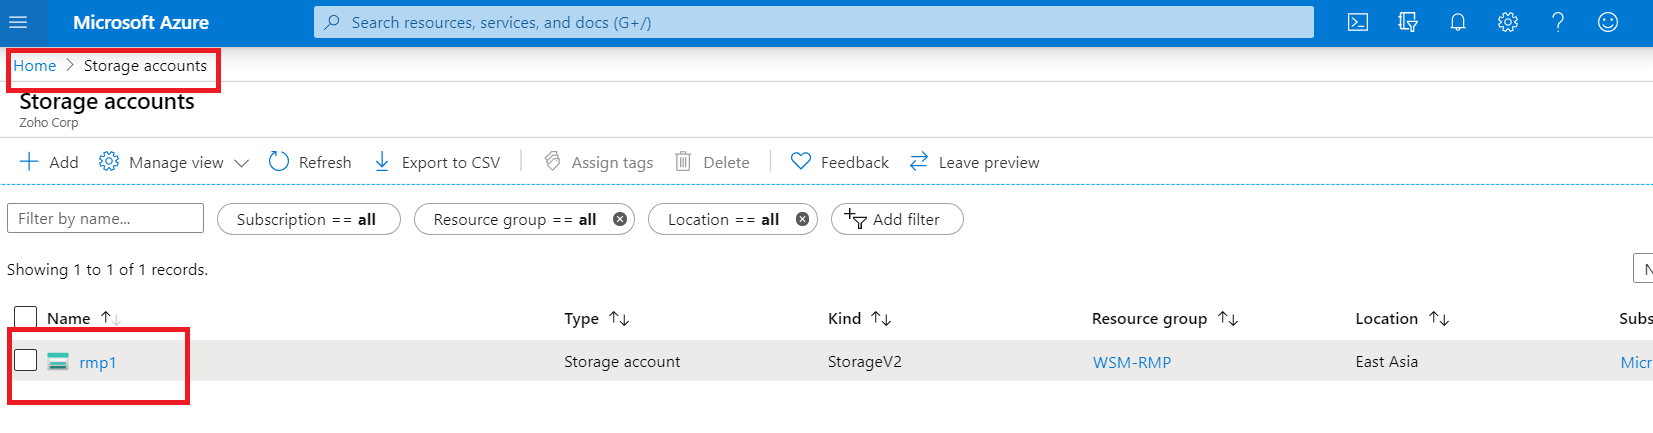
I also have an Azure Storage Account with a Blob Container setup – this is currently empty, and will be the target destination I use for the data above:

Storage Account setup with a Container called "migration01".
Storage Account setup with a Container called “migration01”.

Creating the Storage Mover

Next we need to deploy the Azure Storage Mover Resource – this is done from within the Azure Portal:

Storage Mover setup - using search
Storage Mover setup – using search

Click on “Create storage mover”:

Storage Mover setup - Creation
Storage Mover setup – Creation

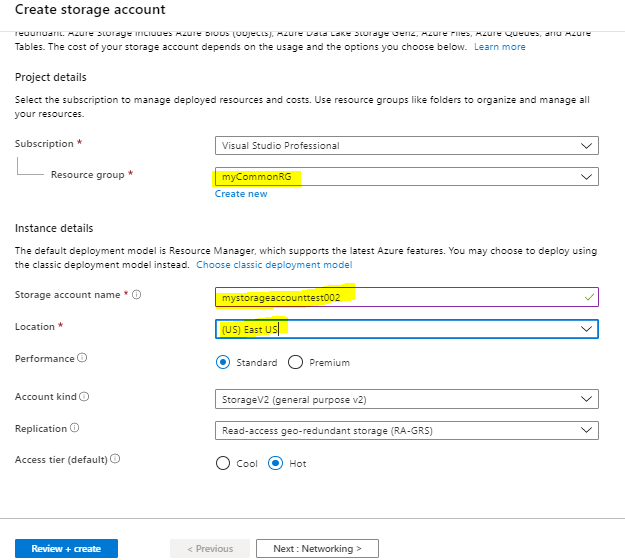
We can then fill in a few basic details to begin:

Storage Mover setup - Basic details
Storage Mover setup – Basic details

There is also an option to add Monitoring to Storage Mover – which enables metrics and logs to be collected:

Storage Mover setup - Log Analytics
Storage Mover setup – Log Analytics

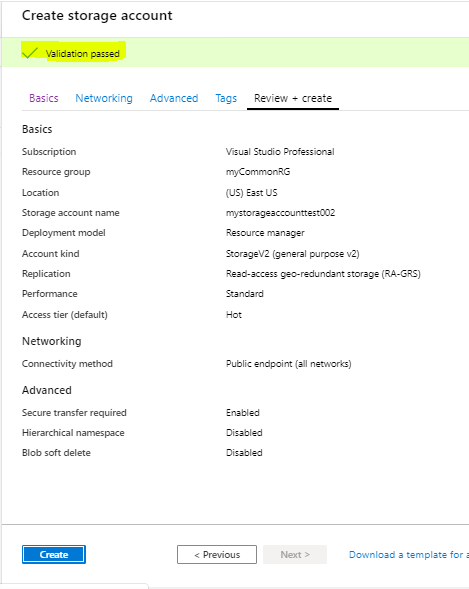
Once this is done we can move onto the “Review + create” pane, and then create the Resource. Once created, we can see our Storage Mover:

Storage Mover setup - Created Resource, ready for our agent.
Storage Mover setup – Created Resource, ready for our agent.

We can now move onto the Agent Deployment. The agent is how our Storage Mover Resource will be able to community with our on-premises storage shares and devices.

Agent Deployment

Storage Mover makes the Agent deployment a simple process – from the Storage Mover overview, click on “Register agent”, as shown below:

Registering our Mover Agent
Registering our Storage Mover Agent

You’ll then be prompted to download the Agent:

Registering our Mover Agent
Registering our Storage Mover Agent

The link shown above will take you to a Microsoft download page, that allows you to download the VHDX for the Agent VM. Once this has downloaded we need to deploy this within our environment. My Lab environment is using Hyper-V, so the process is simple. If you need guidance on deployment of the VHDX to Hyper-V, please see this guide here: https://learn.microsoft.com/en-gb/azure/storage-mover/agent-deploy?tabs=xdmshell.

At this point, it is also worth noting that the Storage Mover agent VM requires outbound unrestricted internet connectivity. There is also a table of CPU Cores and RAM recommendations that needs consideration, depending upon the scale of migration: https://learn.microsoft.com/en-gb/azure/storage-mover/agent-deploy?tabs=xdmshell#recommended-compute-and-memory-resources. A minimum of 20 GB of disk space is also required – with potentially more space for a large migration.

Once the VM is deployed, and has been booted, we can connect via SSH, using the default credentials of admin/admin, and we are prompted to update the password. Note, you can use Hyper-V to check the IP you need to connect to!

Connecting in via PuTTY

We can now start the process of Registering the agent. To do this, select “4” from the menu, which starts the Registration process. Once you select this option and press enter, you will be prompted to enter the following information:

  • Tenant ID
  • Subscription ID
  • Resource Group Name
  • Storage Mover Name
  • Whether Private Link is required
Configuration via PuTTY

Once completed – you will see the following:

Agent configuration completed!

Our Agent is now Registered:

Agent online and ready for use!

We can now setup our Storage Target within Storage Mover, before we move onto the Migration.

Adding our Storage Endpoints

We can now add our Storage Endpoints to Storage Mover, so that we have our source and destination endpoints configured. We will start with our target endpoint – to do this, visit your Storage Mover in the Portal, and click on “Storage endpoints”, then “Create endpoint”, and select “Create target endpoint”:

Creating a Target Endpoint

We are then prompted to fill in some details – as you can see I have selected my Subscription, Storage Account, and Container, and provided a description:

Target Endpoint details

Once these details are added, click on “Create”. After a few moments, our endpoint will then be added:

Our Target Endpoint is added and ready for use

Our Target endpoint is now added, and we can now move on to adding our Source endpoint. To do this, click on the “Create endpoint” drop down and select “Create source endpoint”:

Adding a Source Endpoint

This will bring up a window for us to add the details of our source NFS Share:

Adding our Source NFS Share details

Once the details are added, we can click on “Create”, and our Source will be added:

Source endpoint added and ready to use

We can now move onto the Migration!

Migration

Once our Agents, and Source and Target endpoints are setup, Migration is a straightforward process using Storage Mover. We next need to create a Project, and then a Job within this project – which we can do from the main Storage Mover window. To get started click on “create project”:

Create a Storage Mover project

This will bring up the Project explorer window, where we need to click on “create project” again to start. We can then fill in basic details and click on “create”:

Creating our migration project

We can now create a job definition within this project:

Creating a Job definition

We can now fill in the job definition details – there are a few screens for this, which are shown below:

Step 1 - Creating our migration job
Step 1 – Creating our migration job
Step 2 - Selecting endpoint source
Step 2 – Selecting endpoint source
Step 3 - Selecting target endpoint
Step 3 – Selecting target endpoint
Step 4 - Migration settings
Step 4 – Migration settings
Step 5 - Review
Step 5 – Review

Our job will now be setup – and we can review this from the Project explorer. Once we are happy with the details shown, we can click on “Start job”:

Start migration job
Start migration job

The job will then show as “Queued”, whilst the agent picks up the job:

Migration job queued

Once the operation is completed, you will see the overview screen that details how the job went. Note I added a few more files to my share to increase the number of files/objects since I took the “source” screenshot at the start of this post.

Migration job completed

We can now browse to our Storage Account and confirm that files are showing as expected. I can see the test files I added below:

Confirming Test migration files can be seen

This concludes my test migration. Obviously in a production scenario it’s likely to be significantly more data or shares, however this post hopefully demonstrates the simplicity with which migration can be done using Storage Mover – and in particular, how it can be used to manage a number of migration jobs across different sources and targets.


Azure Storage Mover–A managed migration service for Azure Storage


File storage is a critical part of any organization’s on-premises IT infrastructure. As organizations migrate more of their applications and user shares to the cloud, they often face challenges in migrating the associated file data. Having the right tools and services is essential to successful migrations.

Across workloads, there can be a wide range of file sizes, counts, types, and access patterns. In addition to supporting a variety of file data, migration services must minimize downtime, especially on mission-critical file shares.

In February of 2022, we launched the Azure file migration program that provides no-cost migration to our customers, via a choice of storage migration partners.

We added another choice for file migration with the general availability of Azure Storage Mover, which is a fully managed, hybrid migration service that makes migrating files and folders into Azure a breeze.

The key capabilities of Azure Storage Mover are:

Cloud-driven migrations

Managing copy jobs at scale without a coordinating service can be time consuming and error-prone. Individual jobs have to be monitored and any errors resolved. It’s hard to maintain comprehensive oversight to ensure a complete and successful migration of your data.

With Azure Storage Mover you can express your migration plan in Azure and when you are ready, conveniently start and track migrations right from the Azure portal, PowerShell, or CLI. This allows you to utilize Azure Storage Mover for a one-time migration project or for any repeated data replication needs.

Azure Storage Mover is a hybrid service with migration agents that you’ll deploy close to your source storage. All agents can be managed from the same place in Azure, even if they are deployed across the globe.

Showing the Azure portal page of a running job. Detailed progress in percent and counts is shown for bytes and items migrated. Azure Monitoring charts for these are also shown.

Scale and performance

Many aspects contribute to a high-performance migration service. Fast data movement through the Azure Storage REST protocol and a clear separation of the management path from the data path are among the most important. Each agent will send your files and folders directly to the target storage in Azure.

Directly sending the data to the target optimizes the performance of your migration because the data doesn’t need to be processed through a cloud service or through a different Azure region from where the target storage is deployed in. For example, this optimization is key for migrations that happen across geographically diverse branch offices that will likely target Azure Storage in their region.

Illustrating a migration's path by showing two arrows. The first arrow for data traveling to a storage account from the source/agent and a second arrow for only the management/control info to the storage mover resource/service.

What’s next for Storage Mover?

There are many steps in a cloud migration that need to happen before the first byte can be copied. A deep understanding of your data estate is essential to a balanced cloud solution design for your workloads.

When we combine that with a strategy to minimize downtime, and manage and monitor migration jobs at scale, then we’ve arrived at our vision for the Storage Mover service. This roadmap for this vision includes:

  • Support for more sources and Azure Storage targets.
  • More options to tailor a migration to your needs.
  • Automatically loading possible sources into the service. That’s more than just convenience; it enables large-scale migrations and reduces mistakes from manual input.
  • Deep insights about selected sources for a sound cloud solution design.
  • Provisioning target storage automatically based on your migration plan.
  • Running post-migration tasks such as data validation, enabling data protection, and completing migration of the rest of the workload, etc.

workloads, there can be a wide range of file sizes, counts, types, and access patterns. In addition to supporting a variety of file data, migration services must minimize downtime, especially on mission-critical file shares.

In February of 2022, we launched the Azure file migration program that provides no-cost migration to our customers, via a choice of storage migration partners.

Today, we are adding another choice for file migration with the preview launch of Azure Storage Mover, which is a fully managed, hybrid migration service that makes migrating files and folders into Azure a breeze.

The key capabilities of the Azure Storage Mover preview are:

NFS share to Azure blob container

With this preview release, we focus on the migration of an on-premises network file system (NFS) share to an Azure blob container. Storage Mover will support many additional source and target combinations over the coming months.

Illustrating a source NFS share migrated through an Azure Storage Mover agent VM to an Azure Storage blob container.

Cloud-driven migrations

Managing copy jobs at scale without a coordinating service can be time consuming and error-prone. Individual jobs have to be monitored and any errors resolved. It’s hard to maintain comprehensive oversight to ensure a complete and successful migration of your data.

With Azure Storage Mover you can express your migration plan in Azure and when you are ready, conveniently start and track migrations right from the Azure portal, PowerShell, or CLI. This allows you to utilize Azure Storage Mover for a one-time migration project or for any repeated data movement needs.

Azure Storage Mover is a hybrid service with migration agents that you’ll deploy close to your source storage. All agents can be managed from the same place in Azure, even if they are deployed across the globe.

Showing the Azure portal page of a running job. Detailed progress in percent and counts is shown for bytes and items migrated. Azure Monitoring charts for these are also shown.

Scale and performance

Many aspects contribute to a high-performance migration service. Fast data movement through the Azure Storage REST protocol and a clear separation of the management path from the data path are among the most important. Each agent will send your files and folders directly to the target storage in Azure.

Directly sending the data to the target optimizes the performance of your migration because the data doesn’t need to be processed through a cloud service or through a different Azure region from where the target storage is deployed in. For example, this optimization is key for migrations that happen across geographically diverse branch offices that will likely target Azure Storage in their region.

Illustrating a migration's path by showing two arrows. The first arrow for data traveling to a storage account from the source/agent and a second arrow for only the management/control info to the storage mover resource/service.

What’s next for Storage Mover?

There are many steps in a cloud migration that need to happen before the first byte can be copied. A deep understanding of your data estate is essential to a balanced cloud solution design for your workloads.

When we combine that with a strategy to minimize downtime, and manage and monitor migration jobs at scale, then we’ve arrived at our vision for the Storage Mover service. This roadmap for this vision includes:

  • Support for more sources and Azure Storage targets.
  • More options to tailor a migration to your needs.
  • Automatically loading possible sources into the service. That’s more than just convenience; it enables large-scale migrations and reduces mistakes from manual input.
  • Deep insights about selected sources for a sound cloud solution design.
  • Provisioning target storage automatically based on your migration plan.
  • Running post-migration tasks such as data validation, enabling data protection, and completing migration of the rest of the workload, etc.

Summary illustration showing the Storage Mover road map of feature areas: Discover, Assess, Plan, Deploy, Migrate, Post-Migrate. Highlighted are Plan and Migrate as covered in this public preview release.

Azure Storage Account And Storage Container For Blob Storage


Azure Storage Account And Storage Container For Blob Storage

Azure Blob is an Azure storage object like filer, queues, tables, or disks.

In order to use the blob storage, first we should create the Azure storage account.

To create an Azure storage account we need an Azure account. If you are using Visual Studio Professional, you may have a free INR 3000 Azure credit for Azure learning. You can also try a free one-month trial for learning,

Once you log in to the Azure portal you will see the Azure portal home screen as below.

Since the Microsoft team is making changes frequently in the Azure portal you may see a different look at each login.

 Azure portal

Once we log in to the Azure portal, we can create an Azure storage account by clicking the Storage Accounts button.

Then click the Add button,

Add button

Fill in the mandatory details like resource group name, storage account name, location, etc.

Mandatory details

Since this is a learning activity, we can leave the other optional fields as default.

Click the Review + Create button to create the storage account.

This will validate the filled values and will show the warning if any value is wrong.

Warning

Once we click the Create button, it will take a few seconds to create the storage account.

Once the storage account is created, we can get into the storage account by clicking the Go to Resource button

 Resource button

We will be navigated to the below screen.

Navigate

Create a Storage Container

Once the storage account has been created, we need to create a storage container inside the storage account

To create a storage container, click the Container tile on the storage account home screen.

Then click the + Container button to create the container.

 Container button

Fill in the name field and select the access level as public. It will take a few seconds to create the storage container.

Once the storage container has been created we can upload files to the container by clicking the upload button.

Storage container

We have successfully created a storage account and a container.

The next step is to connect the Azure storage account programmatically using C# and upload and download files from/to the storage account.

I have created another article for uploading and downloading files to an Azure storage account using C#.

Please find the next article here Upload and download files from blob storage using C#

Happy Coding!

Create Azure Blob storage from scratch and adding to Telestream Cloud


Create Azure Blob storage from scratch and adding to Telestream Cloud

If you are an enthusiast and use the software and solutions offered by Microsoft on a daily basis, the best solution is to use Azure Blob storage for Telestream Cloud services.

All your data (objects) in Azure Blob is stored as the so-called blobs in the containers. This is the equivalent of buckets that are used in Amazon S3 and Google Cloud Storage.

At the beginning, let's explain the structure of Azure Blob storage. It has three types of resources:

  • The storage Account
  • A container in the storage account
  • A blob
azure structure

Now you need to create a container for Telestream Cloud. First, you have to create storage account if you don’t have one already.

How to create storage account, step by step:

Every storage account must belong to some Azure resource group - a logical container for grouping your Azure services. When you create a storage account, you have the option to either create a new resource group or use an existing one. We’ll show you how to create a new one.

A general-purpose v2 storage account provides access to all of the Azure Storage services: blobs, files, queues, tables, and disks. Go to Azure portal and then:

  • Select All services.
  • Start typing Storage accounts in the list of resources, and select it.
  • The Storage accounts window will appear, choose Add.
  • Select the subscription in which to create the storage account.
  • Click on Create new under Resource group field.
  • Enter a name for your new resources group.
create azure storage account
  • The next thing is the name for your new storage account. It must be unique across Azure. It can consist of 3 to 24 characters and includes numbers and lowercase letters.
  • Select a location for your storage account, or use the default location.
  • Leave these fields set to their default values:
FieldValue
Deployment modelResource Manager
PerformanceStandard
Account kindStorageV2 (general-purpose v2)
ReplicationLocally redundant storage (LRS)
Access tierHot
  • We’re almost done! Select Review + Create.
  • If the review was successful, click Create.

Now it’s the time to create a container for Telestream Cloud.

Follow the instruction, step by step:

  • In the left menu for the storage account, scroll to the Blob service section, then select Blobs.
  • Then click on Container button.
  • Enter a name for your new container. You can use numbers, lowercase letters, and dash (-) characters.
  • Select the level of public access to the container. The default level is Private (no anonymous access) and we recommend to leave it this way..
  • Click OK to create the container.

Your container is ready. Well done!

Enable your Azure Blob storage in Telestream Cloud console

Before you do that you will need to obtain your Storage Access Key.

  • Go to Azure portal.
  • In the navigation panel, click on All resources.
  • Choose the proper storage account.
  • Click on the Key icon to view the Access Keys for the storage account. Note that every storage account has two Storage Access Keys.
  • Click on the Copy icon next to the first Storage Access Key.
  • Open your Telestream Cloud console and paste the copied Storage Access Key.
azure cloud add
  • Fill in the appropriate fields, giving the store name, entering the storage account name and the container name.
  • Click Add Store and it’s done.

Steps to find the account name and key for your Azure storage account

Steps to find the account name and key for your Azure storage account

  • azure-storage-account
  • In the screen that appears, select the storage account for which you’d like to find the Account Name and Account Key. The name displayed here is the name of your storage account.

    azure-copy-keys

  • Copy Key1 or Key2 by clicking the copy icon. You can use either of the keys.

    azure-access-keys

  • Use the Account Name and Account Key to add your Azure storage account to RecoveryManager Plus.