Azure Functions: Simple Explanation with Examples
This article covers how Azure Functions work and how you can leverage them for your projects. Whether you're new to serverless computing or an experienced developer looking to expand your knowledge, this article will guide you through the process of getting started with Azure Functions.
- Azure Functions simplifies development by removing the need for infrastructure management, allowing developers to focus solely on writing code.
- Common triggers in Azure Functions include HTTP triggers, timer triggers, blob storage triggers, and queue triggers.
- Monitoring and logging, including integration with Application Insights, are crucial for tracking the performance and health of Azure Functions.
What is Azure Functions?
Azure Functions is a serverless computing service offered by Microsoft Azure. It enables the execution of small units of code, called functions, without the need to manage servers. These functions are triggered by specific events or inputs, allowing developers to respond to events in real time. By utilizing Azure Functions, developers can focus solely on writing code and not worry about infrastructure management.
Benefits of Using Azure Functions
Below are some of the benefits of using Azure Functions:
- Serverless Simplicity: Azure Functions allows you to focus solely on writing your code without the need to worry about managing servers. This means you can concentrate on building the functionality of your application without getting caught up in the complexities of infrastructure setup.
- Language Flexibility: Azure Functions supports popular programming languages such as C#, JavaScript, Python, and PowerShell. This flexibility allows you to use a language you're comfortable with or one that aligns with the requirements of your project.
- Cost and Performance Optimization: With Azure Functions, you only pay for the actual resources consumed during the execution of your functions. This pay-as-you-go model ensures cost efficiency as you're not charged for idle resources. Additionally, Azure Functions automatically scales based on demand, ensuring that your application can handle varying workloads without sacrificing performance.
- Streamlined Development and Deployment: Azure Functions simplifies the development and deployment processes. You can focus on writing individual functions that perform specific tasks rather than dealing with the complexities of managing the entire application infrastructure. This streamlined approach speeds up development time and allows you to quickly iterate on your ideas.
Getting Started with Azure Functions
Let's dive into the essentials of Azure Functions before guiding you through the process of creating your first function app.
Azure Functions Essentials
Triggers: Triggers define the events that invoke functions. They can be HTTP requests, timers, storage changes, or messages from queues.
Bindings: Bindings connect functions to external resources or services like Azure Storage or Cosmos DB. They enable seamless integration and data exchange.
Creating an Azure Functions App
To begin your Azure Functions journey, follow these steps:
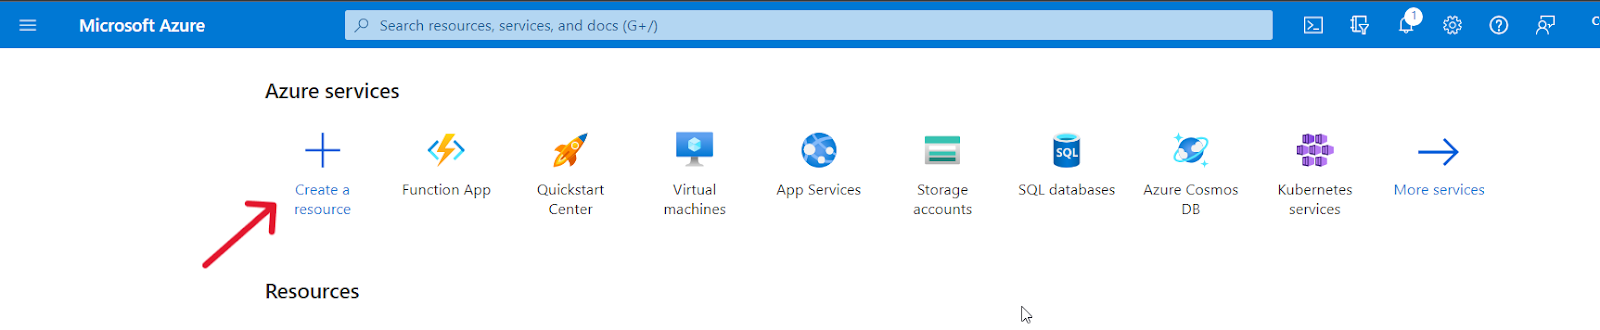
- Sign in to Azure: Log in to the Azure portal using your Azure account.
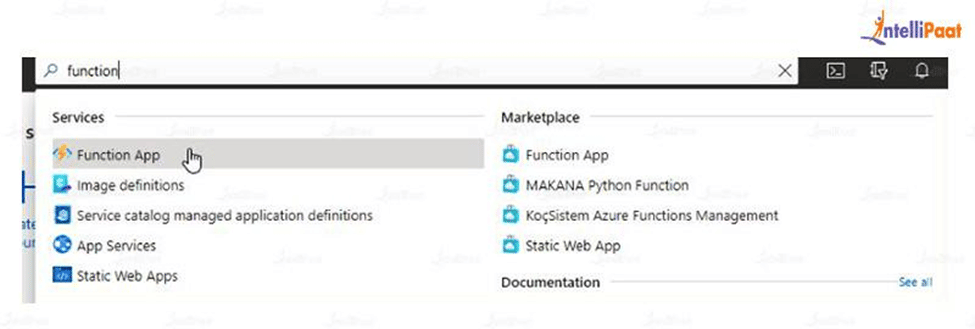
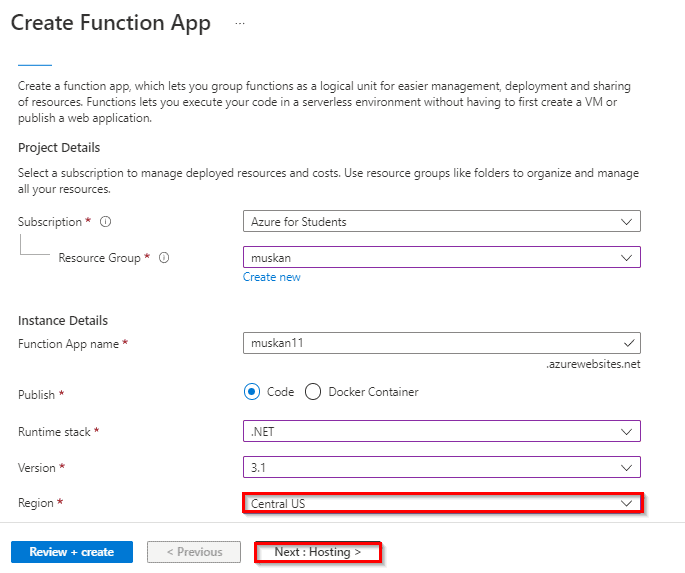
- Create a Function App: Click on "Create a resource" and search for "Function App" in the Azure Marketplace. Click on "Create" to begin the process.
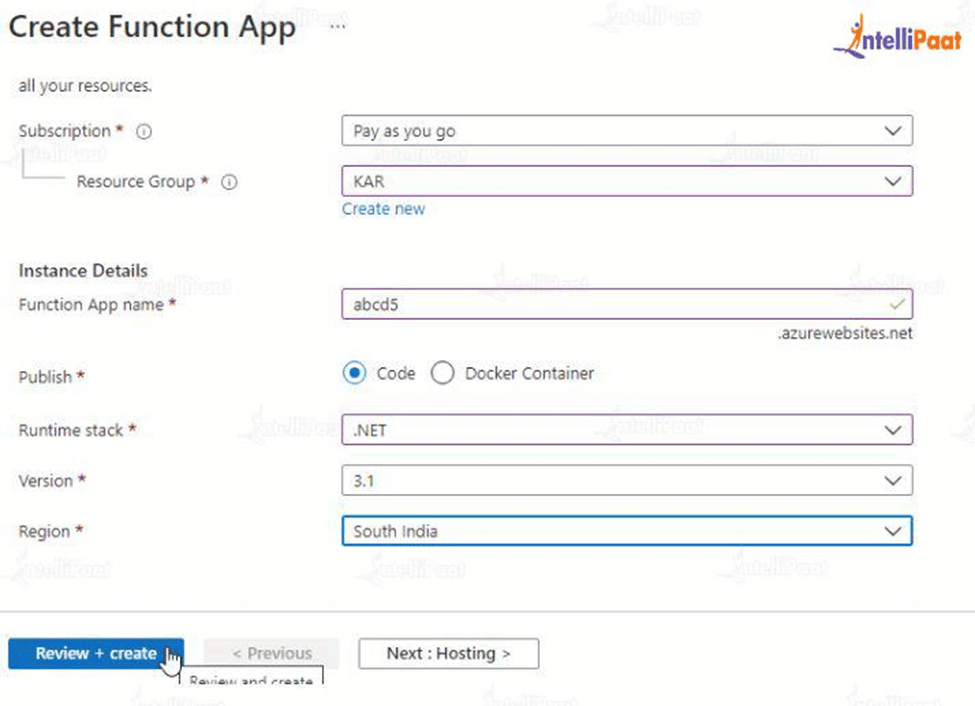
- Configure App Settings: Choose or create a new resource group, provide a unique name for your Function App, and choose your preferred subscription, runtime stack, and hosting plan. The hosting plan includes options like "Consumption Plan" (serverless) or dedicated plans with different pricing models.
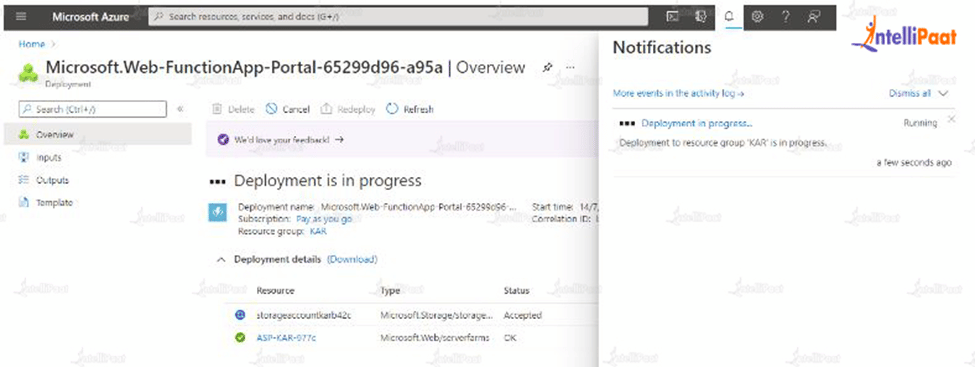
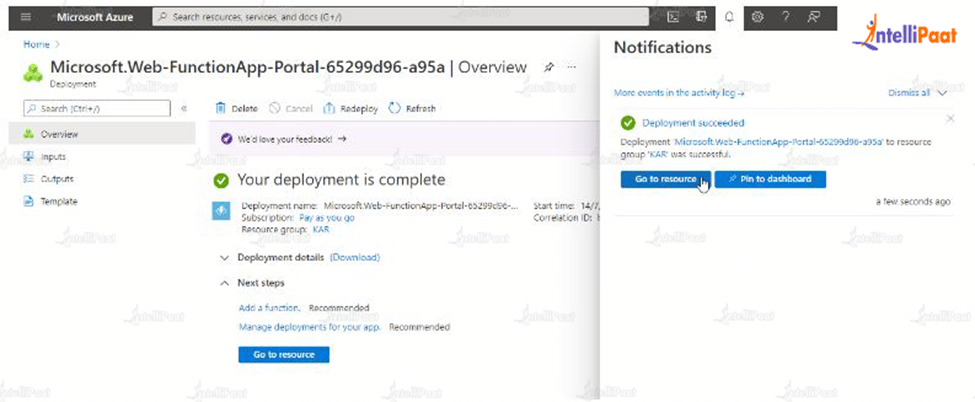
- Review and Create: Double-check your configurations and click on "Create" to create the Function App.
Creating Your First Azure Function
Now that you have your Function App set up, it's time to create your first function. We'll create a simple HTTP-triggered function using C#:
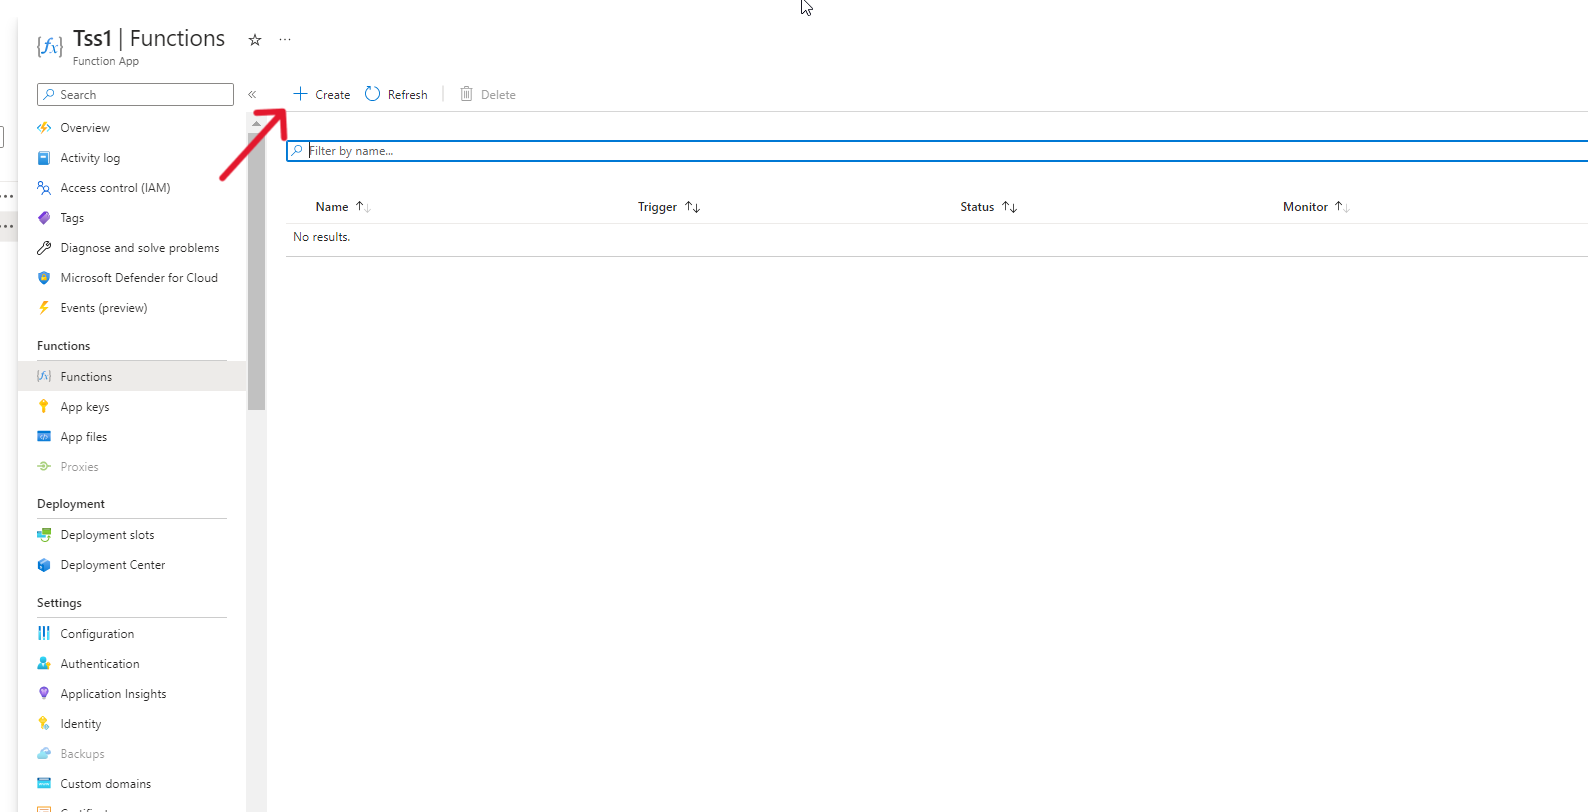
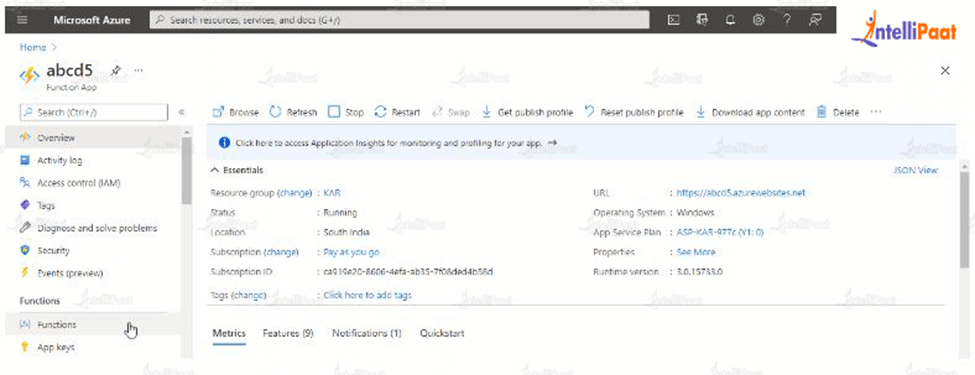
- Open the Function App: Navigate to your newly created Function App in the Azure portal.
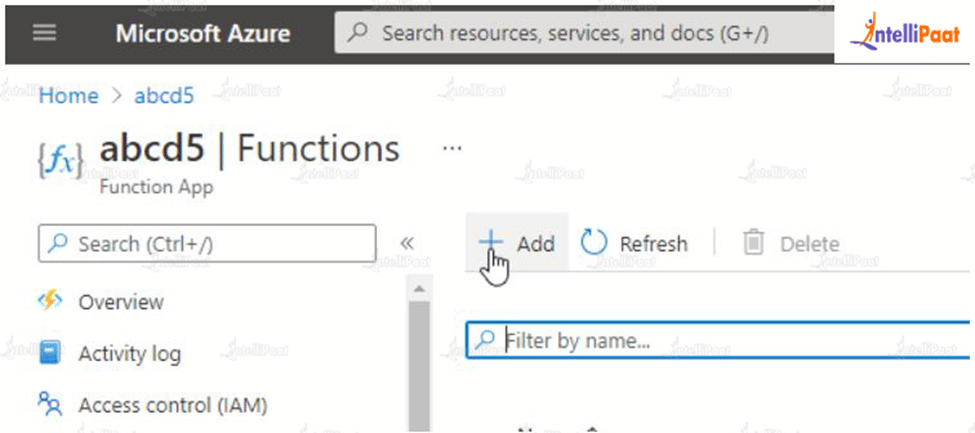
- Add a Function: Click on the "+ New function" button to add a new function.
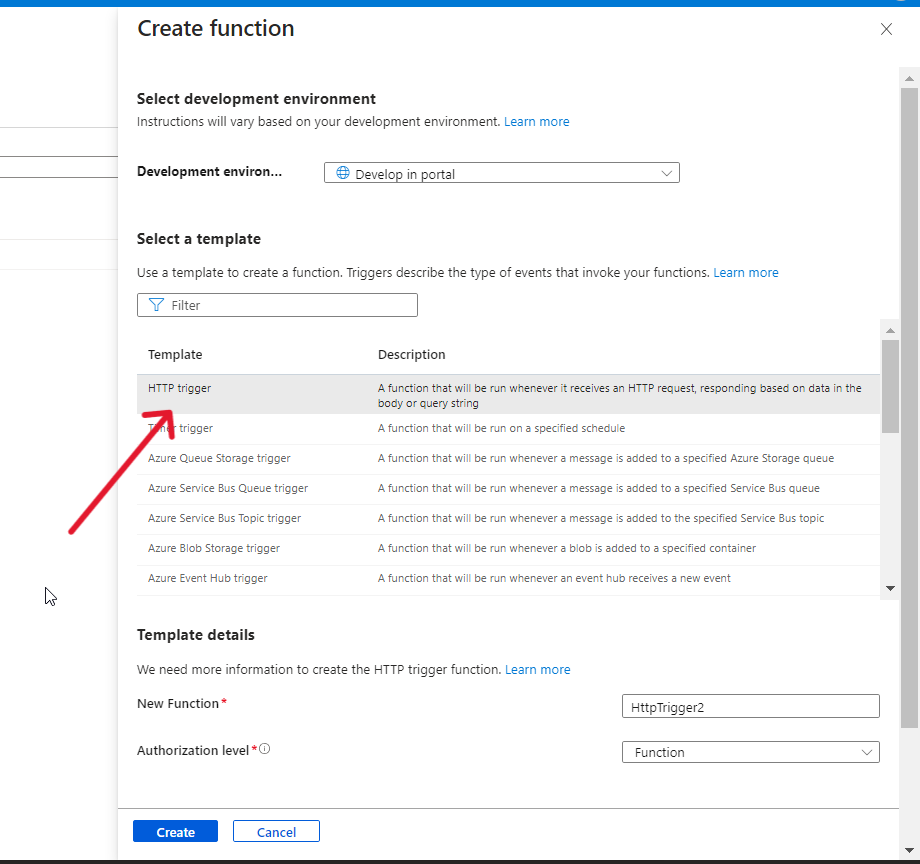
- Choose a Trigger: Select "HTTP trigger" as the trigger type. Give your function a name and choose the appropriate authorization level (Function or Anonymous, depending on whether authentication is required), then click on "Create".
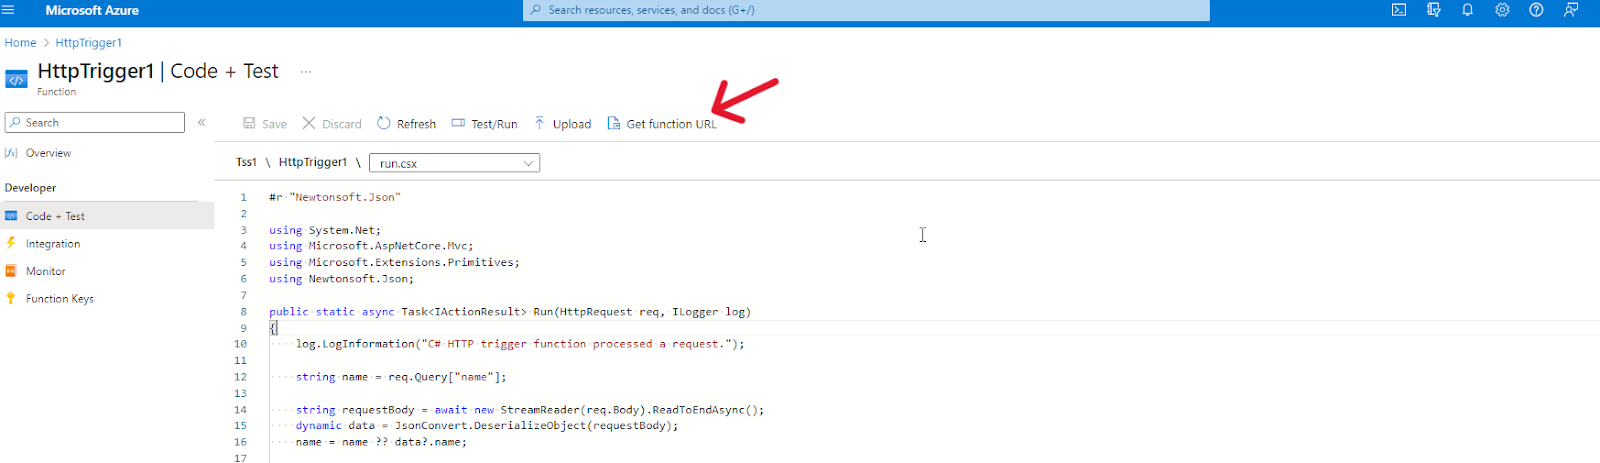
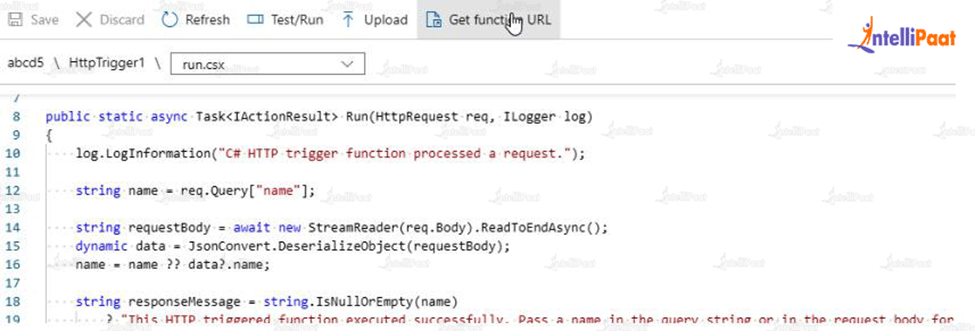
- Function Code: Navigate to the code + test section to customize the function code to perform the desired task. For example, for an HTTP trigger, the code might look like this:
#r "Newtonsoft.Json"

using System.Net;
using Microsoft.AspNetCore.Mvc;
using Microsoft.Extensions.Primitives;
using Newtonsoft.Json;

public static async Task<IActionResult> Run(HttpRequest req, ILogger log)
{
    log.LogInformation("C# HTTP trigger function processed a request.");

    string name = req.Query["name"];

    string requestBody = await new StreamReader(req.Body).ReadToEndAsync();
    dynamic data = JsonConvert.DeserializeObject(requestBody);
    name = name ?? data?.name;

    string responseMessage = string.IsNullOrEmpty(name)
        ? "This HTTP triggered function executed successfully. Pass a name in the query string or in the request body for a personalized response."
                : $"Hello, {name}. This HTTP triggered function executed successfully.";

            return new OkObjectResult(responseMessage);
}
Testing the Function
- Get the Function URL: In the code + test section, locate "Get Function URL". Copy the function URL to the clipboard.
- Send HTTP Requests: Open a new tab in your web browser. Paste the function URL into the address bar of the new tab. Hit Enter. The function will be invoked, and the response from the function will be displayed in the browser window.

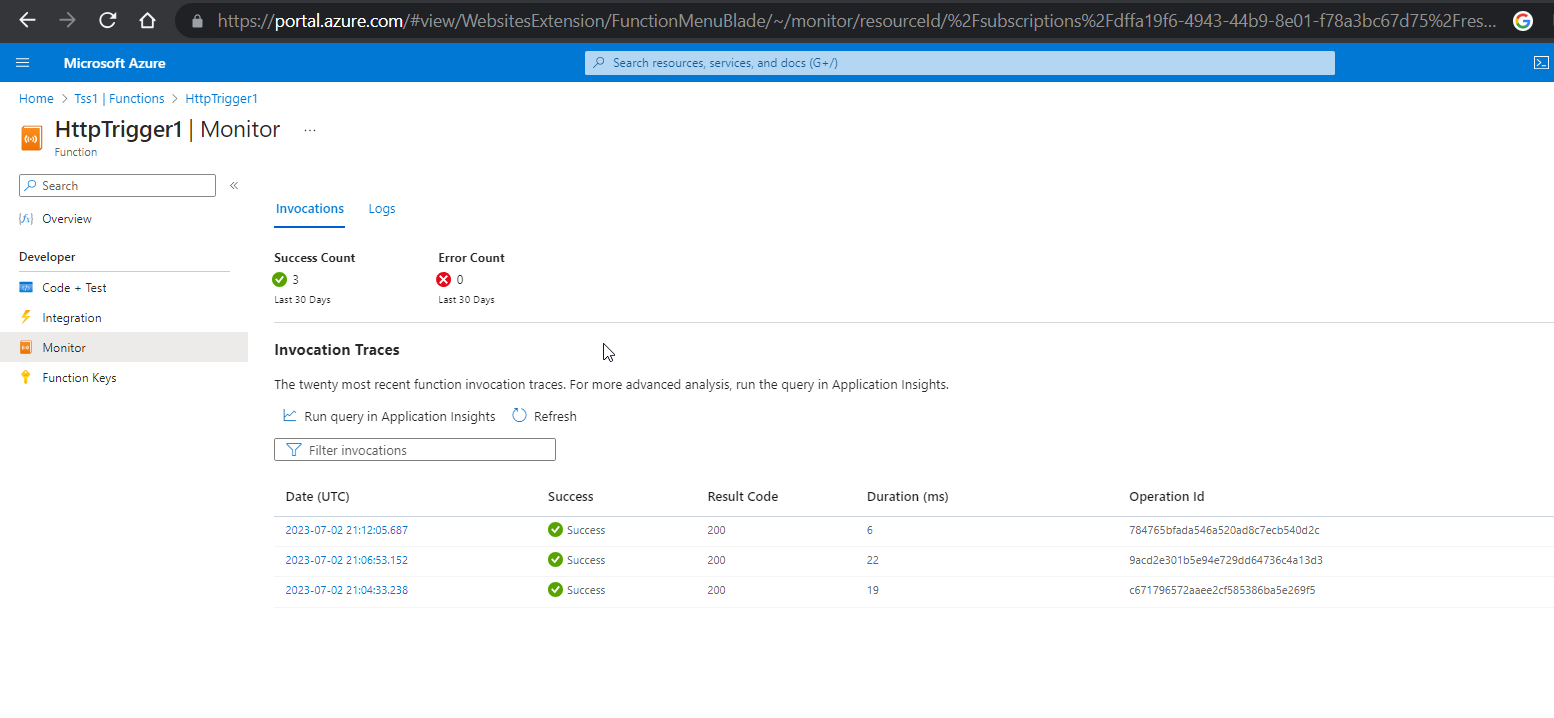
- View Results: Select the "Monitor" tab in the left-hand menu. In the "Monitor" tab, you will be able to access information about your recent HTTP invocations, execution details, and any logged output or errors.
Common Azure Function Triggers
Azure Functions offer various triggers to handle different types of events. Let's explore some of the most commonly used triggers:
HTTP Trigger
HTTP triggers enable functions to be invoked by HTTP requests. They provide a straightforward way to build API endpoints and handle incoming HTTP requests.
Use Cases: Azure Functions with HTTP triggers can be used to create lightweight and scalable RESTful APIs. They are ideal for processing incoming webhooks from various services and taking appropriate actions.
Timer Trigger
Timer triggers allow functions to be executed on a schedule, such as every hour, day, or week. They are useful for tasks like data synchronization or periodic cleanup.
Use Cases: Time-triggered functions enable the automated execution of tasks like generating reports, aggregating data, or sending regular notifications based on specific time intervals.
Azure Blob Storage Trigger
Azure Blob Storage Trigger allows functions to respond to changes, such as new file additions, modifications, or deletions in the Azure Blob storage.
Use Cases: The Azure Blob Storage Trigger automates actions and initiates functions in response to specific events within a Blob storage container, including file uploads, modifications, or deletions.
Azure Queue Triggers
Queue triggers allow functions to process messages from Azure Storage queues or Azure Service Bus queues. They enable asynchronous and reliable message processing. This means that messages can be processed concurrently and independently without being restricted to a specific sequence or order.
Use Cases: Queue-triggered functions can be used to process incoming orders, validate data, or trigger downstream operations asynchronously, making them ideal for handling messages.
Azure Event Grid Trigger
Azure Event Grid provides a centralized event routing service that simplifies building event-driven applications. It allows you to subscribe to events from various Azure services and custom publishers.
Use Cases: Azure Functions can process events from various Azure services like Cosmos DB, Azure Storage, or Azure Service Bus and react to document inserts, file uploads, or other events from these services.
Monitoring and Logging Azure Functions
Monitoring and logging are crucial for understanding the performance and health of your Azure Functions. Fortunately, Azure Functions offers built-in monitoring capabilities to track function execution, performance metrics, and health. However, by integrating application insights, you gain advanced monitoring capabilities and robust logging functionality. This allows you to capture and analyze logs from your Azure Functions alongside other telemetry data, providing a comprehensive view of your application's performance.
Azure Functions Best Practices
For anyone looking to utilize Azure Functions, understanding and implementing the best practices is vital for building reliable serverless applications. These practices serve as guiding principles to optimize performance, maintain application stability, and ensure a seamless user experience. Let's take a closer look at each best practice and why they matter:
- Setting up alerts for critical metrics: As previously mentioned, monitoring the performance of your Azure Functions is crucial. By setting up alerts for key metrics like response times and resource utilization, you can be promptly notified of any issues that may arise. This proactive approach allows you to take immediate action, reducing potential downtimes and maintaining a smooth user experience.
- Optimizing deployment strategy: Simplifying the deployment process is vital for efficient application management. Adopting the "run from package" approach reduces deployment errors and enhances application stability. Consider continuous deployment to streamline integration with your source control solution.
- Leveraging Application Insights: Gaining insights into your function execution and user interactions is essential for optimizing performance. Integrating Azure Application Insights provides valuable monitoring and diagnostics capabilities, helping you identify performance bottlenecks and improve overall application efficiency.
- Designing for concurrency and scalability: Preparing your application for varying workloads and potential increases in demand is essential. Utilize triggers like Azure Event Grid and implement a retry pattern to ensure your application remains responsive under heavy loads.
- Prioritizing security in development and deployment: Security is a top priority for any application. Follow secure coding practices such as storing sensitive data in Azure Key Vault and applying role-based access control (RBAC) and managed identities to safeguard your Azure Functions from potential threats.


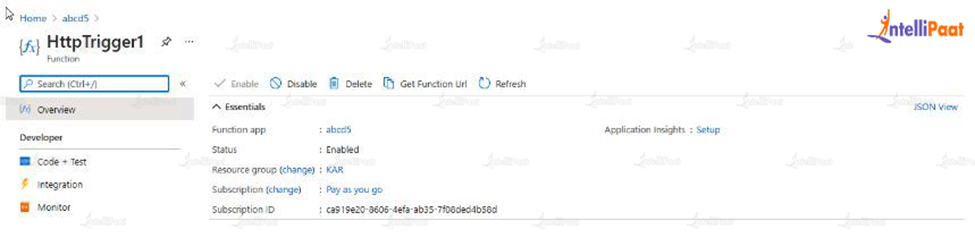


 9. Then click on Create Function. After that, a new HTTP trigger will be created. Select the option of Get File URL and then click on the copy to clipboard button to copy the URL.


