Azure Functions Tutorial
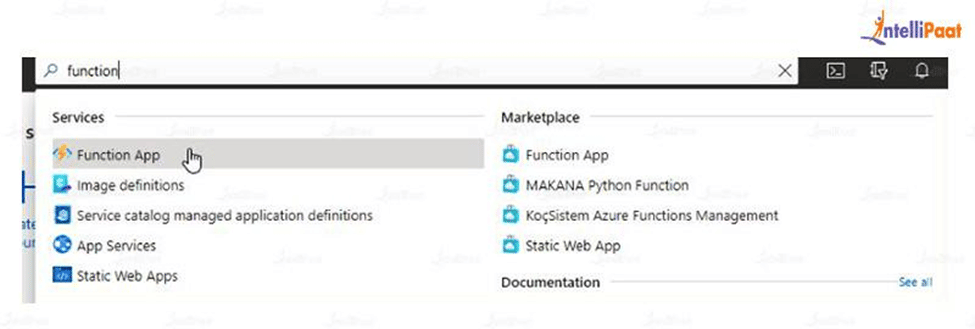
1. Goto the search bar and search for function App and open it
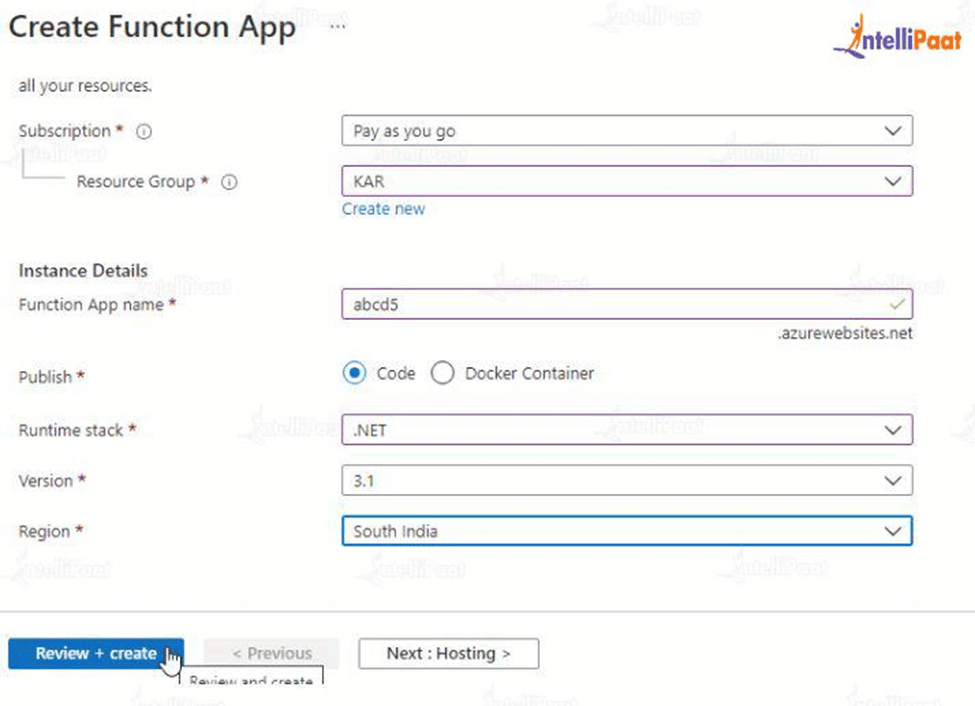
2. Click on create to create a new function app.

3. Fill in the details and proceed to click on Review + Create
4. If you are satisfied with the review, click on Create at the bottom

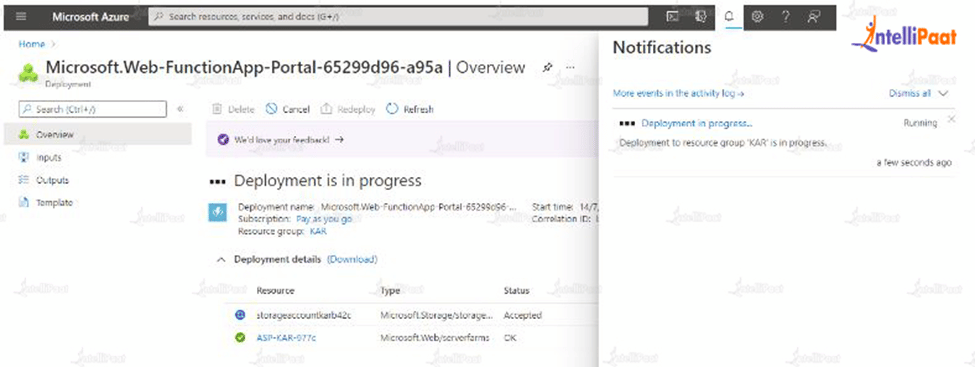
5. Wait for a minute or two until the function app gets created. You can check the status by clicking on the notification icon (bell icon).
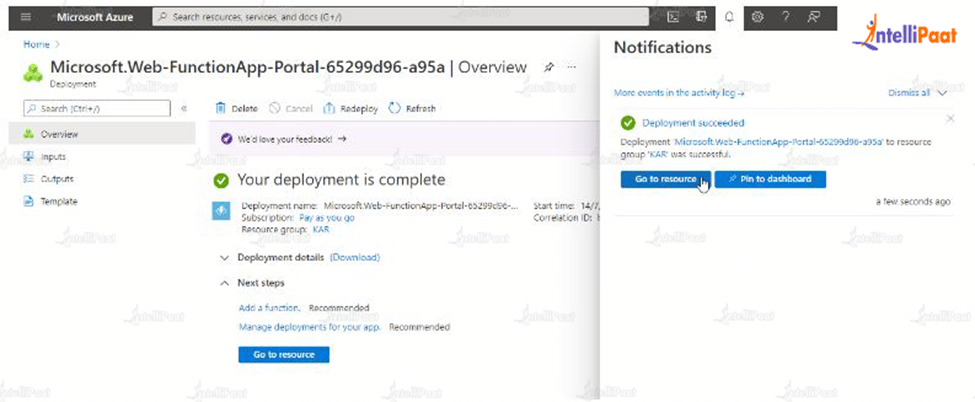
6. Once the status turns to green, that is, a tick mark as shown, click on the go-to resource to proceed. This will take us inside the function app.
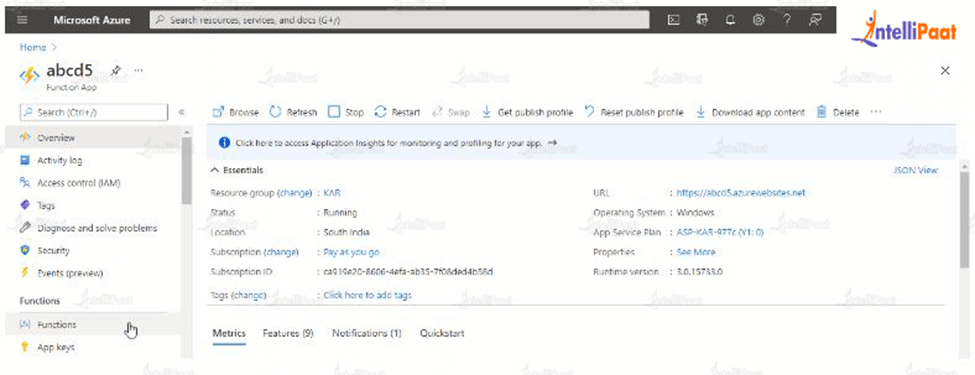
7. This is how the created function app will look. Check the left column for Functions and click to proceed.
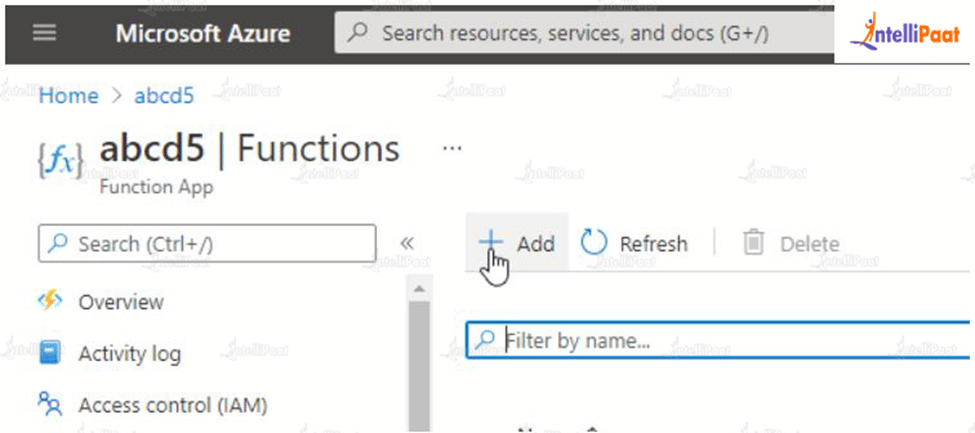
8. After this, click on add, to create a new function.
9. Choose the Develop in portal option and choose the HTTP trigger as the template and click on add below.

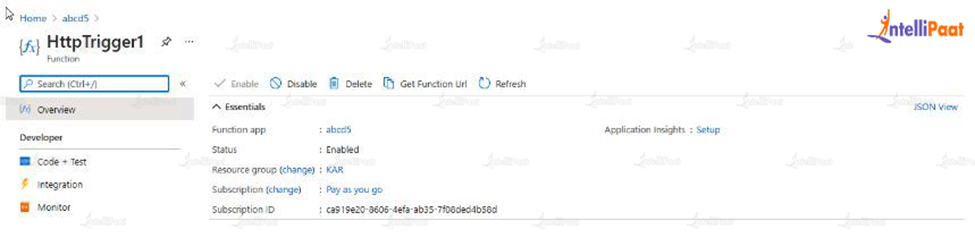
10. Wait for the function to be created and click on Code + Test.
11. After this, click on the Get function URL.
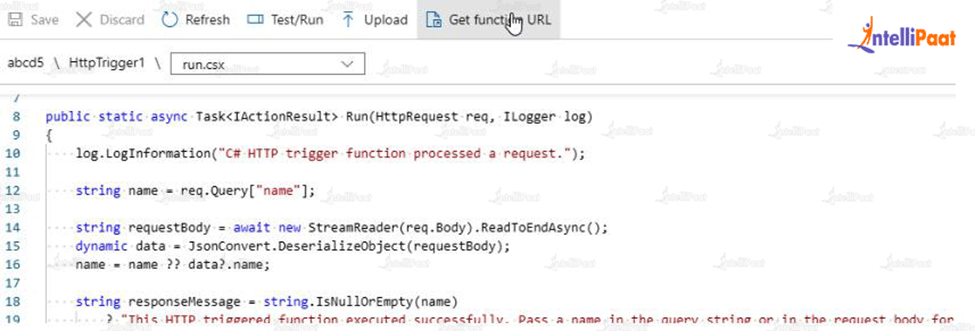
12. Paste the URL on the browser and check if it is loading. If not, recheck the process.

13. It asks to pass a name as a string.
At the end of the URL, type &name=”AbC”
AbC is just an example name, anything can be used in place of that.
Like it can be seen in the given picture, the name gets reflected on the page. This is done by the HTTP trigger function which we created.

No comments:
Post a Comment