Wednesday, 22 May 2024

Azure – Create a new Linux VM and connect to using SSH


Azure – Create a new Linux VM and connect to using SSH


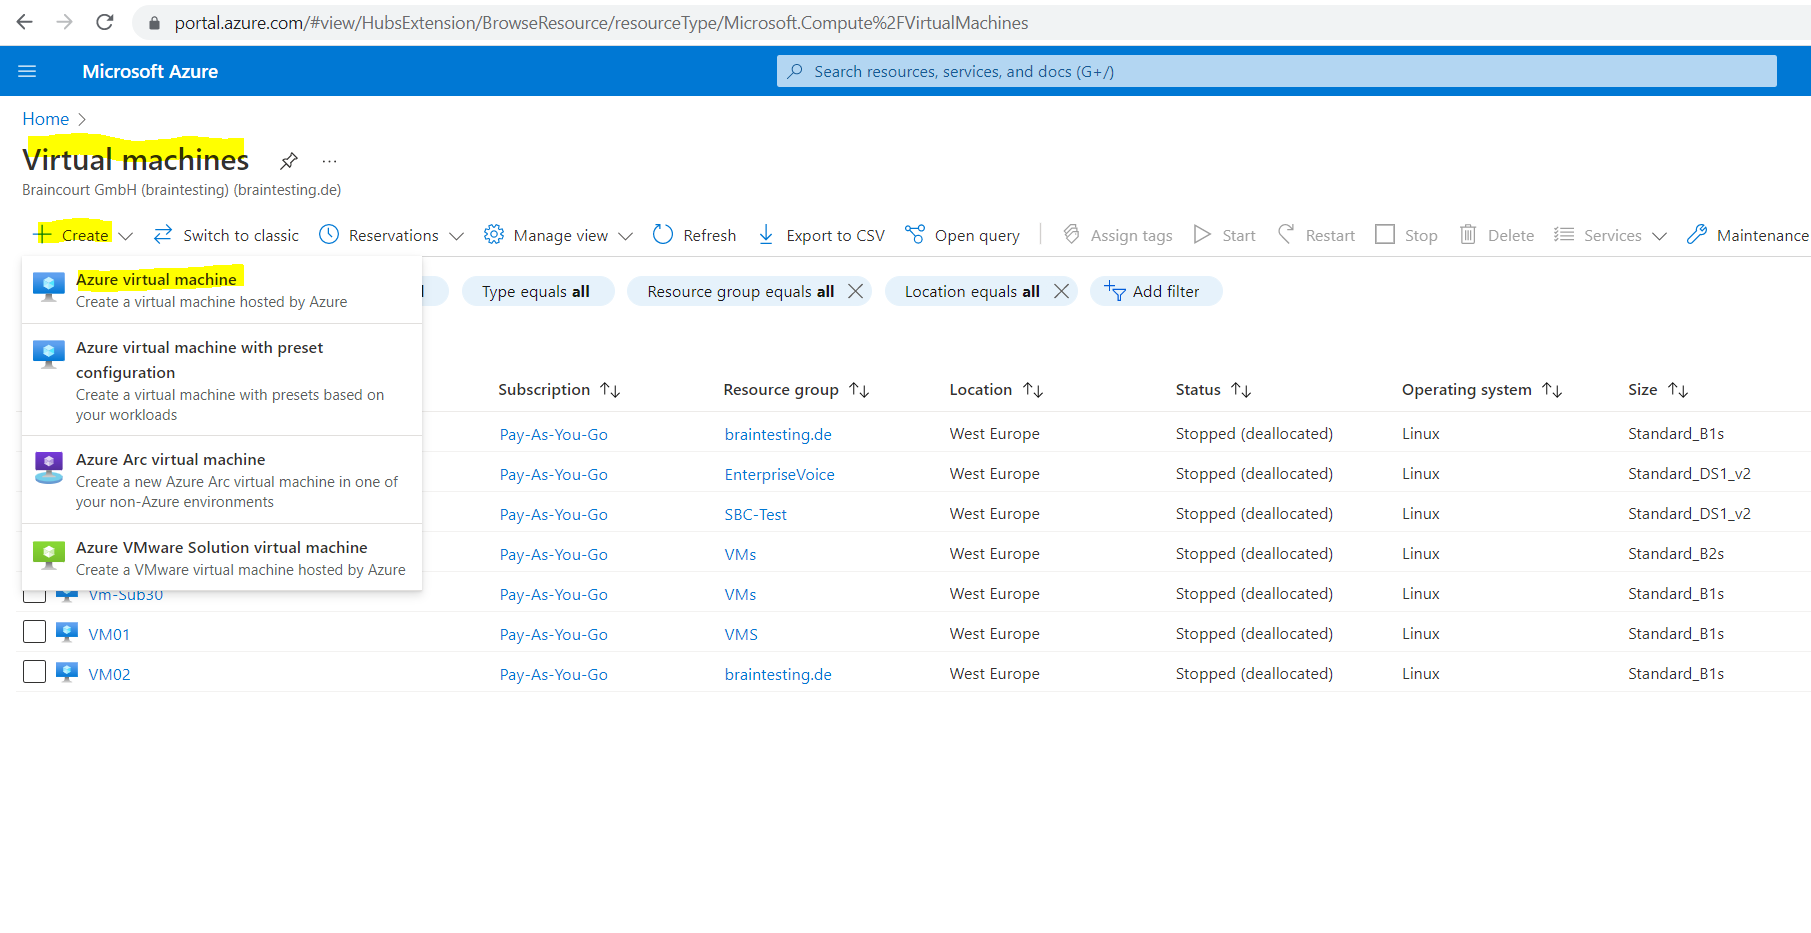
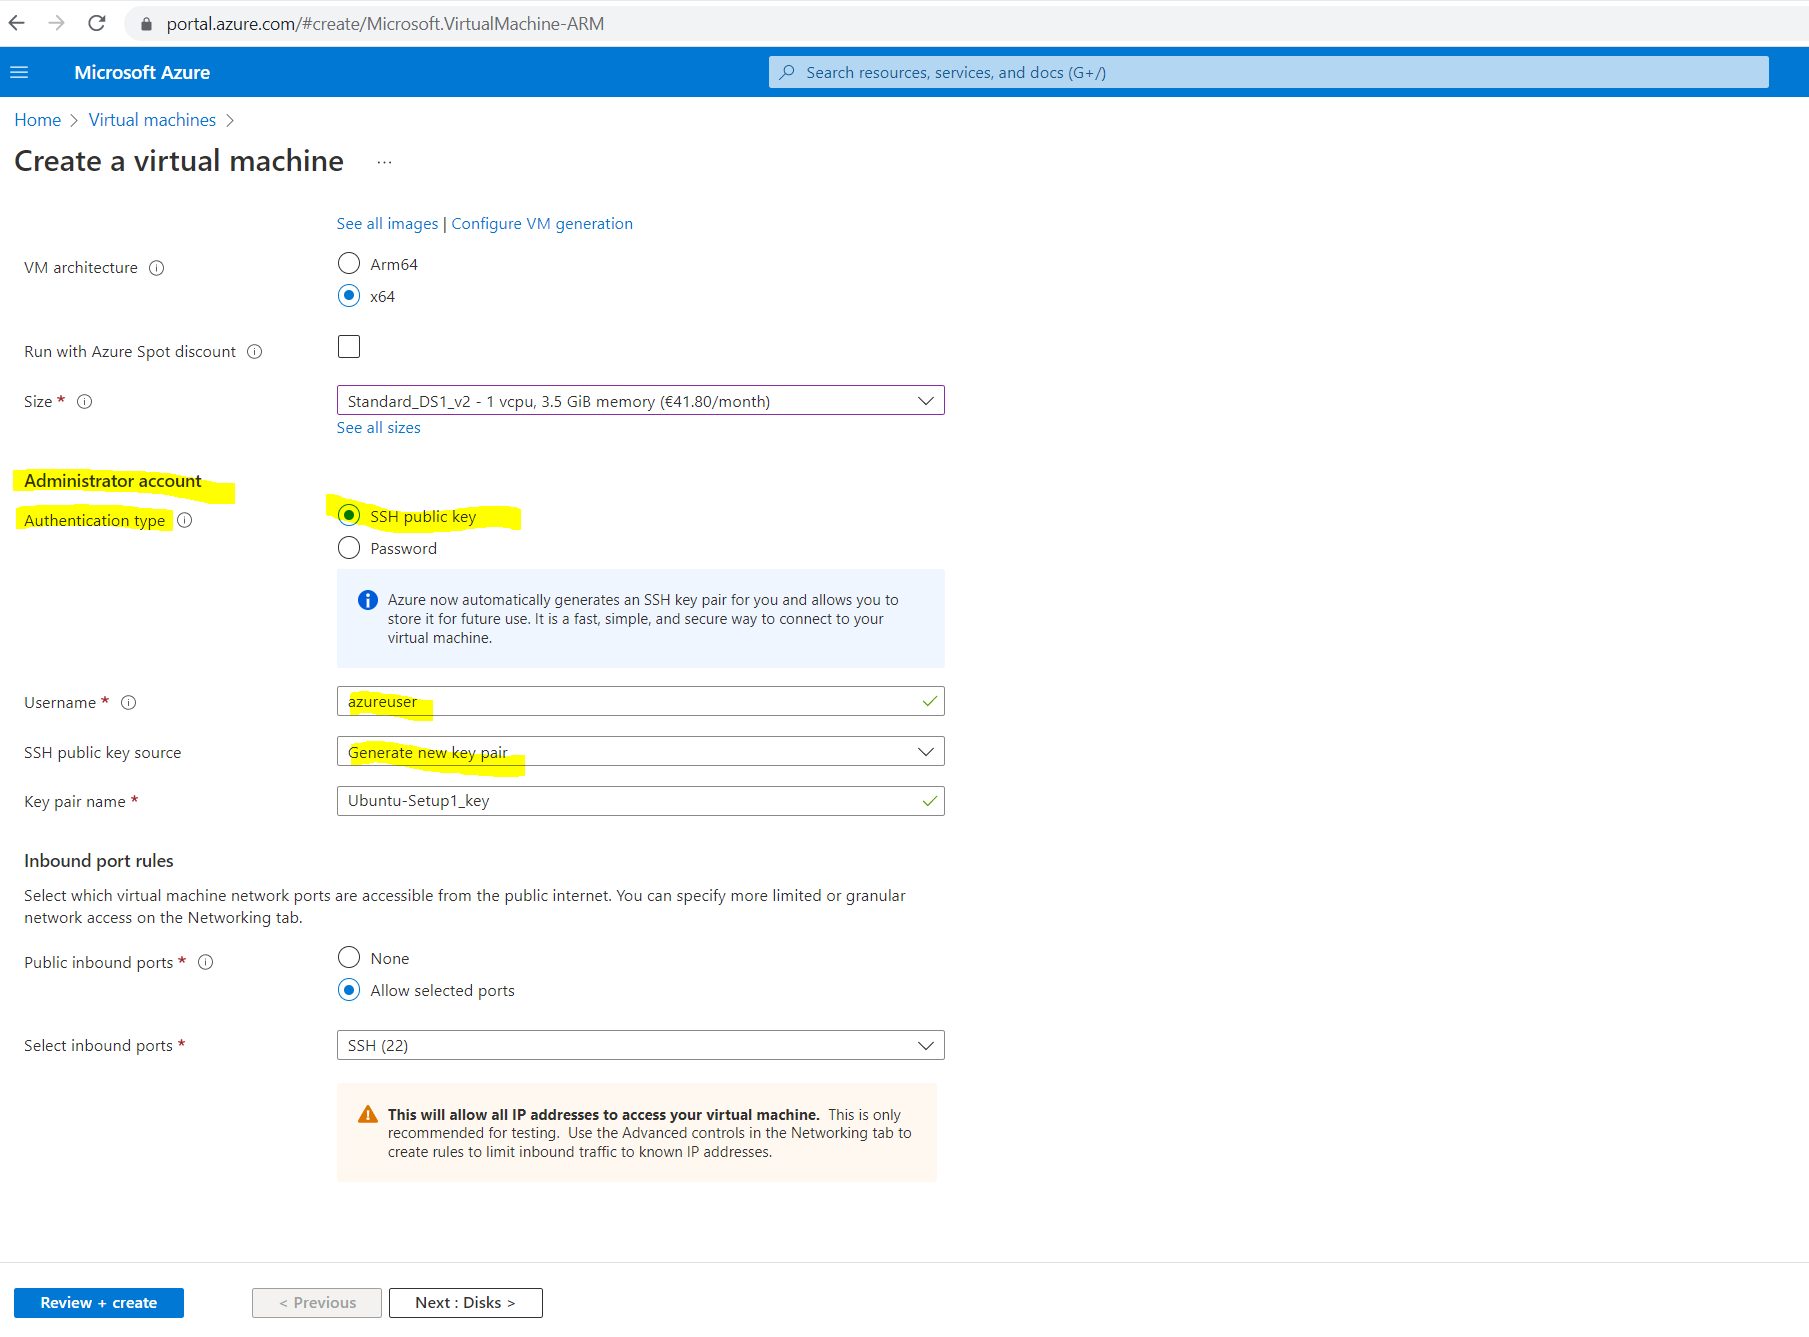
In the Azure portal open the Virtual Machines services and click on Create –> Azure virtual machine


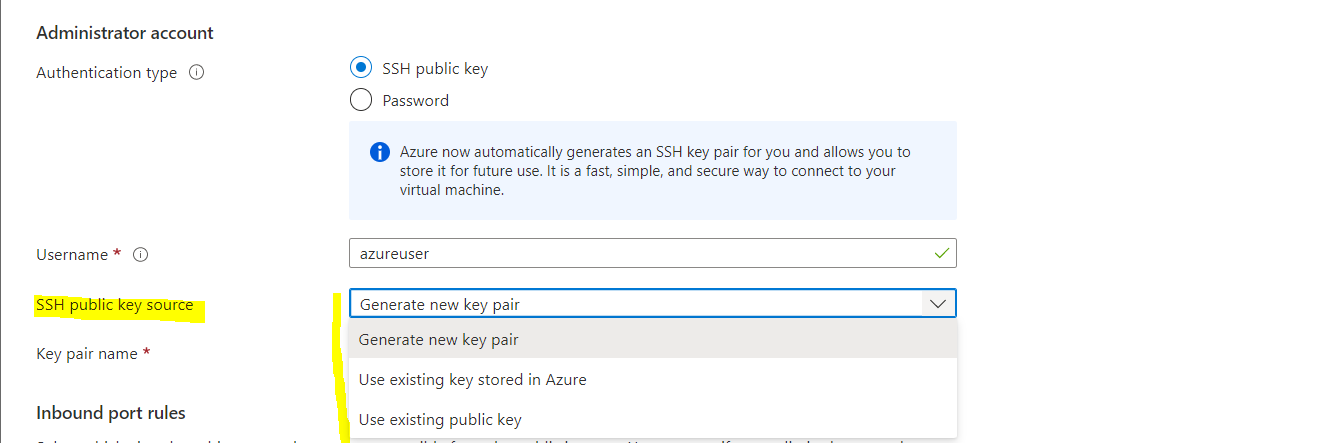
When using SSH with private/public key authentication, you can choose between:

  • Generate a new key pair
  • Use existing key stored in Azure
  • Use existing public key


You can also choose to use password authentication here.


I will create a new key pair below.


By default inbound traffic port 22 TCP will be granted from any source. You can restrict access later to allow only traffic from known IP addresses.


When the VM is created you can control access to and from the VM under the network settings as shown below.


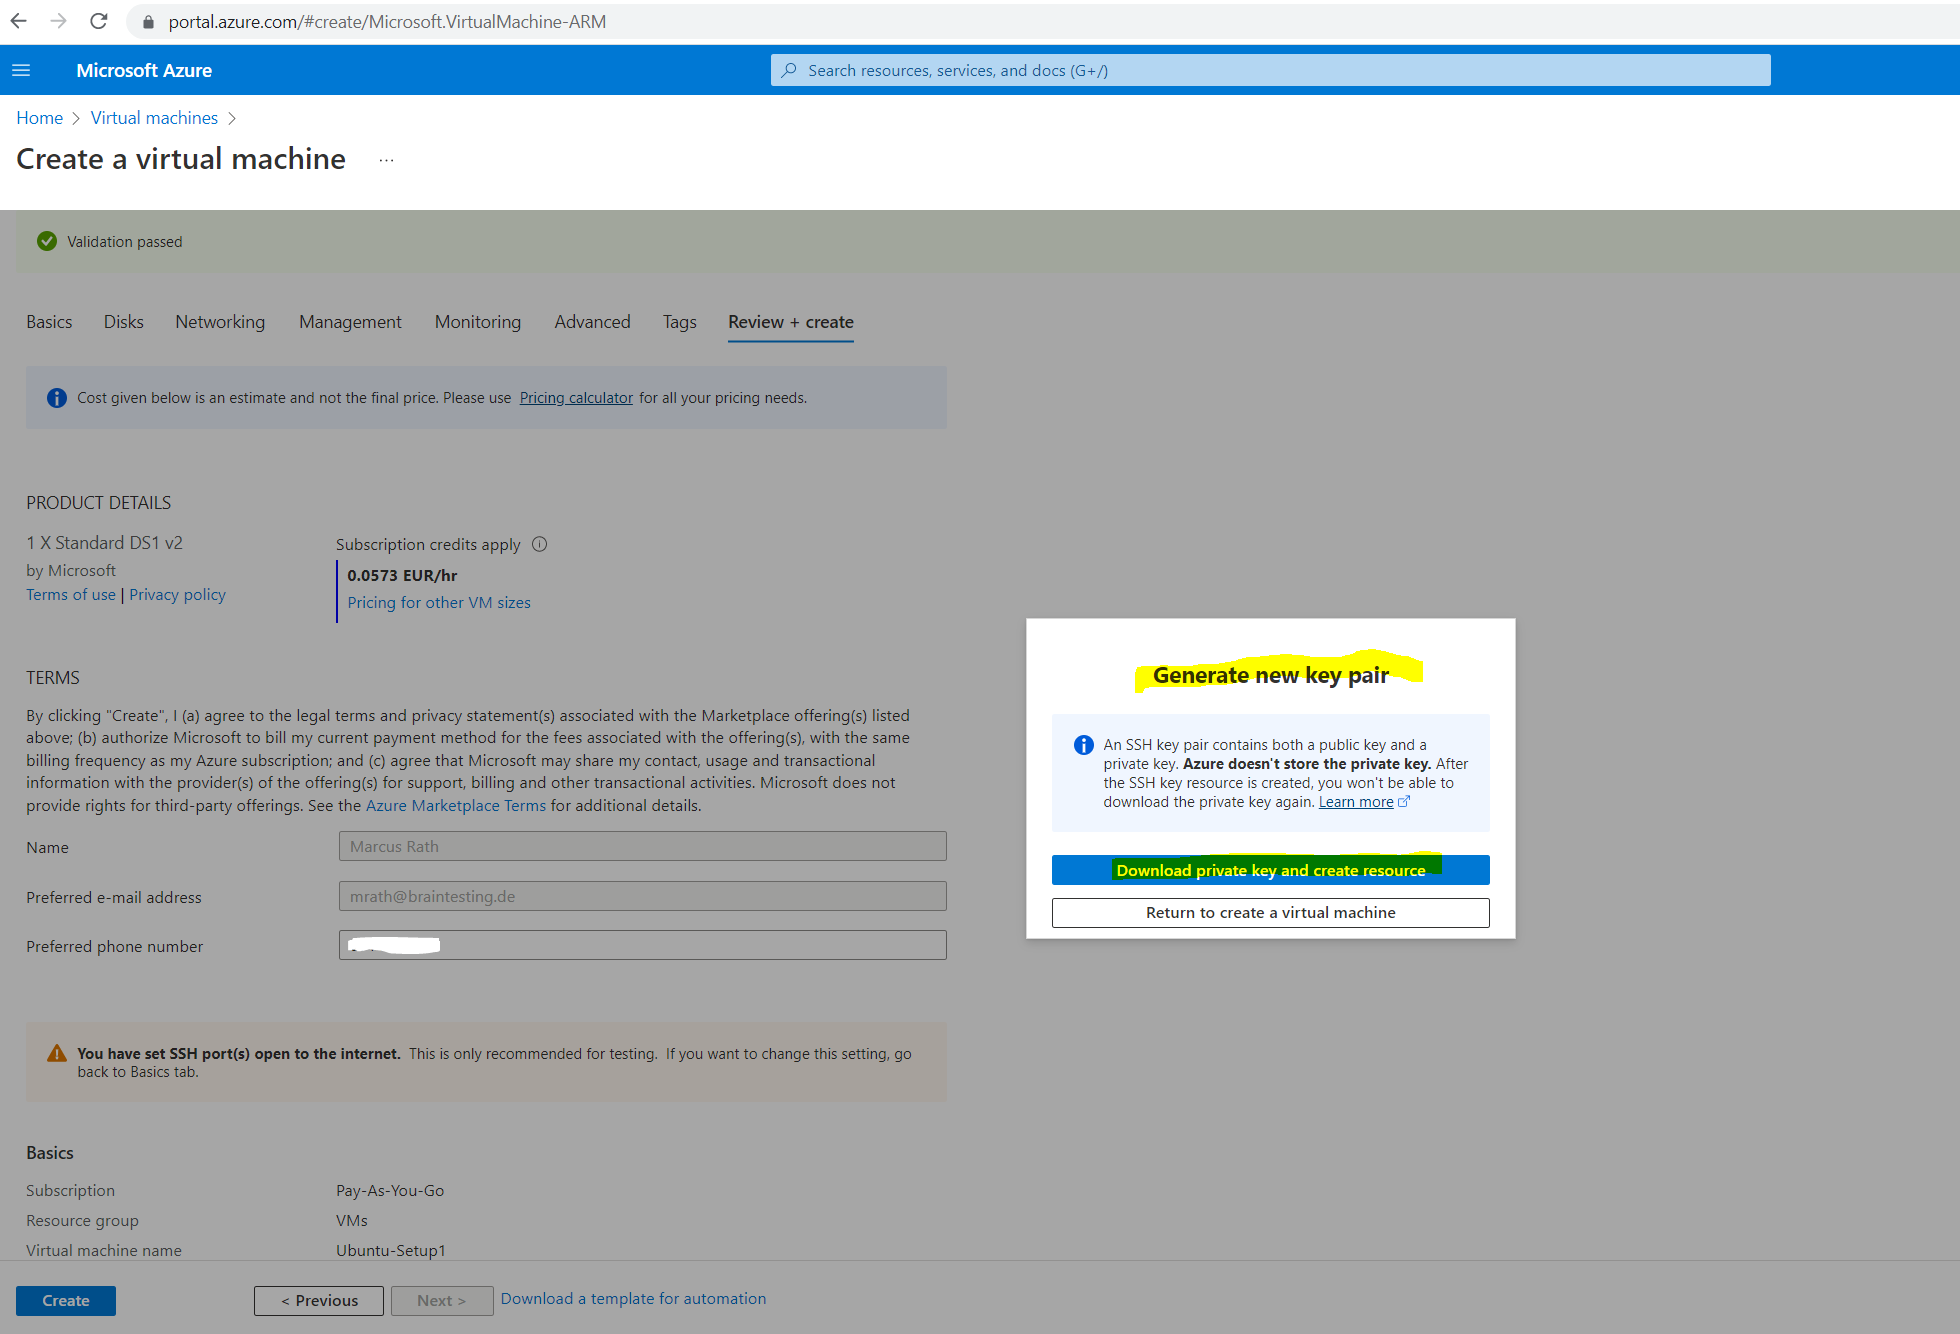
Save the private key to your computer.


Connect to a Azure Linux VM using SSH private/public key authentication

To connect from another Linux VM to our new VM, we can use the ssh command and -i parameter (identity file) for the private key file to connect to.

$ ssh -i /path/to/<private key file> username@Host -p22


To connect to the new Linux VM from a Windows host we can use PuTTY to connect to.

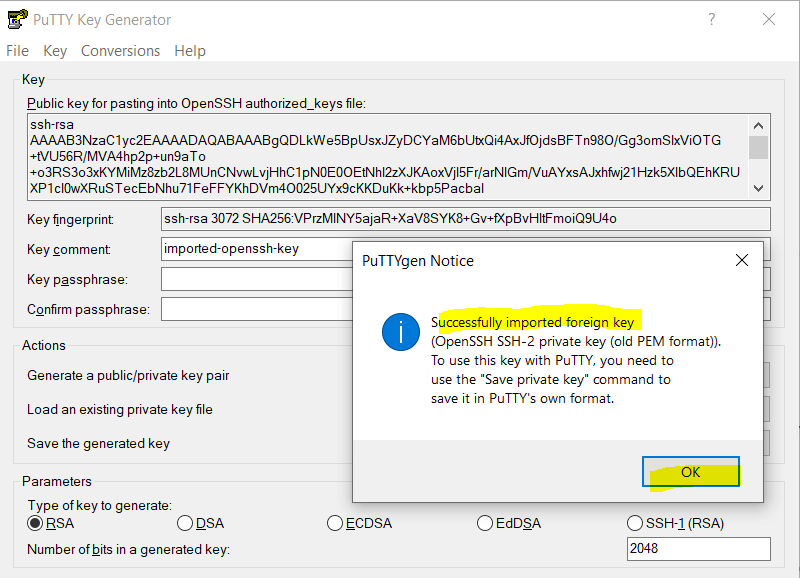
In order to use the previously downloaded private SSH key in PuTTY, we first need to convert it to the .ppk format.

In PuTTYgen click on File –> Load private key

Download PuTTYgen
https://www.putty.org/


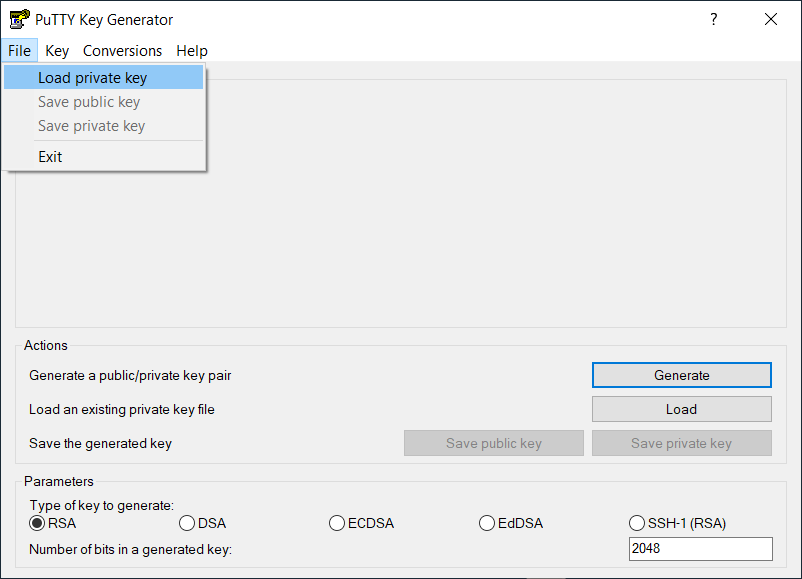
The private key file will be converted and finally you have to save it.


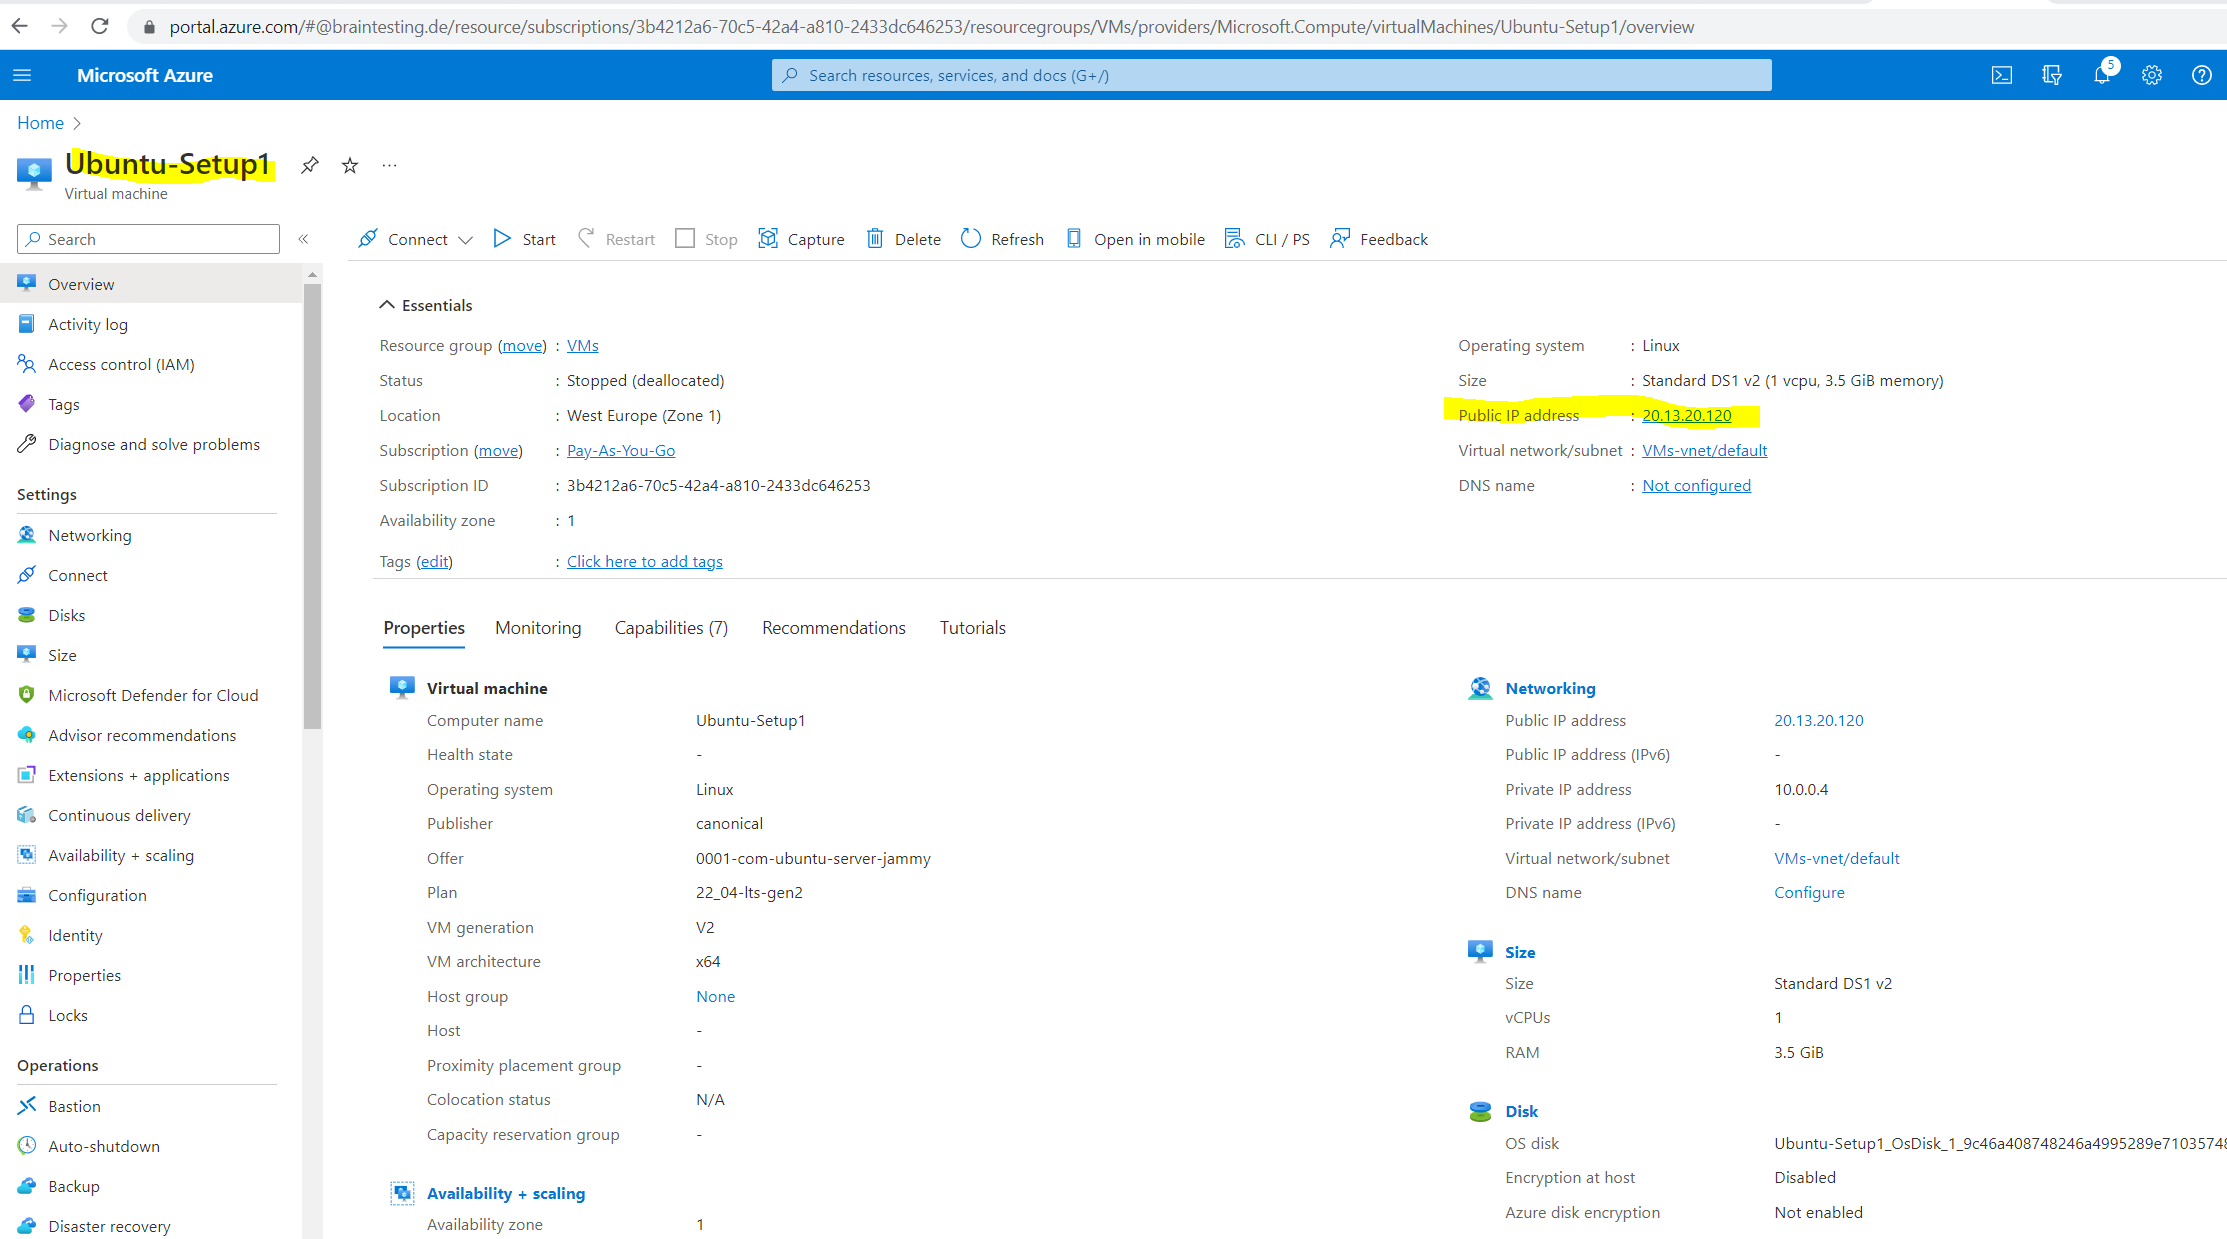
Now we just need to check the public IP address and we can use PuTTY to connect to the VM from Windows.


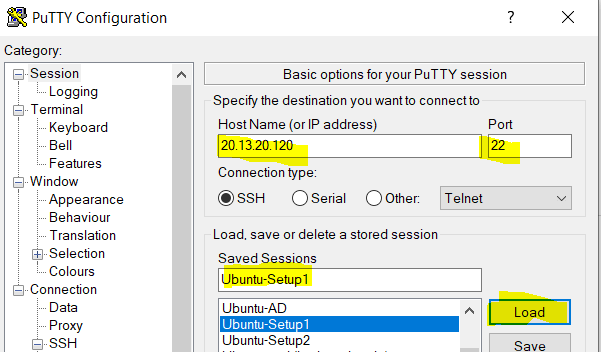
In PuTTY create a new Session with the public IP addressport number default 22 for SSH and save the session.

Download PuTTY
https://www.putty.org/


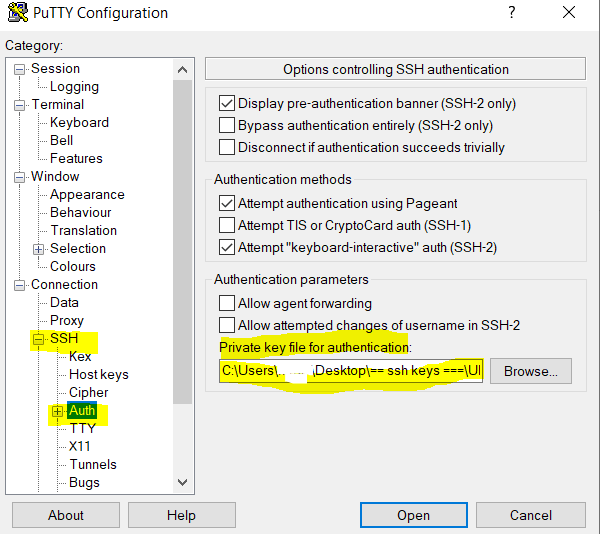
We also need to add the previously created private SSH key in .ppk format to use with PuTTY.

Connection –> SSH –> Auth –> Private key file for authentication


Finally I can connect to my Linux VM using the username (by default azureuser), set during the creation of the VM and the private key from the generated key pair.


Create SSH Key Store

If you frequently use the portal to deploy Linux VMs, you can make using SSH keys simpler by creating them directly in the portal, or uploading them from your computer.

You can create a SSH keys when you first create a VM and reuse them for other VMs. Or, you can create SSH keys separately, so that you have a set of keys stored in Azure to fit your organizations needs.

If you have existing keys and you want to simplify using them in the portal, you can upload them and store them in Azure for reuse.

For more detailed information about creating and using SSH keys with Linux VMs, see Use SSH keys to connect to Linux VMs.

Source: https://learn.microsoft.com/en-us/azure/virtual-machines/ssh-keys-portal


Generate new keys

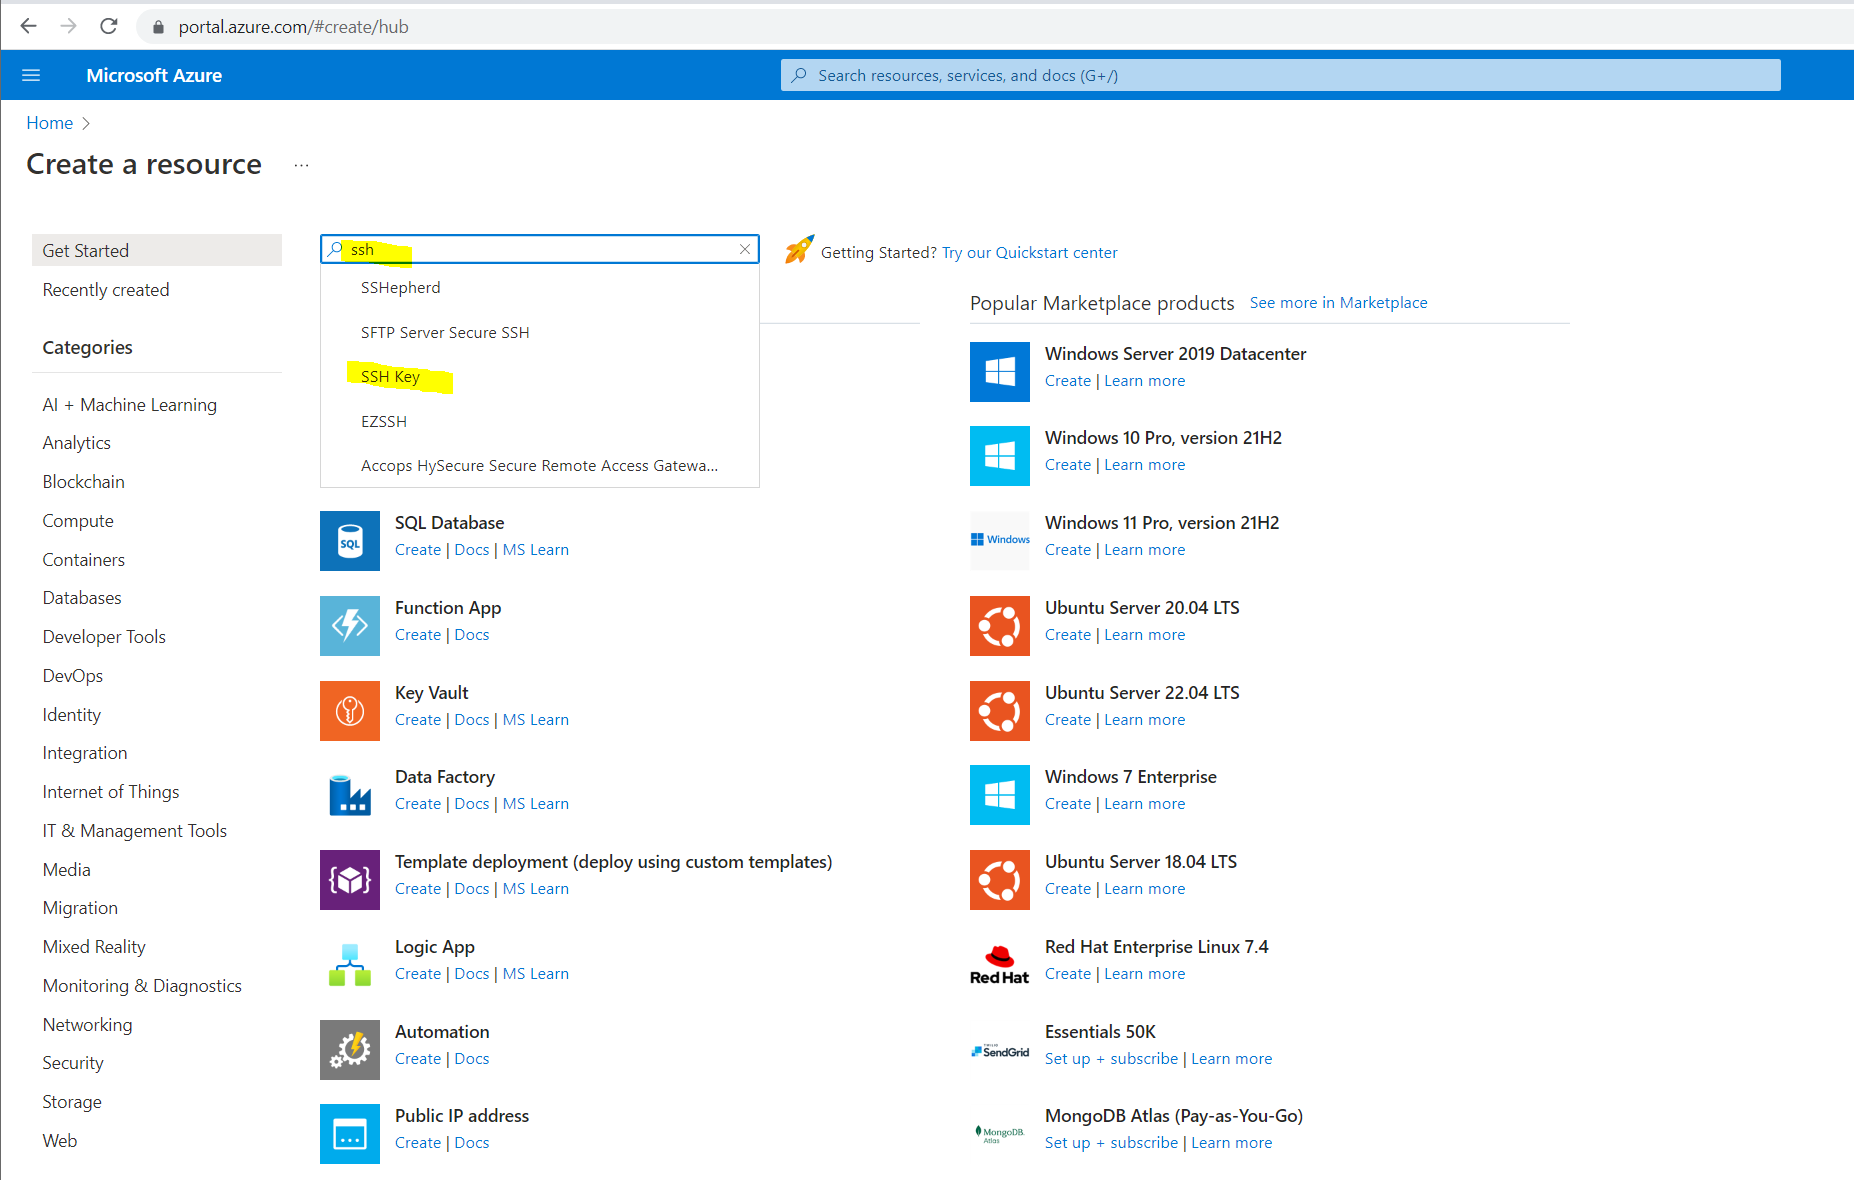
Open the Azure portal and search for SSH.


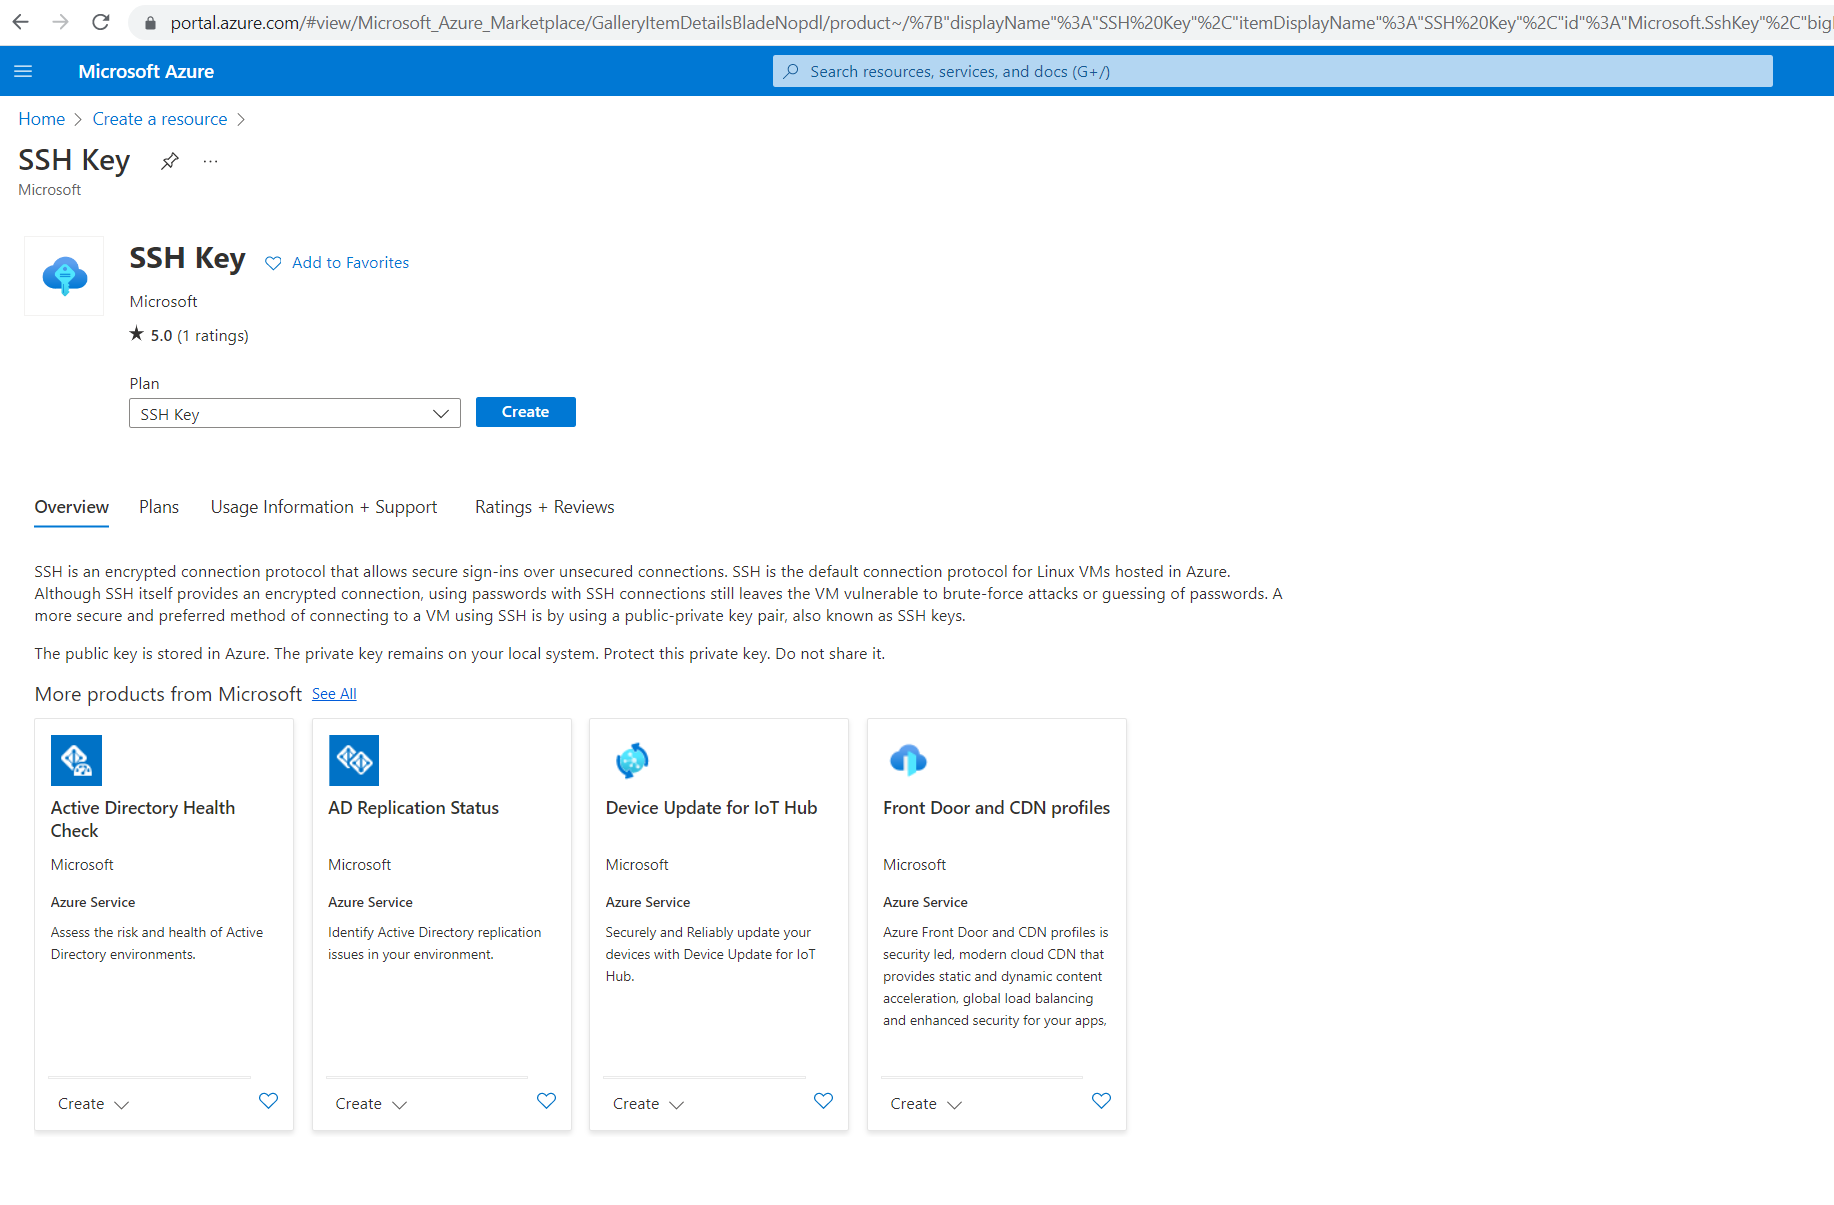
On the SSH Key page, select Create.


Enter a name for the key pair and select the source, I will create a new one here.


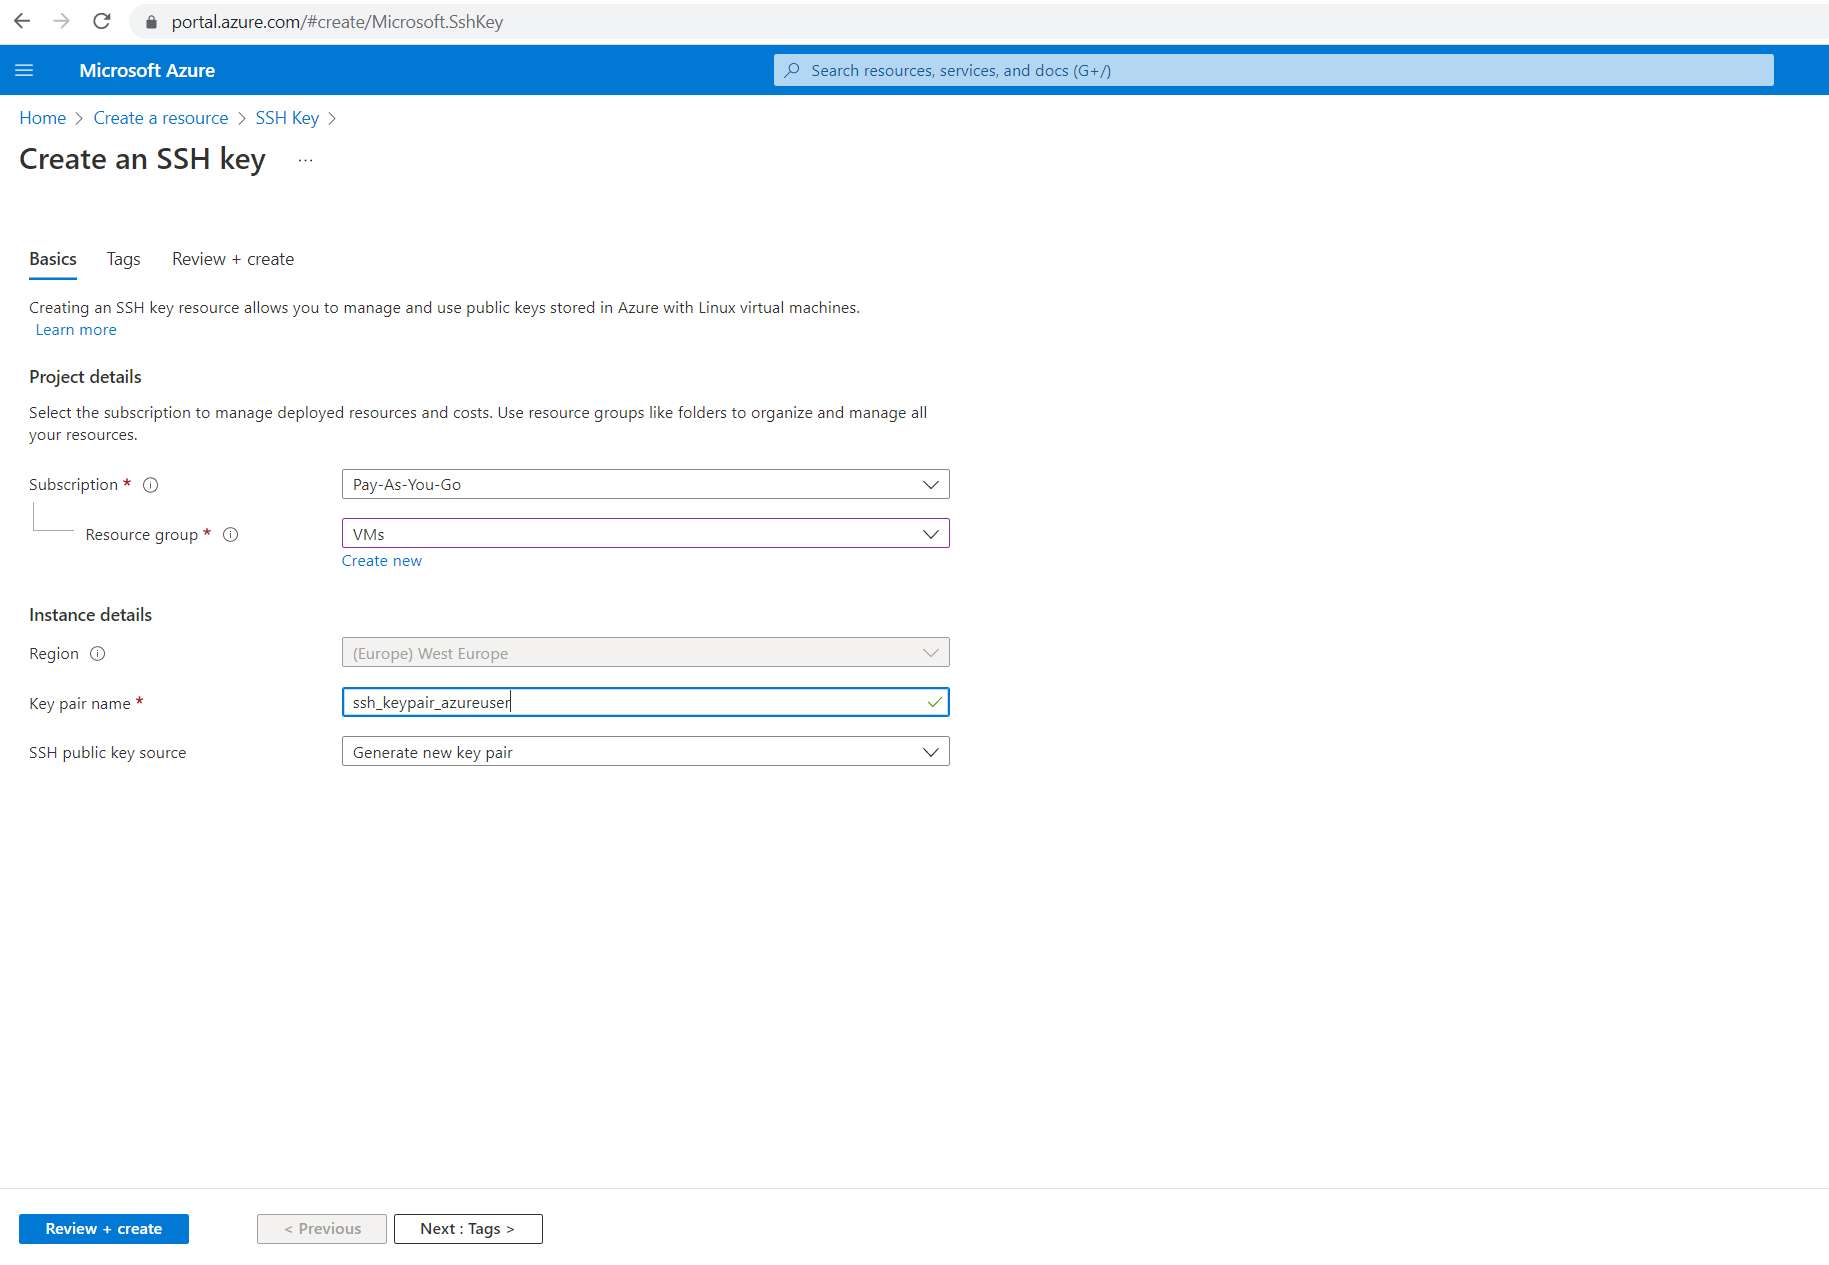
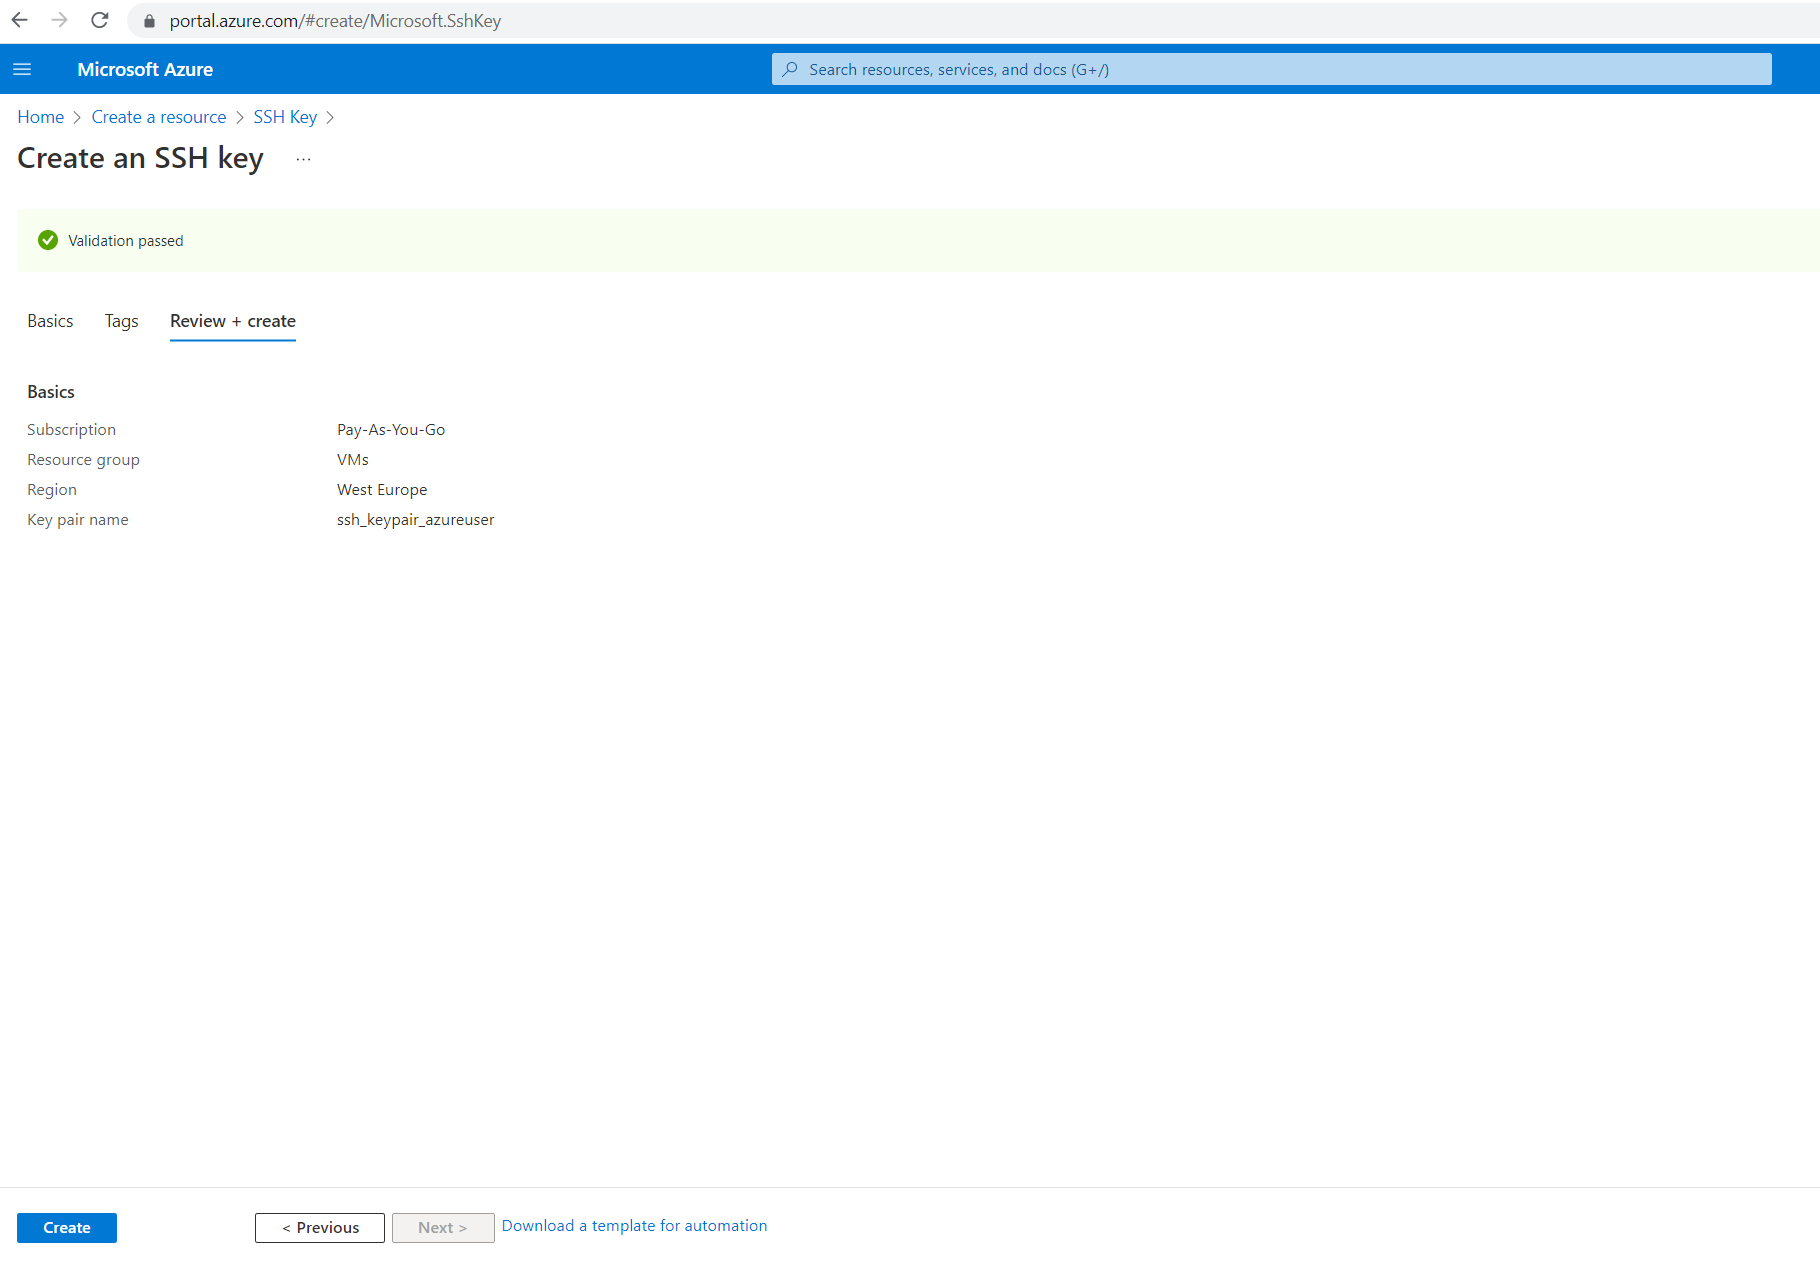
Download the private key to your computer you want to connect from.


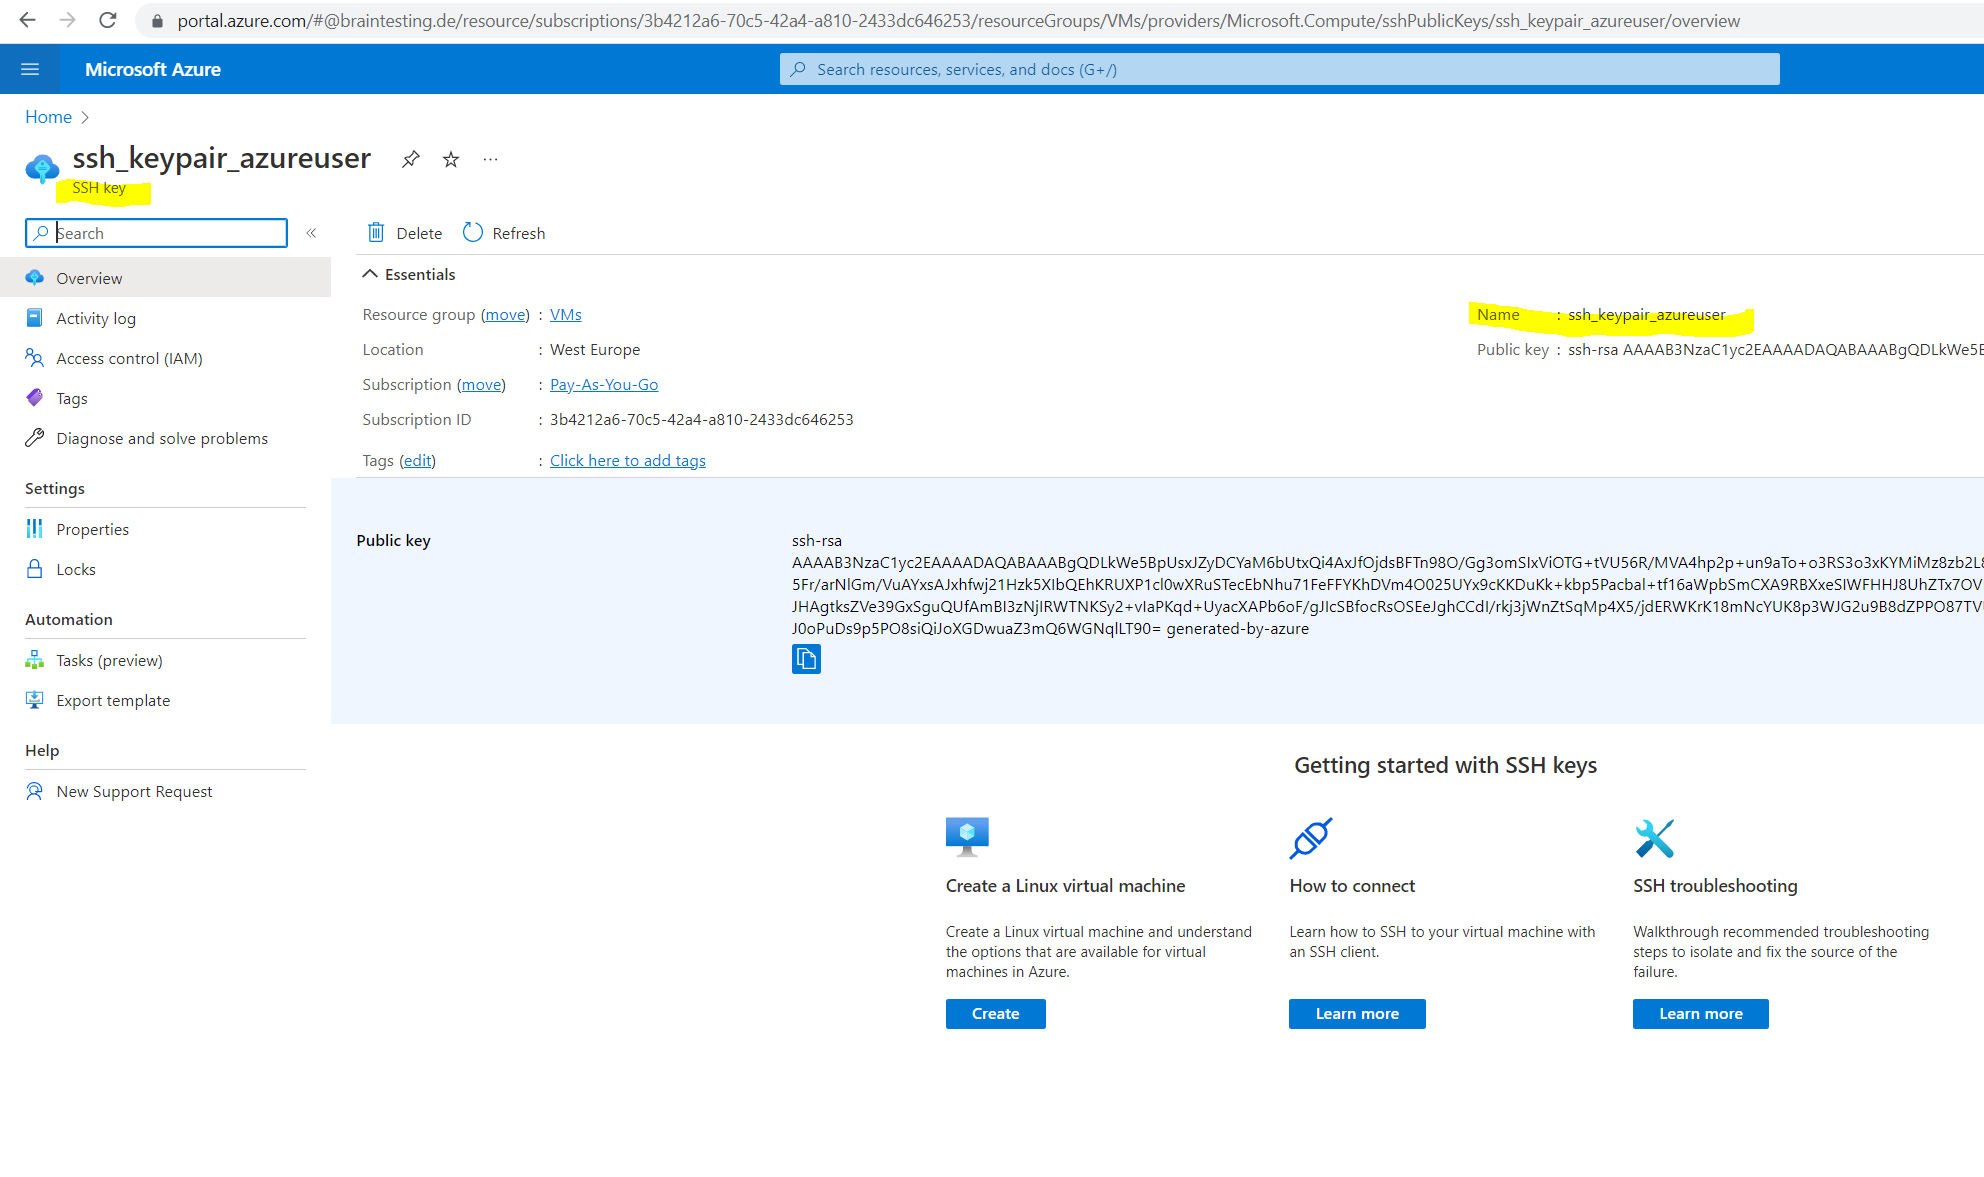
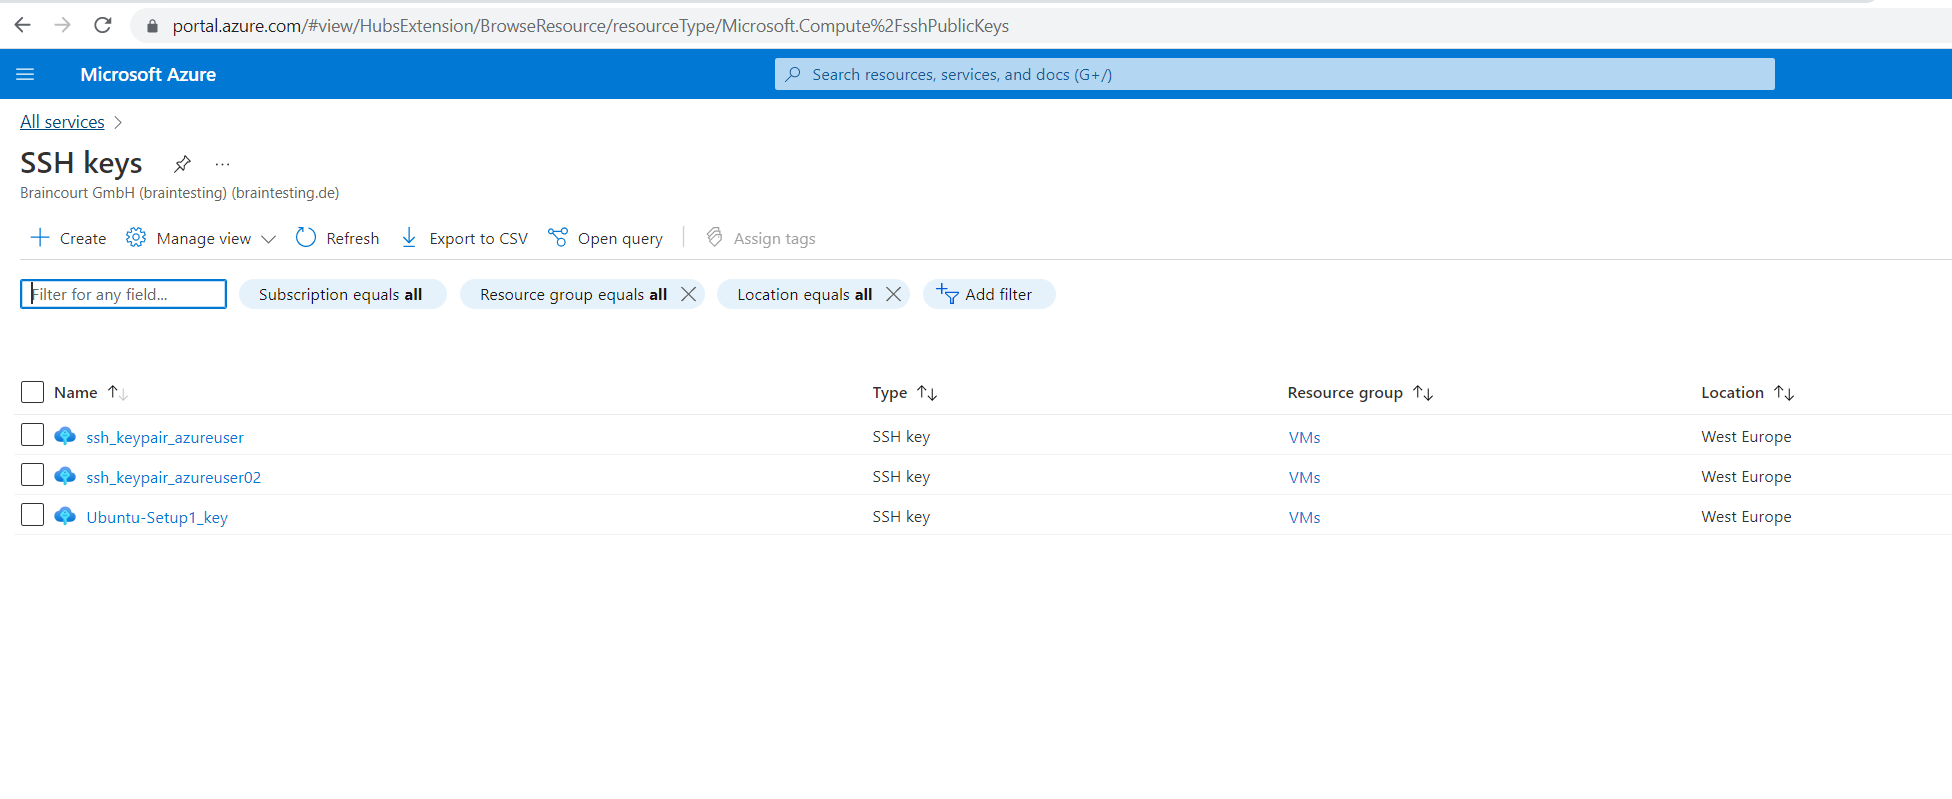
Below I created separately two key pairs, ssh_keypair_azureuser and ssh_keypair_azureuser02. The last one Ubuntu-Setup1_key was generated during the creation of my VM previouly and shown further above by using Generate new key pair.

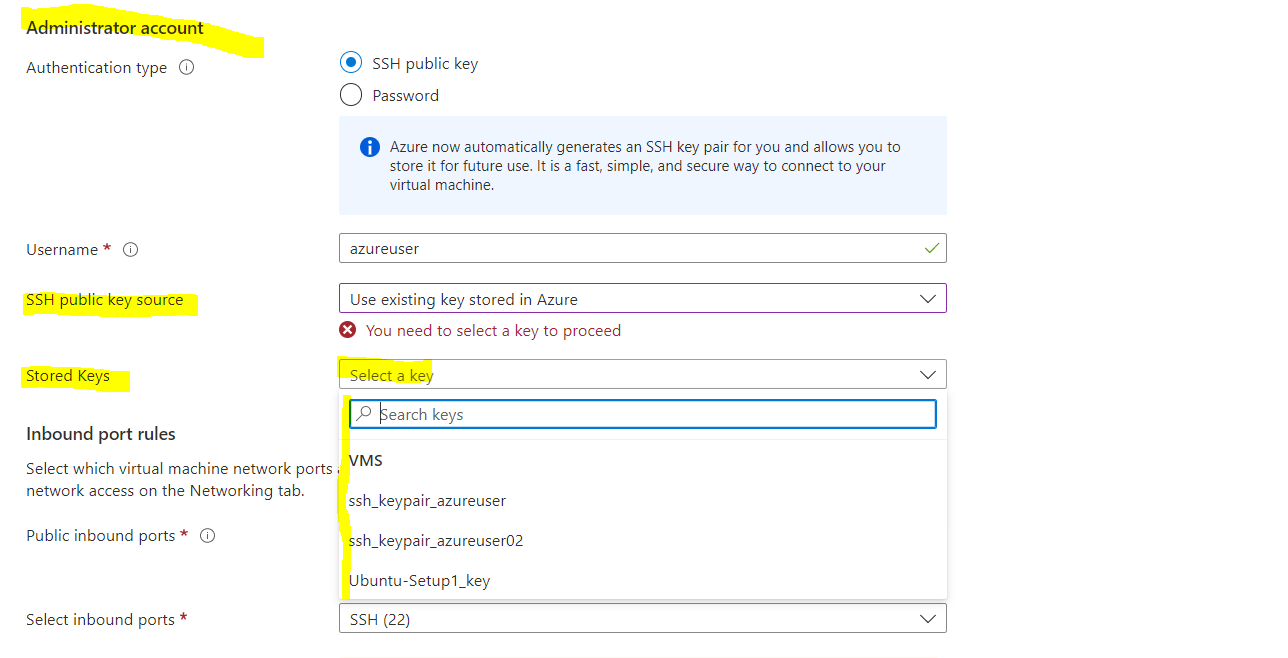
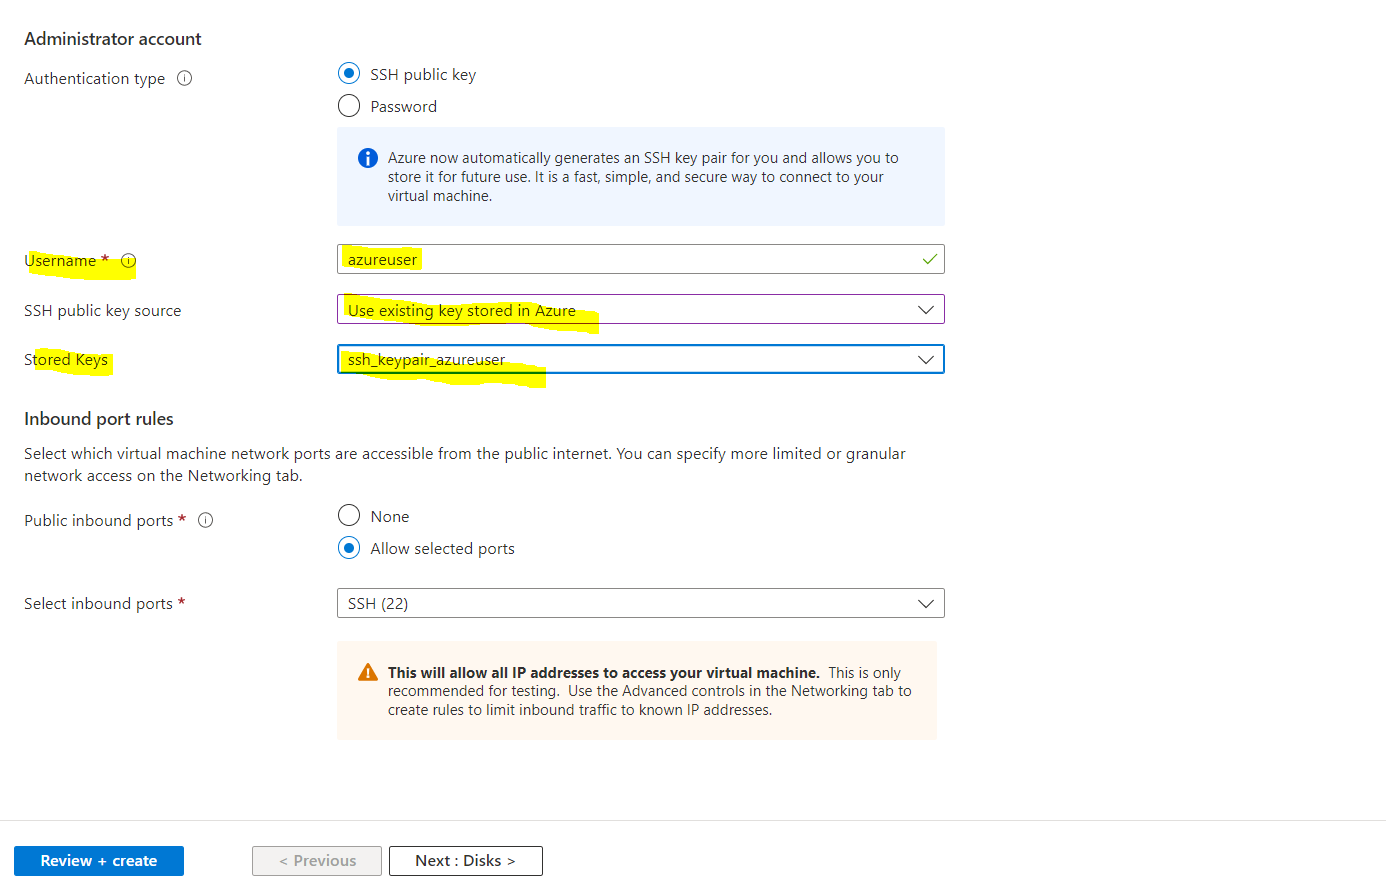
When I now create a new Linux VM, I didn’t have to generate a new SSH key pair and can use instead an existing one stored in Azure.

So I can use my existing private key also for this new Linux VM.


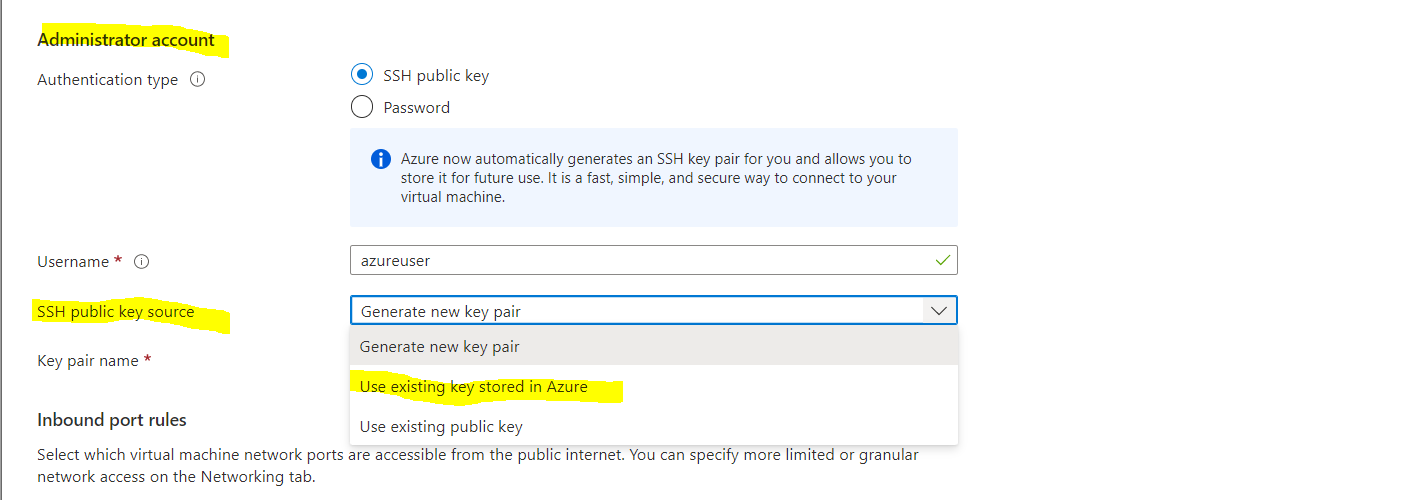
So now I can choose one of my stored SSH public keys in Azure to use for the VM.


The username you set for the new VM doesn’t matter regarding the SSH key pair.

SSH to your Azure Linux VMs with username and password from Windows, Linux or Mac


SSH to your Azure Linux VMs with username and password from Windows, Linux or Mac


If you’re looking to generate SSH keys and use them to login to an Azure Linux VM then good on you because that’s the recommended and most secure method to access your VMs. It’s readily documented here in official documentation. However, I’ve seen people asking on forums how to simply connect to a Linux VM hosted in Azure via SSH with a username and password. If that’s you then I assume you have a good reason (like this VM will generally not have ports open to the internet or this is a proof of concept) and this post will detail how.

Create the Linux VM

When you create your VM make sure you’ve chosen “Password” as your authentication type as seen here in Step 1. Choose the username and password that you will use when you connect to this machine.

Step 1 of the ‘Create virtual machine’ blade.

On Step 2 choose whatever size you need. On Step 3 make sure you’re creating a Public IP. The default Network Security Group rules will leave port 22 open for inbound SSH connections so you can leave it as is.

Step 3 of the ‘Create virtual machine’ blade.

The default Public IP settings will generate a dynamic IP address which is fine but you will need to get your IP address from the portal every time it changes in order to connect via SSH. If you plan to SSH to this VM often you may want to set it to static.

Public IP configuration

Complete the wizard and deploy your VM. From the Overview blade of your VM you can see your public IP address; make note of it.

Connect from Windows

You will need an SSH client. I recommend PuTTY which you can download free from here. Once you’ve fired up PuTTY put your VMs public IP in the Host Name field and leave the port at the default of 22.

PuTTY configuration screen.

Click open and then login with the username and password you chose in the Azure portal and there you go you’re in!

Ubuntu shell within PuTTY.

Connect from Linux

You may have guessed that establishing a remote connection to a Linux VM from a Linux/GNU machine would be trivial. You were right. From your command line run the following command with the username you chose in the Azure portal:

ssh <vm username>@<vm ip address>

Login with the password you created in the Azure portal and you’re in. Your local terminal now acts as the terminal of your VM. You may be warned that the machine is untrusted and you’ll need to type “yes” to add it to list of known hosts.

Secure shell logged into an Ubuntu Server VM.

Connect from MacOS

Like Linux, connecting from a Mac doesn’t require additional software. Open your terminal and run the following command where the username is the one you chose in the Azure portal and the IP address is the public IP of your VM :

ssh <vm username>@<vm ip address>
Example command from Mac terminal.

You will be prompted for the password you created in the Azure portal and you may be asked to type “yes” to add the VM to your list of known hosts. Your Mac terminal is now a Linux terminal. Sudo away!