Thursday, 15 June 2023

Introduction to Amazon Elastic Container Registry

 Amazon Web Services is a subsidiary of Amazon.com that provides on-demand cloud computing platforms to individuals, companies, and governments, on a paid subscription basis.

Cloud Computing:
Cloud computing is the on-demand delivery of compute power, database storage, applications, and other IT resources through a cloud services platform via the internet with pay-as-you-go pricing.

What Is Amazon Elastic Container Registry?
Amazon Elastic Container Registry (ECR) is a managed AWS Docker registry service. Amazon ECR is a secure and reliable AWS service. Just like any other cloud computing service, we can scale it up or scale it down based on our requirements. Amazon ECR uses AWS Identity and Access Management (IAM) to enable resource-based permissions for private Docker repositories. Through the Docker command line interface (CLI) we can push, pull, and manage images.

Components of Amazon ECR:
Amazon ECR has the following components:

  • Registry:
    Each AWS account has an access to Amazon ECR registry. In registry, we can create image repositories and we can also store its image.
  • Authorization Token:
    Before pushing and pulling of images, your Docker client must authenticate to Amazon ECR registries as an AWS user. The Amazon web services command line interface (CLI) has a command called get-login which provides the user with an authentication credential to be passed to docker.
  • Repository:
    The docker image is contained inside the Amazon ECR image repository.
  • Repository Policy:
    The repository policies enables the users to have control on the access to their repository and the image within it.
  • Image:
    The user can very easily push or pull the docker images to their repository. The user can use the image of the repository on their local system or it could be used in Amazon ECS task definitions.

List Of Available Commands:

  • batch-check-layer-availability
  • batch-delete-image
  • batch-get-image
  • complete-layer-upload
  • create-repository
  • delete-lifecycle-policy
  • delete-repository
  • delete-repository-policy
  • describe-images
  • describe-repositories
  • get-authorization-token
  • get-download-url-for-layer
  • get-lifecycle-policy
  • get-lifecycle-policy-preview
  • get-login
  • get-repository-policy
  • initiate-layer-upload
  • list-images
  • list-tags-for-resource
  • put-image
  • put-lifecycle-policy
  • set-repository-policy
  • start-lifecycle-policy-preview
  • tag-resource
  • untag-resource
  • upload-layer-part
Amazon Web Services – Generating Log Bundle for EKS Instance

 Amazon SageMaker is used by data scientists and developers to easily and quickly prepare, build, train, and deploy high-quality machine learning (ML) models by bringing together a broad set of capabilities purpose-built for ML. 

In this article, we will look into how users can generate a log bundle for their Amazon Elastic Kubernetes Service instances. To do so follow the below steps:

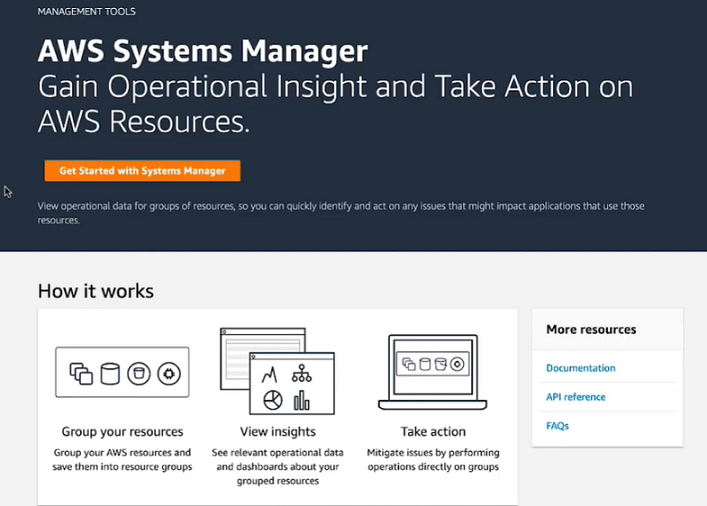
Step 1: After logging into the AWS management console navigate to the System Manager console.

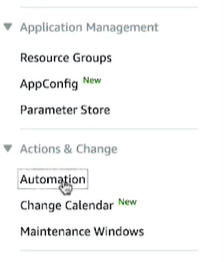
Step 2: Then go to automation in the left pane.

Step 3: Then choose Execute automation.

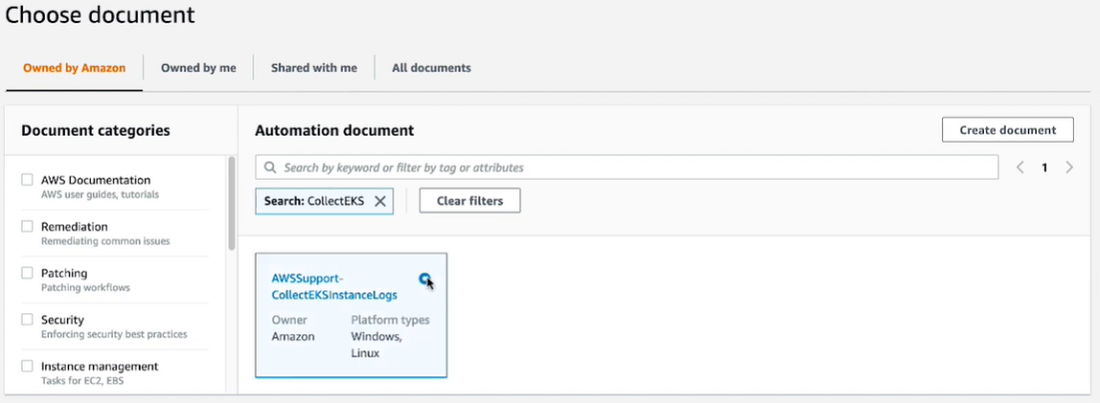
Step 4: Then choose AWSSupport-CollectEKSinstanceLogs in the list and choose next.

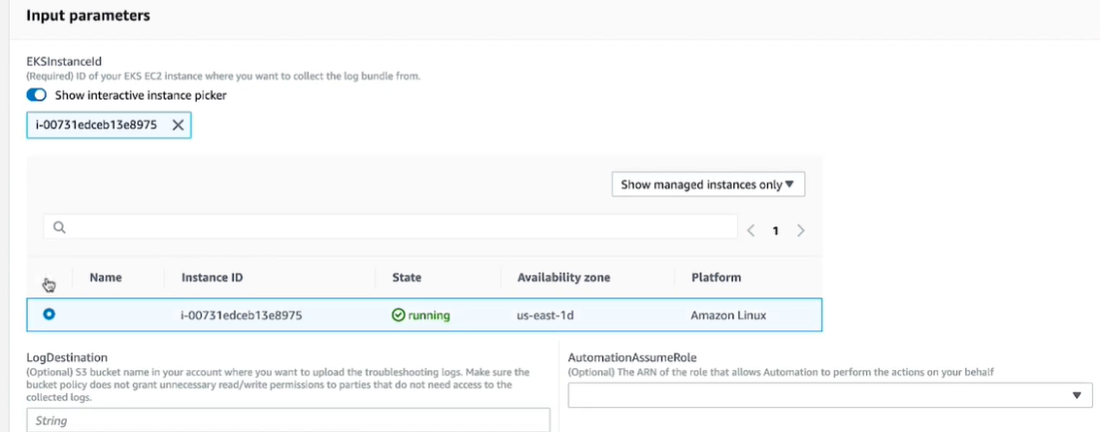
Step 5: Now enter the amazon elastic compute cloud instance id for your amazon EKS instance in the EKS instance-id field. 

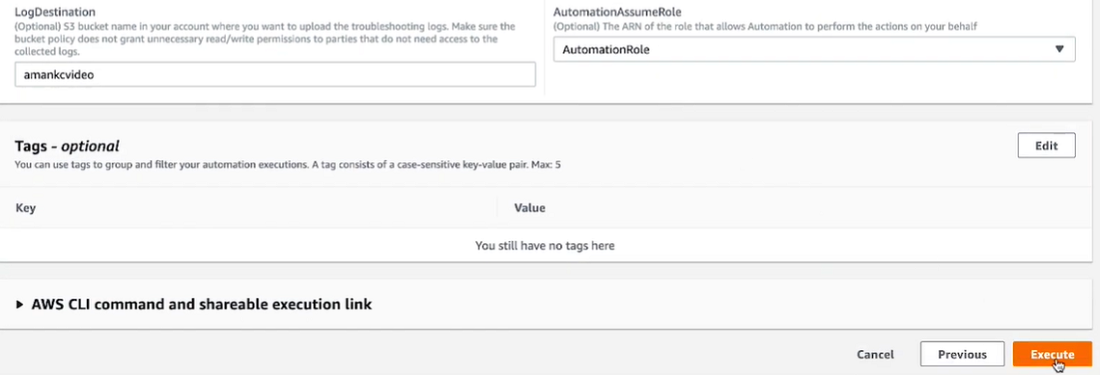
Step 6: To upload the collected logs to an Amazon S3 bucket, enter the bucket name in the log destination field. Note that the S3 bucket used for this purpose can’t be public otherwise, logs aren’t uploaded in the provided S3 bucket for security reasons.

To successfully run this automation and see the output the user running it needs the following permissions:

  •  SSM: ExecuteAutomation
  •  SSM:GetAutomationExecution
  •  SSM: SendCommand

If the user invoking the document doesn’t have the required permissions you must provide the appropriate AWS identity and access management role in the automation assume role field and then choose the execute button:

The AWS run command sends out the run command to run the log collection script which saves manual effort for log collection. The AWS branch validates if an S3 bucket was provided in the automation execution. The AWS run command sends out the run command to upload the lock bundle to the provided S3 bucket. When the automation execution is complete preview the output of the run upload script to view the S3 log bundle location as shown below:

Amazon Web Services – Introduction to Amazon EKS

 Amazon Elastic Kubernetes Service(EKS), is a fully managed service that you can use to run Kubernetes on Amazon Web Service. Kubernetes is open-source software that enables you to install and manage applications at a high scale. 

Its characteristics are:

  • Availability: In order to ensure high availability Kubernetes executes and scales itself to various AWS AZs.
  • Strength: Kubernetes automatically scales itself to avoid loads and unwanted control plane issues.
  • Scalability: It also works with various AWS services to provide security in applications.
    • Amazon ECR for container images
    • Elastic Load Balancing for load classification.

AWS Fargate: It is a serverless compute engine for containers. It works with Amazon EKS  or Amazon ECS.

Amazon EKS Sections :

Amazon EKS organization contains the following sections: clusters, nodes, and networking.

  1. Clusters – Clusters are consists of the control plane and EKS nodes.
  2. EKS nodes – Kubernetes nodes run with EC2 in your organization’s account of amazon web service. Each cluster is defined by a unique certificate to schedule portable storage using three ways:
    • Self-Managed Nodes
    • Managed Node Groups
    • Amazon Fargate
  3. Amazon EKS Networking-EKS operates in a Virtual Private Cloud (VPC) so that it can activate all resources to an existing subnet in a network.

Advantages of AWS EKS :

Following are the advantages of using Amazon EKS:

  1. EKS automates load distribution and parallel processing better than any DevOps engineer could.
  2. EKS uses VPC networking (explained above).
  3. Supports EC2 spot examples using managed node groups that follow best practices.
  4. Your Kubernetes assets integrate smoothly with AWS services if you use EKS.
  5. EKS allows you to run tools easily.

Amazon EKS Control Plane Architecture: 

Each cluster runs only one Kubernetes control plane. The control plane mainly consists of two API servers and three ‘etcd‘( The etcd is used for storing Kubernetes data). It manages the scalability of load to have high performance. It identifies the unwanted part of the control plane and can remove it. The control plane can’t be accessed by any other AWS accounts or clusters except for the authorized user.

Working of Amazon EKS: 

  • Firstly, create an Amazon EKS cluster in the console.
  • Now launch the EKS nodes and placed all the workloads on AWS Fargate.
  • After your cluster is ready, the user can easily communicate by using different types of tools.
  • Users can now manage the workloads over Kubernetes.

Pricing of EKS: 

The user can pay for both long-term service and short-term service. Long-term is a little bit cheaper than the other one because it set a commitment from 1-3 year

Introduction to Amazon Elastic Container Service (ECS)

 Amazon Elastic Container Service (ECS), also known as Amazon EC-2 Container Service, is a managed service that allows users to run Docker-based applications packaged as containers across a cluster of EC2 instances. Running simple containers on a single EC-2 instance is simple but running these applications on a cluster of instances and managing the cluster is being administratively heavy process. With ECS, Fargate launch type, the load, and responsibility of managing the EC2 cluster is transferred over to the AWS and you can focus on application development rather than management of your cluster architecture.

AWS  Fargate is the AWS service that allows ECS to run containers without having to manage and provision resources required for running these applications.

Terminology:

  • Container: A container is a package that holds an application and everything(dependencies, libraries etc.) the application requires to run. Containers are independent of the underlying operating system and hence container applications are fairly portable, flexible, and scalable. This ensures the application will run always as expected irrespective of the system and environment in with a container is run.
  • Docker: Docker is a software that facilitates and automates installation and deployment of applications inside Linux containers.
  • Cluster: A logic group of EC2 instances running as a single application.
  • Container Instance: Each EC2 in an ECS Cluster is called a container instance.

Autoscaling with ECS:

Autoscaling is an AWS Compute service that allows your application to scale up/down according to EC2 instance CPU usage or some other criteria (Autoscaling policies) set by the user.   For example: For a web application, you can set an Autoscaling Policy like, when CPU usage exceeds 80% for 5 minutes add another EC2 instance with the same configurations. This will add another instance behind the ELB and allow requests divided into 2 EC2 instances now. Earlier, Autoscaling feature was only provided with AWS EC2 service, in the year 2016, it started to support ECS clusters as well.

  • Autoscaling for ECS Clusters can be set up from AWS-CLI, AWS-Console and AWS SDKs as well.
  • You can choose the number of starting tasks for the application, attach one or more policies to the Autoscaling Group and AWS handles the rest.
  • Autoscaling for ECS also manages Multi-AZ presence of your ECS cluster. That is, you can attach policies to have a minimum of one or more instances in each Availability Zone to make your application highly available.

Features of ECS:

  • Removes the need for users to manage your own cluster management system by interacting with AWS Fargate.
  • Allows seamless deployment of container-based applications. This can be scheduled or done by simple API calls.
  • AWS ECS takes care of the management and monitoring of the application cluster.
  • Amazon ECS is region specific. This means that a cluster can only scale up/down (start-up or shut down container instances) in a single region.
  • Clusters are dynamically scalable.

Launch types: ECS can be launched in two following modes:

  1. Fargate launch: As discussed above, fargate launch type, takes most of the responsibility from the users and takes in only the basic inputs like the CPU-type, memory and IAM policies from the user to run the application cluster.
  2. EC2 Launch: This is a more customizable launch type. Users are responsible for the number of instances in the cluster, scaling their cluster, and more. This allows you to be more in control of your clusters which may be required for security reasons.

Irrespective of the launch type AWS Cloudwatch is enabled for ECS and can be used for monitoring or to create alarms and events as required.

Advantages:

  • Scalability: ECS automatically scales your applications based on demand, allowing you to easily handle changes in traffic or workload.
  • High availability: ECS provides built-in availability and fault tolerance, ensuring that your applications are always up and running.
  • Cost-effective: ECS enables you to optimize your infrastructure costs by scaling resources based on demand and only paying for what you use.
  • Integration: ECS integrates with other AWS services such as Amazon ECR, AWS Fargate, Amazon CloudWatch, and AWS IAM.
  • Security: ECS provides a secure environment to run your applications, with features such as IAM roles for tasks, VPC isolation, and encryption at rest.

ECS has some limitations to consider. For example, it requires a certain level of expertise to set up and configure the service. Additionally, it may not be suitable for applications that require a high level of customization or specialized networking requirements.

List of available commands:

AWS provides a set of commands that can be run on AWS-CLI (AWS Command Line Interface) to manage your services. Much like you’d manage from your AWS Console. Following is a list of commands that can be used for managing the AWS ECS service.

  • create-capacity-provider:  Used to create a new capacity provider. Capacity providers comprise of a name, an Auto Scaling group along with termination and scaling settings.
  • create-cluster: Creates a new AWS ECS Cluster.
  • create-service: Runs and maintains a desired number of tasks as specified by the given task definition.
  • create-task-set: Create task-set in AWS ECS cluster or a Service.
  • delete-account-setting: Disables an account setting for an IAM user, role or the root user of the account.
  • delete-attributes: Deletes one or more custom attributes of ECS cluster.
  • delete-cluster: Deletes an entire specified cluster.
  • delete-service: Deletes the specified service.
  • delete-task-set: Deletes the specified task-set.
  • deploy: Deploys new task definition to the specified ECS service.
  • deregister-container-instance: Deregisters the specified container instance from its ECS cluster.
  • deregister-task-definition: Deregisters a task definition from ECS Service.
  • describe-capacity-providers: Describes one or more capacity providers.
  • describe-clusters: Describes one or more of ECS Clusters.
  • describe-container-instances: Describes ECS container instances. Gives metadata about remaining resources on each of these instances.
  • describe-services: Describes Services running in specified cluster.
  • describe-task-definition: Describe task definition.
  • describe-task-sets: Describes task sets of the specified ECS service or cluster.
  • describe-tasks: Describes specified task(s).
  • discover-poll-endpoint: Gives endpoint of AWS ECS agent to poll for updates.
  • list-account-settings: Gives account settings for the specified principal.
  • list-attributes: List attributes for specified ECS resource.
  • list-clusters: Gives a list of existing clusters.
  • list-container-instances: Gives a list of container instances in specified cluster.
  • list-services: Gives a list of services running in specified cluster.
  • list-tags-for-resource: Gives tags associated with specified resource.
  • list-task-definition-families: List all the task definition families registered to your account.
  • list-task-definitions: List task definitions registered to your account.
  • list-tasks: Gives tasks running in the specified cluster.
  • put-account-setting: Used to modify account settings for IAM users, roles or the root user.
  • put-account-setting-default: Used to modify an account setting for all IAM users on an account for whom no individual account setting has been specified.
  • put-attributes: Create/Update attribute for specified ECS resource.
  • put-cluster-capacity-providers: Modify capacity providers for a cluster.
  • register-container-instance: Registers container instance into the specified cluster.
  • register-task-definition: Registers task definition from the specified family and container definitions.
  • run-task: Starts a new task from a task definition.
  • start-task: Starts a new task from the task definition on the specified container instance or instances.
  • stop-task:  Stop specified task. (Note that any tags associated with the task are deleted.)
  • submit-attachment-state-changes: Sent to acknowledge that a container changed states.
  • submit-container-state-change: Sent to acknowledge that an attachment changed states.
  • submit-task-state-change: Sent to acknowledge that a task changed states.
  • tag-resource:  Adds specified tags to the resource whose RN is supplied.
  • untag-resource: Removes specified tags from a resource.
  • update-cluster-settings: Modify the cluster settings.
  • update-container-agent: Updates the Amazon ECS container agent on a specified container instance.
  • update-container-instances-state: Modifies the status of an Amazon ECS container instance.
  • update-service: Modifies the parameters of a service.
  • update-service-primary-task-set: Modifies which task-set in a service is the primary task-set. Any parameters that are updated on the primary task set in a service will transition to the service.
  • update-task-set: Modifies a task set.
  • wait: Wait until a particular condition is satisfied. Each sub-command polls an API until the listed requirement is met.

Create and Configure the Auto Scaling Group in EC2

 Pre-requisite:- AWS and EC2

Auto Scaling is an Amazon Web Services it allows instance scalable when the traffic increases or CPU load increases. Auto-scaling is a service monitoring all instances that are configured into the Auto Scaling group and it ensures that loads are balanced in all instances. 

Depending on the load scaling group increase the instance according to the configuration. When we create the Auto Scaling Group we configured the Desired capacity, Minimum capacity, or Maximum capacity and also configured CPU utilization. If CPU utilization increases by 60% in all instances then one more instance create and if CPU utilization decreases by 30% in all instances then terminate one Instance. These are setting totally up to us what is our requirement. If any Instance fails due to any reason then the Scaling group maintains the Desired capacity and starts another instance.

The Auto Scaling group follows Horizontal Scaling. This service is very important for us nowadays because we do not need to create new instances manually and do not require monitoring manually.

Steps to Setup the Auto Scaling Group in EC2

Step 1: Click on the All Services.

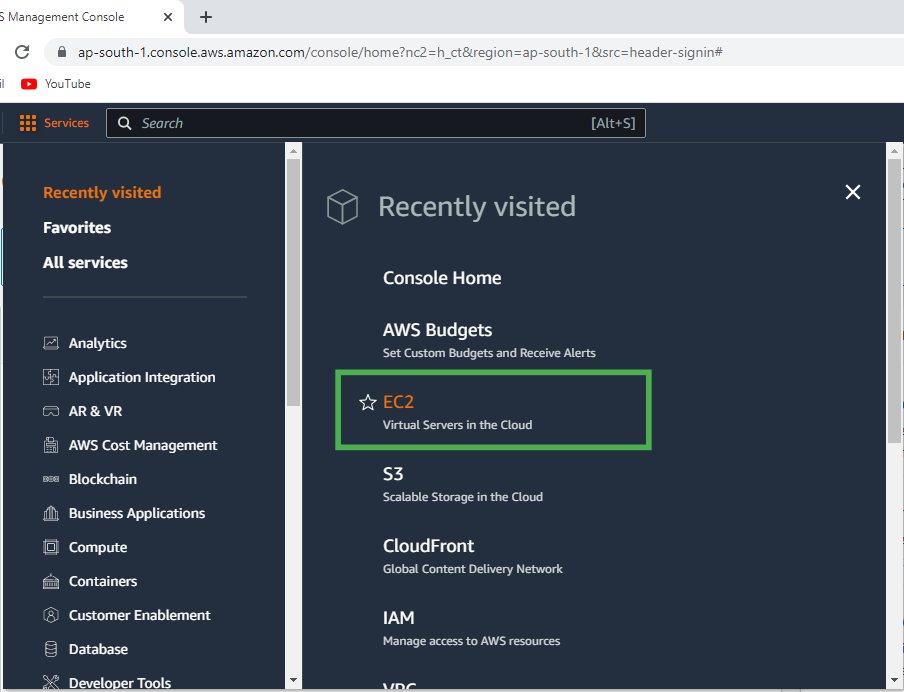
Step 2: Click on the EC2.

ec2


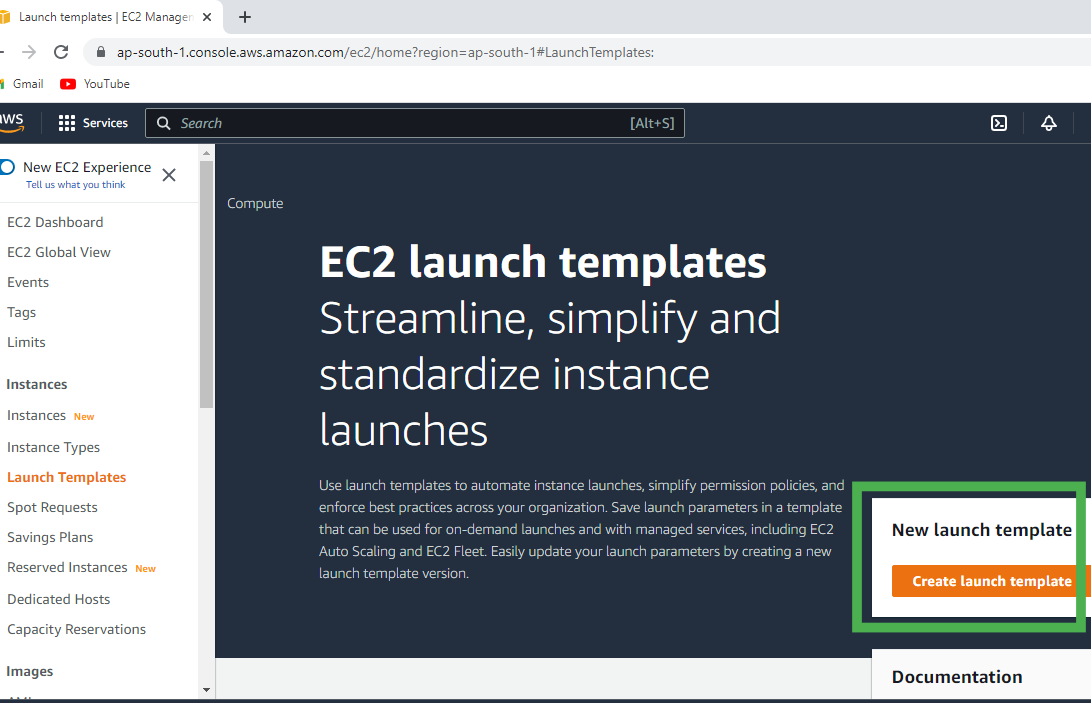
Step 3: Scroll Down and click on the Launch Templates and click on the Create launch template

launch ec2


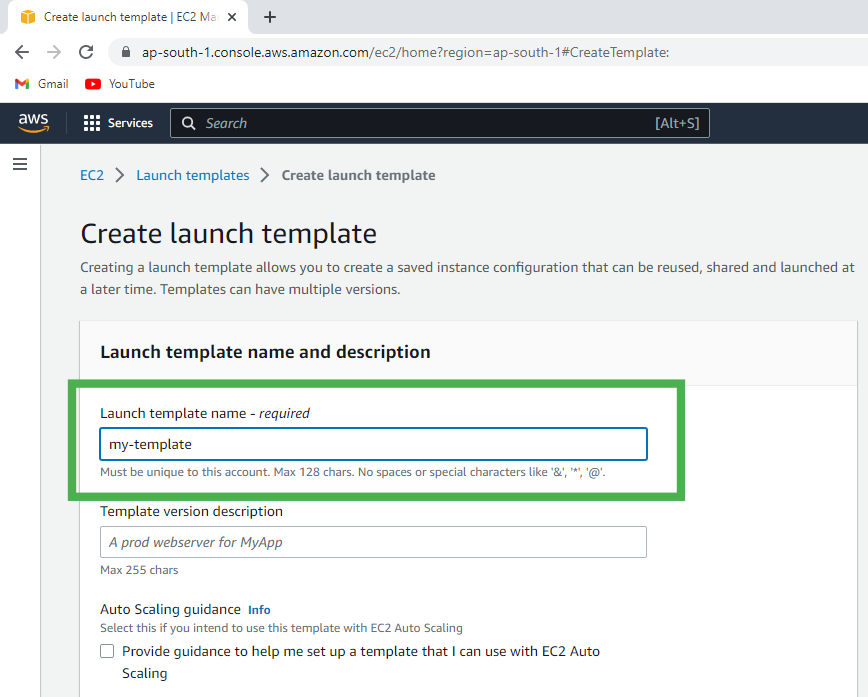
Step 4: Type the Template name.

create template


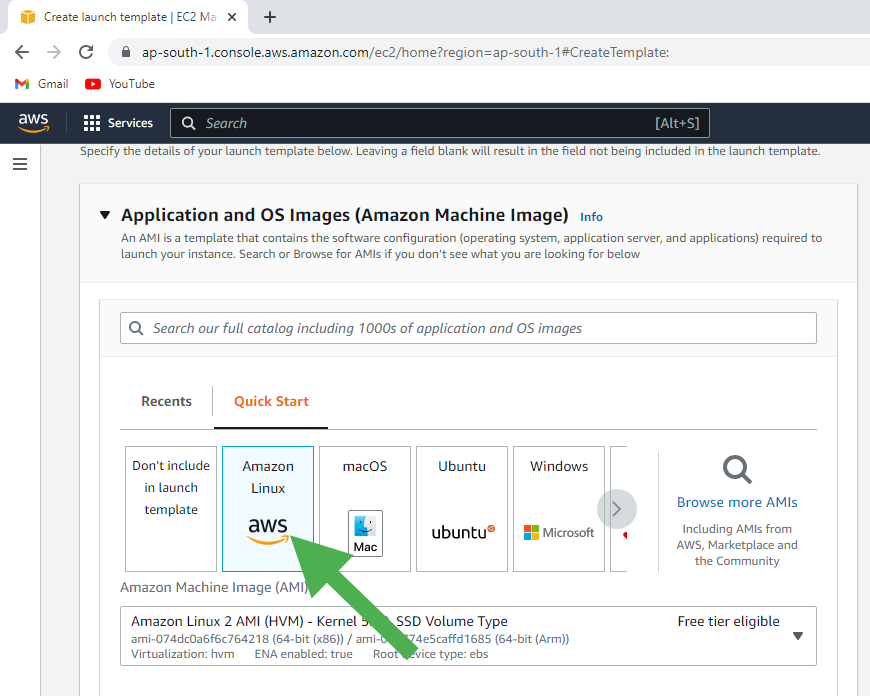
Step 5: Select the Amazon Machine Image.

select AMI


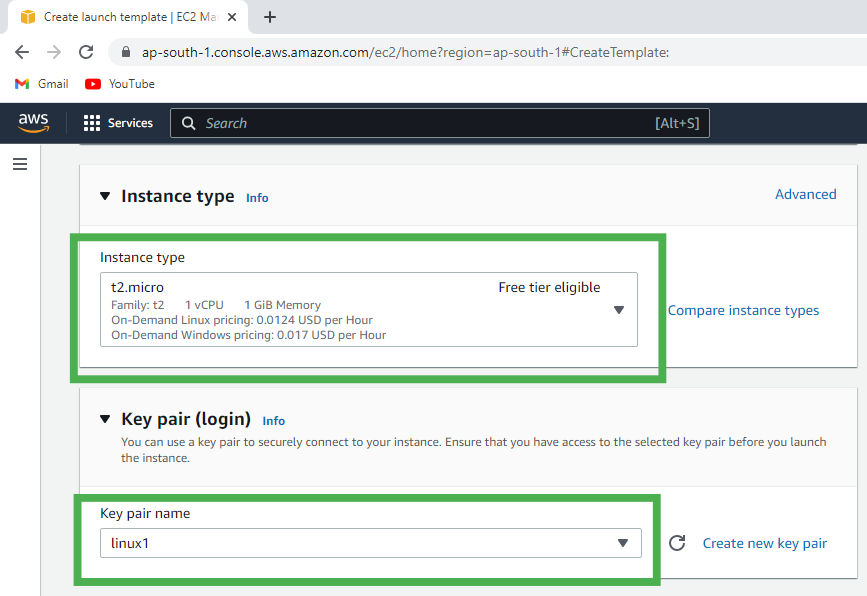
Step 6: Select the Instance Type and Key pair.

select instance type


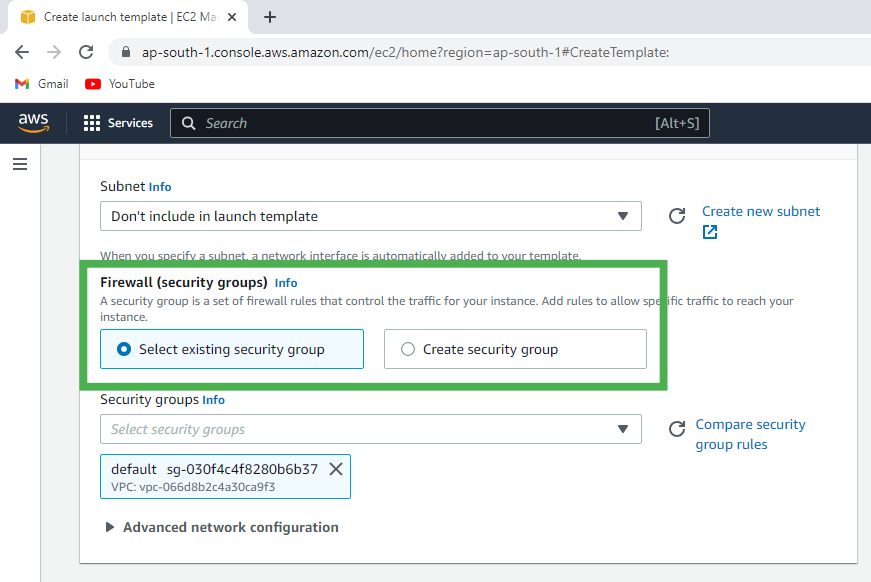
Step 7: Select the Security Group or Create the new one.

security group


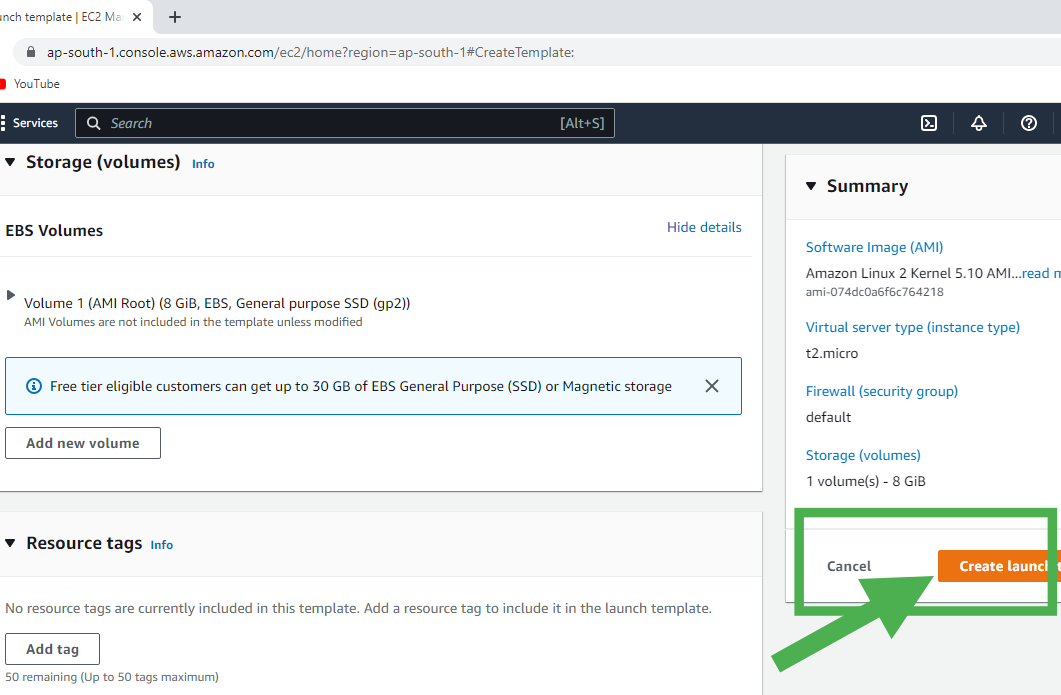
Step 8: Click on the Create Launch Template.

launch instance


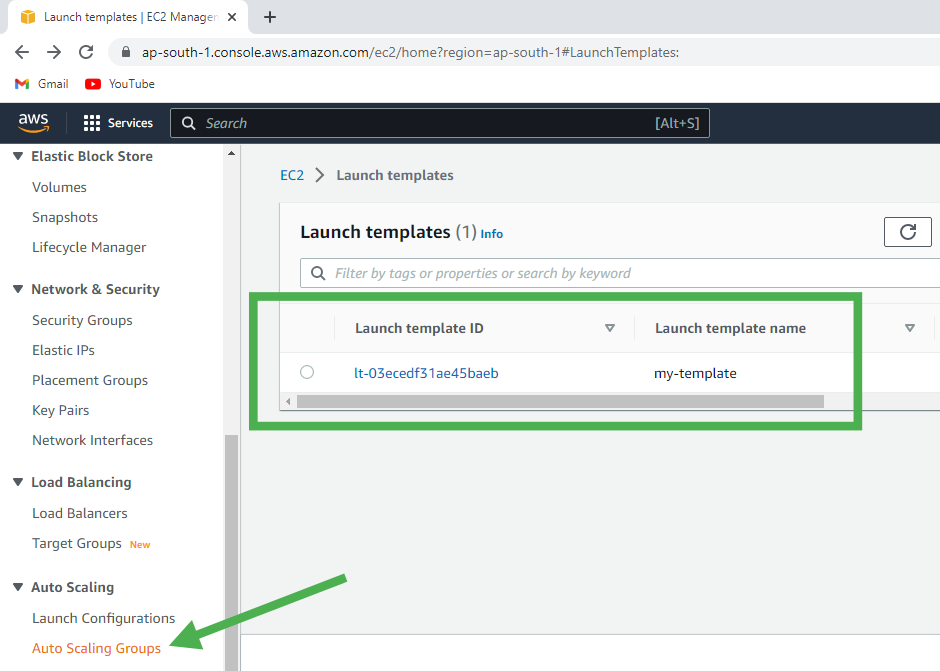
Step 9: Now you can see the template is created. Now, scroll down and click on the Auto Scaling Groups.

autoscaling


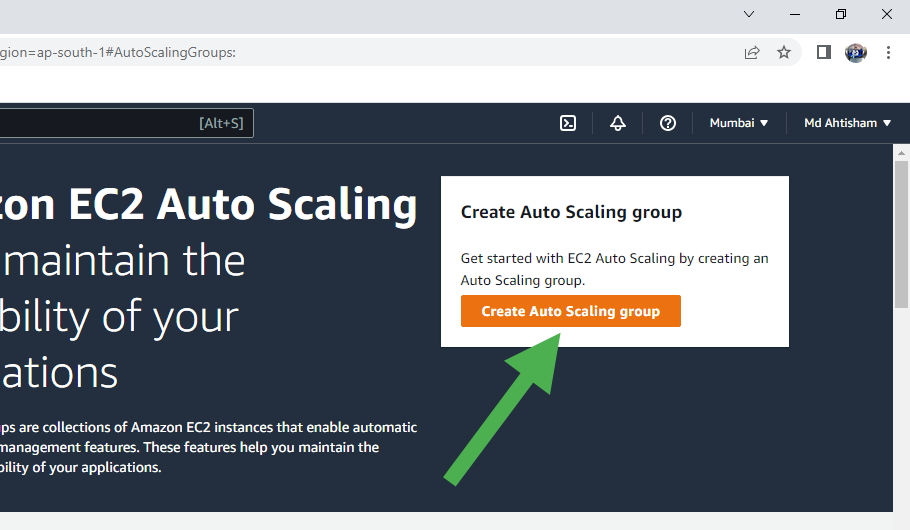
Step 10: Click on the Create Auto Scaling group.

create autoscaling group


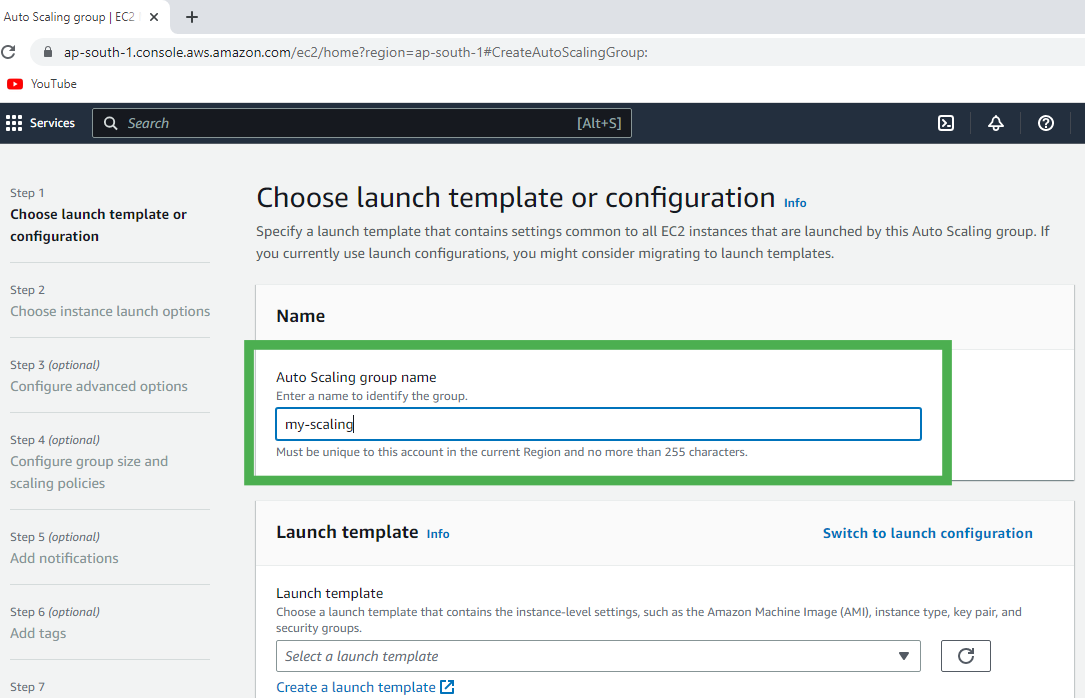
Step 11: Type the Auto Scaling group name.

 Auto Scaling group name


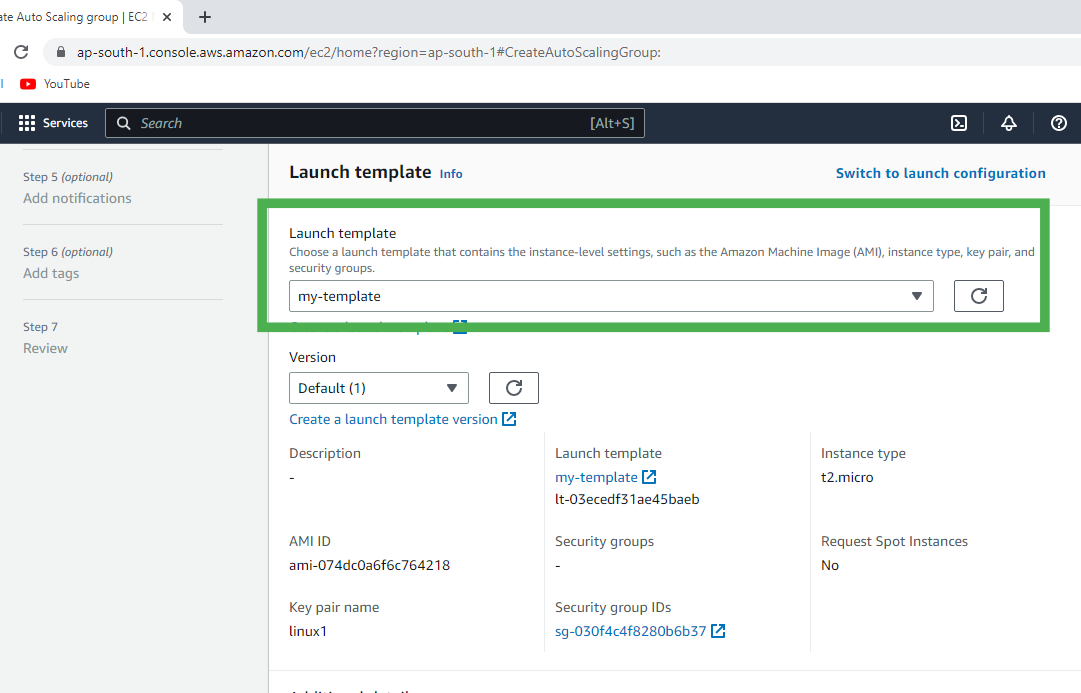
Step 12: Select your Template.

create template


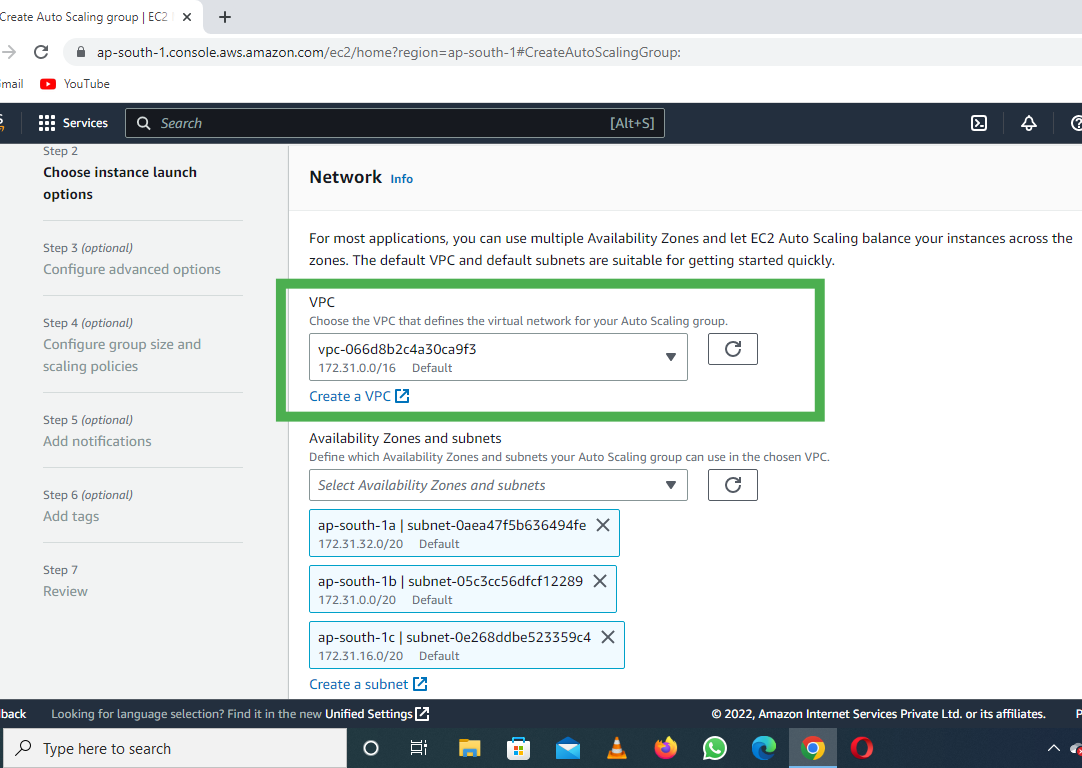
Step 13: Select the VPC or go with the default VPC and also select the Availability zone.

select VPC


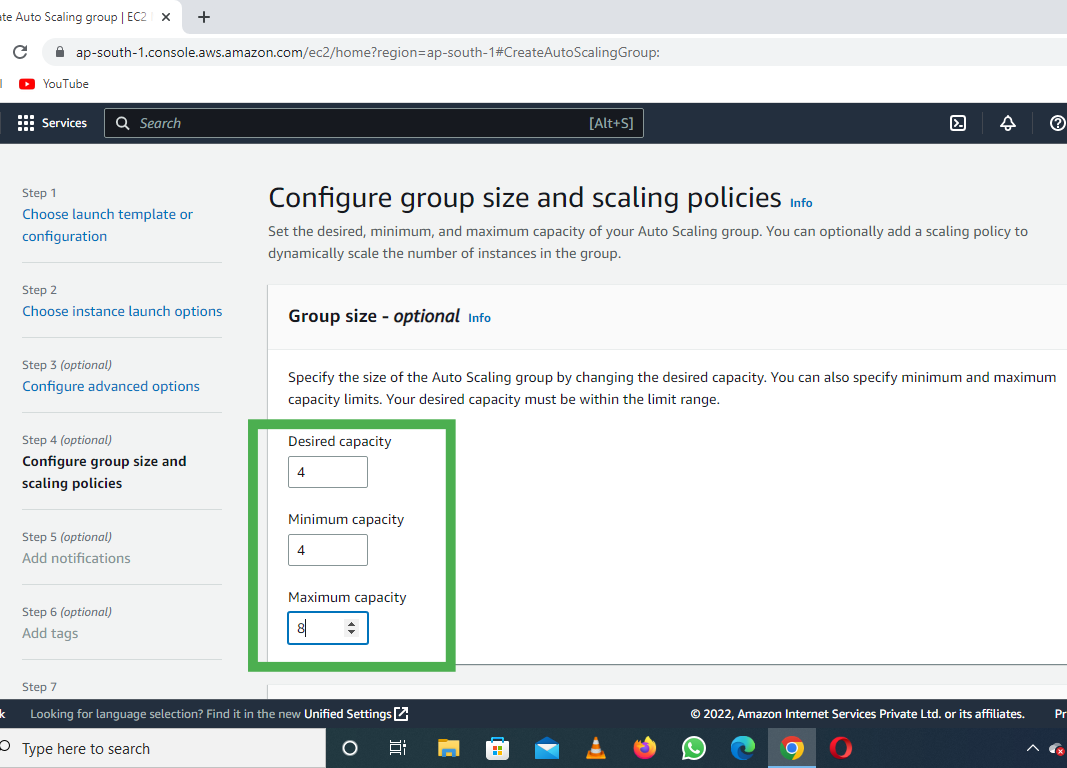
Step 14: Configure the Group size and Scaling policies.

Select as per your requirement:

  • Desired: 4
  • Minimum: 4
  • Maximum: 8
configure size


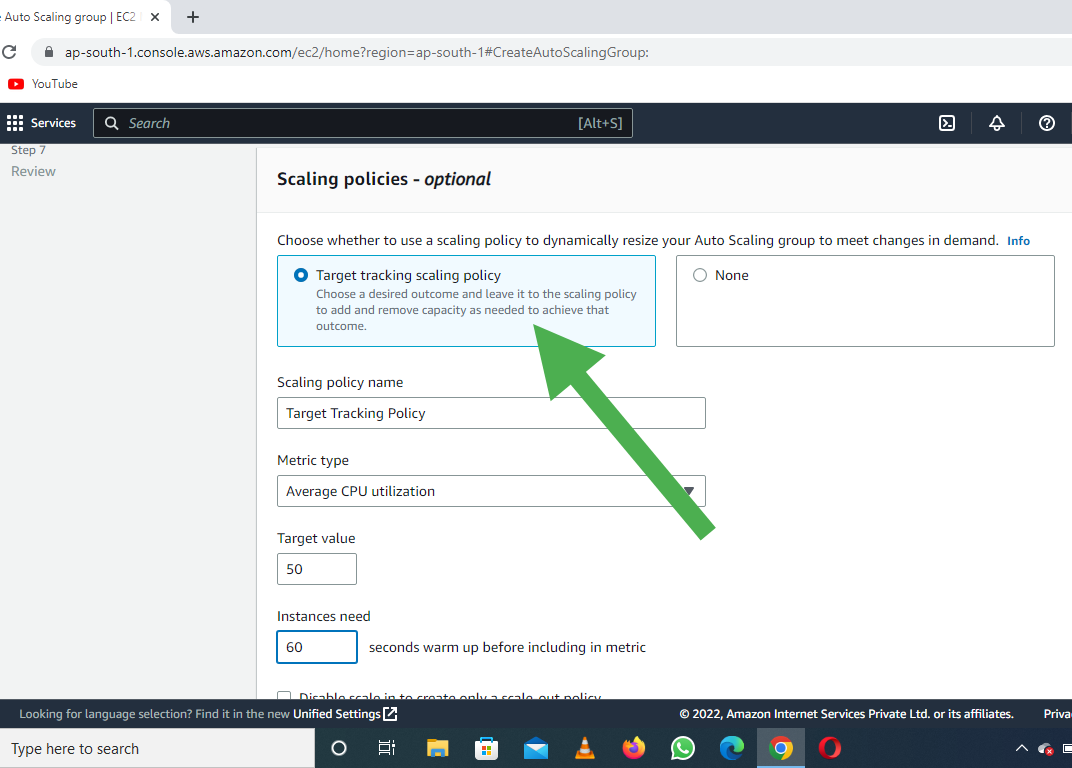
Step 15: Select the Target tracking scaling policy.

scaling policies


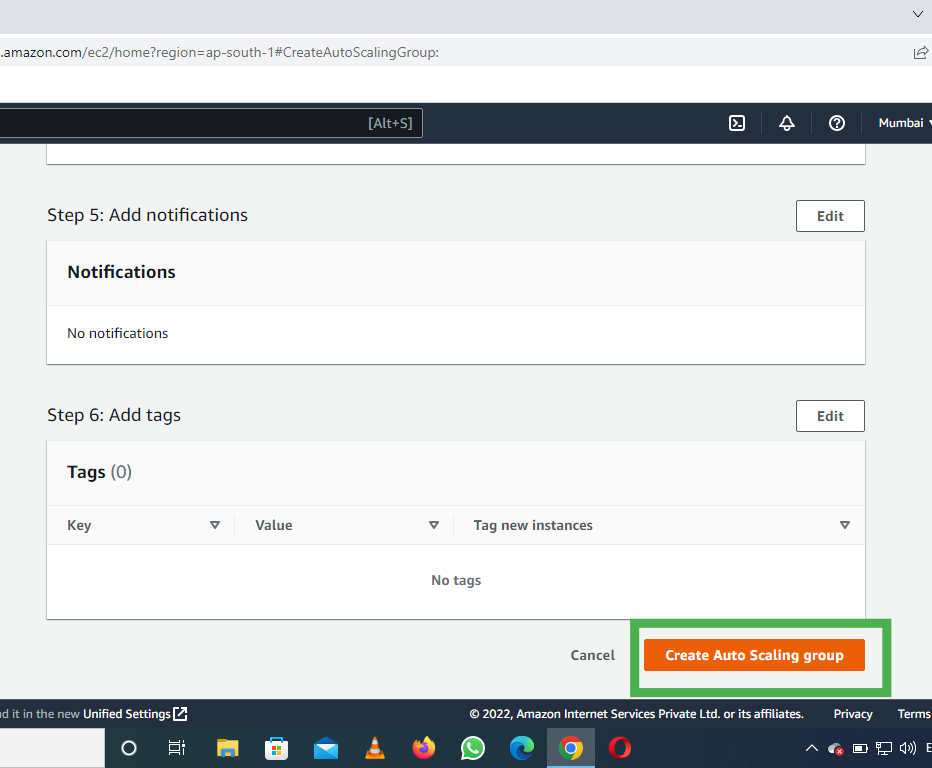
Step 16: Click on the Create Auto Scaling Group.

 Create Auto Scaling Group


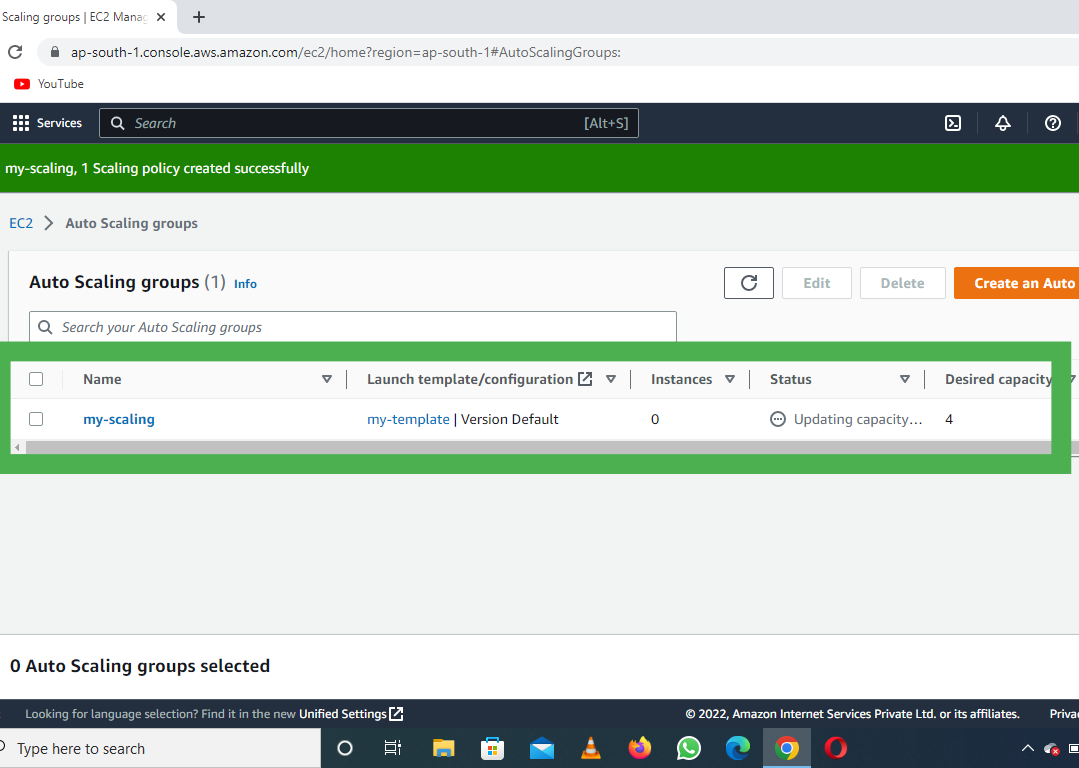
  • Now you can see the Auto Scaling is creating and it is also creating the desired state of the EC2 Instance
Auto Scaling is creating


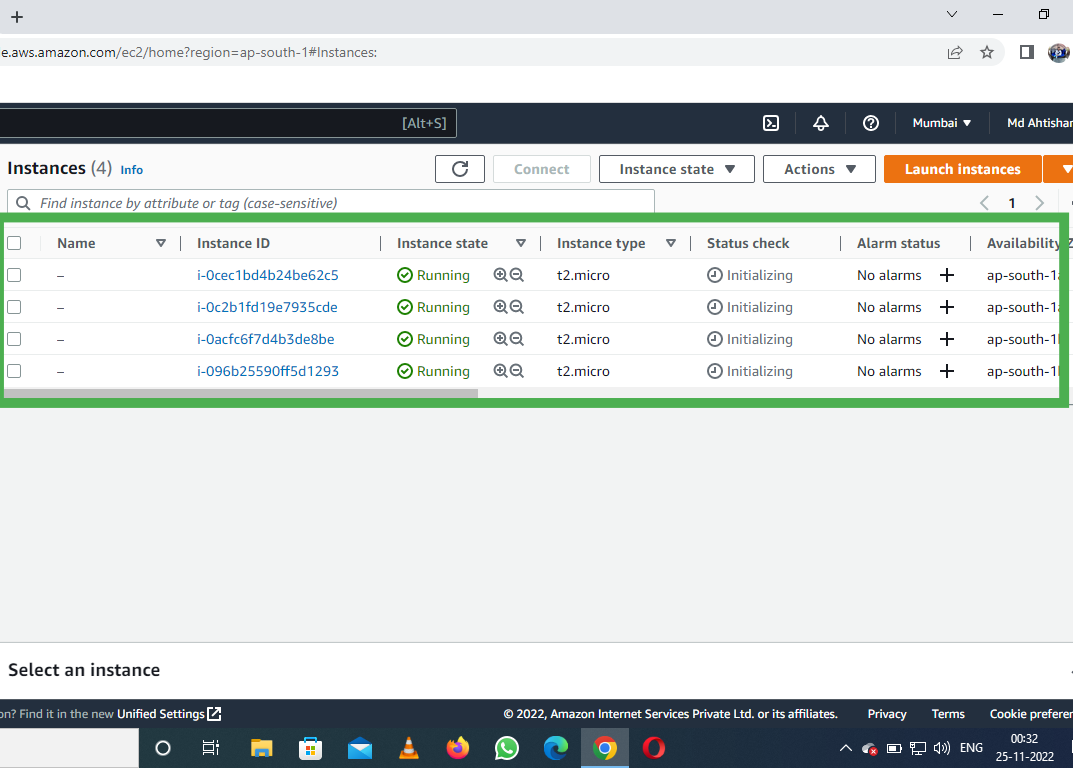
  • We selected the Desired state equal to 4 and you can see the 4 Instance is Running
Auto Scaling is created