In simplest terms, cloud computing means storing and accessing the data and programs on remote servers that are hosted on the internet instead of the computer’s hard drive or local server. It is also referred to as Internet-based computing.
Features of cloud
- No up-front investment
- Lowering operating cost
- Highly scalable and efficient
- Easy access
- Reducing business risks and maintenance expenses
Advantages of Elastic Load Balancer
- ELB automatically distributes incoming application traffic across multiple targets, such as EC2 instances, containers, and IP addresses, to achieve high availability.
- It can automatically scale to handle changes in traffic demand, allowing you to maintain consistent application performance.
- It can monitor the health of its registered targets and route traffic only to the healthy targets.
- It evenly distributes traffic across all availability zones in a region, improving fault tolerance.
Disadvantages of Elastic Load Balancer
- ELB can add latency to your application, as traffic must pass through the load balancer before being routed to your targets.
- It has limited customization options, so you may need to use additional tools and services to fully meet your application’s requirements.
- It can introduce additional complexity to your application architecture, requiring you to manage and maintain additional resources.
- It can increase your overall AWS costs, especially if you have high traffic volumes or require multiple load balancers.
Amazon Web Services
Amazon Web Services is a subsidiary of Amazon.com that provides on-demand cloud computing platforms for individuals, companies, and governments, on a paid subscription basis , pay-as-you-go principle. Amazon Web Services offers a highly reliable, scalable, low-cost infrastructure platform in the cloud.
Elastic load balancer
Elastic load balancer is a service provided by Amazon in which the incoming traffic is efficiently automatically distributed across a group of backend servers in a manner that increases speed and performance. It helps to improve scalability of your application and secures your applications. Load Balancer allows you to configure health checks for the registered targets. In case any of registered target fails the health check, the load balancer will not route traffic to that unhealthy target. Thereby ensuring your application is highly available and fault tolerant.

Load balancer acting as single point of routing traffic
Types of load balancer
A. Classic Load Balancer: It is the traditional form of load balancer which was used initially. It distributes the traffic among the instances and is not intelligent enough to support host-based routing or path-based routing. It ends up reducing efficiency and performance in certain situations. It is operated on connection level as well as request level. Classic Load Balancer is in between the transport layer (TCP/SSL) or the application layer (HTTP/HTTPS .
B. Application Load Balancer: This type of Load Balancer is used when decisions are to be made related to HTTP and HTTPS traffic routing. It supports path-based routing and host-based routing. This load balancer works at the Application layer of the OSI Model. The load balancer also supports dynamic host port mapping.
C. Network Load Balancer: This type of load balancer works at the transport layer(TCP/SSL) of the OSI model. It’s capable of handling millions of requests per second. It is mainly used for load balancing TCP traffic.
D. Gateway Load Balancer: Gateway Load Balancers provides you the facility to deploy, scale, and manage virtual appliances like firewall. Gateway Load Balancers combines a transparent network gateway and then distributes the traffic.
Steps to configure an Application load balancer in AWS:
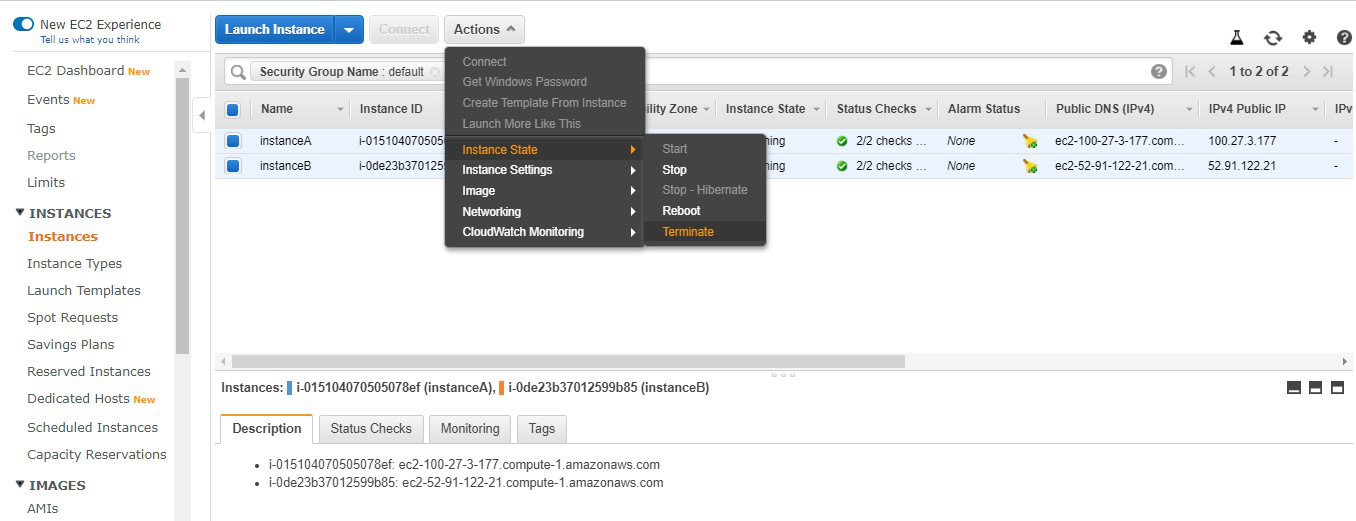
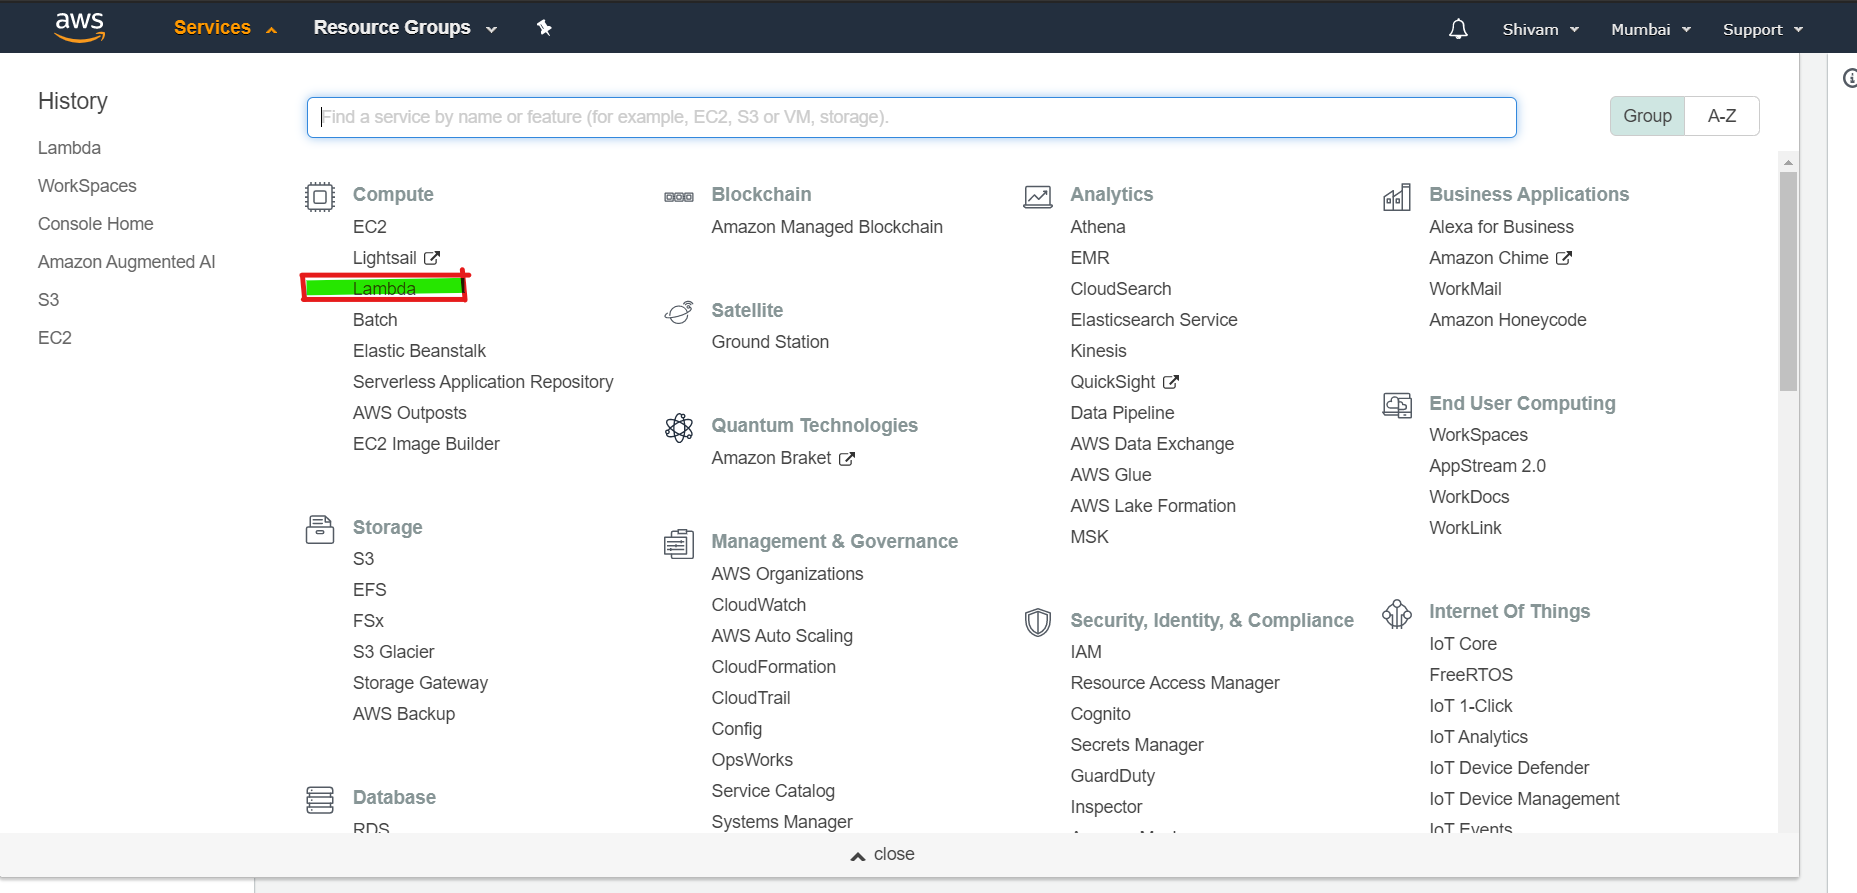
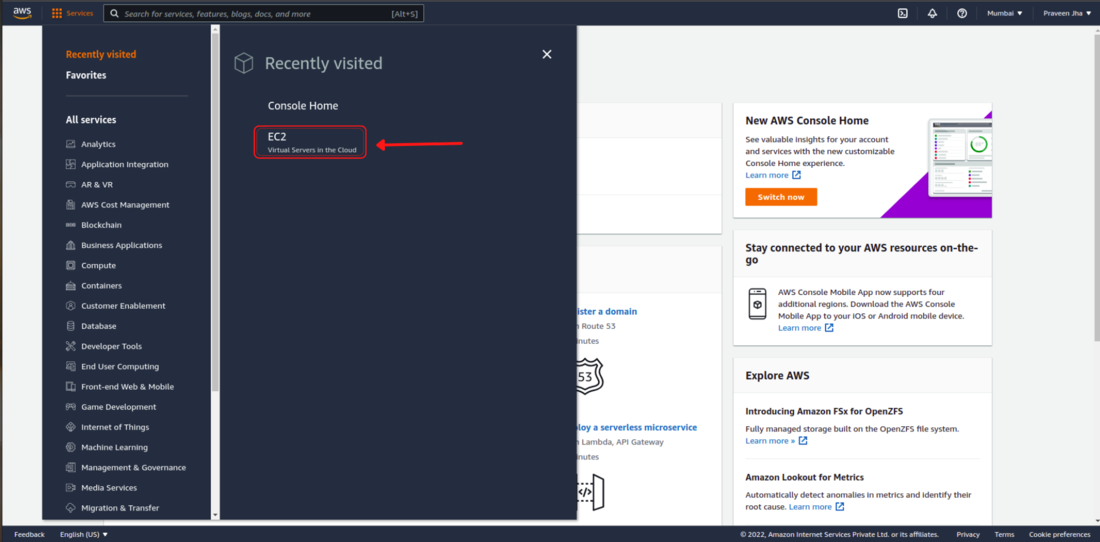
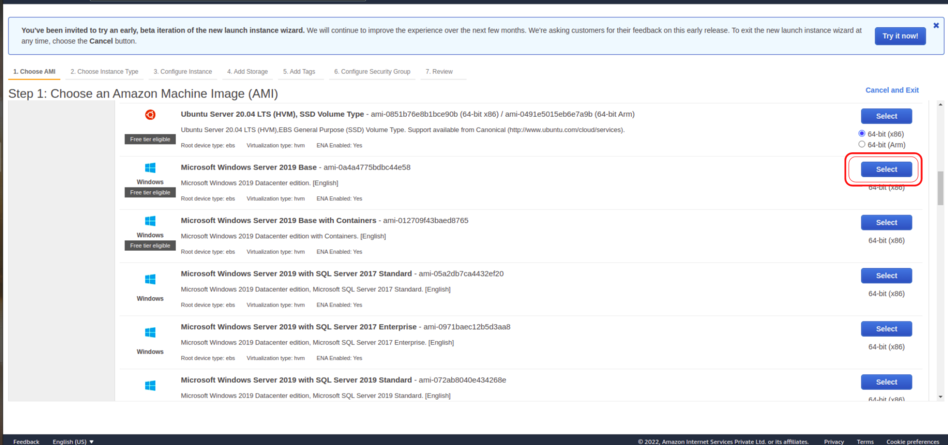
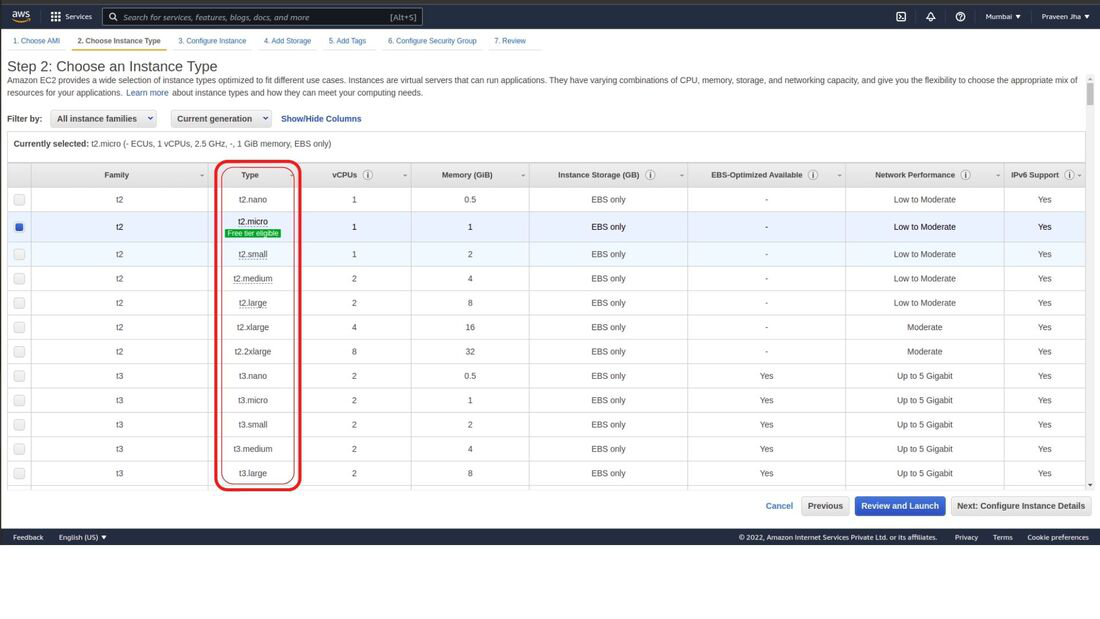
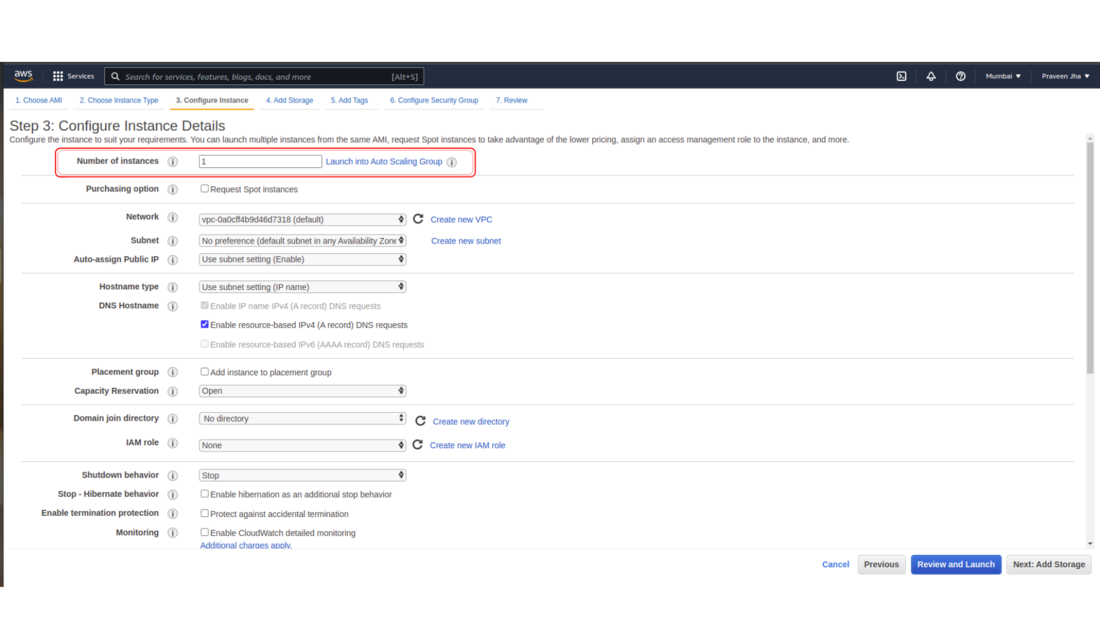
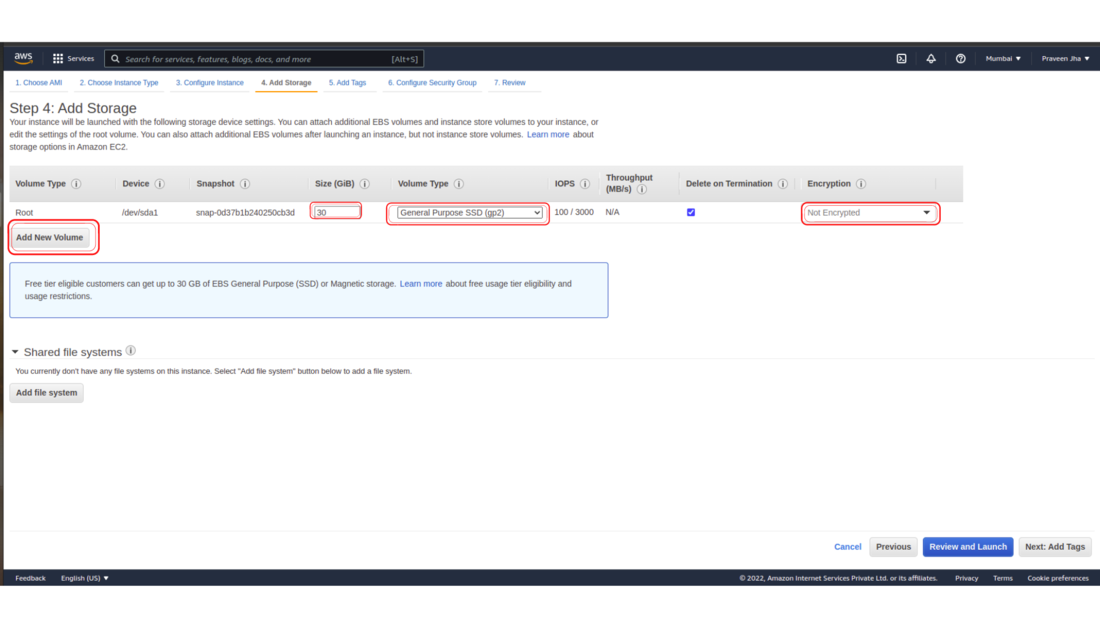
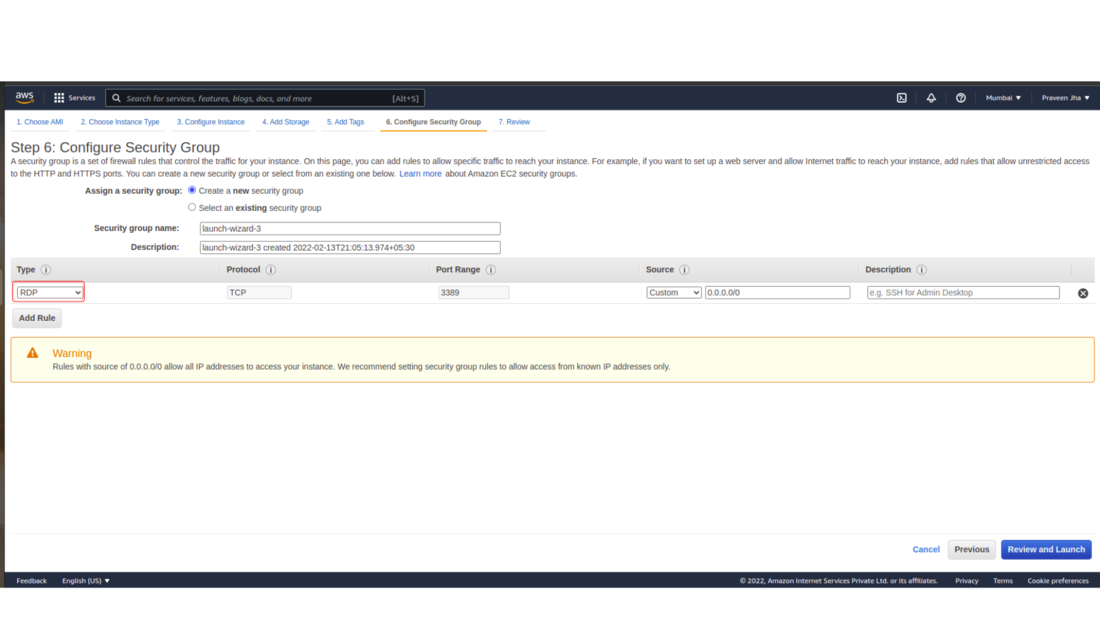
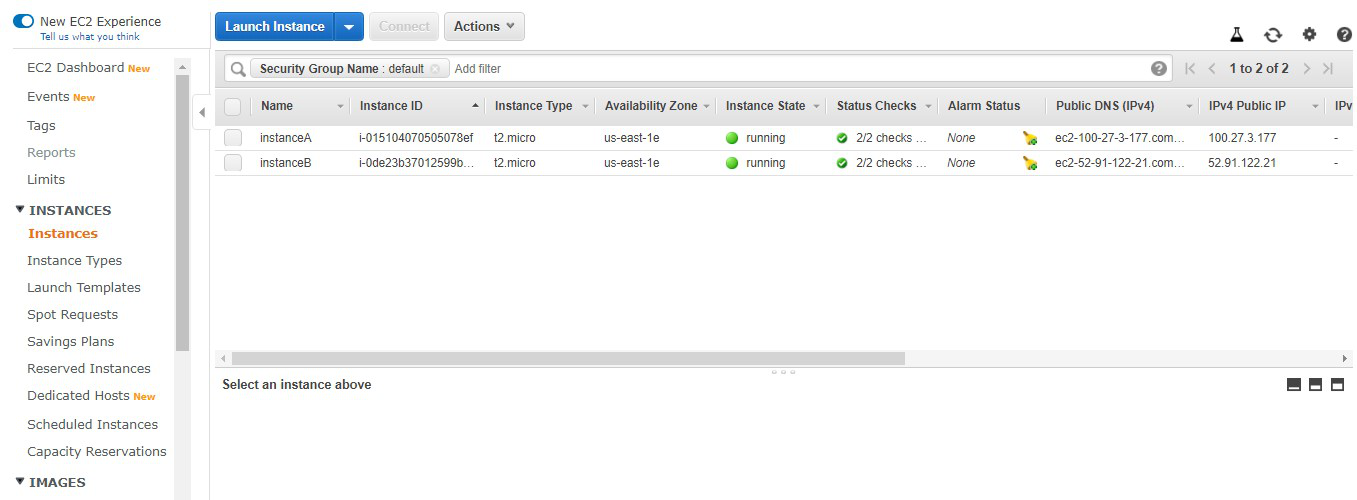
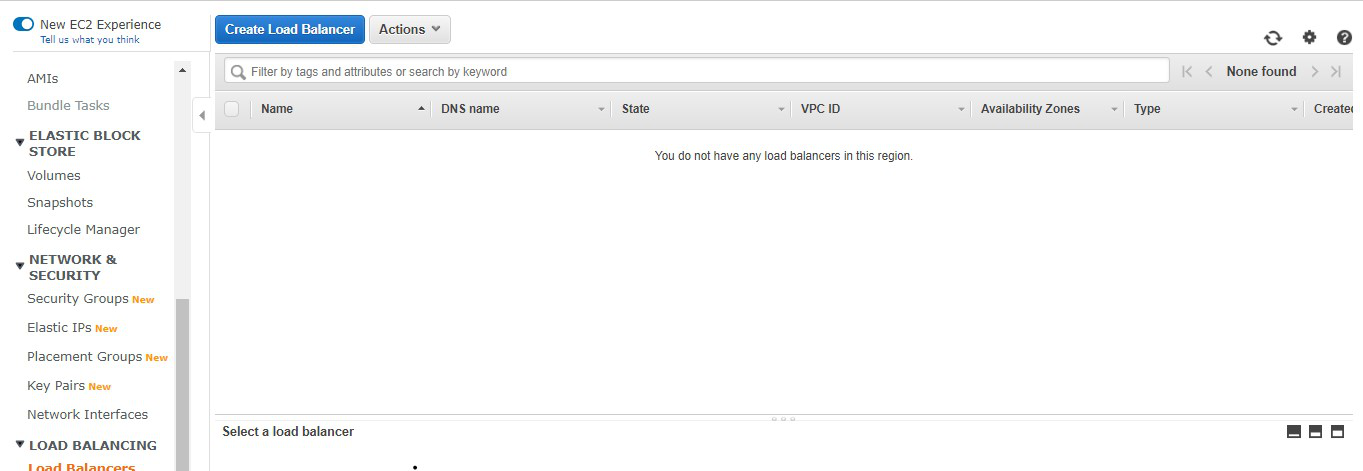
Step 1: Launch the two instances on the AWS management console named Instance A and Instance B. Go to services and select load balancer
Step 2: Click on create load balancer.
Step 3: Select Application Load Balancer and click on create.
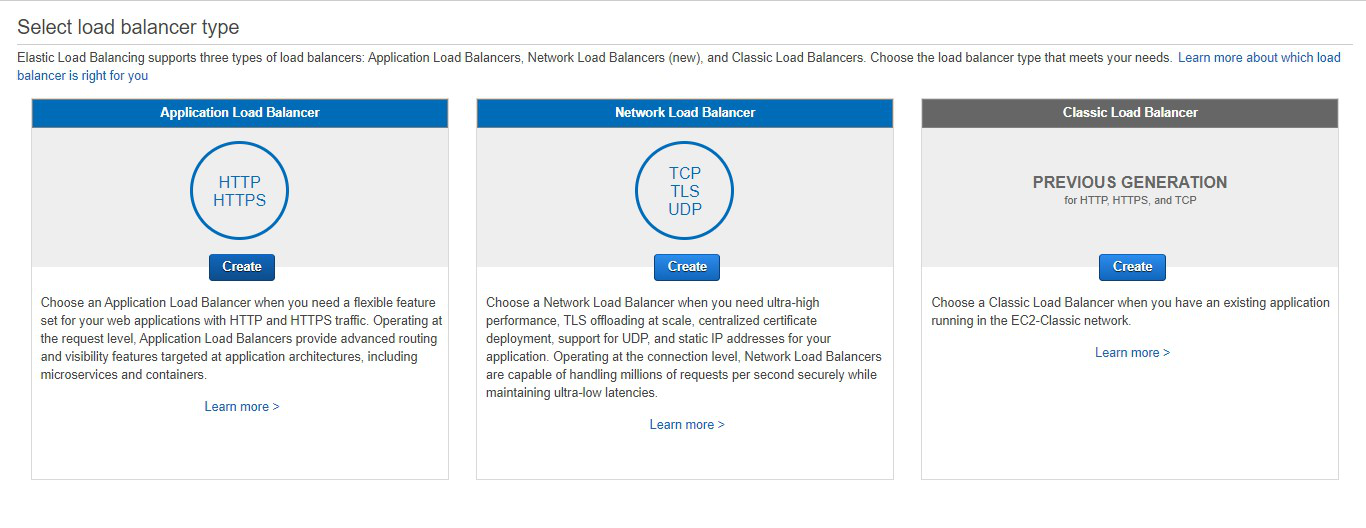
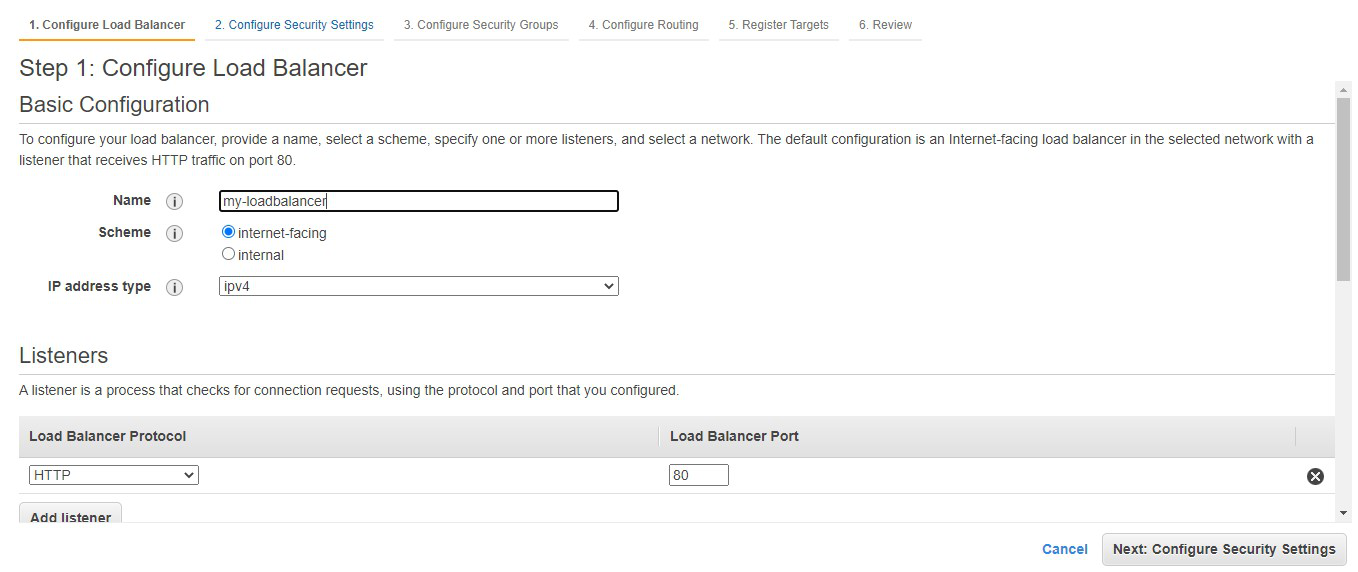
Step 4: Here you are required to configure the load balancer. Write the name of the load balancer. Choose the scheme as internet facing.
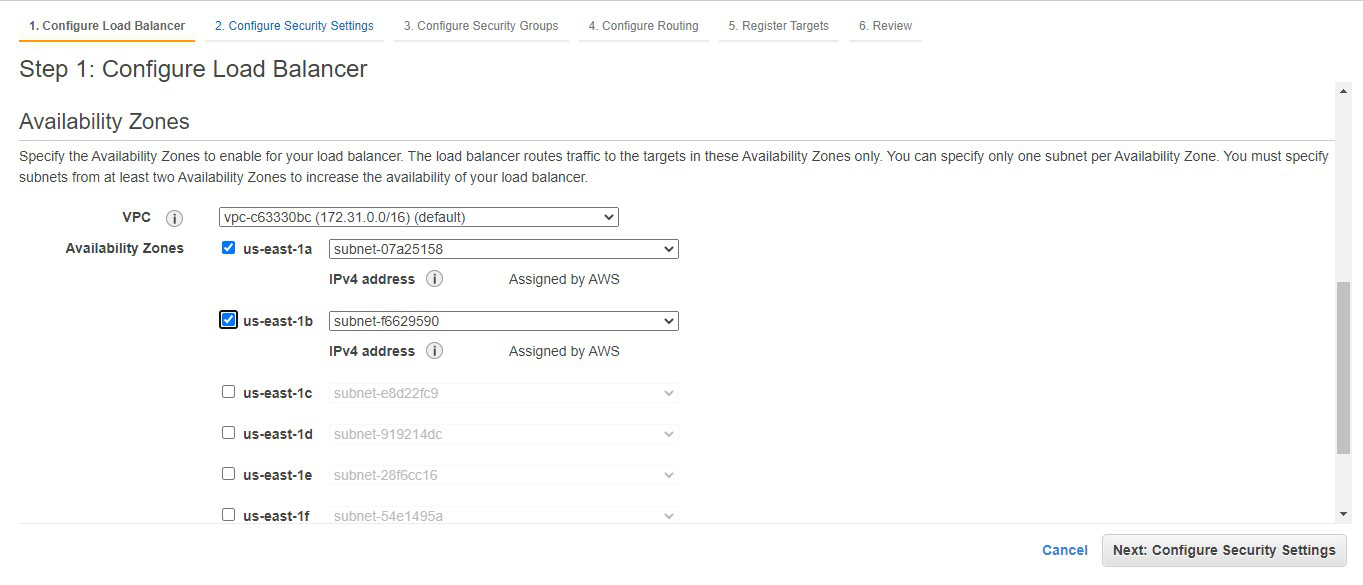
Step 5: Add at least 2 availability zones. Select us-east-1a and us-east-1b
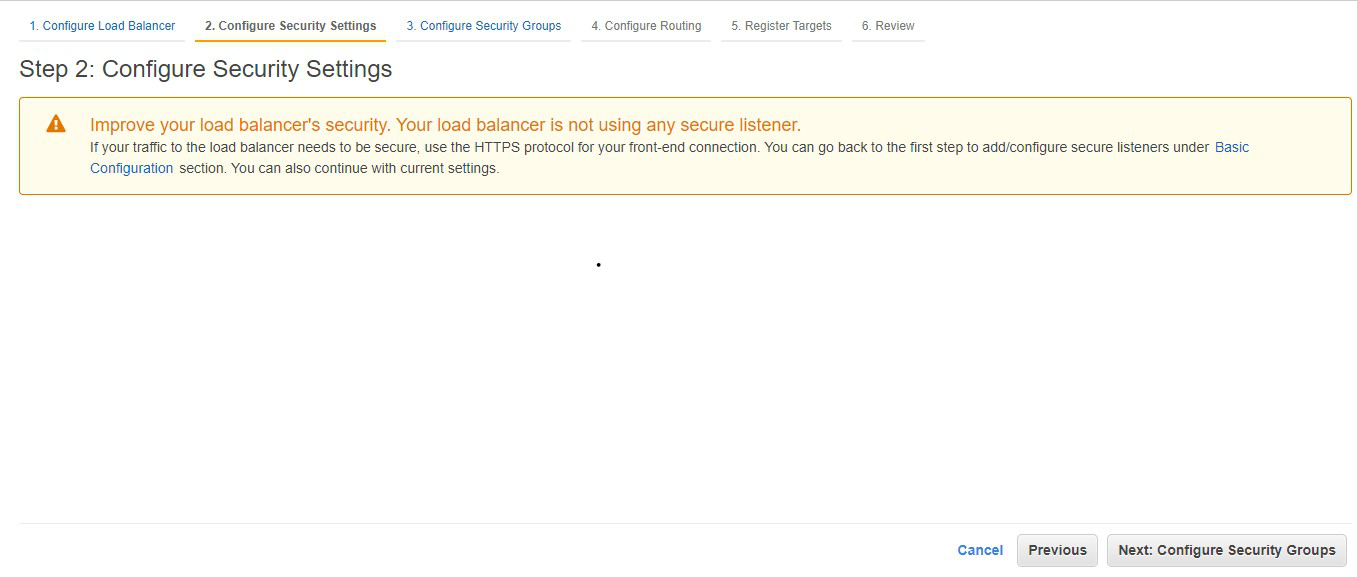
Step 6: We don’t need to do anything here. Click on Next: Configure Security Groups
Step 7: Select the default security group. Click on Next: Configure Routing
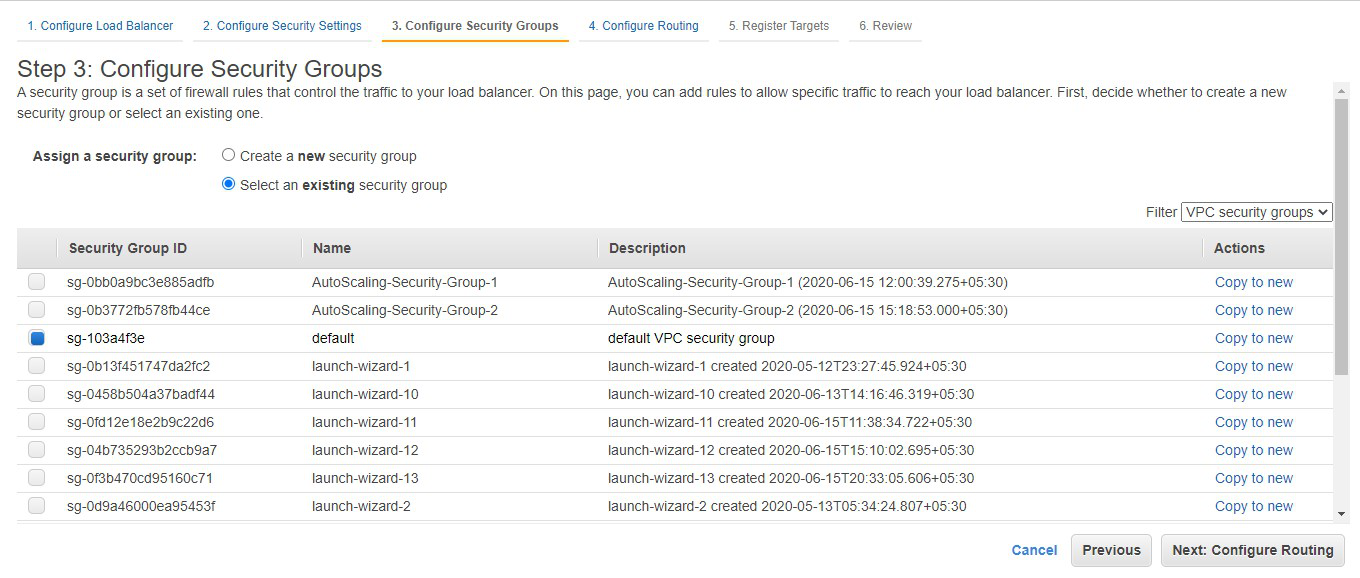
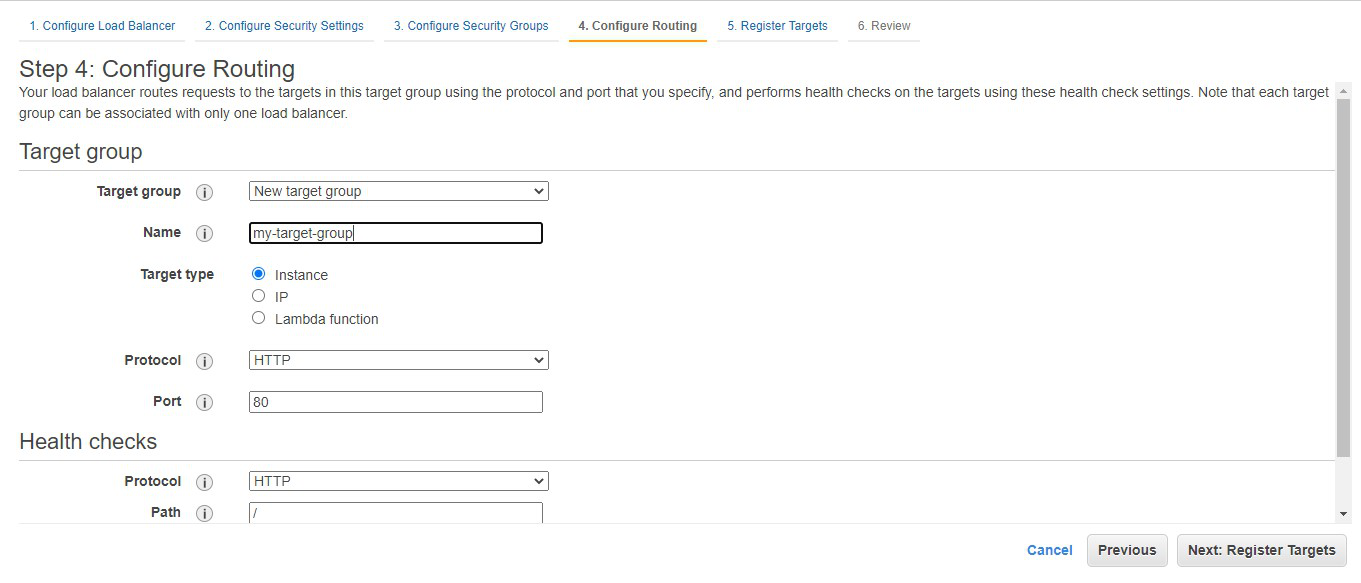
Step 8: Choose the name of the target group to be my-target-group. Click on Next: Register Targets.
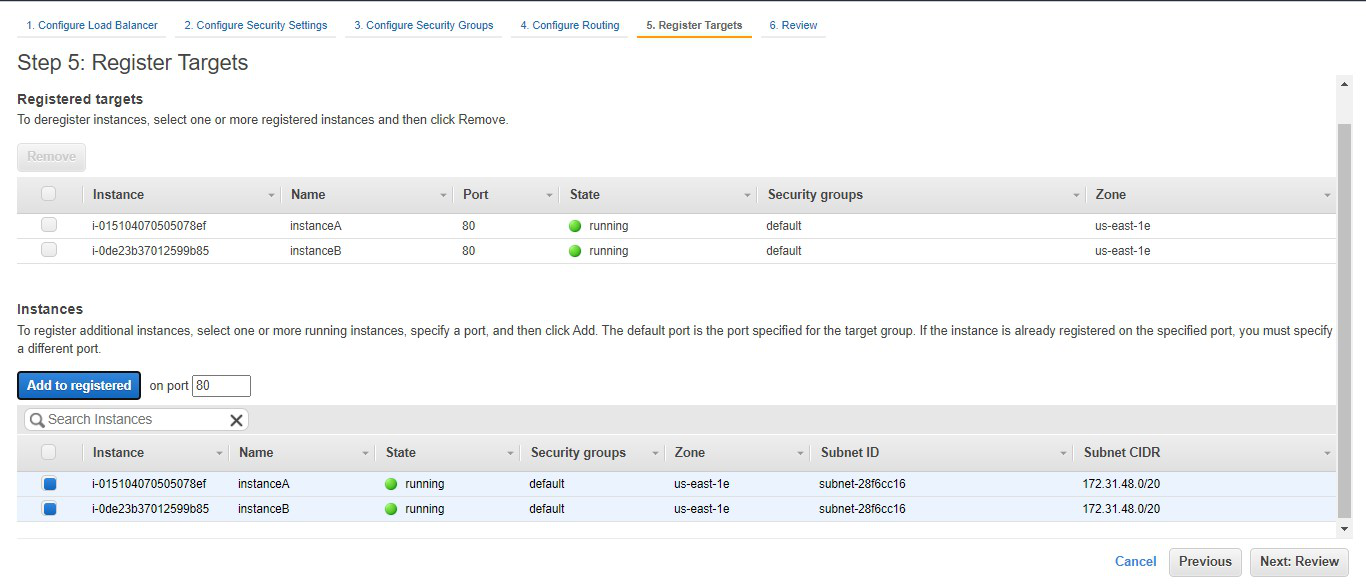
Step 9: Choose instance A and instance B and click on Add to registered. Click on Next: Review.
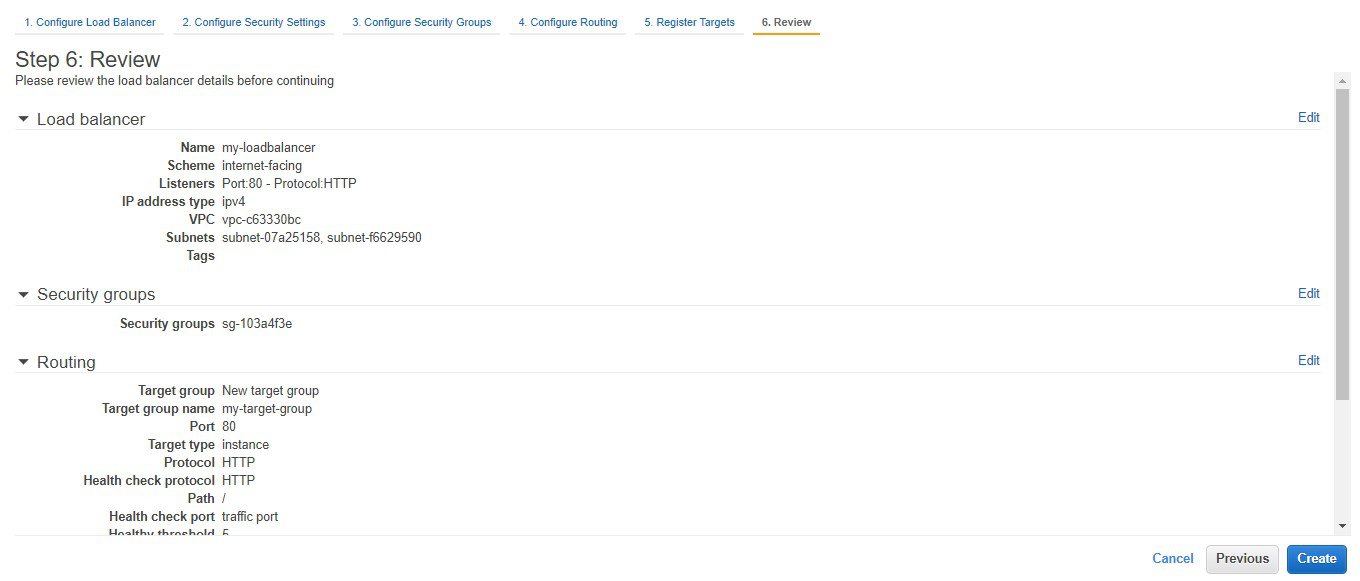
Step 10: Review all the configurations and click on create
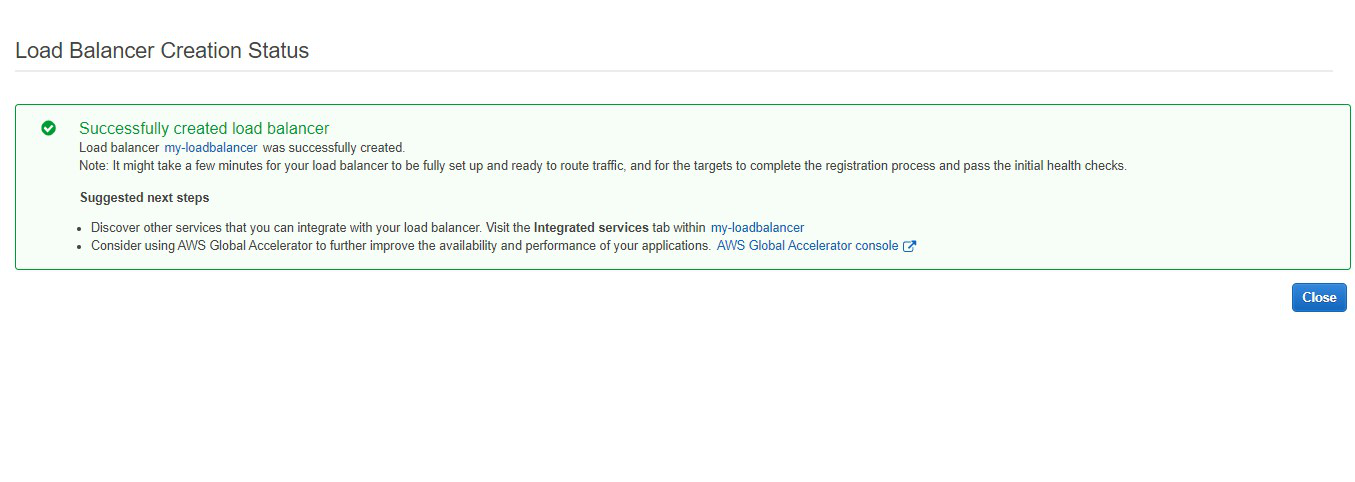
Step 11: Congratulations!! You have successfully created a load balancer. Click on close.
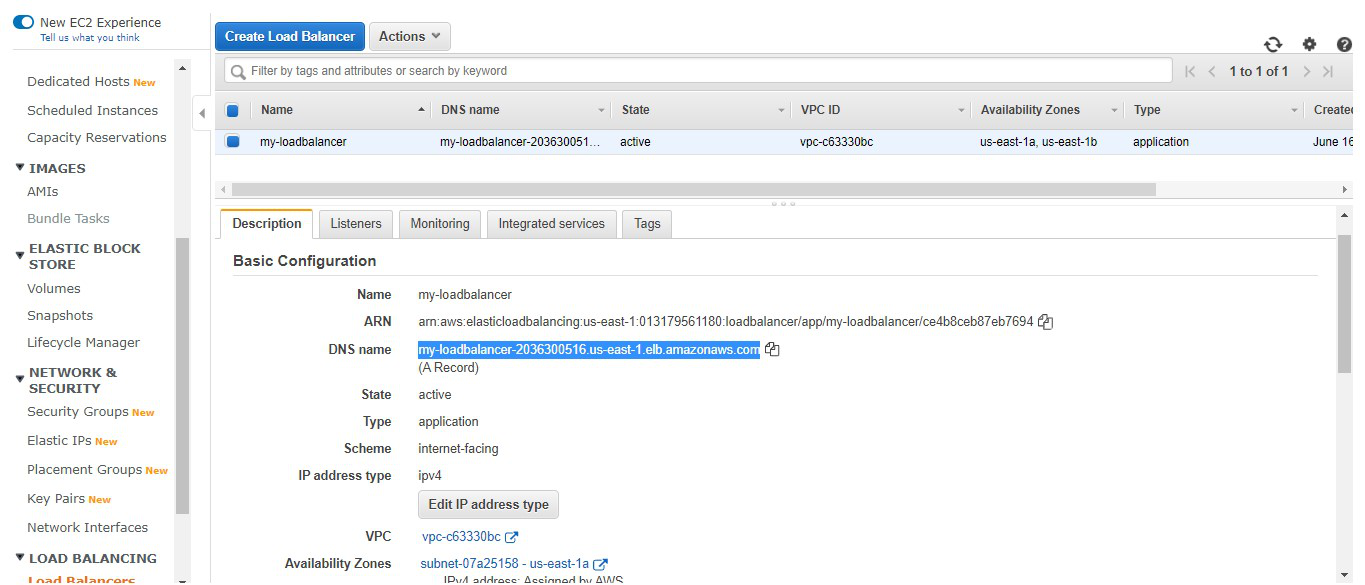
Step 12: This highlighted part is the DNS name which when copied in the URL will host the application and will distribute the incoming traffic efficiently between the two instances.
Step 13: This is the listener port 80 which listens to all the incoming requests

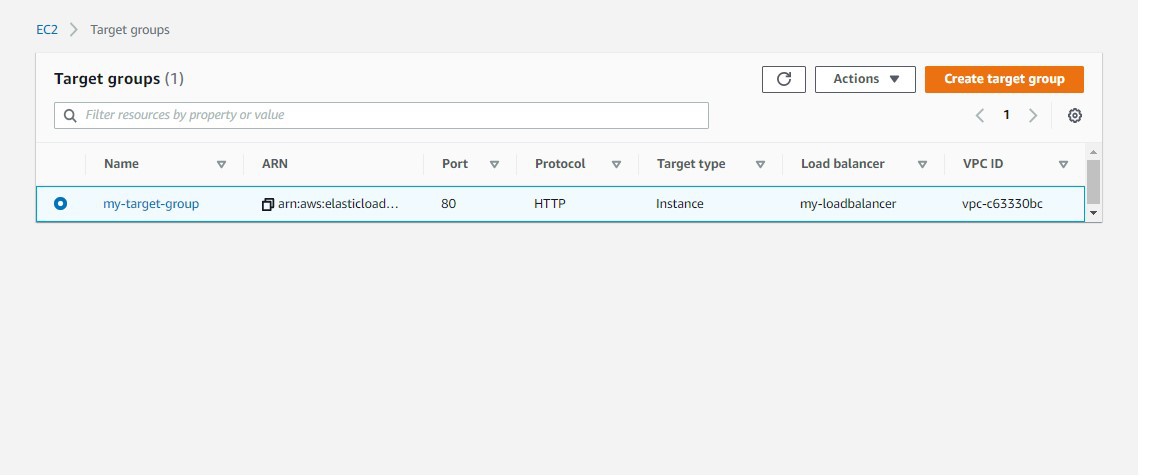
Step 14: This is the target group that we have created
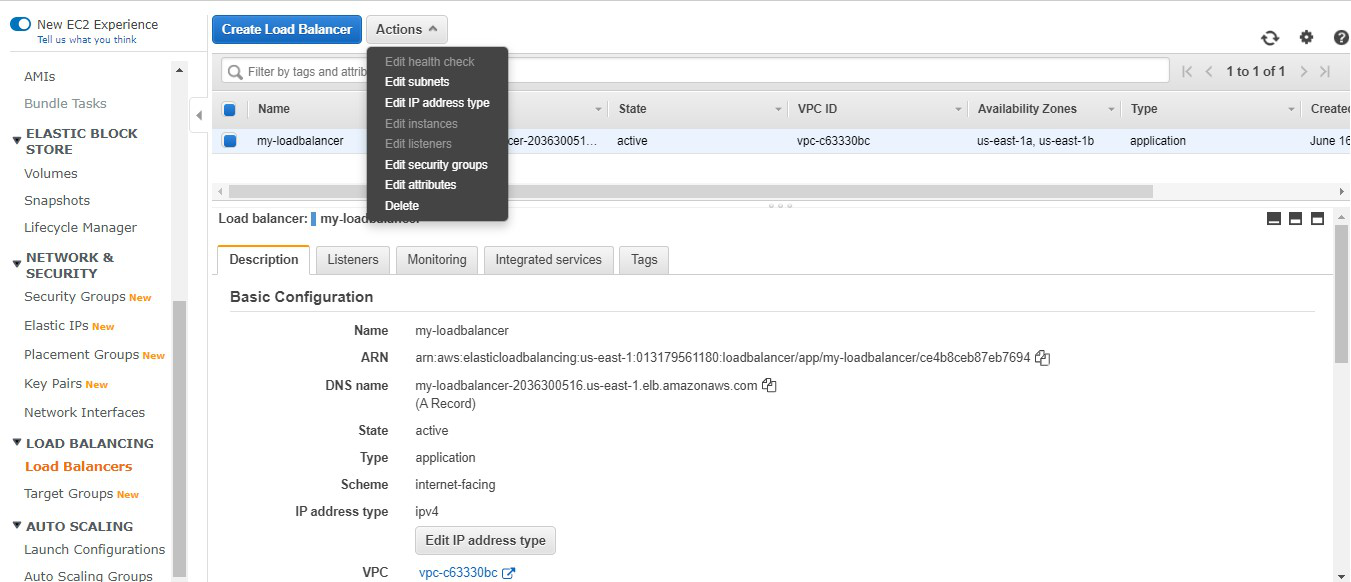
Step 15: Now we need to delete the instance. Go to Actions -> Click on Delete.
Step 16: Also don’t forget to terminate the instances.
