AWS Elastic Beanstalk is an AWS-managed service for web applications. Elastic Beanstalk is a pre-configured EC2 server that can directly take up your application code and environment configurations and use it to automatically provision and deploy the required resources within AWS to run the web application. Unlike EC2 which is Infrastructure as a service, Elastic Beanstalk is a Platform As A Service (PAAS) as it allows users to directly use a pre-configured server for their application. Of course, you can deploy applications without ever having to use elastic beanstalk but that would mean having to choose the appropriate service from the vast array of services offered by AWS, manually provisioning these AWS resources, and stitching them up together to form a complete web application. Elastic Beanstalk abstracts the underlying configuration work and allows you as a user to focus on more pressing matters.
This raises a concern that if elastic Beanstalk configures most of the resources itself and abstracts the underlying details. Can developers change the configuration if needed? The answer is Yes. Elastic Beanstalk is provided to make application deployment simpler but at no level will it restrict the developers from changing any configurations.
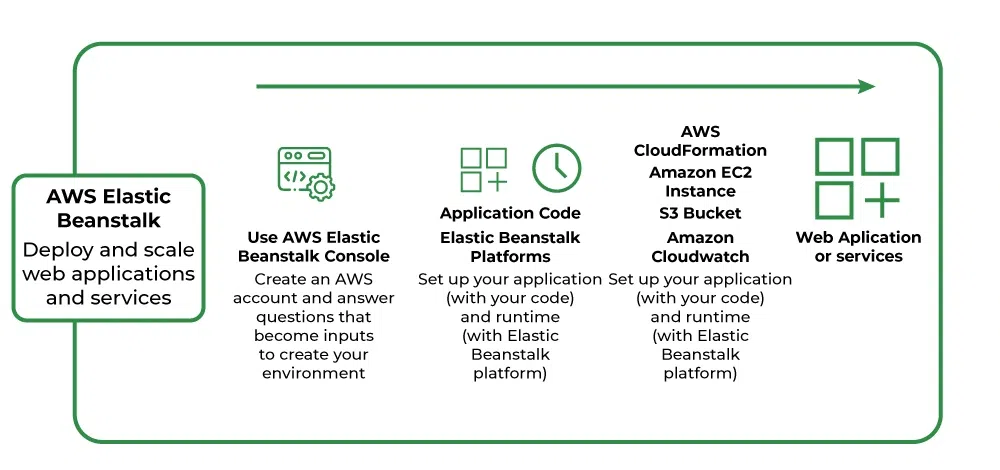
How Elastic Beanstalk Works
Elastic Beanstalk is a fully managed service provided by AWS that makes it easy to deploy and manage applications in the cloud without worrying about the underlying infrastructure. First, create an application and select an environment, configure the environment, and deploy the application.
Elastic Beanstalk-Supported Platforms
AWS Elastic Beanstalk provides a number of platforms on which we may develop our apps, deploy our code, and it manages the entire supporting architecture and computational resources for code execution. Following are the Platforms for programming languages provided by Elastic Beanstalk.
Platforms for Programming Languages Provided By Elastic Beanstalk are
Platforms for Application Servers Provided by Elastic Beanstalk are
Elastic Beanstalk Features
- Elastic Beanstalk offers preconfigured runtime-like environments and deployment tools which makes it easy to deploy our application
- It supports numerous platforms and programming languages like GO, Python java, etc.
- Elastic Beanstalk scales your application automatically when the demand increases with the help of auto-scaling rules.
- Elastic Beanstalk can integrate with databases such as Mysql, Oracle, and Microsoft SQL Server.
- Access control via AWS Identity and Access Management and built-in security features like SSL/TLS encryption are provided by Elastic Beanstalk (IAM).
AWS Elastic Beanstalk Components
- Application: Elastic Beanstalk directly takes in our project code. So Elastic Beanstalk application is named the same as your project home directory.
- Application Environments: Users may want their application to run on different environments like DEV, UAT, and PROD. You can create and configure different environments to run applications on different stages.
- Environment Health: One of the most lucrative features of running applications on AWS or most of the other cloud platforms is automated health checks. AWS runs automatic health checks on all EC-2 deployments (Elastic Beanstalk is a managed EC-2 service) which can be monitored from the AWS console. For example, in the case of web applications AWS will regularly, as scheduled by the developers, ping the application to check if the response is status code 200 and if the application is running as expected. Health check responses:
- Red: The application failed all health tests.
- Yellow: The application failed some of the health tests.
- Grey: The application is updating.
- Green: The application passed the health check successfully.
- Isolated: All environments within a single application are isolated from each other (independent of each others’ running states). Needless to say, two different applications are also isolated.
- Scalability: Using Auto-Scaling within Elastic Beanstalk makes the application dynamically scalable.
- Elastic Load Balancing: All the web requests to the application are not directly relayed to application instances. They first hit the Elastic Load Balancer (ELB), which, as the name suggests, balances the load across all the application instances.
- Language support: Elastic Beanstalk supports the applications developed with Java, .NET, PHP, Node.js, Python, Ruby, Go, and Docker on familiar servers such as Apache, Nginx, Passenger, and IIS.
- Pricing: There is no extra charge for using Elastic Beanstalk. Users are only required to pay for the services and resources provisioned by Elastic Beanstalk Service.
- Automatic Provisioning: Elastic Beanstalk takes away the burden of choosing the right services and configuring their security groups to work together.
- Impossible to Outgrow: AWS claims that since Elastic Beanstalk uses the Auto Scaling feature it can, in theory, handle any amount of internet traffic.
How to Deploy an Application Using Elastic Beanstalk
Step 1: Visit the AWS Console and type “Elastic Beanstalk” into the search bar. After selecting Elastic Beanstalk from the drop-down menu below, you will be taken to the Elastic Beanstalk page where you can click “Create application” to launch a sample application using Elastic Beanstalk. As shown in the screenshots
Step 3: In this step, we are going to configure the necessary Application information like Name, and key-value pairs and select the platform in which the language the application is developed has to be deployed, the platform branch, platform version, and Application code.
Example: In this example, we are going to deploy the sample Java application which is provided by AWS itself select all the options as shown in the below screenshot.
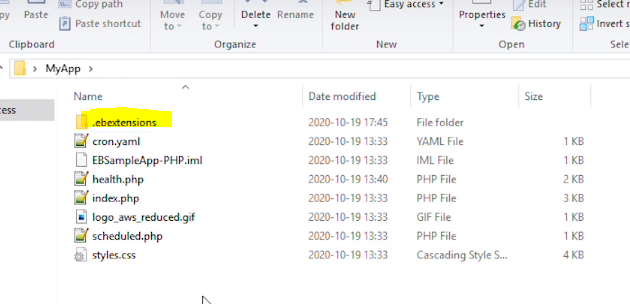
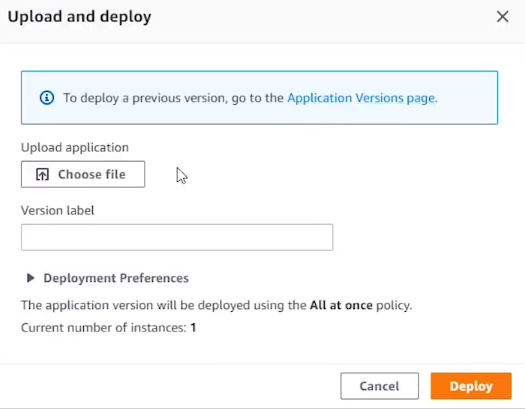
If you want to deploy your own application code then select the option “Upload your code” It needs to be in form of a ZIP or WAR file which is compulsory and needs to be in your local computer or S3 bucket and a version label which your going to provide must be unique.
Step 4: In this step, We do not need to do anything AWS Elastic Beanstalk will take care of the resource required to deploy the web application like
As shown in the image below
Step 5: In the screenshot below, under “Gfgapplication-env,” we can see the URL of the application, which can be accessed through the internet. We can also see that the health is marked in “green color, OK,” indicating that our application has been successfully deployed and has not encountered any difficulties. The resources or full architecture developed by AWS Beanstalk to deploy our application are visible in the Recent Events section.
Step 6: The very last and most important step requires us to use the URL provided by the Elastic Beanstalk to visit our Jave web application. as seen in the image below.
Working With Amazon Beanstalk
Amazon Beanstalk Through AWS Console
We can create and manage Amazon Beanstalk using the AWS Management Console log in to your AWS account. follow the steps that have mentioned above in “How to Deploy an Application Using Elastic Beanstalk”
Amazon Beanstalk Through AWS Command Line Interface (AWS CLI)
AWS provides a set of commands that can be run on AWS-CLI (AWS Command Line Interface) to manage your services. Much like you’d manage from your AWS Console. Following is a list of commands that can be run for managing the AWS Elastic Beanstalk service.
- abort-environment-update
- apply-environment-managed-action
- check-dns-availability
- compose-environments
- create-application
- create-application-version
- create-configuration-template
- create-environment
- create-platform-version
- create-storage-location
- delete-application
- delete-application-version
- delete-configuration-template
- delete-environment-configuration
- delete-platform-version
- describe-account-attributes
- describe-application-versions
- describe-applications
- describe-configuration-options
- describe-configuration-settings
- describe-environment-health
- describe-environment-managed-action-history
- describe-environment-managed-actions
- describe-environment-resources
- describe-environments
- describe-events
- describe-instances-health
- describe-platform-version
- list-available-solution-stacks
- list-platform-branches
- list-platform-versions
- list-tags-for-resource
- rebuild-environment
- request-environment-info
- restart-app-server
- retrieve-environment-info
- swap-environment-names
- terminate-environment
- update-application
- update-application-resource-lifecycle
- update-application-version
- update-configuration-template
- update-environment
- update-tags-for-resource
- validate-configuration-settings
In simple words, Elastic Beanstalk is an automatic application deployment service. It is the easiest possible way to deploy your applications on AWS even with possibly no prior experience on the platform.



.webp)
.webp)
.webp)
.webp)

.webp)
.webp)