Wednesday, 11 April 2018

Adding a NAT to your AWS VPC

In a previous post I described how to setup a VPC with both private and public subnets with AWS. In the post I showed a basic configuration in which we saw that the instances in the private subnet didn’t have internet access, which was necessary to run ‘yum update’, for instance. In this post I will show you one way to solve that by adding a NAT instanceto your VPC and have your EC2 instances in the private subnet use that to access internet resources. Here is the diagram I used in the previous post:
vpc

The steps to create a NAT are:
  • Create a new NAT security group
  • Create the NAT instance
  • Assign Elastic IP address
  • Disable the ‘Source/Destination check’
  • Create a new Route
Create a new NAT security group
Create a new security group in the EC2 Services overview. In this security group we will create our NAT instance. It will receive traffic from our private subnet and send out to the internet. First create the group like this:
Screenshot at Jun 08 19-49-28
Now set up the rules for our outbound and inbound traffic. The rules should reflect the fact that we want to use HTTP and HTTPS traffic to flow from our private subnet to the public subnet. So the inbound rules look like this:
Screenshot at Jun 08 19-52-48
For the outbound I just squeeze down the options by only allowing HTTP and HTTPS:
Screenshot at Jun 08 20-06-39
So this Security Group allows instances in our private subnet to communicate with our NAT instance that we create next.
Create the NAT instance
Go to the EC2 service and select an AMI that will act as our image for the NAT instance. Easiest to ‘Launch new Instance’, select the ‘Community AMIs’ and filter on ‘NAT’. Pick now one of the choices available:
Screenshot at Jun 08 20-13-52
In step 2 just pick the instance type you think you need. For this demo I use a micro.t2 but if you are expecting heavy traffic through the NAT instance you can of course pick a heavier type.
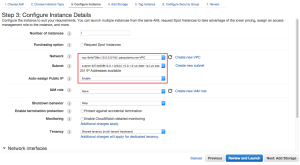
In step 3 make sure you pick the correct VPC and subnet (the public one). I also disable the auto-assign step here as I will assign an IP later on manually:
Screenshot at Jun 08 20-17-58
in step 4 accept the defaults, in step 5 give the instance a name like ‘MyNATInstance’ and in step 6 assign it to the Security Group we created in the previous step:
Screenshot at Jun 08 20-22-16
After this step you will receive a warning saying that the instance won’t be accessible via SSH, which is fine in this case since our instance is only meant to behave like a router so just click ‘Continue’:
Screenshot at Jun 08 20-22-45
After reviewing the settings click ‘Launch’ and select the existing key-pair ‘MyNewKeyPair’ I also created at an earlier stage:
Screenshot at Jun 08 20-24-49
Now we have our new instance up and running and lets assign a IP address to it.
Assign Elastic IP address
Go to ‘Elastic IPs’ in the left menu, click ‘Allocate New Address’ and set EIP used in ‘VPC’:
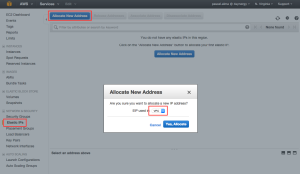
Screenshot at Jun 08 20-32-25
After allocating it we can assign it to the NAT instance by clicking ‘Associate Address’:
Screenshot at Jun 08 20-34-43
Disable the ‘Source/Destination check’
The next thing to do is the go back to the EC2 overview screen and select the NAT instance, open the ‘Actions’ menu and find the item ‘Change Source/Dest. Check’:
Screenshot at Jun 08 20-38-49
After disabling this check the NAT instance is able to act as a router.
Create a new Route
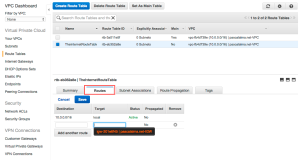
The final step is to add a rule to our private subnet so it is able to speak to our NAT instance and have internet access that way. So I open the VPC overview and go to the Route Tables and edit the Routes for the ‘default’ Route Table:
Screenshot at Jun 08 20-45-04
As Destination we fill in 0.0.0.0/0 to allow traffic from any source and as Target we pick our NAT instance.
Thats it, so lets test it. I logon to our ‘WebServer’ instance which resides in the DMZ. From there I open up an SSH terminal to our ‘ApplicationServer’. If I now perform a ‘sudo yum update’ we see that this instance has a connection to the internet to download the necessary packages (which failed at the end of my previous post since we didn’t have internet access without the NAT):
Screenshot at Jun 08 20-49-30

Setting up your own VPC with AWS

Setting up your own VPC with AWS

VPC-logoWhen you are using AWS resources like EC2 instances they will be assigned to a default VPC. However, by using AWS it is quite easy to setup your own VPC. In this post I describe how to setup a basic configuration. This is a setup in which we have a public subnet for our servers that have to be accessible from the outside world (DMZ) and we have a private subnet for our (EC2) servers that we would like to keep away from the outside world. However, to be able to access the internet from our private subnet we will setup a NAT instance, which I will show in a separate post.
The following diagram shows the setup that I want to create in this post:
vpc
These are the steps that I will perform to set up the VPC:
  • Create a VPC
  • Create subnets
  • Create Internet Gateway
  • Create a custom Route Table
Create a VPC
The first step is to create the VPC. I am not using the wizard but rather go via the menu:
Screenshot at May 30 11-28-41
And choose to create VPC manually:
Screenshot at May 30 11-29-45
Fill in the name of the VPC and the CIDR block to assign to this VPC:
Screenshot at May 30 11-32-08
After clicking ‘Yes, Create’ we see the VPC is created. Next is to create the two subnets in our VPC.
Create subnets
In the VPC dashboard click on the option to create subnets:
Screenshot at May 30 11-39-26
The subnets look like this after creation:
Screenshot at May 30 11-45-40
Remember that a subnet is mapped to only one availability zone. It has by default a route table created that will make communication between the two subnets possible. However, to have internet access from/to our public subnet we need a Internet Gateway (this is created automatically using the wizard but we have to do it manually since we do not use the wizard).
Create Internet Gateway
To make public access possible we need to create an Internet Gateway. This is also straightforward in the console. Go to Internet Gateways, click ‘Create Internet Gateway’ and fill the name of the IGW:
Screenshot at May 30 12-46-53
The created IGW is detached by default and we have to attach it to our VPC (remember you can only have one IGW per VPC). To attach it simply click ‘Attach to VPC’ and select the VPC:
Screenshot at May 30 12-51-13
Next step is to create a new Route Table to attach our public subnet to the IGW.
Create a custom Route Table
To attach the IGW to our public subnet we need a Route Table to define the routes. We do this by clicking ‘Create Route Table’ and create it in our VPC:
Screenshot at May 30 12-58-28
After creating the table we need to add a route to allow outgoing traffic to our IGW. To do this we add a new route to our custom Route Table:
Screenshot at May 30 12-59-48
Select our IGW as the target and enter as destination ‘0.0.0.0/0’ to allow all IP addresses in the assigned subnet to access the IGW. After creating the route we need to associate our public subnet to this Route Table as by default no subnet is associated with our custom Route Table:
Screenshot at May 30 13-06-29
So assign our public subnet to the Route Table:
Screenshot at May 30 13-07-28
Now we have one public subnet acting as our DMZ and one private subnet. Lets now deploy an EC2 instance in both subnets and test it!
I create a standard EC2 micro.t2 instance running AWS Linux. Important is to create the instance in the VPN we just created, assign our public subnet to it and have a public IP assigned to it automatically:
Screenshot at May 30 13-57-01
Next accept the defaults until the security group step. Add ‘HTTP’ as allowed protocol to the default security group:
Screenshot at May 30 20-36-20
Hit next and launch the instance. When it is asking for a key-pair create a new key-pair and don’t forget to download it:
Screenshot at May 30 20-40-32
When our webserver is launched we create a new instance called ‘MyAppServer’ which will reside in our private subnet:
Screenshot at May 30 20-45-41
Use the same security group as the previous instance (note that Security Groups can be used across Availability Zones where subnets can not). Also use the same key-pair as the previous instance (MyNewKeyPair).
We now have two instances running in our VPC each in its own subnet:
Screenshot at May 30 20-49-12
We can see in the properties of our WebServer instance that it has received a public IP address, so lets try to access it via SSH. I use Terminal on my Mac for this. Make sure your downloaded pem file is in the correct SSH key location and has the correct access rights. I simply create a new file like this:
cd ~
nano MyNewKeyPair.pem
** paste pem content of downloaded key file **
[ctrl]-o
[ctrl]-x
chmod 600 MyNewKeyPair.pem

With this pem file in place we can now setup a ssh connection to our web server. Copy the public IP address of the instance and execute the following command:
ssh ec2-user@52.7.40.73 -i MyNewKeyPair.pem 
This should lead to a successful connection like this:
The authenticity of host ‘52.7.40.73 (52.7.40.73)’ can’t be established.
RSA key fingerprint is 0c:5e:48:9a:44:79:af:bd:18:85:68:53:aa:52:a4:5f.
Are you sure you want to continue connecting (yes/no)? yes
Warning: Permanently added ‘52.7.40.73’ (RSA) to the list of known hosts.
__| __|_ )
_| ( / Amazon Linux AMI
___|\___|___|
https://aws.amazon.com/amazon-linux-ami/2015.03-release-notes/
18 package(s) needed for security, out of 46 available
Run “sudo yum update” to apply all updates.
-bash: warning: setlocale: LC_CTYPE: cannot change locale (UTF-8): No such file or directory
[ec2-user@ip-10-0-1-92 ~]$
When we now perform a ‘sudo yum update’ it will update the necessary packages by getting these packages via internet:
Installed:
kernel.x86_64 0:3.14.42-31.38.amzn1
Updated:
aws-amitools-ec2.noarch 0:1.5.7-1.0.amzn1 aws-apitools-common.noarch 0:1.1.0-1.9.amzn1
aws-cfn-bootstrap.noarch 0:1.4-9.4.amzn1 aws-cli.noarch 0:1.7.29-1.13.amzn1
0.1.a1.11.amzn1
python27-configobj.noarch 0:4.7.2-7.15.amzn1 python27-devel.x86_64 0:2.7.9-4.115.amzn1
python27-jmespath.noarch 0:0.7.1-1.8.amzn1 python27-libs.x86_64 0:2.7.9-4.115.amzn1
python27-setuptools.noarch 0:12.2-1.30.amzn1 rpm.x86_64 0:4.11.2-2.64.amzn1
rpm-build-libs.x86_64 0:4.11.2-2.64.amzn1 rpm-libs.x86_64 0:4.11.2-1.25.amzn1
rubygem20-bigdecimal.x86_64 0:1.2.0-1.25.amzn1 rubygem20-psych.x86_64 0:2.0.0-1.25.amzn1
rubygems20.noarch 0:2.0.14-1.25.amzn1 time.x86_64 0:1.7-38.9.amzn1
tzdata.noarch 0:2015b-1.33.amzn1 tzdata-java.noarch 0:2015b-1.33.amzn1
unzip.x86_64 0:6.0-2.9.amzn1 yum.noarch 0:3.4.3-137.57.amzn1
yum-metadata-parser.x86_64 0:1.1.4-8.12.amzn1
Complete!
[ec2-user@ip-10-0-1-92 ~]$
Lets now have a look at our ApplicationServer instance. As we can see in our console this instance has no public IP address nor an Elastic IP address. The only IP address it has is the private one:
Screenshot at May 31 09-13-16
So if we want to SSH into this instance we have to start our SSH connection from our webserver. We can use the same steps we used to log in into our webserver (we need to create a key-pair first and then open the SSH like this):

[ec2-user@ip-10-0-1-92 ~]$ nano MyNewKeyPair.pem
[ec2-user@ip-10-0-1-92 ~]$ chmod 600 MyNewKeyPair.pem
[ec2-user@ip-10-0-1-92 ~]$ ssh ec2-user@10.0.2.37 -i MyNewKeyPair.pem
Last login: Sun May 31 07:22:39 2015 from 10.0.1.92
__| __|_ )
_| ( / Amazon Linux AMI
___|\___|___|
https://aws.amazon.com/amazon-linux-ami/2015.03-release-notes/
[ec2-user@ip-10-0-2-37 ~]$

Now we are logged in in our Application Server. If we now run the command ‘sudo yum update’ we see the following:
Screenshot at May 31 09-40-23
And this makes sense since our private subnet is not attached to our Internet Gateway and therefore doesn’t have access to the internet. To give the subnet access to internet we should add a NAT to our VPC. I will show in another post how to do that.

Using NAT Gateway instead of NAT Instance with AWS VPC

Using NAT Gateway instead of NAT Instance with AWS VPC

imgresI recently bumped into my own post of some time ago in which I describe how to add a NAT instance to your private subnet to have access to the internet to install packages etc. Although this still works some time ago AWS introduced the NAT Gatewaywhich in most cases makes life much easier.
In this post I show you how to set up the NAT Gateway instead of using the NAT instance. To get the same start situation as the original post I created this CloudFormation scriptthat creates a VPC with two private and public subnets. When these are in place I can create an EC2 instance in both the private subnet and in the public one, as I also described in the original post.
What we see is that the ‘sudo yum update’ in the ‘PrivateInstance’ fails as expected because the private instance isn’t allowed to access the internet to install packages. So that is where the NAT Gateway comes in place. To install one I simply use the wizard in the Management Console that will guide you through.
Select the ‘NAT Gateways’ option in the left menu to start the wizard:
screenshot-at-dec-18-20-40-51
In the next screen select a public subnet in which the NAT Gateway has to reside and select an Elastic IP address to it (most likely you will need to create one as you won’t normally have these available):
screenshot-at-dec-18-20-41-50
Then the NAT Gateway is created (yes, it has become that easy) and we need to modify the Route Table for the private subnet so it will make use of the NAT Gateway. Just click the button in the screen that is show after the creation:
screenshot-at-dec-18-20-42-56
In the private route table add a rule that connects our private subnet to the Destination ‘0.0.0.0/0’ (which means any machine) via the NAT Gateway by selecting the NAT as target:
screenshot-at-dec-18-20-49-41
That’s it. Now we can access the internet from our ‘private’ instances as we could with the NAT Instance in place. So the question might be when to use one over the other. To answer that question AWS has made the following comparison so you can check what is your use case and see what fits best,

Archiving your S3 content

In a previous post I showed how to setup a Glacier Vault and put data in it by using a CLI. Another way to make use of the cheaper storage service is to move your data from a S3bucket into a Glacier vault. You can do this by making use of the Object Lifecycle Management which make it possible to move data from your S3 bucket to a Glacier storage class by simply applying a rule like if data in a bucket is more than 3 months old move it.
Please note that although the object is stored in Glacier you cannot access the object from the Glacier console or API. You can only access them via the S3 service to restore a copy of it for a certain time.
Go to the S3 services and select the bucket you want to archive:
Screen Shot 2013-05-15 at 21.56.11
Make sure you select the root of the bucket. If so, then the option ‘Lifecycle’ is available as property. Click ‘Add rule’ to add an archiving rule:
Screen Shot 2013-05-15 at 21.56.40
In the ‘Rule’ window you can define which objects in the bucket should be moved to the Glacier and when:
Screen Shot 2013-05-15 at 21.57.25
After saving the rule just wait and after some time you can see the Storage Class of your objects in the bucket that matches the defined rule will be moved from the ‘Standard’ Storage class to the ‘Glacier’ storage class:
Screen Shot 2013-05-26 at 16.42.37
Now these objects are stored in the Glacier storage (and thus no longer accessible in real time).