Database Lab tutorial for Amazon RDS
Database Lab Engine (DLE) is used to boost software development and testing processes by enabling ultra-fast provisioning of databases of any size. In this tutorial, we will install Database Lab Engine from the AWS Marketplace. If you are an AWS user, this is the fastest way to have powerful database branching for any database, including RDS and RDS Aurora. But not only RDS: any Postgres and Postgres-compatible database can be a source for DLE.
Compared to traditional RDS clones, Database Lab clones are instant. RDS cloning takes several minutes, and, depending on the database size, additional dozens of minutes or even hours may be needed to "warm up" the database (see "Lazy load"). Obtaining a new DLE clone takes as low as a few seconds, and it does not increase storage and instance bill at all.
A single DLE instance can be used by dozens of engineers or CI/CD pipelines – all of them can work with dozens of thin clones located on a single instance and single storage volume. RDS Aurora clones are also "thin" by nature, which could be great for development and testing. However, each Aurora clone requires a provisioned instance, increasing the "compute" part of the bill; IO-related charges can be significant as well. This makes Aurora clones less attractive for the use in non-production environments. The use of DLE clones doesn't affect the bill anyhow – both "compute" and "storage" costs remain constant regardles of the number clones provisioned at any time.
Typical "pilot" setup
Timeline:
- Create and configure DLE instance - ~10 minutes
- Wait for the initial data provisioning (full refresh) - ~30 minutes (for a 100 GiB database; DLE is running on a very small EC2 instance, r5.xlarge)
- Try out cloning - ~20 minutes
- Show the DLE off to your colleagues - one more hour
Outcome:
- Total time spent: 2 hours
- Total money spent (r5.xlarge, 200 GiB disk space for EBS volume + DLE Standard subscription): less than $2
- The maximum number of clones running in parallel with default configuration (
shared_buffers = 1GBfor each clone): ~30 clones - Monthly budget to keep this DLE instance: $360 per month – same as for a single traditional RDS clone
Prerequisites
- AWS cloud account
- SSH client (available by default on Linux and MacOS; Windows users: consider using PuTTY)
- A key pair already generated for the AWS region that we are going to use during the installation; if you need to generate a new key pair, read the AWS docs: "Create key pairs".
Steps
- Install DLE from the AWS Marketplace
- Configure and launch the Database Lab Engine
- Start using DLE UI, API and client CLI to clone Postgres database in seconds
Step 1. Install DLE from the AWS Marketplace
First steps to install DLE from the AWS Marketplace are trivial:
- Log in into AWS: https://console.aws.amazon.com/
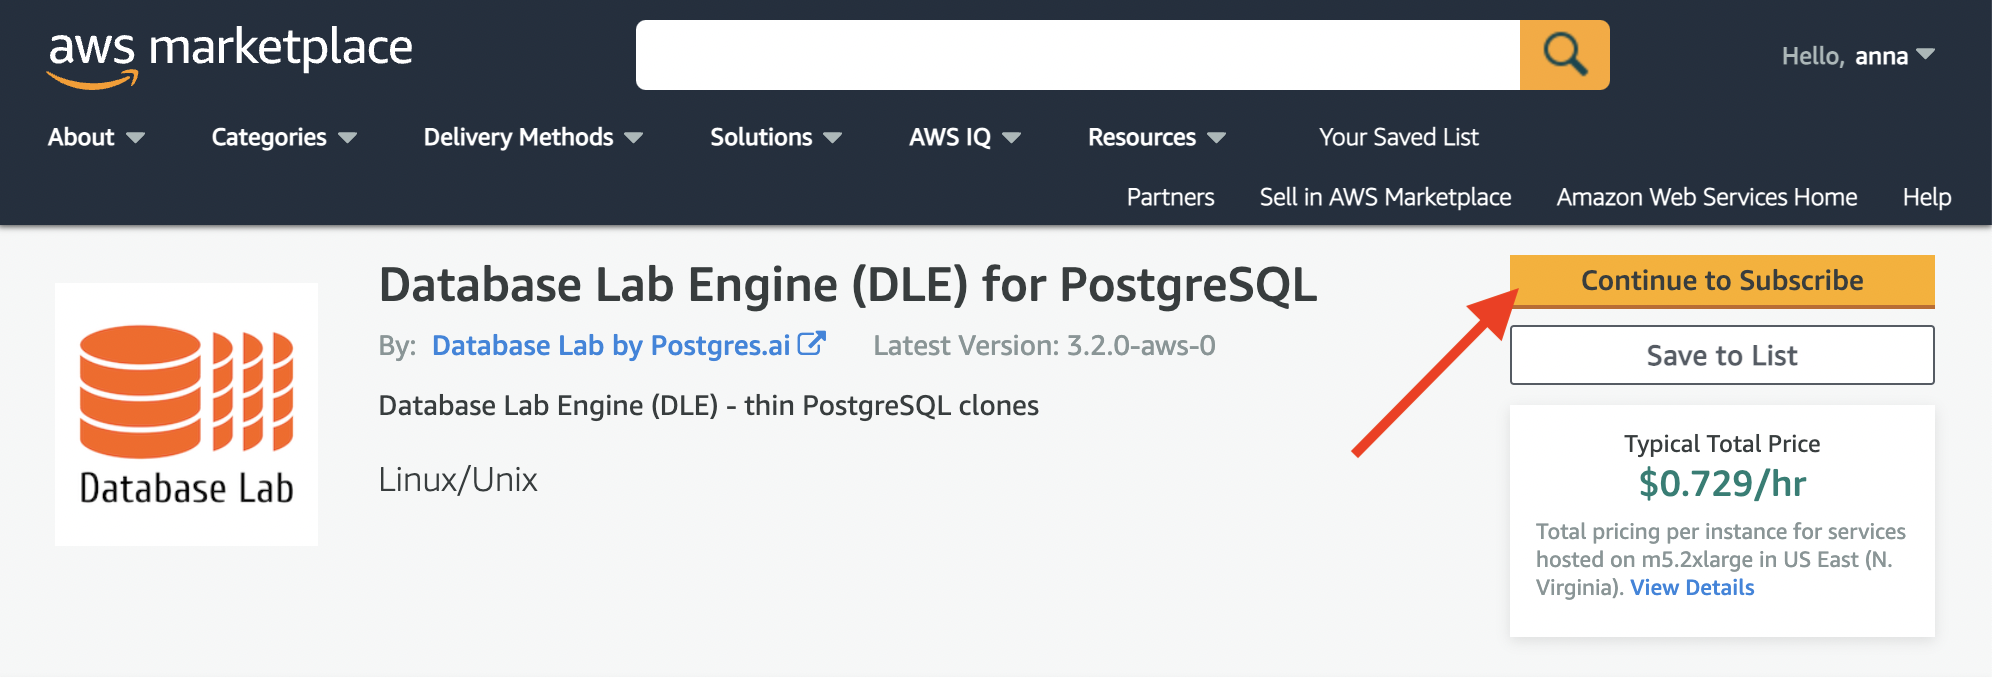
- Open the DLE on AWS Marketplace page
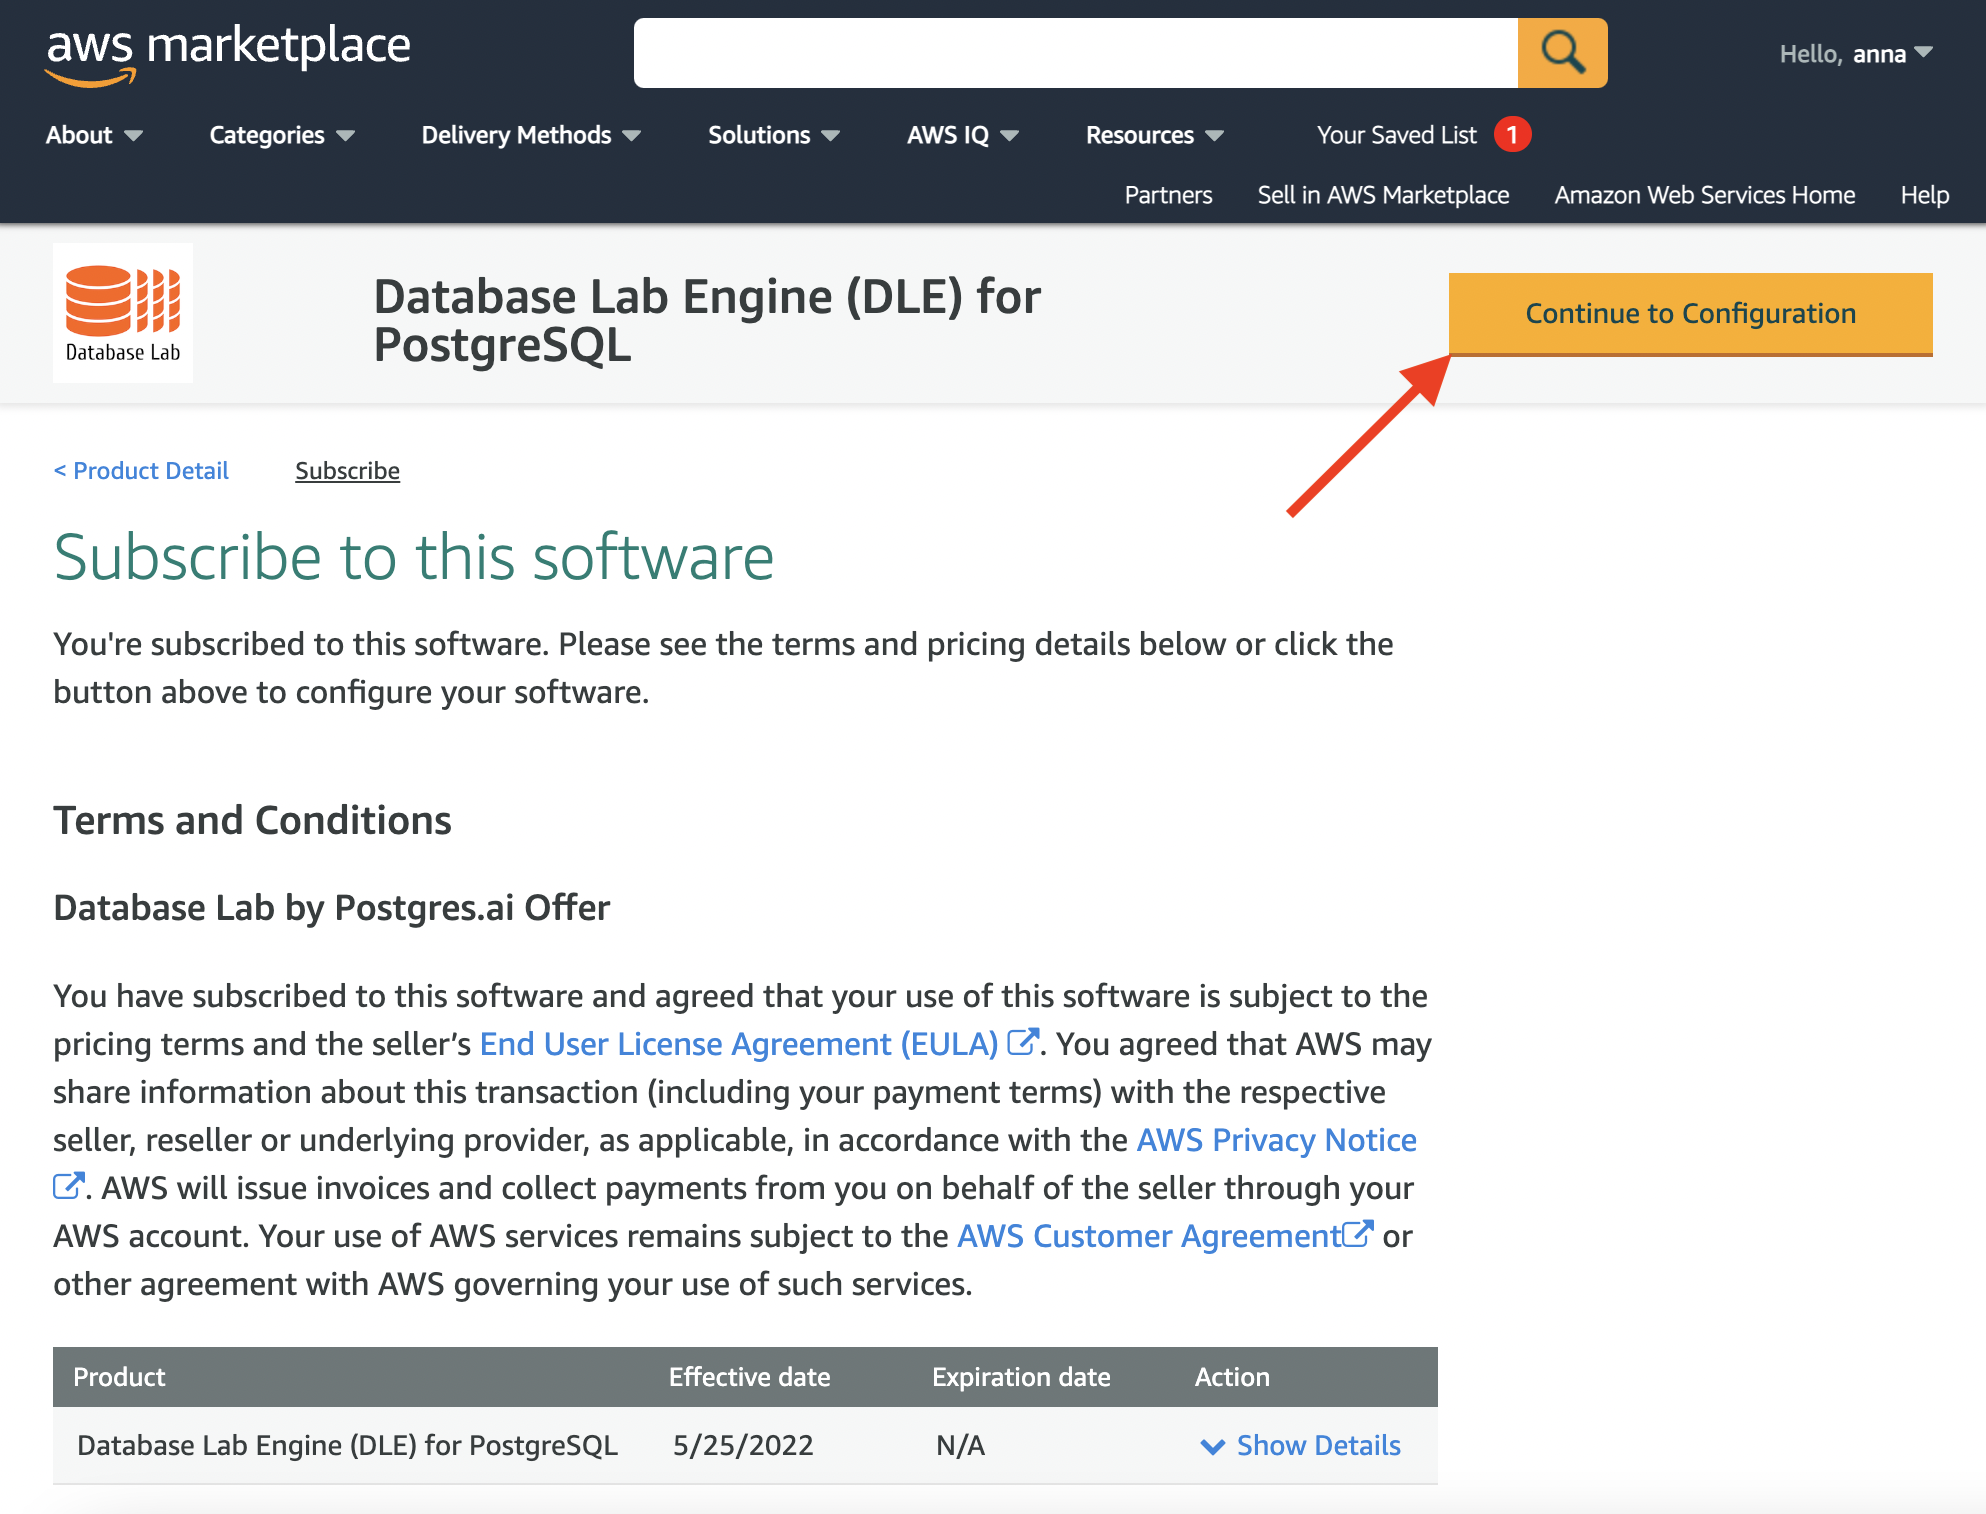
And then press the "Continue..." buttons a couple of times:
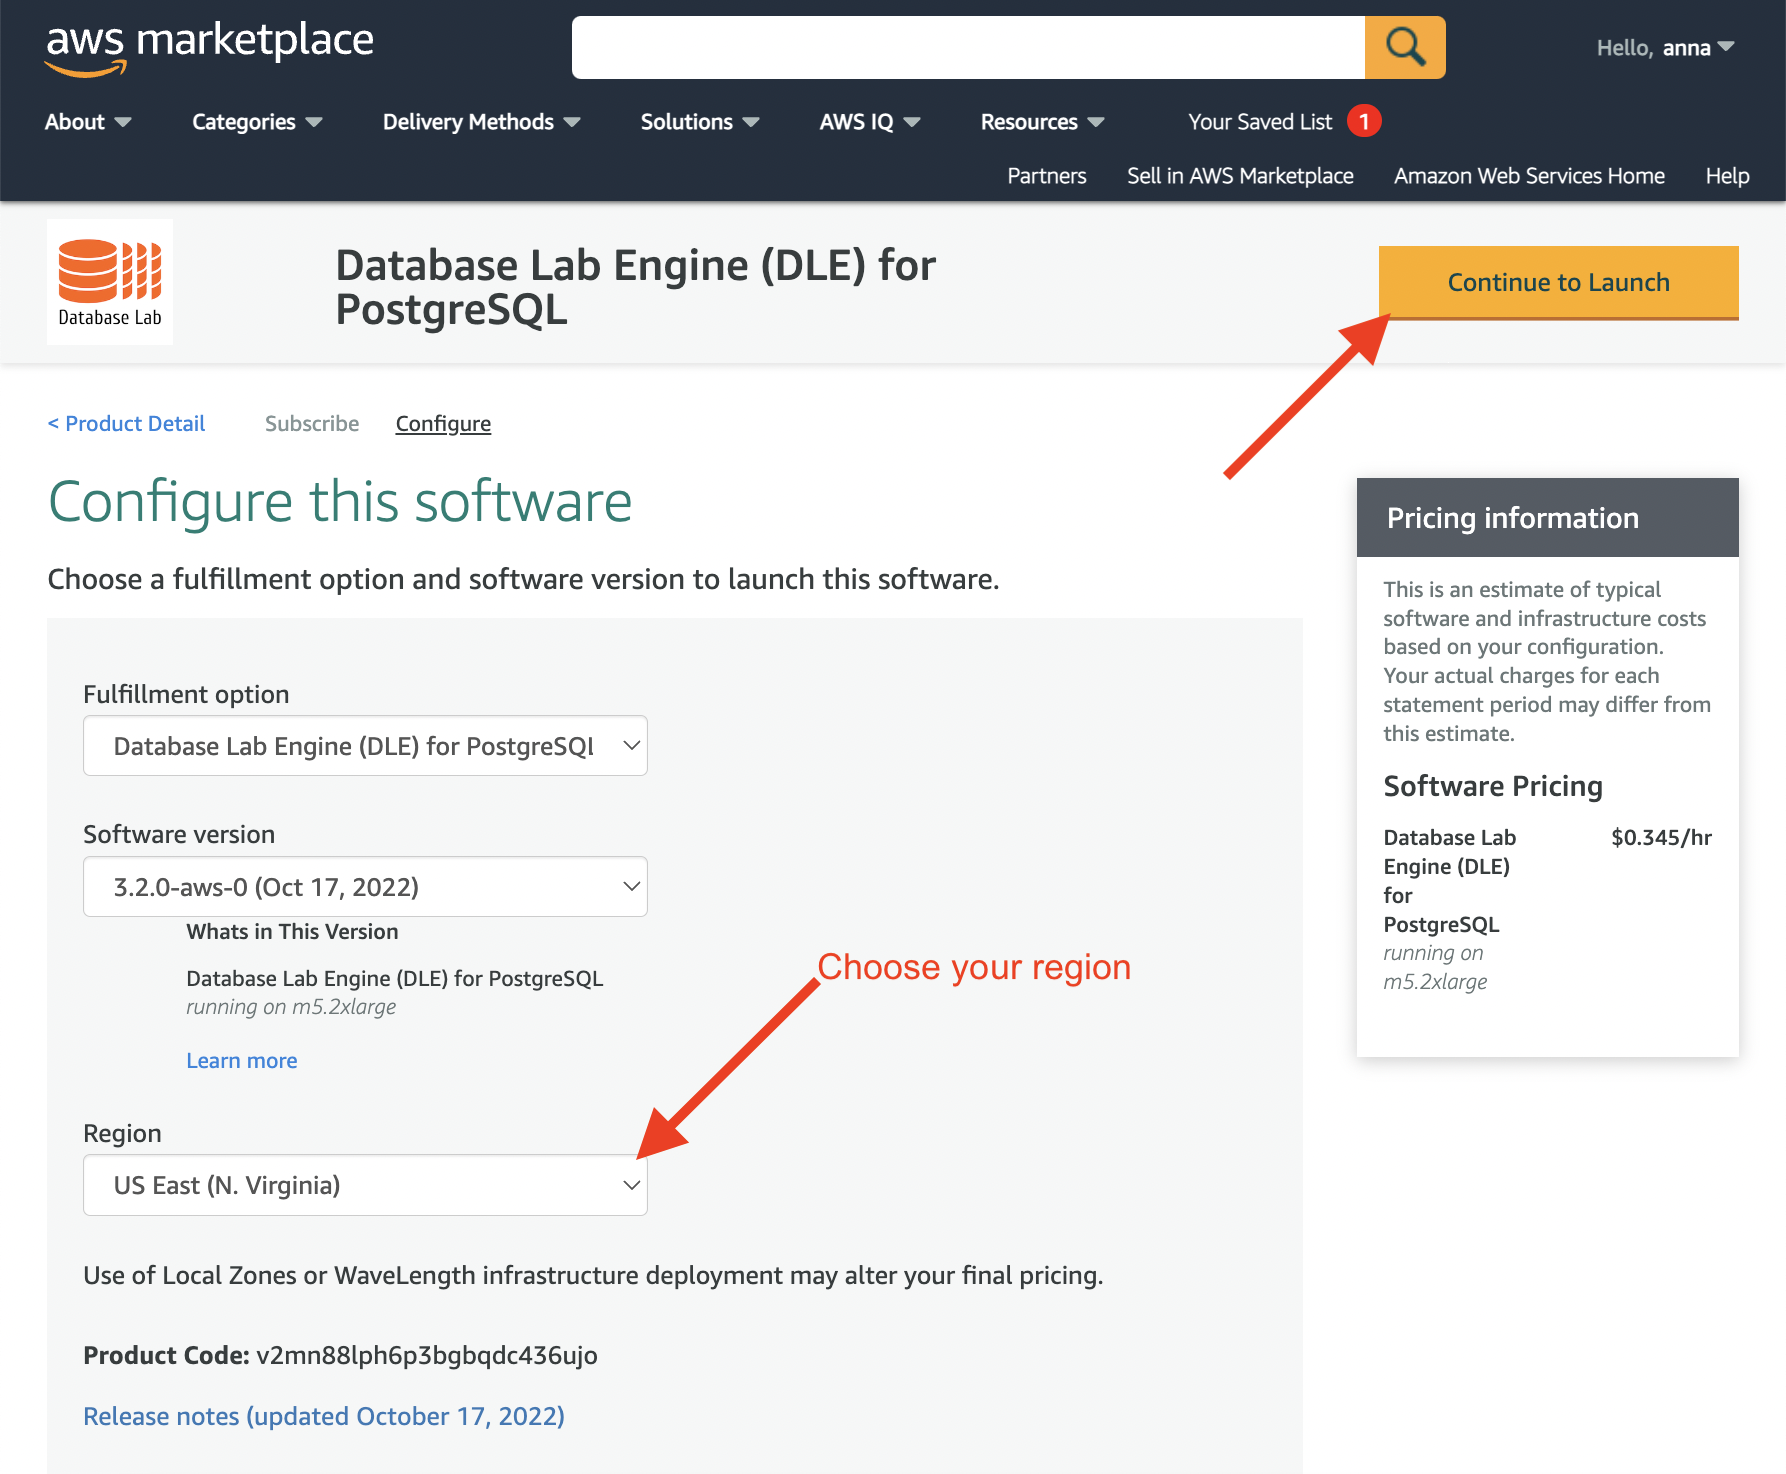
Now check that the DLE version (the latest should be the best) and the AWS region are both chosen correctly, and press "Continue to Launch":
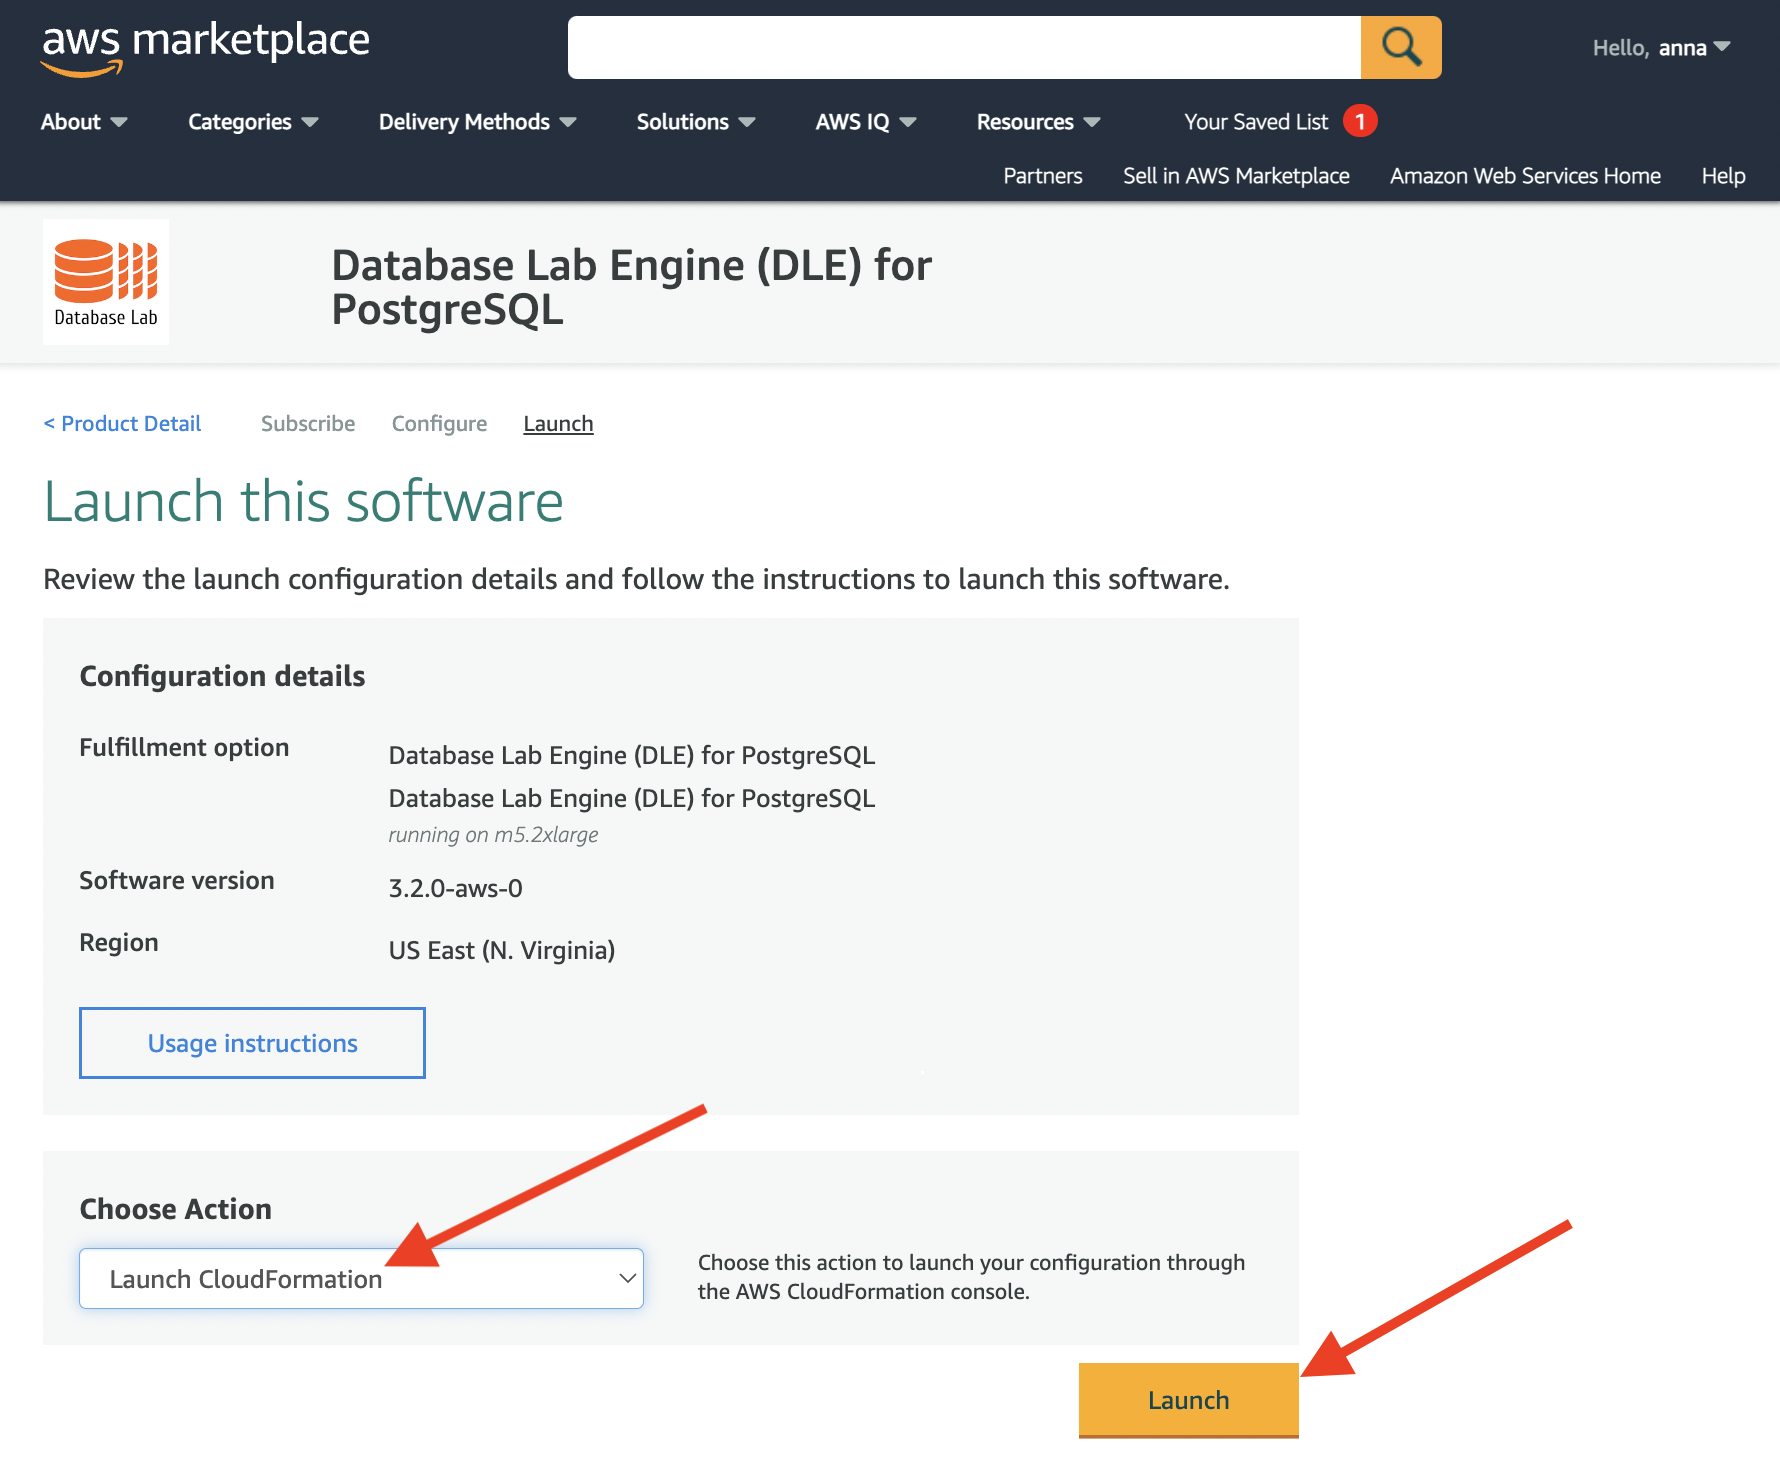
On this page, you need to choose "Launch CloudFormation" and press "Launch":
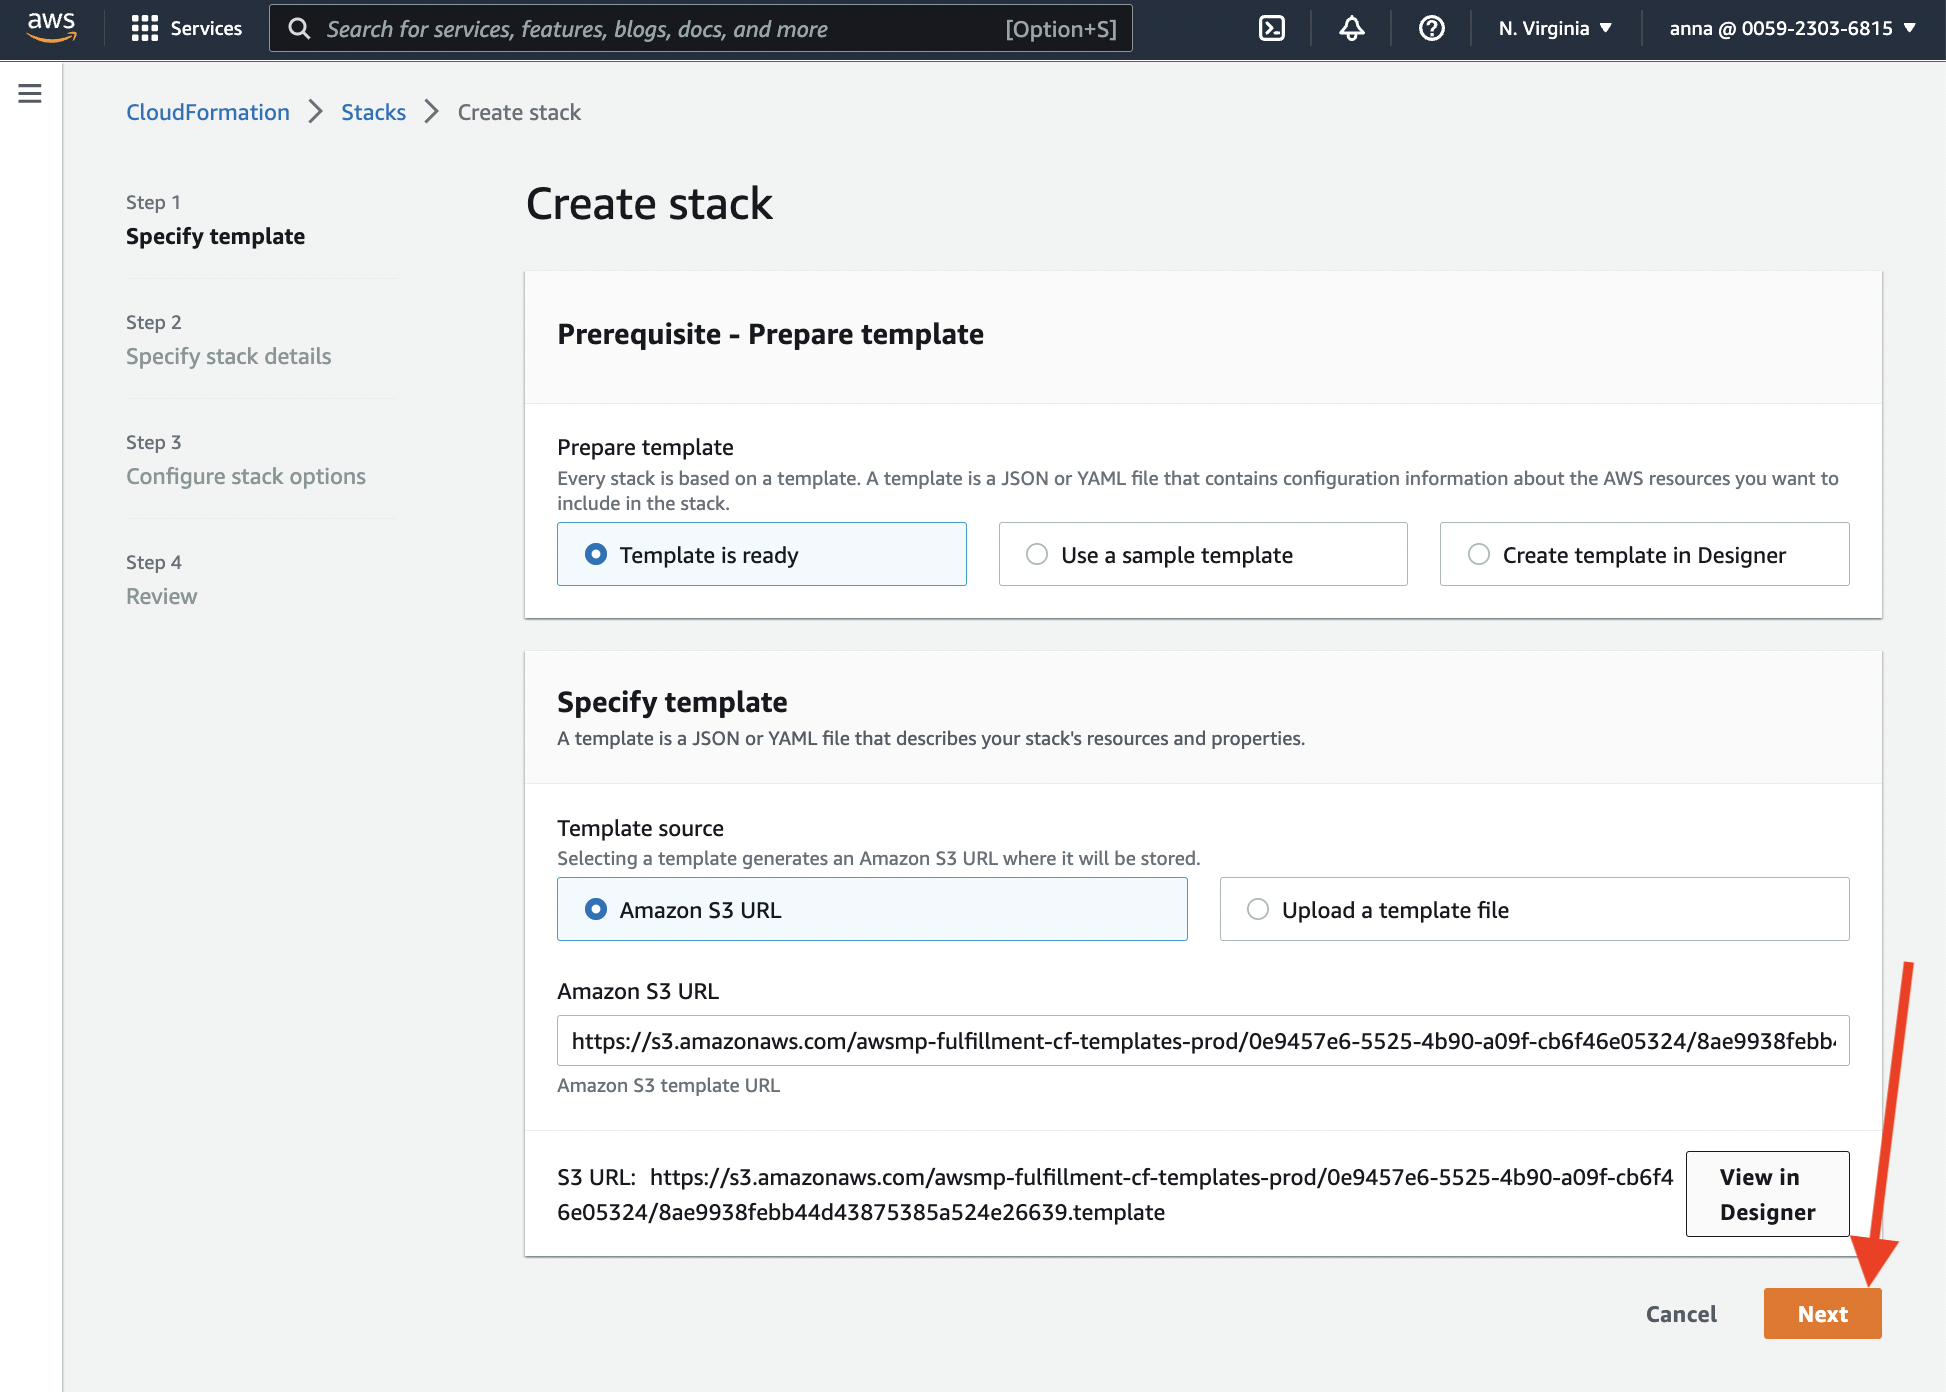
This page should be left unmodified, just press the "Next" button:
Now it is time to fill the form that defines the AWS resources that we need:
- EC2 instance type and size – it defines the hourly price for "compute" (see the full price list);
- subnet mask to restrict connections (for testing, you can use
0.0.0.0/0; for production use, restrict connections wisely); - VPC and subnet – you can choose any of them if you're testing DLE for some database which is publicly available (the only thing to remember: subnet belongs to a VPC, so make sure they match); for production database, you need to choose those options that will allow DLE to connect to the source for the successful data retrieval process;
- choose your AWS key pair (has to be created already).

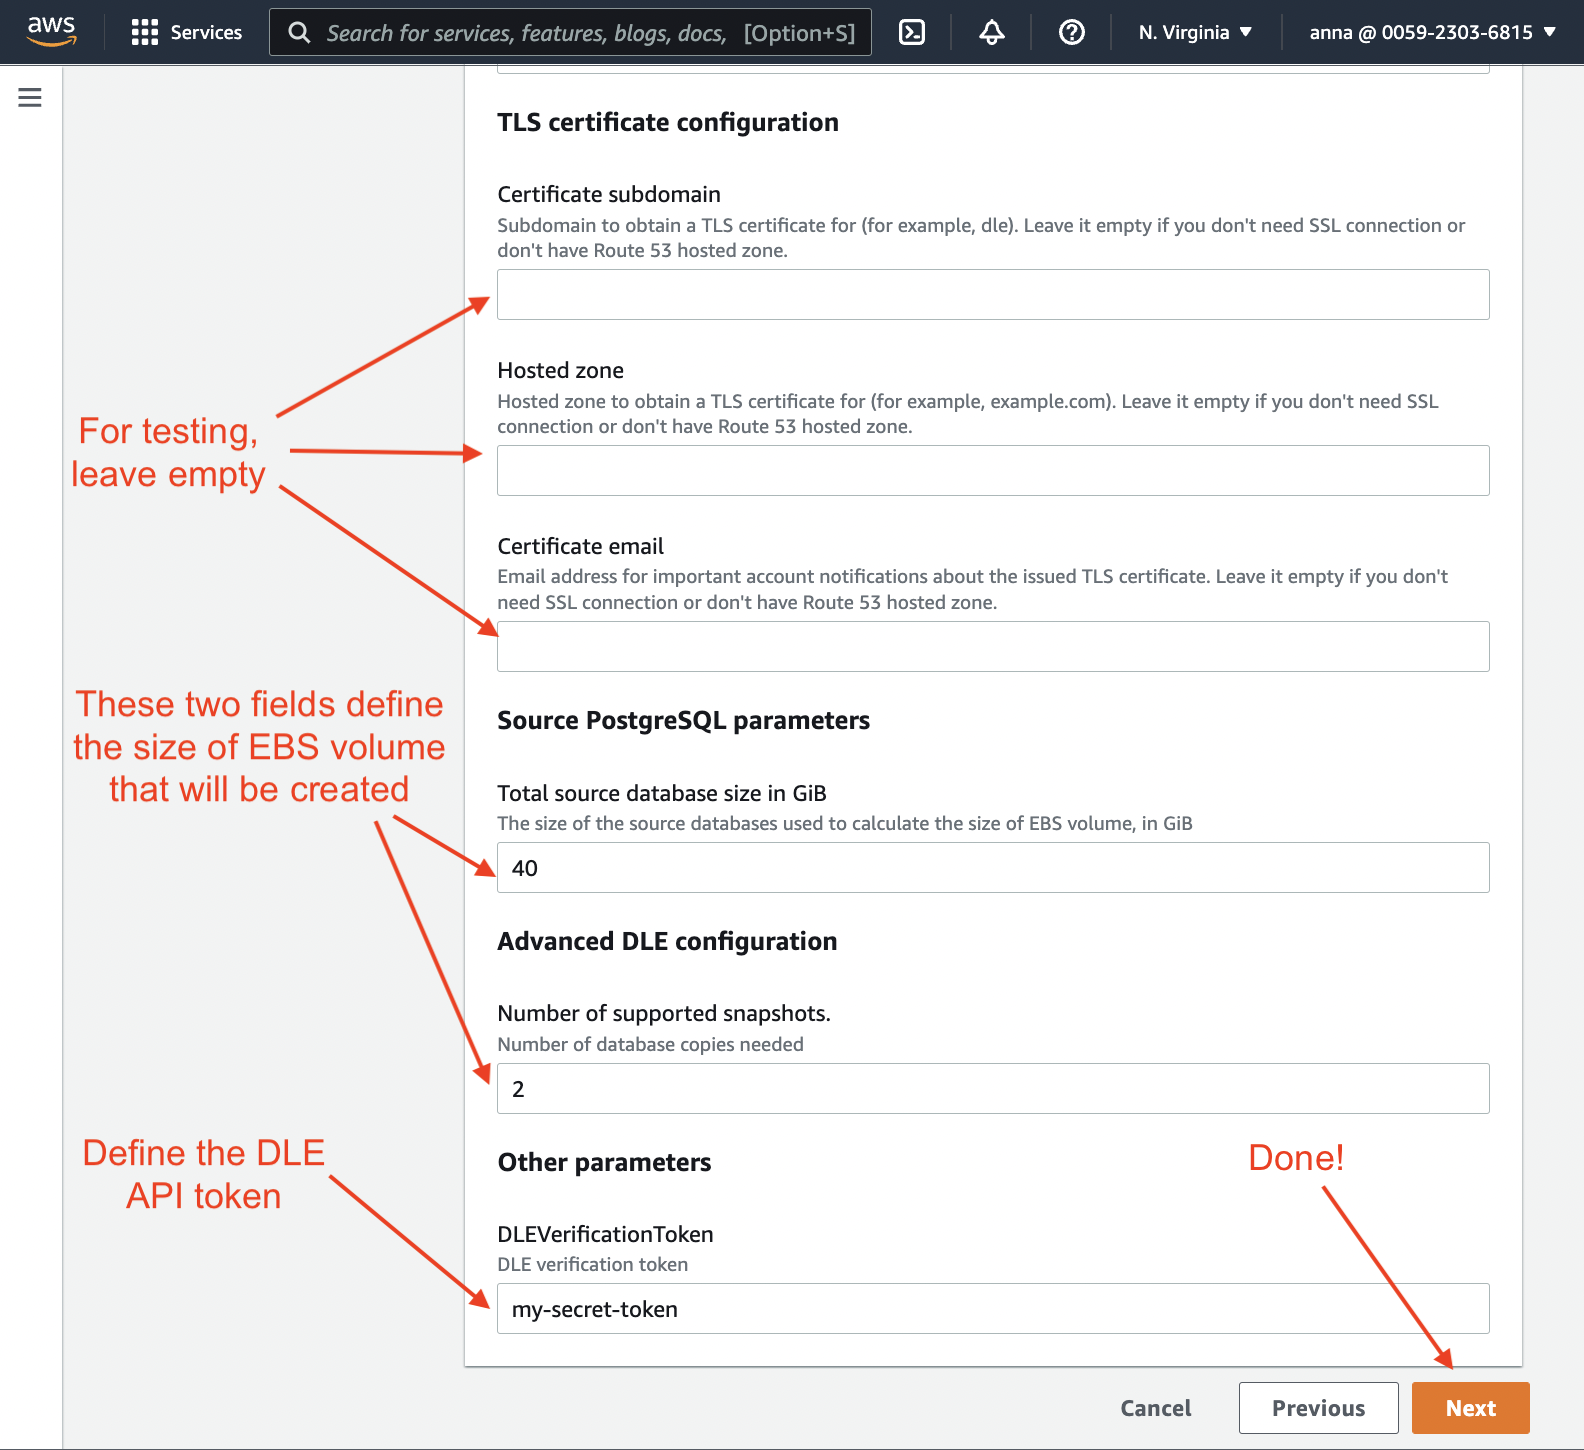
Next, on the same page:
- define the size of EBS volume that will be created (you can find pricing calculator here: "Amazon EBS pricing"):
- put as many GiB as roughtly your database has (it is always possible to add more space without downtime),
- define how many snapshots you'll be needed (minumym 2);
- define secret token (at least 9 characters are required!) – it will be used to communicate with DLE API, CLI, and UI.
Then press "Next":
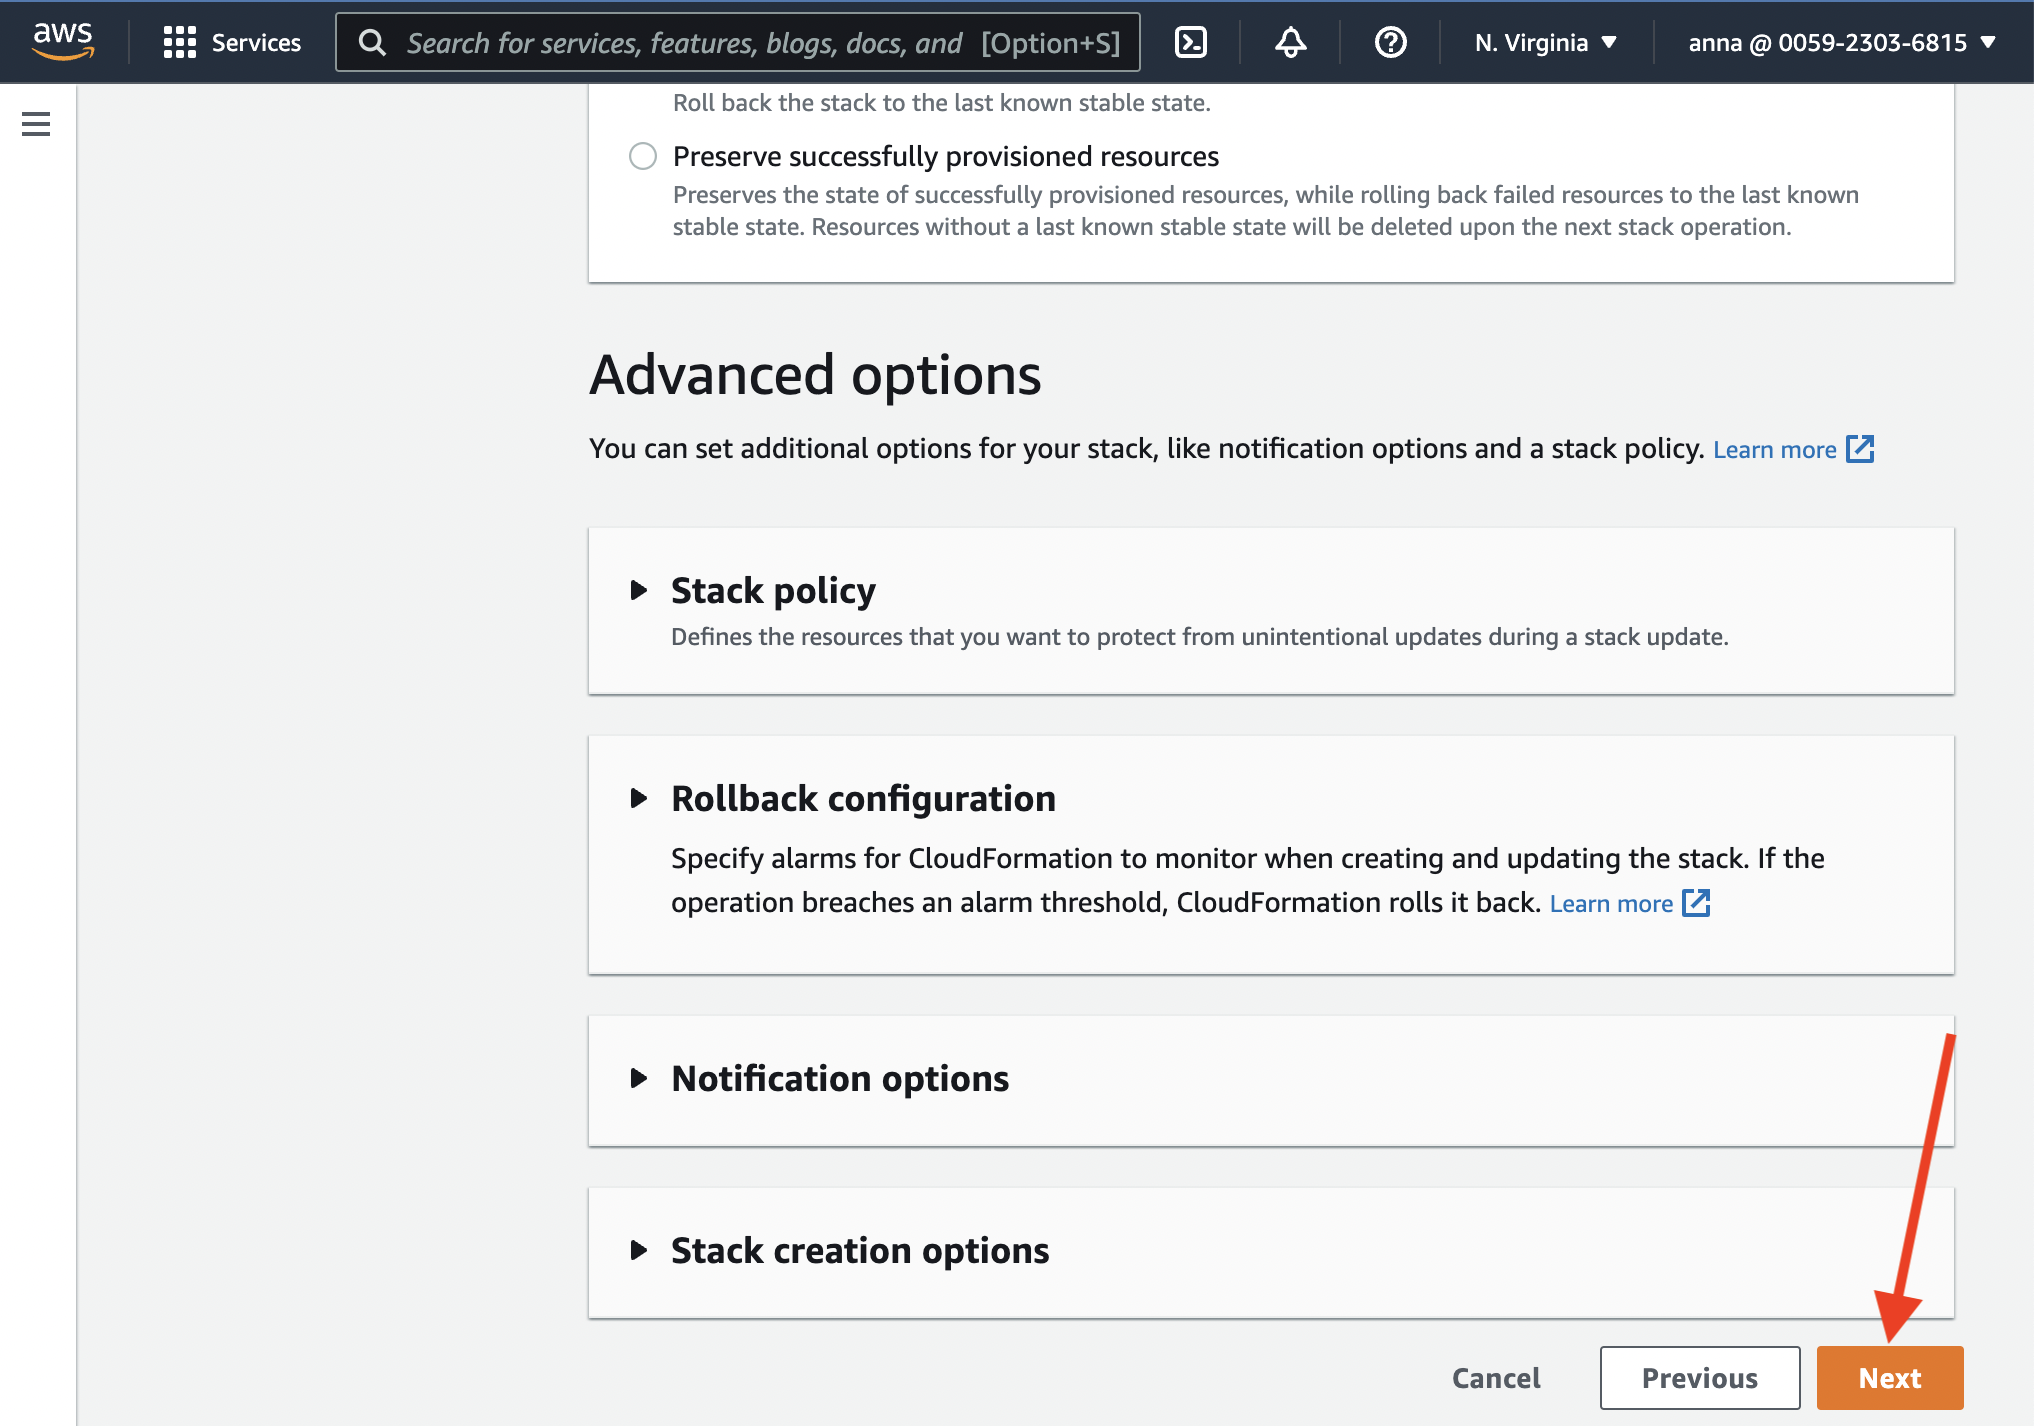
This page should be left unmodified, just press the "Next" button:
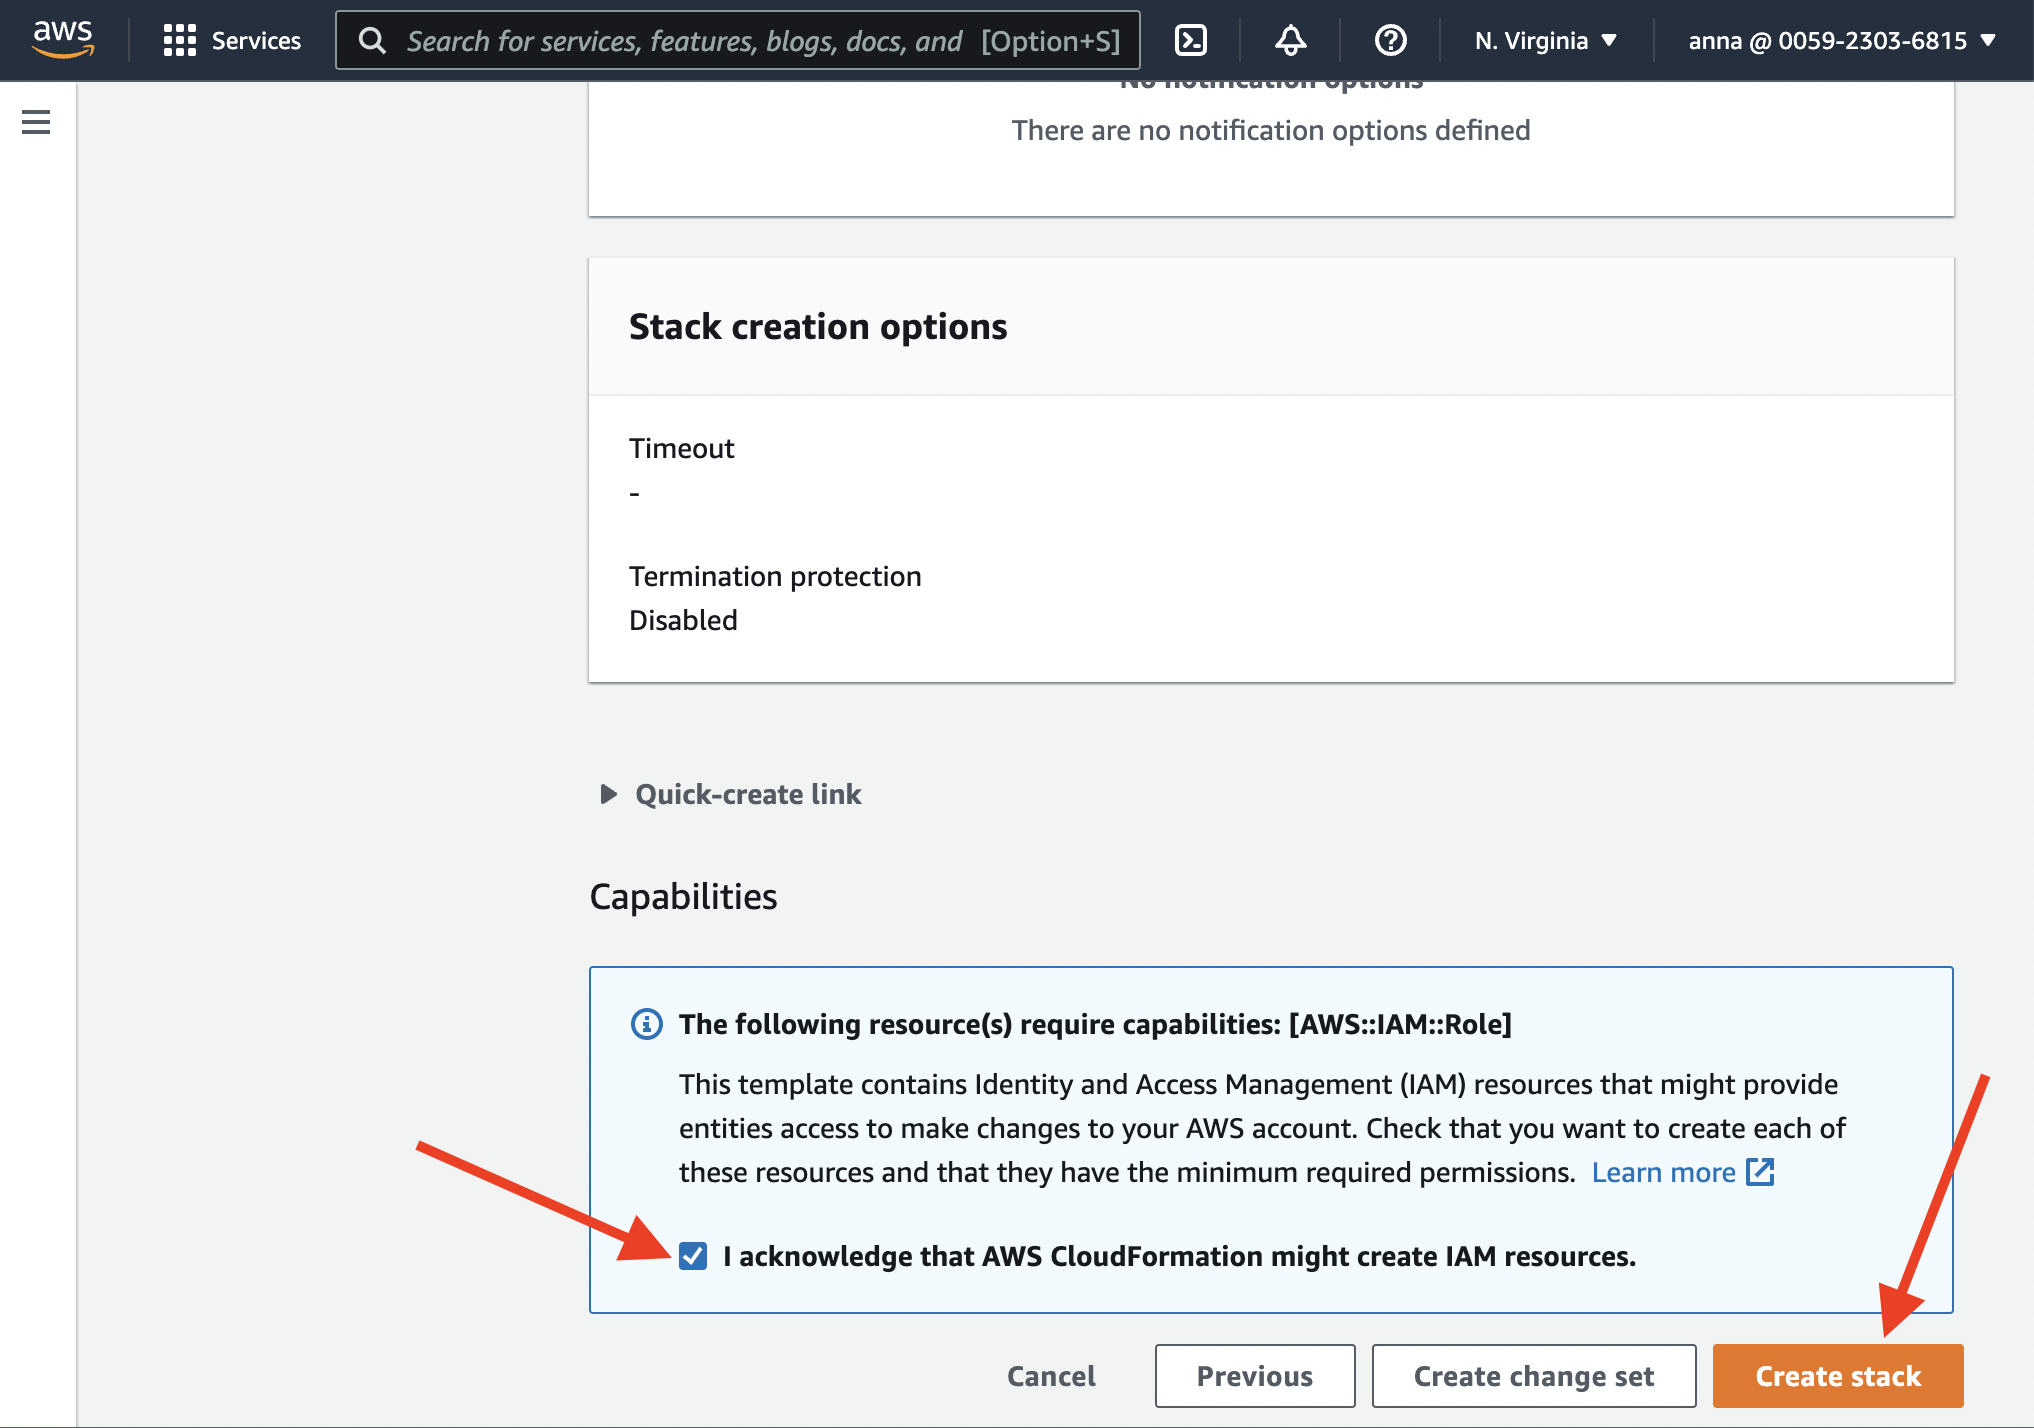
At the bottom of the next page, acknowledge that AWS CloudFormation might create IAM resources. Once you've pressed "Create stack", the process begins:
You need to wait a few minutes while all resources are being provisioned. Check out the "Outputs" section periodically. Once DLE API and UI are ready, you should see the ordered list of instructions on how to connect to UI and API.
Step 2. Configure and launch the Database Lab Engine
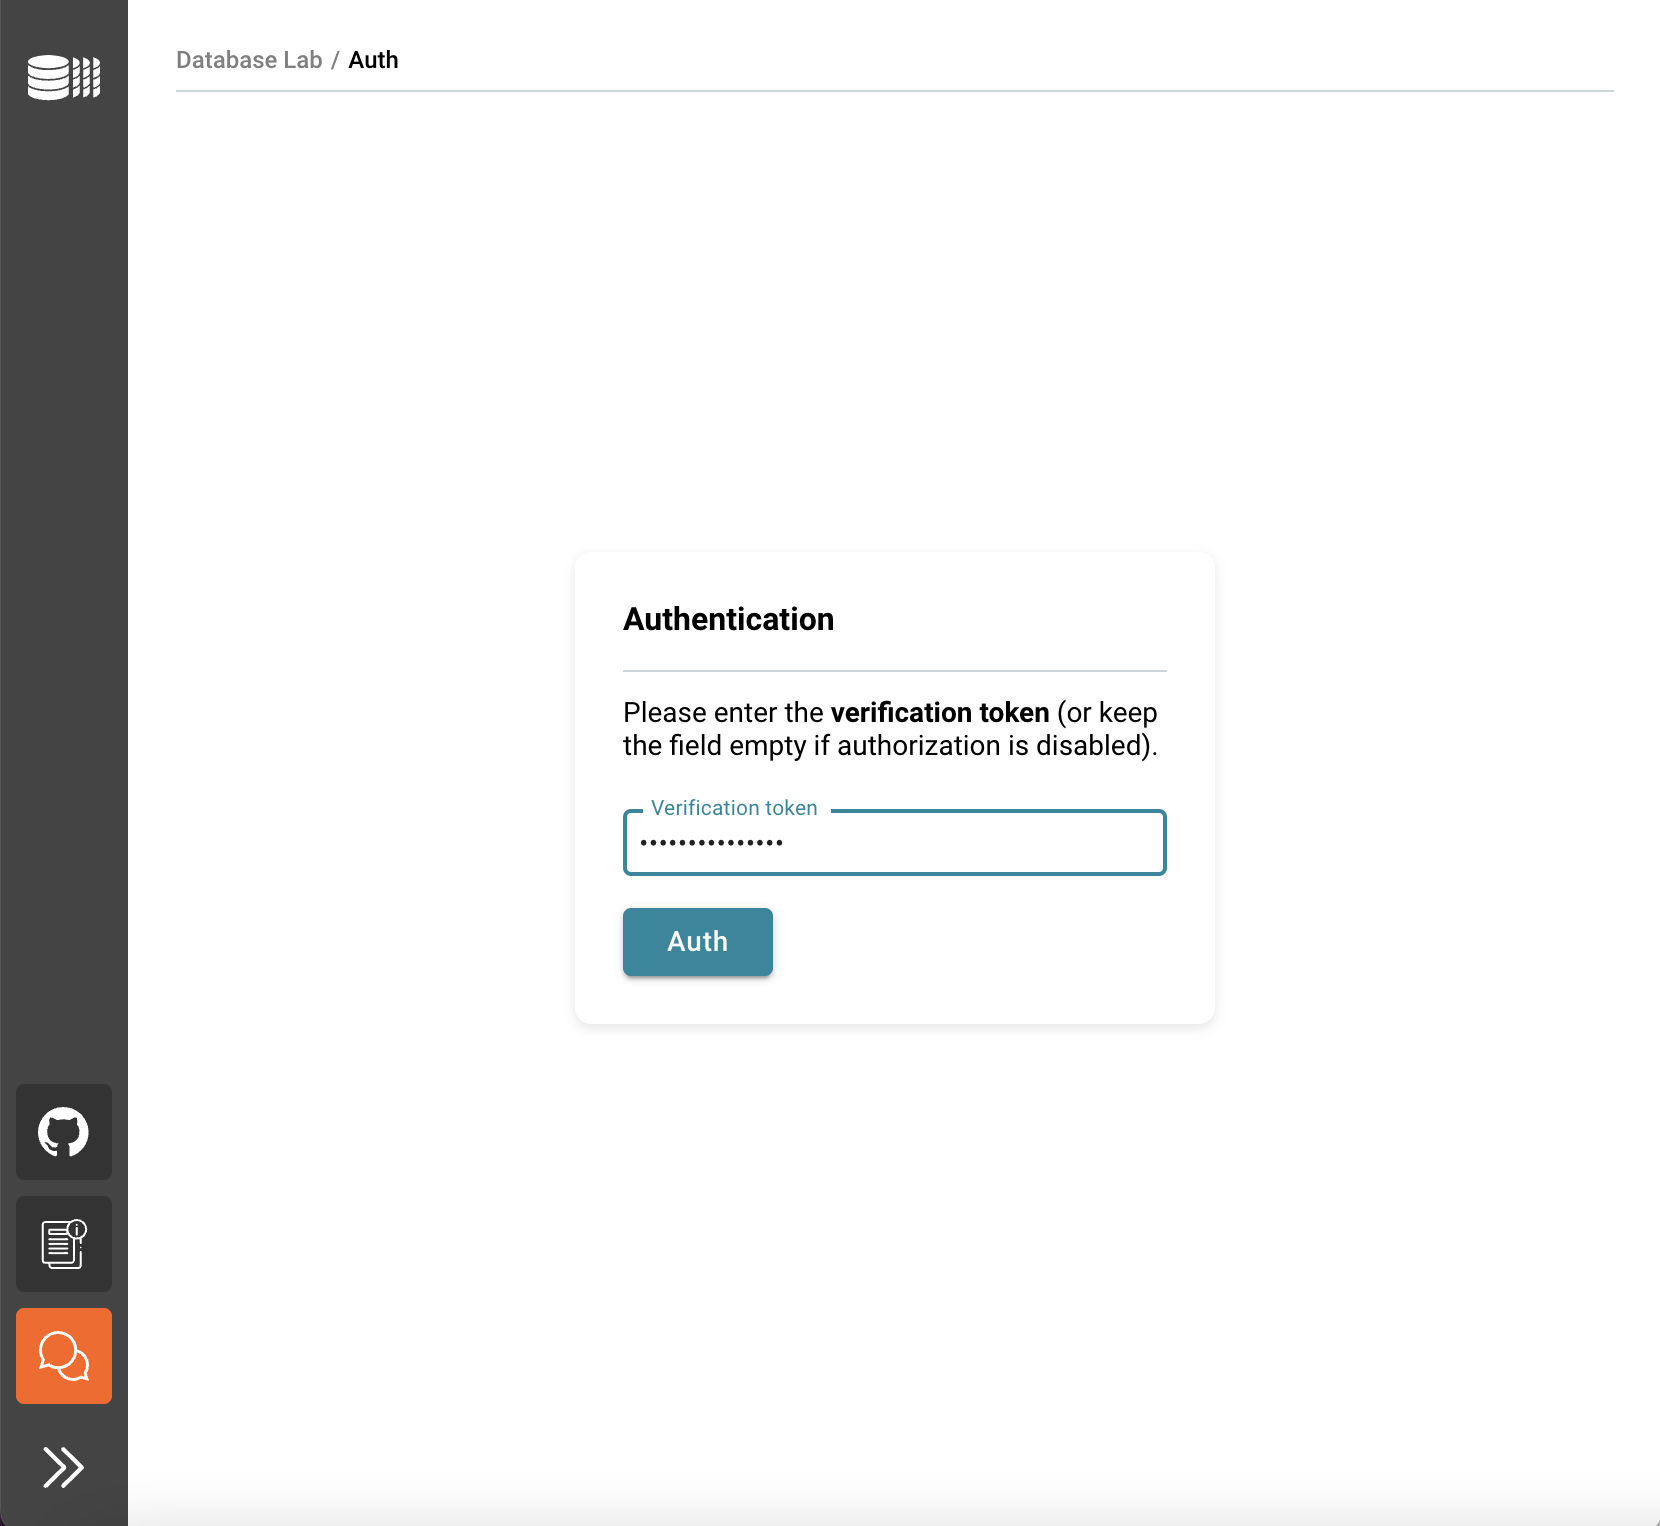
Enter the verification token, you have created earlier. You can also find it in the "Outputs" section.
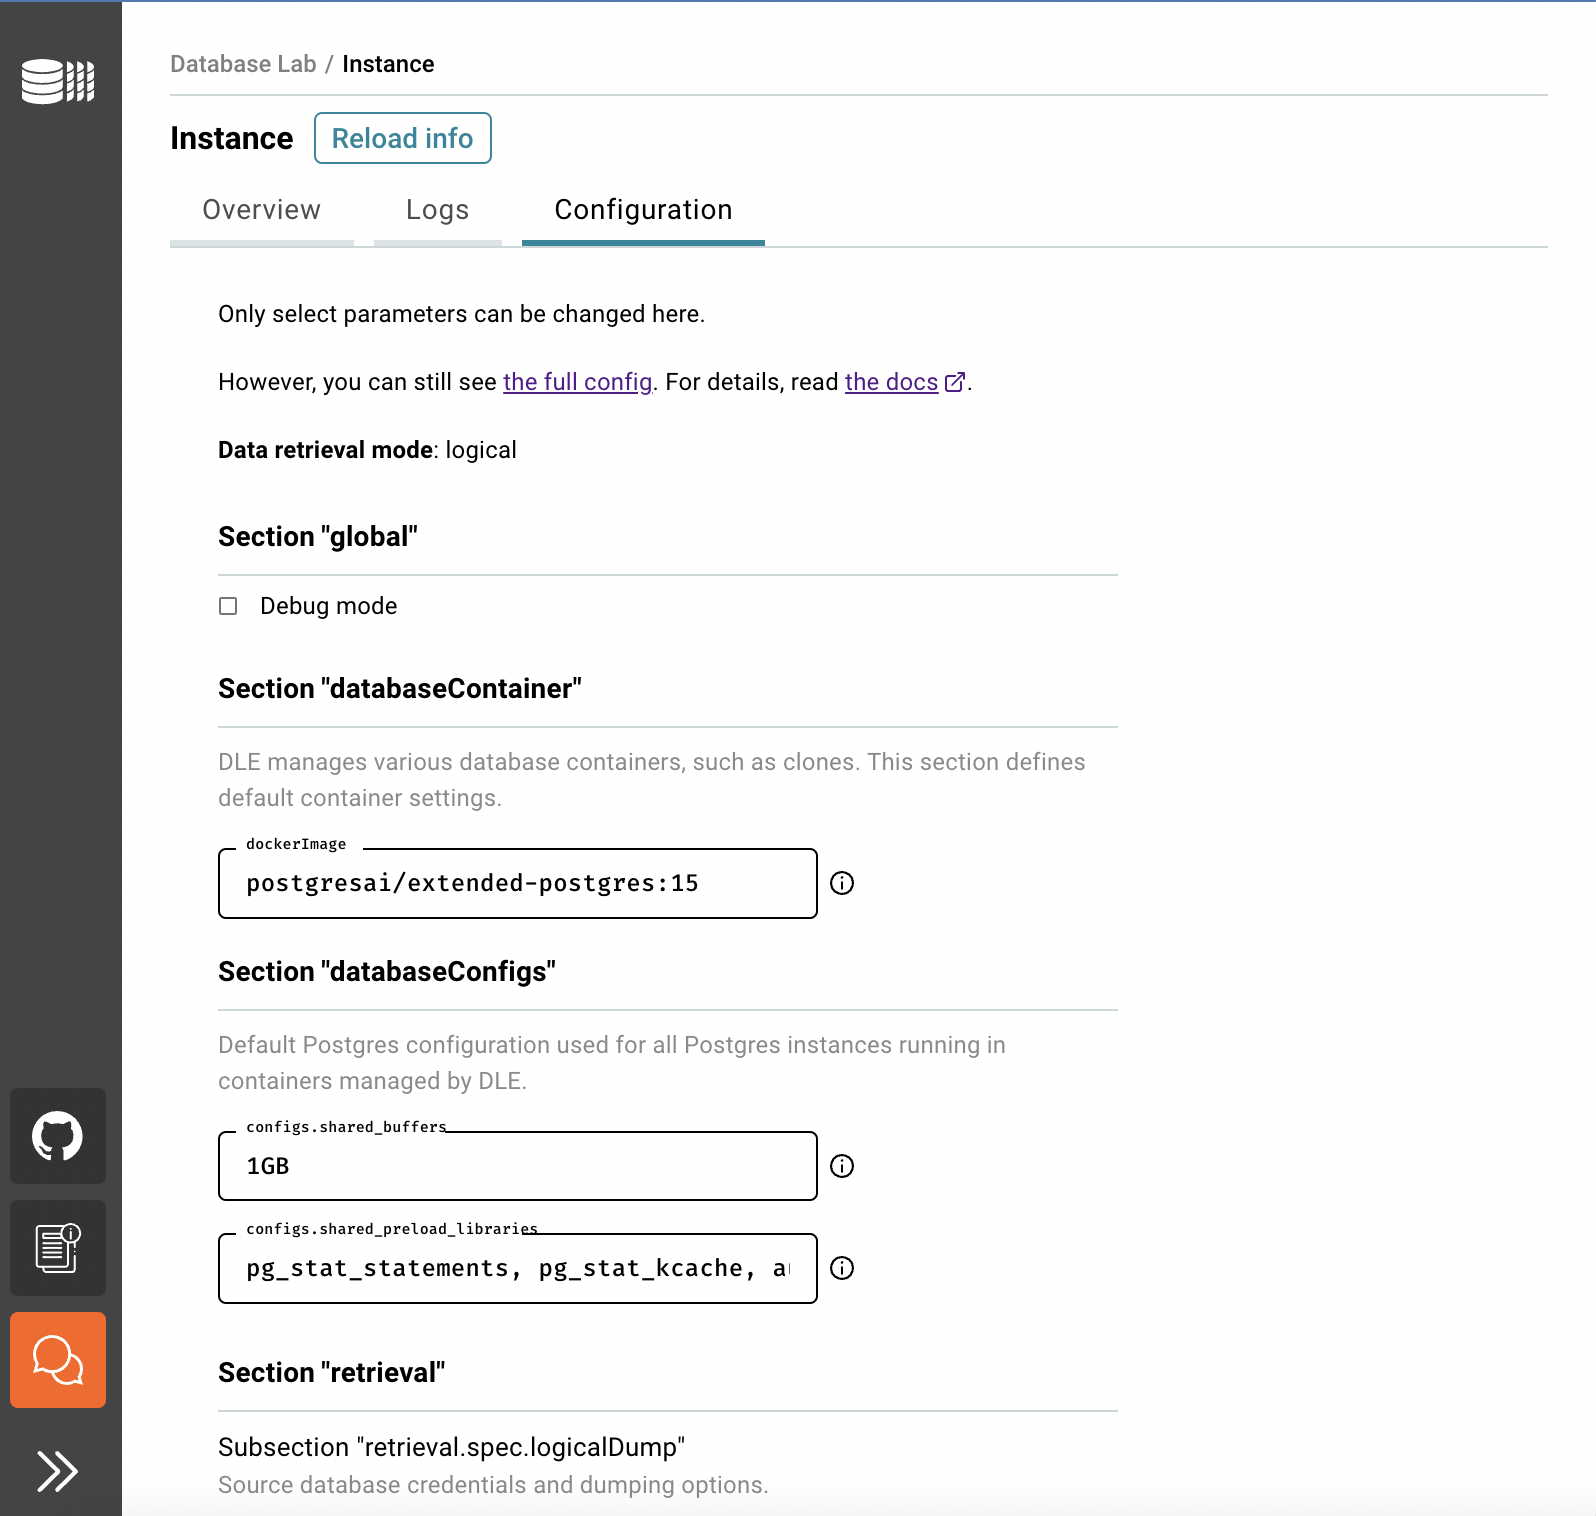
Now it's time to define DB credentials of the source to initiate database privisioning – this is how DLE will be initialized, performing the very first data retrieval, and then the same parameters will be used for scheduled full refreshes according to the schedule defined. Fill the forms, and use the information in the tooltips if needed.
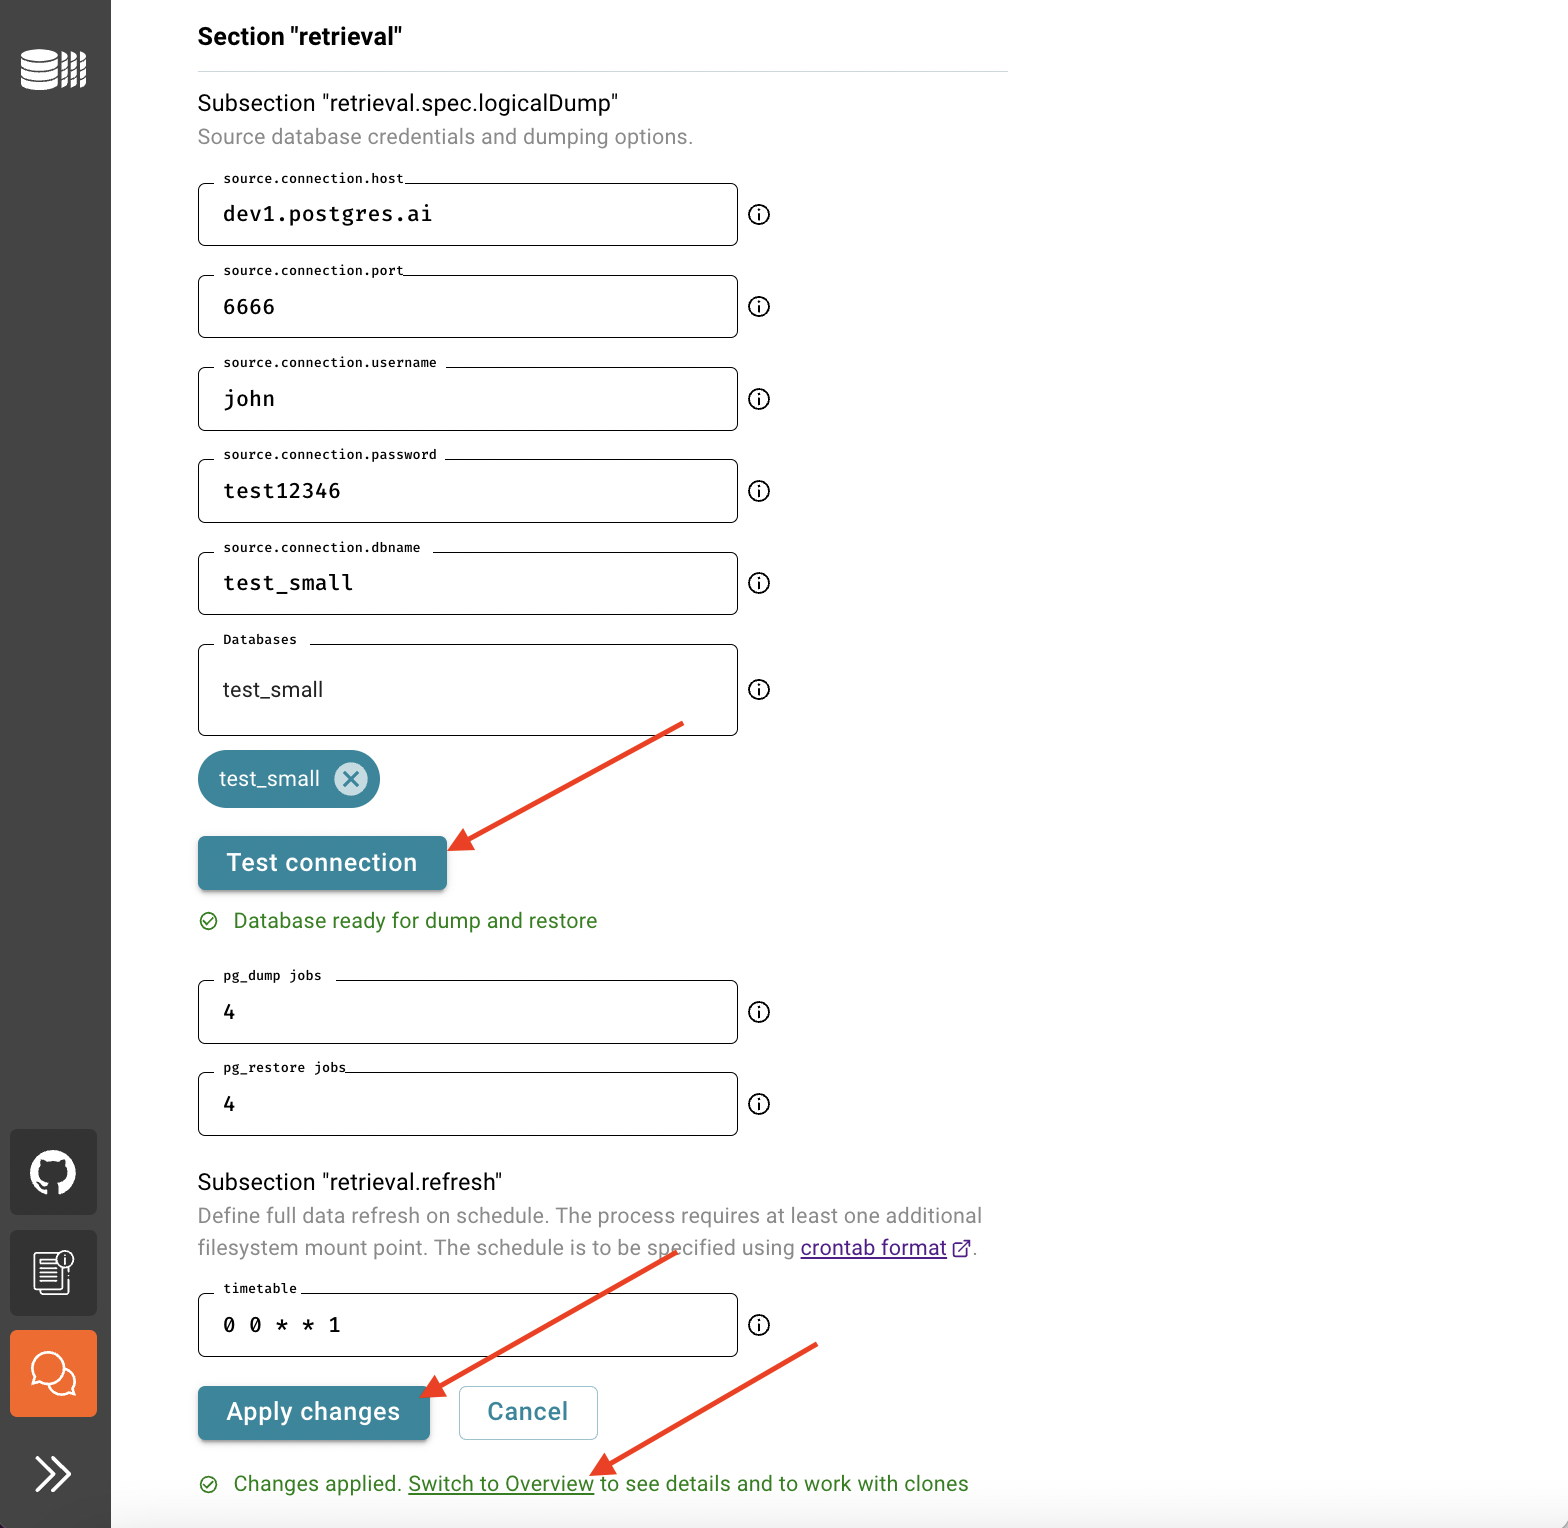
Then press "Test connection". If your database is ready for dump and restore, save the form and press "Switch to Overview" to track the process of data retrieval.
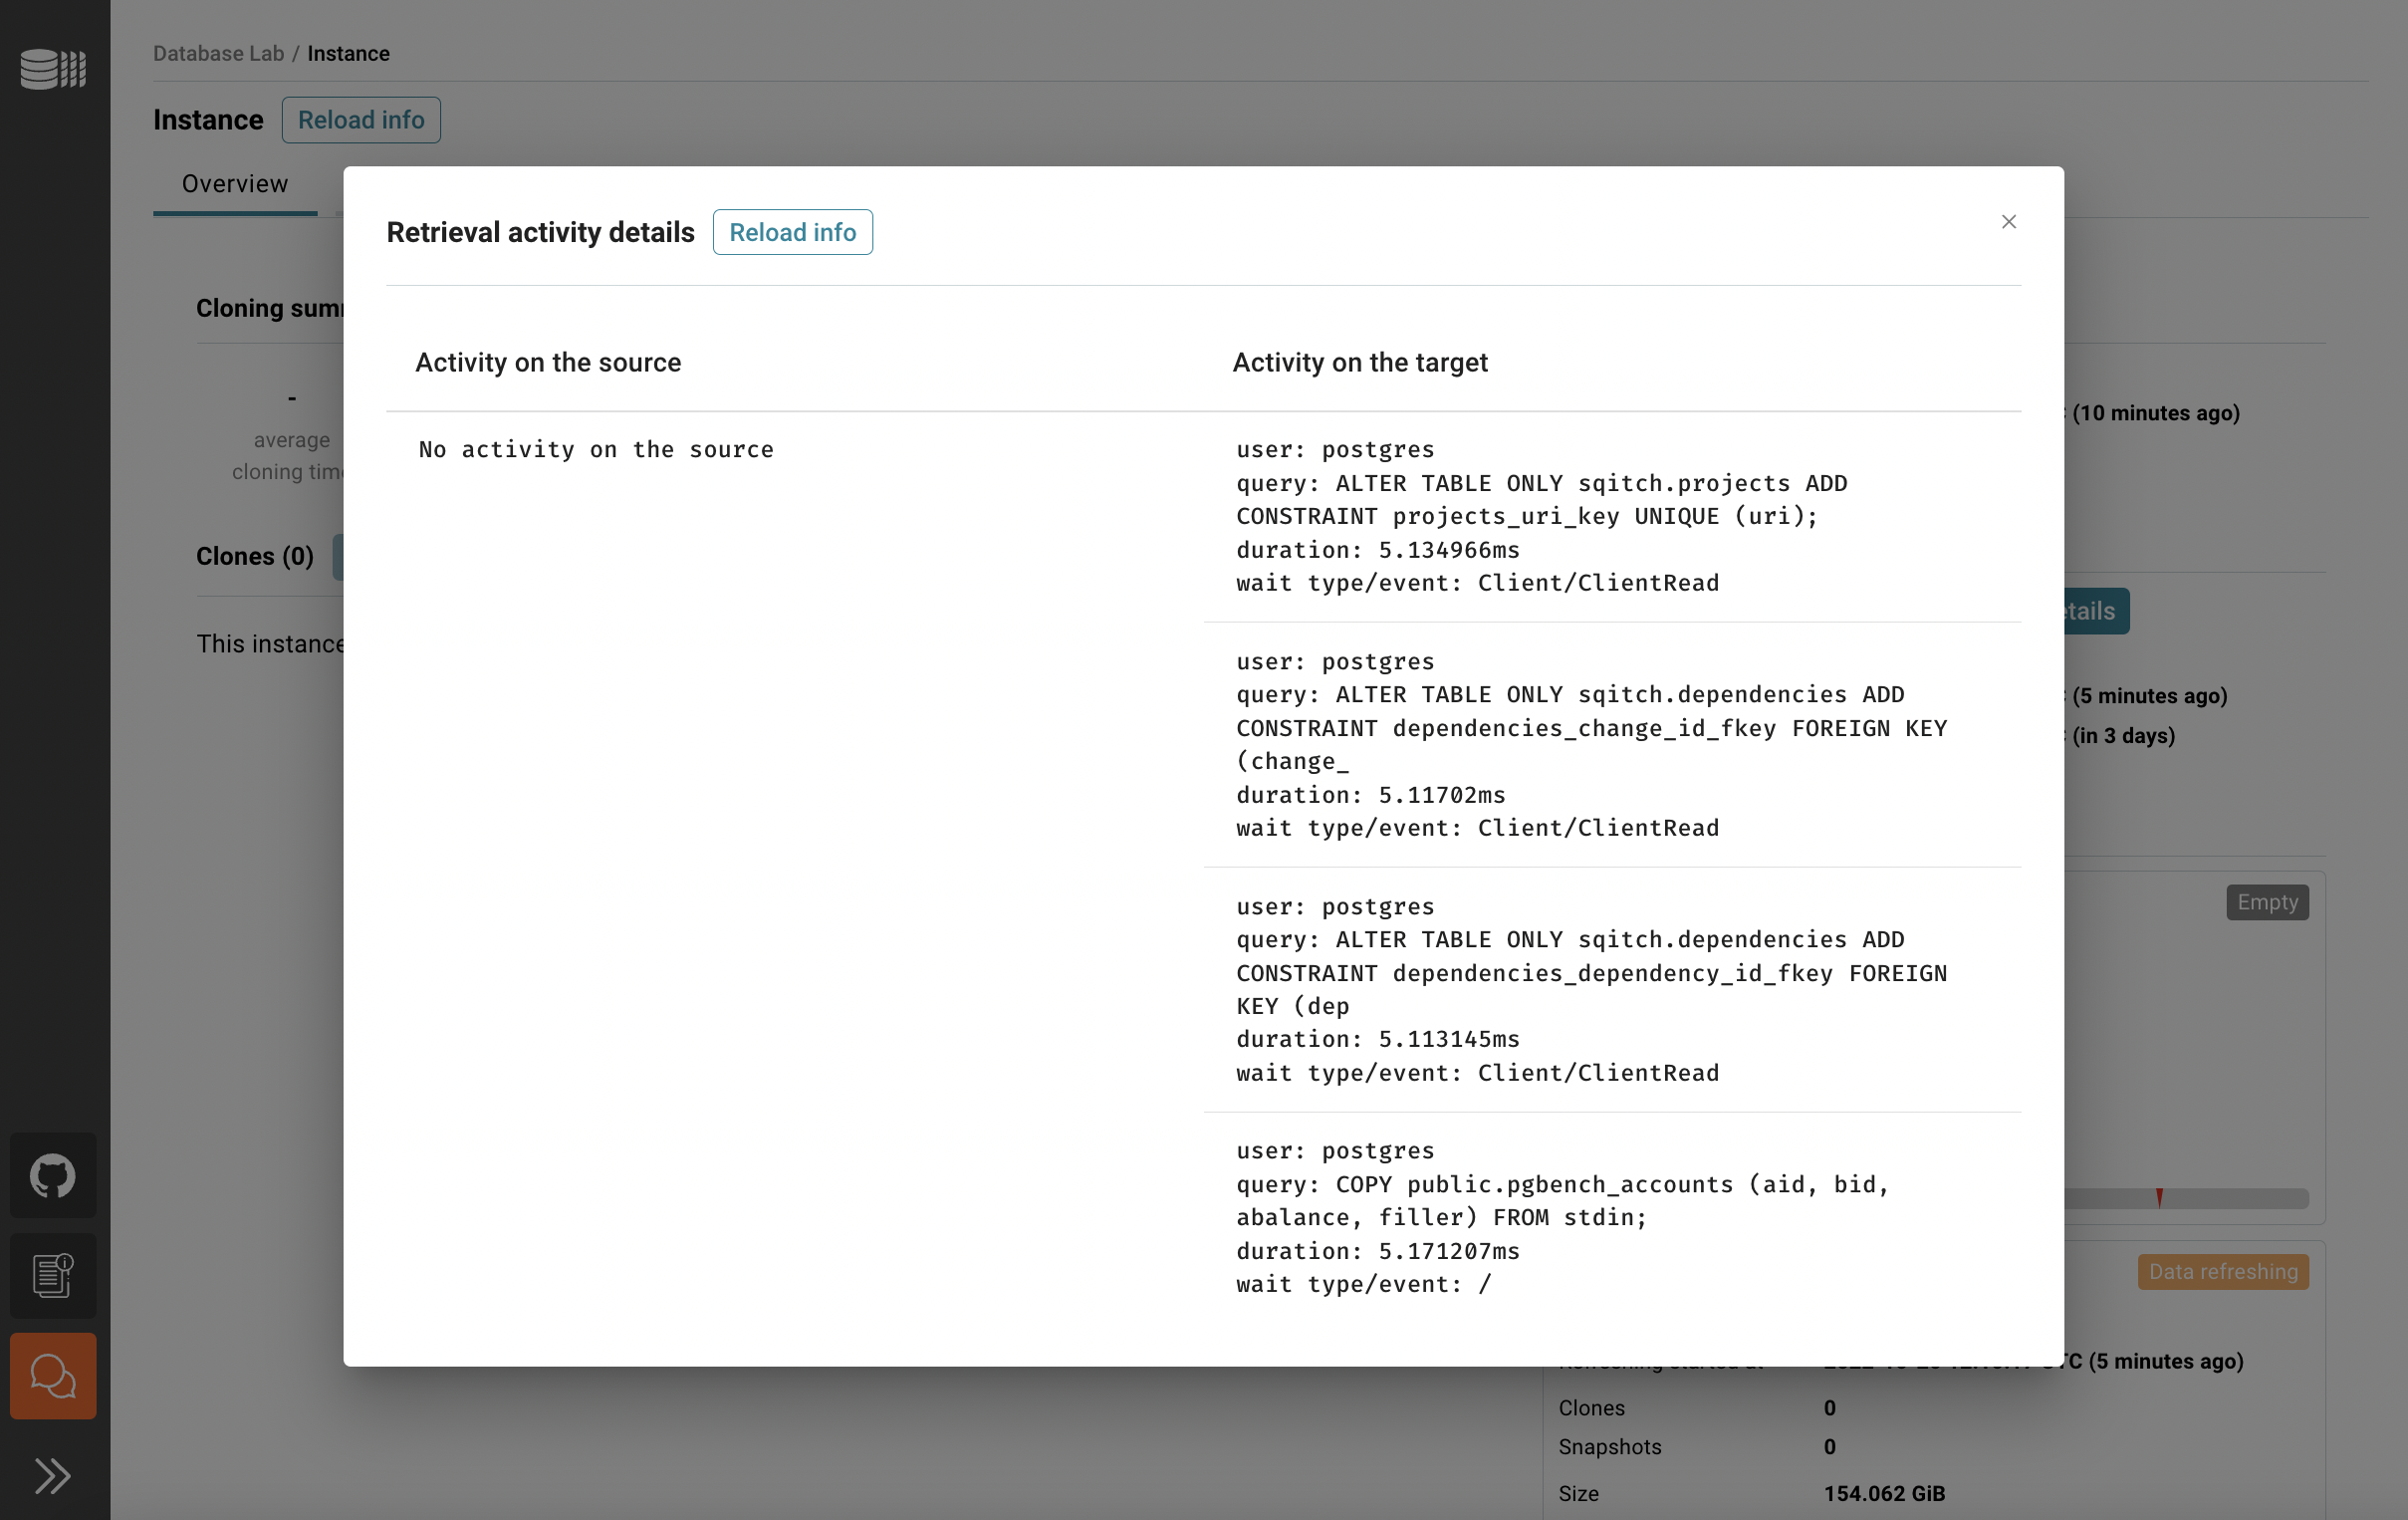
In the Overview tab, you can see the status of the data retrieval. Note that the initial data retrieval takes some time – it depends on the source database size. However, DLE API, CLI, and UI are already available for use. To observe the current activity on both source and target sides use "Show details".

Once the retrieval is done, you can create your first clone. Happy cloning!
No comments:
Post a Comment