Configure ISE Through AWS Marketplace
Introduction
This document describes how to install Identity Services Engine (ISE) 3.1 via Amazon Machine Images (AMI) in Amazon Web Services (AWS). From version 3.1 ISE can be deployed as an Amazon Elastic Compute Cloud (EC2) instance with the help of CloudFormation Templates (CFT).
Prerequisites
Requirements
Cisco recommends that you have basic knowledge of these topics:
ISE
AWS and its concepts like VPC, EC2, CloudFormation
Components Used
The information in this document is based on Cisco ISE Version 3.1.
The information in this document was created from the devices in a specific lab environment. All of the devices used in this document started with a cleared (default) configuration. If your network is live, ensure that you understand the potential impact of any command.
Configure
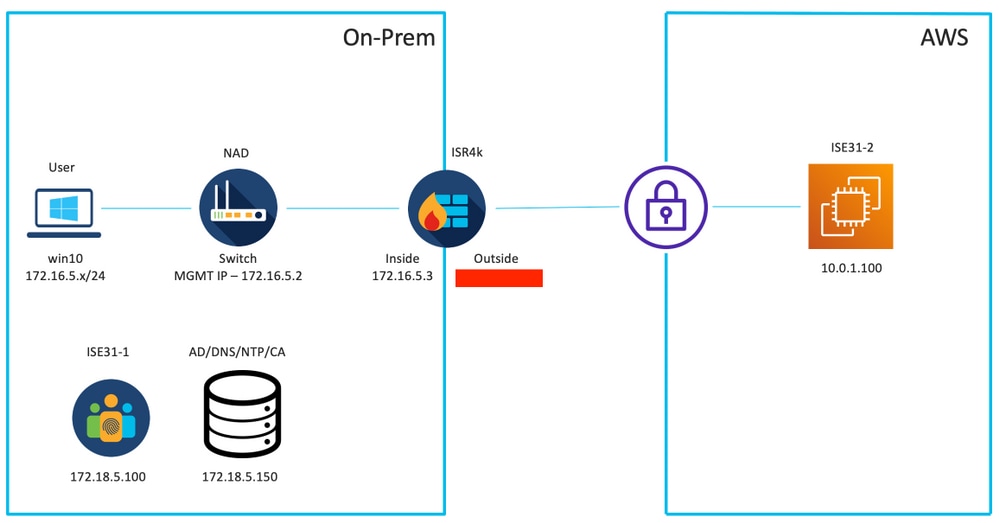
Network Topology
Configurations
If there is no VPC, Security Groups, Key Pairs and VPN tunnel configured yet, you need to follow Optional steps, otherwise, start with Step 1.
Optional Step A. Create VPC
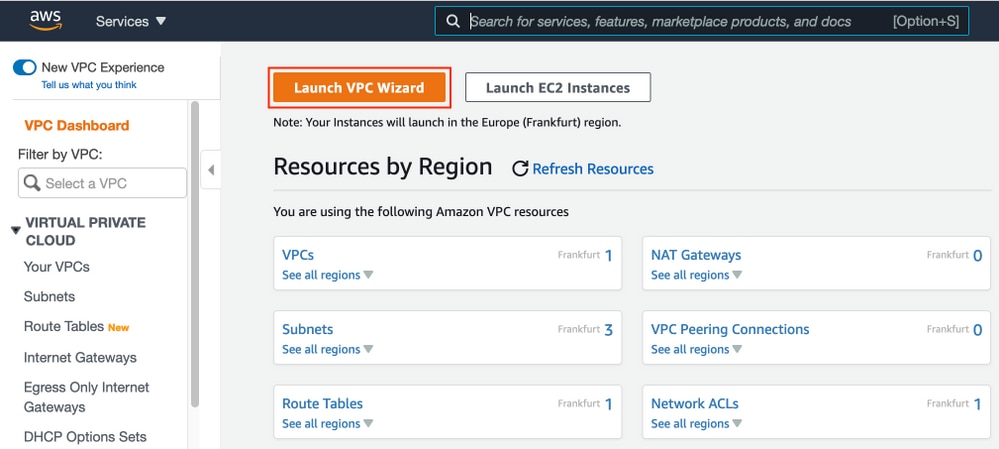
Navigate to VPC AWS Service. Select Launch VPC Wizard as shown in the image.
Choose VPC with Private Subnet Only and Hardware VPN Access and click Select as shown in the image.
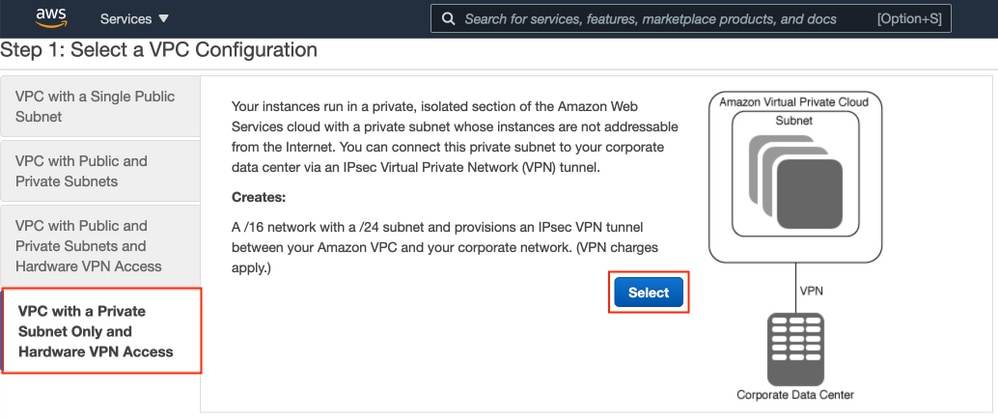
Note: The selection of VPC in Step 1. of the VPC wizard depends on the topology since ISE is not designed as Internet exposed server - VPN with private subnet only is used.
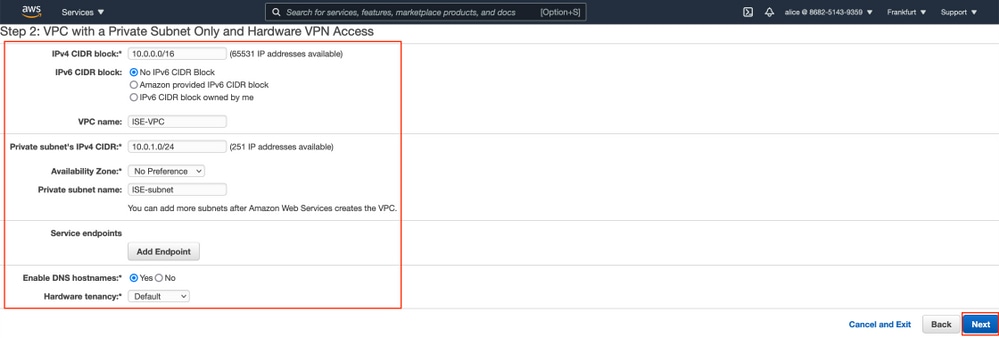
Configure VPC Private Subnet Settings as per your network design and Select Next.
Configure your VPN as per your network design and Select Create VPC.

Once the VPC is created, the message "Your VPC has been successfully created" is displayed. Click OK as shown in the image.

Optional Step B. Configure On-Prem VPN Headend Device
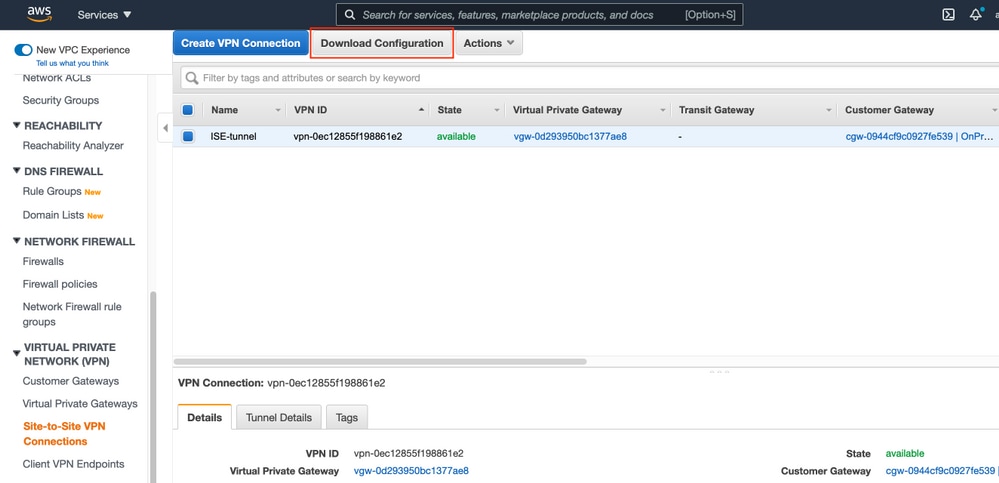
Navigate to VPC AWS Service. Choose Site-to-Site VPN connections, select newly created VPN tunnel and Select Download Configuration as shown in the image.
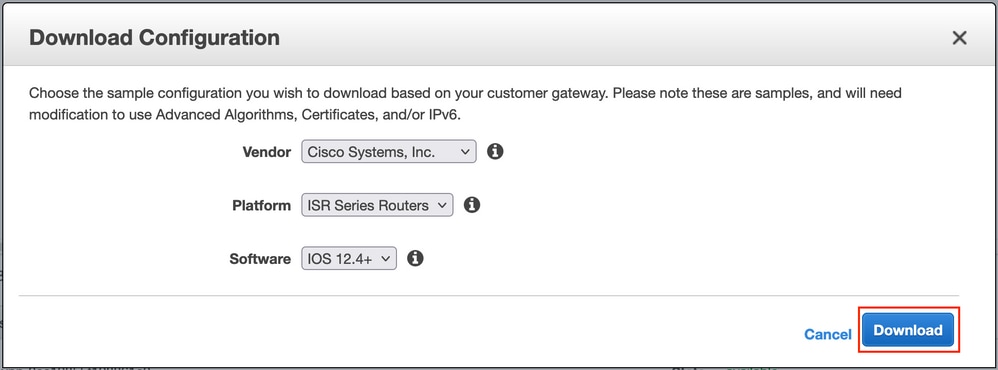
Choose Vendor, Platform and Software, Select Download as shown in the image.
Apply downloaded configuration on On-Prem VPN headend device.
Optional Step C. Create Custom Key Pair
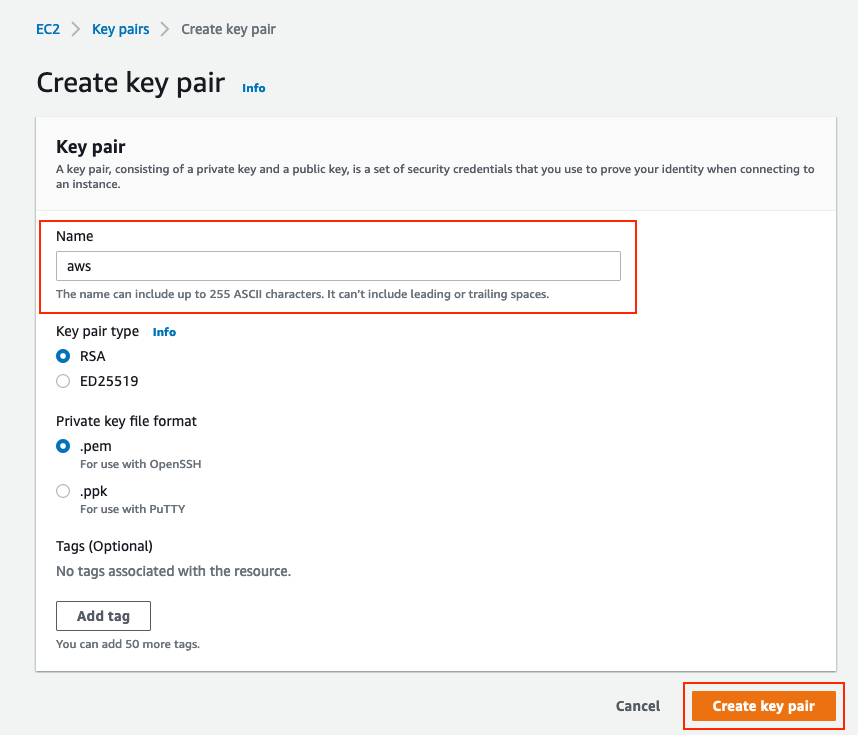
AWS EC2 instances are accessed with the help of key pairs. In order to create a key pair, navigate to EC2 Service. Select Key Pairs menu under Network & Security. Select Create Key Pair, give it a Name, leave other values as default and Select Create Key Pair again.
Optional Step D. Create custom Security Group
AWS EC2 instances access is protected by Security Groups, in order to configure Security Group, navigate to EC2 Service. Select Security Groups menu under Network & Security. Select Create Security Group, configure a Name, Description, in the VPC field select newly configured VPC. Configure Inbound Rules to allow communication to ISE. Select Create Security Group as shown in the image.
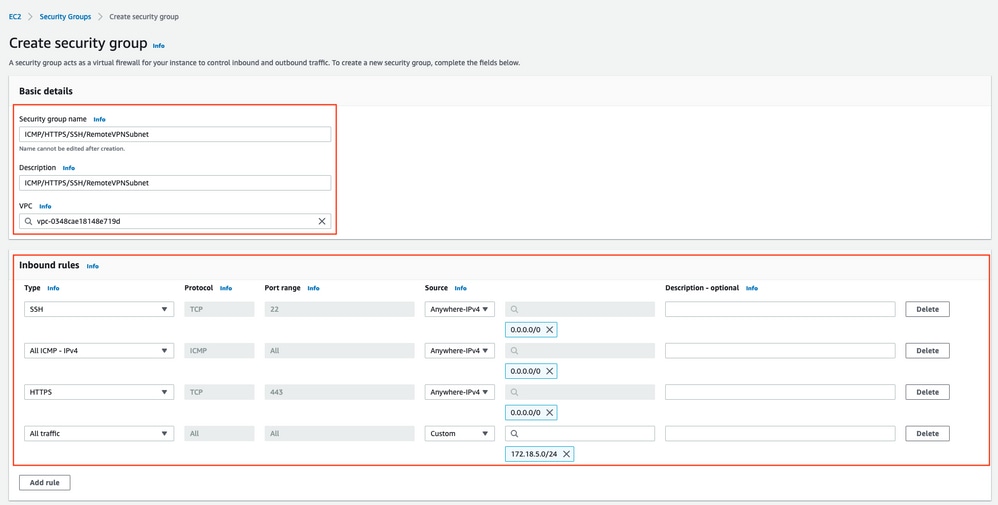
Note: The Security Group configured allows SSH, ICMP, HTTPS access to ISE and all protocols access from On-Prem subnet.
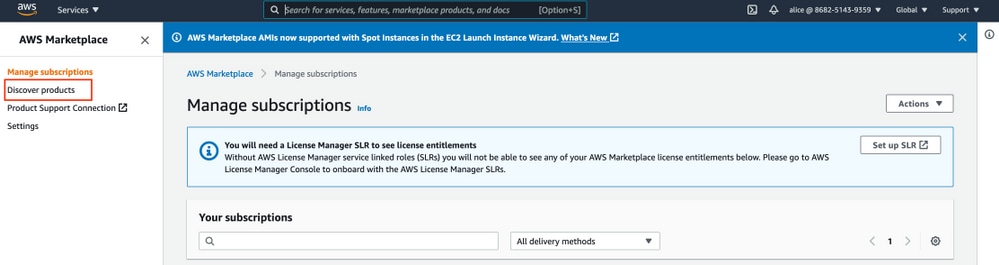
Step 1. Subscribe to AWS ISE Marketplace Product
Navigate to AWS Marketplace Subscriptions AWS Service. Select Discover Products as shown in the image.
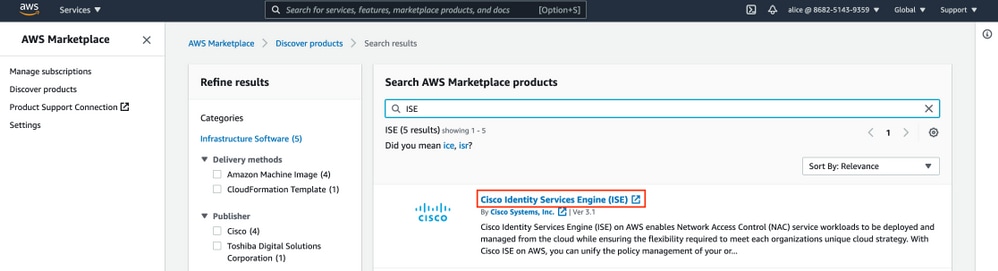
Search for ISE product and Select Cisco Identity Services Engine (ISE) as shown in the image.
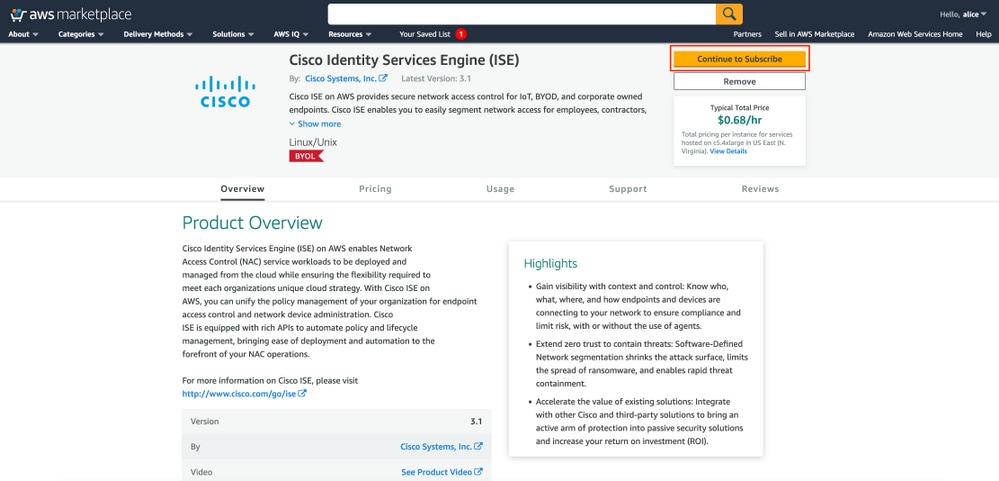
Select Continue to Subscribe button
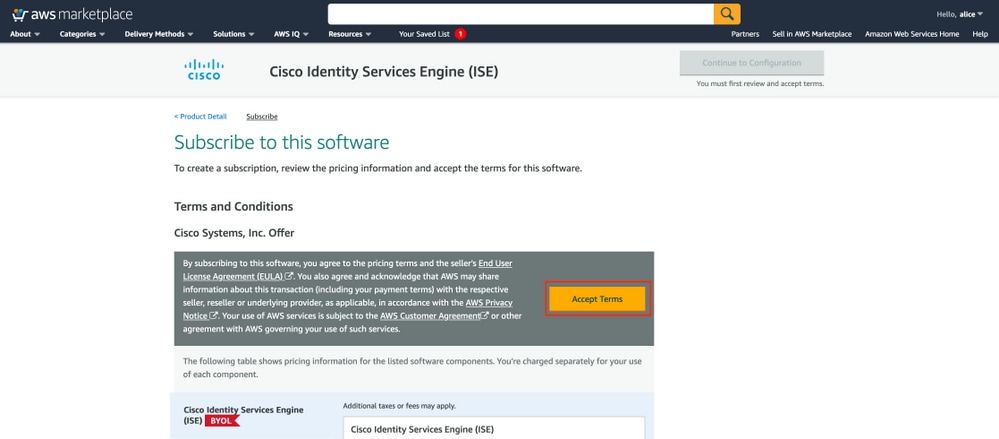
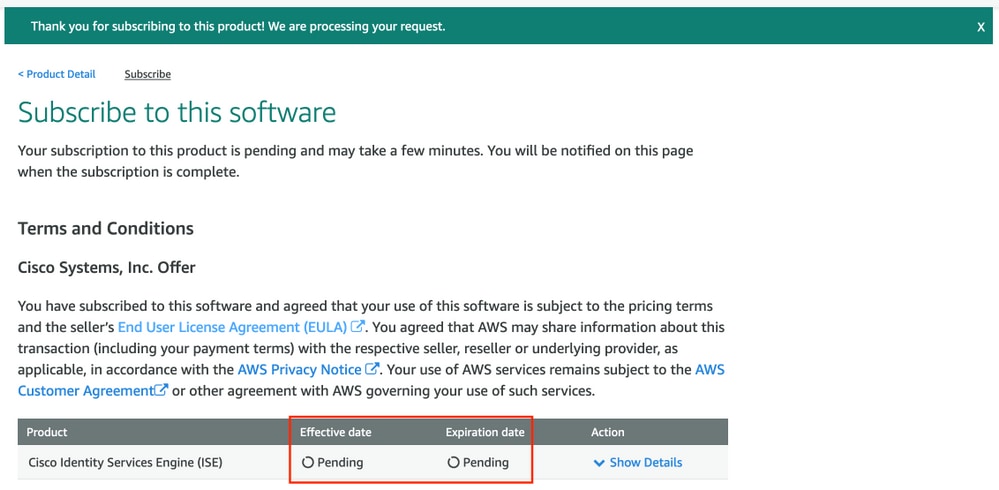
Select Accept Terms button as shown in the image.
Once subscribed the status of Effective and Expiration date with change to Pending as shown in the image.
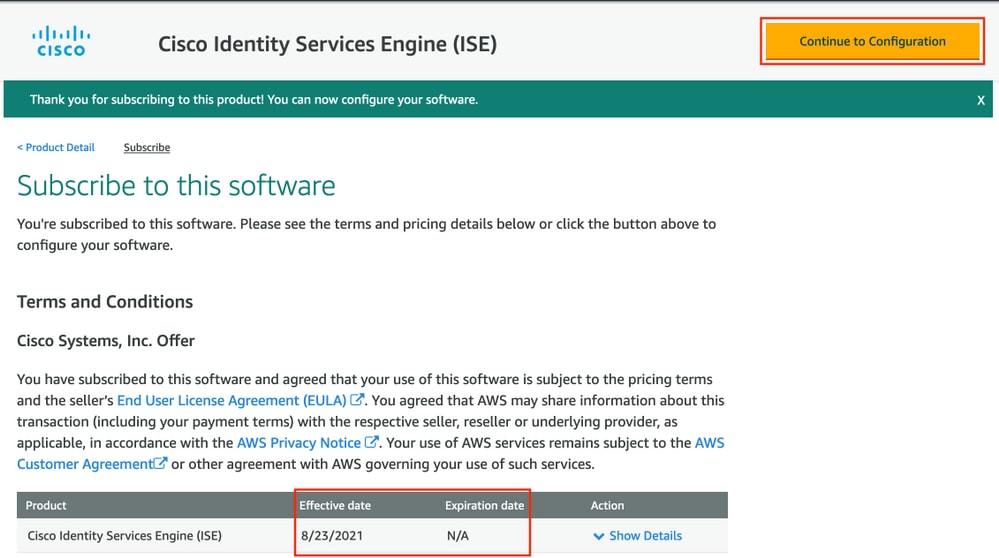
Shortly after the Effective date changes to the date of Subscription and the Expiration date changes to N/A. Select Continue to Configuration as shown in the ima
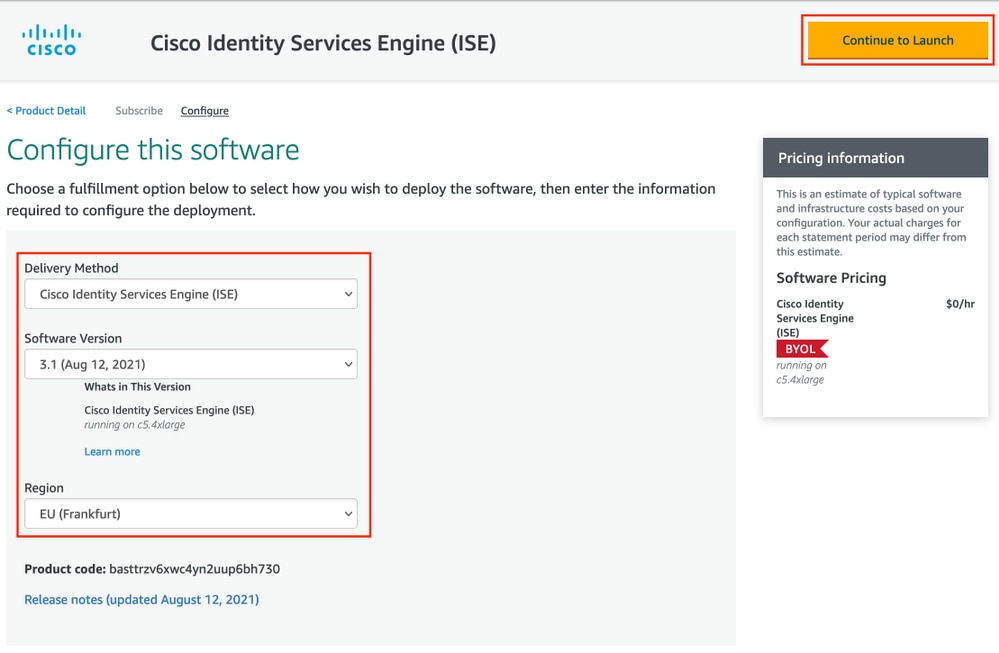
Step 2. Configure ISE on AWS
In the Delivery Method menu of the Configure this software screen select Cisco Identity Services Engine (ISE). In the Software Version select 3.1 (Aug 12, 2021). Select the Region, where ISE is planned to be deployed. Select Continue to Launch.
Step 3. Launch ISE on AWS
From the Actions drop-down menu of the Launch this Software screen, select Launch CloudFormation.

(Optional) Select Usage instructions to make yourself familiar with them. Select Launch.
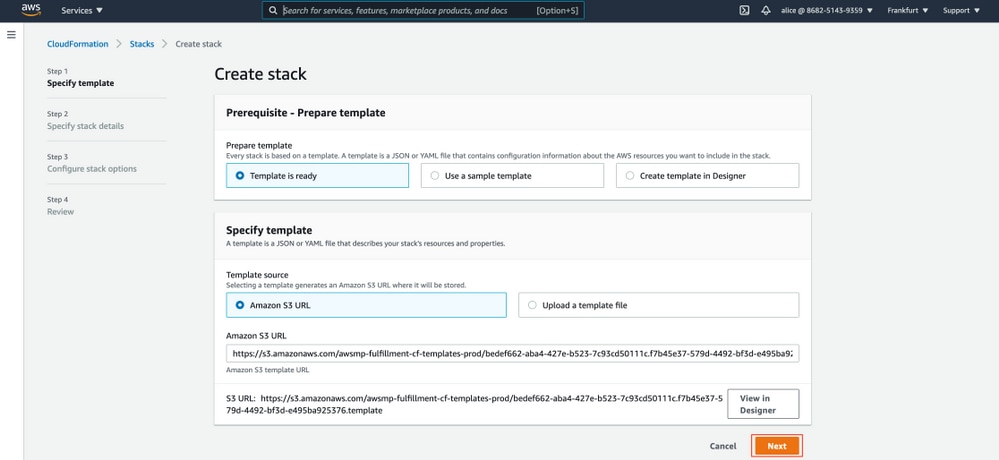
Step 4. Configure CloudFormation Stack for ISE on AWS
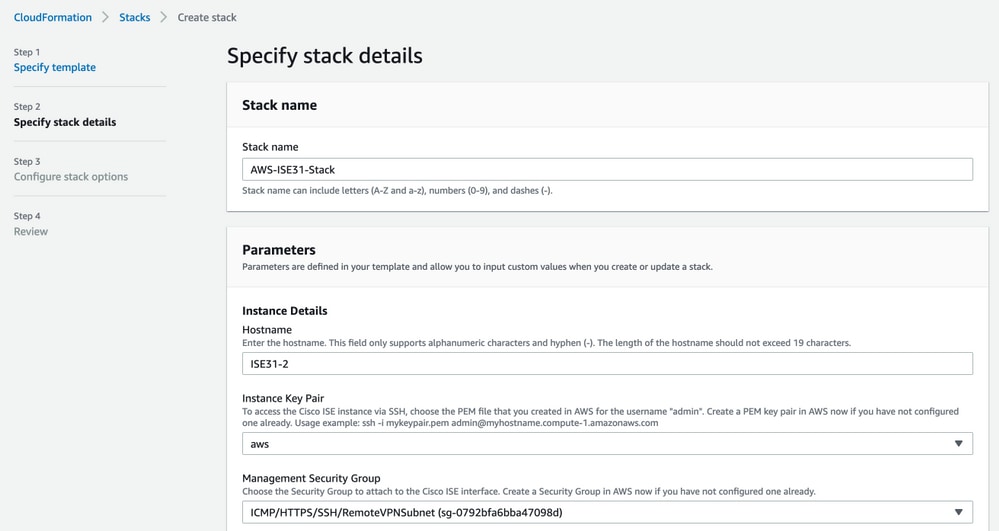
Launch button redirects you to the CloudFormation Stack setup screen. There is a prebuilt template that must be used to set up ISE. Keep default settings and select Next.
Populate CloudFormation Stack data with Stack Name. Configure Instance Details like Hostname, select Instance Key Pair and Management Security Group.
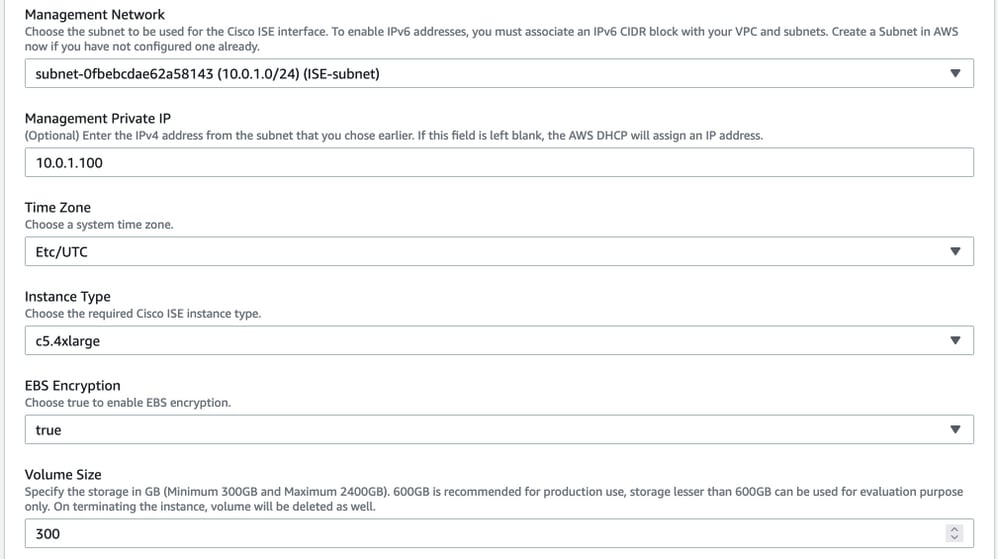
Continue Instance Details configuration with Management Network, Management Private IP, Time Zone, Instance Type, EBS Encryption and Volume Size.
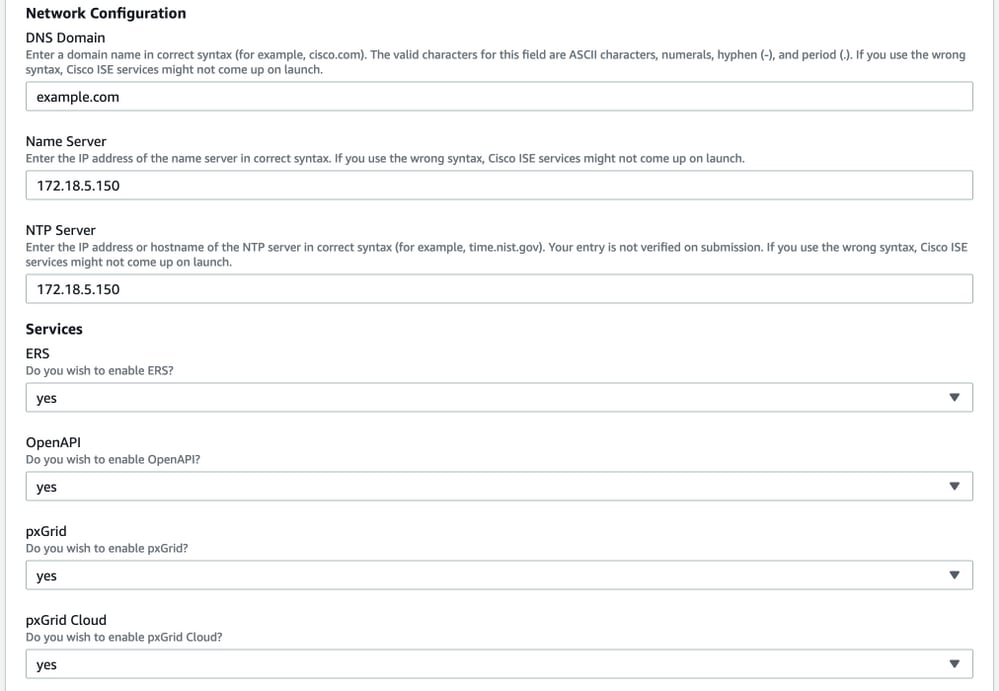
Continue Instance Details configuration with DNS Domain, Name Server, NTP Service and Services.
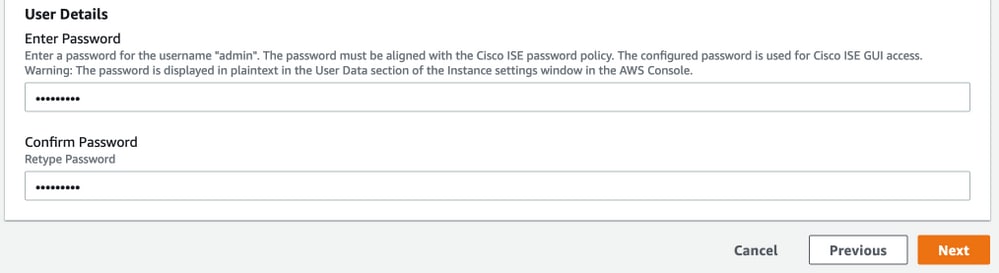
Configure GUI user password and select Next.
No changes are required on the next screen. Select Next.
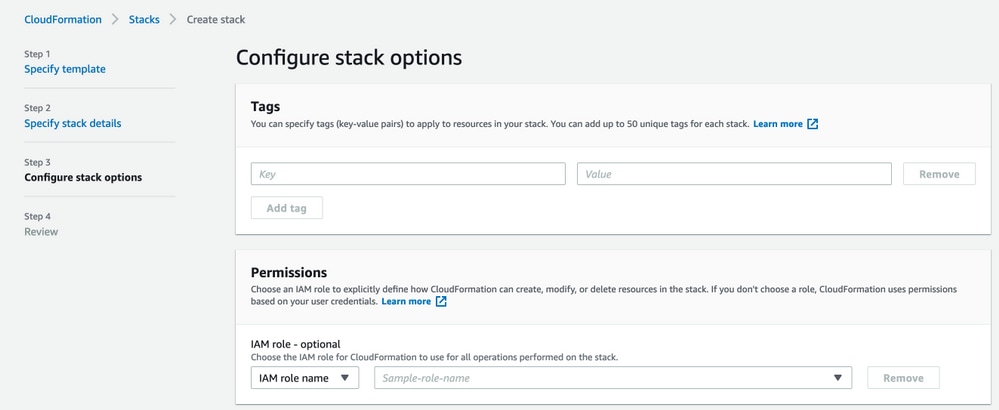
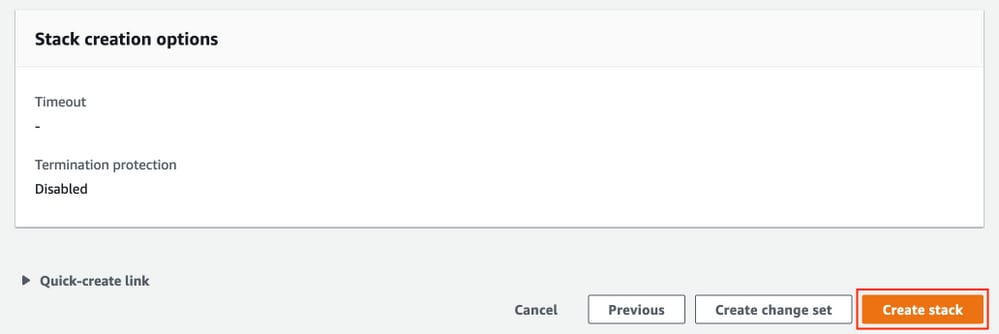
Go over the Review Stack screen, scroll down and Select Create stack.
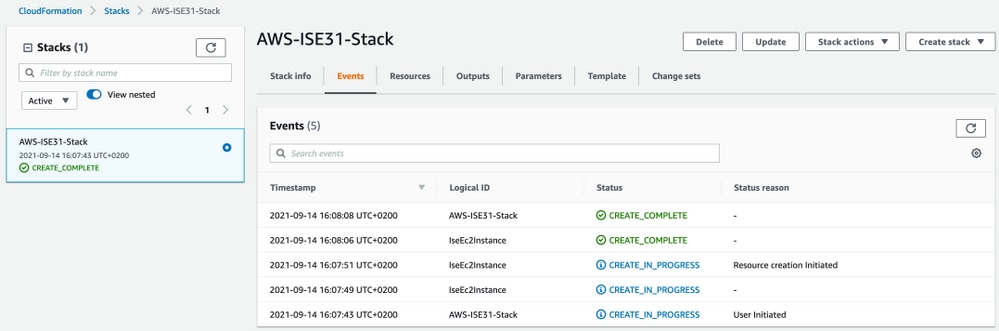
Once the Stack is deployed CREATE_COMPLETE status must be seen.
Step 5. Access ISE on AWS
In order to access ISE instance, navigate to the Resources tab to view the EC2 instance created from CloudForms (Alternatively navigate to Services > EC2 > Instances in order to view the EC2 instances) as shown in the image.
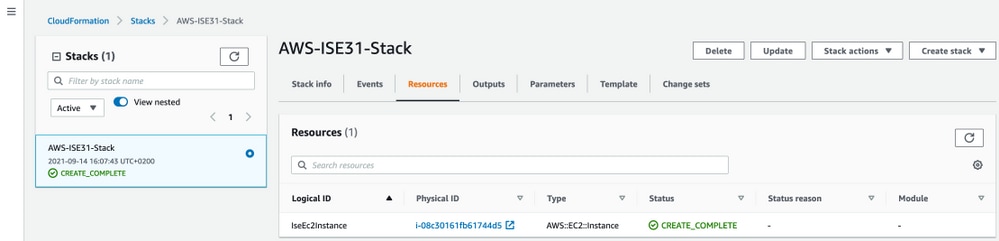
Select Physical ID in order to open EC2 Instances menu. Ensure the Status check has 2/2 checks passed status.

Select Instance ID. ISE can be accessed via Private IPv4 address/Private IPv4 DNS with SSH or HTTPS protocol.
Note: If you access ISE via Private IPv4 address/Private IPv4 DNS ensure that there is network connectivity towards ISE private address.
Example of ISE accessed via Private IPv4 Address via SSH:
[centos@ip-172-31-42-104 ~]$ ssh -i aws.pem admin@10.0.1.100
The authenticity of host '10.0.1.100 (10.0.1.100)' can't be established.
ECDSA key fingerprint is SHA256:G5NdGZ1rgPYnjnldPcXOLcJg9VICLSxnZA0kn0CfMPs.
ECDSA key fingerprint is MD5:aa:e1:7f:8f:35:e8:44:13:f3:48:be:d3:4f:5f:05:f8.
Are you sure you want to continue connecting (yes/no)? yes
Warning: Permanently added '10.0.1.100' (ECDSA) to the list of known hosts.
Last login: Tue Sep 14 14:36:39 2021 from 172.31.42.104
Failed to log in 0 time(s)
ISE31-2/admin#
Note: It takes around 20 minutes for ISE to be accessible via SSH. Till that time connectivity to ISE fails with "Permission denied (publickey)." error message.
Use show application status ise in order to verify that services are running:
ISE31-2/admin# show application status ise

ISE PROCESS NAME                        STATE           PROCESS ID
--------------------------------------------------------------------
Database Listener                       running         27703
Database Server                         running         127 PROCESSES
Application Server                      running         47142
Profiler Database                       running         38593
ISE Indexing Engine                     running         48309
AD Connector                            running         56223
M&T Session Database                    running         37058
M&T Log Processor                       running         47400
Certificate Authority Service           running         55683
EST Service                             running
SXP Engine Service                      disabled
TC-NAC Service                          disabled
PassiveID WMI Service                   disabled
PassiveID Syslog Service                disabled
PassiveID API Service                   disabled
PassiveID Agent Service                 disabled
PassiveID Endpoint Service              disabled
PassiveID SPAN Service                  disabled
DHCP Server (dhcpd)                     disabled
DNS Server (named)                      disabled
ISE Messaging Service                   running         30760
ISE API Gateway Database Service        running         35316
ISE API Gateway Service                 running         44900
Segmentation Policy Service             disabled
REST Auth Service                       disabled
SSE Connector                           disabled
Hermes (pxGrid Cloud Agent) Service     disabled

ISE31-2/admin#
Note: It takes around 10-15 minutes since SSH is available for ISE services to transition to a running state.
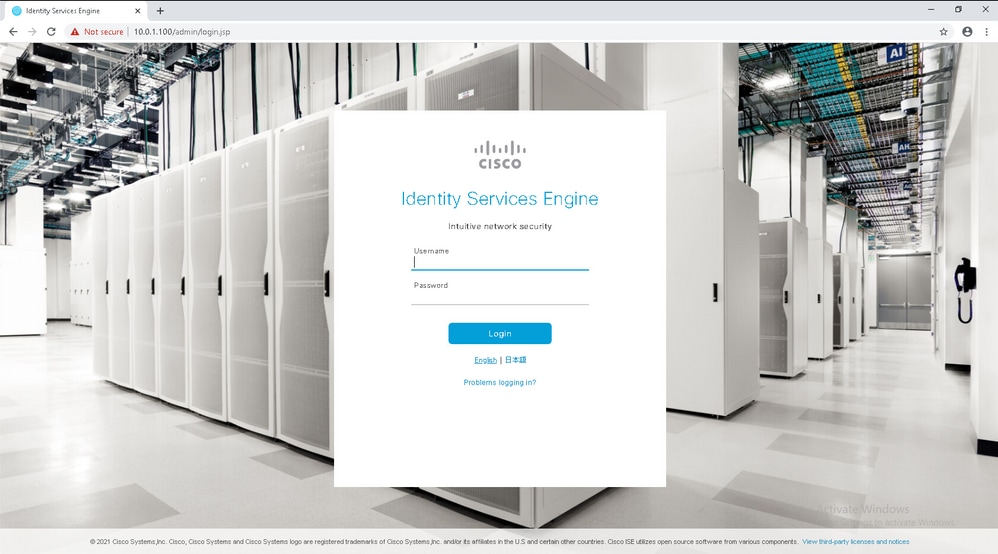
Once the Application Server is in running State, you can access ISE via GUI as shown in the image.
Step 6. Configure Distributed Deployment between On-Prem ISE and ISE on AWS
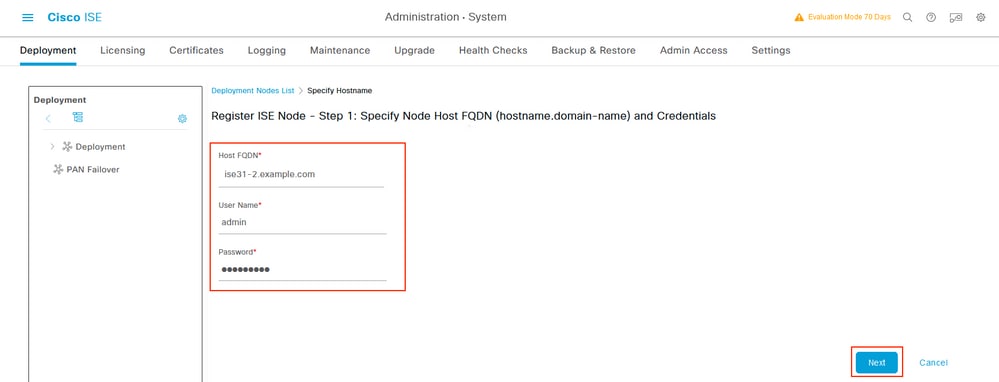
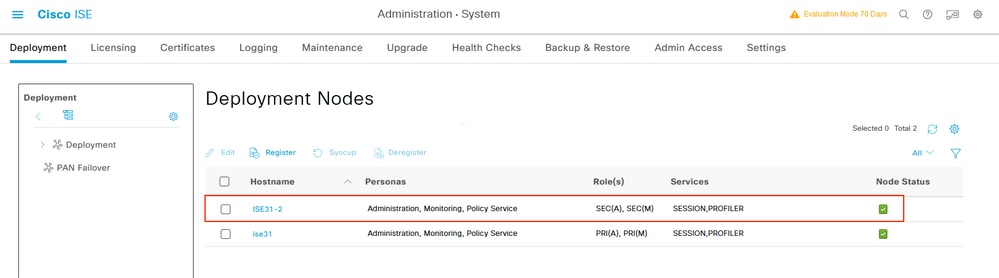
Log in to On-Prem ISE and navigate to Administration > System > Deployment. Select the node and Select Make Primary. Navigate back to Administration > System > Deployment, Select Register. Configure Host FQDN of ISE on AWS, GUI Username and Password. Click Next.
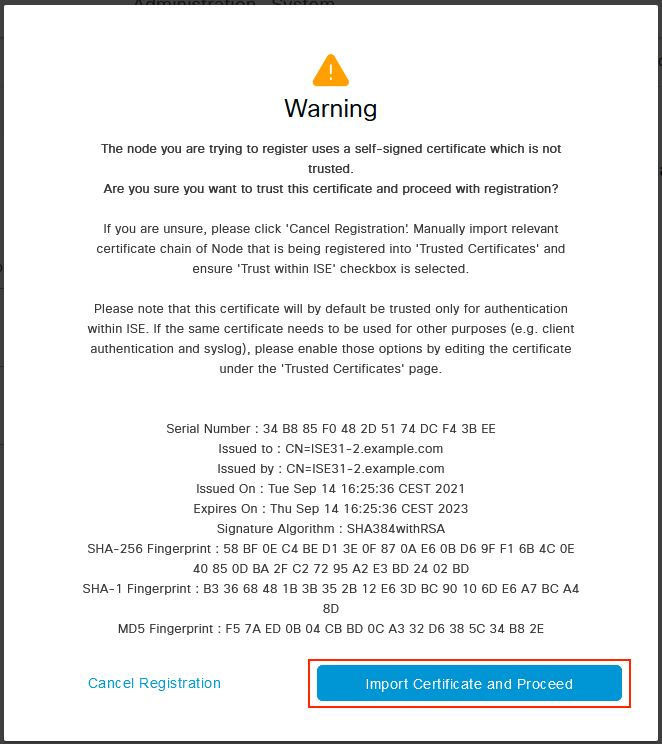
Since Self-signed certificates are used in this topology, to cross import admin certificates to the Trusted Store Select Import Certificate and Proceed.
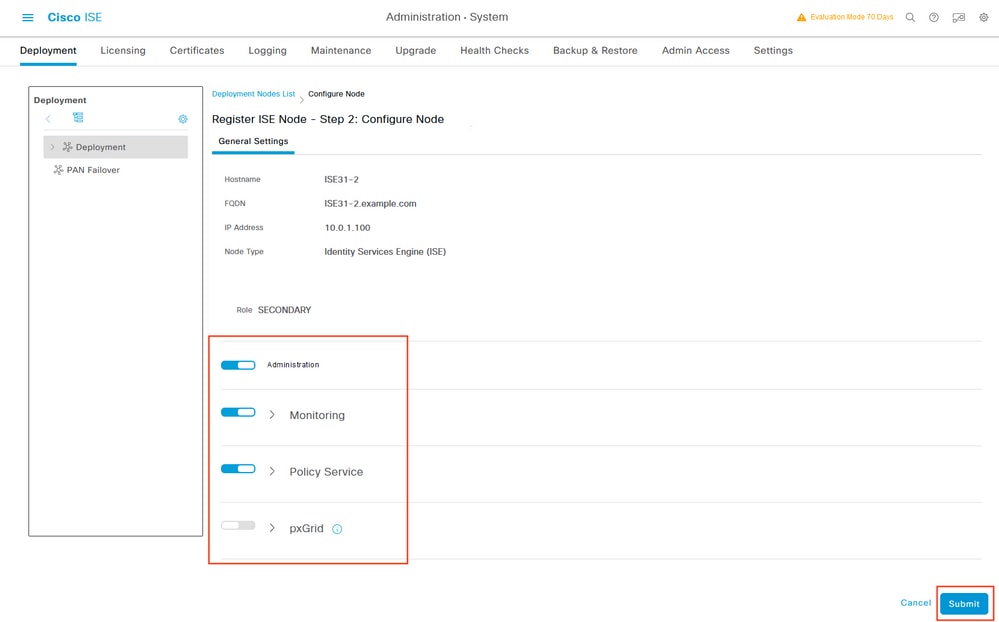
Select the Personas of your choice and click Submit.
Once the synchronization completes, the node transitions to the connected state, the green checkbox is displayed against it.
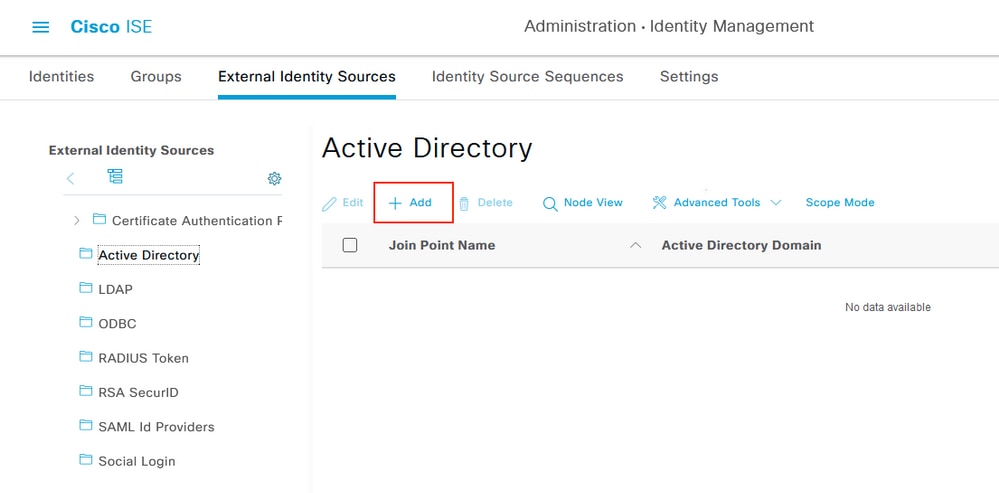
Step 7. Integrate ISE Deployment with On-Prem AD
Navigate to Administration > Identity Management > External Identity Sources. Select Active Directory, Select Add.
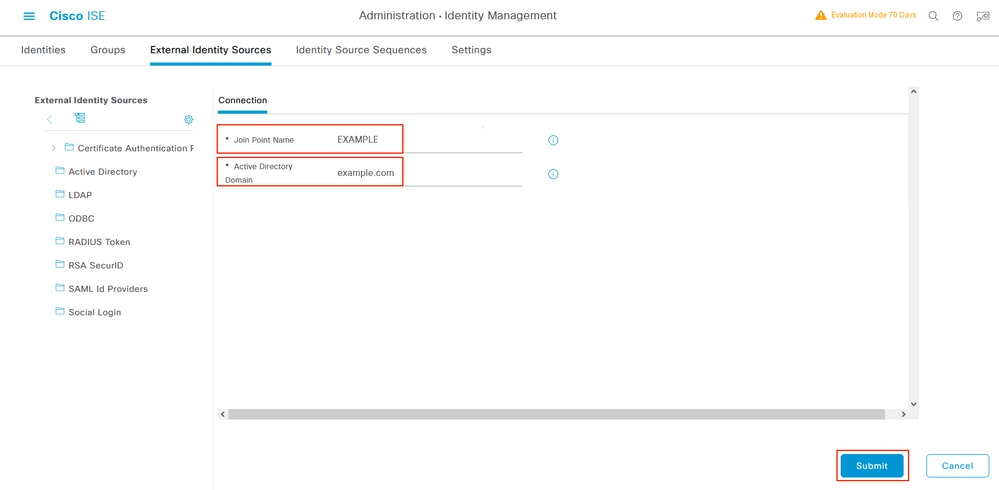
Configure Joint Point Name and Active Directory Domain, Select Submit.
To integrate both nodes with Active Directory Select Yes.
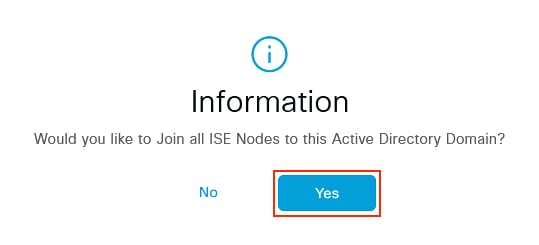
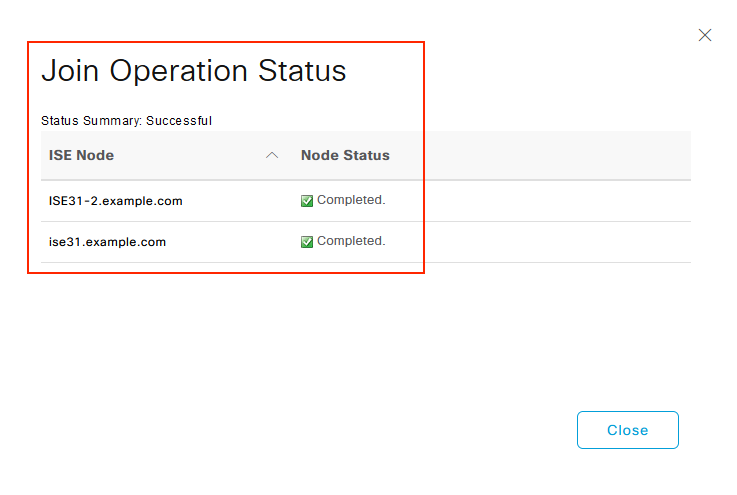
Enter AD User Name and Password, click OK. Once the ISE Nodes are successfully integrated with Active Directory, Node Status changes to Completed.
Limitations
For ISE on AWS limitations please refer to the Known Limitations section of the ISE Admin Guide.
Verify
Use this section in order to confirm that your configuration works properly.
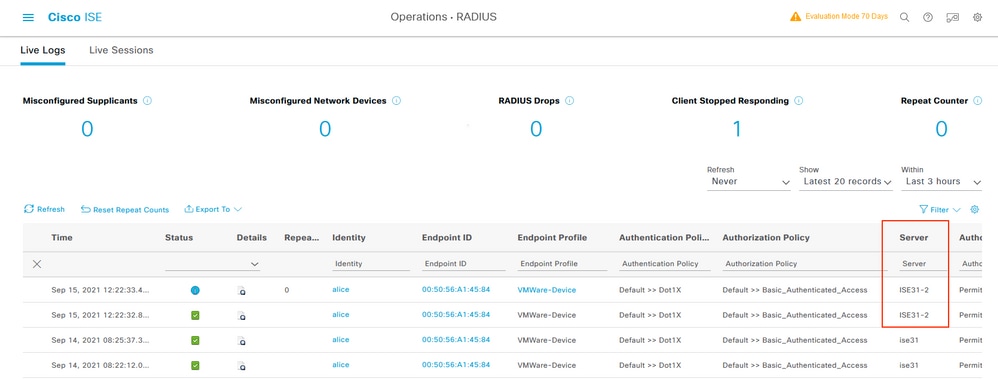
In order to verify authentication is performed on the ISE PSN located on AWS, navigate to Operations > Radius > Live Logs, and confirm in the Server column ISE on AWS PSN is observed.
Troubleshoot
This section provides information you can use in order to troubleshoot your configuration.
CloudFormation Stack Creation Failed
CloudFormation Stack Creation can fail due to multiple reasons, one of them is when you select that Security Group from the VPN which is different from the Management network of ISE. The Error looks like the one in the image.
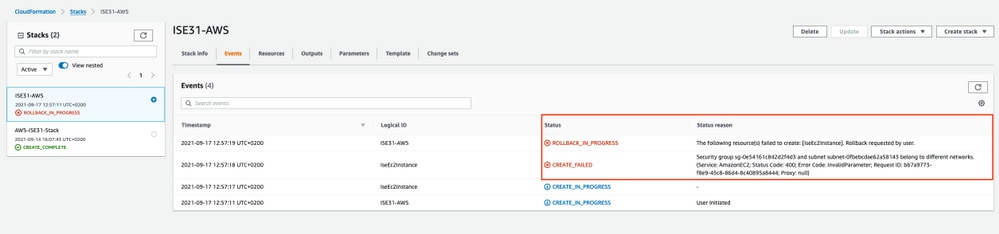
Solution:
Ensure to pick up the Security Group from the Same VPC. Navigate to Security Groups under VPC Service, and note the Security Group ID, ensure it corresponds to the right VPC (where ISE resides), verify VPC ID.
No comments:
Post a Comment