Prerequisites
- Have an AWS account.
- Create an IAM user with administrator permissions. To do this, you can just follow this tutorial. I recommend you give granular permissions to the user that will do the provisioning.
- Install and configure AWS CLI.
If something from the above doesn’t work, it might be because a permission is missing, or the CLI is not configured properly. I’ll let you know exactly what’s needed in the following steps.
Go to AWS Batch
Log in to your AWS account and look for AWS Batch in the initial screen, or you can go directly by using this link.
You’ll see a screen like the following:
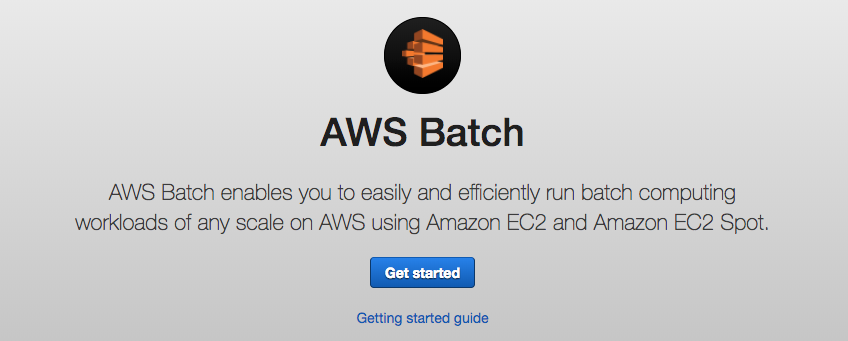
Click the “Get started” button. Then, this next screen will appear:
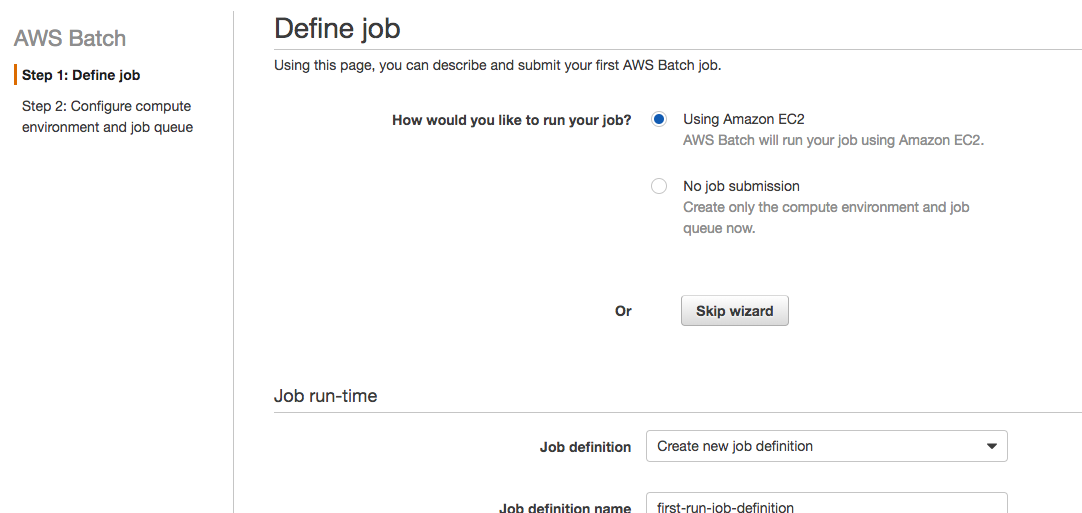
Click the “Skip wizard” button. We’re not going to follow this wizard because I want to explain each step to you. Also, after this, you’ll probably use AWS CloudFormation or something else to provision, not the wizard.
Create a Compute Environment
The jobs will run on a compute environment. Here, you’ll configure the instance type, family, and some other things that we’ll see in a bit.
It’s important that you know we’re not going to create any instances now. AWS Batch will create one when it’s needed. You can also configure things to create instances right away, speeding up job scheduling, but we won’t tackle that in this post.
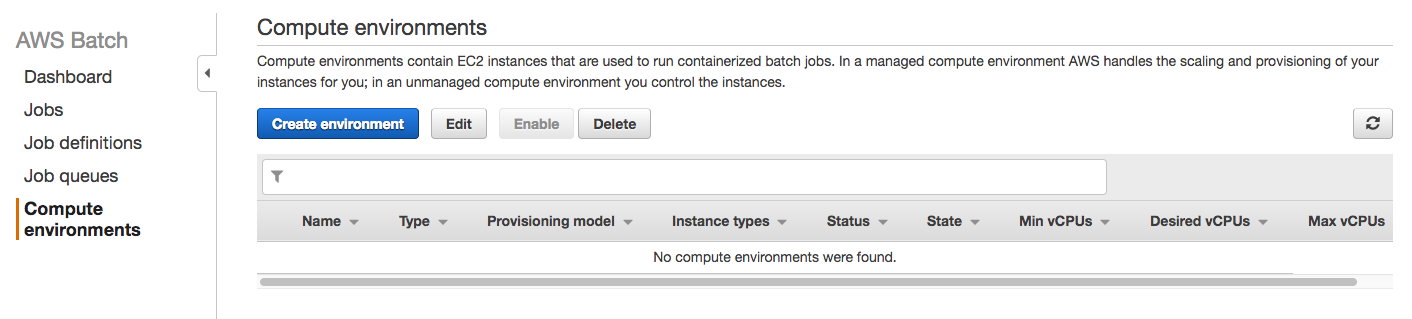
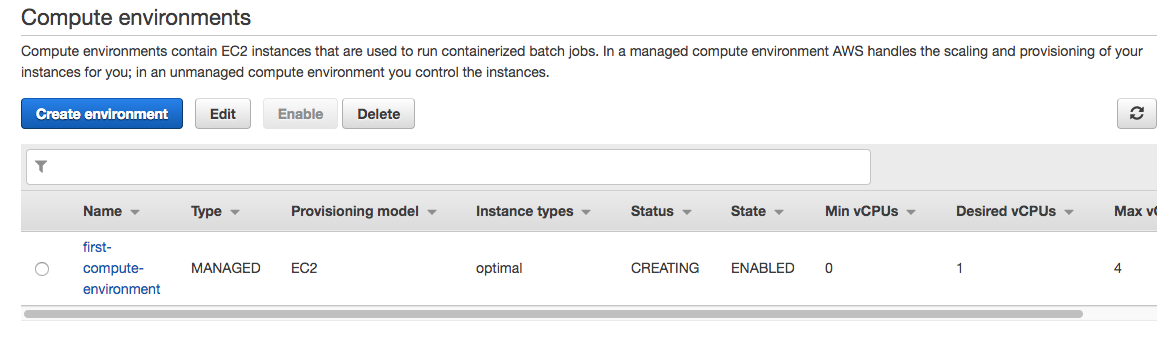
Click the “Compute environments” link that appears in the left menu. You’ll see the following screen:
Instance Type and Permissions
Now click the “Create environment” blue button so you can start defining the compute environment. You’ll start configuring the environment in the following screen:
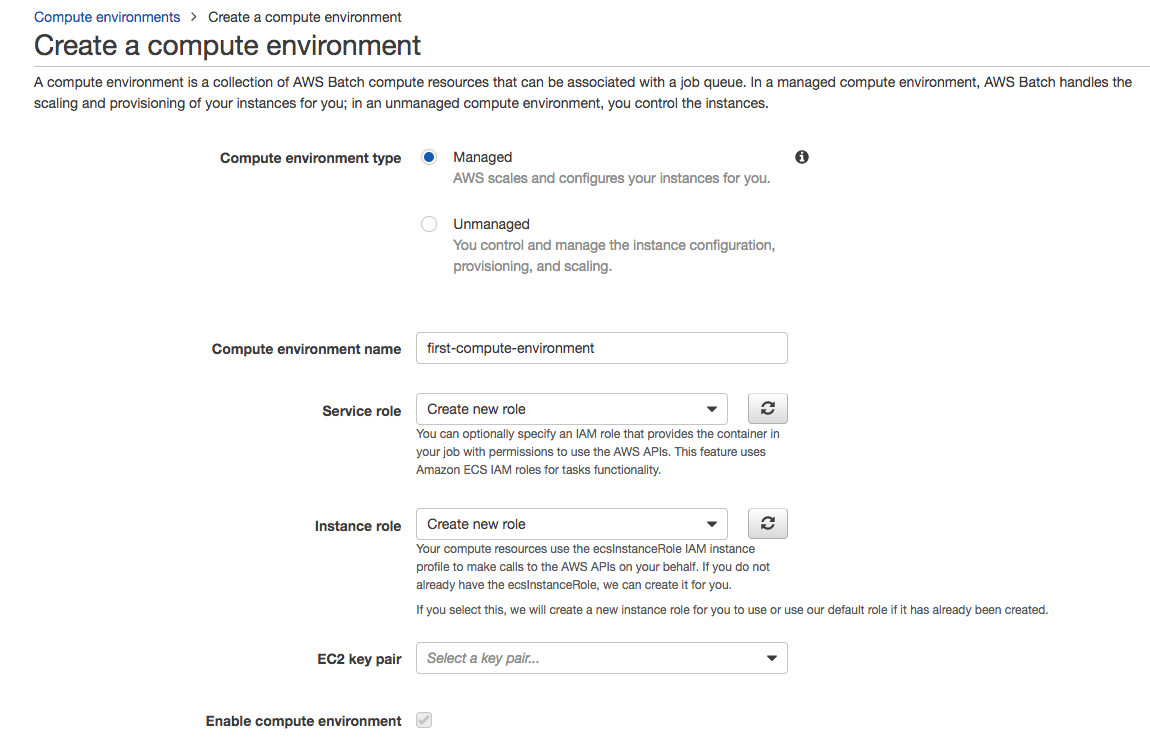
For simplicity, we’re going to choose all default values. You just need to name the environment. I called it “first-compute-environment.”
You don’t have to worry about creating a service or instance role right now. Just choose the option “Create new role” for both, and AWS will create them for you with the proper permissions. It will help you see which permissions are needed and adjust them if you want to.
Leave the EC2 key pair blank because we don’t need to access the servers for now.
Compute Resources
Scroll down a little bit, and let’s talk about the compute resources section. You’ll see the following screen:
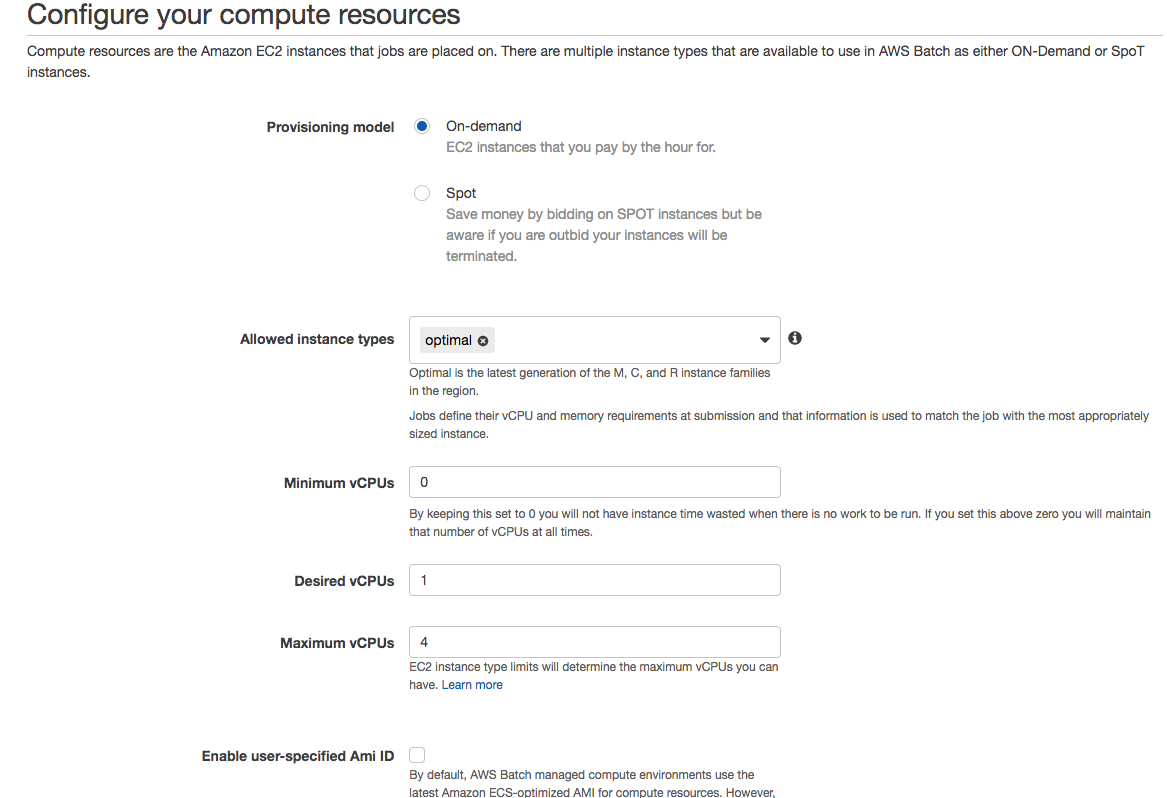
This is where you get to choose if you want to use on-demand or spot instances. For simplicity, let’s choose “On-demand.”
The “Allowed instance types” field is where you define which family type you’d like these environments to create. This is where things get fun because you can create compute environments that are CPU-intensive and choose between C family instance types. Or if there are jobs that are memory intensive, you can choose M family instance types. You’re limiting which instance types can be created. I chose “optimal,” so AWS decides for me which instance is better based on the configuration of job queues.
Now, vCPUs are one of the most important things here in order for your first job to run.
If you’re familiar with running workloads using ECS, you might get confused here. You might configure so many vCPUs that AWS won’t be able to create the environment. And even if there are a few instances running, jobs won’t run until the environment is ready. So keep in mind that vCPUs are virtual CPUs, not CPU units that you configure in a container when running in ECS.
I configured a maximum of four vCPUs. It means that if at some point the cluster has four vCPUs among all instances, it won’t create more. Jobs will run slowly, but your costs will remain controlled. I also put one vCPU as desired, just so it starts creating an instance right now. AWS will adjust this later if needed, and you can change it when submitting a job if you’re in a hurry.
Networking
Scroll down a little bit, and you’ll now configure the networking section and tags. You’ll see a screen like this:
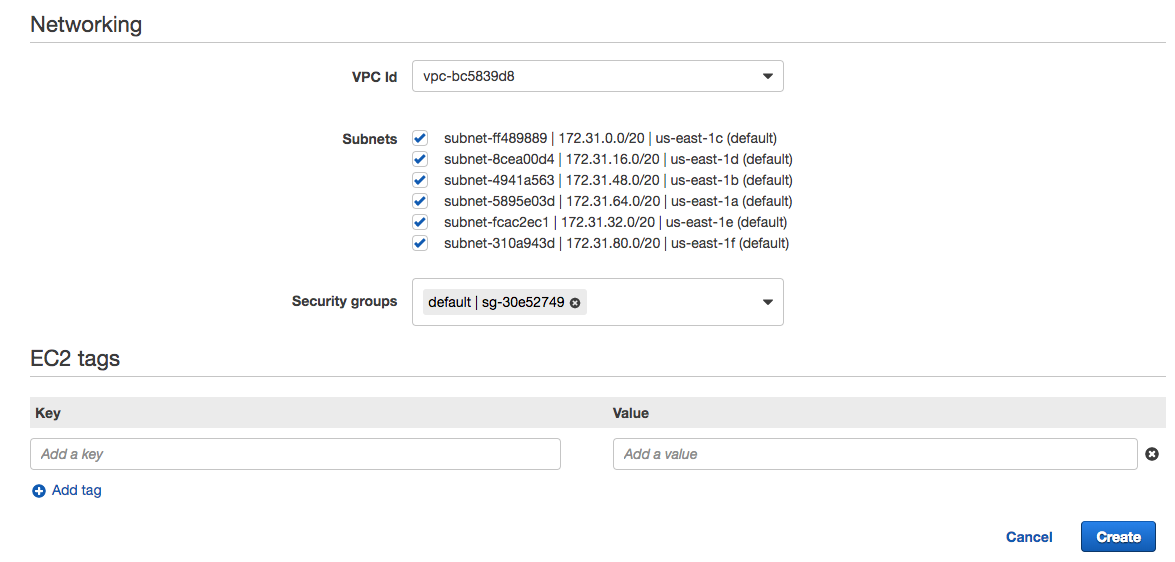
Leave the VPC and subnets as default for now. Click the “Create” blue button and wait a bit while the environment is created.
Create a Job Queue
Now you need a queue where you’ll send the jobs to get executed. This queue will be attached to a compute environment so the AWS Batch service will create the resources needed based on the load of the queue. It will use the min, max, and desired vCPUs configuration to know how many instances to create.
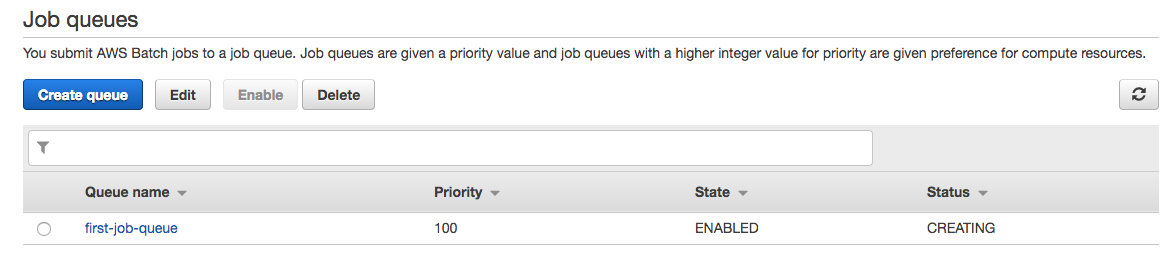
Click the “Job queues” link in the left menu and you’ll see the following screen:

Then, you can click the “Create queue” blue button. You’ll see this:
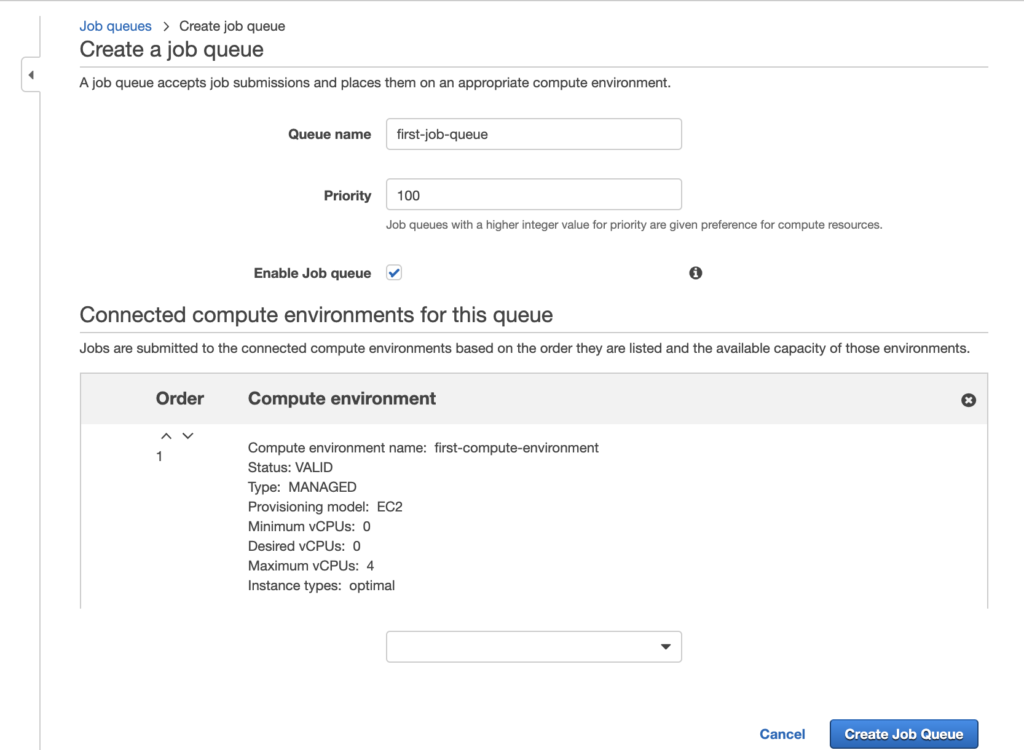
Let’s put a name to the queue so it’s easy to identify. I called it “first-job-queue.”
In the priority, make sure you type a value that lets you play with lower priority queues later. I put “100” in case I need to create a lower priority queue later—say, for example, one with 50.
Enable the job queue. By default, this checkbox will be checked. You should leave it that way.

You now need to connect this queue to one or more compute environments. I chose the one I just created, the “first-compute-environment” one. If there were any other environment, this is where you’d choose it.
Why would I like to have more than one compute environment? Well, it’s useful if you want to speed up a job’s processing time by creating more instances using the spot market. You can have an on-demand compute environment where you always have resources available. And if the load increases, you can create spot instances if there are any available, based on the bid you configured.
Click the “Create queue” blue button.
Create a Job Using Docker
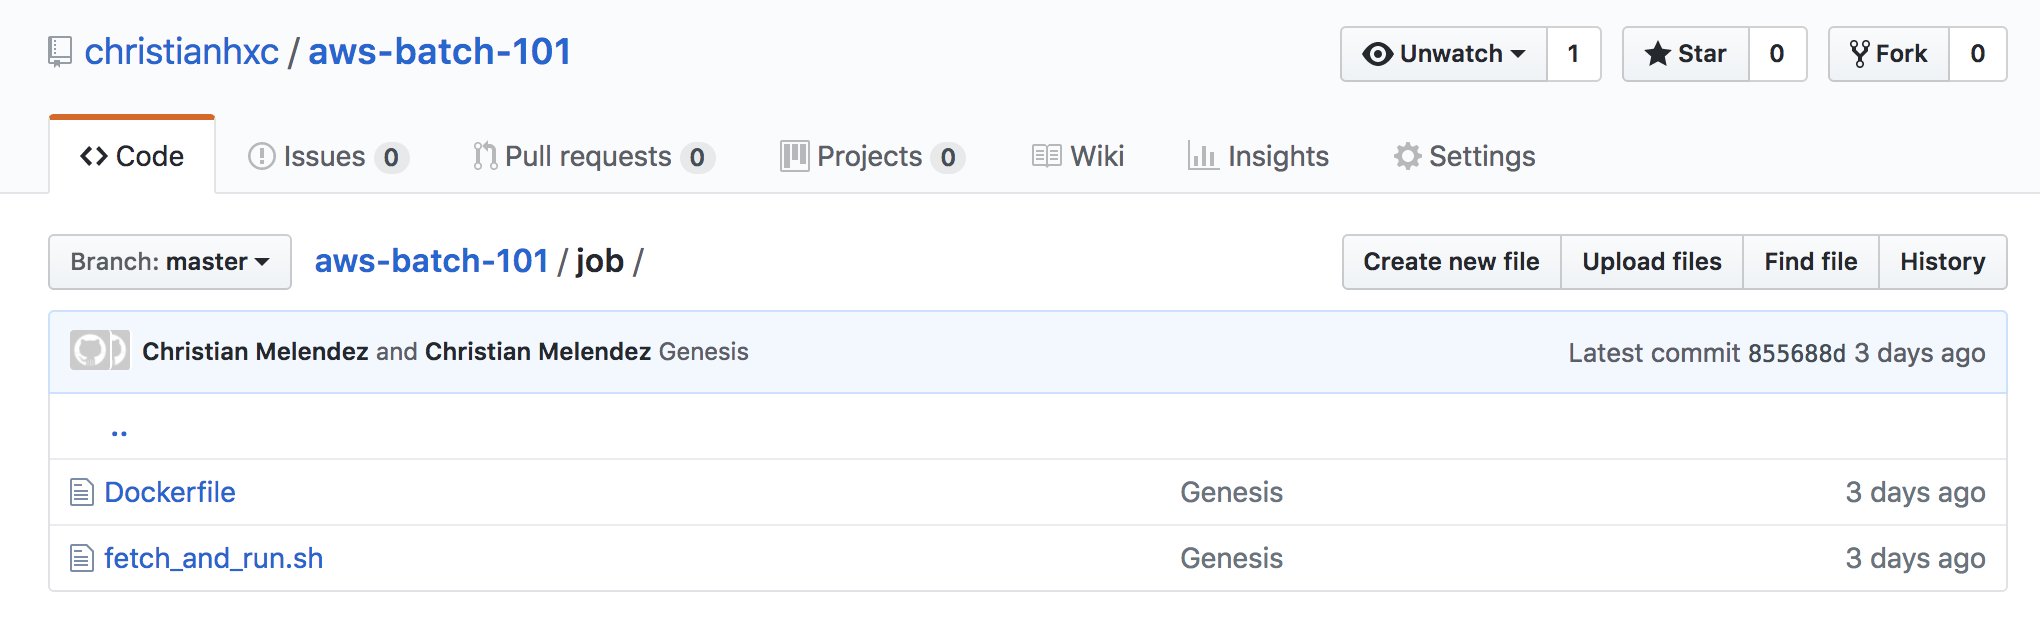
We’re going to use a “hello world” job that AWS evangelists have used for demo purposes. I couldn’t find a repository with all the files they’ve used, so I created one with all the files we’re going to need. You can find it on GitHub here.
Let’s explore what’s in there, as well as why and how to use those files to create our first job in AWS Batch.
Docker Image
We’re going to create a simple job that will pull a Bash script from S3 and execute it. The Dockerfile and the script that does what I just described is located in the “job” folder of the repository.
I won’t explain either the script or the Dockerfile just yet—we’ll just use it. So let’s build the Docker image and push it to the Docker hub. You need to have Docker installed on your machine, a Docker hub account, and a login for your computer.
Let’s build the Docker image. You can skip this step and use my image located here, or you can run the following command and tag the image using your username instead of mine:
docker build -t christianhxc/aws-batch-101:latest .
Now, let’s push the image. You need to be logged in with your user ID. And make sure you push the image that has your username in the tag. Run the following command:
docker push christianhxc/aws-batch-101:latest
That’s it! You now have the Docker image that will download a Bash script from S3 and run it.
A Bash Script
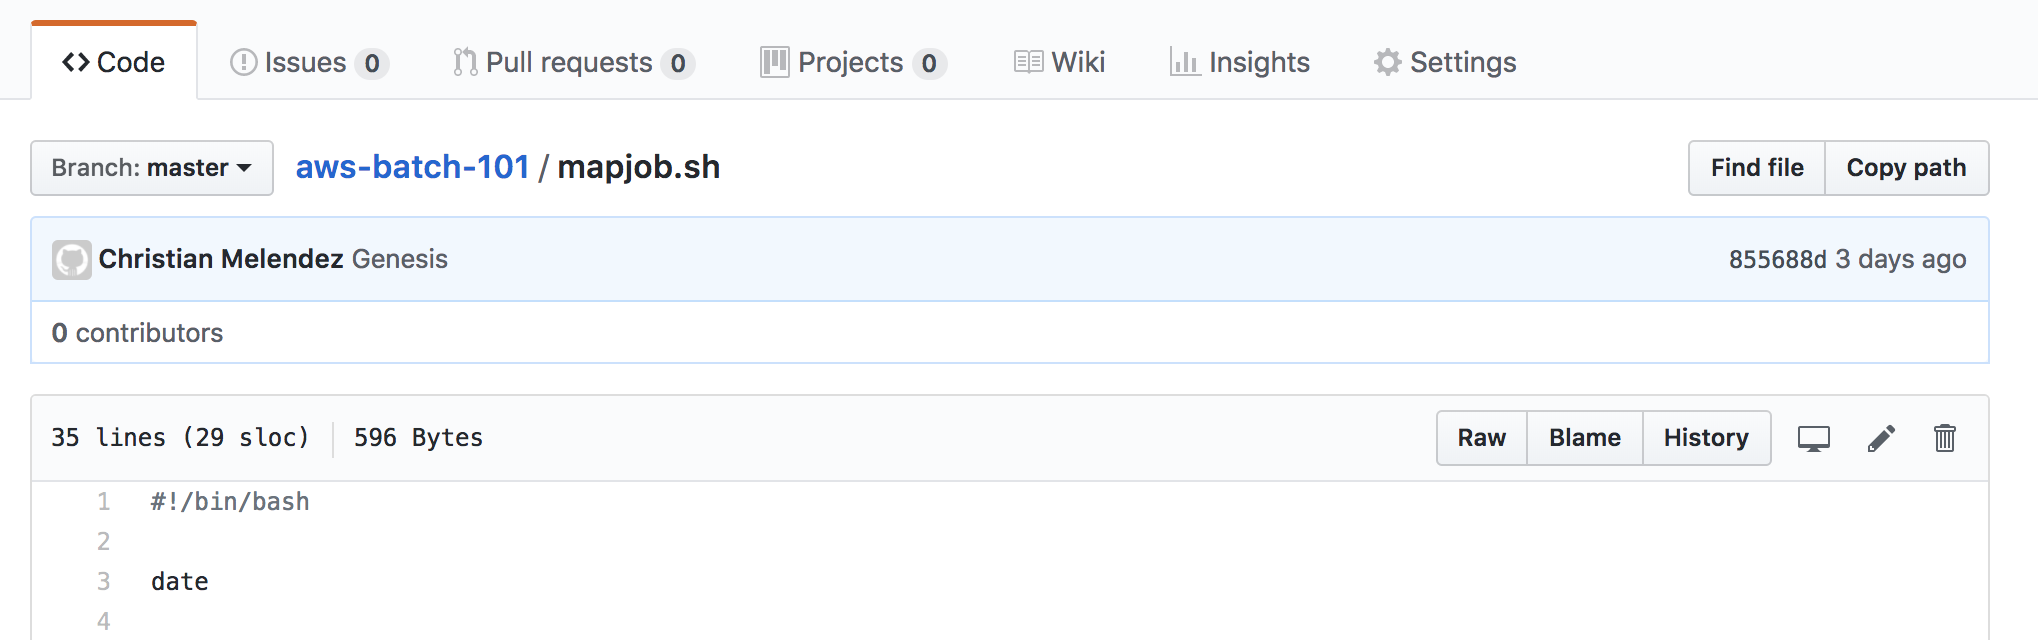
Let’s create the Bash script. You can use the one I have in the repo. That script simply puts a Fibonacci sequence in a DynamoDB table. It uses an environment variable called FOO to create the series of numbers, and it uses an argument just to print it in the console.
This script is in the root of the GitHub repository I linked before, and it’s called mapjob.sh
Now, because this is outside the scope of AWS Batch, I’m just going to list the actions you’ll need for this guide to work. We’ll need to do the following:
- Create a DynamoDB table in the Virginia region with primary key of “jobID”. Mine is called “fetch_and_run.” If you decide to enter a different name, make sure you change it at the end in the mapjob.sh script.
- Create an S3 bucket in the Virginia region. Mine is called “cm-aws-batch-101.” Don’t make it public.
- Upload the mapjob.sh script in the bucket you just created.
- Create an IAM role for an ECS service task with permissions to the S3 bucket and the DynamoDB table. If you don’t know how to do that, follow these instructions. I called my IAM role “aws-batch-101.” We’ll use this one next.
You’re almost ready to kick off your first job. You already have a script and a Docker image to use.
Let’s create the job definition in AWS and then submit a job.
Create a Job Definition
At this point, you’ve defined the environment where your jobs will run and the queue, which means AWS takes care of creating resources only when they’re needed. Now you need to run the job definition. And this is where things get more interesting.
Click the “Job definitions” link in the left menu and you’ll see the following screen:
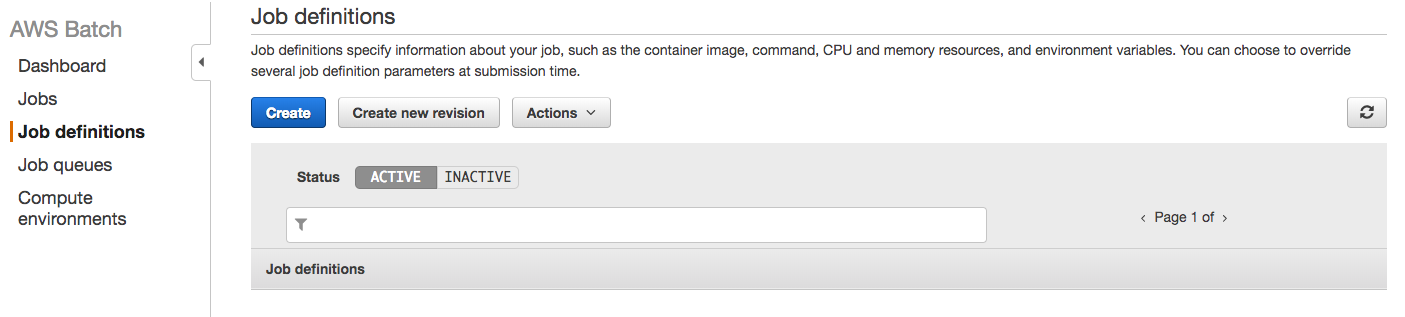
Click the “Create” blue button and let’s start defining the job.
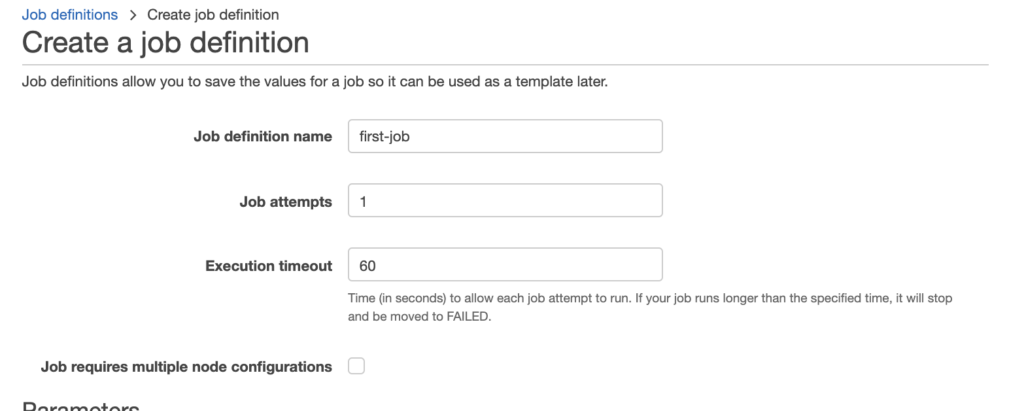
Enter any name you’d like. I put “first-job.” We set job attempts to 1. Job attempts is the maximum number of times to retry your job if it fails. And Execution timeout, is the maximum number of seconds your job attempts would run. For this example, we set it to 60 seconds.
Scroll down a bit and let me explain what’s there:
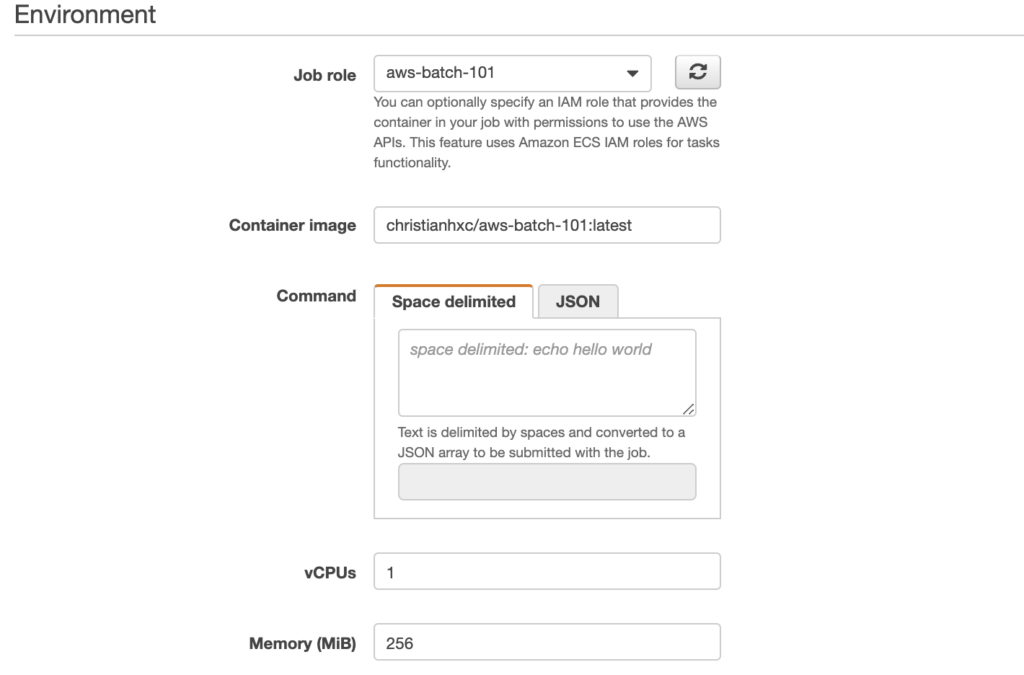
Job role provides a drop down menu where you select the job role. choose the IAM role you created previously; mine is “aws-batch-101.”
Note that: Only roles with Amazon Elastic Container Service Task Role trust relationship will be shown. You can learn more about creating roles with AWS ECS trust relationship here.
Now pick a name for the container image. Like I said before, for simplicity, you can use mine. I called it “christianhxc/aws-batch-101:latest.” These values can’t be changed when submitting a job, but the ones we’re about to explore can be changed.
The command field describes the command passed to the container. It maps to the COMMAND parameter to docker run. Here, we’ll type the name of the script that will run the container and its parameters. Because we can override this value, we’ll leave it as it is right now.
Now, here’s another trick to be able to run a job. Unfortunately, you can’t configure CPU units to a container, only vCPUs. It means that, at minimum, the container will have 1024 CPU units because that’s the equivalent to one vCPU. You can configure the CPU, then, in blocks of 1024. This is important because I entered 256, thinking that this was CPU units, and the job never started. It sticks in the RUNNABLE state if there’s nowhere to run it.
Configure how much memory this container will need. I put 256. Leave the rest as it is.
Submit a Job
You’re now, finally, able to submit a job.
Click the “Jobs” link in the left menu, and you’ll see the following screen:
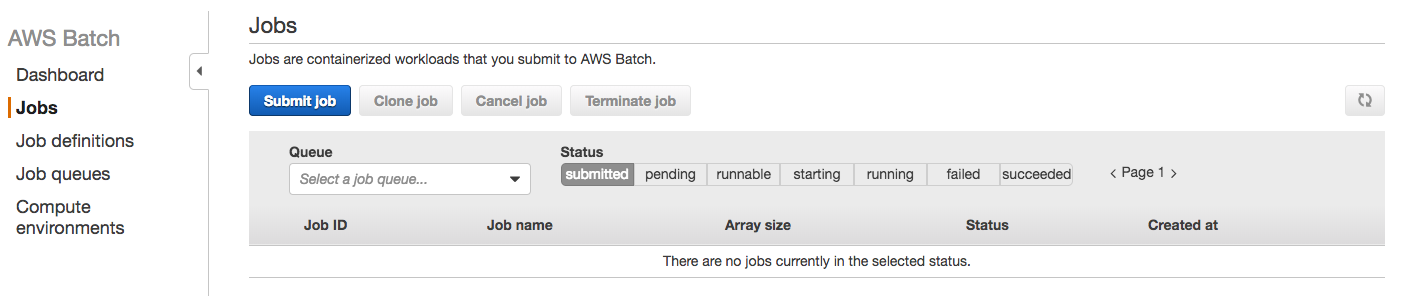
Click the “Submit job” blue button. Let’s submit one!
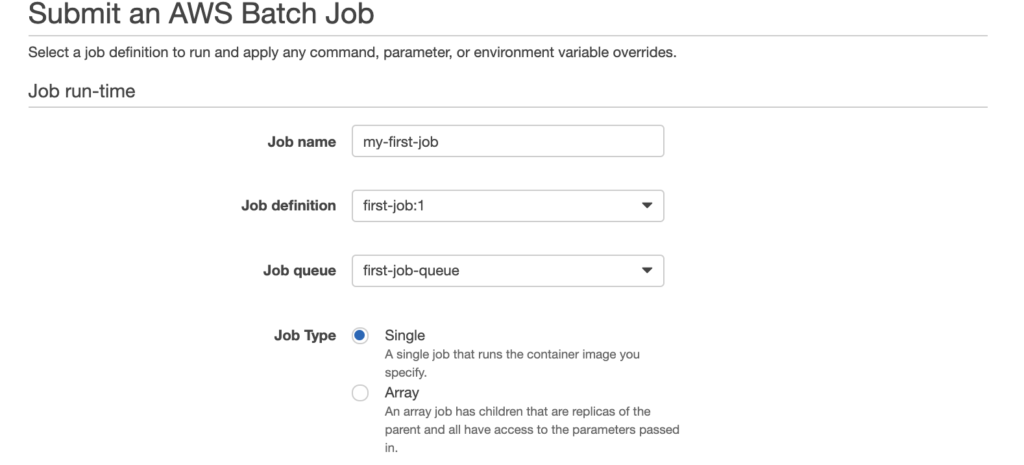
Next, name your job submission. I called it “my-first-job.” Choose the job definition and the queue we just created, and choose “Single” as a job type.
Scroll down a little and let’s override some values here:

In here, you’ll need to put the name of the script in the S3 bucket and the Fibonacci number as parameter. But these are only for reference. I used “mapjob.sh 60.” Type in “1” for vCPU and “256” for memory.
Scroll down some because our scripts need environment variables in order to work. Let’s add the corresponding values:
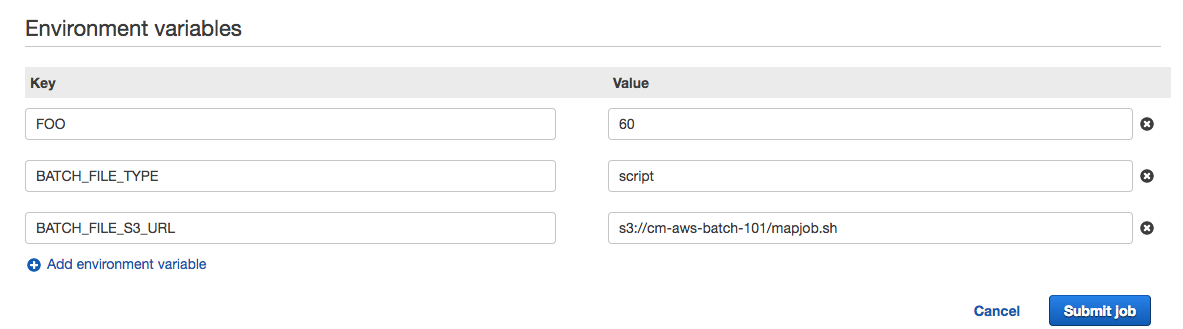
Let’s add the environment variables. For FOO, enter the Fibonacci number. I used 60. For BATCH_FILE_TYPE, put “script”, and for BATCH_FILE_S3_URL, put the S3 URL of the script that will fetch and run.
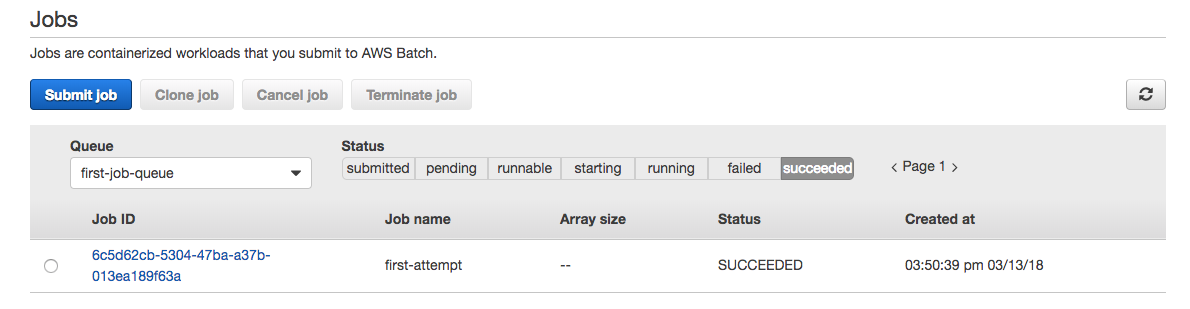
Click the “Submit job” blue button and wait a while. You can go to the computer environment and changed the desired vCPUs to 1 to speed up the process.
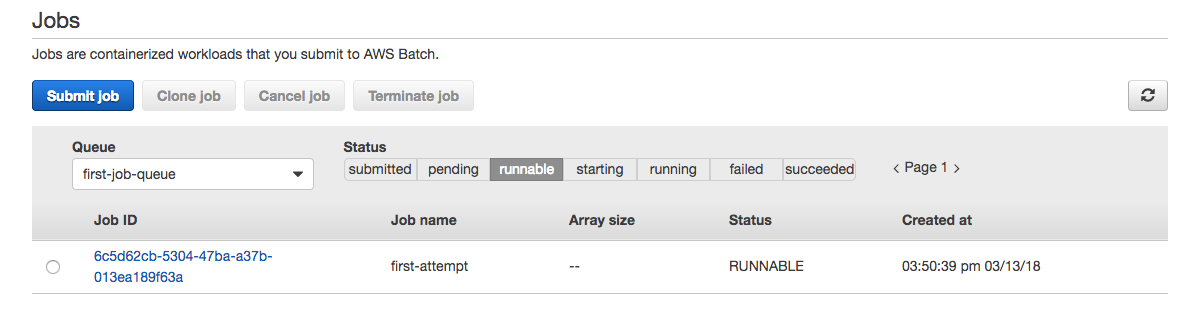
It will start creating one instance. When the instance is ready to process a job, the job will transition from RUNNABLE to SUCCEEDED.
And you’ll see a new entry in the DynamoDB table.
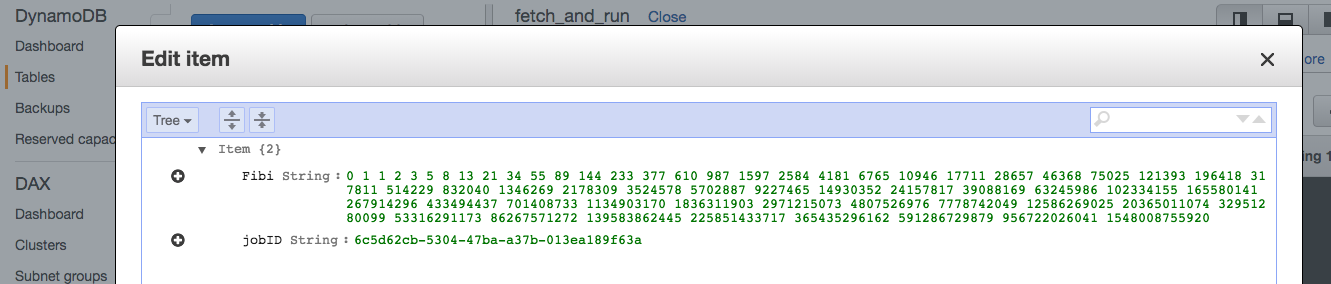
You can keep submitting jobs and change the FOO var to generate a different sequence of numbers. When you don’t submit any other job, AWS Batch will terminate the instance it created.
No comments:
Post a Comment