Network Watcher in Azure Features
What is Azure Network Watcher
Azure Network Watcher provides tools to monitor, diagnose, view metrics, and enable or disable logs for resources in an Azure virtual network. It is designed to monitor and repair the network health of IaaS (Infrastructure-as-a-Service) products which includes Virtual Machines, Virtual Networks, Application Gateways, Load balancers, etc.
The Connection Troubleshoot capability enables you to test a connection between a VM and another VM, an FQDN, a URI, or an IPv4 address. The test returns similar information returned when using the connection monitor capability, but tests the connection at a point in time, rather than monitoring it over time, as the connection monitor does.
By using Network Watcher, you can Monitor communication between a virtual machine and an endpoint. Endpoints can be another virtual machine (VM), a fully qualified domain name (FQDN), a uniform resource identifier (URI), or an IPv4 address. The connection monitor capability monitors communication at a regular interval and informs you of reachability, latency, and network topology changes between the VM and the endpoint. For example, you might have a web server VM that communicates with a database server VM. Someone in your organization may, unknown to you, apply a custom route or network security rule to the web server or database server VM or subnet.
Features of Network Watcher
Azure Network Watcher allows you to monitor, diagnose and gain insight into your network performance between various points in your network infrastructure. Here’s a breakdown of some of the elements:
1. The Monitoring Element – You can monitor from one endpoint to another with a connection monitor to ensure connectivity between 2 points, like a web application and a database for instance. You’ll be alerted of potential issues such as a disconnect between those two services.
2. The Network Performance Monitor – Allows monitoring between Azure and on-premises resources for hybrid scenarios using VPN or express route. It also has some advanced detection to traffic blackholing and routing errors – in other words, some advanced intelligence when it comes to these network issues.
Best of all, as you add more endpoints it will develop a visual diagram of your network with a topology tool that will look like a Visio-diagram, showing IP addresses, hostnames, etc.
3. Diagnostic Tools – From a diagnostic standpoint there are several diagnostic tools that give you better insight into your virtual network by diagnosing possible causes of traffic issues.
IP Flow– Tells you which security rule allowed or denied traffic to or from a virtual machine in your virtual network for further inspection or remediation.
4. Metrics Tools – There are some limitations as to how many resources you can deploy within an Azure network which can be based on subscriptions or regions. The Metric Tool gives you the visibility that you need to understand exactly where you are inside of those limitations. It shows you how many of those resources you’ve deployed and how many are still available that you can deploy – so it helps you set up plans for the future as you deploy more and more resources.
5. Logging – We’ve done some interesting things with log analytics. Log analytics provides the ability to capture data about a bunch of Azure networking components, like network security groups, public IP addresses, load balances, virtual networking, and application gateways, to name a few.
Configure Network Watcher
- Log in to Azure Portal.
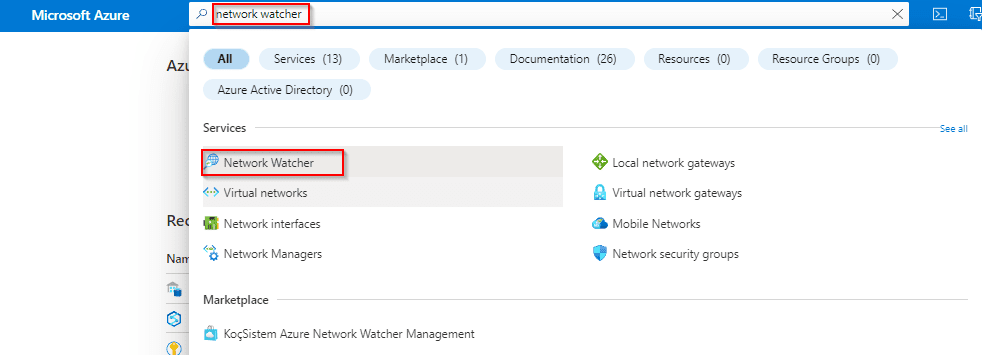
- Search for Network Watcher in Global Search.
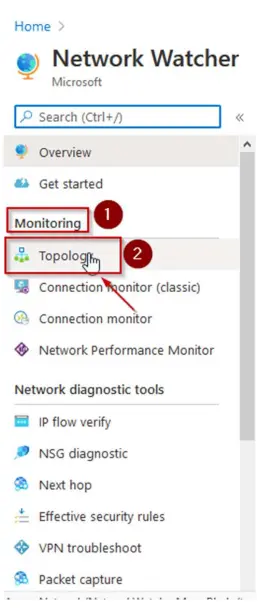
3. Click Topology under Monitoring.
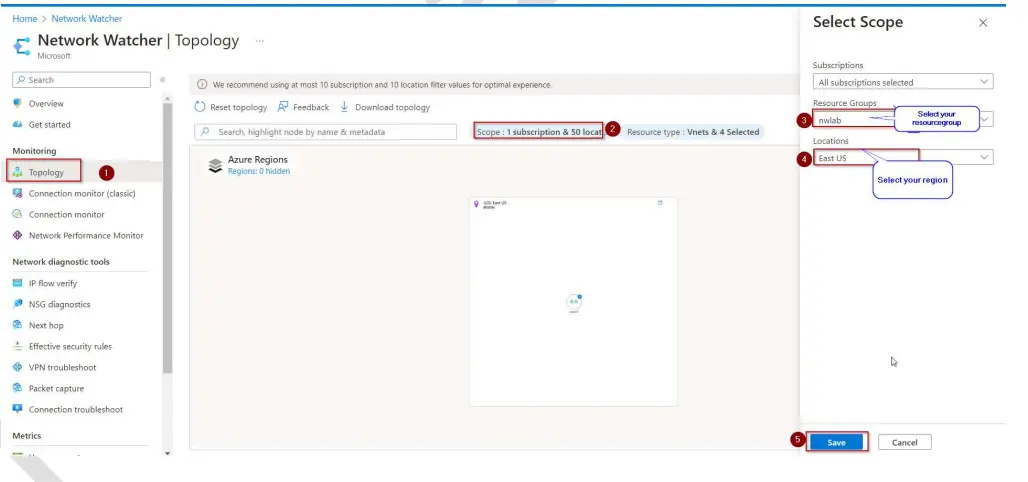
4. Now, select your Resource Group and Select your Region.
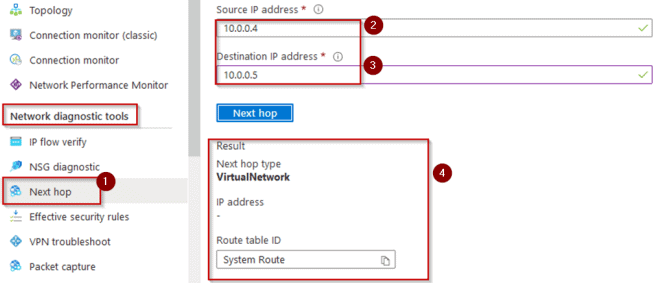
 5. On Next Hop under Network diagnostic tools, enter the following:
• Source IP Address – Enter the Source IP Address as 10.0.0.4
• Destination IP Address- Enter Destination IP Address 10.0.0.5
• Click on Next Hop

6. You’ll see the Next Hop type as Virtual Network because VM – 1 – Web from SUBNET1- WEB can talk to VM- 2 – SQL in SUBNET2 – SQL via System routes so no router involved in between.
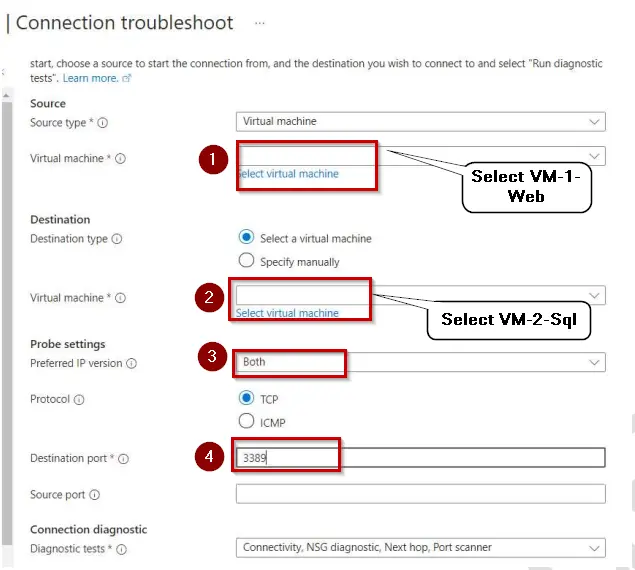
7. On the Connection troubleshoot, enter the following things then Click Run diagnostics :
• Virtual Machine: Select VM-1-Web as your First VM in the Source
• Virtual Machine: Select VM-2-SQL as your Second VM in the Destination
• Preferred IP: Select Both as Preferred IP Version
• Destination Port: Enter Destination Port as 3389
8. You can see all the Results as shown below. You can also click on see details to see more
detailed results.

No comments:
Post a Comment