How to Find and Remove Old Azure Snapshots
If you have Azure snapshots in your account that are outdated, you can clean them up to lower your monthly cloud costs. In this guide, we'll show you how to find and delete these snapshots.
Snapshots of Azure virtual hard disks (VHD) are point-in-time copies of virtual machines that users can easily revert to when needed, in case of disaster or for troubleshooting purposes.
If you have a snapshot policy that creates them automatically and periodically, they are a convenient recovery option, but if you don’t keep tabs on unnecessary snapshots, the costs can add up. At the time of writing this, the storage costs for snapshots and images are billed at $0.05/GB per month based on the used portion of the disk for both standard options (LRS and ZRS). The premium offering is billed higher at $0.12/GB per month.
For example, if you are storing 1 TB of snapshot data across your organization, that’s an added $50 to your cloud bill each month. You can view your current amount by reviewing your Azure usage report.
In this guide, we’ll show you how to identify and remove old Azure snapshots so you can keep your Azure costs down.
Finding and Deleting Old Azure Snapshots
You can define what qualifies a snapshot as “old” depending on your situation. You can say anything older than 90 days for example. If you want to be cautious about deleting snapshots, you can adjust your soft delete settings to ensure that you can recover any snapshots you have recently deleted.
Using the Azure Portal
By using the Azure portal, you can manually review and delete old snapshots one at a time. Here's how:
1. Log into your Azure service to access old virtual machine (VM) snapshots and identify the number of days configured for each VM.
2. Go to the All resources blade in the Microsoft Azure portal.
3. From Type, select Snapshot to display only VM snapshots created (and charged) according to your initial service setups.
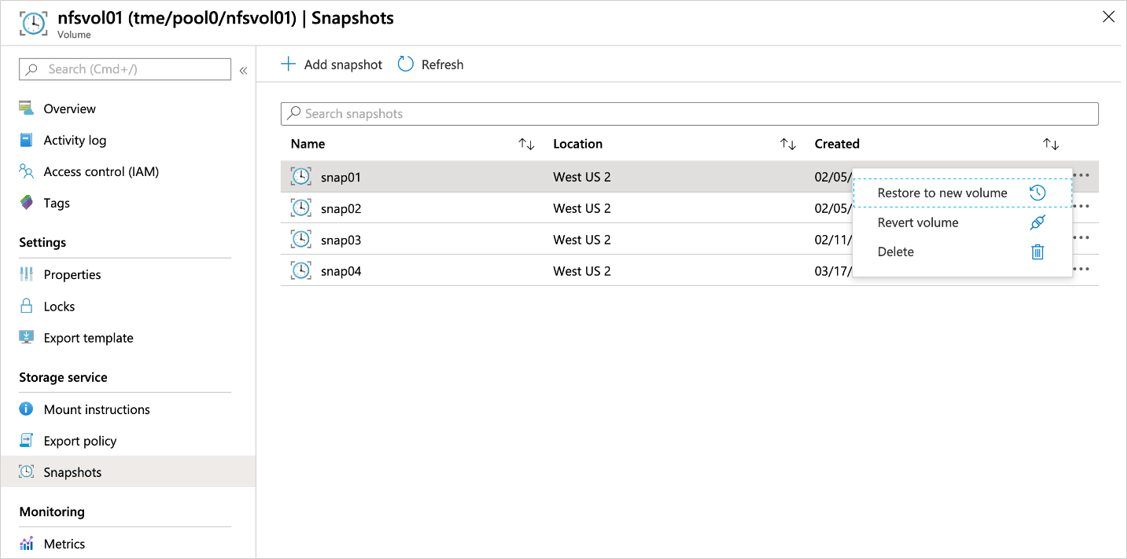
4. Right-click all old snapshots you want to delete, as shown below:

5. Go to Overview to access the configuration details of your selected snapshots.
6. Check DATE CREATED to examine when your selected snapshots were created. Compare the snapshot age with the threshold age identified in Step 1. If the snapshot age is higher than your configured threshold, your verified resource can be considered outdated and should be removed.
7. In Delete Snapshot, confirm you want to remove (delete) your selected snapshot by clicking Yes, as shown below:

Do this for each snapshot you want to delete from your Azure service.
Using the Azure CLI
With the Azure CLI, it's a little easier since you can run a query to find all snapshots that were created before a certain date and then remove them. Here's how:
1. First, use this “az snapshot list” command with a JMESPath query to get a list of all the snapshots before a given date:
2. Next, you can use this output to then delete each snapshot using the following “az snapshot delete” command:
Just remember to ensure that you want to delete your selected snapshots. Re-provisioning new instances may incur extra charges if you need one or more of your deleted snapshots later on.
Clean Up Old Azure Snapshots Automatically with Blink
If you are creating snapshots automatically, you should have an automated method of cleanup. Otherwise, you’ll need to context-switch regularly just to click through the console or run commands.
With Blink, you can use this automation to identify old Azure snapshots and queue them for removal.


No comments:
Post a Comment