Create, change, or delete a network interface
A network interface (NIC) enables an Azure virtual machine (VM) to communicate with internet, Azure, and on-premises resources. This article explains how to create, view and change settings for, and delete a NIC.
A VM you create in the Azure portal has one NIC with default settings. You can create NICs with custom settings instead, and add one or more NICs to a VM when or after you create it. You can also change settings for an existing NIC.
Prerequisites
You need the following prerequisites:
- An Azure account with an active subscription. Create an account for free.
- An existing Azure virtual network. To create one, see Quickstart: Create a virtual network by using the Azure portal.
To run the procedures in this article, sign in to the Azure portal with your Azure account. You can replace the placeholders in the examples with your own values.
Permissions
To work with NICs, your account must be assigned to the network contributor role or to a custom role that's assigned the appropriate actions from the following list:
| Action | Name |
|---|---|
| Microsoft.Network/networkInterfaces/read | Get network interface |
| Microsoft.Network/networkInterfaces/write | Create or update network interface |
| Microsoft.Network/networkInterfaces/join/action | Attach a network interface to a virtual machine |
| Microsoft.Network/networkInterfaces/delete | Delete network interface |
| Microsoft.Network/networkInterfaces/joinViaPrivateIp/action | Join a resource to a network interface via private ip |
| Microsoft.Network/networkInterfaces/effectiveRouteTable/action | Get network interface effective route table |
| Microsoft.Network/networkInterfaces/effectiveNetworkSecurityGroups/action | Get network interface effective security groups |
| Microsoft.Network/networkInterfaces/loadBalancers/read | Get network interface load balancers |
| Microsoft.Network/networkInterfaces/serviceAssociations/read | Get service association |
| Microsoft.Network/networkInterfaces/serviceAssociations/write | Create or update a service association |
| Microsoft.Network/networkInterfaces/serviceAssociations/delete | Delete service association |
| Microsoft.Network/networkInterfaces/serviceAssociations/validate/action | Validate service association |
| Microsoft.Network/networkInterfaces/ipconfigurations/read | Get network interface IP configuration |
Create a network interface
You can create a NIC in the Azure portal or by using Azure CLI or Azure PowerShell.
The portal doesn't provide the option to assign a public IP address to a NIC when you create it. If you want to create a NIC with a public IP address, use Azure CLI or PowerShell. To add a public IP address to a NIC after you create it, see Configure IP addresses for an Azure network interface.
The portal does create a NIC with default settings and a public IP address when you create a VM. To create a NIC with custom settings and attach it to a VM, or to add a NIC to an existing VM, use PowerShell or Azure CLI.
The portal doesn't provide the option to assign a NIC to application security groups when you create the NIC, but Azure CLI and PowerShell do. However, if an existing NIC is attached to a VM, you can use the portal to assign that NIC to an application security group. For more information, see Add to or remove from application security groups.
To create a NIC, use the following procedure.
In the Azure portal, search for and select network interfaces.
On the Network interfaces page, select Create.
On the Create network interface screen, enter or select values for the NIC settings.
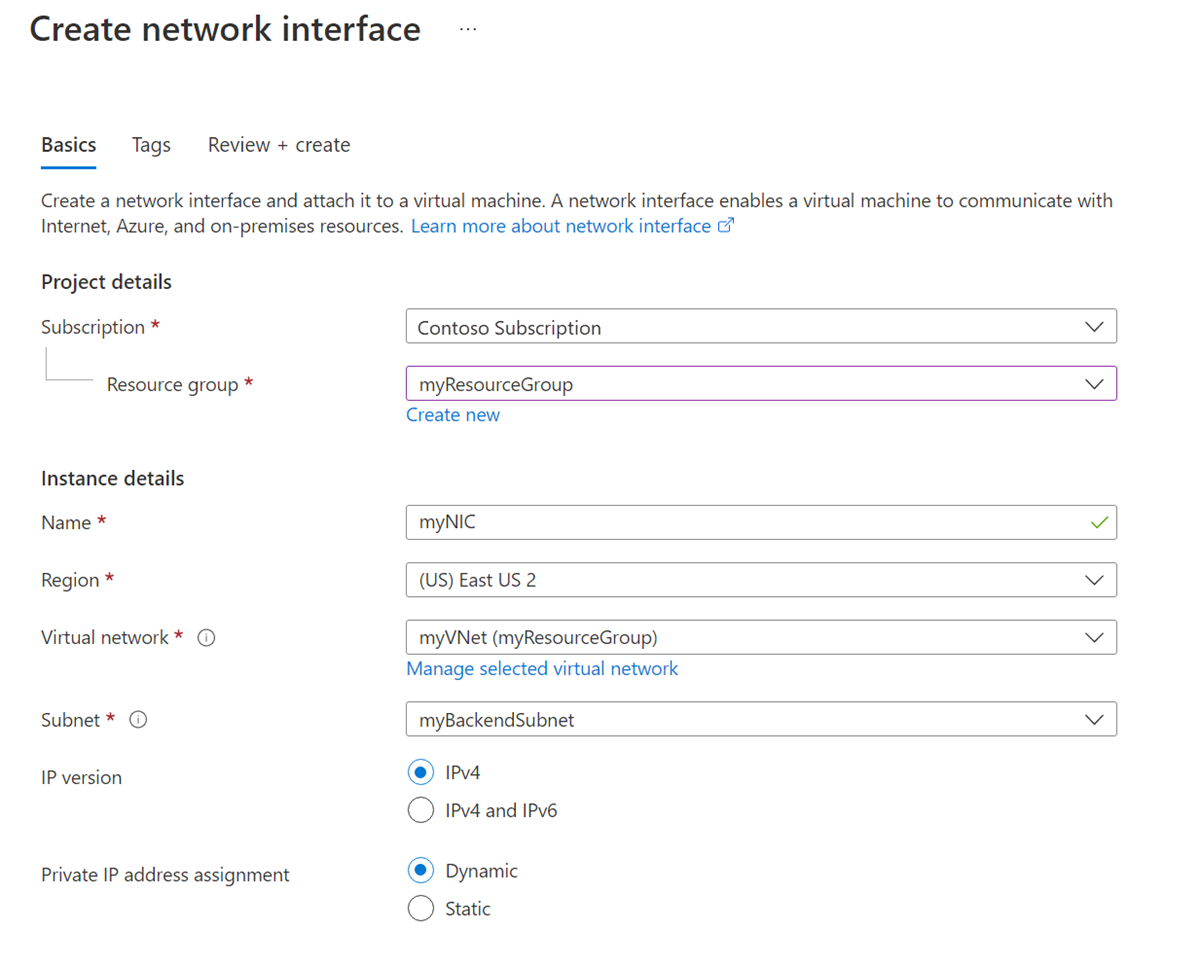
Select Review + create, and when validation passes, select Create.
You can configure the following settings for a NIC:
| Setting | Value | Details |
|---|---|---|
| Subscription | Select your subscription. | You can assign a NIC only to a virtual network in the same subscription and location. |
| Resource group | Select your resource group or create a new one. | A resource group is a logical container for grouping Azure resources. A NIC can exist in the same or a different resource group from the VM you attach it to or the virtual network you connect it to. |
| Name | Enter a name for the NIC. | The name must be unique within the resource group. For information about creating a naming convention to make managing several NICs easier, see Resource naming. You can't change the name after you create the NIC. |
| Region | Select your region. | The Azure region where you create the NIC. |
| Virtual network | Select your virtual network. | You can assign a NIC only to a virtual network in the same subscription and location as the NIC. Once you create a NIC, you can't change the virtual network it's assigned to. The VM you add the NIC to must also be in the same location and subscription as the NIC. |
| Subnet | Select a subnet within the virtual network you selected. | You can change the subnet the NIC is assigned to after you create the NIC. |
| IP version | Select IPv4 or IPv4 and IPv6. | You can choose to create the NIC with an IPv4 address or IPv4 and IPv6 addresses. To assign an IPv6 address, the network and subnet you use for the NIC must also have an IPv6 address space. An IPv6 configuration is assigned to a secondary IP configuration for the NIC. |
| Private IP address assignment | Select Dynamic or Static. | The Azure DHCP server assigns the private IP address to the NIC in the VM's operating system. - If you select Dynamic, Azure automatically assigns the next available address from the address space of the subnet you selected. - If you select Static, you must manually assign an available IP address from within the address space of the subnet you selected. Static and dynamic addresses don't change until you change them or delete the NIC. You can change the assignment method after the NIC is created. |
The default outbound access IP is disabled when one of the following events happens:
- A public IP address is assigned to the VM.
- The VM is placed in the backend pool of a standard load balancer, with or without outbound rules.
- An Azure NAT Gateway resource is assigned to the subnet of the VM.
VMs that you create by using virtual machine scale sets in flexible orchestration mode don't have default outbound access.
For more information about outbound connections in Azure, see Default outbound access in Azure and Use Source Network Address Translation (SNAT) for outbound connections.
View network interface settings
You can view most settings for a NIC after you create it. The portal doesn't display the DNS suffix or application security group membership for the NIC. You can use Azure PowerShell or Azure CLI to view the DNS suffix and application security group membership.
In the Azure portal, search for and select Network interfaces.
On the Network interfaces page, select the NIC you want to view.
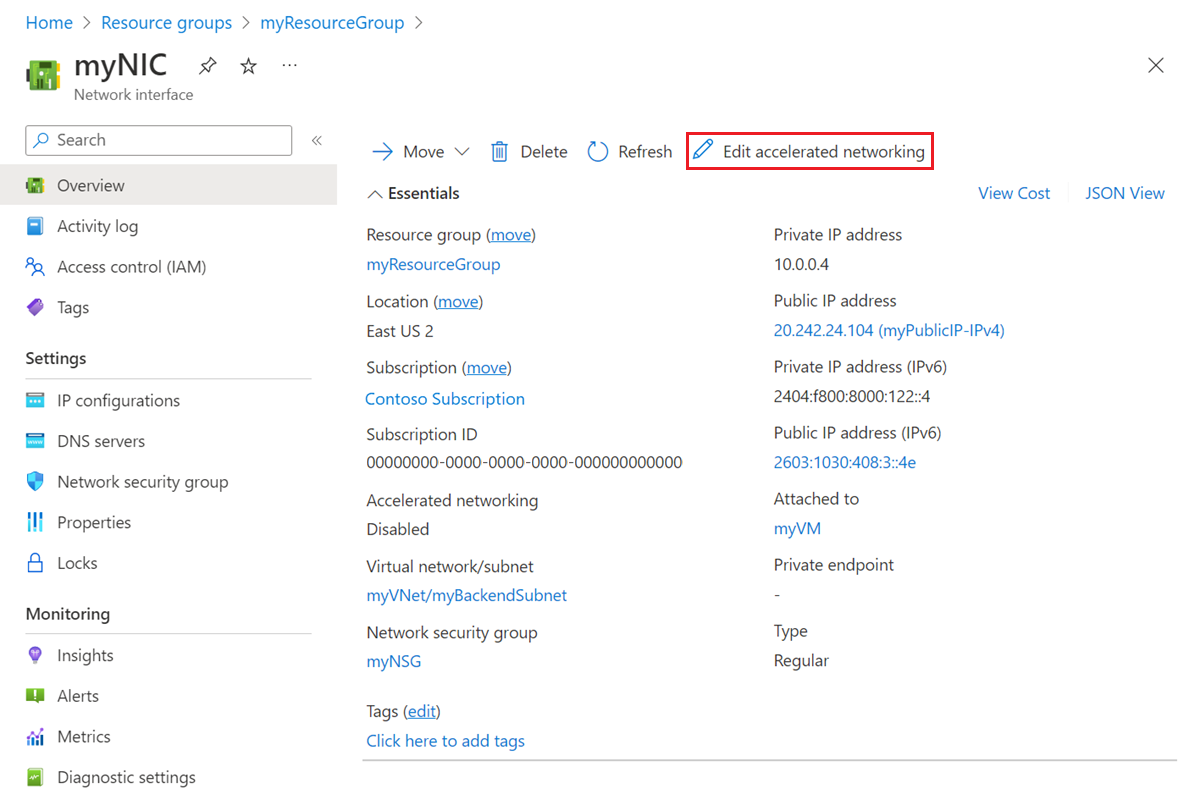
On the Overview page for the NIC, view essential information such as IPv4 and IPv6 IP addresses and network security group (NSG) membership.
You can select Edit accelerated networking to set accelerated networking for NICs. For more information about accelerated networking, see What is Accelerated Networking?
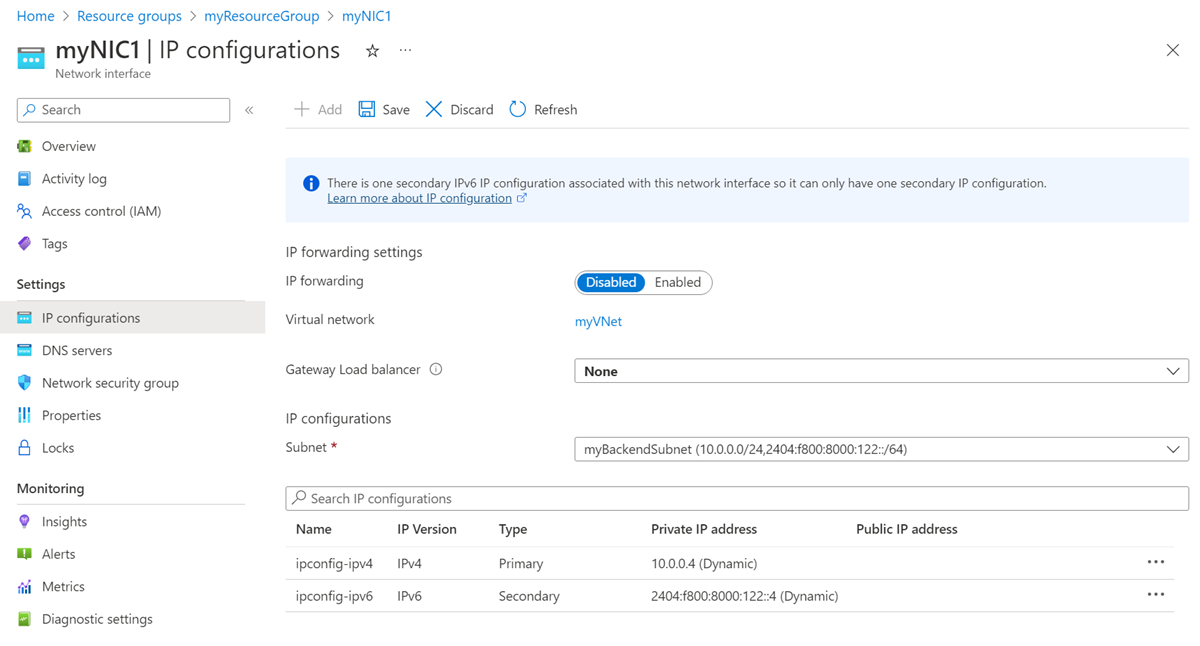
Select IP configurations in the left navigation, and on the IP configurations page, view the IP forwarding, Subnet, and public and private IPv4 and IPv6 IP configurations. For more information about IP configurations and how to add and remove IP addresses, see Configure IP addresses for an Azure network interface.
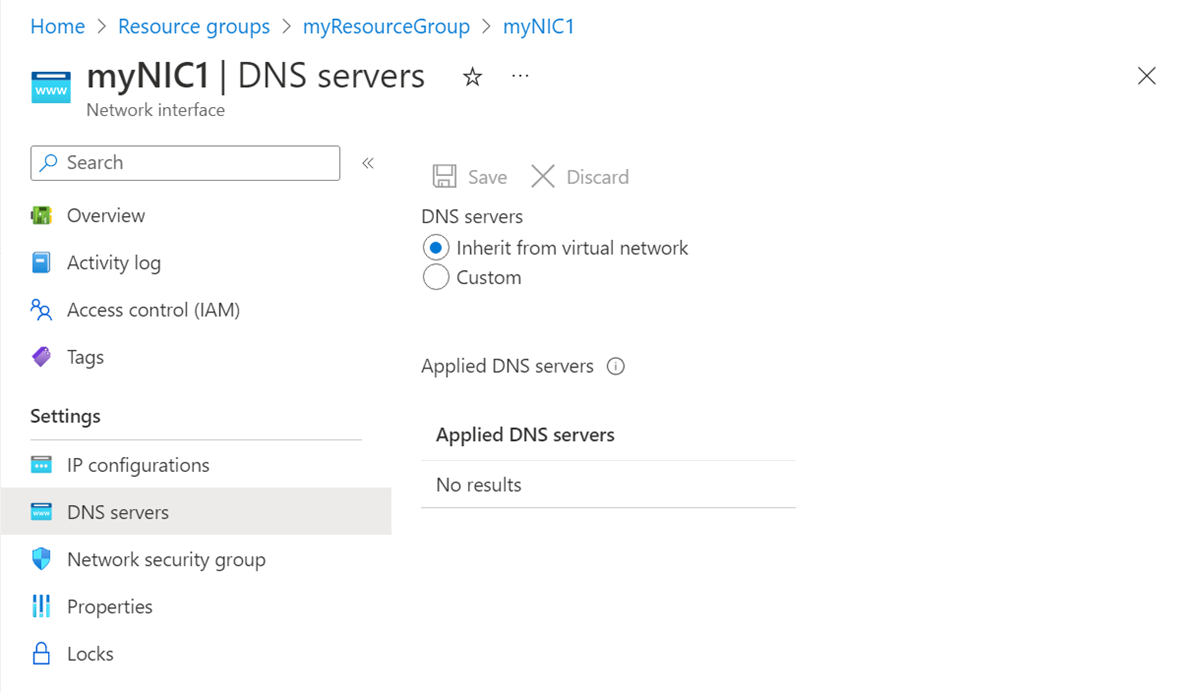
Select DNS servers in the left navigation, and on the DNS servers page, view any DNS server that Azure DHCP assigns the NIC to. Also note whether the NIC inherits the setting from the virtual network or has a custom setting that overrides the virtual network setting.
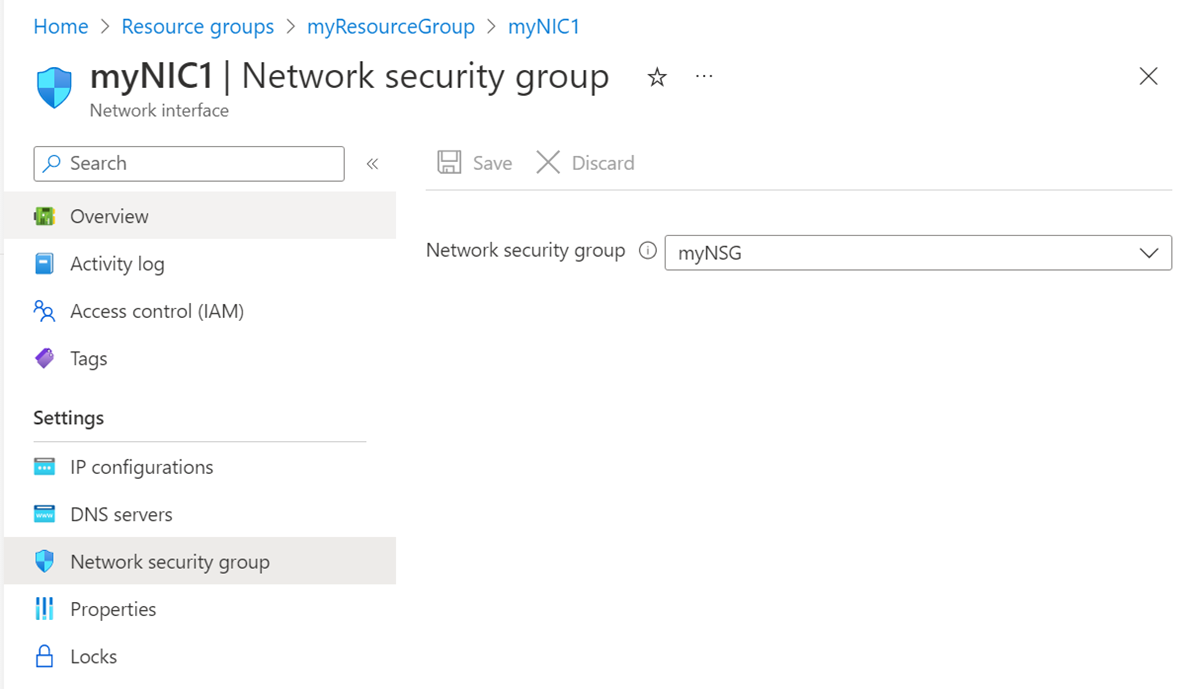
Select Network security group from the left navigation, and on the Network security group page, see any NSG that's associated to the NIC. An NSG contains inbound and outbound rules to filter network traffic for the NIC.
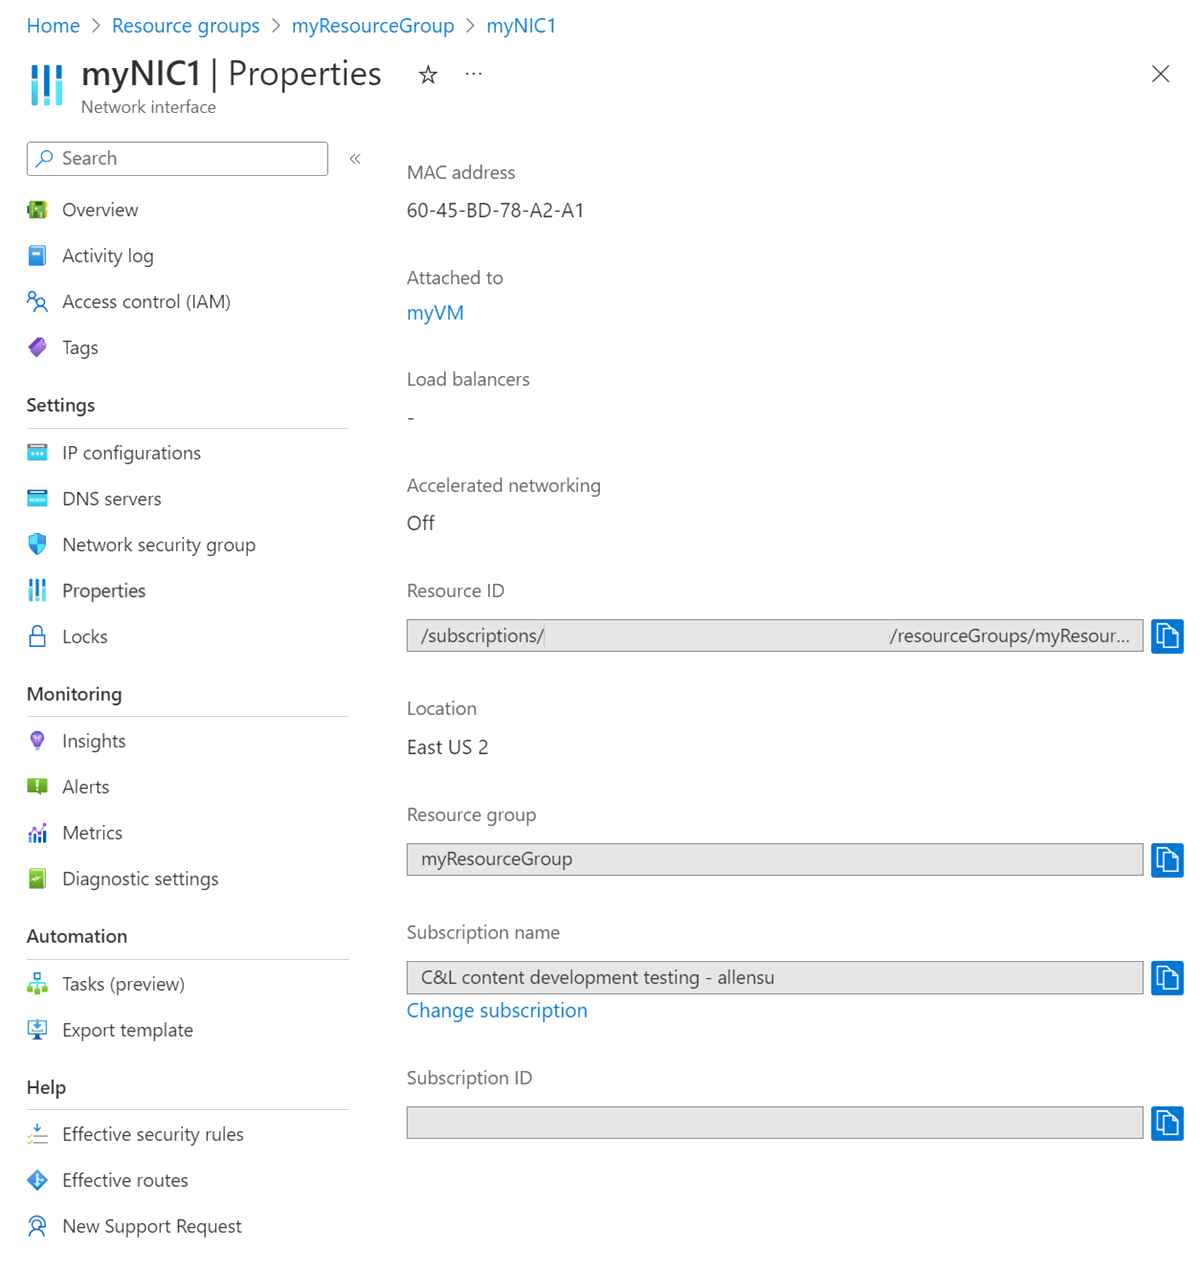
Select Properties in the left navigation. On the Properties page, view settings for the NIC, such as the MAC address and subscription information. The MAC address is blank if the NIC isn't attached to a VM.
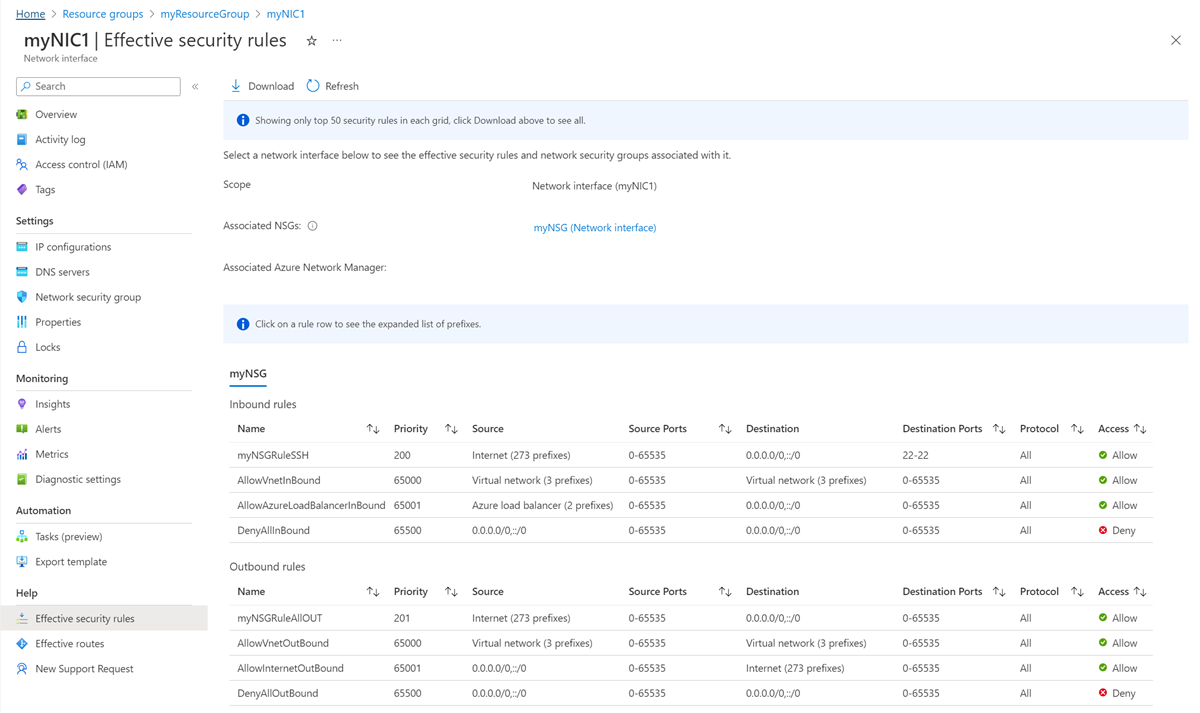
Select Effective security rules in the left navigation. The Effective security rules page lists security rules if the NIC is attached to a running VM and associated with an NSG. For more information about NSGs, see Network security groups.
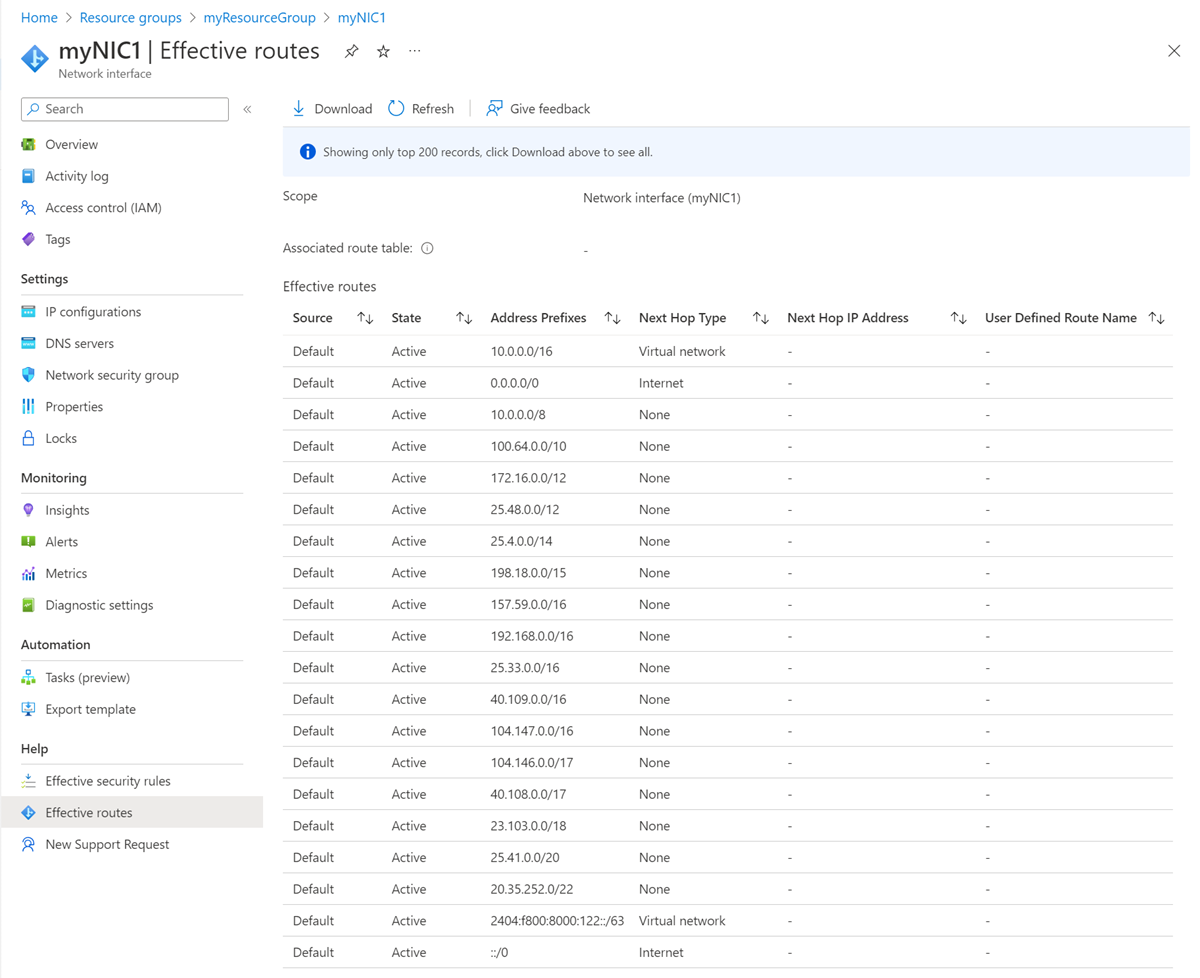
Select Effective routes in the left navigation. The Effective routes page lists routes if the NIC is attached to a running VM.
The routes are a combination of the Azure default routes, any user-defined routes, and any Border Gateway Protocol (BGP) routes that exist for the subnet the NIC is assigned to. For more information about Azure default routes and user-defined routes, see Virtual network traffic routing.
Change network interface settings
You can change most settings for a NIC after you create it.
Add or change DNS servers
Azure DHCP assigns the DNS server to the NIC within the VM operating system. The NIC can inherit the settings from the virtual network, or use its own unique settings that override the setting for the virtual network. For more information about name resolution settings for a NIC, see Name resolution for virtual machines.
In the Azure portal, search for and select Network interfaces.
On the Network interfaces page, select the NIC you want to change from the list.
On the NIC's page, select DNS servers from the left navigation.
On the DNS servers page, select one of the following settings:
Inherit from virtual network: Choose this option to inherit the DNS server setting from the virtual network the NIC is assigned to. Either a custom DNS server or the Azure-provided DNS server is defined at the virtual network level.
The Azure-provided DNS server can resolve hostnames for resources assigned to the same virtual network. The fully qualified domain name (FQDN) must be used for resources assigned to different virtual networks.
Custom: You can configure your own DNS server to resolve names across multiple virtual networks. Enter the IP address of the server you want to use as a DNS server. The DNS server address you specify is assigned only to this NIC and overrides any DNS setting for the virtual network the NIC is assigned to.
Select Save.
Enable or disable IP forwarding
IP forwarding enables a NIC attached to a VM to:
- Receive network traffic not destined for any of the IP addresses assigned in any of the NIC's IP configurations.
- Send network traffic with a different source IP address than is assigned in any of the NIC's IP configurations.
You must enable IP forwarding for every NIC attached to the VM that needs to forward traffic. A VM can forward traffic whether it has multiple NICs or a single NIC attached to it.
IP forwarding is typically used with user-defined routes. For more information, see User-defined routes.
While IP forwarding is an Azure setting, the VM must also run an application that's able to forward the traffic, such as a firewall, WAN optimization, or load balancing application. A VM that runs network applications is often called a network virtual appliance (NVA). You can view a list of ready-to-deploy NVAs in the Azure Marketplace.
- On the NIC's page, select IP configurations in the left navigation.
- On the IP configurations page, under IP forwarding settings, select Enabled or Disabled, the default, to change the setting.
- Select Save.
Change subnet assignment
You can change the subnet, but not the virtual network, that a NIC is assigned to.
On the NIC's page, select IP configurations in the left navigation.
On the IP configurations page, under IP configurations, if any private IP addresses listed have (Static) next to them, change the IP address assignment method to dynamic. All private IP addresses must be assigned with the dynamic assignment method to change the subnet assignment for the NIC.
To change the assignment method to dynamic:
- Select the IP configuration you want to change from the list of IP configurations.
- On the IP configuration page, select Dynamic under Assignment.
- Select Save.
When all private IP addresses are set to Dynamic, under Subnet, select the subnet you want to move the NIC to.
Select Save. New dynamic addresses are assigned from the new subnet's address range.
After assigning the NIC to a new subnet, you can assign a static IPv4 address from the new subnet address range if you choose. For more information about adding, changing, and removing IP addresses for a NIC, see Configure IP addresses for an Azure network interface.
Add or remove from application security groups
You can add NICs only to application security groups in the same virtual network and location as the NIC.
You can use the portal to add or remove a NIC for an application security group only if the NIC is attached to a VM. Otherwise, use PowerShell or Azure CLI. For more information, see Application security groups and How to create an application security group.
To add or remove a NIC for an application security group on a VM, follow this procedure:
In the Azure portal, search for and select virtual machines.
On the Virtual machines page, select the VM you want to configure from the list.
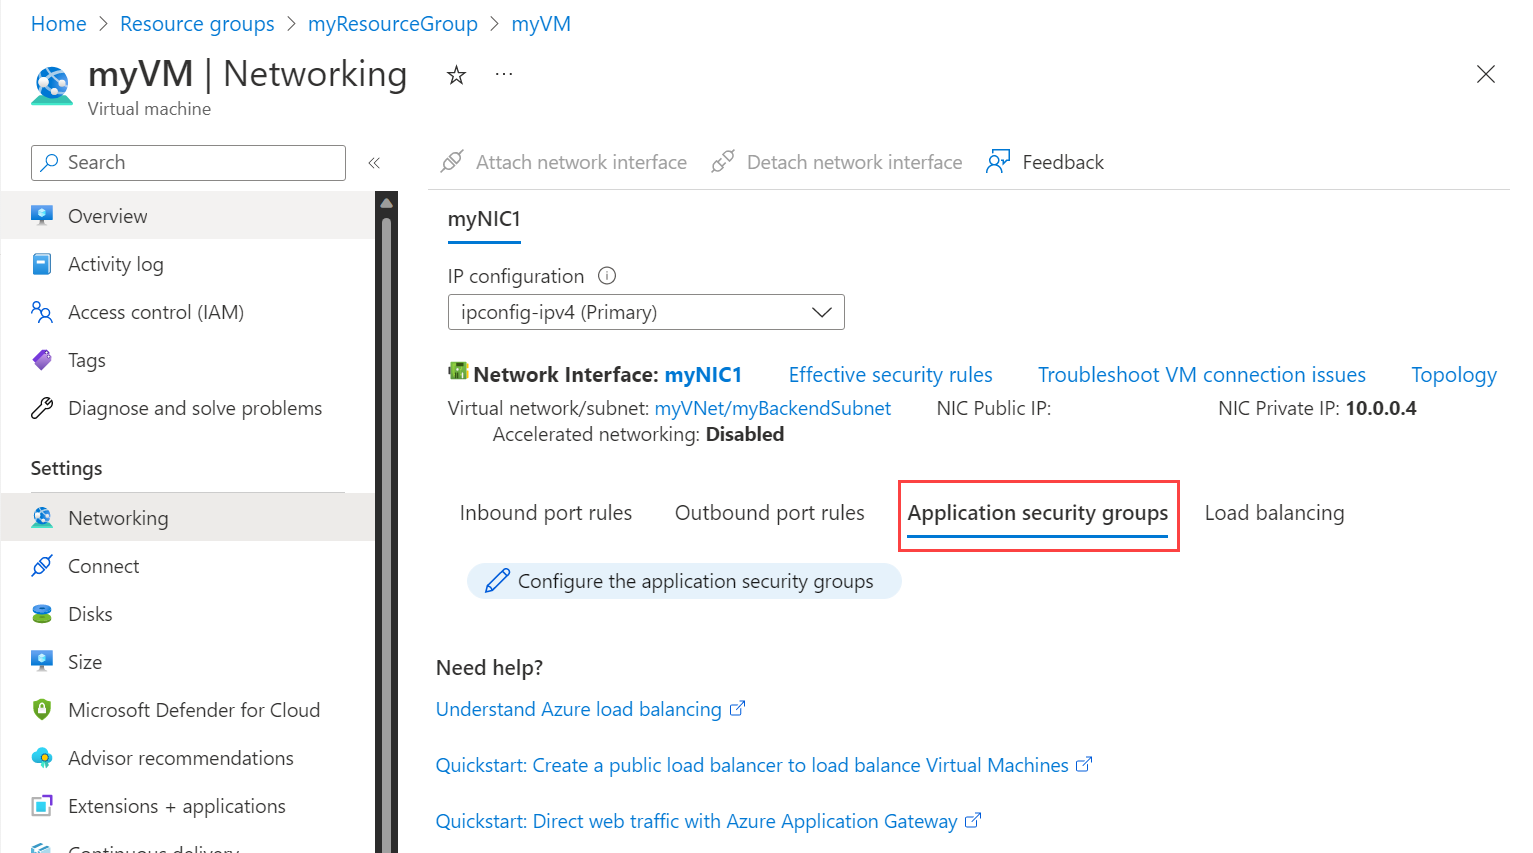
On the VM's page, select Networking from the left navigation.
On the Networking page, under the Application security groups tab, select Configure the application security groups.
Select the application security groups you want to add the NIC to, or deselect the application security groups you want to remove the NIC from.
Select Save.
No comments:
Post a Comment