1. Introduction
ADM’s batch creation function allows you to quickly create multiple regular sequential user accounts (e.g., student numbers). With regards to irregular non-sequential account creation, you can enter account data into a text file (*.txt, *.csv) and then import it into ADM to create accounts.
2. Creating Accounts
2.1 Batch creation of ADM accounts
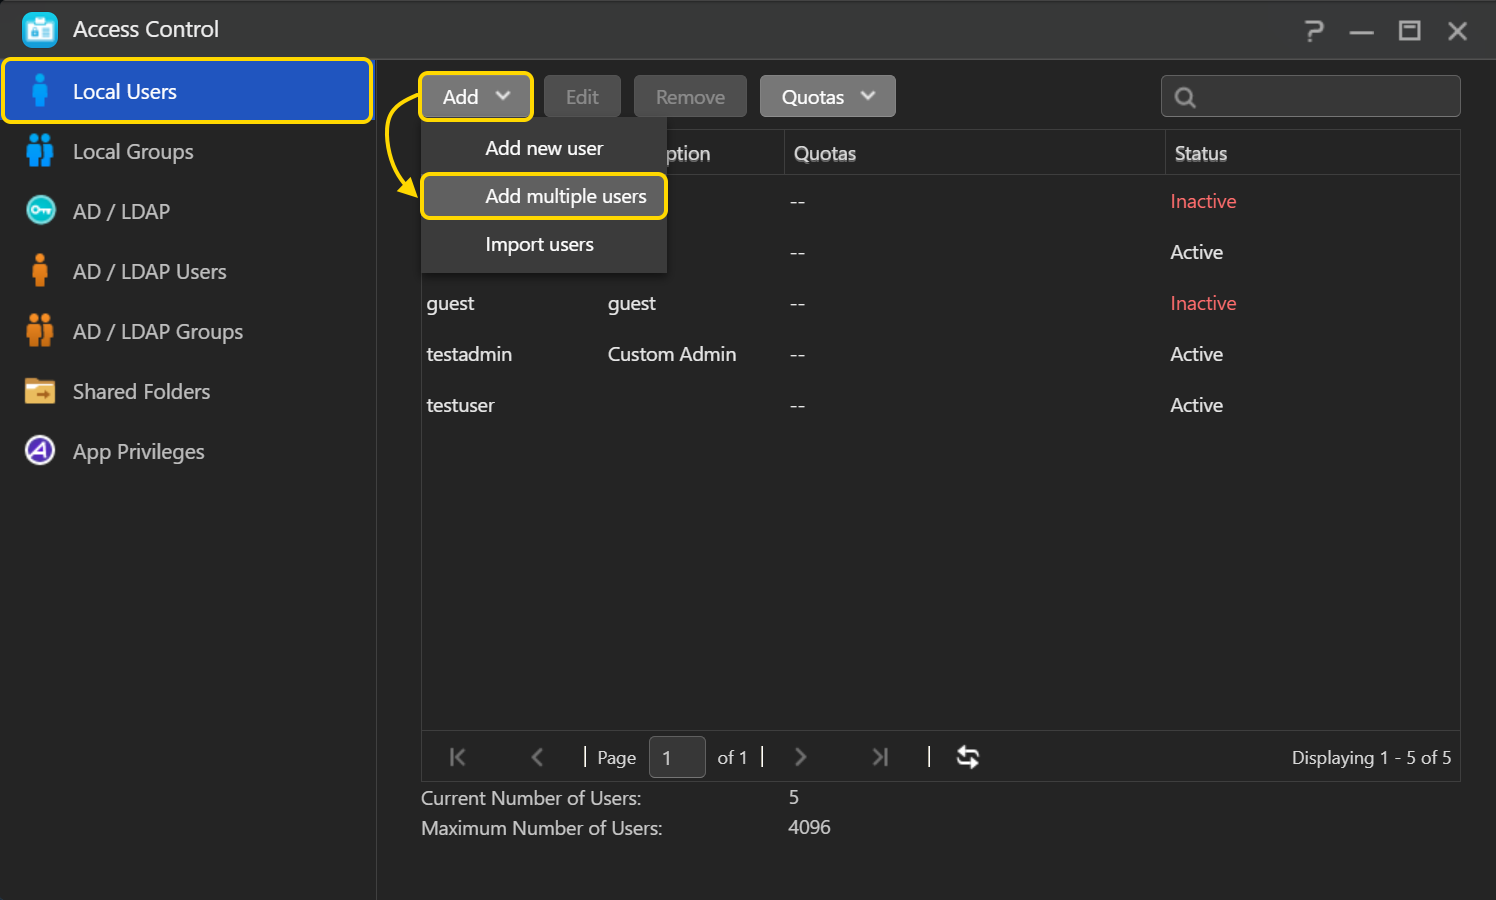
STEP 1
- Log into ADM and then select [Access Control] [Local Users] [Add] [Add multiple users].
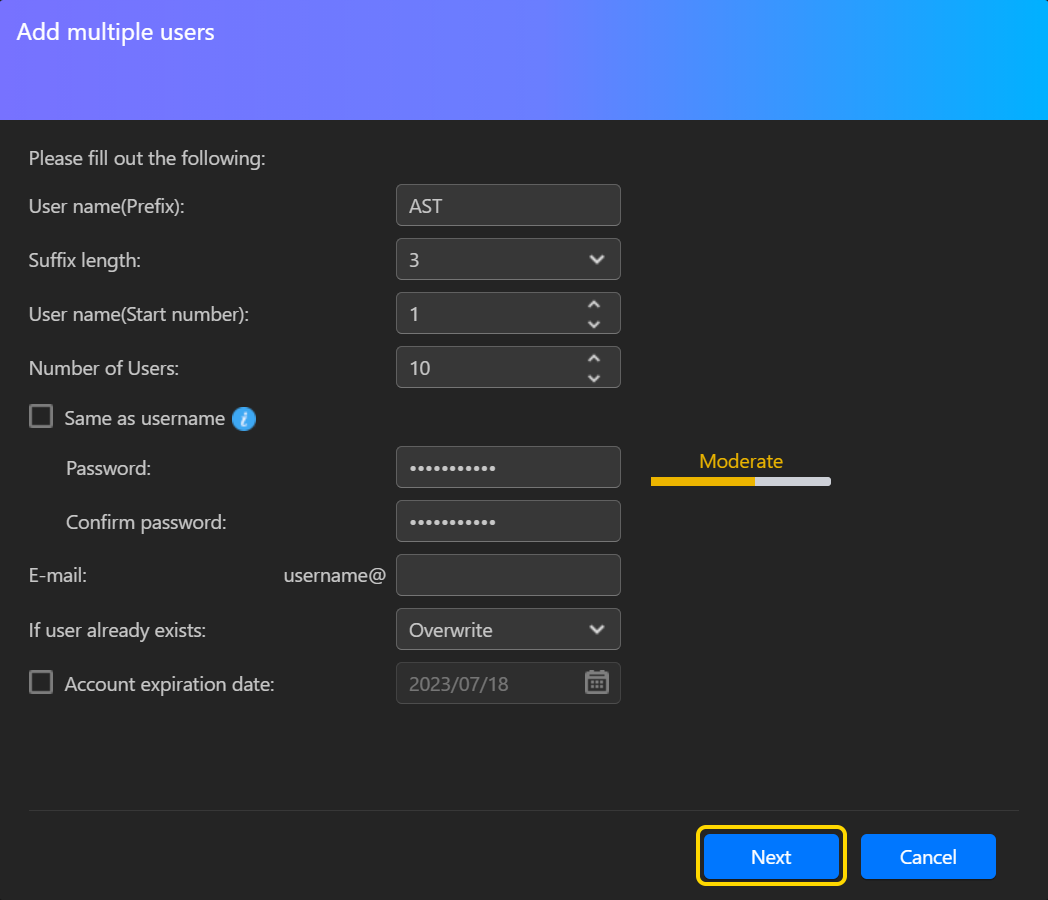
STEP 2
- Fill out the following information:
- User name (prefix): Enter a prefix that you would like to be used at the beginning of each user name. In the example below we have used "AST". "AST" will now appear at the beginning of each username for the accounts we create.
- Suffix length: Select the number of digits that you would like to use in the username suffix. The username suffix comes immediately after the prefix in a username and consists of numerical digits only.
- User name (start number): Enter the start number that you would like to use in the suffix of the first user. The other users will then be created sequentially based on the start number of this user.
- Number of users: Enter the number of users that you wish to create.
- Password: Enter a password of your choice. You can also choose to select the [Same as username] checkbox to make all passwords the same as the usernames.
- Confirm password: Enter your password again to confirm it.
- E-mail: Enter an e-mail address for the accounts (optional).
- If user already exists: Select either [Overwrite] or [Skip]. If ADM encounters a user with the same name as one you are trying to create it will automatically either overwrite the existing user or skip the creation of the new user.
- Account expiration date: Select this checkbox if you wish to set an expiration date for the accounts you are about to create (optional).
- Click on [Next] after you have filled out all of the relevant information.
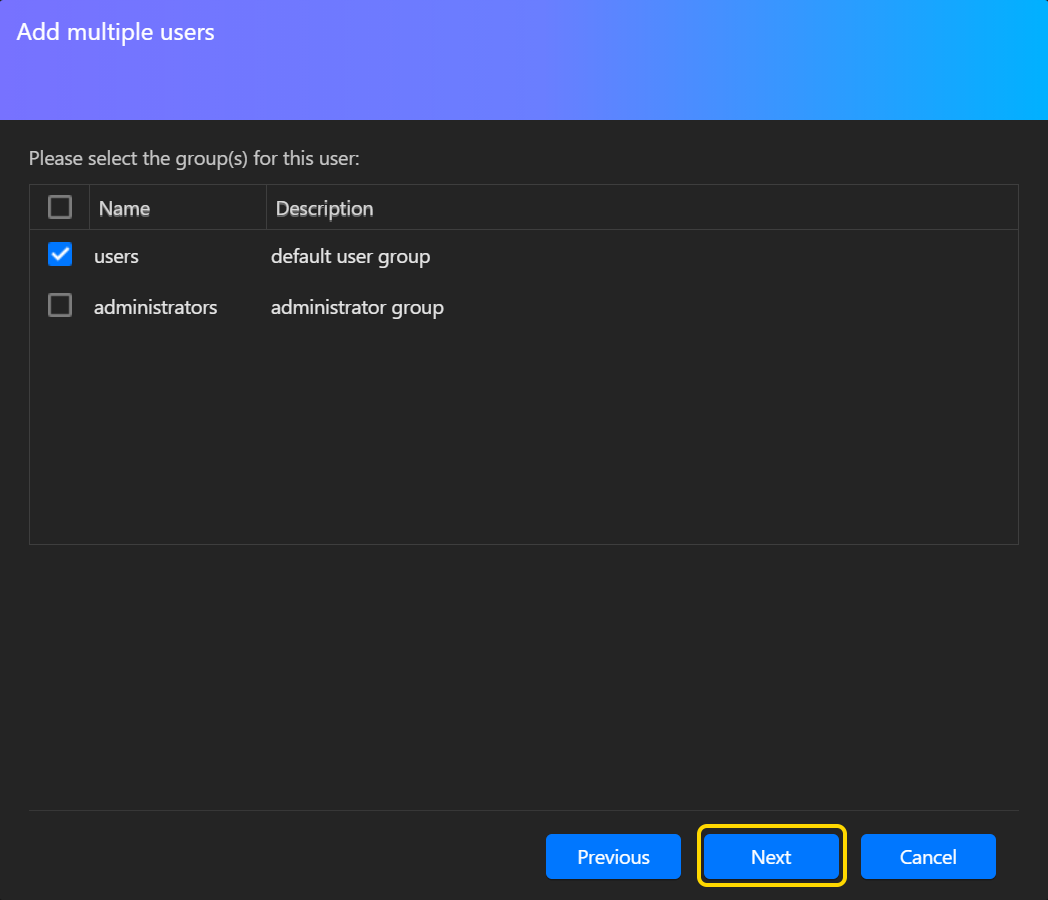
STEP 3
- Select the group(s) for the users you are about to create.
- Click on [Next] once you are done.
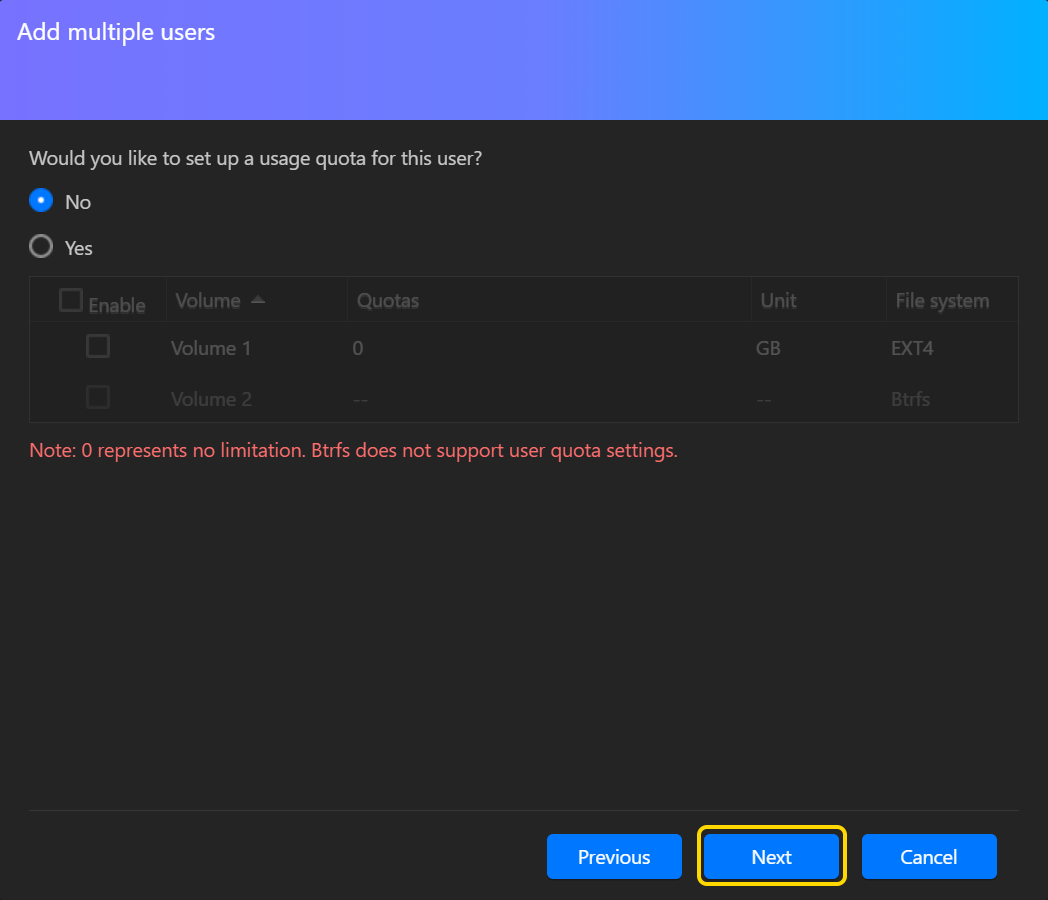
STEP 4
- Here you will be able to create a usage quota for the users if you wish.
- Click on [Next] once you are done.
Note: Btrfs does not support user quota settings.
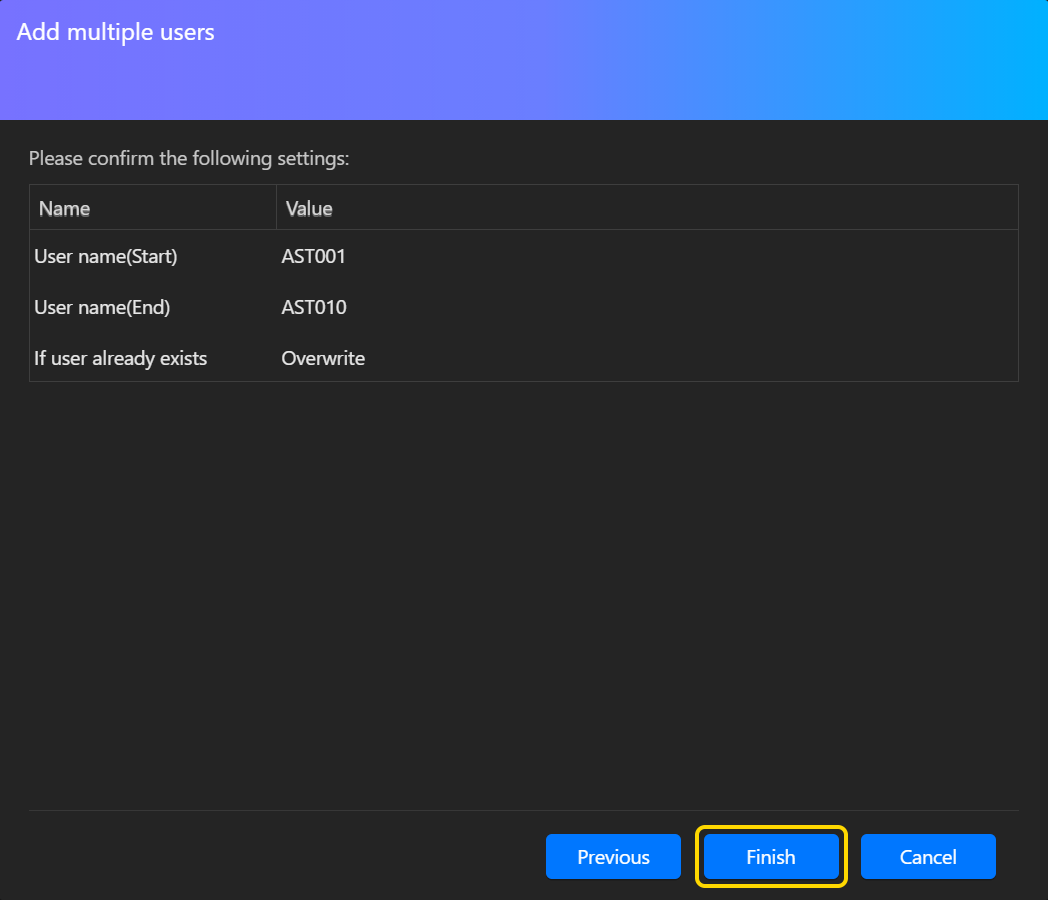
STEP 5
- Here you will be able to view a summary of the settings for the users accounts you are about to create.
- Click on [Finish] once you have confirmed the settings.
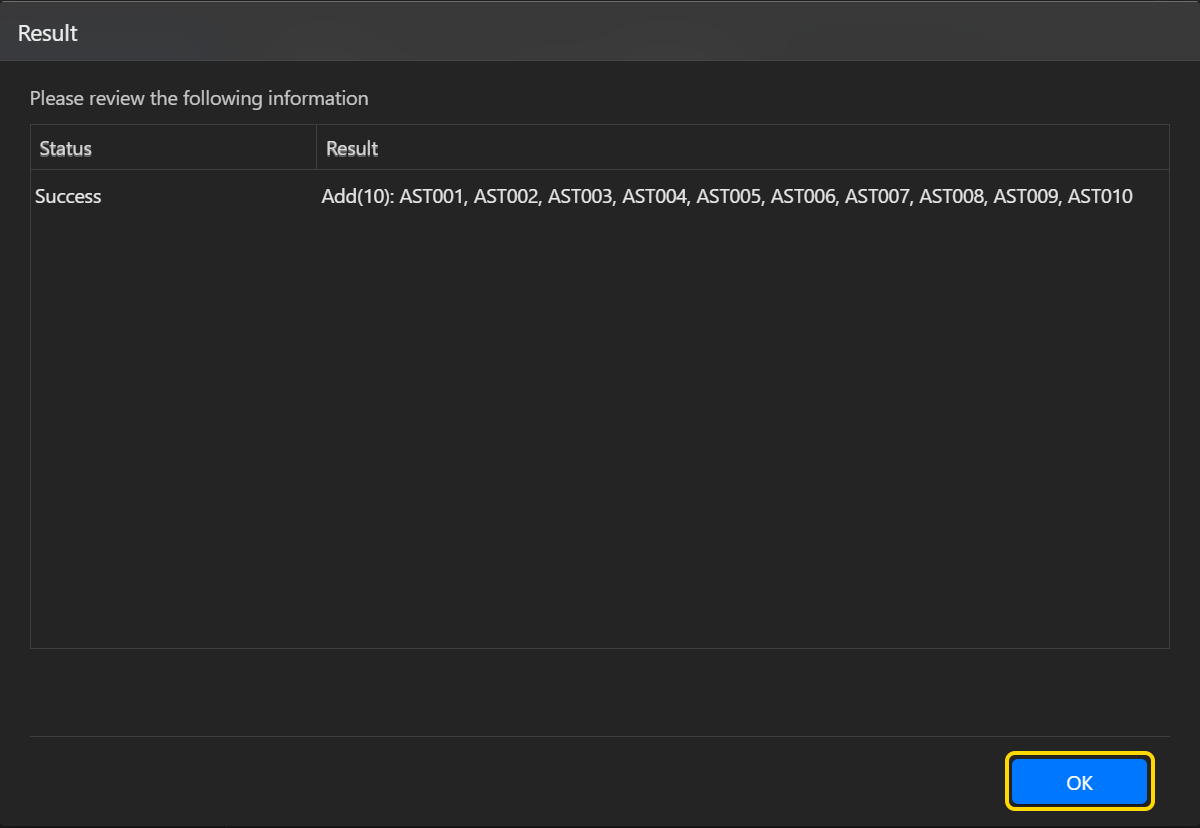
STEP 6
- Now you will be able to see if the new accounts were created successfully along with a list of the user accounts created. Click on [OK].
- The batch of accounts should now have been created successfully.
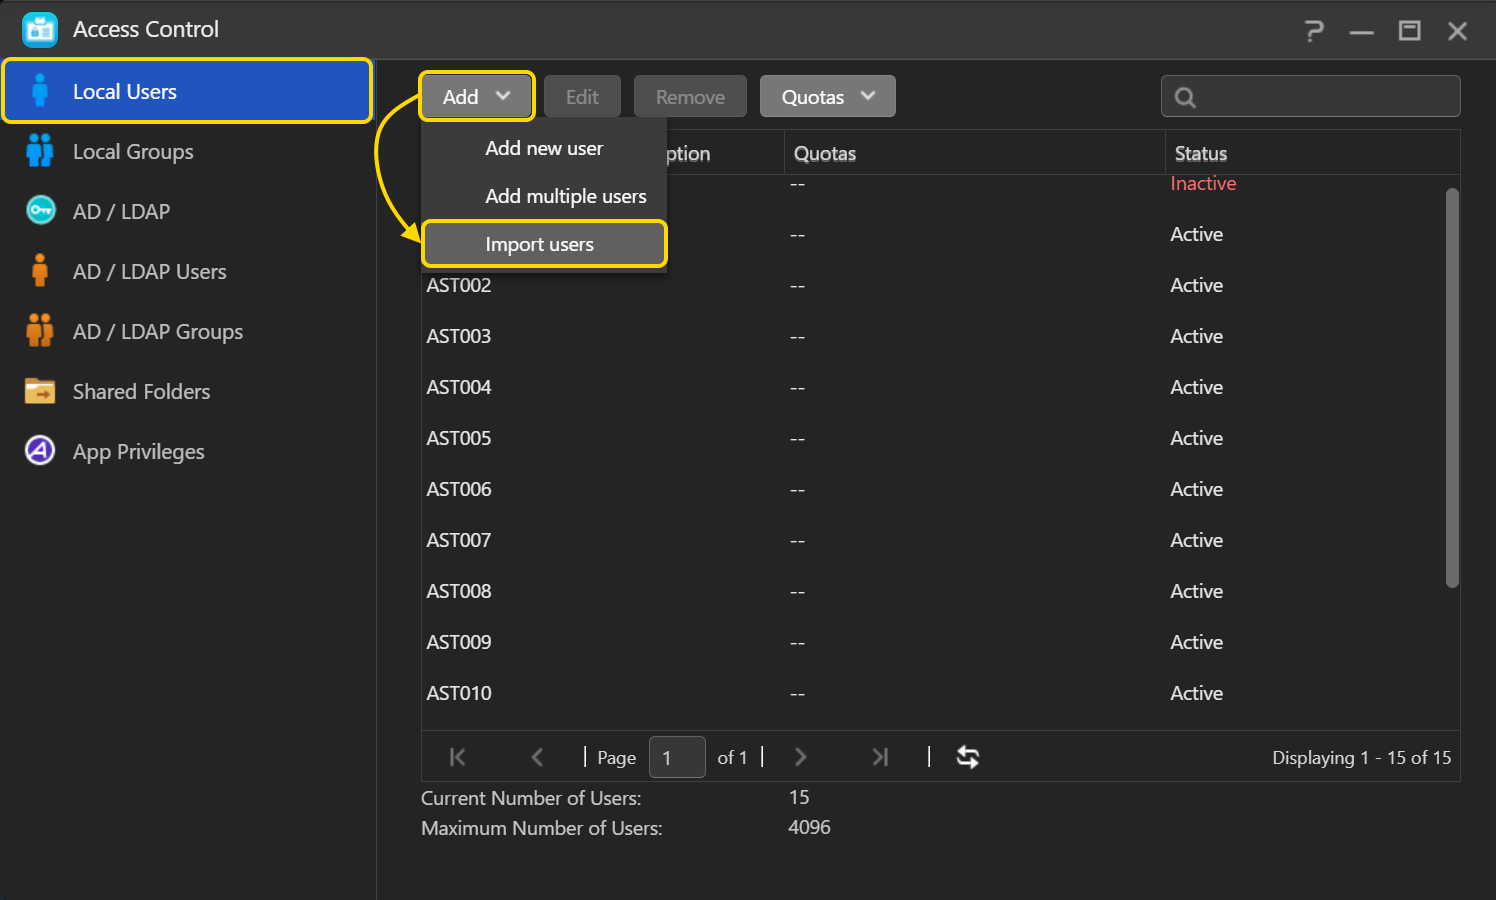
2.2 Importing a batch of accounts to ADM
STEP 1
- Log into ADM and then select [Access Control] [Local Users] [Add] [Import users].
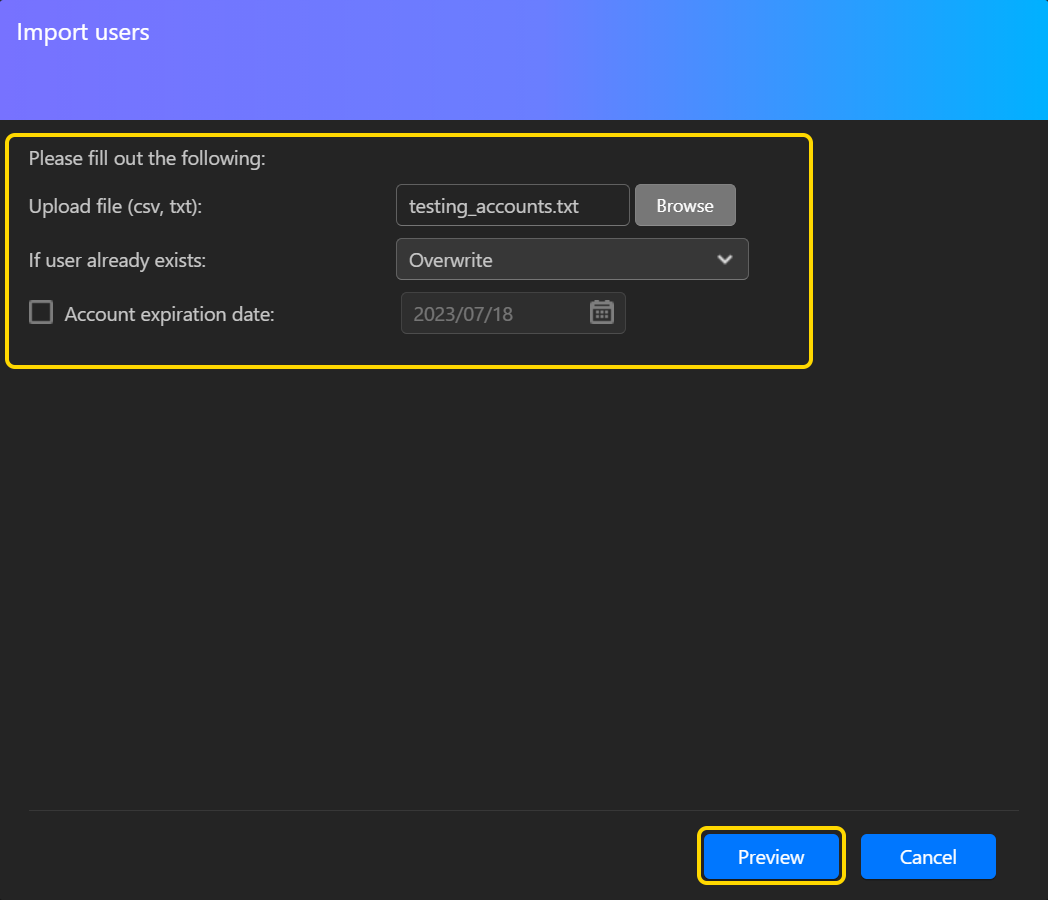
STEP 2
- Fill out the following information:
- Upload file (csv, txt): Click on the [Browse] button and then select the account file that you wish to use. For more information on creating suitable account files for ADM, please see the Notes section at the end of this document.
- If user already exists: Select either [Overwrite] or [Skip]. If ADM encounters a user with the same name as one you are trying to create it will automatically either overwrite the existing user or skip the creation of the new user.
- Account expiration date: Select this checkbox if you wish to set an expiration date for the accounts you are about to create (optional).
- Click on [Preview] once you have filled out all of the relevant information.
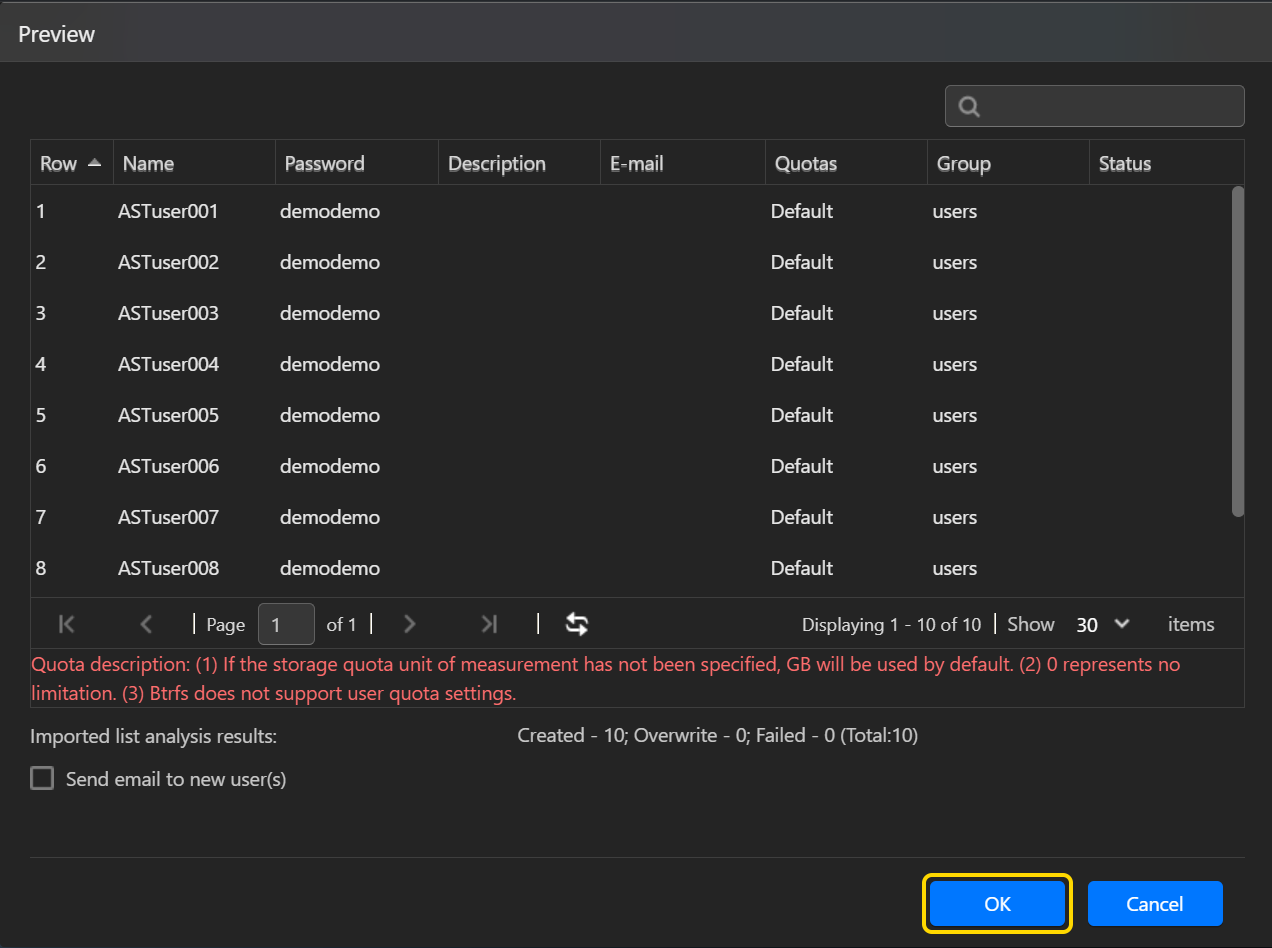
STEP 3
- You will now be able to see a preview and summary of the accounts that you are about to create.
- Click on [OK] to begin creating the accounts.
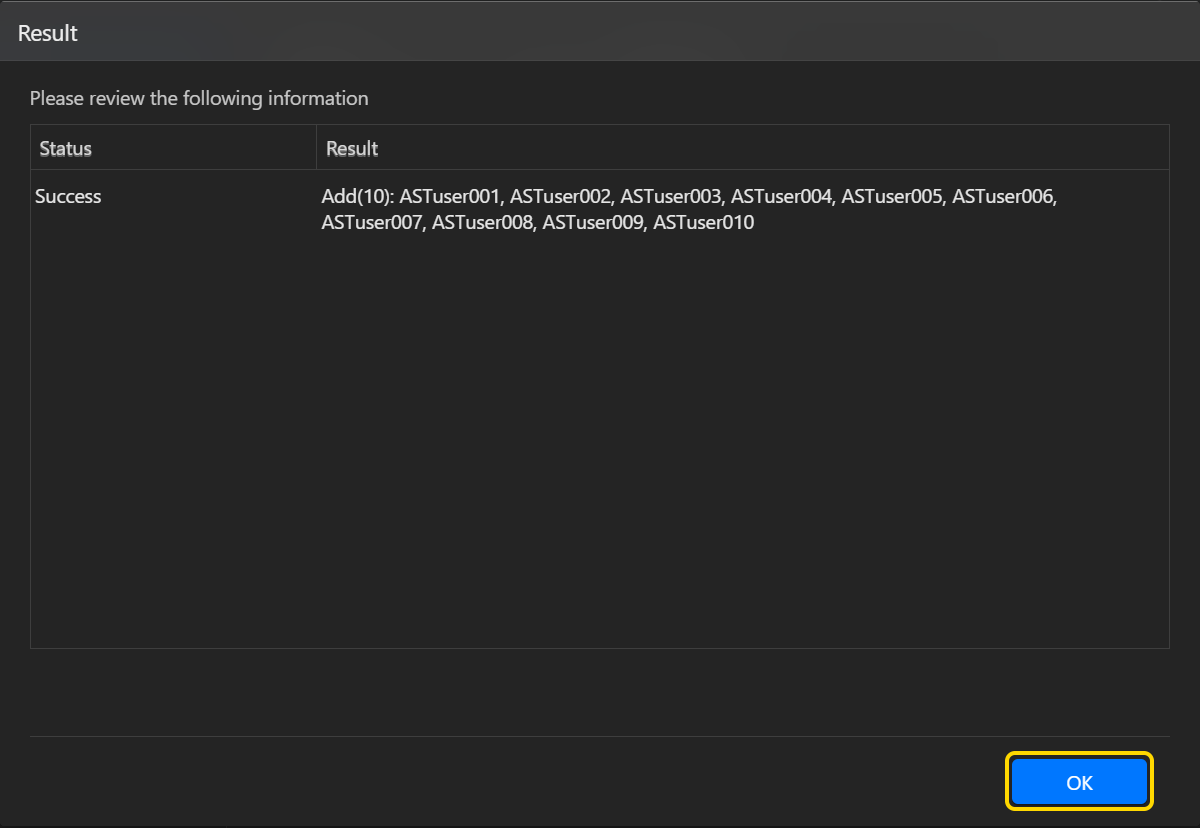
STEP 4
- Now you will be able to see if the new accounts were created successfully along with a list of the user accounts created. Click on [OK].
- The batch of accounts should now have been successfully created.
No comments:
Post a Comment