Introduction
When we are working with any web application development project, we need to publish that on production server continuously. Before introduced CI/CD we are doing that by manual code uploading on ec2 server or using other method for deployment. But do not need to do that because AWS providing services for automate deployment of your application on production server without taking care of other background process.
Using CI/CD pipeline we can automate the complete workflow of our application for build, testing and deployment on a production server. So whenever we commit any code changes on git repo, it will start execution. Let us understand each of the services and its use for the CI/CD process.
In this article, we will learn how to set up a CI/CD pipeline using AWS services like AWS codePipeline, AWS codeBuild, AWS codeDeploy, AWS s3 bucket and AWS ec2. We will use Next.js as technology for auto deployment on ec2 server.
Code pipeline
CodePipeline is the primary service for continuous integration and continuous delivery service for fast, secure and reliable application deployment. CodePipeline builds, tests, and deploys your code every time if there is a code change, based on the release process models you define in CodePipeline settings.
Code build
It is a continuous integration service that compiles source code, runs tests, and produces ready to deploy software packages. With CodeBuild, you don’t need to provision, manage, and scale your own build servers. CodeBuild scales continuously and processes multiple builds concurrently, so your builds are not left waiting in a queue.
Code Deploy
CodeDeploy is a fully managed deployment service that automates software deployments to compute services such as Amazon EC2, AWS Lambda, and your on-premises servers. AWS CodeDeploy makes it easier for you to rapidly release new features, helps you avoid downtime during application deployment, and handles the complexity of updating your applications
Let’s start with the code deploy first, as we need our application ready in code deploy before we create the pipeline.
Let’s start with Pipeline and in the same process we will create a build project & application.
To use Code Deploy, We have to create an application first in the left hand side Deploy section.
Click on create Application.
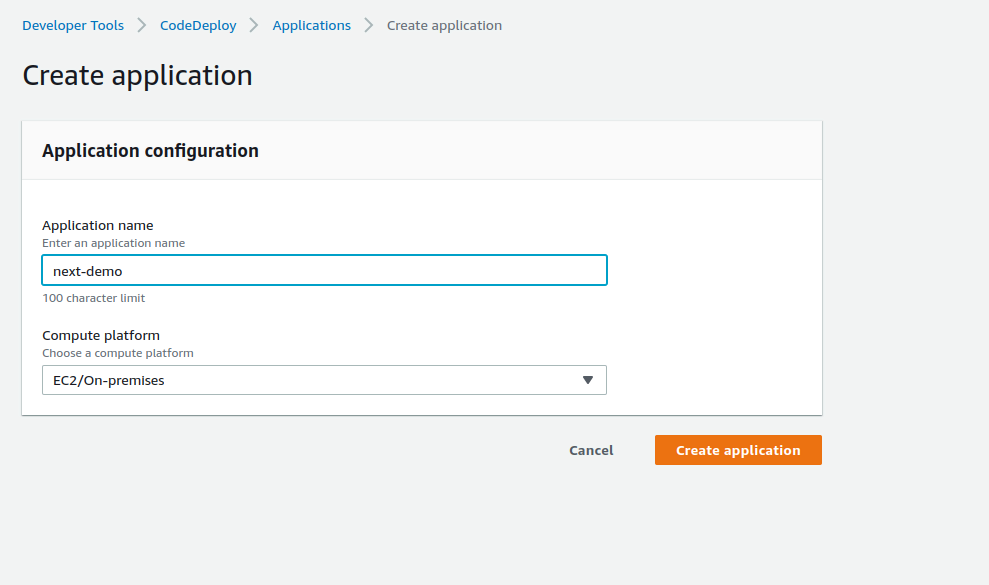
You can choose a different computer platform as per your requirement.
Once you create an application, Go to Deployment groups inside your newly created application.
Provide deployment group, And service role. Which should have access to codeDeploy.
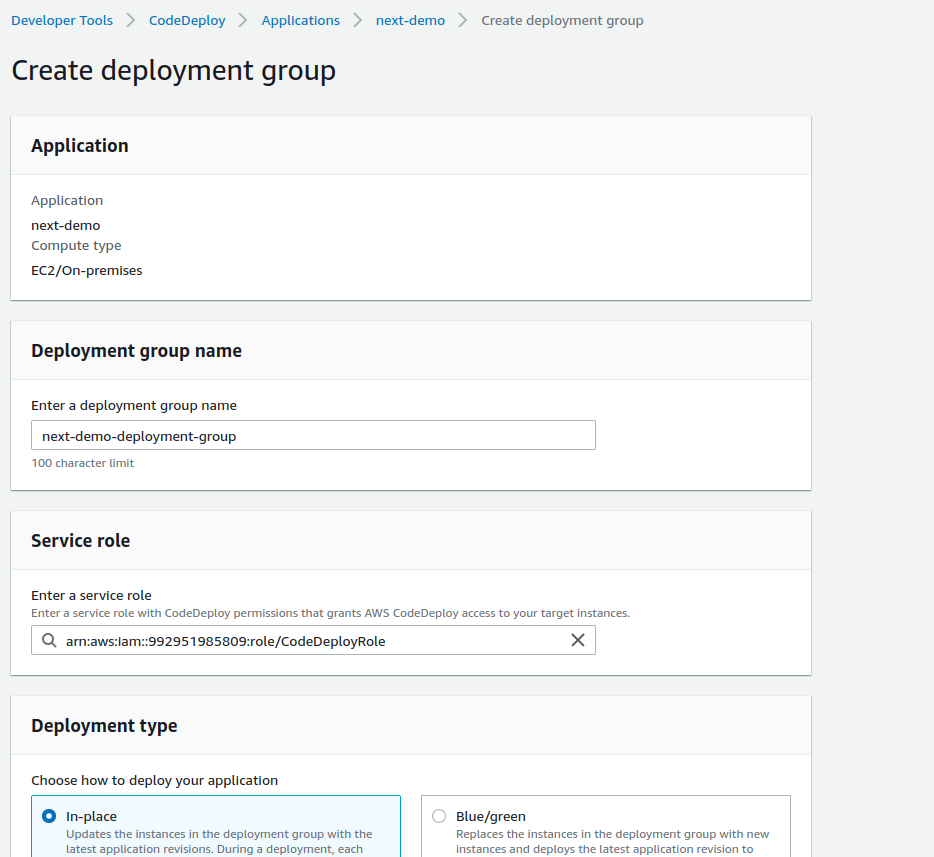
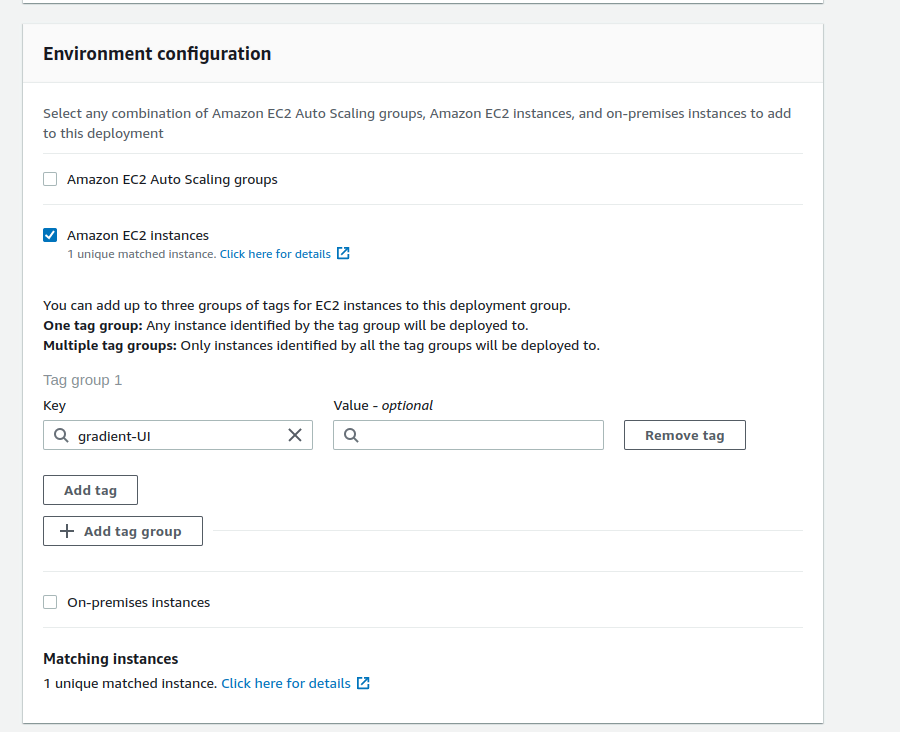
Choose Deployment Type. And In environment Configuration, Choose your appropriate option as per your requirement.
In Agent configuration with AWS Systems Manager, choose the option whether you want to allow the installation of the CodeDeploy Agent on all instances and update it based on the configured frequency.
Choose deployment settings options. Disabled load balancer if you don’t want to manage incoming traffic during the deployment process.
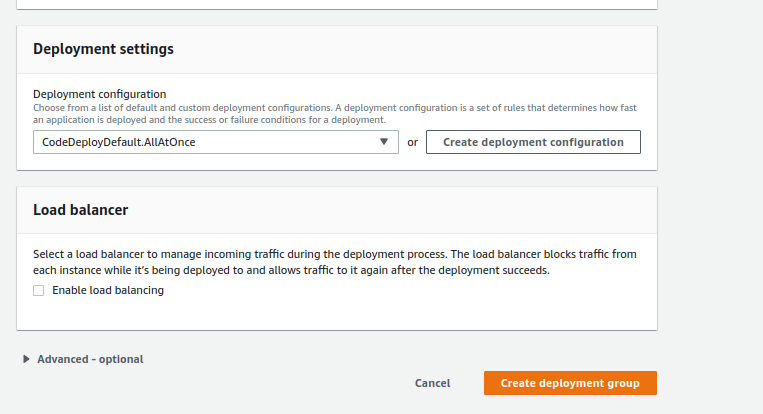
Once you are all set, create a deployment group.
Now Let’s start with the Pipeline. To create a new pipeline, you can search the code pipeline in the AWS console search bar. Go to pipelines, and click on Create pipeline.
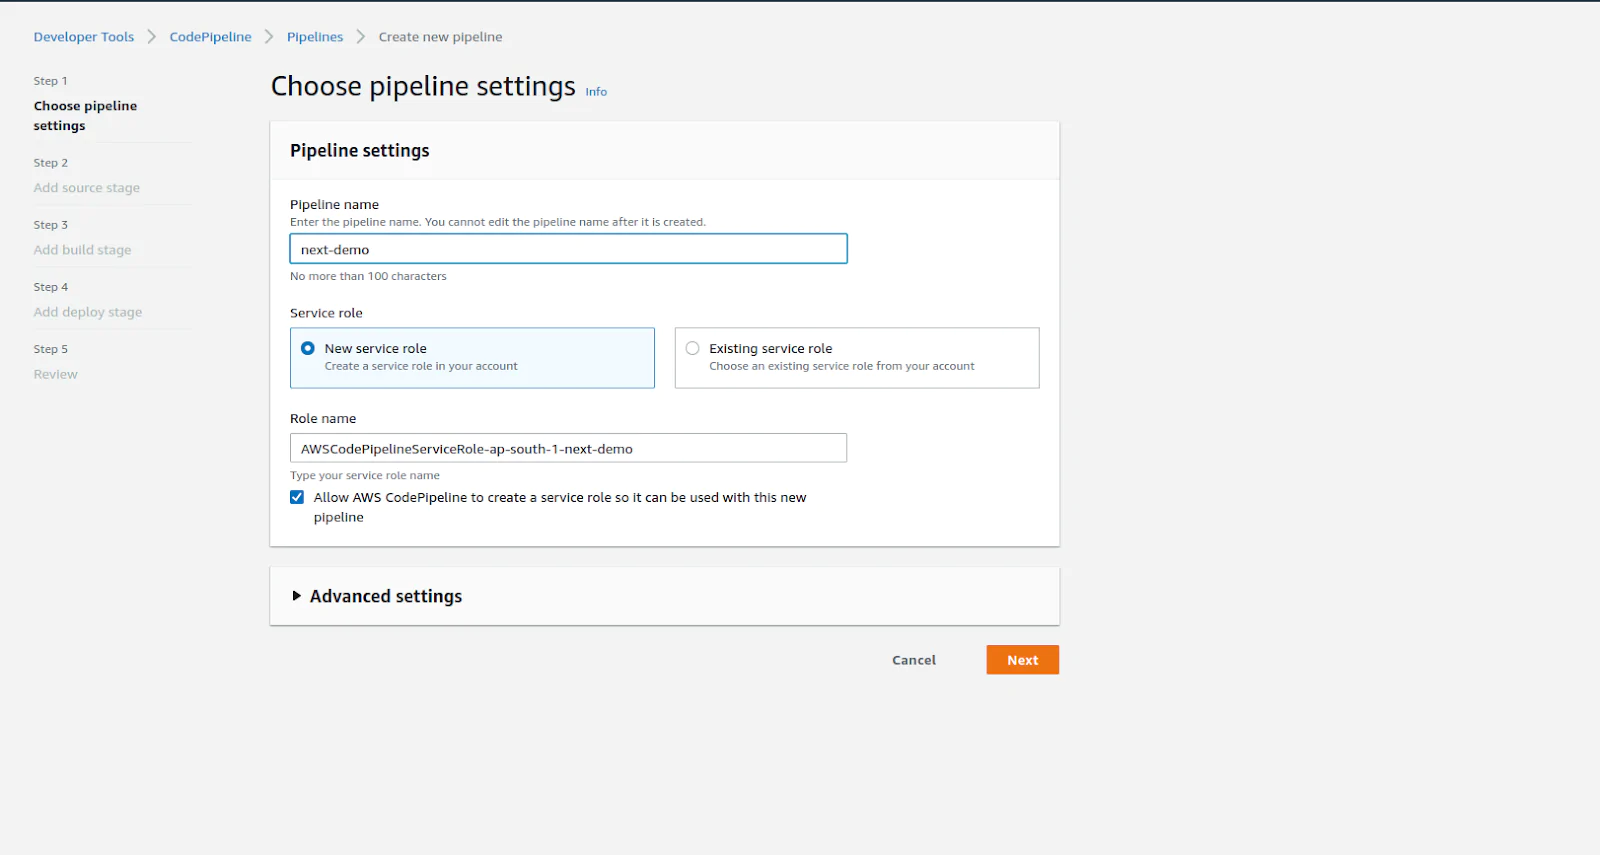
Pipeline settings
Enter your pipeline name (Generally your project name with environment), Allow AWS to create a new role or you can use an already existing role if created in AWS for pipeline.
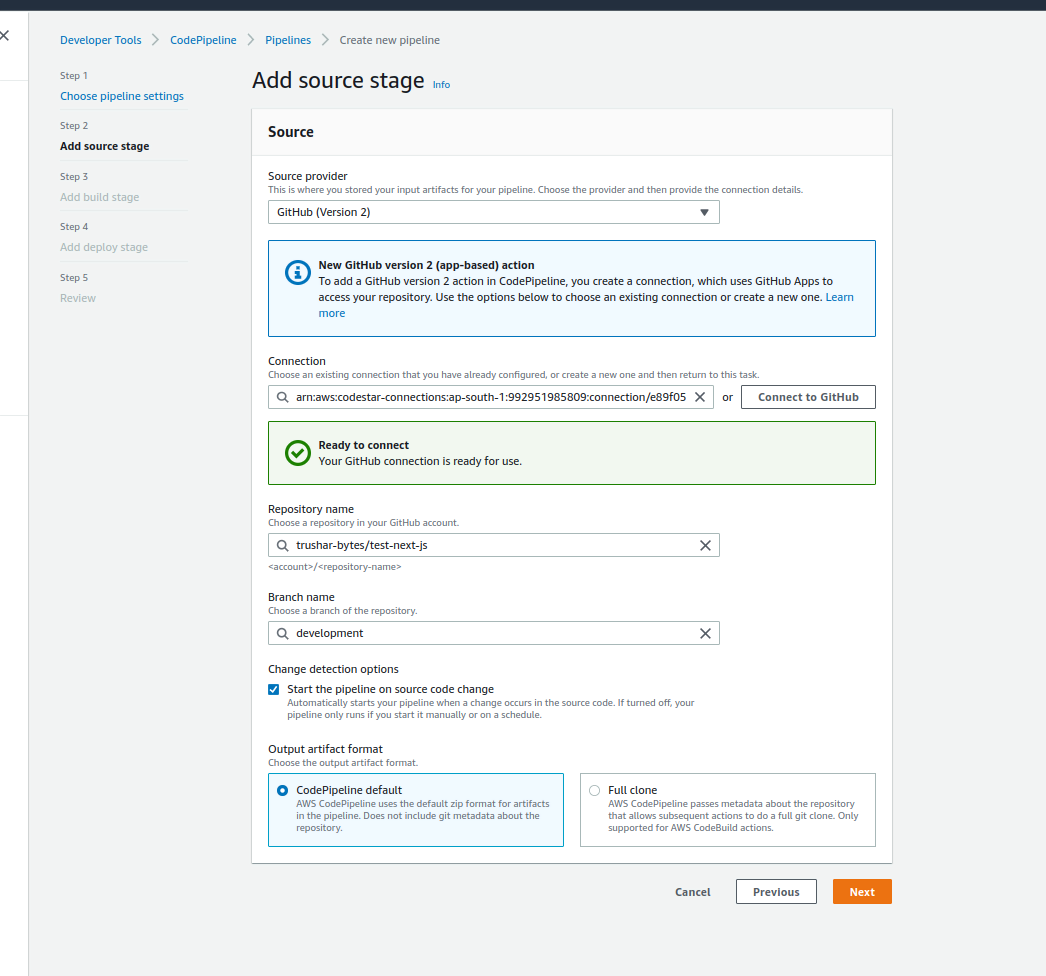
Choose source provider
At this moment, AWS supports below source providers.
- AWS code commit
- Amazon ECR
- Bitbucket
- Github Version 1 (Not recommended method)
- Github Version 2
- Github Enterprise server
You can choose any of one option from the above options.For now, we are going with the Github Version 2.
Connect your github account with Code pipeline to access your repo.
Once you are done with your connection you can choose which account you want to use with AWS.
Once you choose your github account. It will ask you for the repository name and branch name.
Click on the detection options if you want to trigger build every time. It means when any change occurs in a specific branch.
Choose appropriate artifact format and click on next.
Build stage
Choose the build stage, AWS code build or Jenkins. You can skip this stage if you want. You can add the build step at a later stage or already created pipeline also.
We will choose the codeBuild. Select the region. Choose the build project if you have not created it.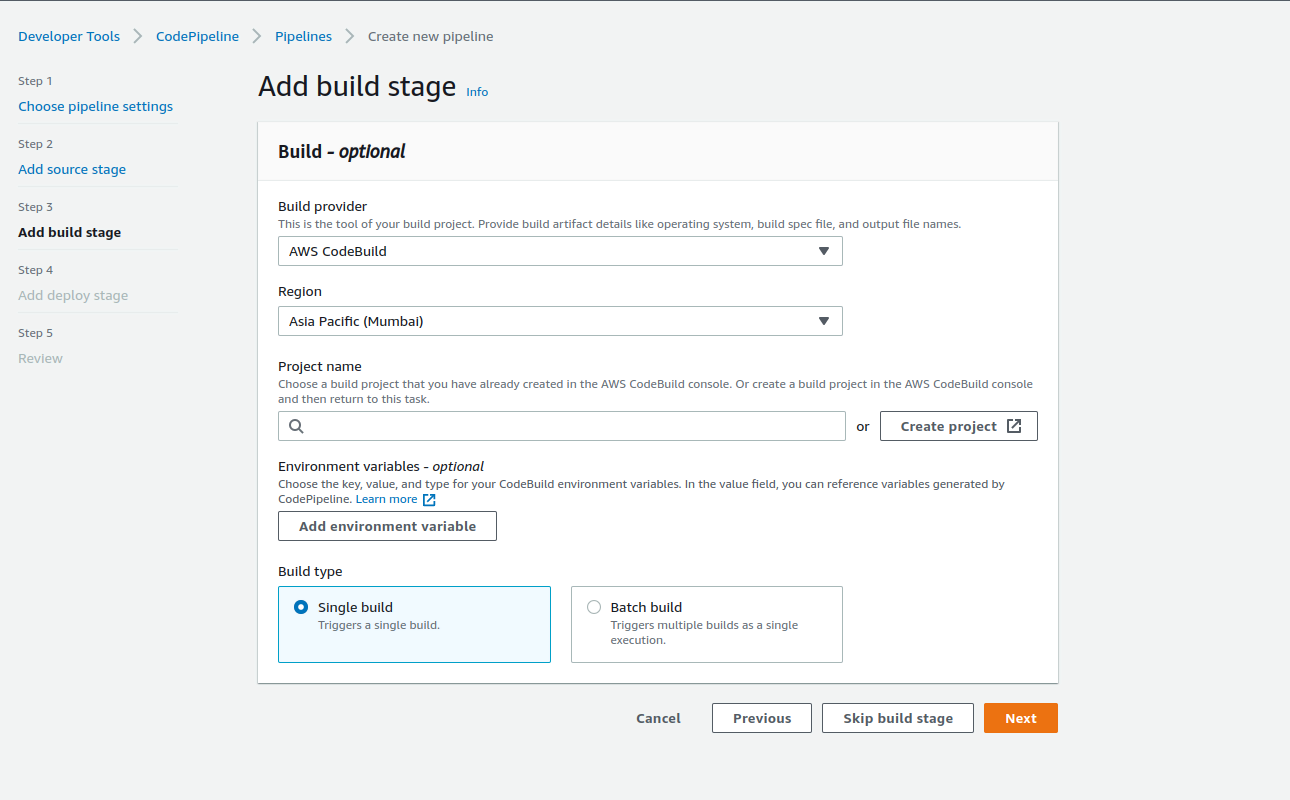
3.1 If you choose Create Project, it will open a popup,
3.1.1 Project configuration
Provide the project name, description and number of concurrent builds.
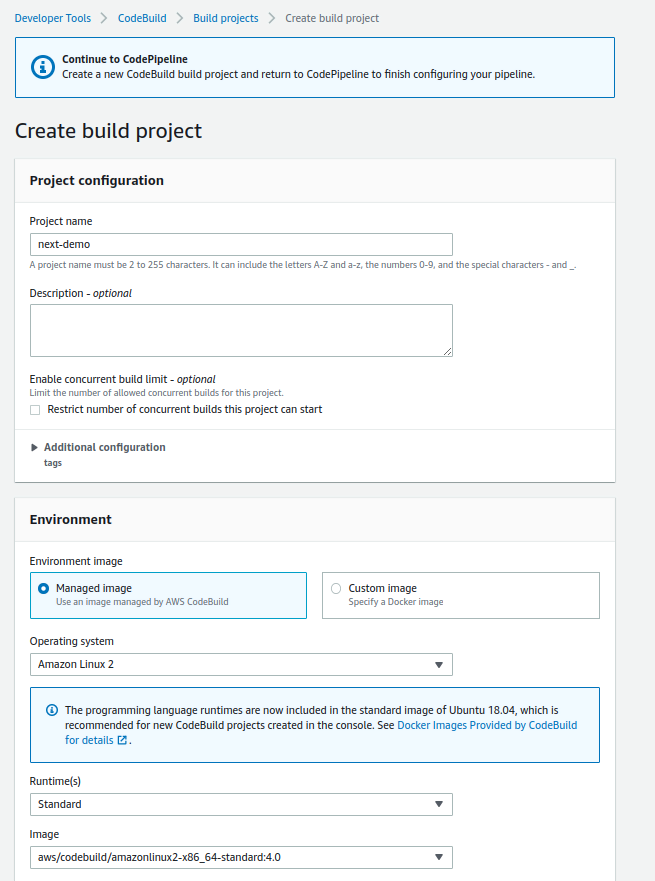
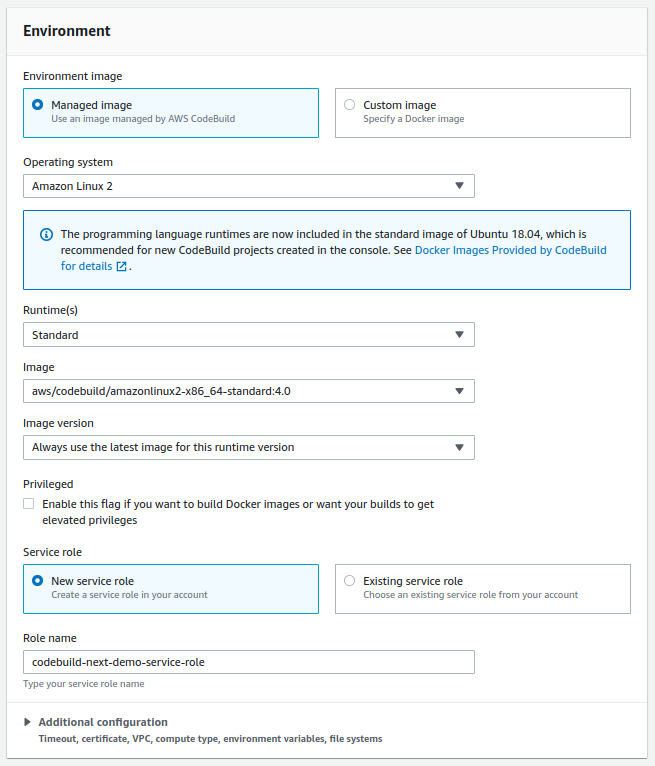
3.1.2 Environment
Choose the managed image or docker image. We will go with a managed image. In the service role, click new service role if you want to create new role or provide existing service role.
3.1.3 Buildspec option
Either you can use a buildspec file or can edit build commands. You can switch to editor also if you want to edit existing build commands.
We can provide our custom commands which is required at time of build or after build
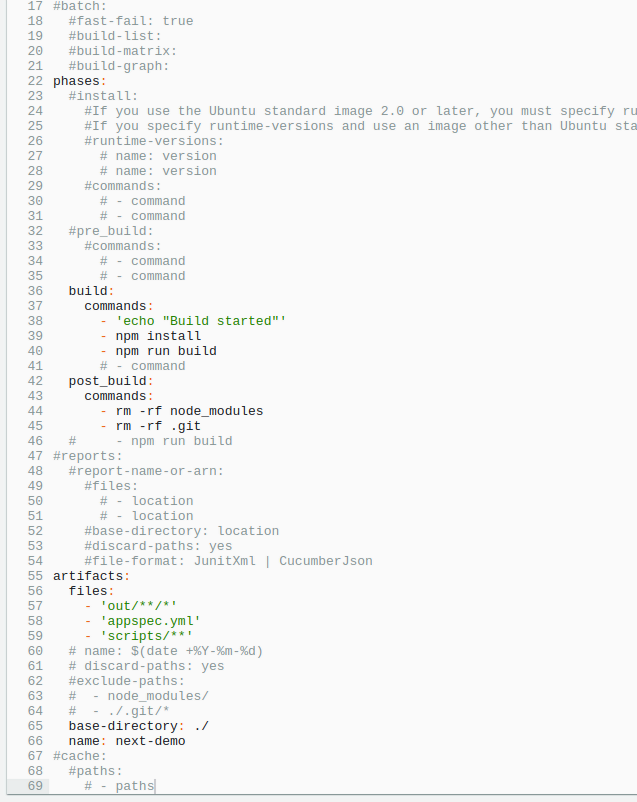
Note: Make sure your artifacts are up to date. And your code should have an appspec.yml file. And in that file we can provide steps which we want to run. You can find more information in CodeDeploy AppSpec File reference.
Once you add the build project in the Build stage, click on next.
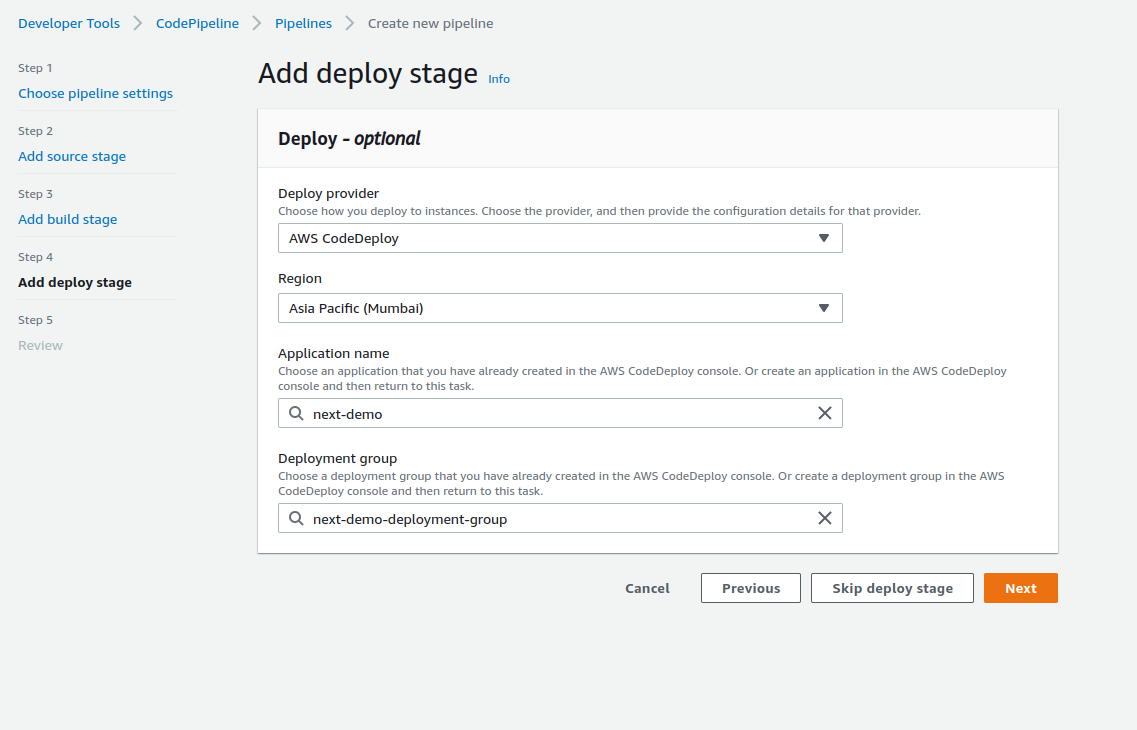
Choose the deployment stage
There are many deployment providers which AWS provides. For now, we are going with codeDeploy.
Choose your application and deployment group you want to go with.
Review
Review your all settings and if all is good, Hit Create pipeline.
Once you hit the create pipeline, It will immediately start the build process. And you can show the stages which we have added during pipeline creation.
This pipeline will run when any code changes when source changes.Which you have provided in codeBuild sections.

No comments:
Post a Comment