S3 Cross-Region Replication
Enable cross-region replication.
Objectives:
1. Learn to enable cross-region replication of an S3 Bucket.
Step 1: In AWS console go to S3 services. Select Buckets and click on Create bucket
Step 2: Give a Bucket name to this source bucket.
Here bucketsource753 is a random name chosen for your bucket.
You may have to try giving a different name if your required bucket name is already being used by some other AWS user.
Note the region. Here it is US East (Ohio)
Uncheck the checkbox which says Block Public Access settings for this bucket and check the acknowledge it by checking the box below.
Make sure you Enable the Bucket Versioning option. Scroll Down and click on Create Bucket.
Step 3: Create a destination bucket, follow Step 2 up to this point. Select a different region. Here the name is bucketdestination7531 and region is selected as Asia Pacific (Mumbai).
Step 4: Click on the Hyperlink of Source Bucket and in bucket details click on Management
Scroll down and in Replications Rules, Click on Create Replication Rule
Step 5: Under Replication Rule Name, provide a name for the replication rule. Here, it is given as ReplicationRuleid1.
Under Source Bucket select This rule applies to all objects in the bucket
For Destination click on Browse S3 and select your Destination Bucket
Click on the Dropdown for IAM Role and click on Create new role
Check the checkbox for bucket replication and make sure AWS key for encrypting destination objects is selected as AWS managed key (AWS/s3)
Click on the checkbox of Change the storage class for the replicated objects and make sure storage class is selected to Standard
You can see the Replication Rule has been created on the S3 Bucket management section
Even in IAM Role you can see IAM Role for S3 service role has been created
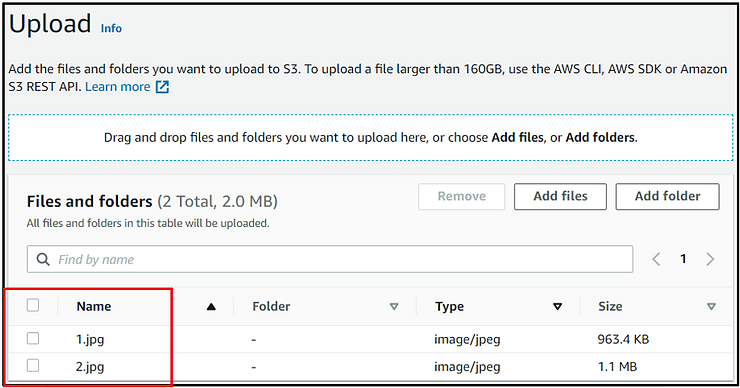
Step 6: Open the S3 Source Bucket and Upload 2 images.
Step 7: Go to Destination bucket check that the files have been replicated. A copy of these files has been created in this bucket. Note: It takes a little while for the Source Bucket Item to replicate on the destination bucket so wait for a few minutes and then refresh the destination bucket page
Note: Follow the next step only if you do not require the bucket for later use.
Step 8: Select the bucket and click on delete
Since our bucket has objects in it we need to empty the bucket first before deleting.
Click on empty bucket configuration
Type permanently delete in the text field and click on Empty. Now all the objects in your bucket are emptied. And the bucket can be deleted.
Now go to S3 buckets page again and click on delete
This time enter the bucket name in this case bucketsource753 in the text field and click on Delete Bucket


No comments:
Post a Comment