Amazon Elastic Transcoder is a cloud-based media transcoding service. It is intended to be a highly scalable, simple-to-use, and cost-effective way for developers and organizations to convert their media files from their original format into versions that can be played on devices such as smartphones, tablets, and Computers.
To be able to use the service you can start by login into AWS Management Console. The system’s transcoding Presets make it easier to get transcoding parameters right the first time. Aside from that, transcoding pipelines allow you to perform several transcodes at the same time. Amazon Elastic Transcoder makes use of other Amazon Web Services such as Amazon S3, Amazon EC2, Amazon DynamoDB, Amazon Simple Workflow (SWF), and Amazon Simple Notification Service to ensure scalability and stability (SNS).
Another advantage that consumers can make use of is Amazon Elastic Transcoder’s free tier. It includes up to 20 minutes per month of transcoding.
Let’s go through the structure of the Amazon Elastic transcoder and how we may use it by following a few basic steps.
Structure of Amazon Elastic Transcoder
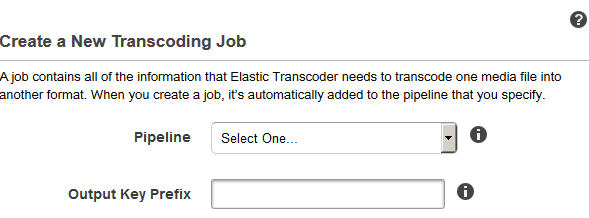
- Jobs are in charge of transcoding. Each job translates a single file into up to 30 different formats. As an example, if you wish to convert a media file into several distinct formats, you can do so by creating a single job.
- Pipelines are queues used to handle transcoding jobs. When you create a job, you select which pipeline the job should be added to. Elastic Transcoder begins processing jobs in a pipeline in the order in which they were added. Elastic will transcode a work into more than one format if you set it to do so.
- Presets are templates that provide the majority of the settings for converting multimedia content from one format to the other. Elastic Transcoder comes with some default presets for common formats. You can also make your own presets for formats that aren’t covered by the defaults. When you create a job, you indicate which preset you wish to utilize.
- Notifications enable you to arrange Elastic Transcoder and Amazon Simple Notification Service to keep you updated on the status of a job, such as when Elastic Transcoder starts processing the job, or when it finishes processing, and also if it might have encountered any warnings or issues during processing.
Using Amazon Elastic Transcode Services
Starting with Amazon Elastic Transcoder, the first step, to begin with, is signing up for an AWS account, After that, set up an Amazon S3 bucket and upload a media file to be transcoded. You then create a pipeline to handle your jobs, as well as a job to convert a specific file to a particular format. You can construct a custom preset if you need to transcode to a format for which we do not have a preset.
To start with Amazon Elastic Transcoder services, follow the procedures outlined below:
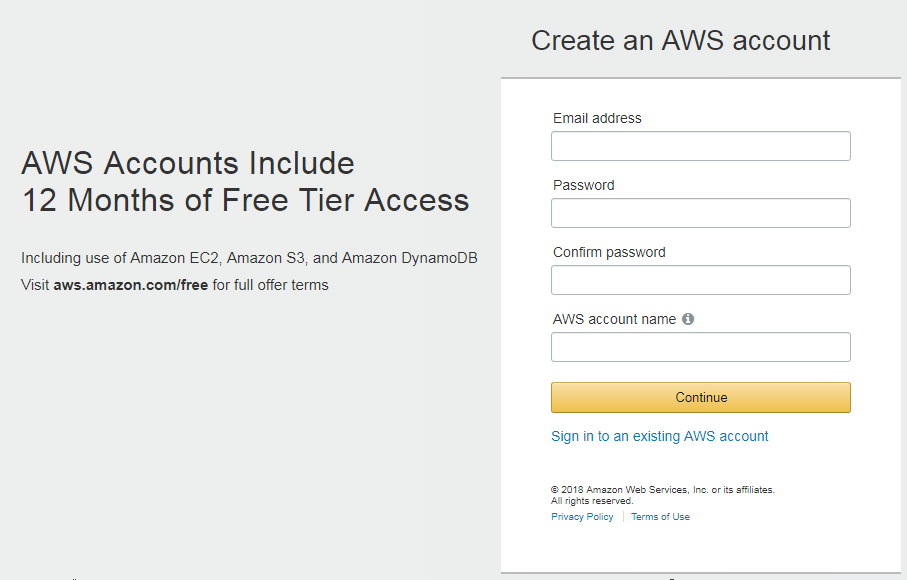
Step 1: Create an account on AWS.
To get started with Amazon Elastic Transcoder, the first thing you will need is an AWS account. When you join up, you will be required to create an account.
Step 2: Create one or more Amazon S3 buckets and upload a media file.
- Log in to the AWS Management Console and navigate to the Amazon S3 console.
- In the Amazon S3 console, select the Create Bucket option.
- In the Create Bucket dialogue box, type a name for your bucket. Give the bucket an appropriate name if you wish to create different input and output buckets.
- Choose a location for your bucket. Amazon S3 generates buckets in the US Standard region by default. It is recommended to select a region close to you to optimize latency, save expenses, or meet regulatory requirements.
- Select Create.
- Repeat Steps 2–5 if you wish to create different buckets for the files you’re transcoding and the files Elastic Transcoder has finished transcoding.
- Click the name of your input bucket in the Buckets pane.
- Select Actions and then Upload.
- On the Upload – Select Files tab, click Add Files, and then select a media file to transcode.
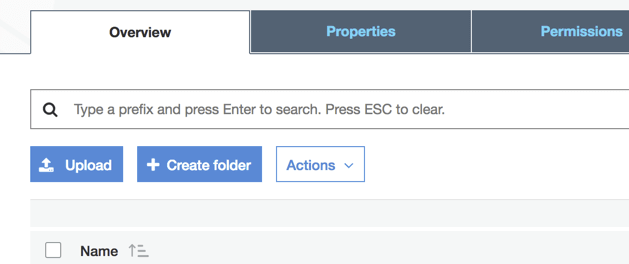
- Press the Start Upload button.
Step 3: Creating a Pipeline.
- Go to this link to access the Elastic Transcoder console.
- Select the region in which you want to create the pipeline from the Elastic Transcoder console’s navigation bar.

- In the console’s left pane, select Pipelines.
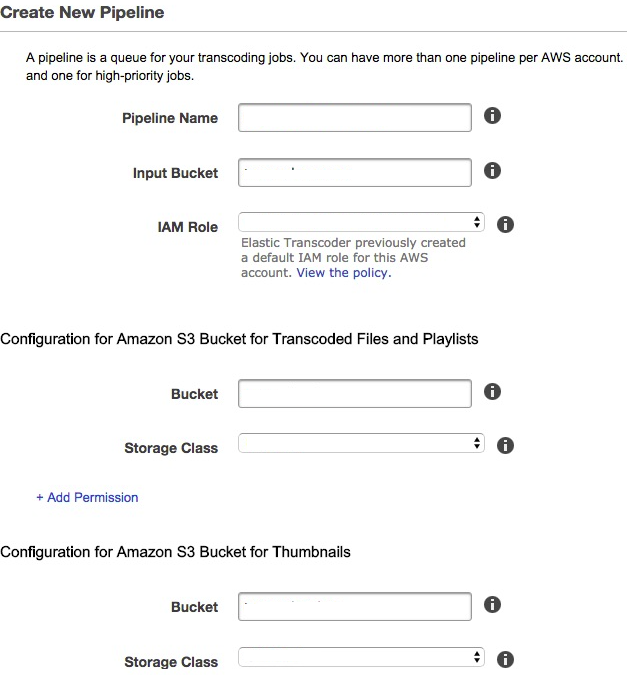
- Click Create New Pipeline on the Pipelines page.
- Fill in the blanks with the corresponding values.
- Click the Create Pipeline button.
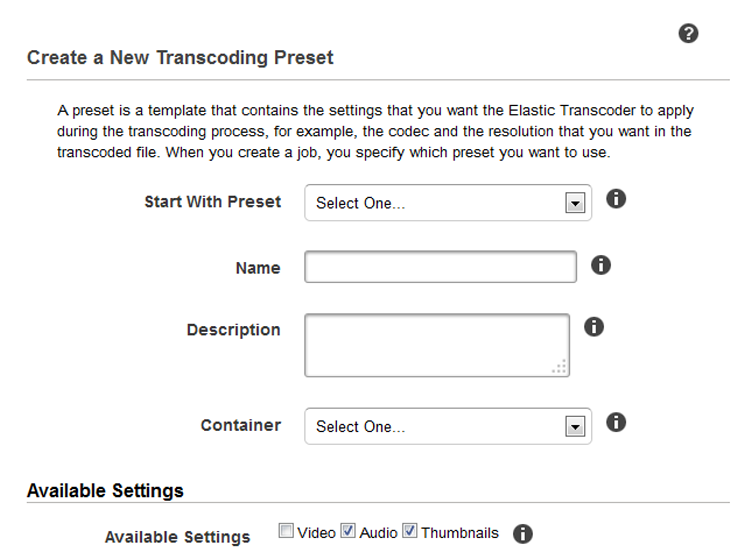
Step 4: Creating a Preset(optional). Well, this step is an optional one. A preset refers to a template that contains the settings that Elastic Transcoder should use throughout the transcoding process, such as the codec and resolution that you desire in the transcoded file. When you create a job, you choose the preset to utilize. AWS sets up system presets that can build media files that may be played on different devices, as well as targeted specific devices.
Step 5: Establish a Job
- Go to this link to access the Elastic Transcoder console.
- Select the region in which you want to create the pipeline from the Elastic Transcoder console’s navigation bar.
- In the console’s left pane, select Pipelines.
- Click Create New Job on the Pipelines page.
- Fill in the blanks with the measured data. For further information on each field, see Settings that You Specify When Creating an Elastic Transcoder Job..
- Select the Create Job option.
Step 6: Track the Progress of Your Job
- While constructing a pipeline, you might configure notifications so that Elastic Transcoder sends a message to an Amazon Simple Notification Service (Amazon SNS) topic when it starts and finishes processing a task. You can track the progress of your work if you configured notifications and subscribe to the relevant Amazon SNS topic.
Well, here we have discussed in brief the Amazon Elastic Transcoder and its use in the AWS management console. And how we can use these services for our requirements by following some simple steps.
Elastic Transcoder Benefits:
- Scalability: Elastic Transcoder is designed to scale automatically to handle large-scale media transcoding jobs.
- Ease of use: Elastic Transcoder is easy to use, and you can create a transcoding job with just a few clicks in the AWS Management Console.
- Cost-effective: Elastic Transcoder is a pay-as-you-go service, so you only pay for the transcoding jobs that you run.
- Compatibility: Elastic Transcoder is designed to work with a wide range of media formats, and it can convert your files into a wide range of output formats.
- Integration: Elastic Transcoder integrates with other AWS services like Amazon S3 and Amazon CloudFront, making it easy to get your media files to and from the transcoding service.
Elastic Transcoder has some limitations to consider. For example, it has a maximum output resolution of 1080p, so it may not be suitable for transcoding high-resolution video files. Additionally, it does not support transcoding of some specialized formats such as closed captioning or subtitles.

No comments:
Post a Comment