Azure is the name of the cloud computing service owned by Microsoft that provides Infrastructure as a Service (IaaS), Platform as a Service (Paas) and Software as a Service (SaaS). Azure’s cloud computing services are network, storage, compute, database, analytics, security, and many more. In this blog, we will only focus on the basics of network services.
What Is Azure Virtual Network?
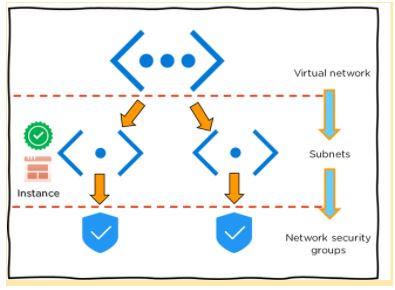
An Azure Virtual Network (VNet) may be a network or environment which will be wont to run VMs and applications within the cloud.
When it’s created, the services and Virtual Machines within the Azure network interact securely with one another.
Advantages of Using Azure Virtual Network
Some of the foremost advantages of using Microsoft Azure VNet are as follows:
- It provides an isolated environment for your applications
- A subnet in a very VNet can access the general public internet by default
- We can easily direct traffic from resources
- It is a highly secure network
- It has high network connectivity
- It builds sophisticated network topologies in a very simple manner
Moving on, let’s have a glance at the components of Azure VNet.
Elements of Azure Virtual Network
Azure networking components provide a large range of functionalities that may help companies build efficient cloud applications that meet their requirements.
The components of Azure Networking are listed below, and we have explained each of those components in an exceedingly detailed manner:
- Subnets
- Routing
- Network Security Groups
Subnets
Subnets let users segment the virtual network into one or more sub-networks.
These sub-networks may be separated logically, and every subnet consists of a server.
We can further divide a subnet into two types:
- Private – Instances can access the web with NAT (Network Address Translation) gateway that’s present within the public subnet.
- Public – Instances can directly access the net.
Routing
- It delivers the information by choosing an appropriate path from source to destination.
- For each subnet, the virtual network automatically routes traffic and creates a routing table.
Network Security Groups
- It is a firewall that protects the virtual machine by limiting network traffic.
- It restricts inbound and outbound network traffic depending upon the destination IP addresses, port, and protocol.
How to Launch an Instance using Azure VNet?
- First, create a virtual network within the Azure cloud
- Next, create subnets into each virtual network
- Now, assign each subnet with the respective instance or Virtual Machine
- After which you’ll connect the instance to a relevant Network Security Group
- Finally, configure the properties within the network security and set policies
- As a result, you’ll be able to launch your instance on Azure
Moving forward, we’ll see an indication on creating an Azure virtual machine and virtual network step-by-step.
Demo: Step-By-Step Demo of Creating Azure Virtual Machine and Virtual Network
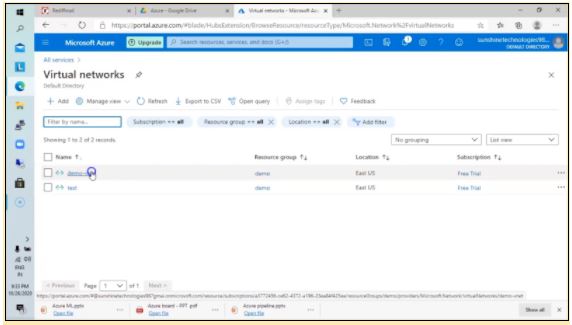
Step 1 − First, log into your Azure Management Portal, select ‘New’ at the underside left corner.
Step 2 − Next, on the Network Services visit Virtual Network -> Quick create.
Step 3 – Now, enter the name and leave all other fields empty and click on ‘next’.
Step 4 − Finally, click on ‘Create a Virtual Network,’ and it’s done.
Note: Now, within the same VNet, create a Virtual machine
Step 5 – First, select ‘create’ to create a replacement Virtual Machine with Windows Server 2012 R2 Datacenter.
Step 6 – Once the fields are entered, select the present resource group that you just had created for the virtual network and choose OK.
Step 7 – Now, choose a desired size and configuration by selecting DS1_V2 Standard type
Note: By default, we might choose a Virtual Network.
Step 8 – Now select the subnet as FrontEndSubnet and don’t change the general public IP address. Also, keep the Network Security Group as none.
Step 9 – Create a brand new availability set and set a replacement name thereto.
Next, set the fault domains as 2 and so disable the Guest OS Diagnosis section.
Step 10 – Finally, click and choose ‘create’.

Congratulations, you’ve got successfully created a VM.
This is all the fundamental information you wish to grasp about Microsoft Azure Virtual Network.
No comments:
Post a Comment