The Windows Firewall with Advanced Security is a firewall that runs on the Windows Server 2016 and is turned on by default. The Firewall settings within Windows Server 2016 are managed from within the Windows Firewall Microsoft Management Console. To set Firewall settings perform the following steps −
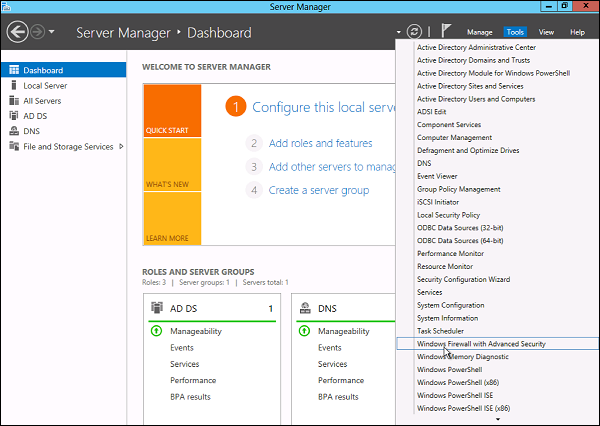
Step 1 − Click on the Server Manager from the task bar → Click the Tools menu and select Windows Firewall with Advanced Security.
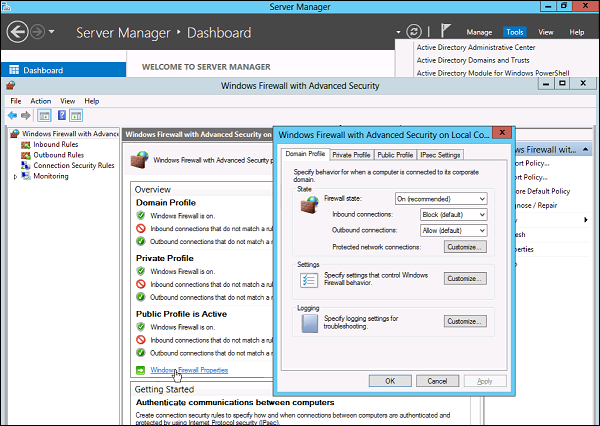
Step 2 − To see the current configuration settings by selecting Windows Firewall Properties from the MMC. This allows access to modify the settings for each of the three firewall profiles, which are – Domain, Private and Public and IPsec settings.
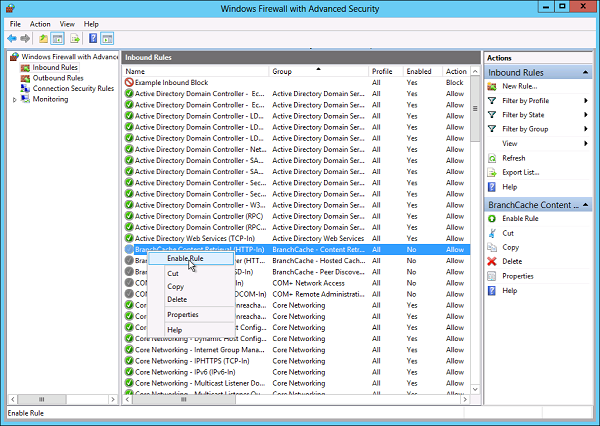
Step 3 − Applying custom rules, which will include the following two steps −
- Select either Inbound Rules or Outbound Rules under Windows Firewall with Advanced Security on the left side of the management console. (As you Know outbound traffic is the traffic generated from server towards the internet and inbound traffic is vice versa). The rules that are currently enabled are denoted by green checkbox icon, while disabled rules display a grey checkbox icon.
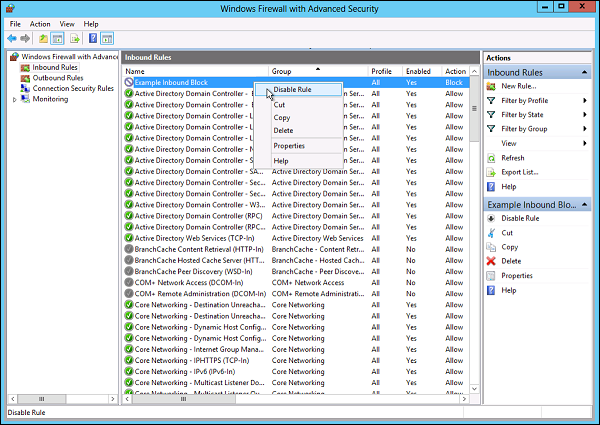
- Right-clicking a rule will allow you toggle enable/disable.
How to Create a New Firewall Rule?
To create a new Firewall Rule, you have to adhere to the following steps −
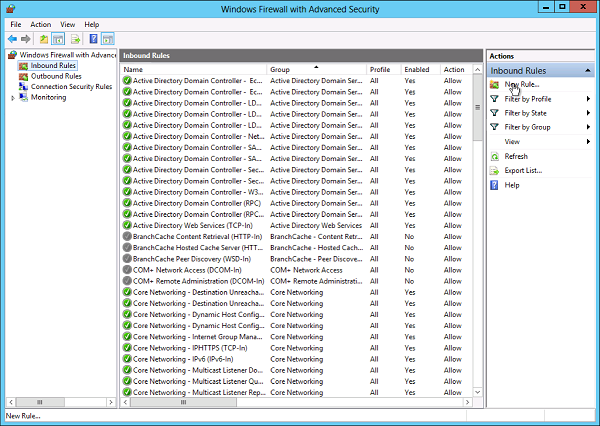
Step 1 − From the right side of either the Inbound Rules or Outbound Rules – click “New Rule”.
Step 2 − Custom from the Rule Type radial button → click Next.
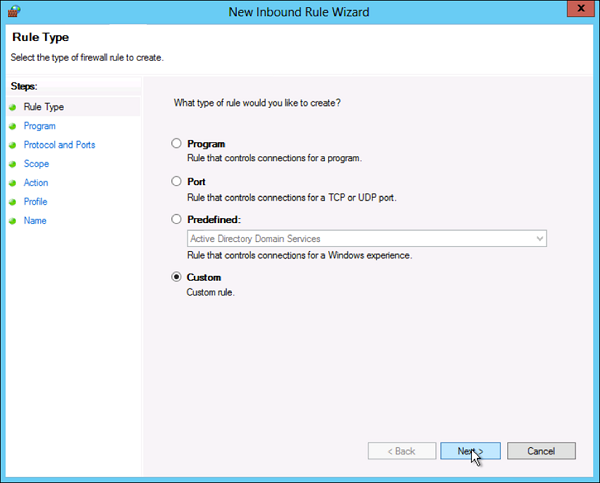
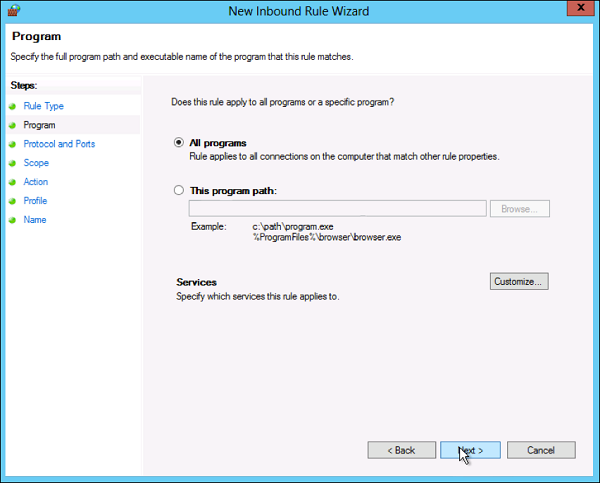
Step 3 − Select the Program association for the Custom Firewall Rule as either All programs or the path to a program → click Next.
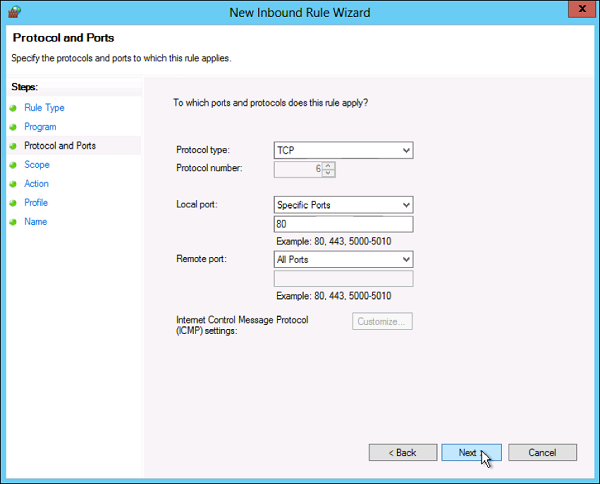
Step 4 − Protocol type field select the protocol type → click Next.
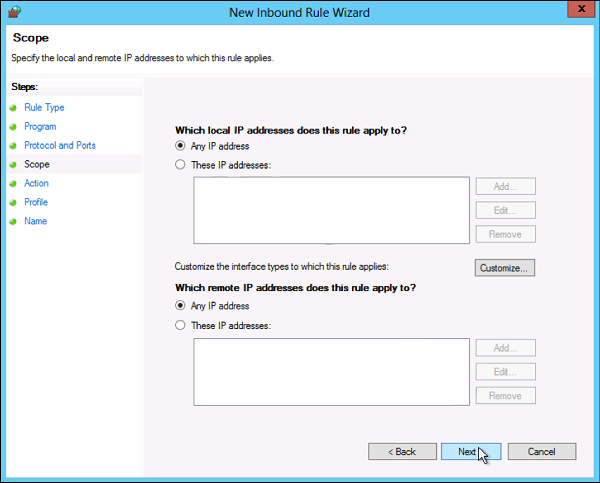
Step 5 − Select an IP address association for both local and remote addresses → click Next.
Step 6 − Select an action to take on matching traffic → click Next.
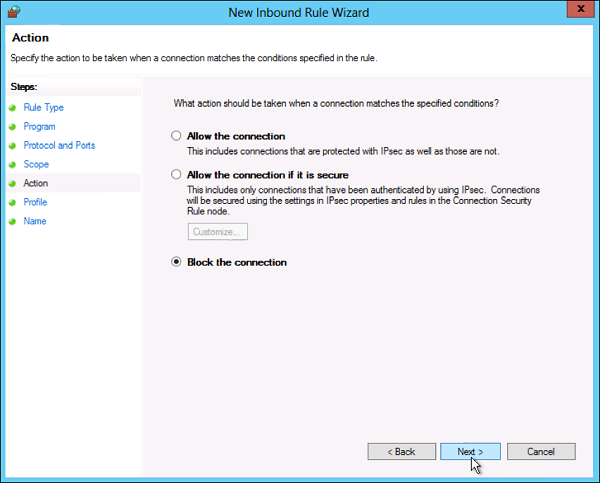
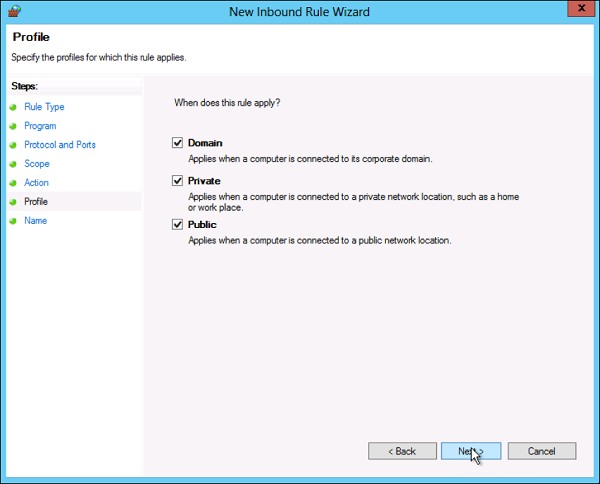
Step 7 − Select the profiles associated with the custom rule → click Next.
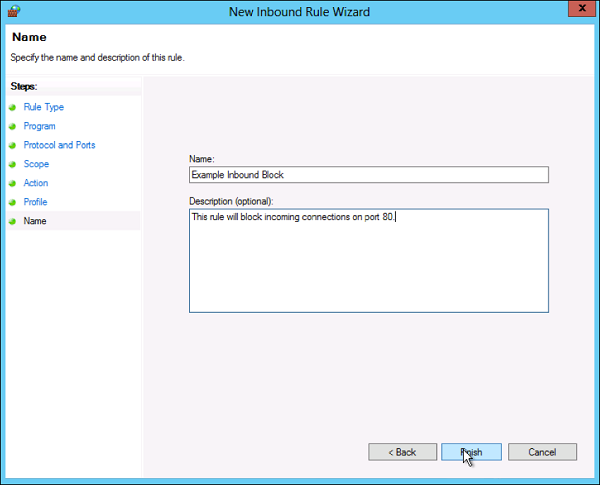
Step 8 − Put a name for your Firewall rule and an optional description → Finish.
Step 9 − The firewall rule can be found on the corresponding Rule tab, either inbound or outbound depending on the type created. To disable or delete the rule find the rule in the MMC, right-click it and select either Disable Rule or Delete.

No comments:
Post a Comment