AWS App Runner
Introduction:
Amazon Web Services, Inc. (AWS) announced its new service, i.e., AWS App Runner, on May 18, 2021. It is a fully managed container application service. With App Runner, it will be very convenient and quick for customers to build, deploy, and run containerized web applications and APIs with just a few clicks. Customers need to provide a container image or source code, and App Runner can automatically build and deploy the web application. It loads, balances traffic, and can scale and monitor application health when there is a demand. This service handles the configuration and operations of their container environments. With the help of this service, a customer can point their existing code or container repository and make an application run and scale in the cloud without having to configure infrastructure services, and, of course, there will be no burden for maintenance.
How it works:

Deployment methods:
App runner deploys in two ways:
1. Deploy from the source
2. Deploy from a container image
Deploy from the source:
With the help of App Runner, the application can be deployed by connecting to your source code. To run my web application, I will be using a python code already existing in my GitHub repository. App Runner connects to this project, and code will compile and deployed. The python code in my repository will create a test web page.
Go to AWS Console and search for App Runner service and click on Create an APP Runner Service.
Source & Deployment:
Choose Source Code Repository
Connect to your GitHub account by authenticating your GitHub login credentials.
In the repository, select the suitable repository which contains the application to deploy.
In Branch, select the appropriate Branch from the dropdown.
In Deployment Trigger, we can choose Manual or Automatic. In this example, we will choose Automatic, which indicates that App Runner automatically discovers the change made to the source code and then automatically builds and deploys the updated version. Otherwise, Manual can select if you want to manage things manually.

Configure Build:
In Build Setting, there are two ways to select the configuration file
Configure All Setting Here: This will specify all settings for your service here in the App Runner console
Use A Configuration File: Let App Runner read your configuration from the app runner.yaml file in your source repository.
In Runtime, currently, there are two options – Python 3 and Nodejs 12. To use other languages, container registry workflow needs to use.
In Build Command, enter the command to install dependencies or compile the code.
In Start Command, enter the command used to start a web server for your service.
In Port, enter the IP port your service uses.

Configure Service:
In Service Name, provide the name of your service.
In Virtual CPU & Memory, choose the CPU and memory size you want your container to have.
In Environment Variable, a key-value pair uses to store custom configuration values. This is optional.

Various other settings customize the service:
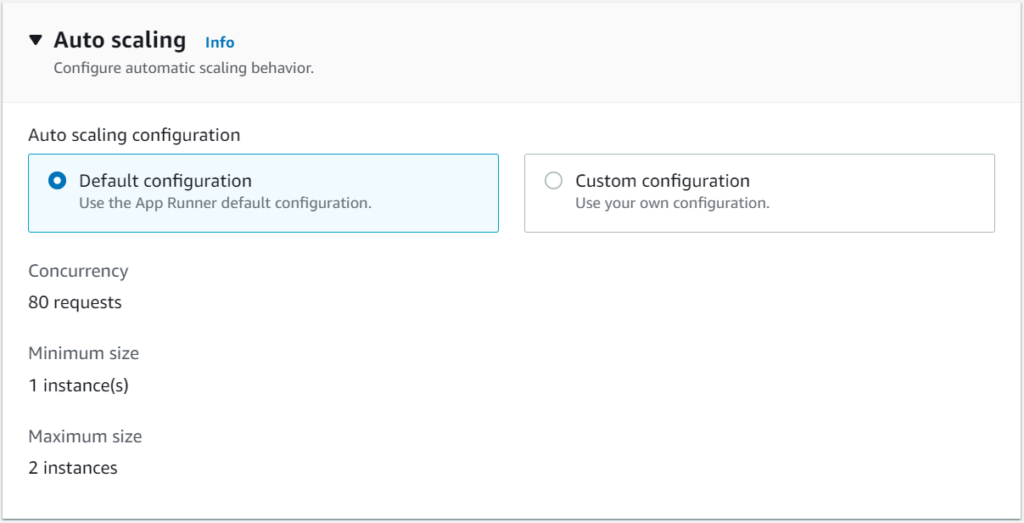
Auto Scaling uses to configure automatic scaling behavior. The Default configuration hasone instance of my container image with 80 concurrent requests, but if requests increases, it will scale to multiple instances by setting up the configuration through Custom Configuration.
Health Check performs a TCP health check at the Port that your application is listening to; various parameters can set up in this option.

Security uses to choose an IAM role that an instance can use, and this role permits the container to correspond with other AWS services. App Runner can encrypt all copies of the application source image. I have not used the IAM role here as my demo doesn’t require it.

Tags use to search and filter the resources. It also controls access permissions and tracks the AWS costs. Tags can add by clicking Add New Tag, and not using it for my demo here.

Review & Create:
A page displays all the configurations we have made in previous steps and then clicks on “create & deploy.”
After the deployment, a URL will generate for your application. And the application will be live on that custom URL. My test application is up and running now

2. Deploy from a Container Image:
Another deployment method uses a container image to push the container image to the Amazon ECR Public.
In the Source & Deployment tab, in the Repository type, select Container Registry
In the Provider, choose Amazon ECR public
In Container Image URI, enter the URI to the image.
After clicking next, follow the similar steps mentioned in Deploy from Source.

Region Availability:
Currently, App Runner is available in the following regions:
US East (N. Virginia)
US West (Oregon)
US East (Ohio)
Asia Pacific (Tokyo)
Europe (Ireland)
App Runner can use the AWS Management Console and AWS Copilot CLI.
Pricing:
App Runner costs for the compute and memory resources used by the application. App Runner billed when it is running. The application can be paused if not in use and can be resumed when required. In development and test environments, the strategy of pause and resume can be an excellent cost-saving option. To meet the application’s processing requirements, App Runner automatically scales the number of active containers up and down. The maximum limit can be set on the number of containers so that you can take control of the budget.


.png)


