Amazon DocumentDB
Amazon DocumentDB is a fast, secure, scalable, and fully managed database service that is compatible with MongoDB. It allows you to store and query JSON data, as well as set up, operate, and scale MongoDB-compatible databases in the cloud. Amazon DocumentDB also supports the same application code, drivers, and tools as MongoDB.
Hevo uses DocumentDB Change Streams to ingest data from your Amazon DocumentDB database and replicate it into the Destination of your choice.
Prerequisites
An active Amazon Web Services (AWS) account is available.
The Amazon DocumentDB version is 4.0 or higher.
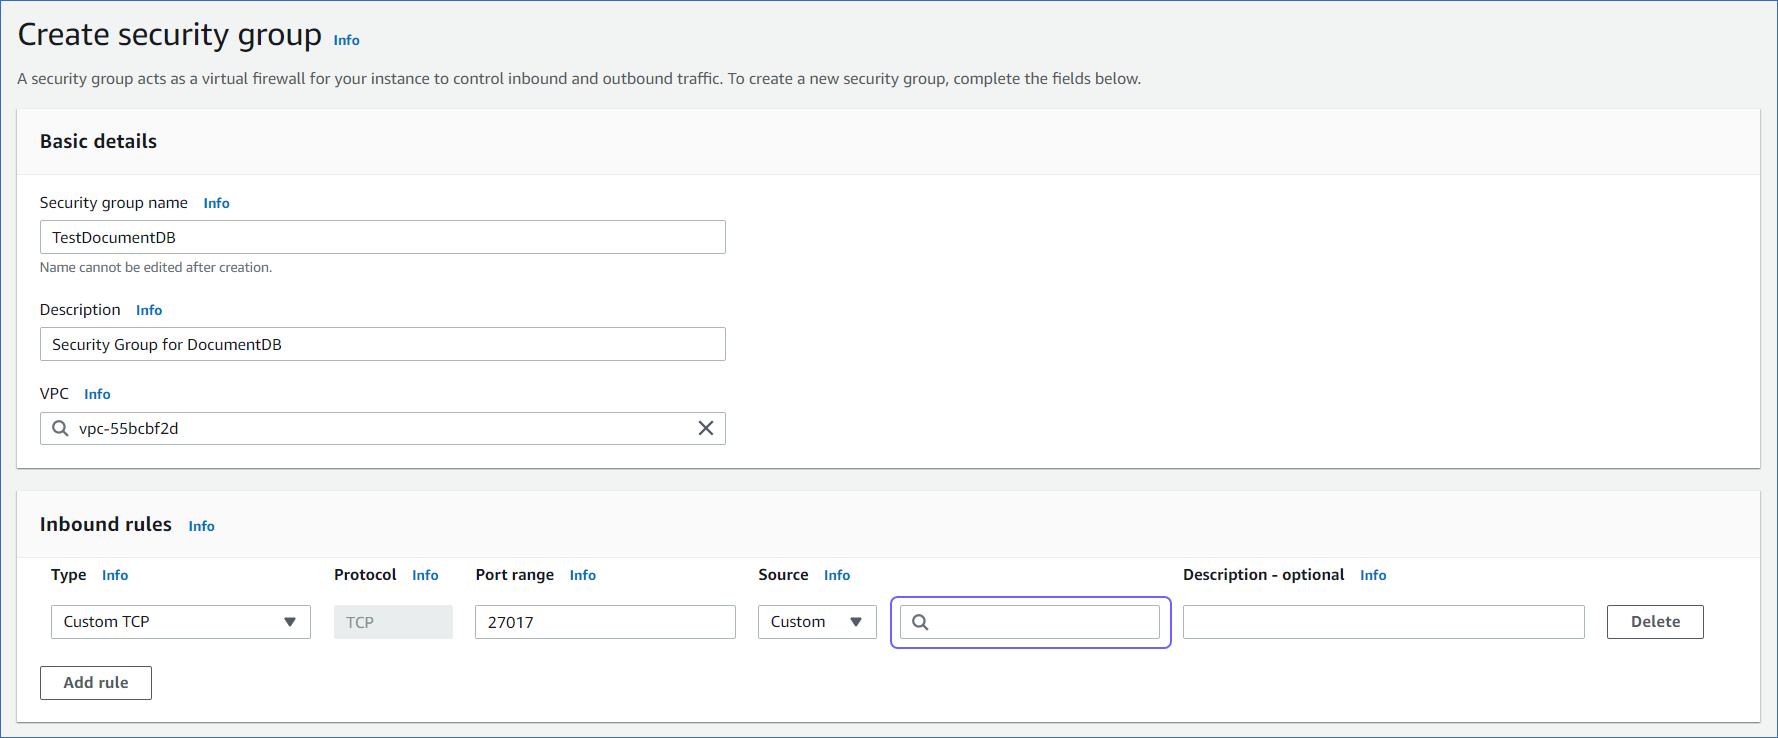
A security group for the DocumentDB cluster is created in your AWS EC2 console.
Note: You must specify the security group that you used for Whitelisting Hevo’s IP address in the Source column of the Inbound rules section, while creating the security group for the DocumentDB cluster.
A cluster parameter group is created in your Amazon DocumentDB console.
Note: You must assign this group while creating your DocumentDB cluster, as the default parameter group that gets auto-assigned cannot be edited.
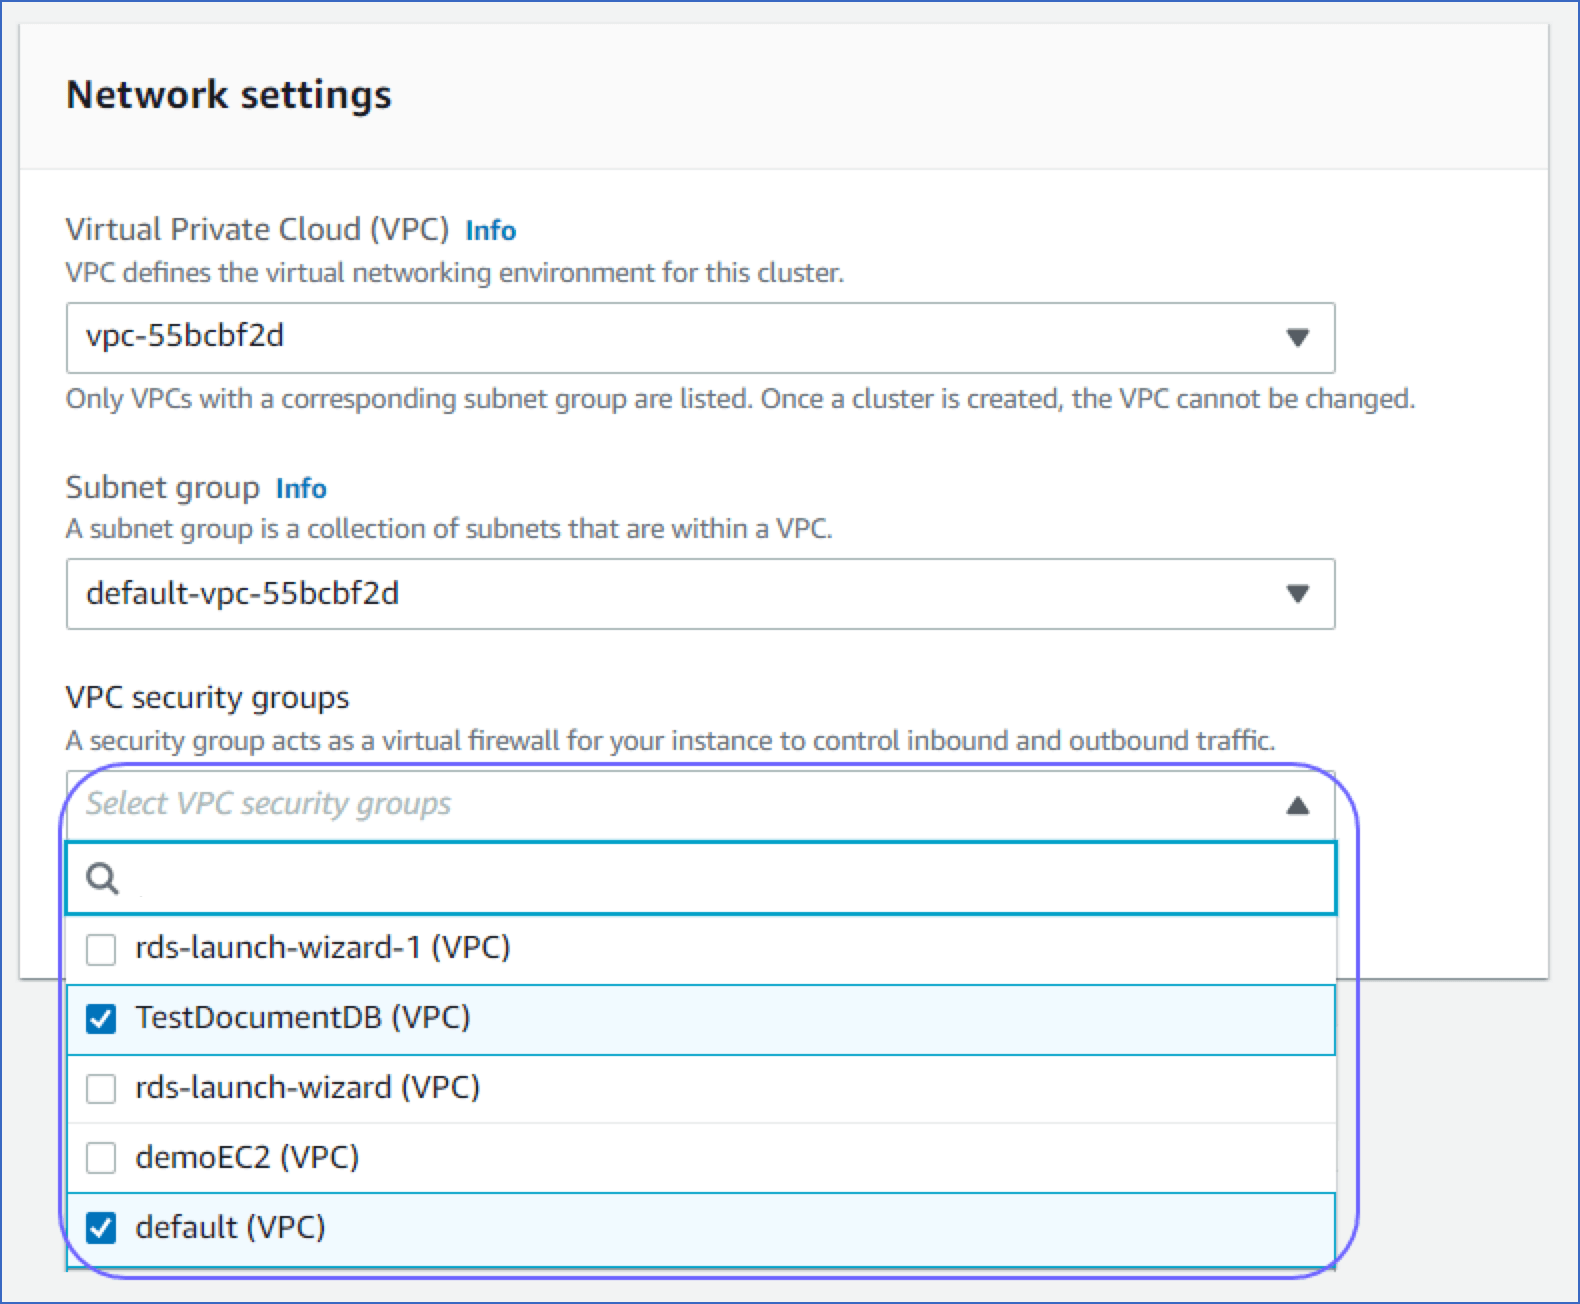
An Amazon DocumentDB cluster is created.
Note: You must select the security group that you created in the VPC security groups drop-down, while creating a DocumentDB cluster.
You are connected to your Amazon EC2 .
The mongo shell is installed for your operating system and is connected to your DocumentDB cluster.
A user is created with the required privileges in your Amazon DocumentDB database.
Streams are enabled on the DocumentDB cluster, and the log retention duration is updated.
You are assigned the Team Administrator, Team Collaborator, or Pipeline Administrator role in Hevo, to create the Pipeline.
Perform the following steps to configure your Amazon DocumentDB Source:
Step 1Whitelist Hevo’s IP Address
You must whitelist Hevo’s IP address in your existing Amazon EC2 instance in order to connect to Hevo. Read Creating an Amazon EC2 instance if you have not created one already. Hevo needs this EC2 instance to create an SSH tunnel to connect to your DocumentDB cluster and replicate data from it.
Perform the following steps to whitelist Hevo’s IP address in your existing EC2 instance:
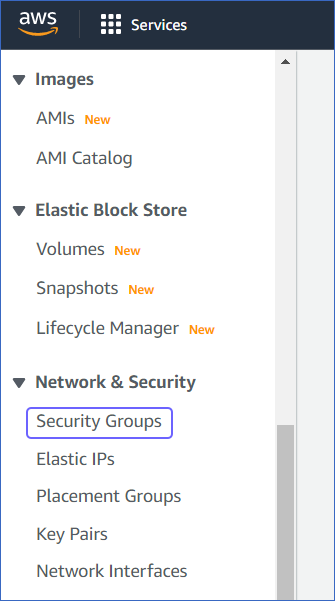
Log in to your Amazon EC2 console.
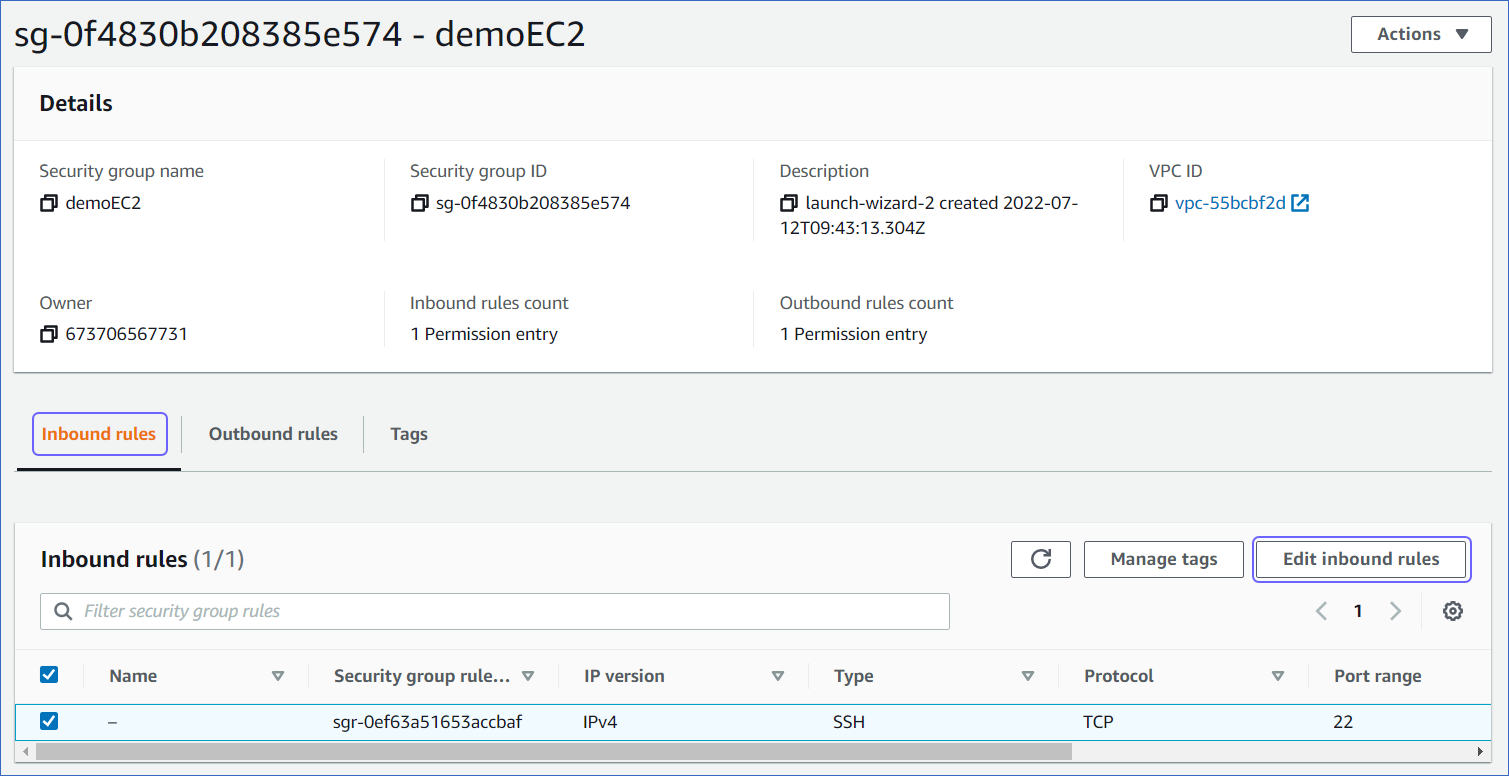
In the left navigation pane, under Network & Security, click Security Groups.
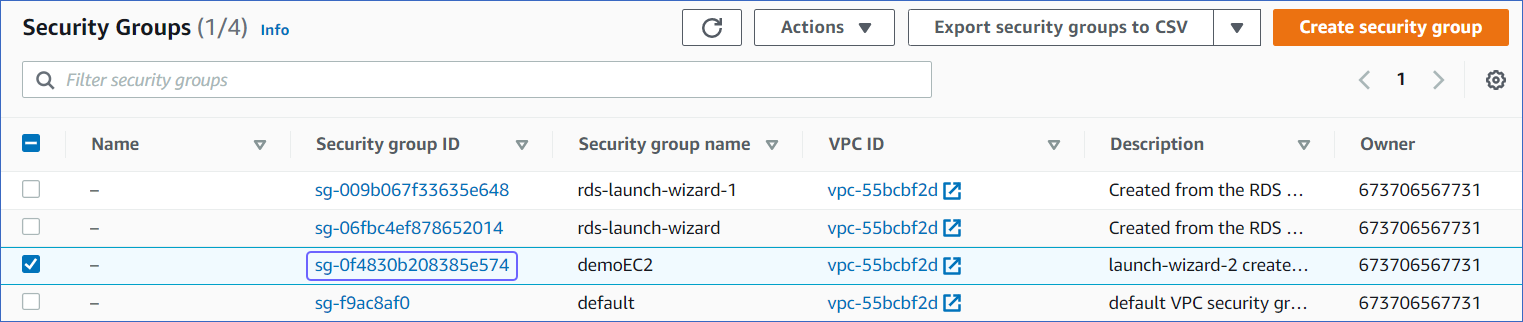
Click on the security group linked to your EC2 instance.
In the Inbound rules tab, click Edit inbound rules.
In the Edit inbound rules page, in the Source column, select Custom from the drop-down, and enter Hevo’s IP address for your region.
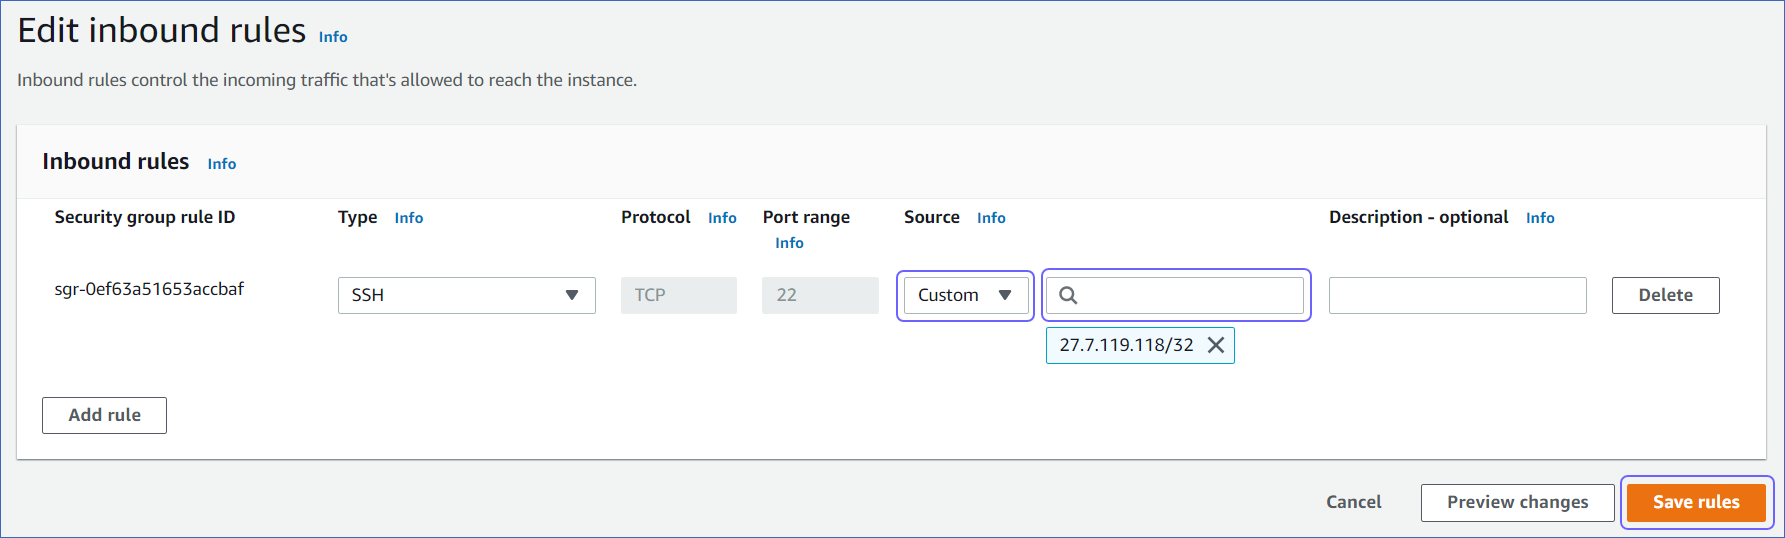
Click Save rules.
Step 2Create User and Set up Permissions to Read DocumentDB Databases
Perform the following steps to create a database user, and grant READ privileges to that user:
Open your mongo shell.
Note: Ensure that your mongo shell is connected to your DocumentDB cluster before executing any commands.
Run the following command to create a user and grant READ permissions to that user.
use admin db.createUser({ user: "<username>", pwd: "<password>", roles: [ "readAnyDatabase" ] });Note: Replace the placeholder values in the command above with your own. For example, <username> with jacobs.
Step 3Enable Streams
You need to enable Streams on the DocumentDB collections and databases whose data you want to replicate to the Destination through Hevo.
To do this:
Open your mongo shell.
Note: Ensure that your mongo shell is connected to your DocumentDB cluster before executing any commands.
Depending on the collections and databases you want to sync, run one of the following commands:
To enable change streams for a specific collection in a specific database:
db.adminCommand({ modifyChangeStreams: 1, database: "<database_name>", collection: "<collection_name>", enable: true });Note: Replace the placeholder values in the command above with your own. For example, <database_name> with hevosalesdata.
To enable change streams for all collections in a specific database:
db.adminCommand({ modifyChangeStreams: 1, database: "<database_name>", collection: "", enable: true });Note: Replace the placeholder values in the command above with your own. For example, <database_name> with hevosalesdata.
To enable change streams for all collections in all databases:
db.adminCommand({
    modifyChangeStreams: 1,
    database: "",
    collection: "",
    enable: true
});
Step 4Modify the Change Stream Log Retention Duration
The change stream retention duration is the period for which Events are held in the change stream logs. If an Event is not read within that period, then it is lost.
This may happen if:
The change stream log is full, and the database has started discarding the older Event entries to write the newer ones.
The timestamp of the Event is older than the change stream retention duration.
The change stream log retention duration directly impacts the change stream log size that you must maintain to hold the entries.
By default, Amazon DocumentDB retains the Events for three hours after recording them. You must maintain an adequate size or retention duration of the change stream log for Hevo to read the Events without losing them. Hevo recommends that you modify the retention duration to 72 hours (259200 seconds).
To extend the change stream log retention duration:
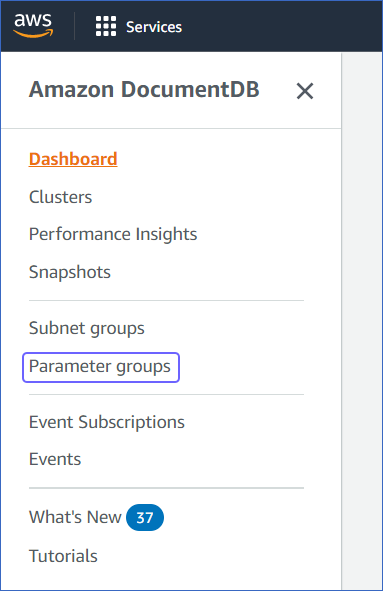
Log in to your Amazon DocumentDB console.
In the left navigation pane, click Parameter Groups.
Select the cluster parameter group associated with your cluster. Read Determining an Amazon DocumentDB Cluster’s Parameter Group for more information.
Note: You cannot edit a default cluster parameter group. Hence, if your DocumentDB cluster is using the default parameter group, you must either create a new group or make a copy of the default group and assign it to the cluster.

In the Cluster parameters section, search and select change_stream_log_retention_duration, and then click Edit.

Modify the Value to 259200 seconds.
Note: The Value should be in seconds only.

Click Modify cluster parameter.
Step 5Configure Amazon DocumentDB Connection Settings
Perform the following steps to configure Amazon DocumentDB as the Source in your Pipeline:
Click PIPELINES in the Navigation Bar.
Click + CREATE in the Pipelines List View.
On the Select Source Type page, select Amazon DocumentDB.
On the Configure your Amazon DocumentDB Source page, specify the following:
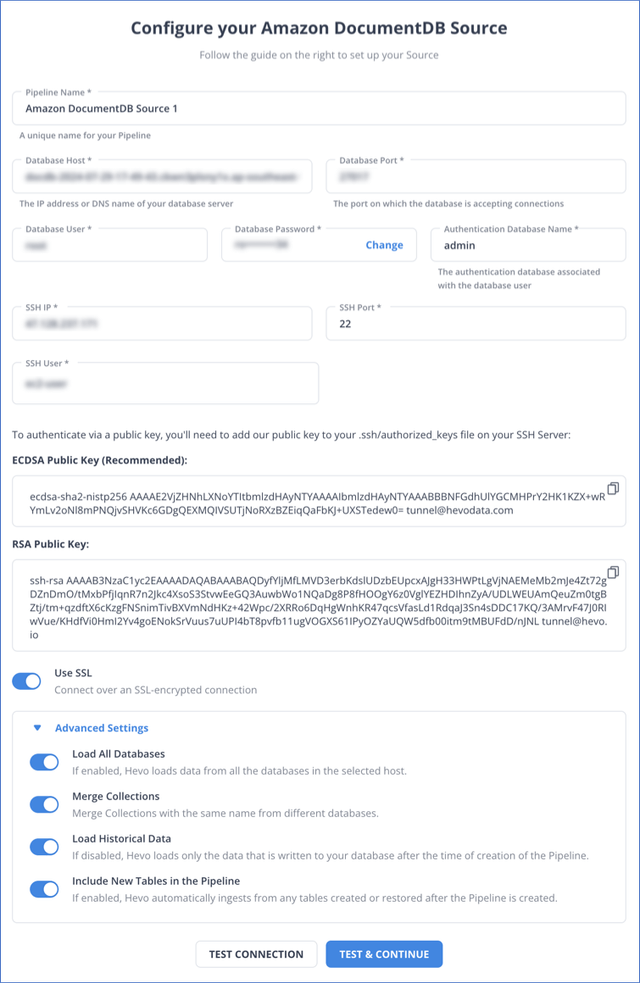
Pipeline Name: A unique name for your Pipeline, not exceeding 255 characters.
Database Host: The IP address or Domain Name System (DNS) of your primary instance in the AWS console. You can find the primary instance for your cluster under the Role column of your AWS console.
Database Port: The port on which your Amazon DocumentDB server listens for connections. Default value: 27017.
Database User: The database user that you created. This authenticated user has permission to read collections in your database.
Database Password: The password of your database user.
Authentication Database Name: The database that stores the user’s information. The user name and password entered in the preceding steps are validated against this database. Default value: admin.
SSH IP: The IP address or DNS of the SSH server.
SSH Port: The port of the SSH server as seen from the public internet. Default port: 22.
SSH User: The username on the SSH server. For example, hevo.
The SSH IP, port, and user credentials must be obtained from the AWS EC2 instance where you whitelisted Hevo’s IP address. Hevo connects to your DocumentDB cluster using these SSH credentials instead of directly connecting to your Amazon DocumentDB database instance. This method provides an additional level of security to your database by not exposing your Amazon DocumentDB setup to the public. Read Connecting Through SSH.
Use SSL: Enable this option if you have activated the TLS setting for your DocumentDB instance.
Advanced Settings:
Load All Databases: If enabled, Hevo fetches data from all the databases you have access to on the specified host. If disabled, provide the comma-separated list of the database names from which you want to fetch the data.
Merge Collections: If enabled, collections with the same name across different databases are merged into a single Destination table. If disabled, separate tables are created and prefixed with the respective database name.
Load Historical Data: If enabled, the entire table data is fetched during the first run of the Pipeline. If disabled, Hevo loads only the data that was written in your database after the time of the creation of the Pipeline.
Include New Tables in the Pipeline: If enabled, Hevo automatically ingests data from tables created after the Pipeline is built. If disabled, the new tables are listed in the Pipeline Detailed View in Skipped state, and you can manually include the ones you want and load their historical data.
You can change this setting later.
Click TEST & CONTINUE.
Proceed to configuring the data ingestion and setting up the Destination.