Create and modify peering for an ExpressRoute circuit using the Azure portal
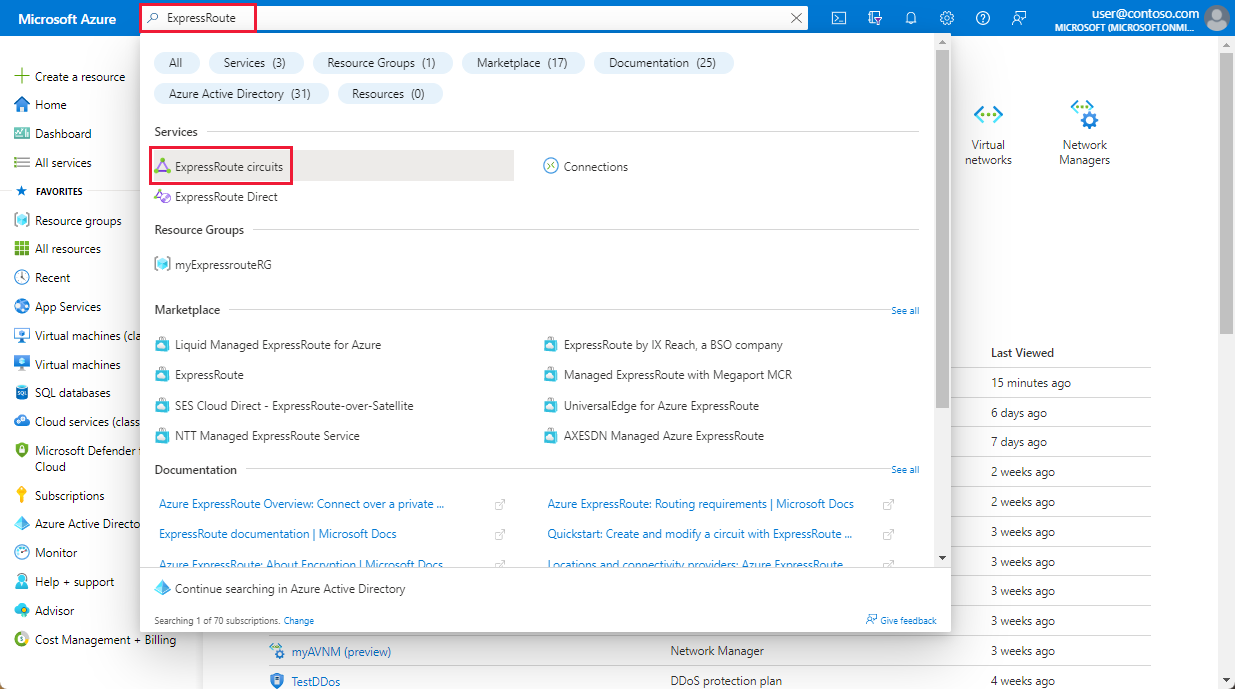
This article shows you how to create and manage routing configuration for an Azure Resource Manager ExpressRoute circuit using the Azure portal. You can also check the status, update, or delete and deprovision peerings for an ExpressRoute circuit. If you want to use a different method to work with your circuit, select an article from the following list:
You can configure private peering and Microsoft peering for an ExpressRoute circuit. Peerings can be configured in any order you choose. However, you must make sure that you complete the configuration of each peering one at a time. For more information about routing domains and peerings, see ExpressRoute routing domains.

Prerequisites
- Make sure that you've reviewed the following pages before you begin configuration:
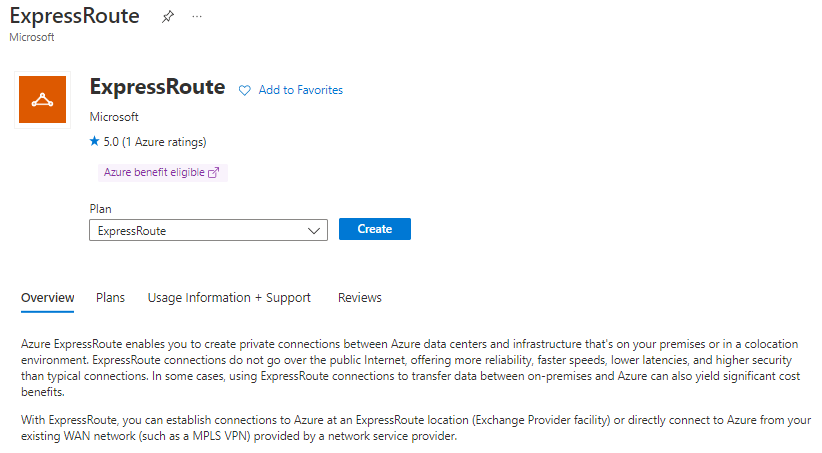
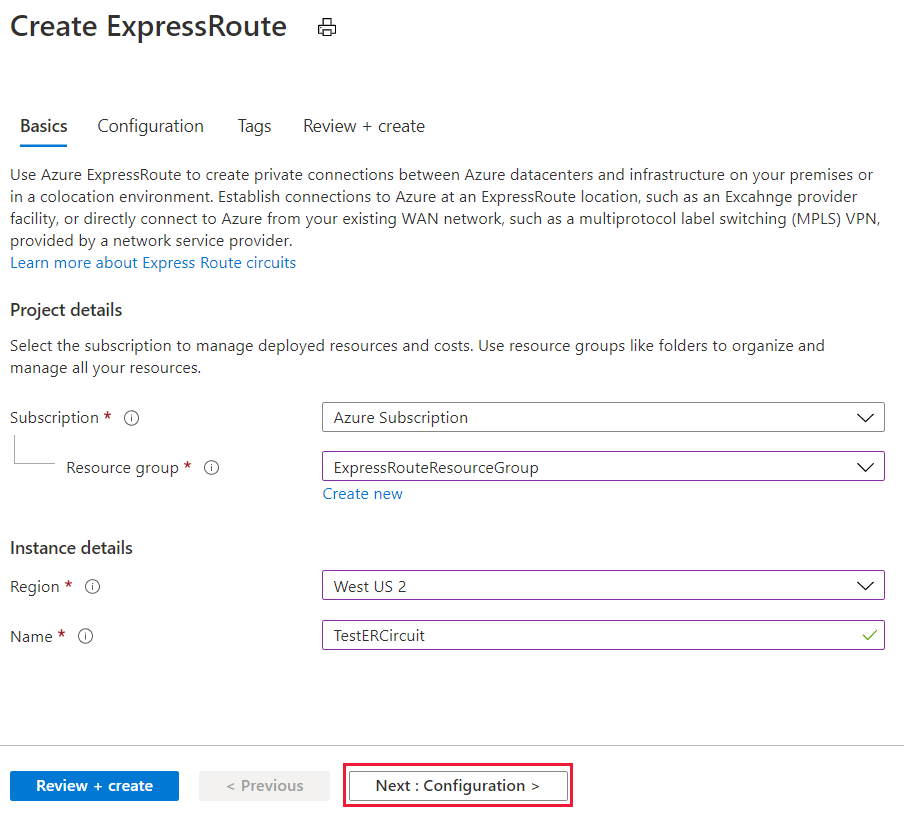
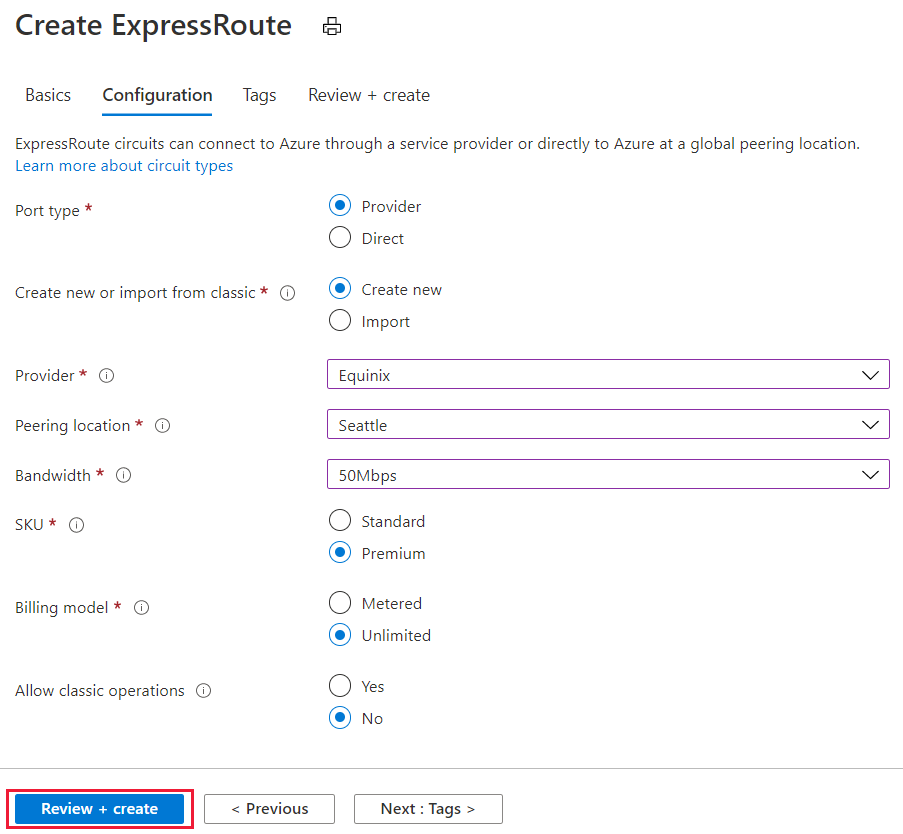
- You must have an active ExpressRoute circuit. Follow the instructions to Create an ExpressRoute circuit and have the circuit enabled by your connectivity provider before you continue. To configure peering(s), the ExpressRoute circuit must be in a provisioned and enabled state.
- If you plan to use a shared key/MD5 hash, be sure to use the key on both sides of the tunnel. The limit is a maximum of 25 alphanumeric characters. Special characters aren't supported.
These instructions only apply to circuits created with service providers offering Layer 2 connectivity services. If you're using a service provider that offers managed Layer 3 services (typically an IPVPN, like MPLS), your connectivity provider configures and manages the routing for you.
Microsoft peering
This section helps you create, get, update, and delete the Microsoft peering configuration for an ExpressRoute circuit.
To create Microsoft peering
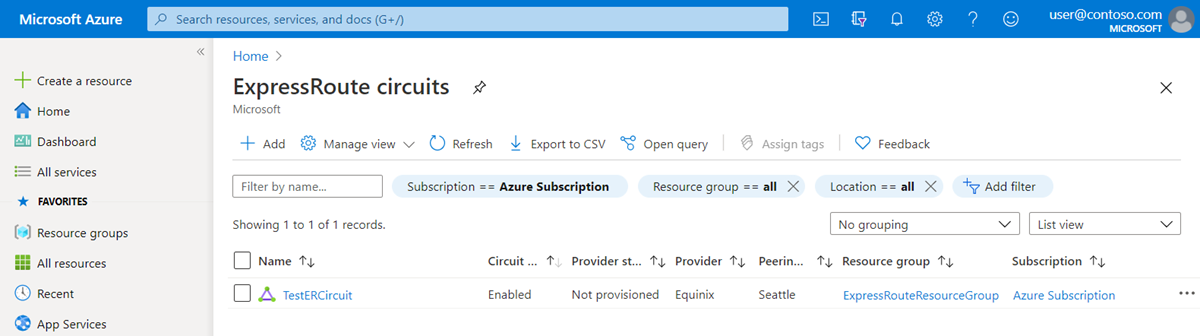
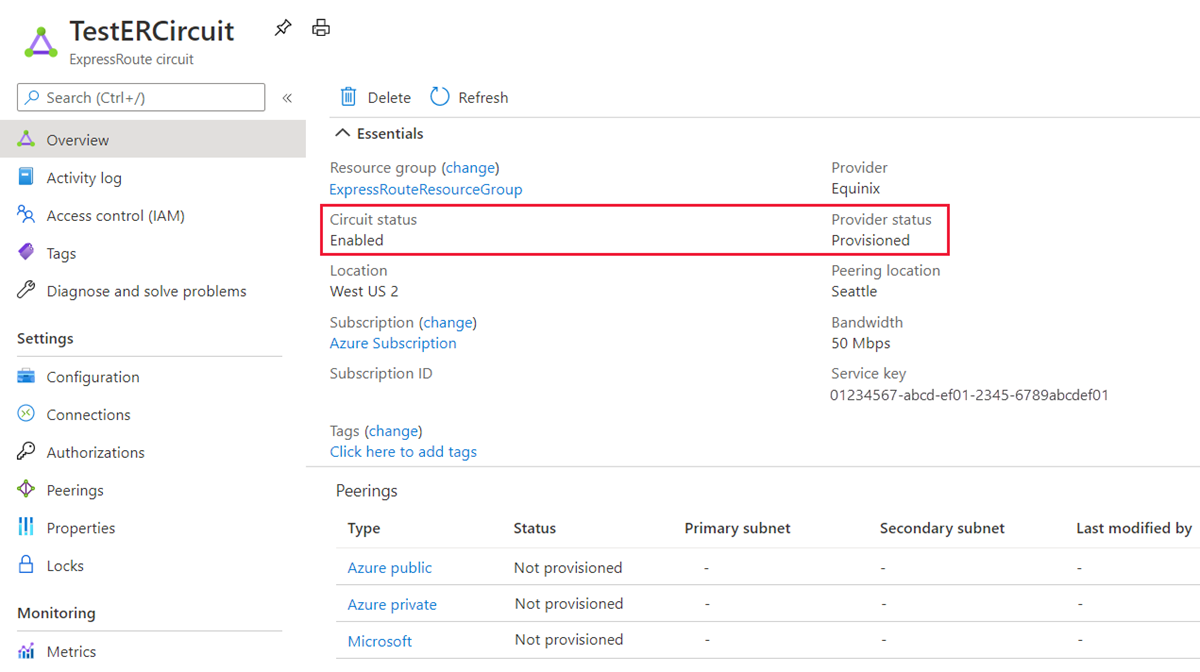
Configure the ExpressRoute circuit. Check the Provider status to ensure that the circuit is fully provisioned by the connectivity provider before continuing further.
If your connectivity provider offers managed Layer 3 services, you can ask your connectivity provider to enable Microsoft peering for you. You won't need to follow the instructions listed in the next sections. However, if your connectivity provider doesn't manage routing for you, after creating your circuit, continue with these steps.
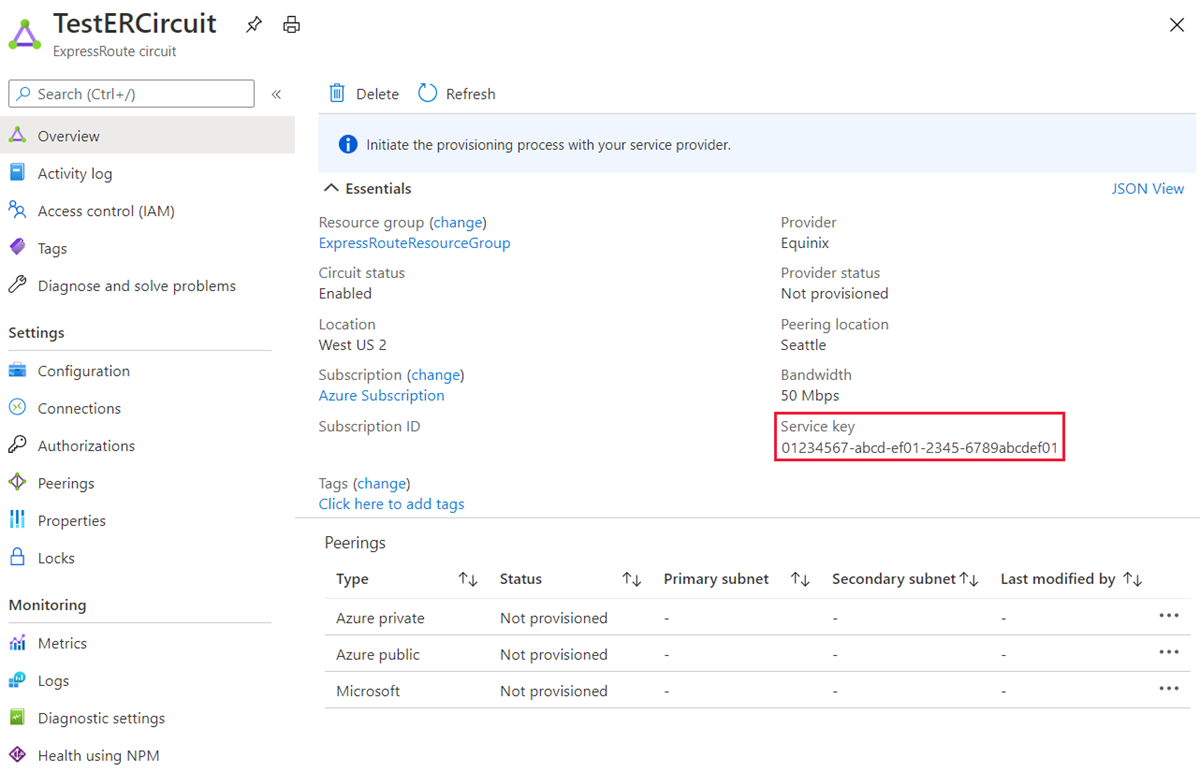
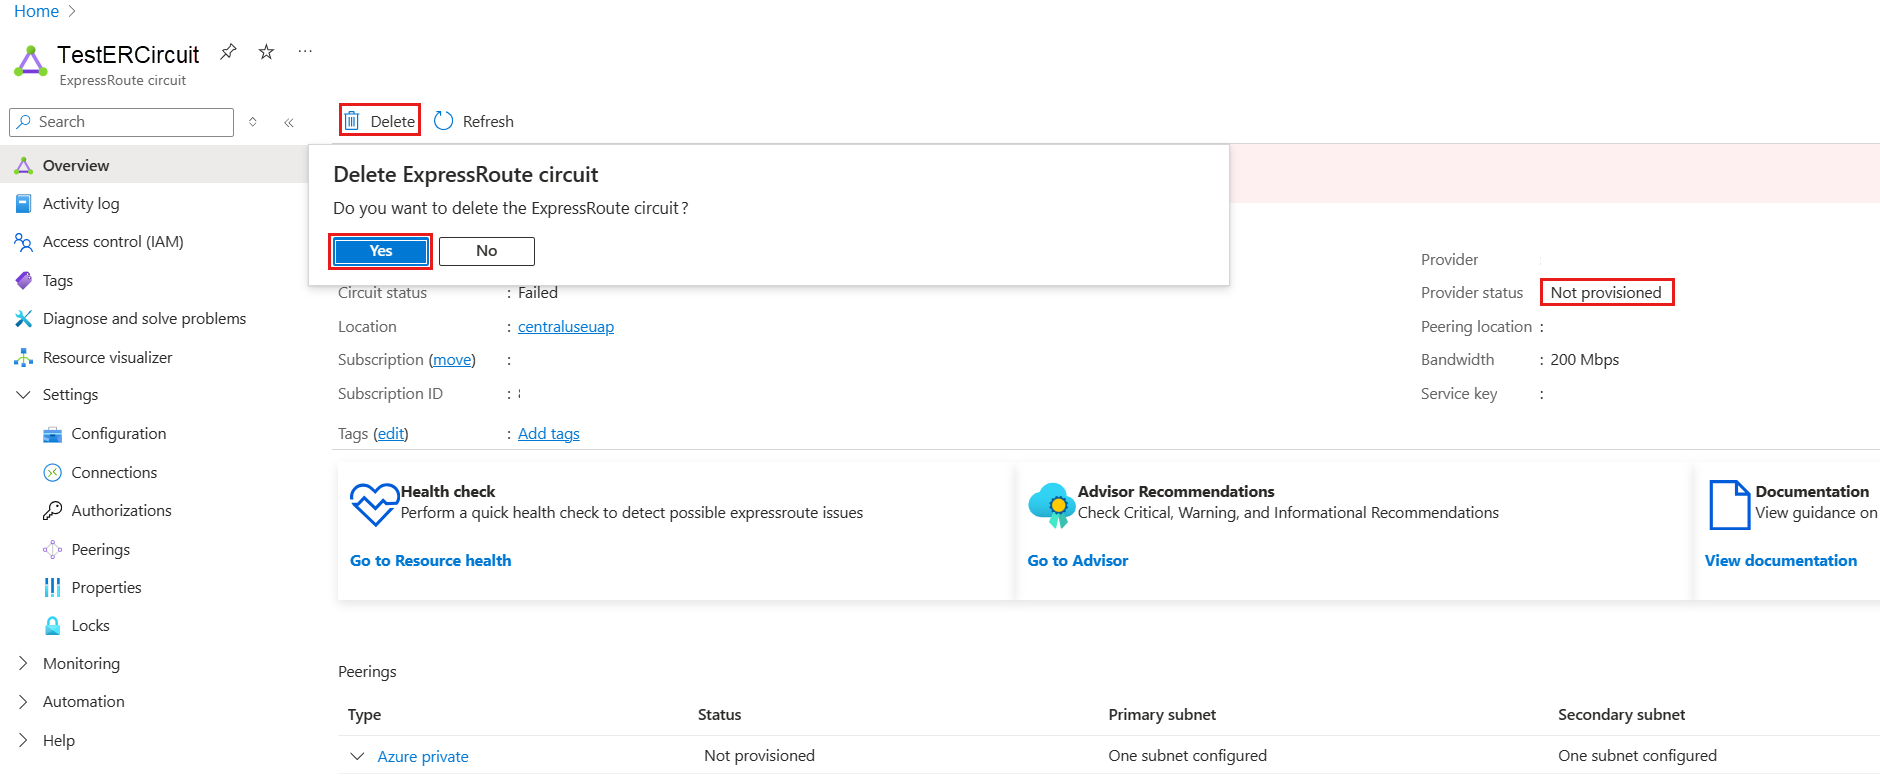
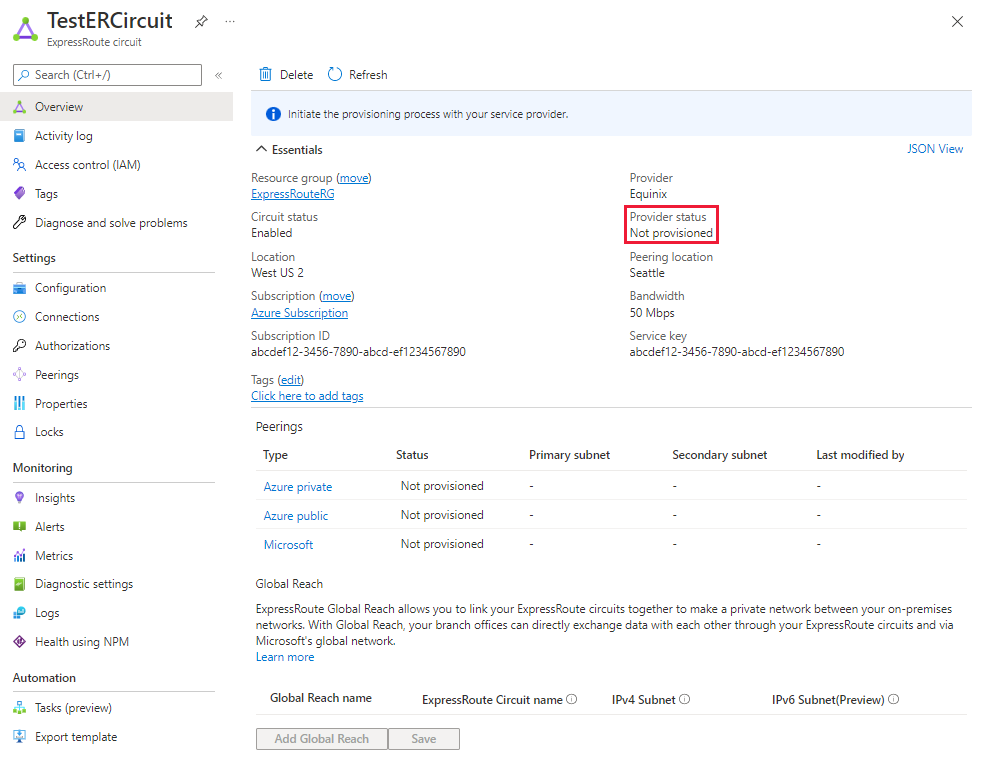
Circuit - Provider status: Not provisioned
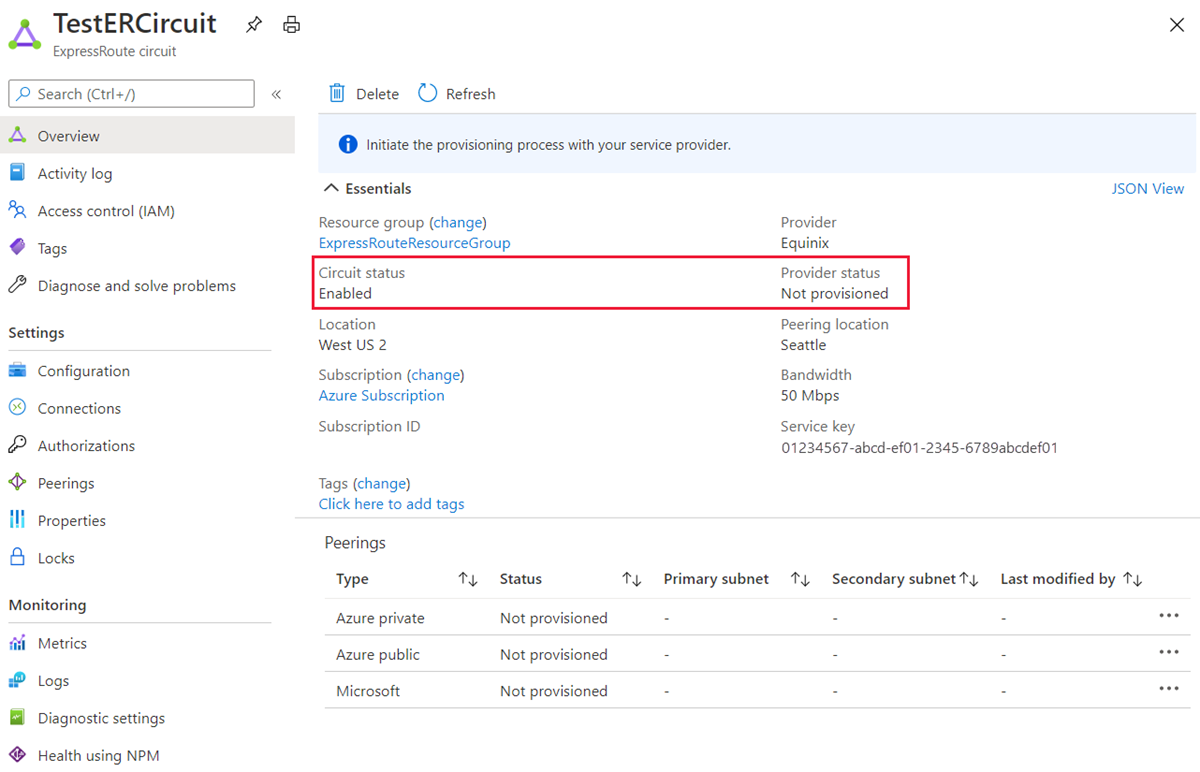
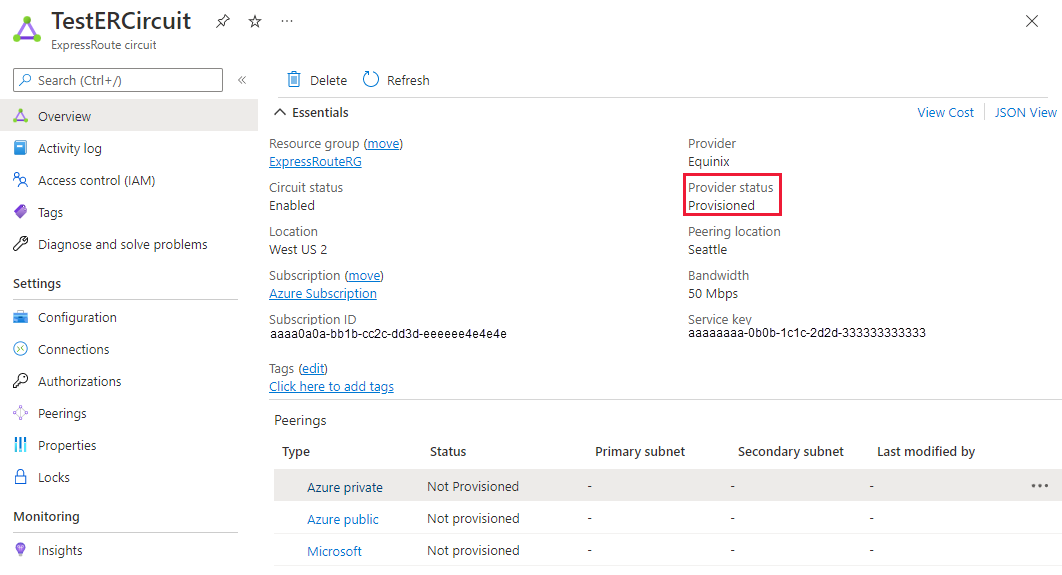
Circuit - Provider status: Provisioned
Configure Microsoft peering for the circuit. Make sure that you have the following information before you continue.
- A pair of subnets owned by you and registered in an RIR/IRR. One subnet is used for the primary link, while the other will be used for the secondary link. From each of these subnets, you assign the first usable IP address to your router as Microsoft uses the second usable IP for its router. You have three options for this pair of subnets:
- IPv4: Two /30 subnets. These must be valid public IPv4 prefixes.
- IPv6: Two /126 subnets. These must be valid public IPv6 prefixes.
- Both: Two /30 subnets and two /126 subnets.
- Microsoft peering enables you to communicate with the public IP addresses on Microsoft network. So, your traffic endpoints on your on-premises network should be public too. This is often done using SNAT.
e as small as a single IP address (represented as '/32' for IPv4 or '/128' for IPv6).
- A valid VLAN ID to establish this peering on. Ensure that no other peering in the circuit uses the same VLAN ID. For both Primary and Secondary links you must use the same VLAN ID.
- AS number for peering. You can use both 2-byte and 4-byte AS numbers.
- Advertised prefixes: You provide a list of all prefixes you plan to advertise over the BGP session. Only public IP address prefixes are accepted. If you plan to send a set of prefixes, you can send a comma-separated list. These prefixes must be registered to you in an RIR / IRR.
- Optional - Customer ASN: If you're advertising prefixes not registered to the peering AS number, you can specify the AS number to which they're registered with.
- Routing Registry Name: You can specify the RIR / IRR against which the AS number and prefixes are registered.
- Optional - An MD5 hash if you choose to use one.
- A pair of subnets owned by you and registered in an RIR/IRR. One subnet is used for the primary link, while the other will be used for the secondary link. From each of these subnets, you assign the first usable IP address to your router as Microsoft uses the second usable IP for its router. You have three options for this pair of subnets:
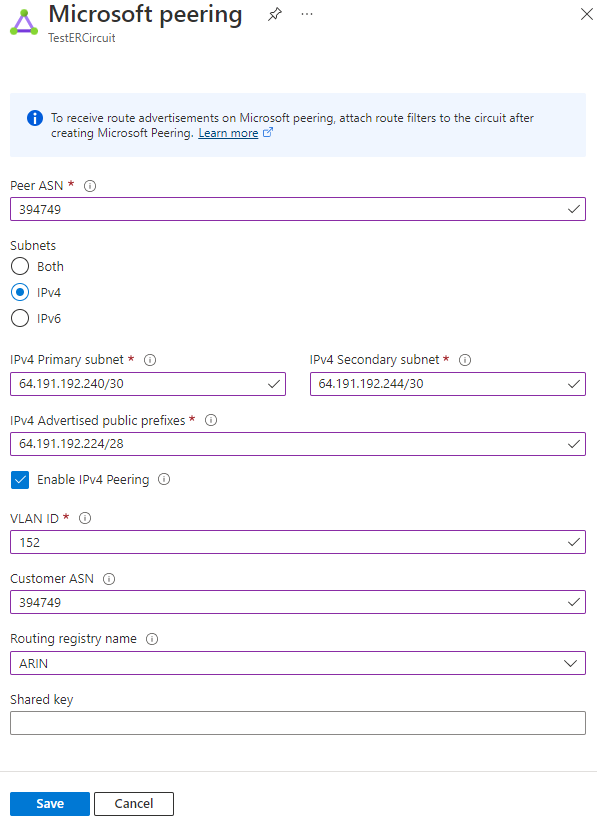
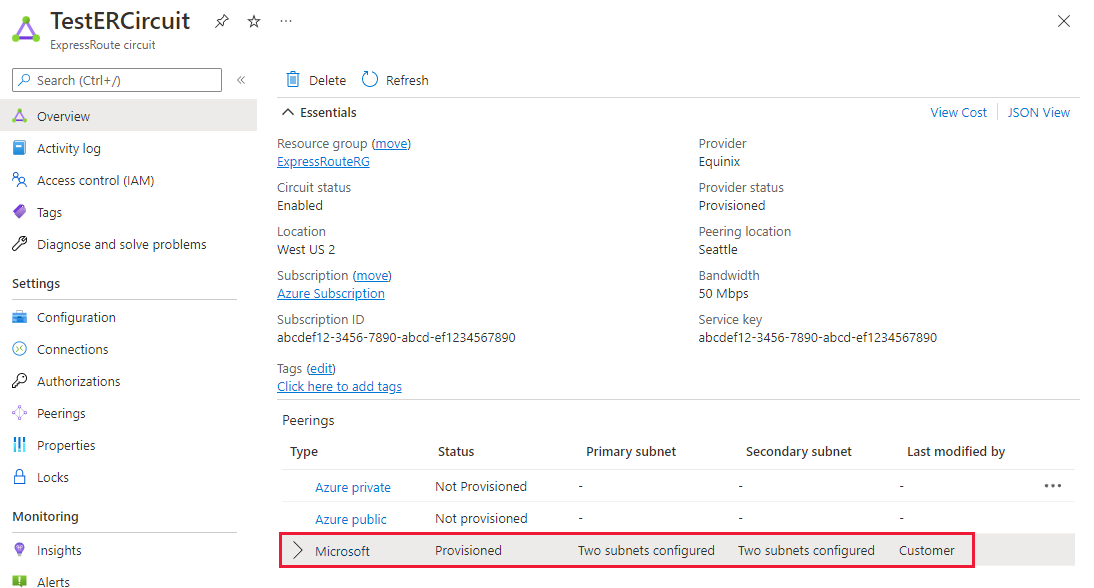
You can select the peering you wish to configure, as shown in the following example. Select the Microsoft peering row.

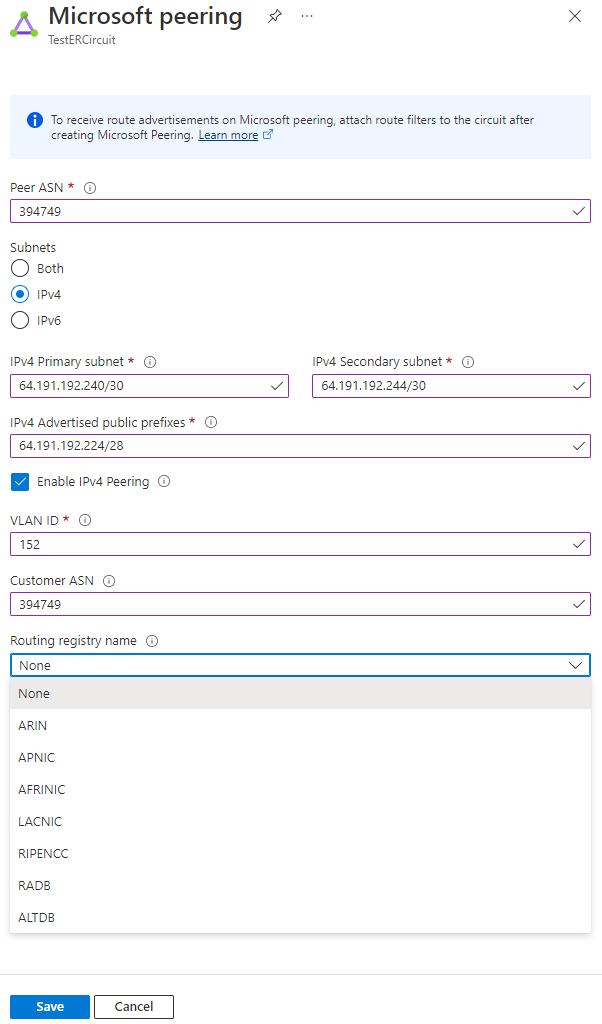
Configure Microsoft peering. Save the configuration once you've specified all parameters. The following image shows an example configuration:
Important
Microsoft verifies if the specified 'Advertised public prefixes' and 'Peer ASN' (or 'Customer ASN') are assigned to you in the Internet Routing Registry. If you are getting the public prefixes from another entity and if the assignment is not recorded with the routing registry, the automatic validation will not complete and will require manual validation. If the automatic validation fails, you will see the message 'Validation needed'.
If you see the message 'Validation needed', collect the document(s) that show the public prefixes are assigned to your organization by the entity that is listed as the owner of the prefixes in the routing registry and submit these documents for manual validation by opening a support ticket.
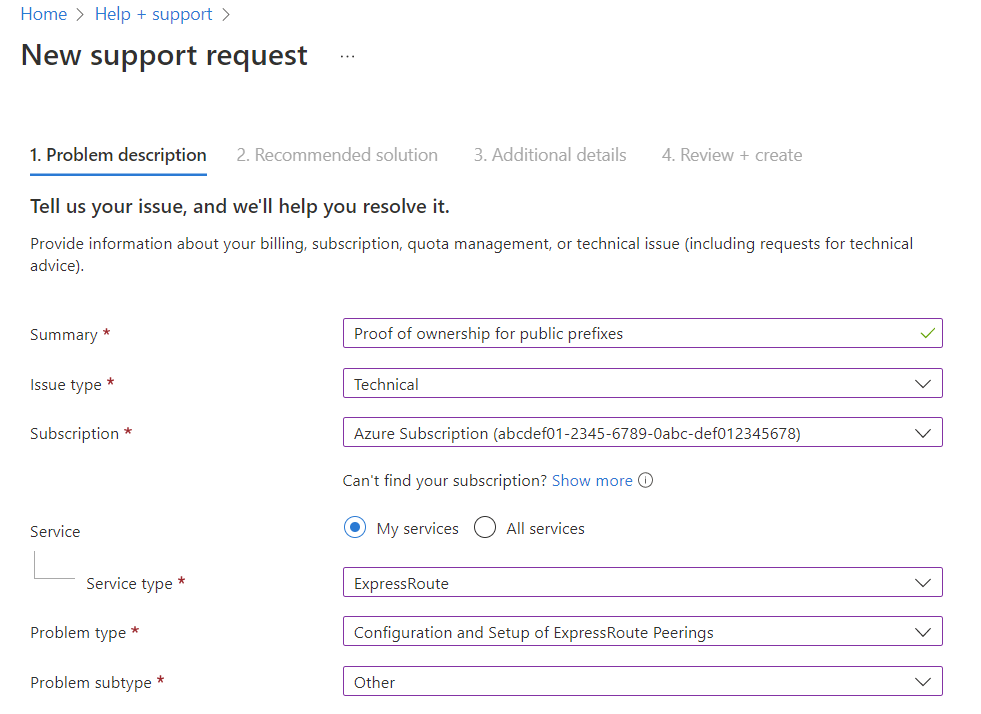
If your circuit gets to a Validation needed state, you must open a support ticket to show proof of ownership of the prefixes to our support team. You can open a support ticket directly from the portal, as shown in the following example:
To view Microsoft peering details
You can view the properties of Microsoft peering by selecting the row for the peering.
To update Microsoft peering configuration
You can select the row for the peering that you want to modify, then modify the peering properties and save your modifications.
Azure private peering
This section helps you create, get, update, and delete the Azure private peering configuration for an ExpressRoute circuit.
To create Azure private peering
Configure the ExpressRoute circuit. Ensure that the circuit is fully provisioned by the connectivity provider before continuing.
If your connectivity provider offers managed Layer 3 services, you can ask your connectivity provider to enable Azure private peering for you. You won't need to follow the instructions listed in the next sections. However, if your connectivity provider doesn't manage routing for you, after creating your circuit, continue with the next steps.
Circuit - Provider status: Not provisioned
Circuit - Provider status: Provisioned
Configure Azure private peering for the circuit. Make sure that you have the following items before you continue with the next steps:
- A pair of subnets that aren't part of any address space reserved for virtual networks. One subnet is used for the primary link, while the other will be used for the secondary link. From each of these subnets, you assign the first usable IP address to your router as Microsoft uses the second usable IP for its router. You have three options for this pair of subnets:
- IPv4: Two /30 subnets.
- IPv6: Two /126 subnets.
- Both: Two /30 subnets and two /126 subnets.
- A valid VLAN ID to establish this peering on. Ensure that no other peering in the circuit uses the same VLAN ID. For both Primary and Secondary links you must use the same VLAN ID.
- AS number for peering. You can use both 2-byte and 4-byte AS numbers. You can use a private AS number for this peering except for the number from 65515 to 65520, inclusively.
- You must advertise the routes from your on-premises Edge router to Azure via BGP when you configure the private peering.
- Optional - An MD5 hash if you choose to use one.
- A pair of subnets that aren't part of any address space reserved for virtual networks. One subnet is used for the primary link, while the other will be used for the secondary link. From each of these subnets, you assign the first usable IP address to your router as Microsoft uses the second usable IP for its router. You have three options for this pair of subnets:
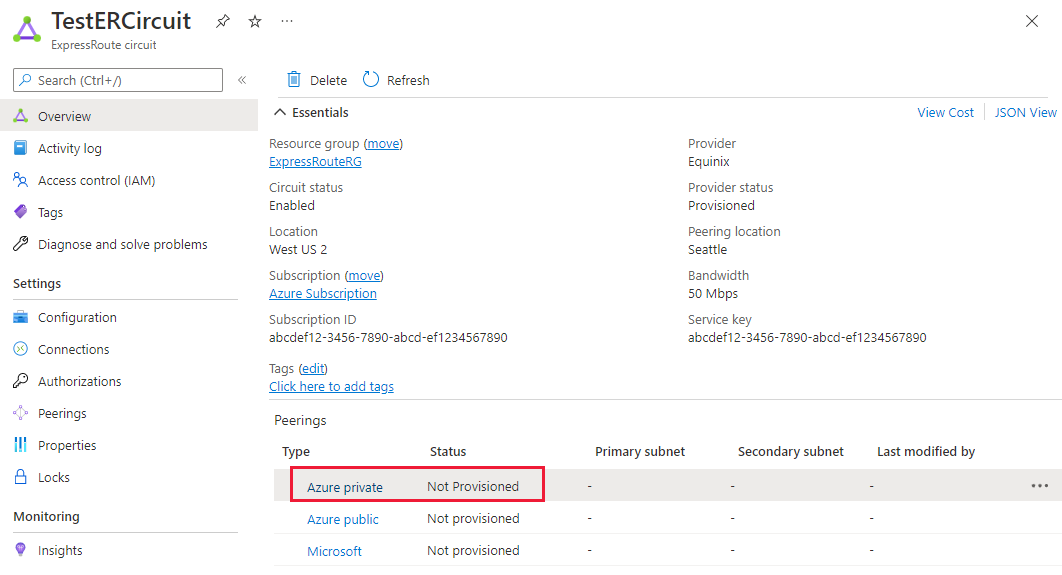
Select the Azure private peering row, as shown in the following example:
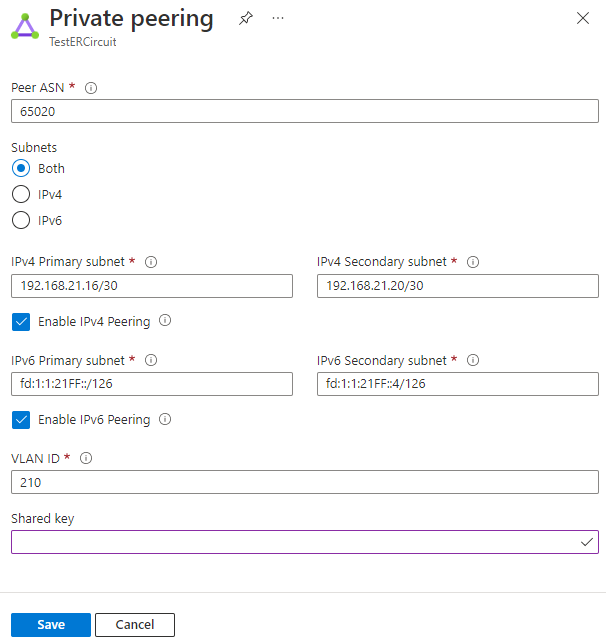
Configure private peering. Save the configuration once you've specified all parameters.
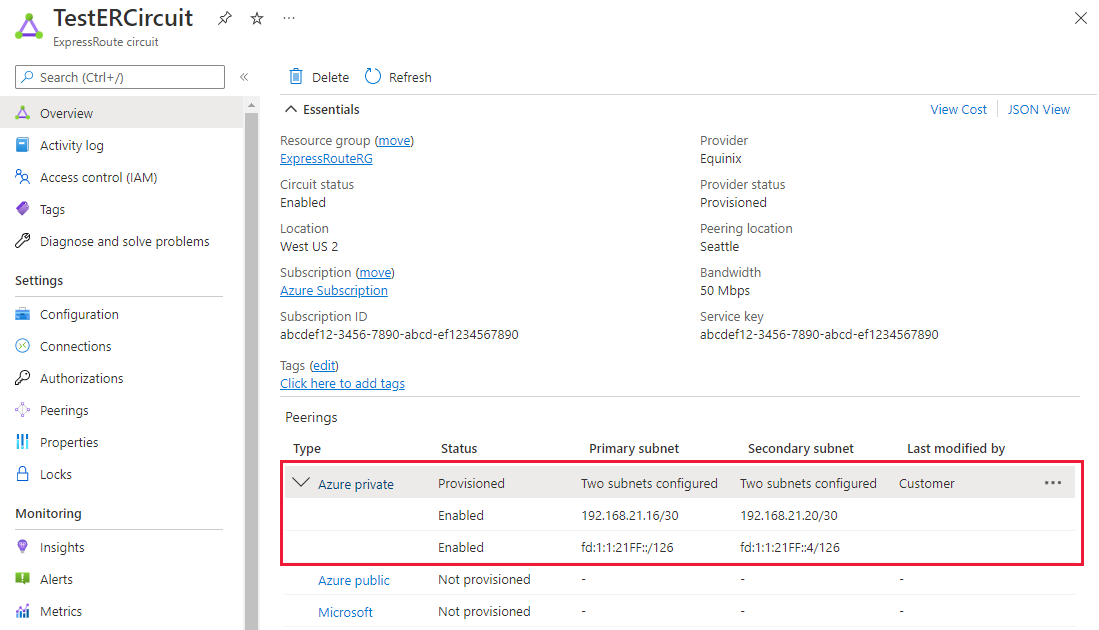
To view Azure private peering details
You can view the properties of Azure private peering by selecting the peering.
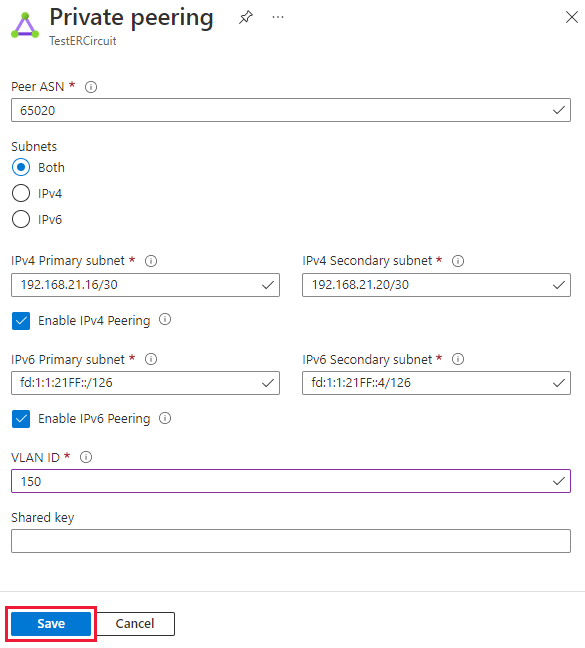
To update Azure private peering configuration
You can select the row for peering and modify the peering properties. After updating, save your changes.
Clean up resources
To delete Microsoft peering
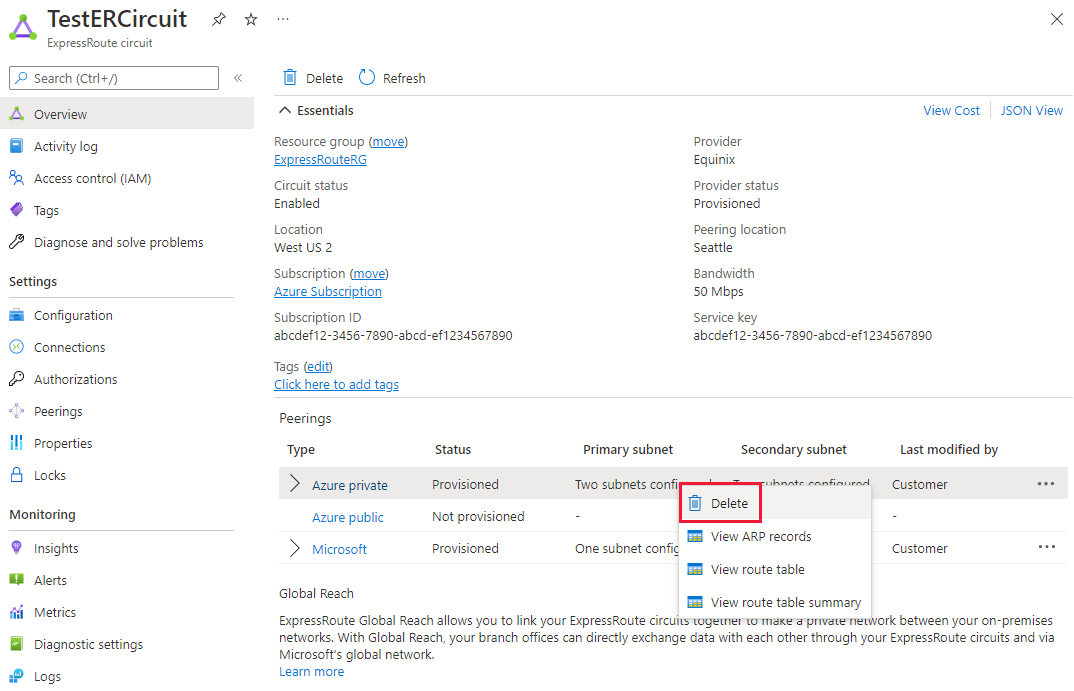
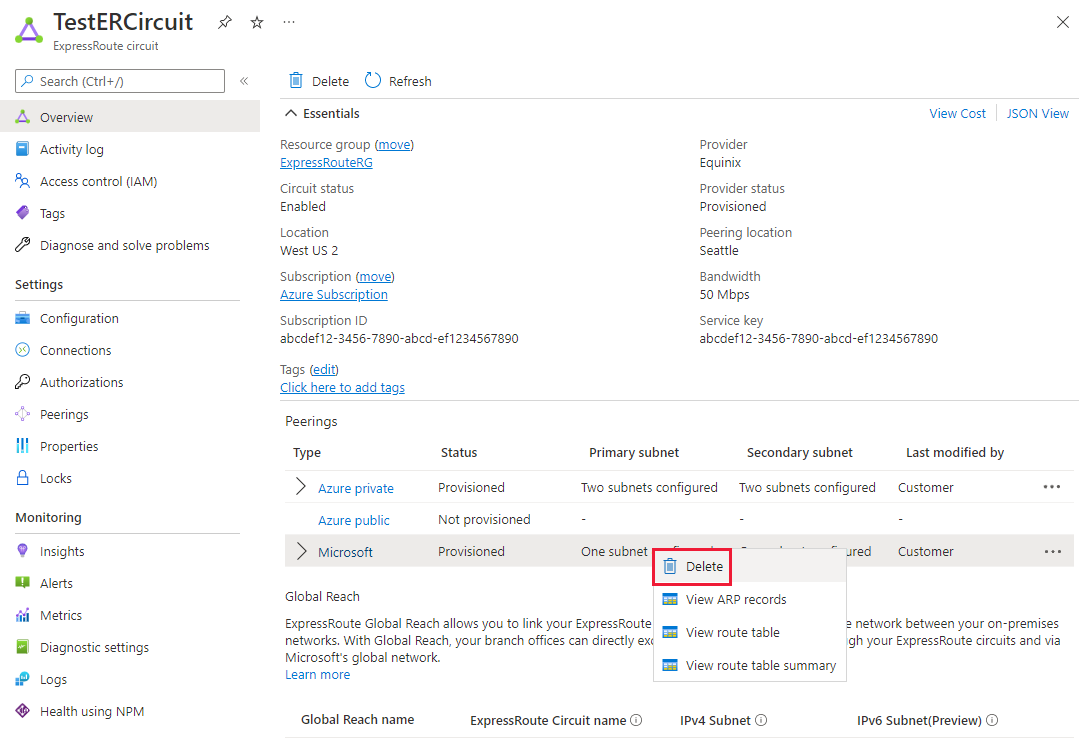
You can remove your Microsoft peering configuration by right-clicking the peering and selecting Delete as shown in the following image:
To delete Azure private peering
You can remove your private peering configuration by right-clicking the peering and selecting Delete as shown in the following image:
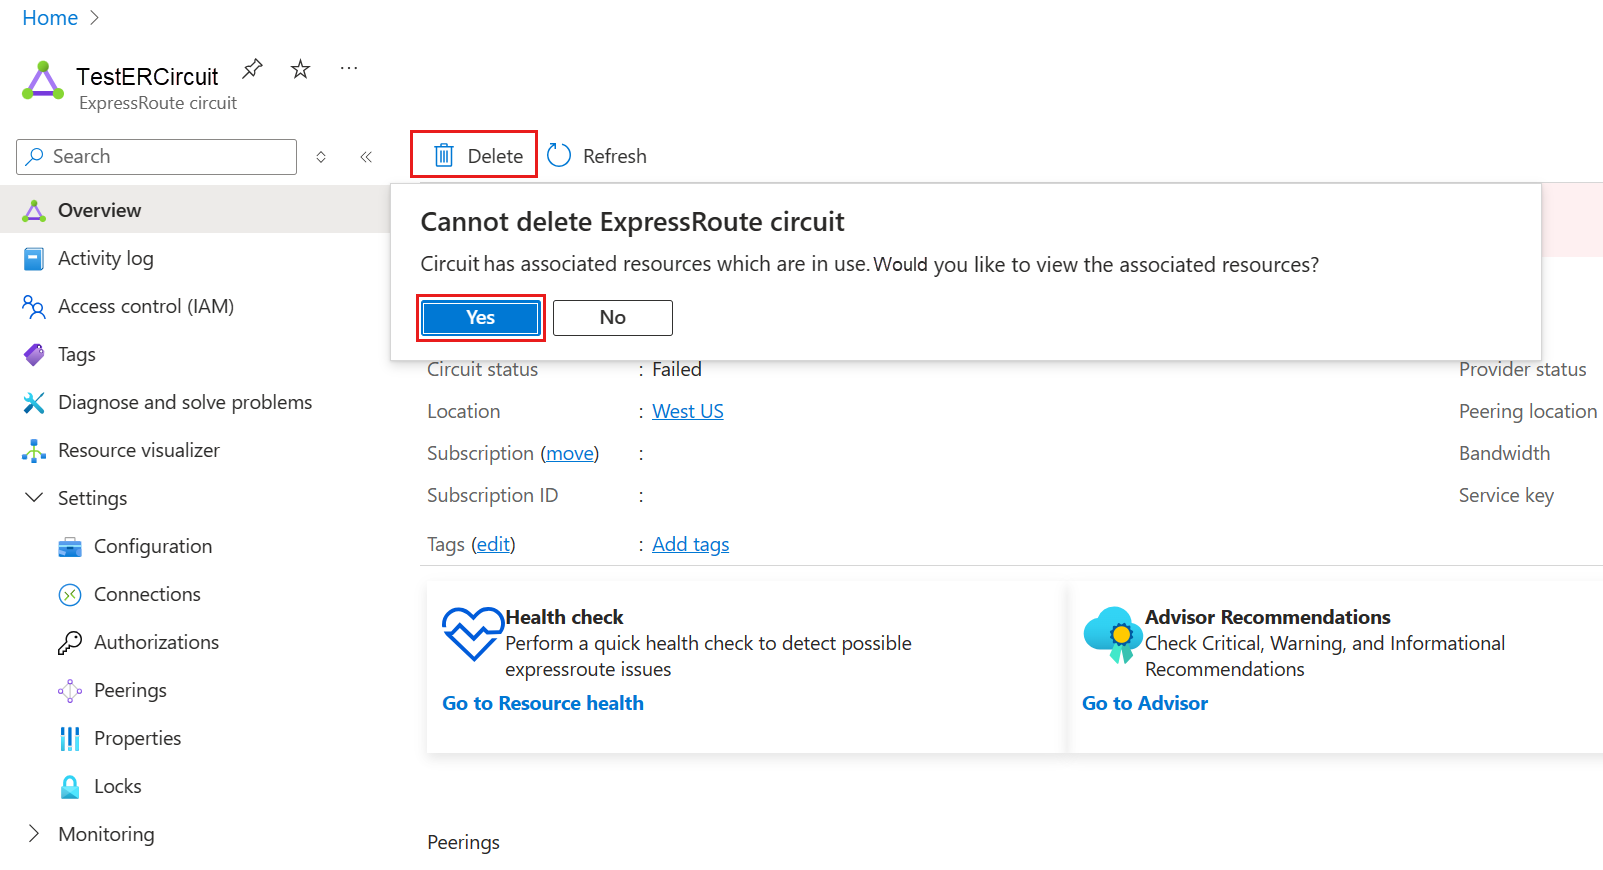
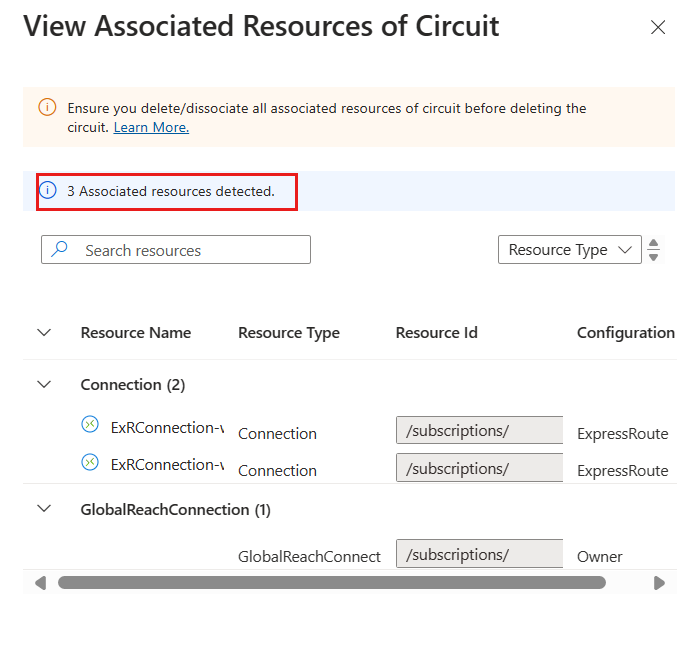
Warning
You must ensure that all virtual network connections and ExpressRoute Global Reach connections are removed before running this operation.