Connect to Azure Data Lake Gen1 in Microsoft Purview
Supported capabilities
** Lineage is supported if dataset is used as a source/sink in Data Factory Copy activity
Prerequisites
An Azure account with an active subscription. Create an account for free.
An active Microsoft Purview account.
You will need to be a Data Source Administrator and Data Reader to register a source and manage it in the Microsoft Purview governance portal. See our Microsoft Purview Permissions page for details.
Register
This section will enable you to register the ADLS Gen1 data source and set up an appropriate authentication mechanism to ensure successful scanning of the data source.
Steps to register
It is important to register the data source in Microsoft Purview prior to setting up a scan for the data source.
Open the Microsoft Purview governance portal by:
- Browsing directly to https://web.purview.azure.com and selecting your Microsoft Purview account.
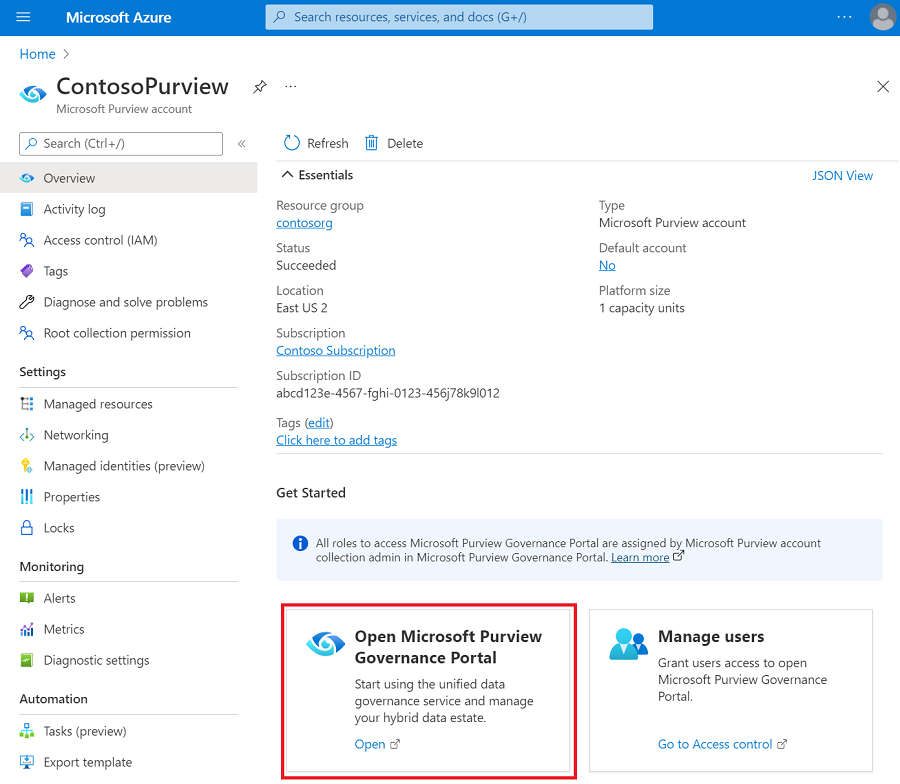
- Opening the Azure portal, searching for and selecting the Microsoft Purview account. Selecting the the Microsoft Purview governance portal button.
Navigate to the Data Map --> Sources
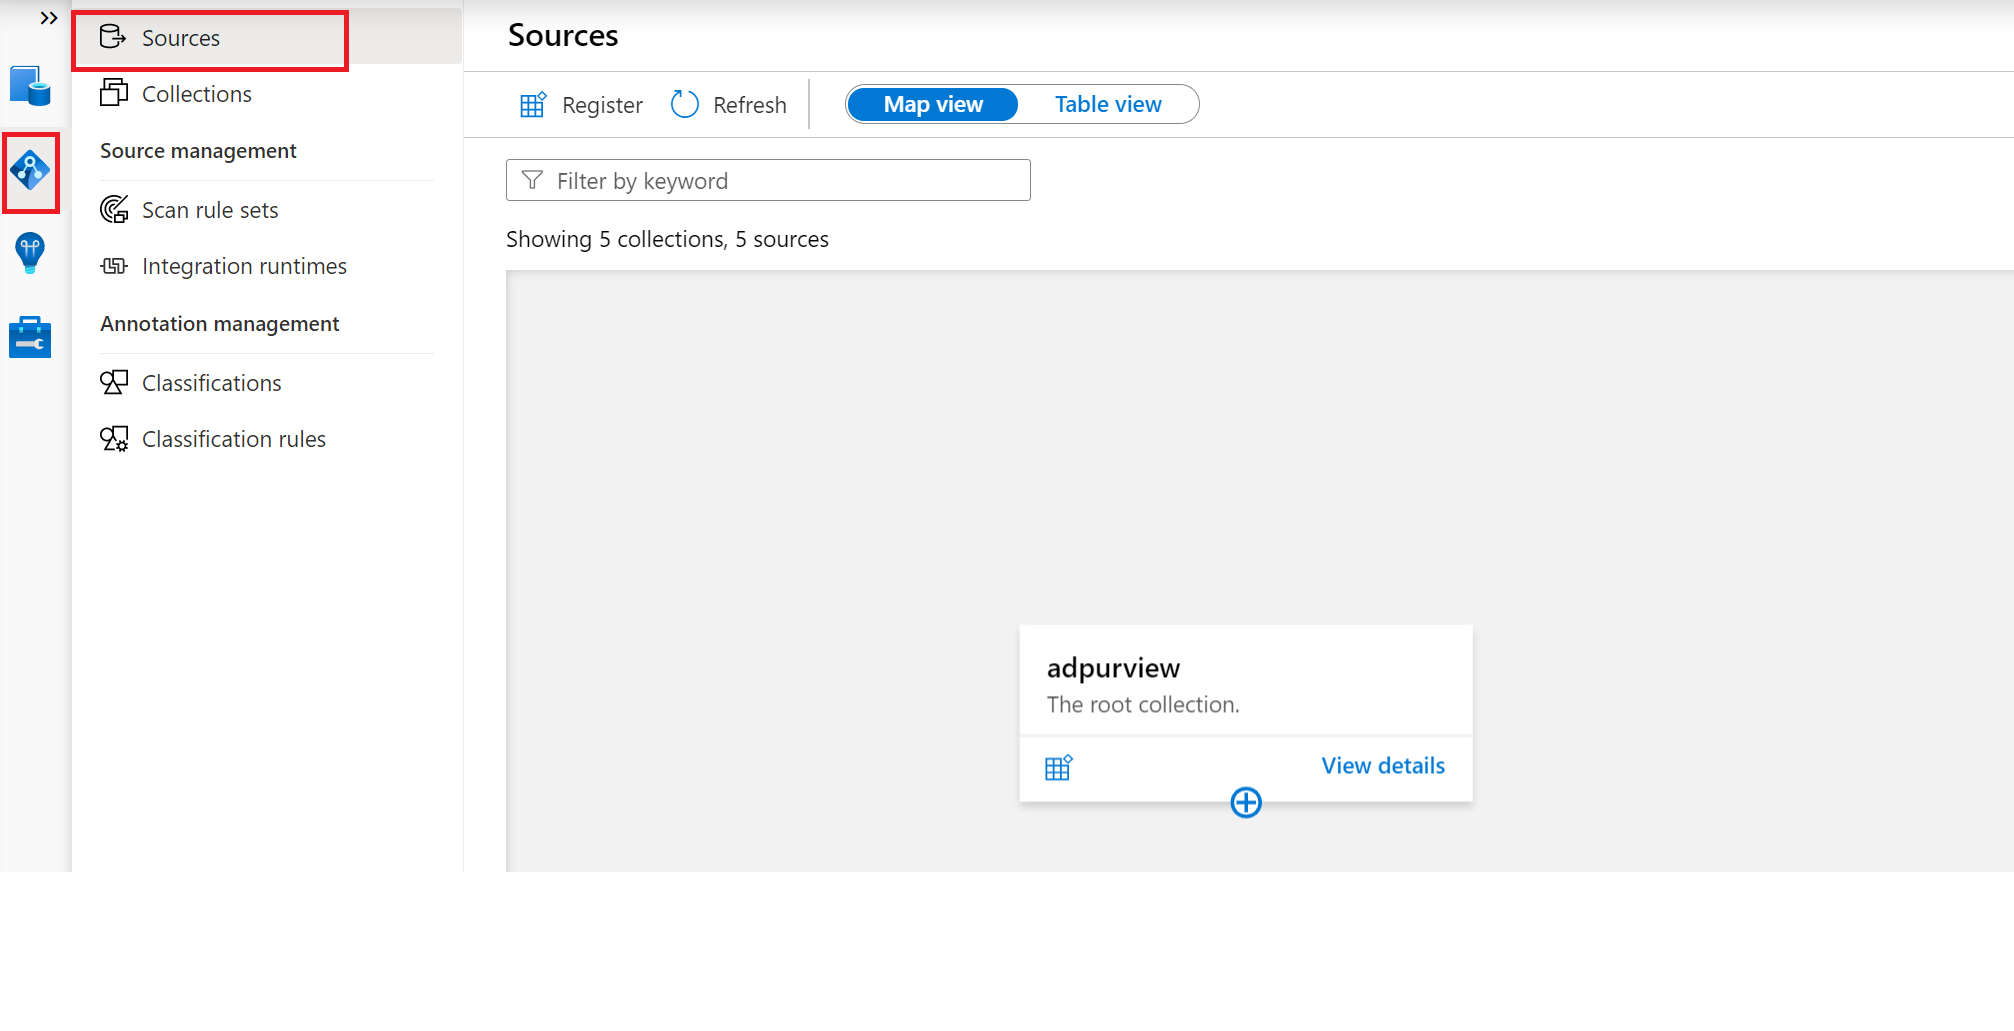
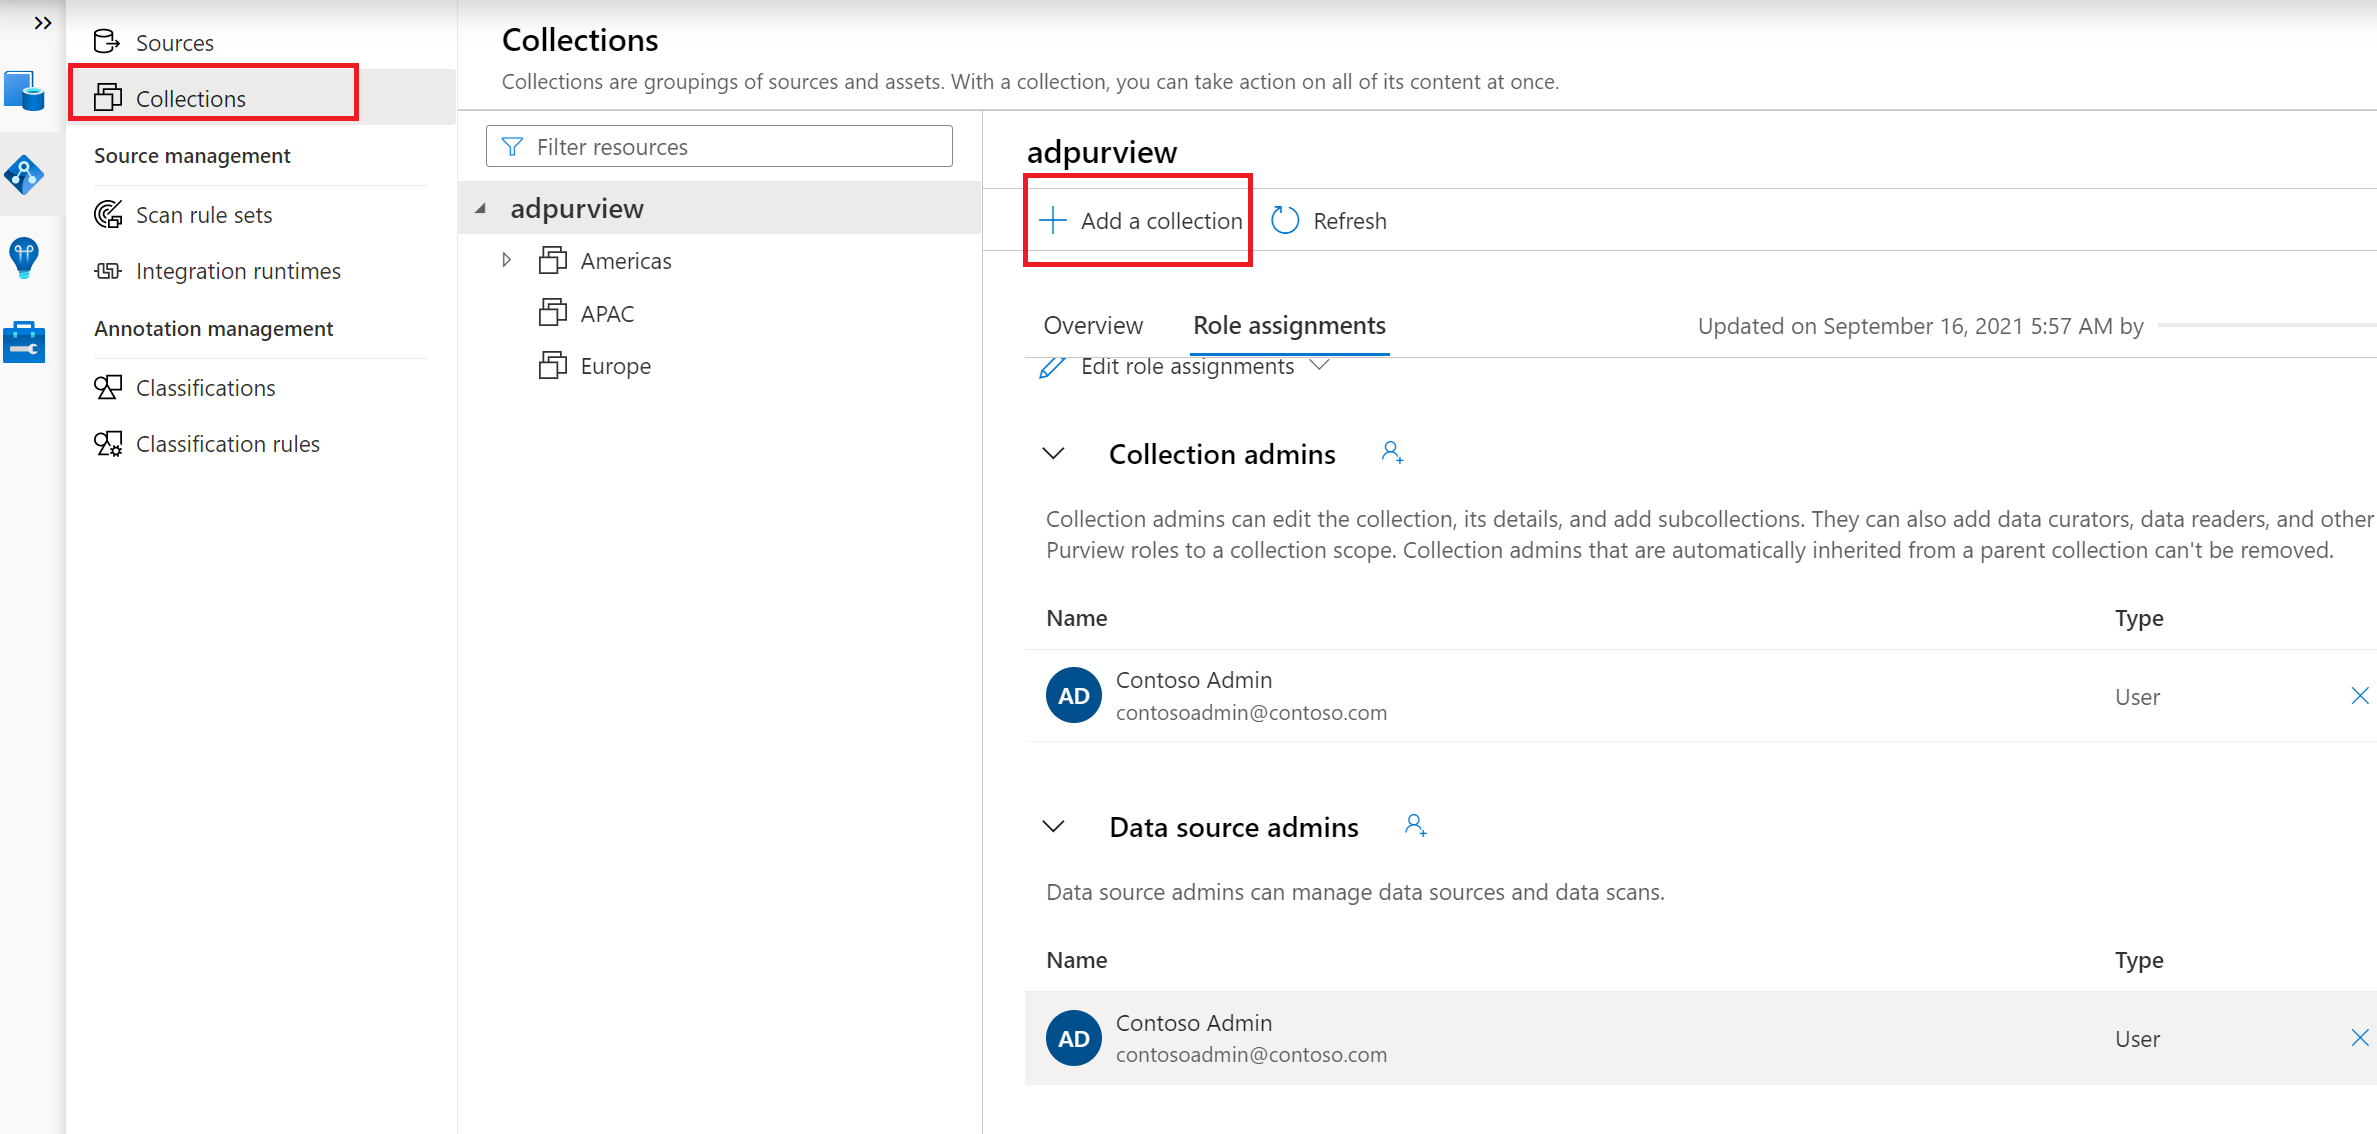
Create the Collection hierarchy using the Collections menu and assign permissions to individual subcollections, as required
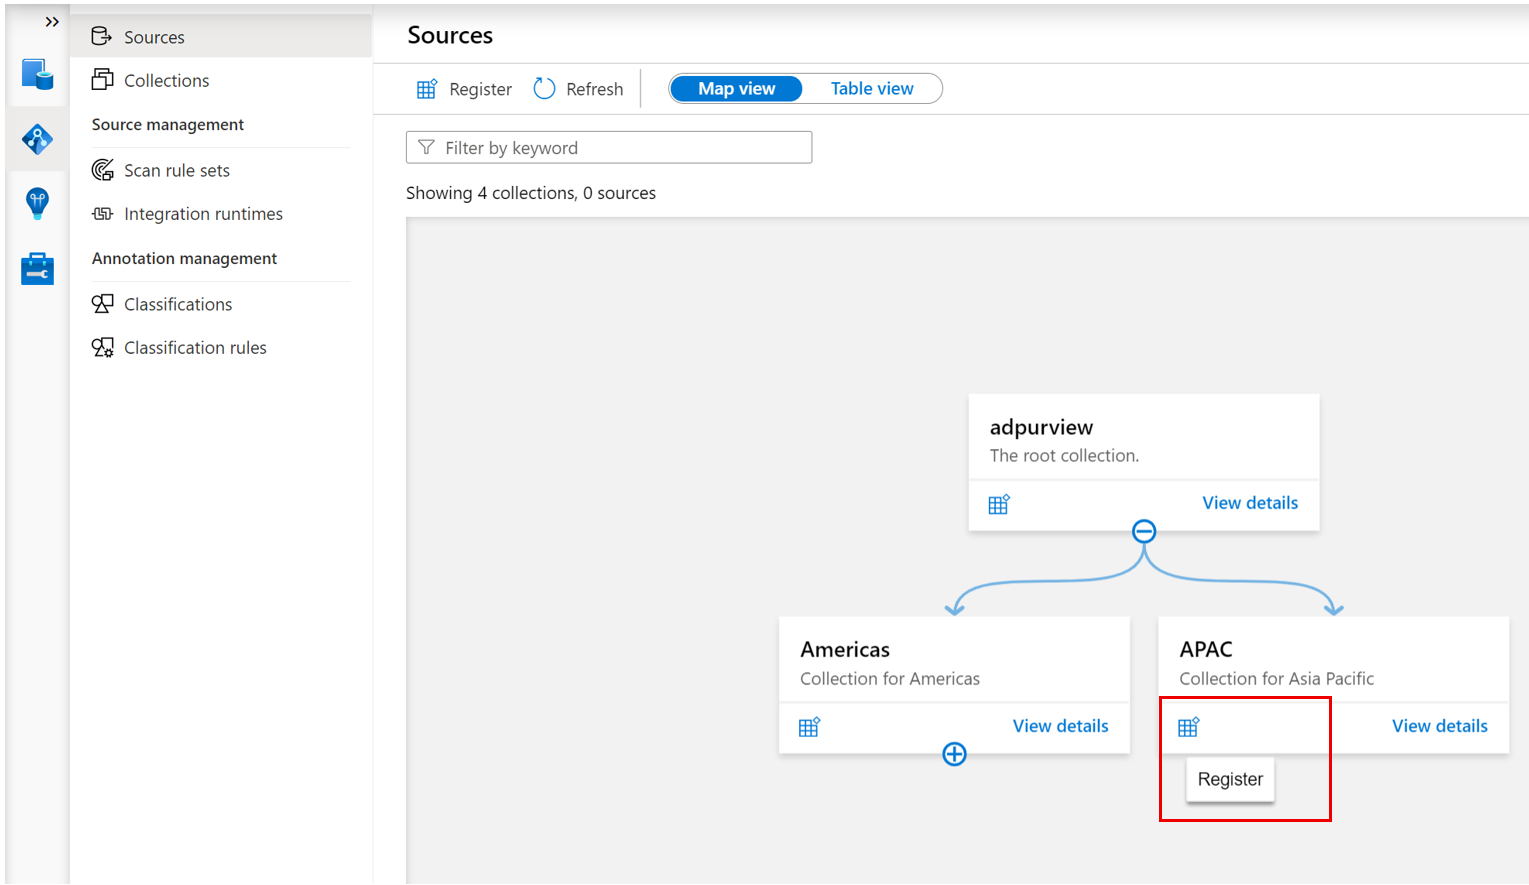
Navigate to the appropriate collection under the Sources menu and select the Register icon to register a new ADLS Gen1 data source
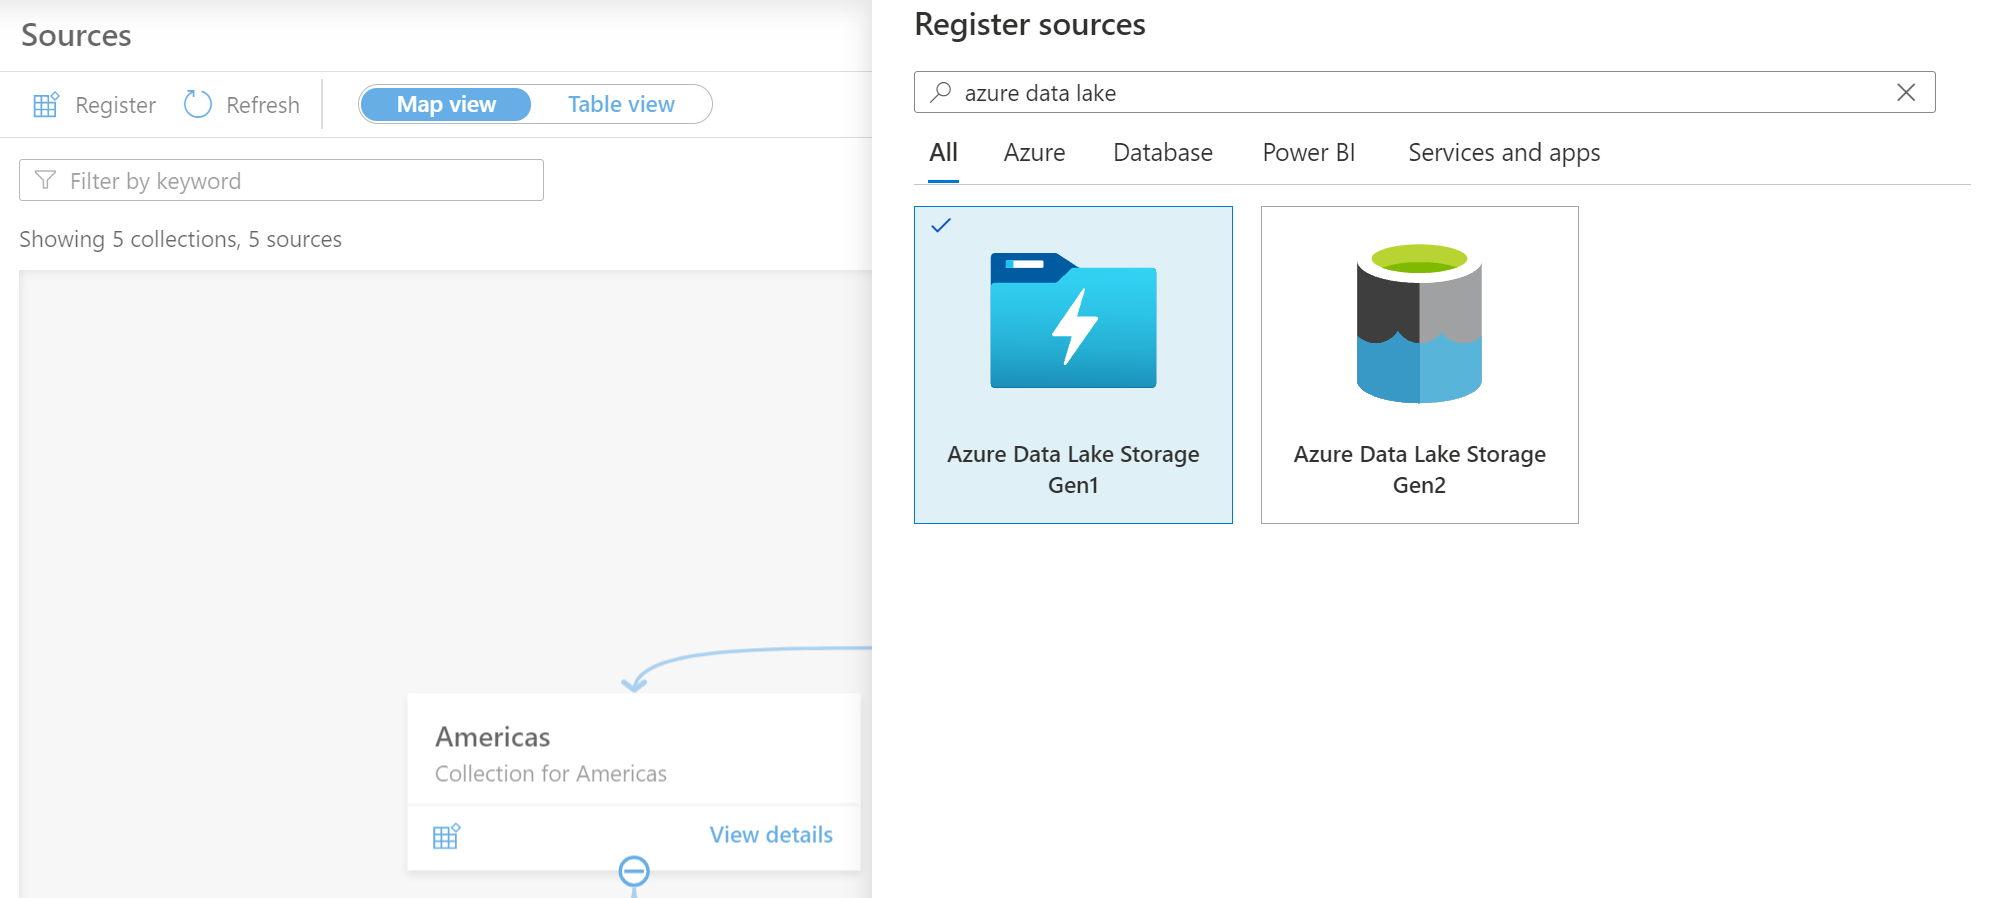
Select the Azure Data Lake Storage Gen1 data source and select Continue
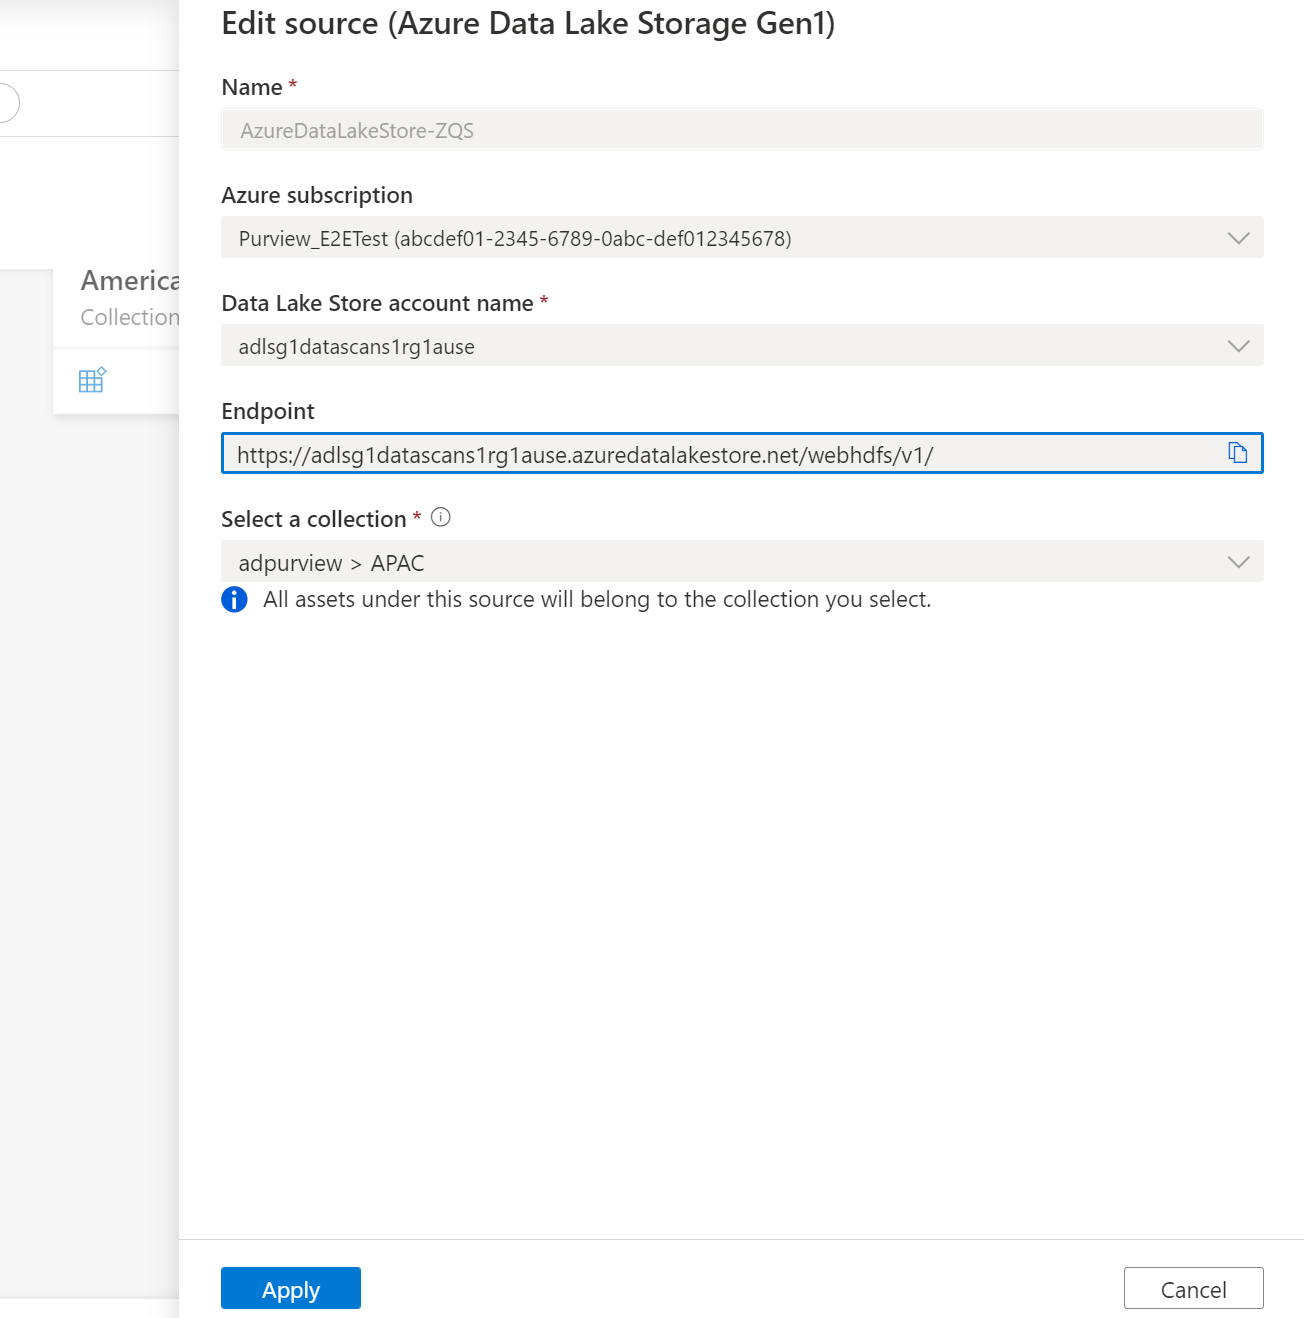
Provide a suitable Name for the data source, select the relevant Azure subscription, existing Data Lake Store account name and the collection and select Apply
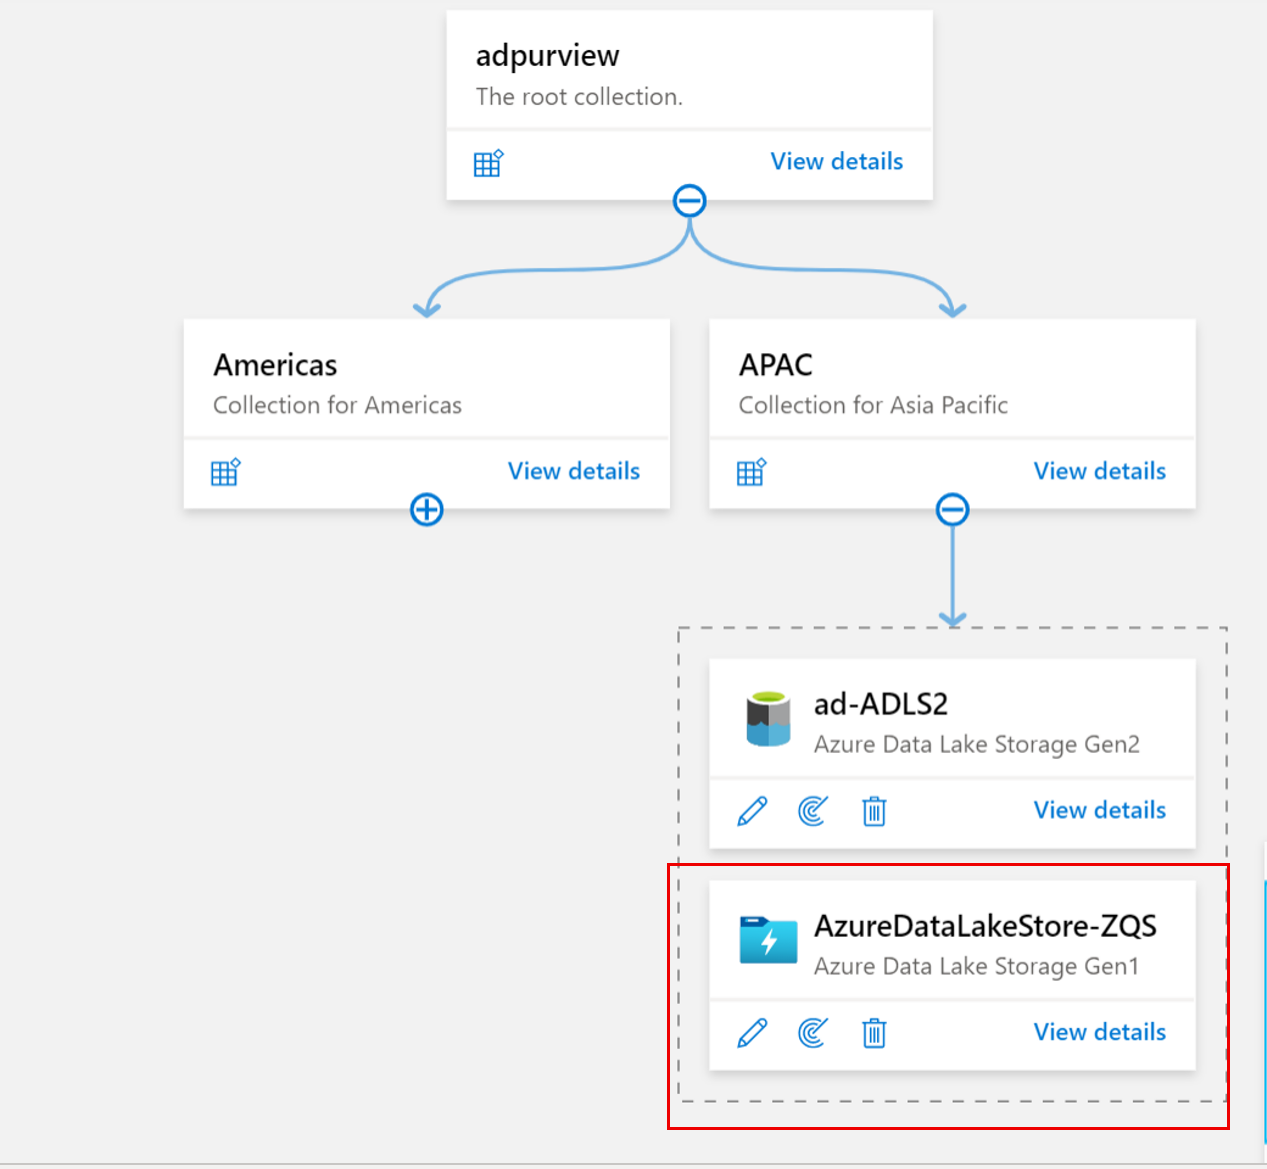
The ADLS Gen1 storage account will be shown under the selected Collection
Scan
Prerequisites for scan
In order to have access to scan the data source, an authentication method in the ADLS Gen1 Storage account needs to be configured. The following options are supported:
Note
If you have firewall enabled for the storage account, you must use managed identity authentication method when setting up a scan.
System-assigned managed identity (Recommended) - As soon as the Microsoft Purview Account is created, a system Managed Identity is created automatically in Microsoft Entra tenant. Depending on the type of resource, specific RBAC role assignments are required for the Microsoft Purview SAMI to perform the scans.
User-assigned managed identity (preview) - Similar to a system-managed identity, a user-assigned managed identity is a credential resource that can be used to allow Microsoft Purview to authenticate against Microsoft Entra ID. For more information, you can see our user-assigned managed identity guide.
Service Principal - In this method, you can create a new or use an existing service principal in your Microsoft Entra tenant.
Authentication for a scan
Using system or user-assigned managed identity for scanning
It is important to give your Microsoft Purview account the permission to scan the ADLS Gen1 data source. You can add the system managed identity, or user-assigned managed identity at the Subscription, Resource Group, or Resource level, depending on what you want it to have scan permissions on.
Note
You need to be an owner of the subscription to be able to add a managed identity on an Azure resource.
From the Azure portal, find either the subscription, resource group, or resource (for example, an Azure Data Lake Storage Gen1 storage account) that you would like to allow the catalog to scan.
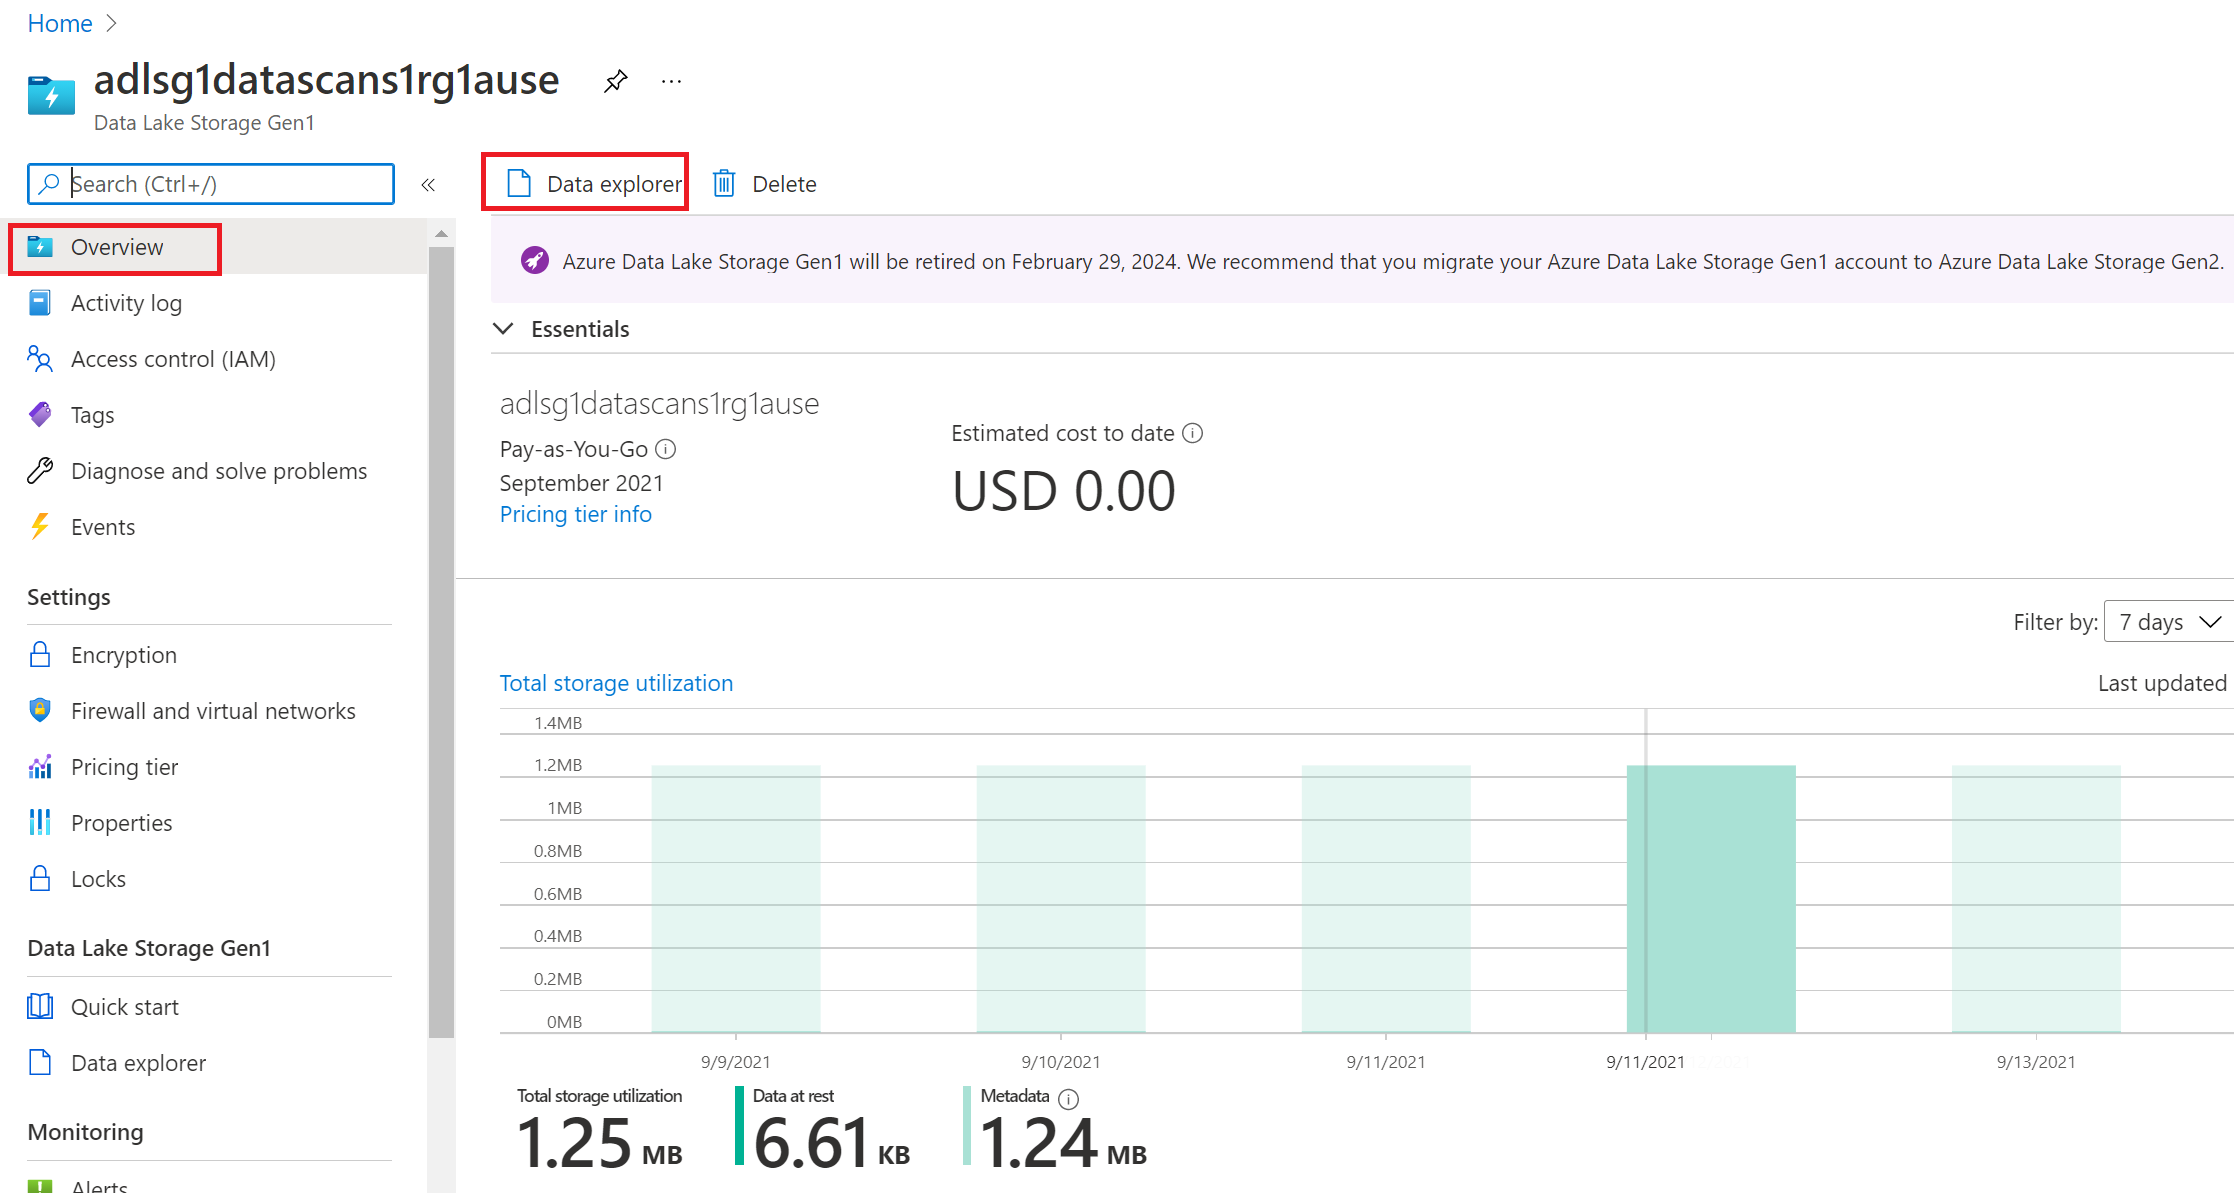
Select Overview and then select Data explorer
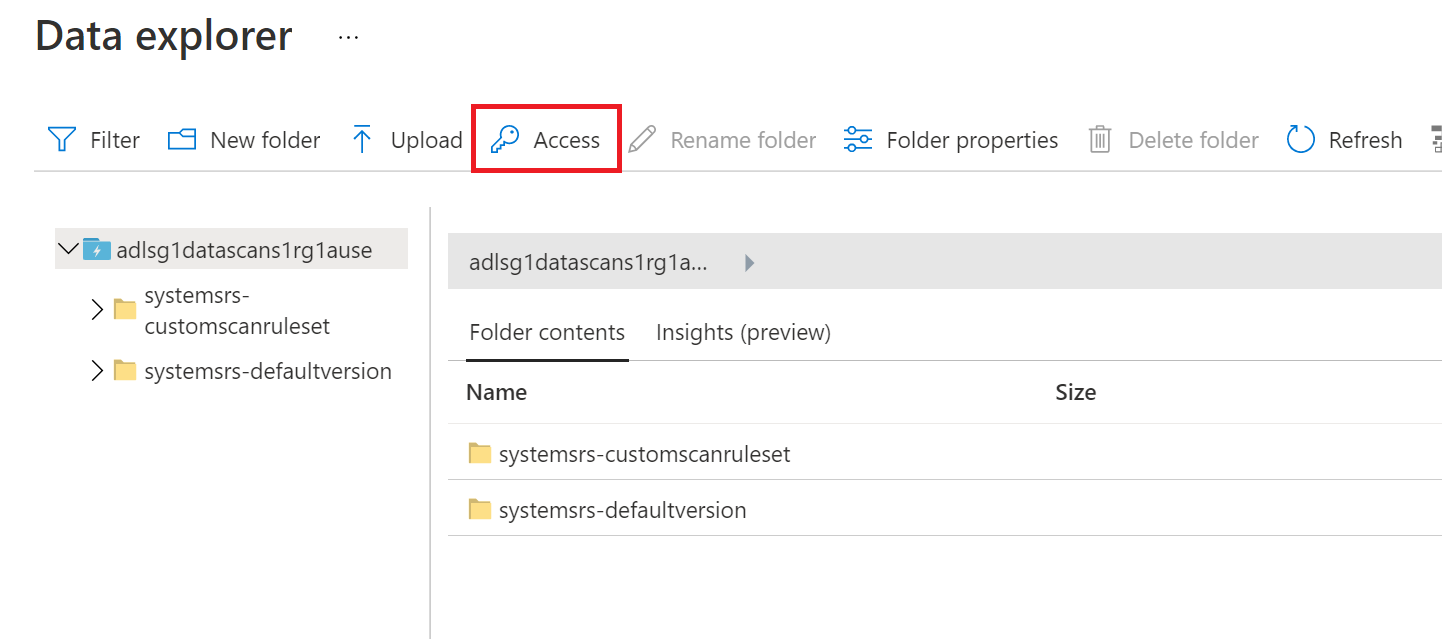
Select Access in the top navigation
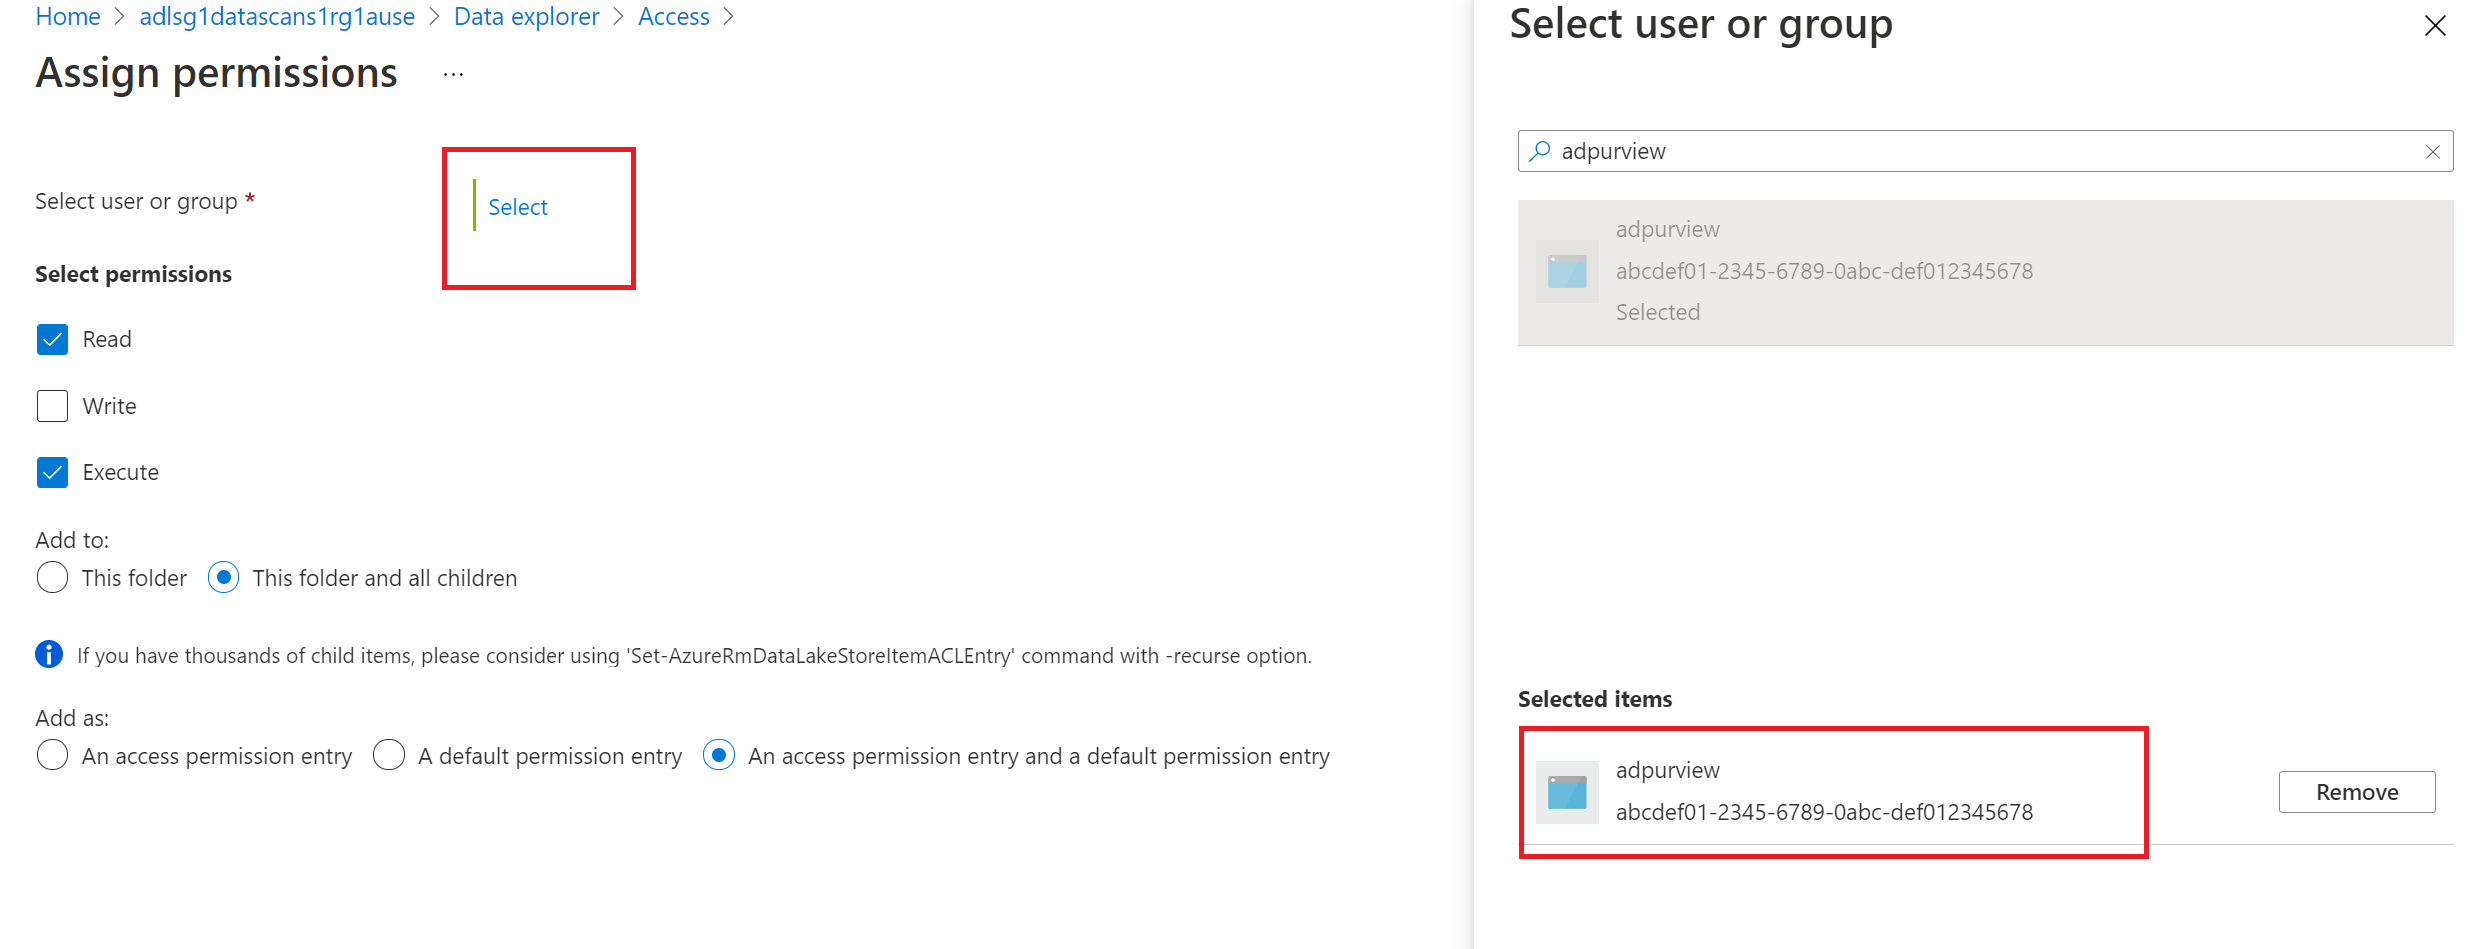
Choose Select and add the Microsoft Purview Name (which is the system managed identity) or the user-assigned managed identity(preview), that has already been registered in Microsoft Purview, in the Select user or group menu.
Select Read and Execute permissions. Make sure to choose This folder and all children, and An access permission entry and a default permission entry in the Add options as shown in the below screenshot. Select OK
Tip
An access permission entry is a permission entry on current files and folders. A default permission entry is a permission entry that will be inherited by new files and folders. To grant permission only to currently existing files, choose an access permission entry. To grant permission to scan files and folders that will be added in future, include a default permission entry.
Using Service Principal for scanning
Creating a new service principal
If you need to Create a new service principal, it is required to register an application in your Microsoft Entra tenant and provide access to Service Principal in your data sources. Your Microsoft Entra Global Administrator or other roles such as Application Administrator can perform this operation.
Getting the Service Principal's application ID
Copy the Application (client) ID present in the Overview of the Service Principal already created

Granting the Service Principal access to your ADLS Gen1 account
It is important to give your service principal the permission to scan the ADLS Gen2 data source. You can add access for the service principal at the Subscription, Resource Group, or Resource level, depending on what permissions it needs.
Note
You need to be an owner of the subscription to be able to add a service principal on an Azure resource.
Provide the service principal access to the storage account by opening the storage account and selecting Overview --> Data Explorer

Select Access in the top navigation

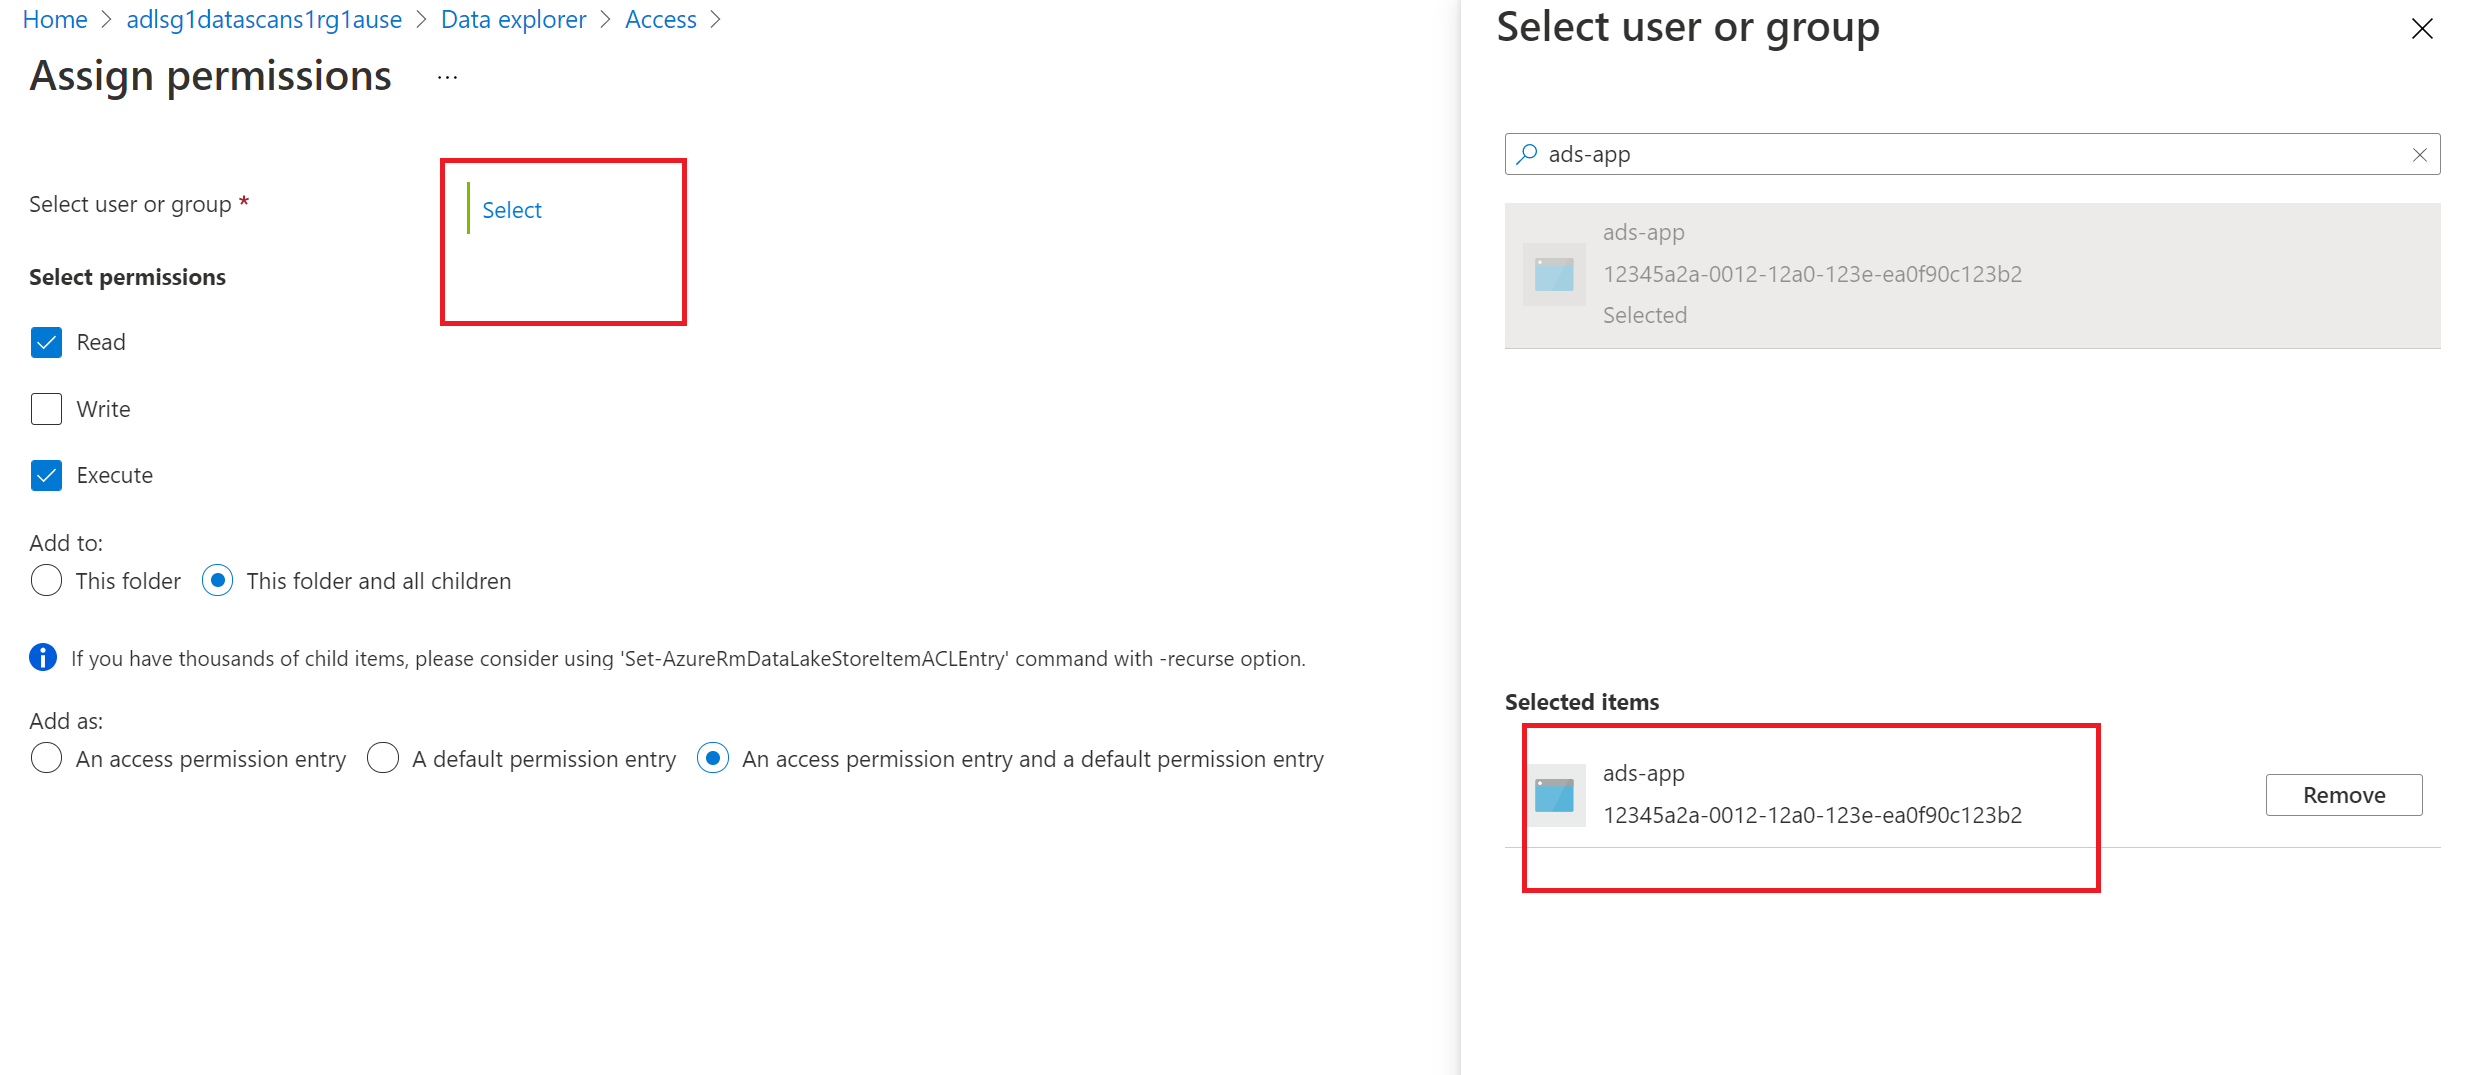
Select Select and Add the Service Principal in the Select user or group selection.
Select Read and Execute permissions. Make sure to choose This folder and all children, and An access permission entry and a default permission entry in the Add options. Select OK
Creating the scan
Open your Microsoft Purview account and select the Open Microsoft Purview governance portal
Navigate to the Data map --> Sources to view the collection hierarchy

Select the New Scan icon under the ADLS Gen1 data source registered earlier
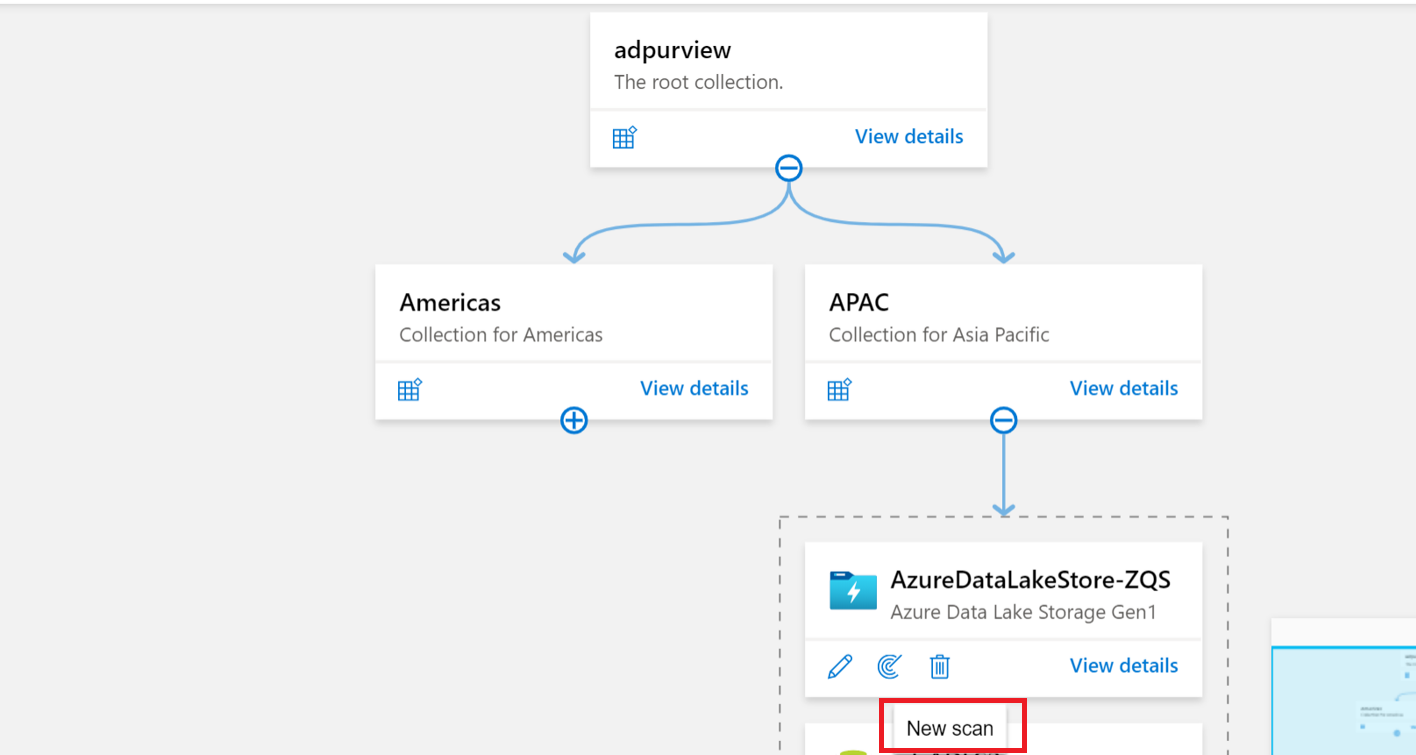
Choose either the Azure integration runtime if your source is publicly accessible, a managed virtual network integration runtime if using a managed virtual network, or a self-hosted integration runtime if your source is in a private virtual network. For more information about which integration runtime to use, see the choose the right integration runtime configuration article.
If using system or user-assigned managed identity
Provide a Name for the scan, select the system or user-assigned managed identity under Credential, choose the appropriate collection for the scan, and select Test connection. On a successful connection, select Continue.
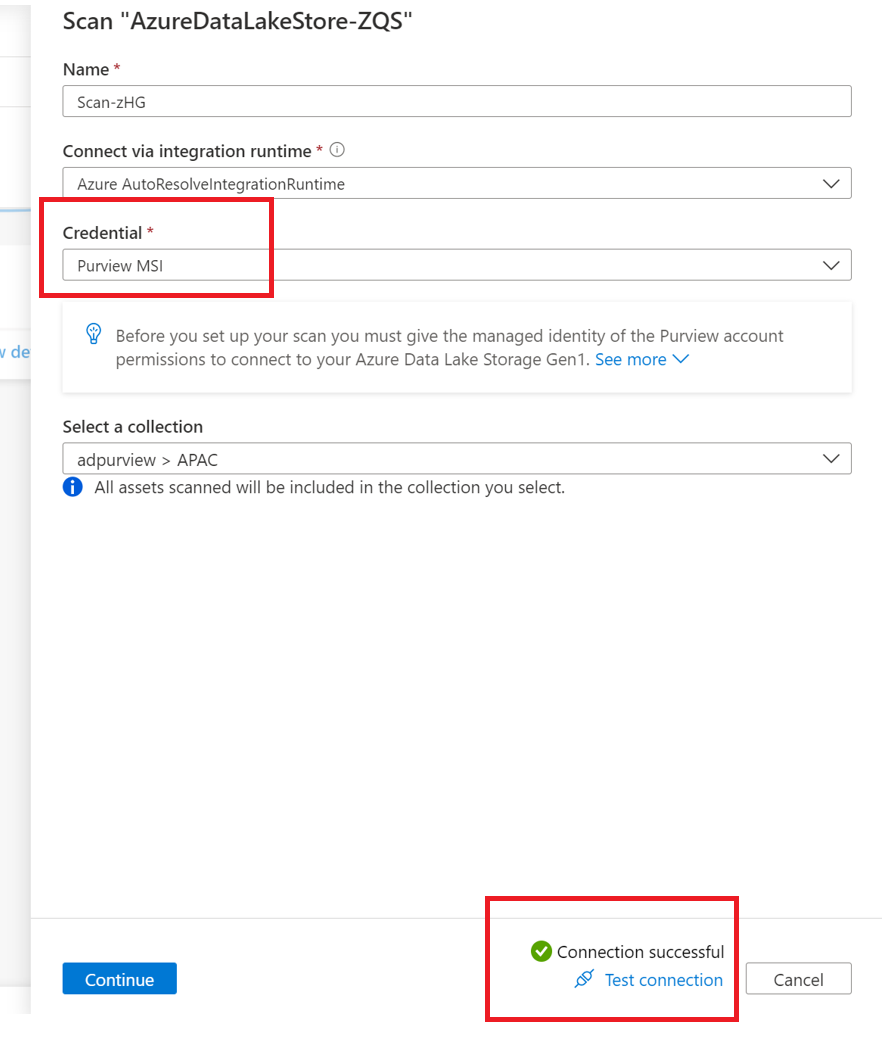
If using Service Principal
Provide a Name for the scan, choose the appropriate collection for the scan, and select the + New under Credential
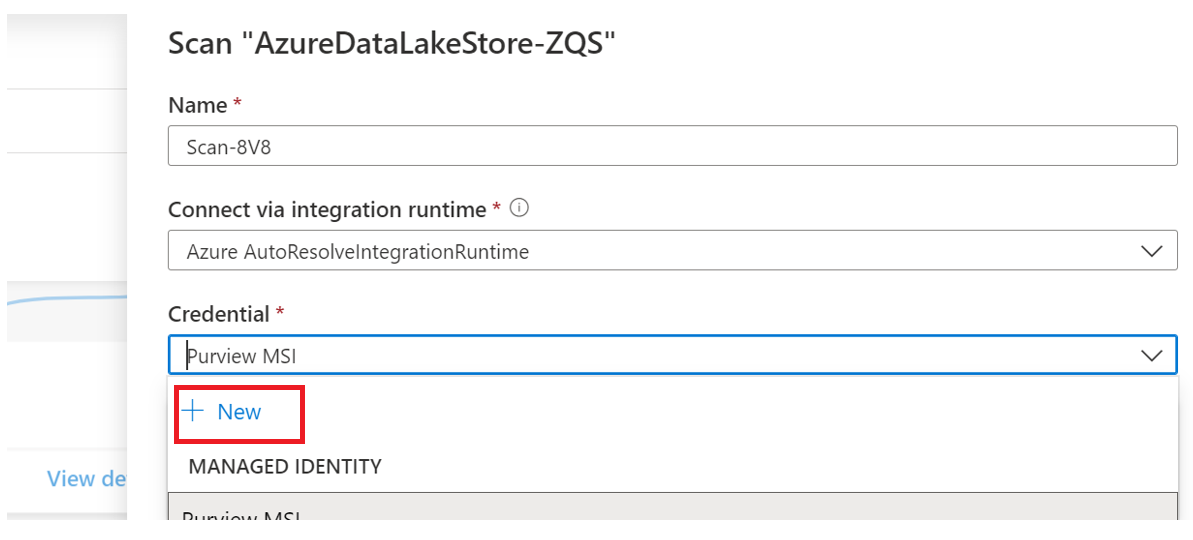
Select the appropriate Key vault connection and the Secret name that was used while creating the Service Principal. The Service Principal ID is the Application (client) ID copied as indicated earlier
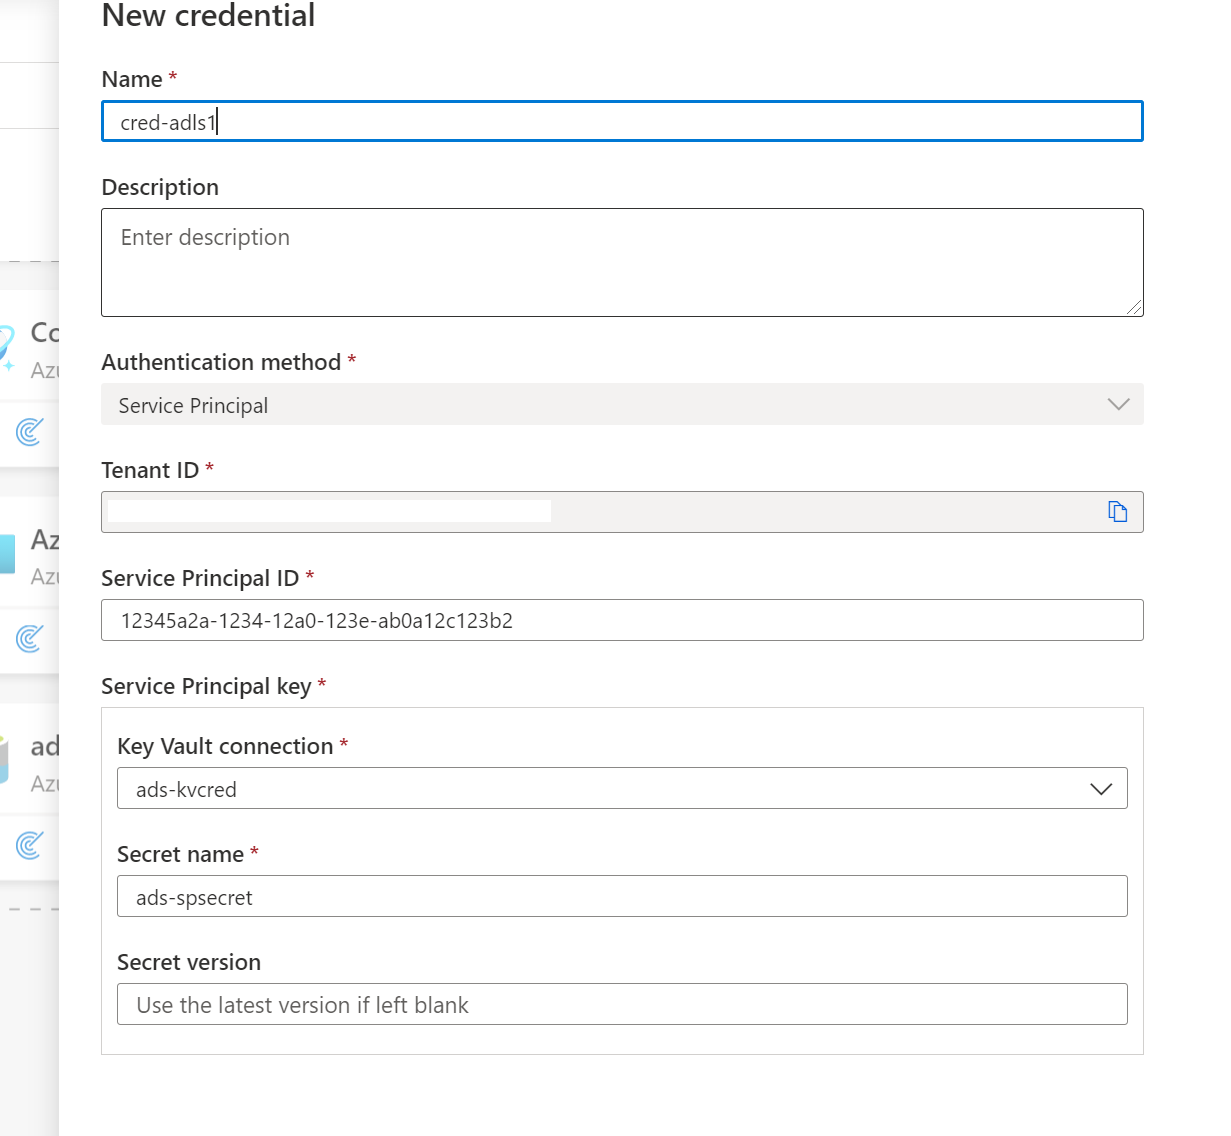
Select Test connection. On a successful connection, select Continue
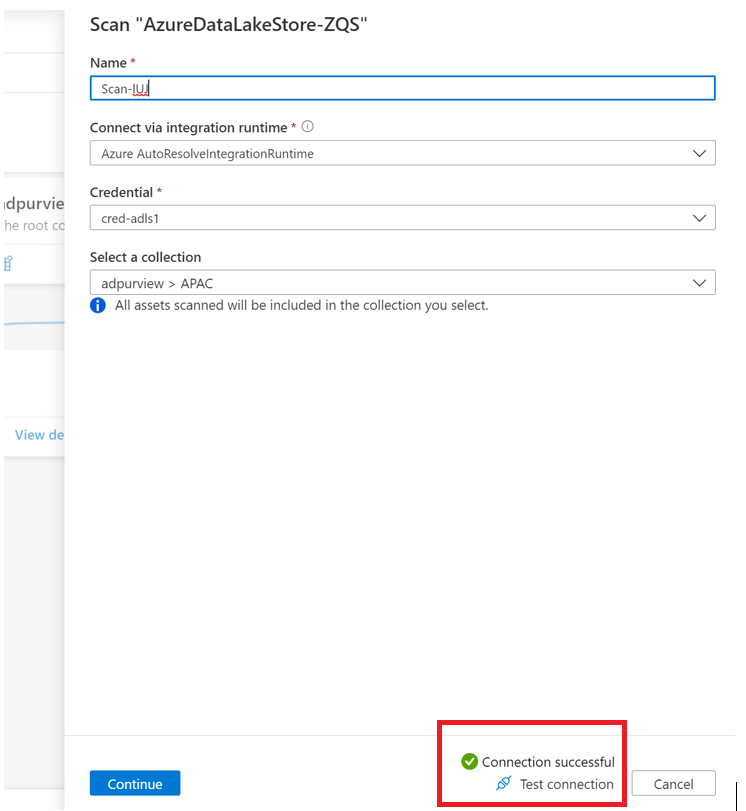
Scoping and running the scan
You can scope your scan to specific folders and subfolders by choosing the appropriate items in the list.
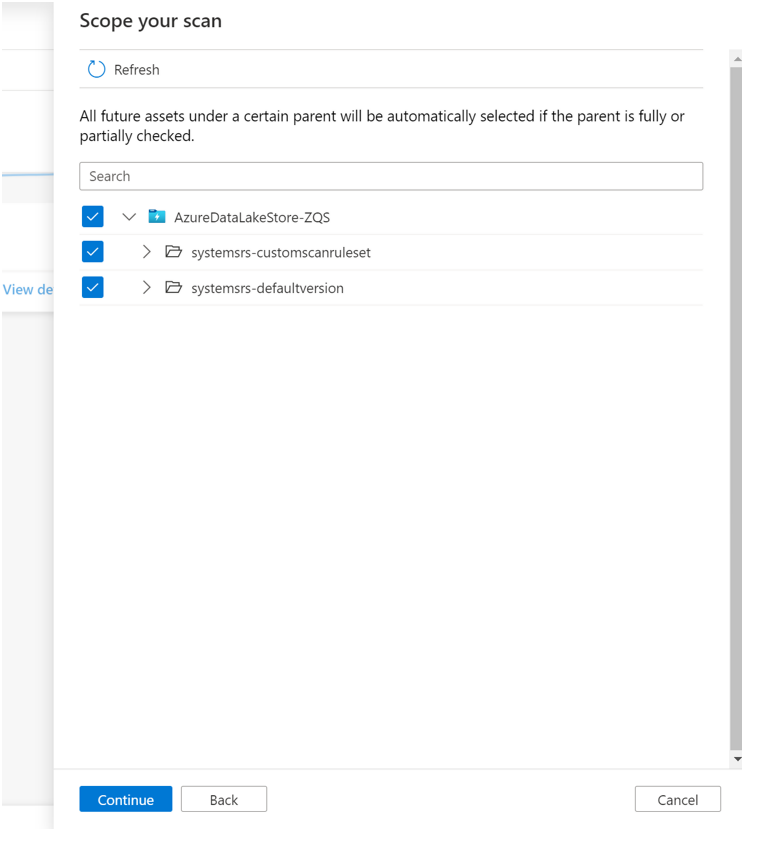
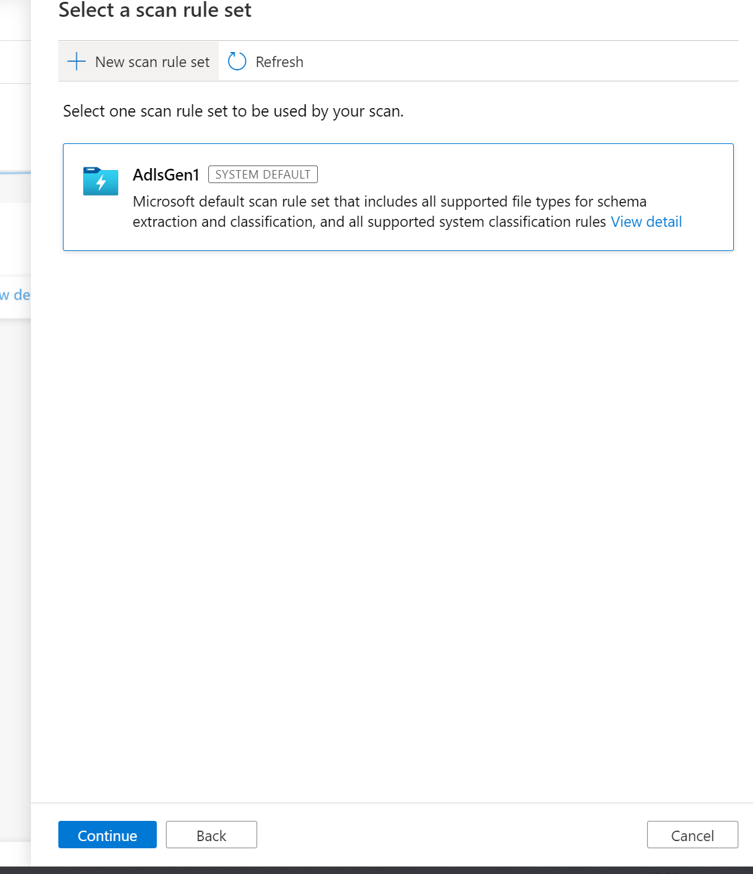
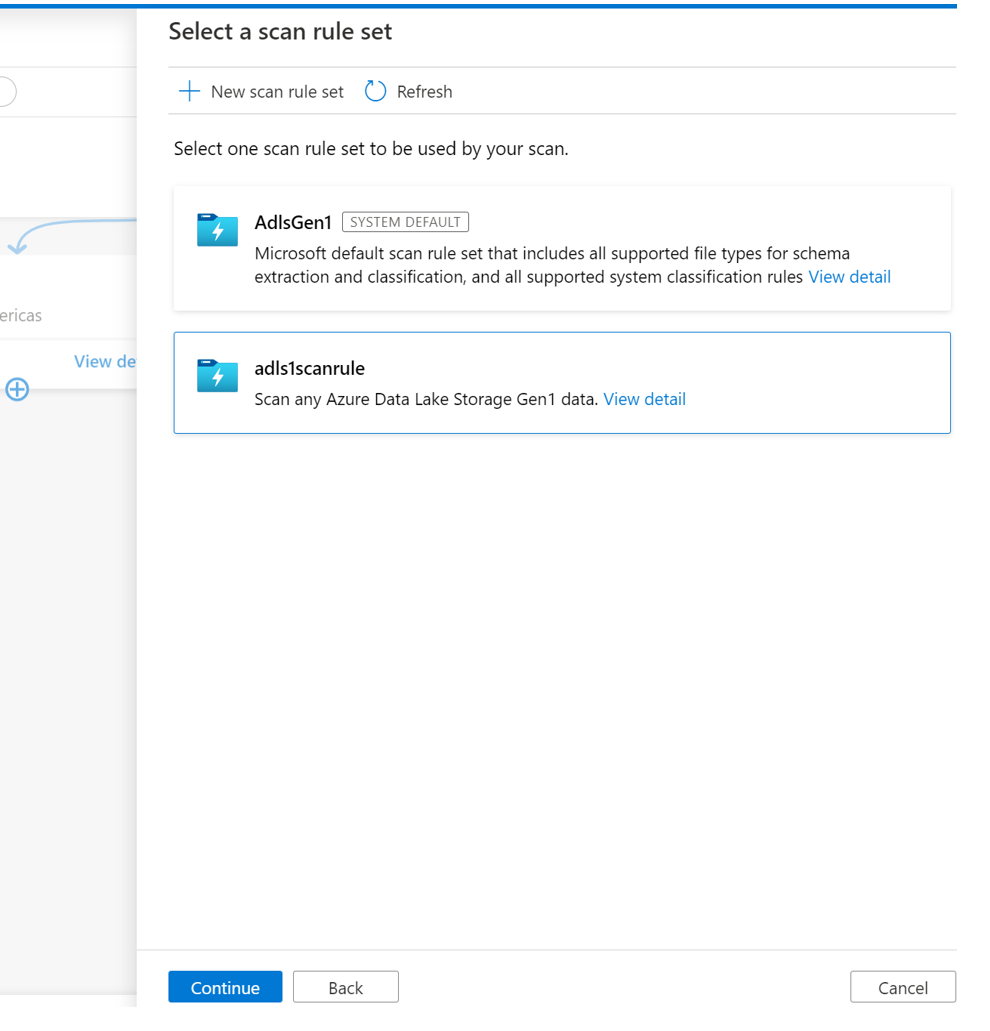
Then select a scan rule set. You can choose between the system default, existing custom rule sets, or create a new rule set inline.
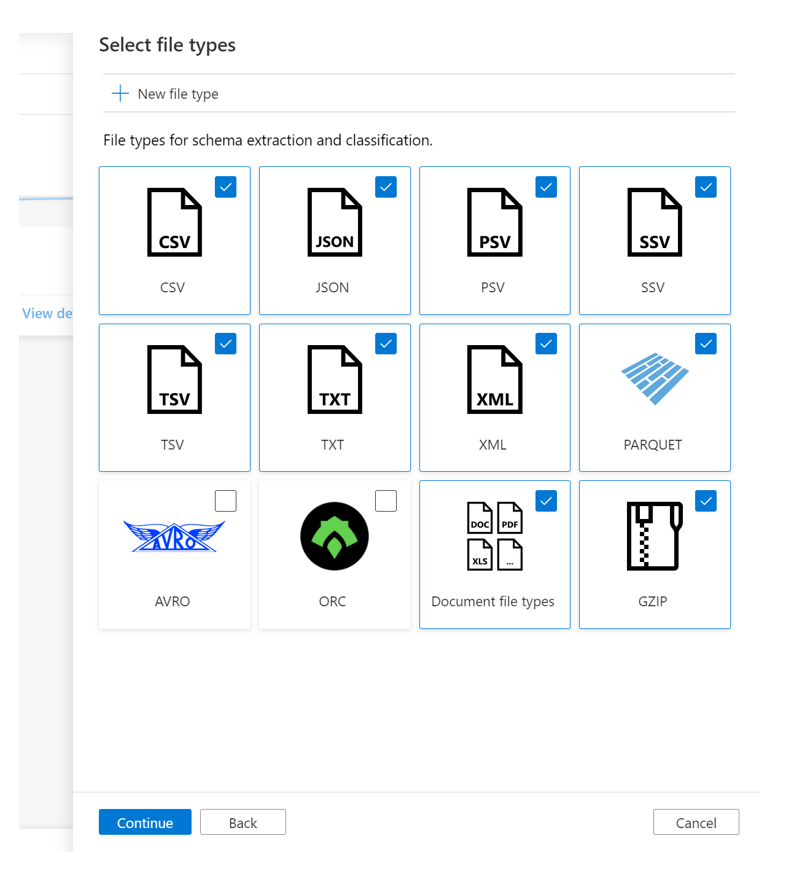
If creating a new scan rule set, select the file types to be included in the scan rule.
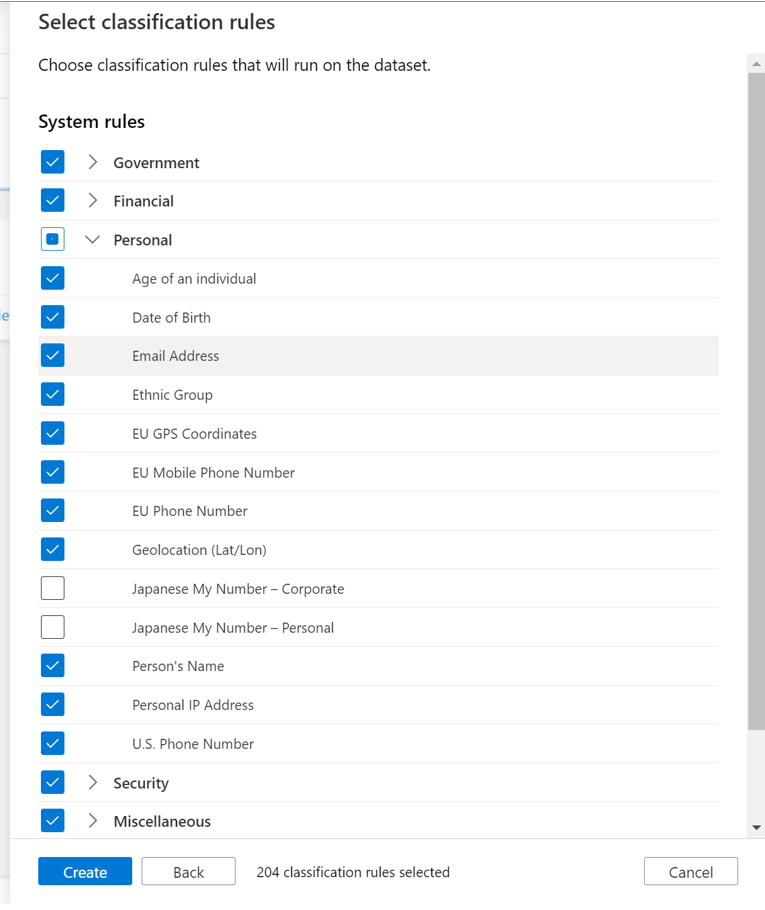
You can select the classification rules to be included in the scan rule
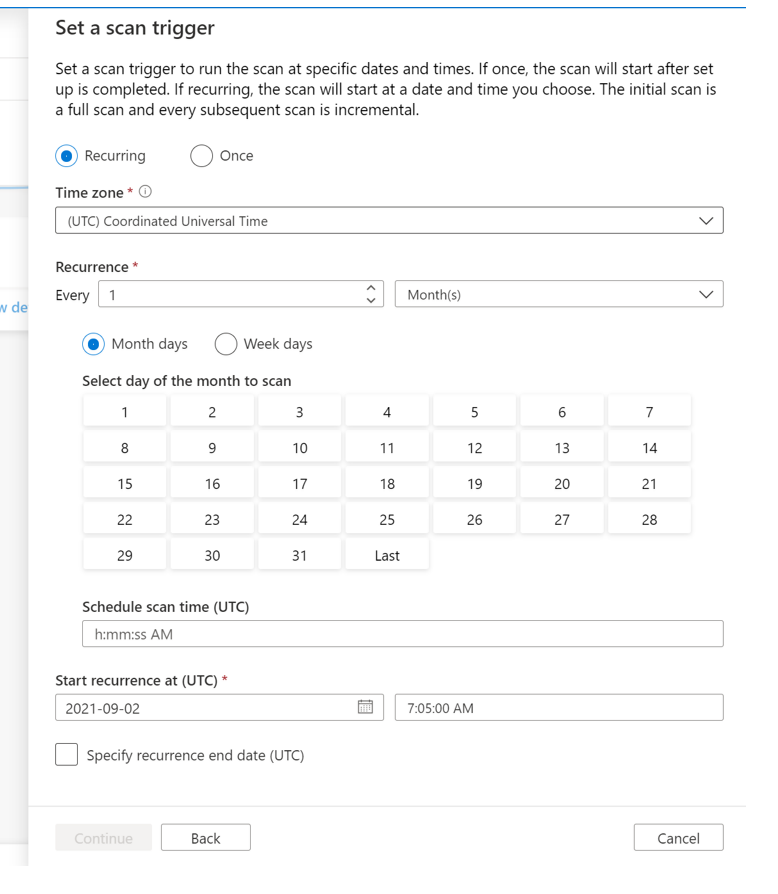
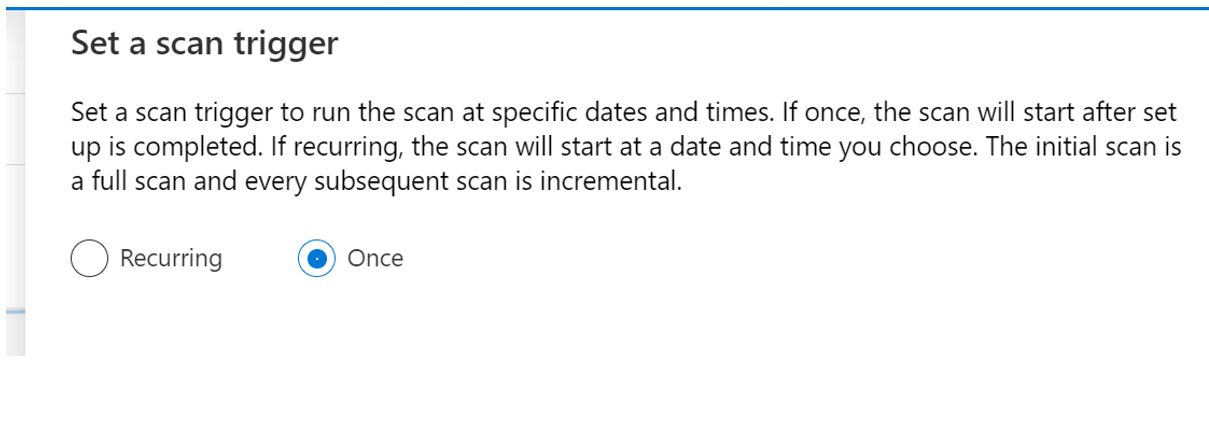
Choose your scan trigger. You can set up a schedule or run the scan once.
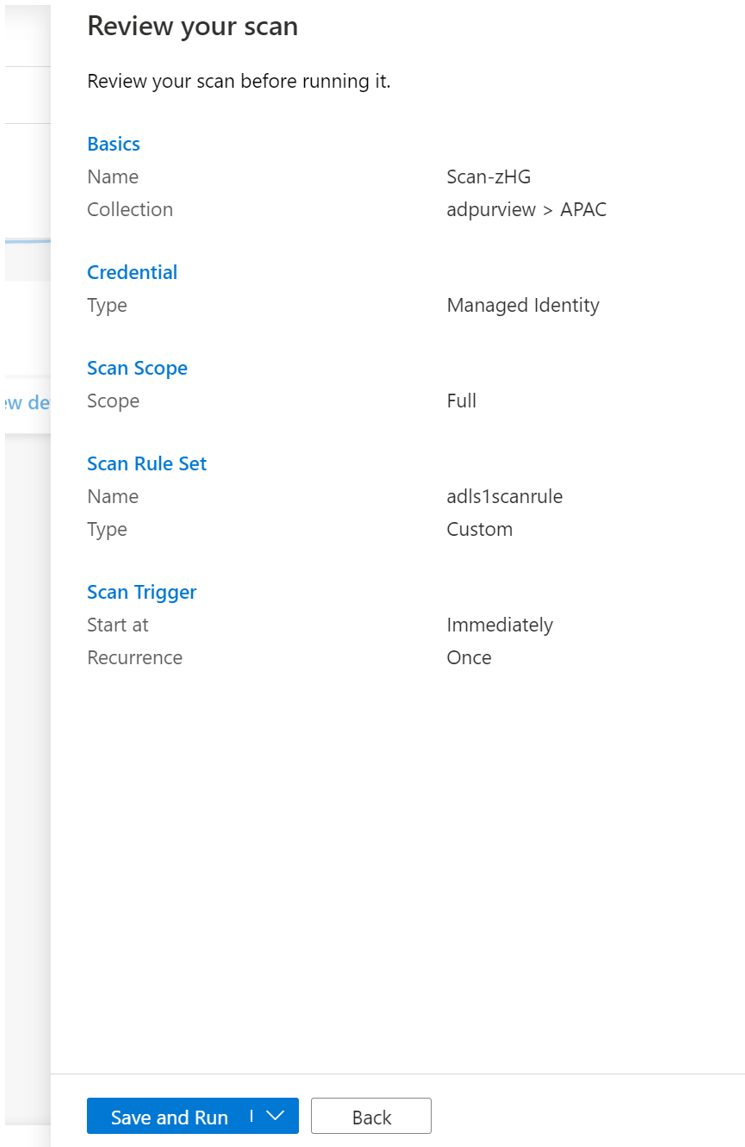
Review your scan and select Save and run.
Viewing Scan
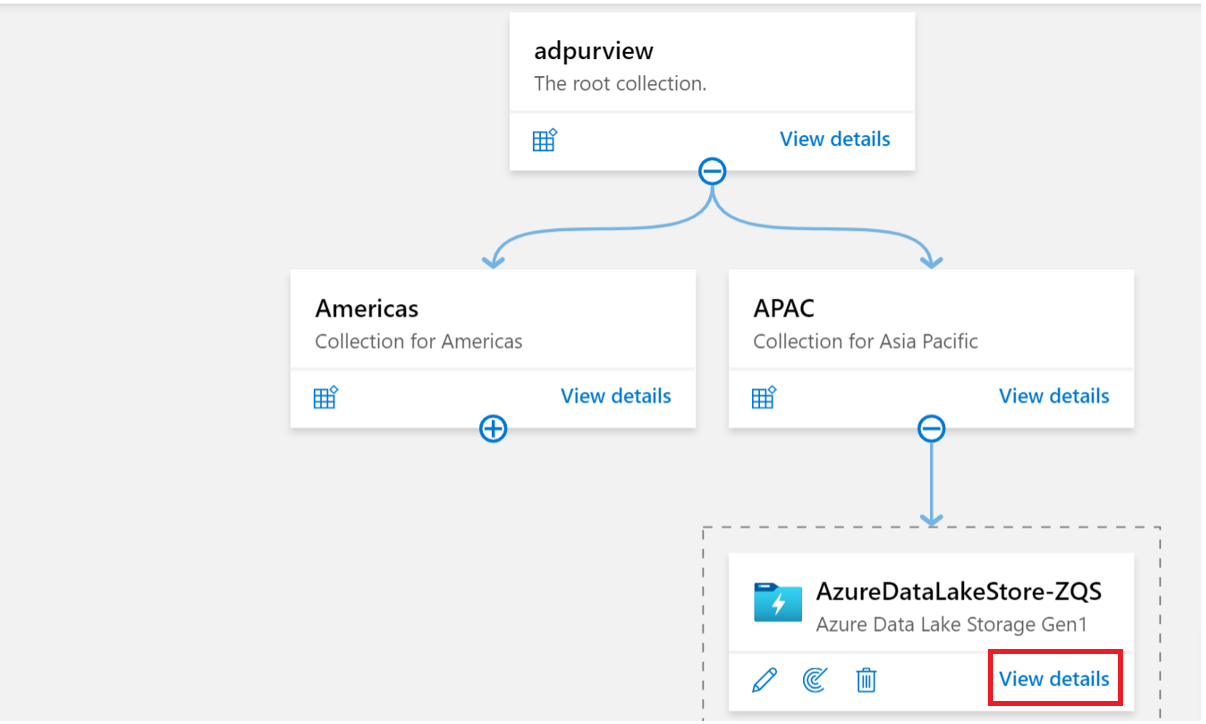
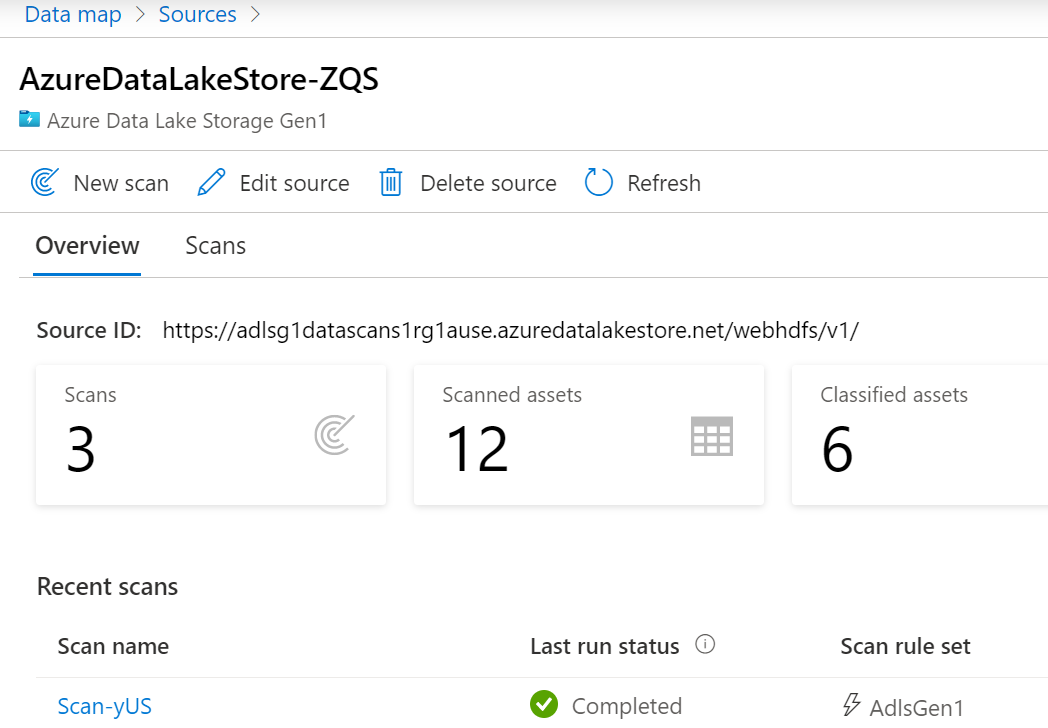
Navigate to the data source in the Collection and select View Details to check the status of the scan
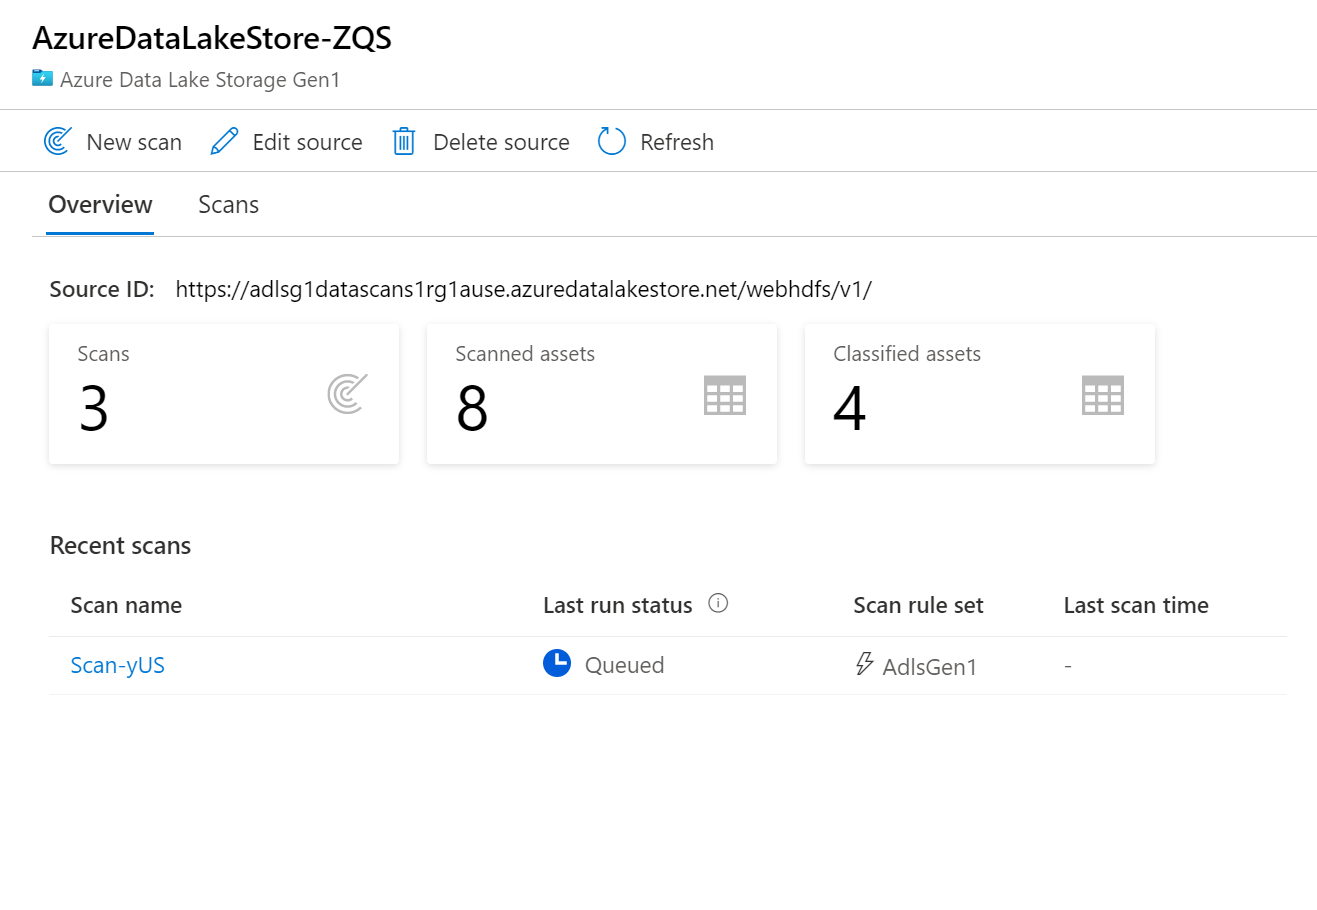
The scan details indicate the progress of the scan in the Last run status and the number of assets scanned and classified
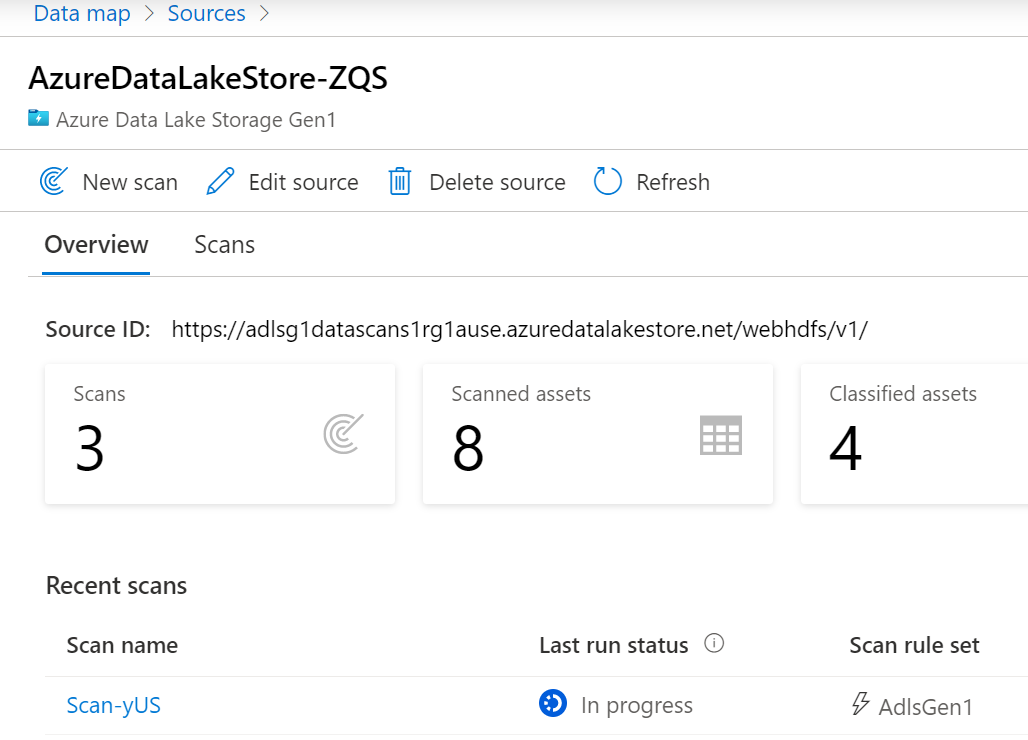
The Last run status will be updated to In progress and then Completed once the entire scan has run successfully
Managing Scan
Scans can be managed or run again on completion.
Select the Scan name to manage the scan
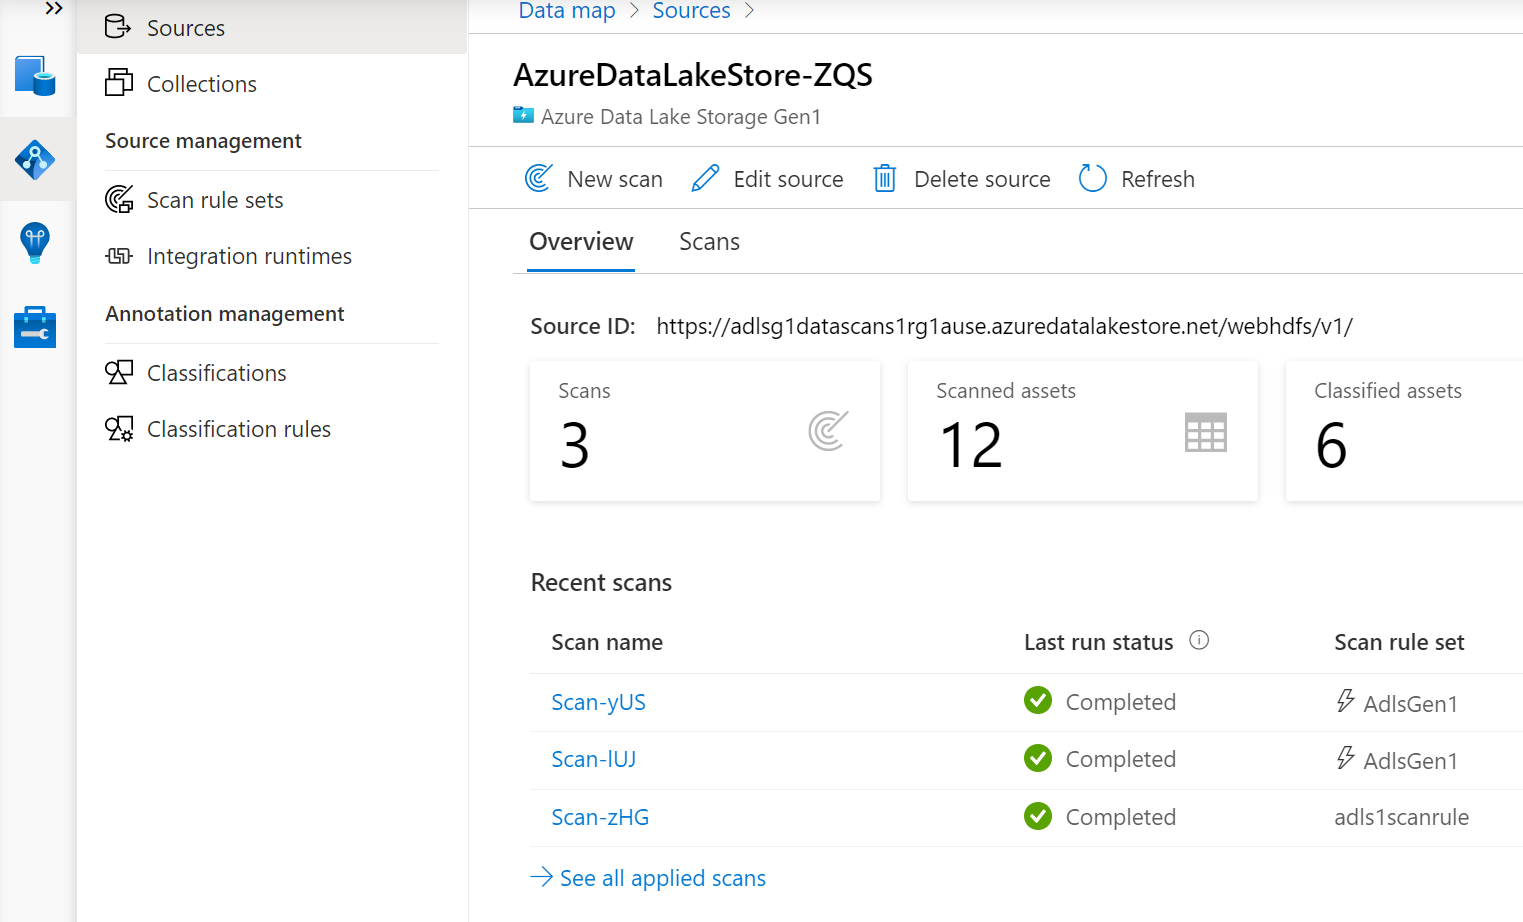
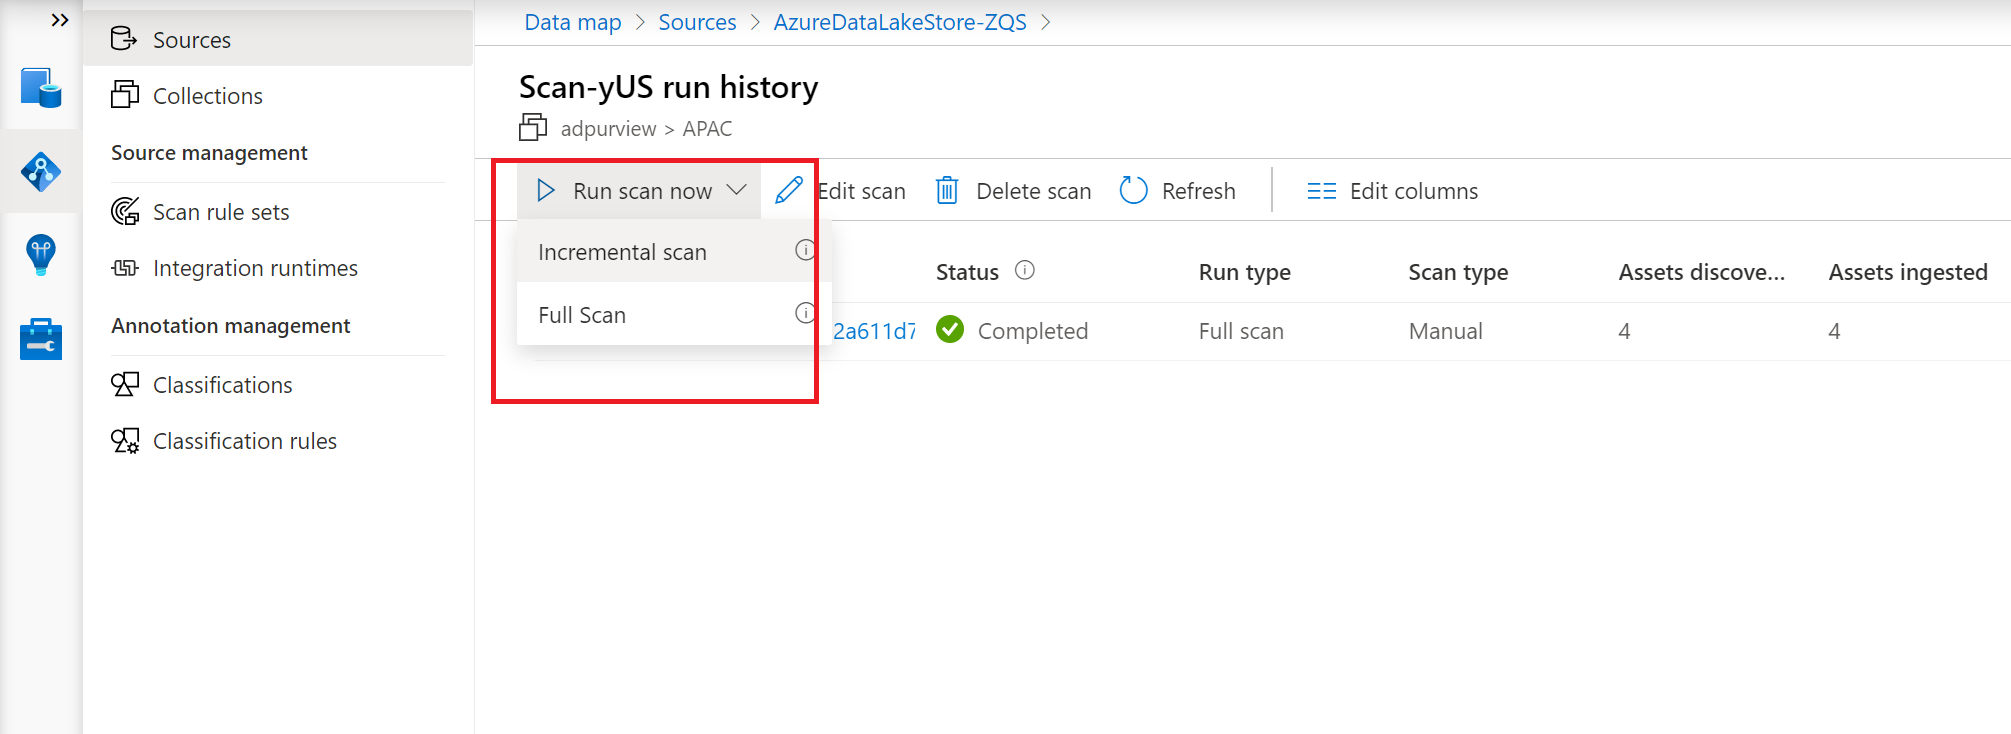
You can run the scan again, edit the scan, delete the scan

Note
- Deleting your scan does not delete catalog assets created from previous scans.
- The asset will no longer be updated with schema changes if your source table has changed and you re-scan the source table after editing the description in the schema tab of Microsoft Purview.
You can run an incremental scan or a full scan again.
