Thursday, 30 May 2024

Azure Managed Disks


Key concepts

Now that you have an initial understanding of the Azure Managed Disks service, let’s spend some time going through all the different components and features in detail.

Disk roles

In Azure, disks play three primary roles:

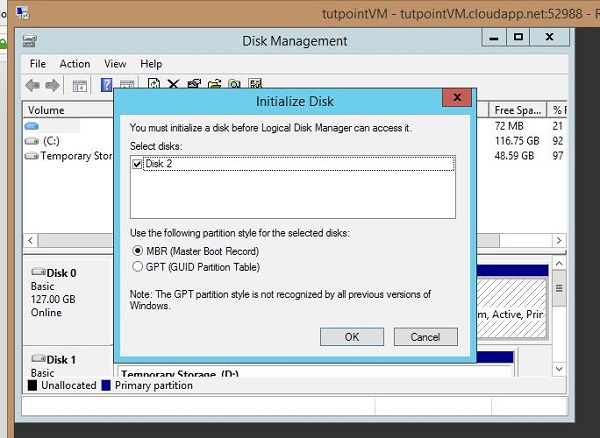
  • Operating system (OS) disk An OS disk is created by default for every VM you create in Azure. This disk contains the OS running on the VM as well as the boot volume. The OS disk supports partitioning with a master boot record (MBR) and GUID partition table (GPT) depending on the OS requirement. By default, most operating systems use partitioning with MBR, which limits the OS disk capacity to 2 TB. However, you can increase this to 4 TB by converting the disk from MBR to GPT.

  • Temporary disk Microsoft provides a temporary disk as a non-persistent disk for specific VM models in Azure. When selecting the VM size in Azure, you can see the size of the temporary disk provided with that VM type. Any data you store on the temporary disk should be data that you are willing to lose, such as page files, swap files, or temporary logs. Each time a VM undergoes a forced restart, maintenance, or a redeployment, data on the temporary disk is erased. The VM can retain data stored on these disks only during standard reboot operations. Temporary disks are not encrypted by default, although you can enable encryption if needed. These disks are mapped as D: in Windows VMs and /dev/sdb in Linux-based VMs.

  • Data disk Data disks are optional, and you can use them based on your workload requirements—for example, separating database installation files from data and log files, which can be stored on their own or individual data disks. As mentioned, OS disks have a maximum capacity of 4 TB, so any data-storage requirements that exceed that would require you to use data disks. The maximum disk capacity for a single data disk is currently 32,767 gigabytes (GB) for Standard HDD, Standard SSD, and Premium SSD disks. However, Ultra disks can be scaled up to 65,536 GB. The number and type of data disks that you can use with a VM depends on the size and type of the VM. Be sure to consider this when selecting the size for your VM.

Disk types

Azure offers four types of disks:

  • Standard HDD disks

  • Standard SSD disks

  • Premium SSD disks

  • Ultra disks

Standard HDD disks

Standard HDD disks are suitable for workloads that are less critical and are not latency sensitive and for dev/test environments. These disks provide write latencies of less than 10 milliseconds (ms) and read latencies of less than 20 ms. Their performance varies depending on numerous factors, including IO size and workload pattern. Standard HDD disks are the least expensive (per gigabyte) disk option in Azure.

Standard SSD disks

Standard SSD disks are a great alternative for customers that want better performance, scalability, availability, and reliability than is possible with Standard HDD disks. Standard SSD disks are a great choice for low-intensity workloads that require consistent performance, such as web servers, low-usage business applications, and low IOPS applications. Standard SSD disks of 512 GB or more support credit-based bursting, making them ideal for applications that require a burst of performance only on rare occasions. All Azure VMs support Standard SSD disks.

Premium SSD disks

Premium SSD disks offer the second highest level of disk performance, with single-digit millisecond latencies, targeted IOPS, and defined throughput 99.9% of the time. They are suitable for high-intensity workloads, such as production applications and databases.

Premium SSD disks come in different sizes, and the level of IOPS support differs depending on the size of the Premium SSD disk. For example, P1 4 GB to P4 32 GB disks provide 120 IOPS, P10 128 GB disks provide 500 IOPS, while P80 32 TB disks provide 20,000 IOPS. Disk throughput and burst performance also increase as the capacity of the Premium SSD disks go up.

A few more features of Premium SSD disks are as follows:

  • Premium SSD disks support one-year reservations to help you save on costs. You can set reservations for disks 1 TB and larger.

  • Premium SSD disks support on-demand and credit-based bursting models. Bursting enables the Premium SSD to increase its performance in the short term to meet workload requirements.

  • Only specific Azure VM types support Premium SSD disks. When you select a VM type, Azure shows you which types of disks that VM type supports. Because Microsoft adds and removes VM SKUs on an ongoing basis, I have not listed the VM types here, because they may change by the time you read this.

Ultra disks

Ultra disks currently provide the highest level of performance in terms of IOPS and disk throughput, with sub-millisecond latency 99.99% of the time. This makes Ultra disks suitable for critical high-performance workloads such as SAP HANA, mission-critical databases, and transaction-heavy applications.

By default, each Ultra disk can be scaled up to 32 TB. However, you can contact Azure support to request an increase of up to 64 TB. In terms of IOPS, each Ultra disk supports a minimum of 300 IOPS per gibibyte (GiB) and currently maxes out at 160,000 IOPS per disk.

Ultra disks allow you to adjust IOPS and throughput performance during runtime. You are permitted four adjustments every 24 hours. Each adjustment can take up to one hour to take effect and requires sufficient performance bandwidth capacity to prevent failures.

At present, Ultra disks have numerous limitations. These include lack of support for the following:

  • Availability sets

  • Azure Dedicated Host

  • Disk snapshots

  • Azure Backup

  • Azure Site Recovery

  • Disk exports

  • VM image creation

In addition, Ultra disks cannot be used as OS disks. They can only be set up as data disks. For high-performance workloads that call for the use of an Ultra disk, you will want to set up the OS disk as a Premium SSD disk and leverage Ultra disks for all your workload data.

Managed disk creation walkthrough

The following sections step you through the process of creating a managed disk using the Azure portal, Azure PowerShell, and the Azure CLI.


Using Azure portal

To create a managed disk using the Azure portal, follow these steps:

  1. Log in to the Azure portal, type disks in the search box, and select the Disks option in the list that appears. (See Figure 3-1.)

    FIGURE 3-1

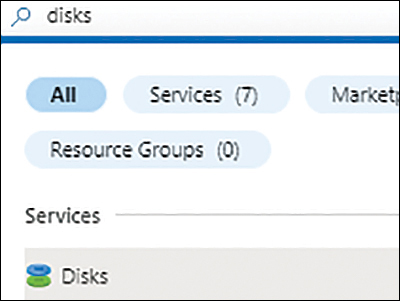
    FIGURE 3-1 Searching for the Disks service in the Azure portal.

  2. On the Disks page (see Figure 3-2), click Create.

    FIGURE 3-2

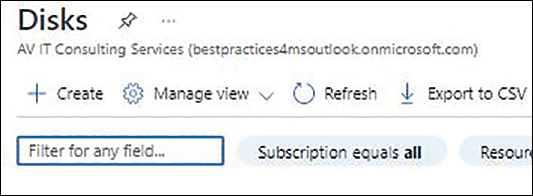
    FIGURE 3-2 Creating a new disk.

  3. In the Basics tab of the Create a Managed Disk wizard (see Figure 3-3), enter the following information:

    • Subscription Select the subscription in which you want to create the new managed disk.

    • Resource Group Select an existing resource group in which to create the new managed disk or create a new one.

    • Disk Name Enter a unique name for the managed disk.

    • Region Select the Azure region where you want to host the managed disk.

    • Availability Zone Select the availability zone you want to use or leave this option set to None (the default).

    • Source Type If the disk will be created from source data, such as a snapshot, storage blob, another disk, etc., select the source type.

    FIGURE 3-3

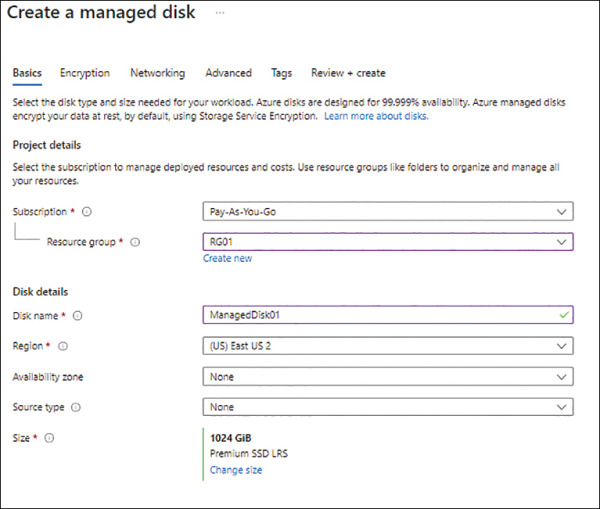
    FIGURE 3.3 The Basics tab of the Create a Managed Disk wizard.

  4. To create a disk that is a different redundancy level, type, size, or performance tier from the default (1,024 GiB Premium SSD LRS), click the Change Size link in the Size section of the wizard’s Basics tab.

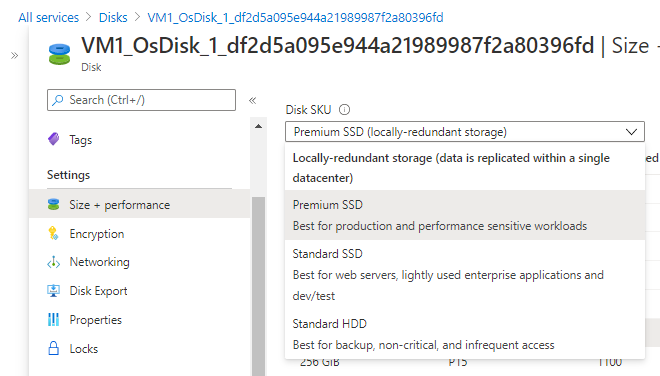
  5. In the Select a Disk Size dialog box, open the Disk SKU drop-down list and choose a disk type/redundancy level pairing. (See Figure 3-4.)

    FIGURE 3-4

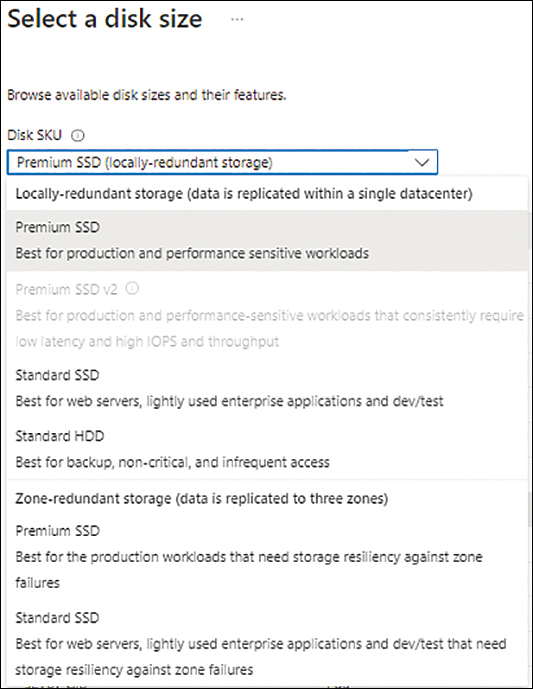
    FIGURE 3-4 Choose a disk type and redundancy level.

  6. Click a size option in the list to select it. Alternatively, use the Custom Disk Size (GiB) and Performance Tier drop-down lists to choose a custom size/tier pairing. Then click OK. (See Figure 3-5.)

    FIGURE 3-5

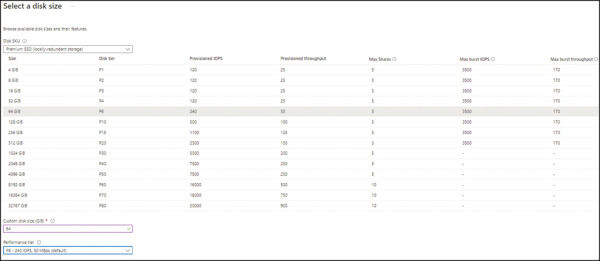
    FIGURE 3.5 Selecting a different disk size and performance tier.

  7. Back in the Basics tab of the Create a Managed Disk wizard, click Next.

  8. In the Encryption tab of the Create a Managed Disk wizard (see Figure 3-6), open the Key Management drop-down list and choose Platform-Managed KeyCustomer-Managed Key, or Platform-Managed and Customer-Managed Keys. Then click Next.

    FIGURE 3-6

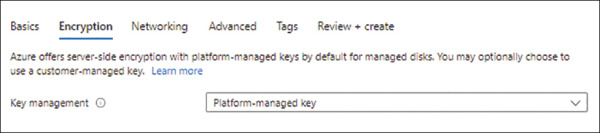
    FIGURE 3.6 The Encryption tab of the Create a Managed Disk wizard.

  9. In the Networking tab of the Create a Managed Disk wizard (see Figure 3-7), in the Network Access section, leave the Enable Public Access from All Networks option button selected and click Next.

    FIGURE 3-7

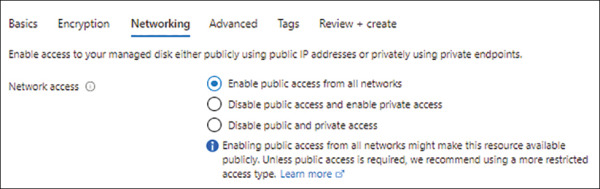
    FIGURE 3.7 The Networking tab of the Create a Managed Disk wizard.

  10. In the Advanced tab of the Create a Managed Disk wizard (see Figure 3-8), enter the following information and click Next:

    • Enable Shared Disk If you want to use this managed disk as a shared disk, select the Yes Option button. Then use the Max Shares drop-down list to specify how many VMs will share the disk.

    FIGURE 3-8

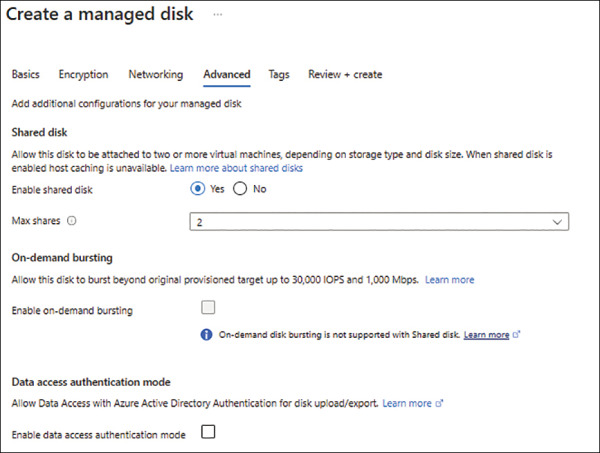
    FIGURE 3.8 The Advanced tab of the Create a Managed Disk wizard.

    • On-Demand Bursting If you want this managed disk to be capable of on-demand bursting, select the Enable On-Demand Bursting check box.

    • Enable Data Access Authentication Mode Optionally, select this check box to enable data access authentication. When you enable data access authentication, you can limit who can download the disk to admins who are authorized using Azure AD and authenticated using an approved account.

  11. In the Tags tab (see Figure 3-9), enter any tags you want to associate with the managed disk and click Next.

    FIGURE 3-9

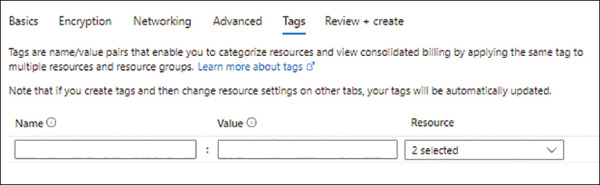
    FIGURE 3.9 The Tags tab of the Create a Managed Disk wizard.

  12. In the Review + Create tab (see Figure 3-10), review your settings, and click Create to create the managed disk.

    FIGURE 3-10

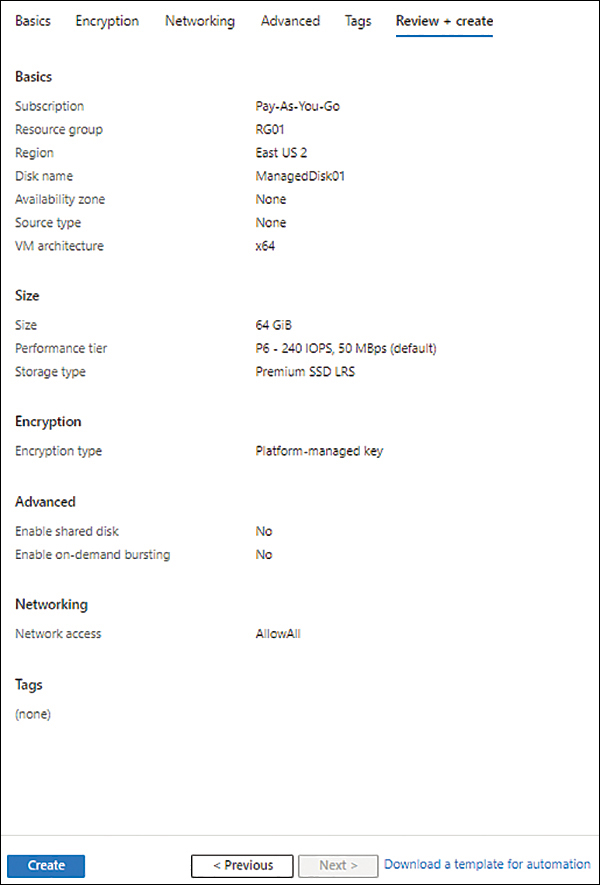
    FIGURE 3-10 The Review + Create tab of the Create a Managed Disk wizard.

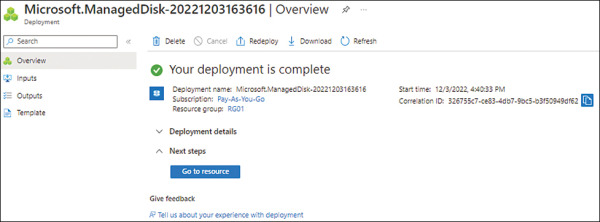
  13. After the managed disk is created, click Go to Resource to access its page. (See Figure 3-11.)

FIGURE 3-11

Virtual Machine and Disks

Virtual Machine and Disks

When we create a virtual machine, it always resides in a storage account in Azure account. If there is no existing storage account in Azure, while attempting to create a virtual machine, Azure will automatically create one. If you already have a storage account, it will ask you to choose the storage account while creating a virtual machine. There is a detailed how-to on creating a virtual machine in this tutorial.

Create/Attach a Disk in Virtual Machine

Step 1 − Go to the virtual machine.

Step 2 − Select ‘Dashboard’ from the top menu.

Step 3 − Click ‘Attach disk’ → Attach empty disk at the bottom of the screen.

Create Disk in Virtual Machine

Step 4 − Enter the details in the following screen that pops up.

Create Disk in Virtual Machine

It will take few seconds to attach the disk to the virtual machine.

Configure the Disk in Virtual Machine

Step 1 − Connect to the virtual machine through .rpd file downloaded on your local machine.

Step 2 − In the virtual machine, right-click the windows icon at the left bottom corner and select ‘Disk Management’.

Configure Disk in Virtual Machine

Step 3 − You will see a message saying Disk is available on the screen. This is the same disk that you attached in the previous step.

Disk Management

Step 4 − Before you can use it, you need to allocate it. You will see that it is still unallocated. Scroll down on the same screen and locate the disk as shown in the following image, it is Disk 2. Right-click on it and select ‘New Simple Volume’.

Configure Disk in Virtual Machine

Step 5 − Follow the wizard. It will ask very general things, like naming the drive and file system. In the last screen, make sure to keep the quick format option checked.

New Simple Volume

Step 6 − After the wizard’s job is over, you will be ready to use the disk. In this example, we have created the ‘F’ drive. You can create the folder and files or copy your data in the F drive.

F Drive

Delete the Disk

You will have to first locate the disk in order to delete. Locating the right disk is very important. When you create a virtual machine you select the storage account for it. Disks reside in the storage account.

Step 1 − Go to the storage account of the virtual machine.

Step 2 − Click ‘Containers’ from the top menu.

Step 3 − Click vhd.

Delete Disk

Step 4 − All the vhds in that storage account will be listed. This list will also contain the vhds from other virtual machines so be very careful while selecting the vhd.

Step 5 − Select the vhd you want to delete. You must know the name of the disk in order to identify it among the several vhds in the list (when you attach the disk you are prompted to enter the name of the disk).

VHDs

Image Disks

Create an image from Virtual Machine

Step 1 − Go to the management portal.

Step 2 − Select the virtual machine you want to create an image of.

Step 3 − Click ‘Dashboard’ from the top menu.

Step 4 − Click the ‘Capture’ icon at the bottom of the window.

Image Disk

Step 5 − Name the image and enter the description.

Image Disk

Step 6 − Once capturing is done, to find the image, follow the points given below −

  • Select Virtual Machines from the panel. All the virtual machines in your account will be listed there.

  • Click ‘Images’ from the top menu.

Virtual Machines

Create an Image from Your Computer

This is done through sysprep tool available in all modern Windows operating system.

Step 1 − Go C drive −> Windows −> System32 → Sysprep

Step 2 − Alternatively copy the following path in the address bar C:\Windows\System32\Sysprep

Step 3 − Run ‘sysprep’ application. This will create a VHD file on your computer which is the image of your machine.

Create Image Disk

Considerations

You might get confused with the names of vhds, when you have multiple virtual machines under the same storage account. A way of knowing the name of the vhds associated with a particular machine is running ‘Get-AzureDisk’ cmdlet in Windows PowerShell. This cmdlet will get you all the details of disks in each virtual machine.

Disk Considerations

Step 1 − Run the following command

Get-AzureDisk  

Step 2 − Locate your virtual machine name in the list. Under that virtual machine, check the diskname and medialink for your vhd name and link.

Microsoft Azure- Disk Storage in Microsoft Azure

Microsoft Azure- Disk Storage in Microsoft Azure

Azure Disk Storage is the only shared cloud block storage that supports both Windows and Linux-based clustered or high-availability applications via Azure shared disks.

There are two types of

 Disks in Azure :

  1. Managed Disks
  2. Unmanaged Disks.

Managed Disks

  • Simplest option
  • Lower management overhead as Azure manages the storage accounts.
  • Only LRS replication mode is currently available

To know how to host a Static Website with Azure Storage

Unmanaged Disks

  • DIY option
  • Management overhead (20000 IOPS per storage account limit)
  • Supports all replication  modes  (LRS, ZRS, GRS, RA-GRS)

VM Disk Storage Types

Standard Storage: Mostly used for General Work Loads like dev/test.

  • Backed by HHD drives,
  • Cost-Effective – Low Performance
  • Offers Max throughput  – 60MB/S per disk
  • Offers Max IOPS  – 500 IOPS per disk

Premium Storage: Majorly used for Production Work Loads. 

  • Backed by SSD drives,
  • Offers Higher performance
  • Offers Max throughput  – 250MB/S per disk
  • Offers Max IOPS  – 7500 IOPS per disk

Disk SKU Offers Various Standards: 

  1. Premium SSD Disks offer high-performance, low-latency disk support for I/O-intensive applications and production workloads.
  2. Standard SSD Disks are a cost-effective storage option optimized for workloads that need consistent performance at lower IOPS levels. 
  3. Standard HDD Disks can be used for Dev/Test scenarios and less critical workloads at the lowest cost.

Disk SKU

Performance Tier 

A baseline performance tier is set based on your provisioned disk size. You can set a higher performance tier when your application requires this to meet higher demand and return to the initial baseline performance tier once this period is complete. When upgrading the performance tier, you will be billed at the upgraded tier until you return to the baseline tier.

Premium SSD Disks To Choose From

Current Best Azure Disk Performance Tier for Quality Development and Production Environments.

  • P10 – 500 IOPS, 100 MBps (default)
  • P15 – 1100 IOPS, 125 MBps
  • P20 – 2300 IOPS, 150 MBps
  • P30 – 5000 IOPS, 200 MBps
  • P40 – 7500 IOPS, 250 MBps
  • P50 – 7500 IOPS, 250 MBps

i/o OPERATIONS

Note: Changes to the disk size can be made only when the disk is unattached or the managing virtual machines are deallocated.

Cost Saving Tip: 

Benefits Of Managed Disks

  1. Managed Infrastructure: The underlying infrastructure is fully managed by not Microsoft Azure and also you no need to worry about managing, provisioning,take and configuration it will taken care of by the Microsoft Azure.
  2. Availability: Microsoft Azure ensure the disks which are managed will be available 99.99%.
  3. Low Cost: Disks which are managed by the Microsoft Azure will more cost saving when compared to unmanaged disks because in unmanaged disks you can’t scale up and down the disks depending up on the traffic. So once you fixed the storage size you are going to use same size if there load or not having load nu managed disks can be scale down depending upon the load by which you can reduce the cost.
  4. Automated Backups: The disks which are managed using Microsoft Azure will gone through automated backups which can be used for later or you can take an snapshot of the backup and use it for creating new disks.
  5. Dynamic Resizing: The resizing of the disk will be done depending upon the incoming traffic load if there is huge traffic if will scale up and if the traffic is low it will be scale down.

Integration With Availability Zones

Integrating the Azure storage disk which is fully managed by the Microsoft Azure with different availability zone will increases the availability of the disk. Once you crated an managed Azure storage disk it will automatically replicates the data present in the disk to multiple availability zones which will increase the availability and helps in the disaster recovery (DR). TO know more about microsoft azure regions refer to Microsoft Azure – What are Regions and Availability Zones.

Before creating managed azure disk you need to be do some research and select the availability zones which you want your disk to be deployed by depending up on the availability.

Security Microsoft Azure- Disk Storage in Microsoft Azure

The Azure disk will be secured in different ways some of them are mentioned below.

  1. Control Access: You can control the access to the disk with the help of azure active directory or Azure RBAC by this the users who are having the perfect access only can access azure storage disk.
  2. Disk Encryption: The disk which consists of data will be encrypted at rest by which we can protect unauthorised access and data will in the form of encryption which will very to read and write the data.
  3. Maintains the Logs: Microsoft azure maintains the logs of the disks were you can find who accessed the data or who performed the read and write operations on the data it is like auditing data which detect the suspicious activity.
  4. Monitor the Disk: Enable the monitoring to the azure disk which will helps you to find the security issues and also you can see the data which is storing including the data and time of of the operations performed.

Above are the some of security measures taken by the Microsoft azure to protect the data which is storing in the azure disk.

Disk Roles

Microsoft azure provide three main disk roles as following:

  1. Data Disk: The main use of data disk is to store the data which is related to the application and it is attached to the virtual machine. Maximum capacity of the the data disk is 32,767 gigabytes (GiB). No.of disks required for virtual machine will depending upon the size of virtual machine.
  2. Operating System disk (or) OS Disk: OS Disk is an pre-requisite disk for the virtual machine which will consists of pre-installed OS required for the virtual machine and also it contains the boot volume the maximum capacity of 4,095 GiB.
  3. Temporary Disk: The disk which is used to store the temporary data of the virtual machine such as
    1. page files,
    2. swap files,
    3. SQL Server tempdb.

Disk Allocation And Performance

Disk allocation and performance will be consider on the many factories like mentioned following.

  1. Managed and Unmanaged disks: The disks which are managed by the Microsoft azure can perform high input and output operations when compared to the unmanaged disk. The managed disk are more reliable then the umanaged disk because of there avalibiluity.
  2. Size of Disk: As the size of the disk increase the cost of the disk will also increases and the capacity to store data will increase automatically but processing time of performing I/O operations will increase.
  3. Disk I/O operations: Disk will also gets effects based on the input and output operations that you are going to perform on the disk. Like how many I/O operations are performed on the disk how much data transferred per second.
  4. Disk Caching: Disk caching can help to improve the performance of your storage by storing frequently accessed data in memory.