Configure an App Service app
This article explains how to configure common settings for web apps, mobile back end, or API app. For Azure Functions, see App settings reference for Azure Functions.
Configure app settings
For example to set an environment variable in App Service Linux with the value "pa$$w0rd\" the string for the app setting should be: "pa\$\$w0rd\\"
In App Service, app settings are variables passed as environment variables to the application code. For Linux apps and custom containers, App Service passes app settings to the container using the --env flag to set the environment variable in the container. In either case, they're injected into your app environment at app startup. When you add, remove, or edit app settings, App Service triggers an app restart.
For ASP.NET and ASP.NET Core developers, setting app settings in App Service are like setting them in <appSettings> in Web.config or appsettings.json, but the values in App Service override the ones in Web.config or appsettings.json. You can keep development settings (for example, local MySQL password) in Web.config or appsettings.json and production secrets (for example, Azure MySQL database password) safely in App Service. The same code uses your development settings when you debug locally, and it uses your production secrets when deployed to Azure.
Other language stacks, likewise, get the app settings as environment variables at runtime. For language-stack specific steps, see:
App settings are always encrypted when stored (encrypted-at-rest).
Note
App settings can also be resolved from Key Vault using Key Vault references.
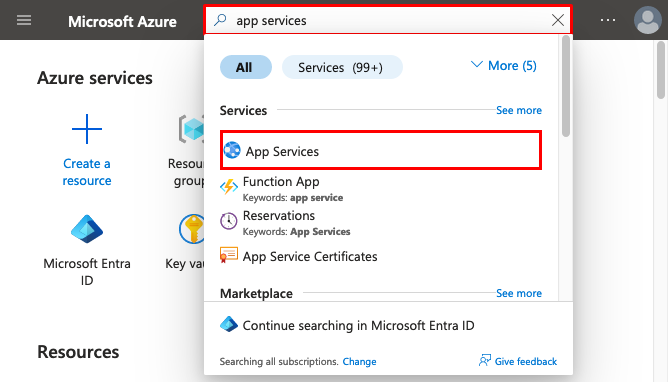
In the Azure portal, search for and select App Services, and then select your app.
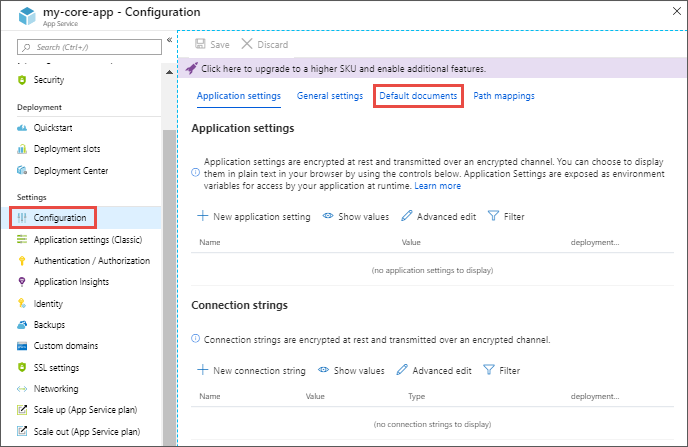
In the app's left menu, select Configuration > Application settings.
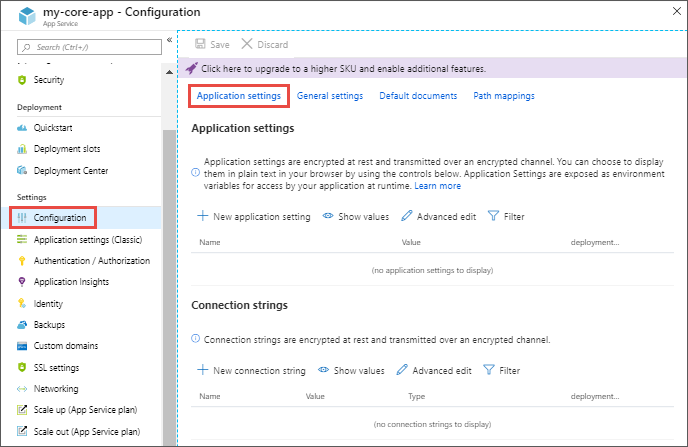
By default, values for app settings are hidden in the portal for security. To see a hidden value of an app setting, select its Value field. To see the hidden values of all app settings, select the Show values button.
To add a new app setting, select New application setting. To edit a setting, select the Edit button on the right side.
In the dialog, you can stick the setting to the current slot.
Note
In a default Linux app service or a custom Linux container, any nested JSON key structure in the app setting name like
ApplicationInsights:InstrumentationKeyneeds to be configured in App Service asApplicationInsights__InstrumentationKeyfor the key name. In other words, any:should be replaced by__(double underscore). Any periods in the app setting name will be replaced with a_(single underscore).When finished, select Update. Don't forget to select Save back in the Configuration page.
Edit app settings in bulk
Select the Advanced edit button. Edit the settings in the text area. When finished, select Update. Don't forget to select Save back in the Configuration page.
App settings have the following JSON formatting:
[
  {
    "name": "<key-1>",
    "value": "<value-1>",
    "slotSetting": false
  },
  {
    "name": "<key-2>",
    "value": "<value-2>",
    "slotSetting": false
  },
  ...
]
Configure connection strings
In the Azure portal, search for and select App Services, and then select your app. In the app's left menu, select Configuration > Application settings.
For ASP.NET and ASP.NET Core developers, setting connection strings in App Service are like setting them in <connectionStrings> in Web.config, but the values you set in App Service override the ones in Web.config. You can keep development settings (for example, a database file) in Web.config and production secrets (for example, SQL Database credentials) safely in App Service. The same code uses your development settings when you debug locally, and it uses your production secrets when deployed to Azure.
For other language stacks, it's better to use app settings instead, because connection strings require special formatting in the variable keys in order to access the values.
Note
There is one case where you may want to use connection strings instead of app settings for non-.NET languages: certain Azure database types are backed up along with the app only if you configure a connection string for the database in your App Service app. For more information, see Create a custom backup. If you don't need this automated backup, then use app settings.
At runtime, connection strings are available as environment variables, prefixed with the following connection types:
- SQLServer:
SQLCONNSTR_ - MySQL:
MYSQLCONNSTR_ - SQLAzure:
SQLAZURECONNSTR_ - Custom:
CUSTOMCONNSTR_ - PostgreSQL:
POSTGRESQLCONNSTR_
Note
.NET apps targeting PostgreSQL should set the connection string to Custom as workaround for a knows issue in .NET EnvironmentVariablesConfigurationProvider
For example, a MySQL connection string named connectionstring1 can be accessed as the environment variable MYSQLCONNSTR_connectionString1. For language-stack specific steps, see:
Connection strings are always encrypted when stored (encrypted-at-rest).
Note
Connection strings can also be resolved from Key Vault using Key Vault references.
In the Azure portal, search for and select App Services, and then select your app.
In the app's left menu, select Configuration > Application settings.
By default, values for connection strings are hidden in the portal for security. To see a hidden value of a connection string, select its Value field. To see the hidden values of all connection strings, select the Show value button.
To add a new connection string, select New connection string. To edit a connection string, select the Edit button on the right side.
In the dialog, you can stick the connection string to the current slot.
When finished, select Update. Don't forget to select Save back in the Configuration page.
Edit connection strings in bulk
Select the Advanced edit button. Edit the connection strings in the text area. When finished, select Update. Don't forget to select Save back in the Configuration page.
Connection strings have the following JSON formatting:
[
  {
    "name": "name-1",
    "value": "conn-string-1",
    "type": "SQLServer",
    "slotSetting": false
  },
  {
    "name": "name-2",
    "value": "conn-string-2",
    "type": "PostgreSQL",
    "slotSetting": false
  },
  ...
]
Configure language stack settings
Configure general settings
In the Azure portal, search for and select App Services, and then select your app. In the app's left menu, select Configuration > General settings.
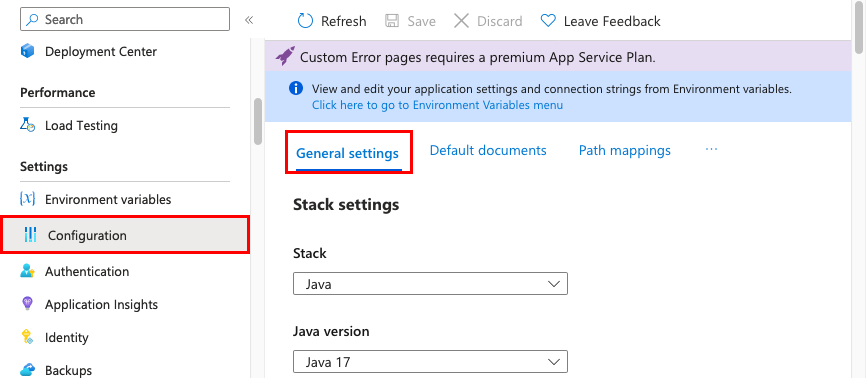
Here, you can configure some common settings for the app. Some settings require you to scale up to higher pricing tiers.
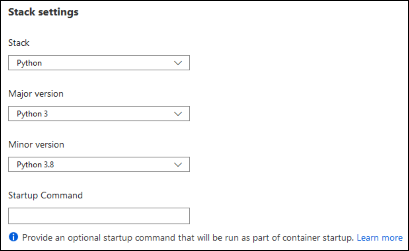
Stack settings: The software stack to run the app, including the language and SDK versions.
For Linux apps, you can select the language runtime version and set an optional Startup command or a startup command file.
Platform settings: Lets you configure settings for the hosting platform, including:
- Platform bitness: 32-bit or 64-bit. For Windows apps only.
- FTP state: Allow only FTPS or disable FTP altogether.
- HTTP version: Set to 2.0 to enable support for HTTPS/2 protocol.
Note
Most modern browsers support HTTP/2 protocol over TLS only, while non-encrypted traffic continues to use HTTP/1.1. To ensure that client browsers connect to your app with HTTP/2, secure your custom DNS name. For more information, see Secure a custom DNS name with a TLS/SSL binding in Azure App Service.
Web sockets: For ASP.NET SignalR or socket.io, for example.
Always On: Keeps the app loaded even when there's no traffic. When Always On isn't turned on (default), the app is unloaded after 20 minutes without any incoming requests. The unloaded app can cause high latency for new requests because of its warm-up time. When Always On is turned on, the front-end load balancer sends a GET request to the application root every five minutes. The continuous ping prevents the app from being unloaded.
Always On is required for continuous WebJobs or for WebJobs that are triggered using a CRON expression.
ARR affinity: In a multi-instance deployment, ensure that the client is routed to the same instance for the life of the session. You can set this option to Off for stateless applications.
HTTPS Only: When enabled, all HTTP traffic is redirected to HTTPS.
Minimum TLS version: Select the minimum TLS encryption version required by your app.
Debugging: Enable remote debugging for ASP.NET, ASP.NET Core, or Node.js apps. This option turns off automatically after 48 hours.
Incoming client certificates: require client certificates in mutual authentication.
Configure default documents
This setting is only for Windows apps.
The default document is the web page that's displayed at the root URL of an App Service app. The first matching file in the list is used. If the app uses modules that route based on URL instead of serving static content, there's no need for default documents.
In the Azure portal, search for and select App Services, and then select your app.
In the app's left menu, select Configuration > Default documents.
To add a default document, select New document. To remove a default document, select Delete to its right.
Map a URL path to a directory
By default, App Service starts your app from the root directory of your app code. But certain web frameworks don't start in the root directory. For example, Laravel starts in the public subdirectory. Such an app would be accessible at http://contoso.com/public, for example, but you typically want to direct http://contoso.com to the public directory instead. If your app's startup file is in a different folder, or if your repository has more than one application, you can edit or add virtual applications and directories.
Important
Virtual directory to a physical path feature is only available on Windows apps.
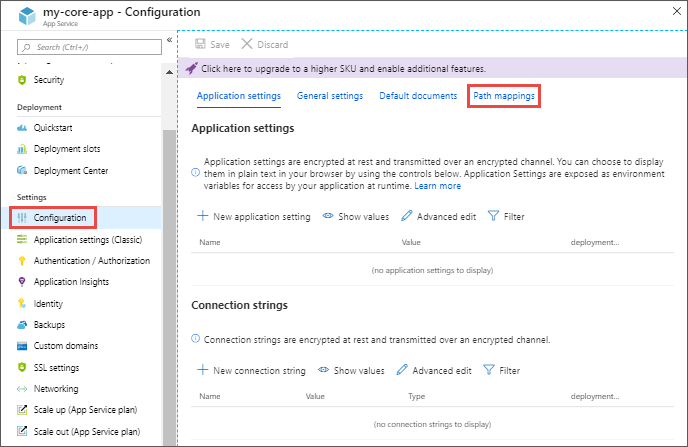
In the Azure portal, search for and select App Services, and then select your app.
In the app's left menu, select Configuration > Path mappings
Select New virtual application or directory.
- To map a virtual directory to a physical path, leave the Directory check box selected. Specify the virtual directory and the corresponding relative (physical) path to the website root (
D:\home). - To mark a virtual directory as a web application, clear the Directory check box.
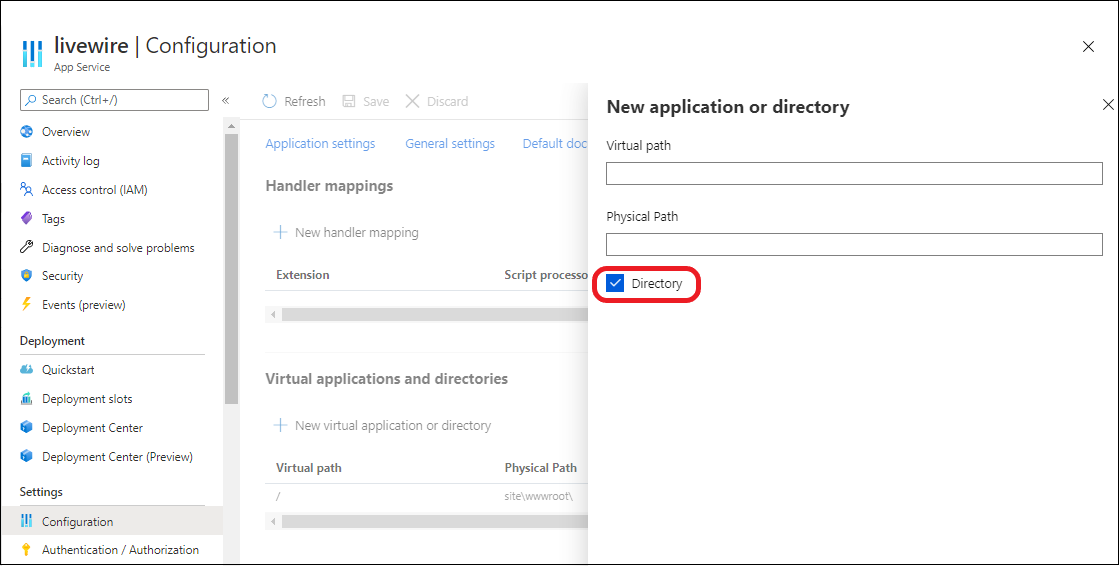
- To map a virtual directory to a physical path, leave the Directory check box selected. Specify the virtual directory and the corresponding relative (physical) path to the website root (
Select OK.
Configure handler mappings
For Windows apps, you can customize the IIS handler mappings and virtual applications and directories. Handler mappings let you add custom script processors to handle requests for specific file extensions.
To add a custom handler:
In the Azure portal, search for and select App Services, and then select your app.
In the app's left menu, select Configuration > Path mappings.
Select New handler mapping. Configure the handler as follows:
- Extension. The file extension you want to handle, such as *.php or handler.fcgi.
- Script processor. The absolute path of the script processor to you. Requests to files that match the file extension are processed by the script processor. Use the path
D:\home\site\wwwrootto refer to your app's root directory. - Arguments. Optional command-line arguments for the script processor.
Select OK.