Publishing Docker Images On Azure Container Registry
To successfully set up and operate the ACR, you’ll need the following:
- The Azure CLI installed
- A command-line environment, such as PowerShell (Windows), Bash (Linux), or the Terminal (macOS) application. Alternatively, you can use the Windows Subsystem for Linux (WSL) on Windows.
- A Microsoft Azure subscription
- The Docker client (Note: this is not Docker Desktop but part of Docker Desktop, so you can also install Docker Desktop, which is also required on Windows for non-WSL users.)
To create and deploy a Docker image to the ACR, you’ll first need to create an ACR instance. You can use the Azure Portal, a template engine like ARM with the Bicep template, or the Azure CLI.
Log in to your Azure subscription. In the search bar, type in “container” and select Container registries.
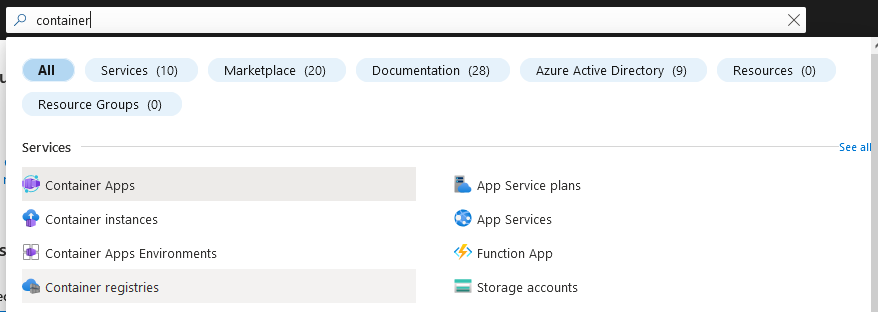
You'll see all ACR instances assigned to your subscription. Click Create to add a new instance.

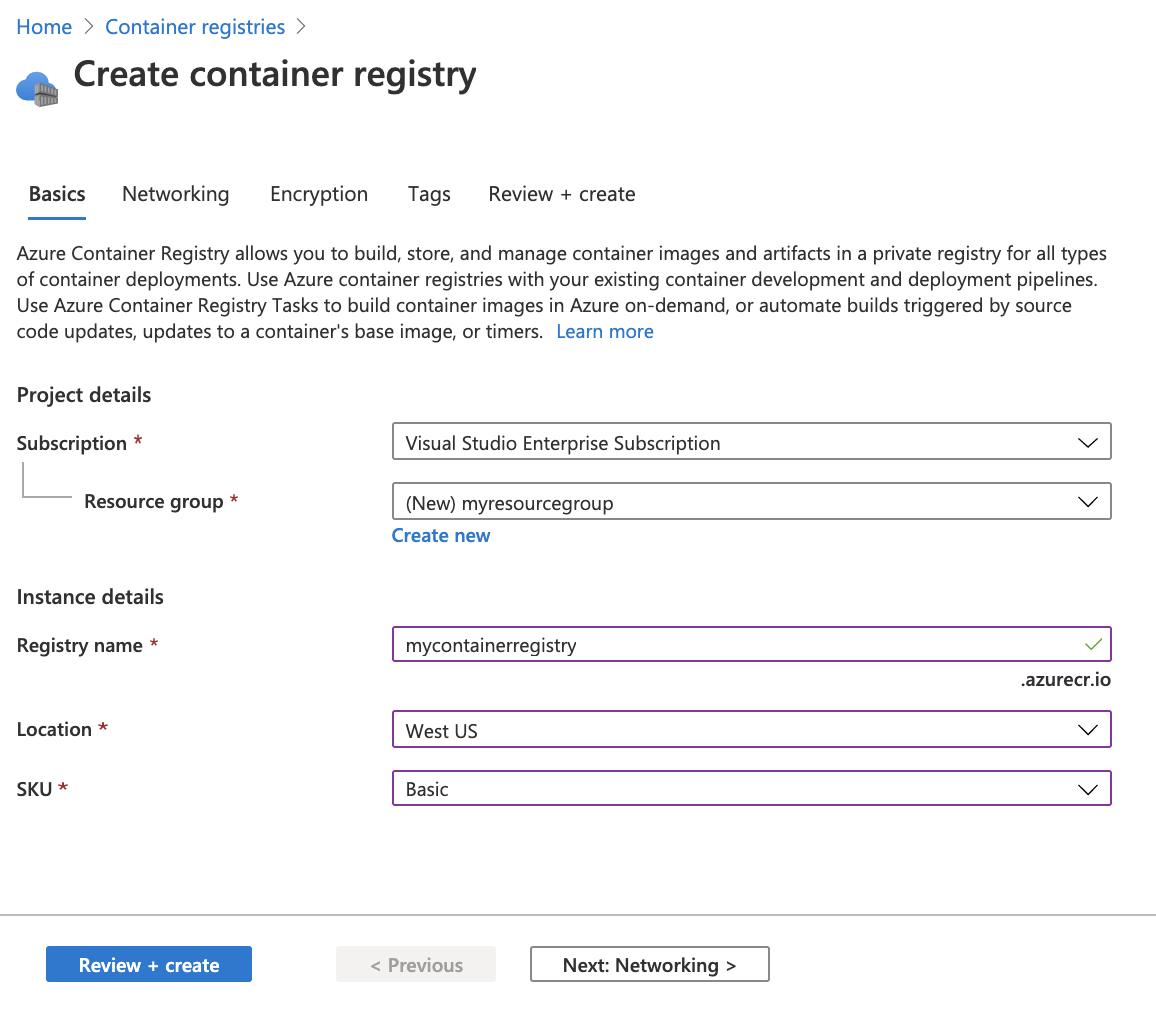
Now it’s time to fill out the essential details. You can either assign the ACR to an existing resource group or create a new one. Usually, the latter is considered good practice for an ACR because multiple services and resource groups will use it. This also counteracts accidental deletion, like when you want to remove a specific environment. The region determines which data center will host the ACR. In the example configuration below, we selected the West US location.
Keep in mind that the location is essential for deployment performance. Consumption can be optimized by techniques such as geo-replication (available in the premium SKU). However, deployment will always occur at the selected location. Ideally, this is the exact location of the computers or services deploying the Docker images. Improved deployment performance is one of the primary reasons to use a private registry such as the ACR.
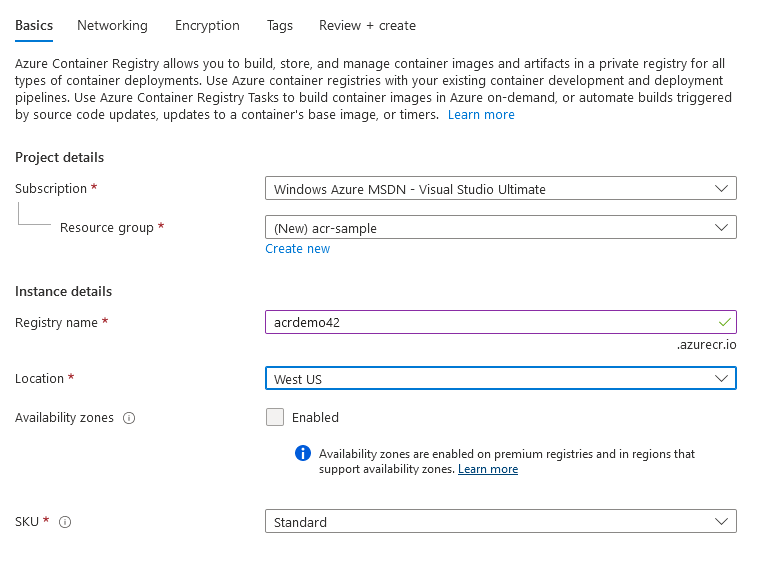
The SKU setting determines the capabilities and pricing of the ACR instance. While the Basic and Standard tiers only differ in quantity, Premium instances get many additional features, including private endpoint network connectivity, encryption with customer-managed keys, access tokens, and geo-replication. If you’re interested in comparing these SKUs, check out this documentation on ACR service tiers.
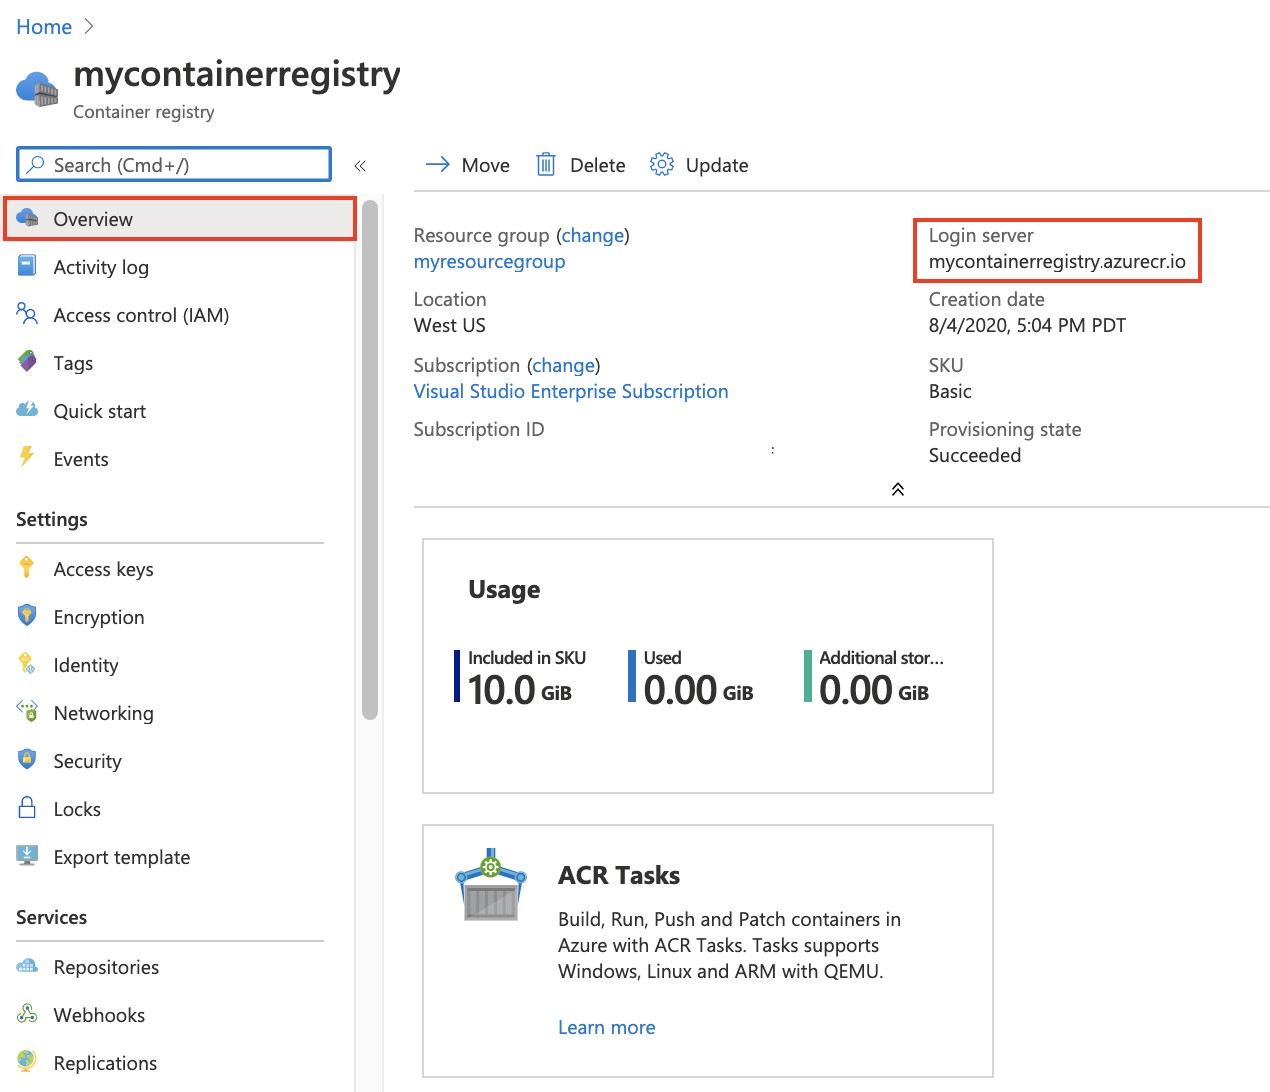
Coming back to the initial setup, you can click Review + create to review all the chosen options and trigger the creation of the new ACR instance. After the new ACR has been fully deployed, you can go to the resource in the portal. This should look as displayed below.

For now, the most important menu item is Repositories, which lists the published Docker images.
Before we continue, let’s see how the ACR instance can be created using the Azure CLI. You’ll need to have the Azure CLI installed and connected to your subscription. To do this, log in using the az login command.
Now you can create an ACR using the Azure CLI. First, ensure you’ve created a resource group. Via the Azure CLI, you enter the following:
az group create --name acr-sample --location westus
Use the resource group to place a new ACR instance there:
az acr create --resource-group acr-sample --name acrdemo42 --sku Standard
That’s it! You should see the JSON response from the Azure API indicating a successful creation.
Before we consider publishing and consuming a Docker image from the ACR, let’s create a simple Docker image on our local machine. In a new directory, create a file named Dockerfile.
The content of the Dockerfile should be:
FROM node:16-alpine
WORKDIR /app
COPY index.html .
RUN npm i http-server
CMD ["npx", "http-server"]
EXPOSE 8080
Here, you’re using the Node.js v16 Alpine image as the basis. It’s rather minimalistic but highly secure, providing frameworks and tools like node, npm, and npx. Then, set the working directory to /app (this is part of the image, so it doesn’t need to exist locally). Copy the index.html file from the same directory as the Dockerfile to the container’s working directory (/app) and install the http-server package.
When the Docker image starts, it should run the npx http-server command and expose port 8080, which is the default port used by the http-server package.
This will serve the following index.html file:
<!DOCTYPE html>
<meta charset="UTF-8">
<title>Hello Docker</title>
<style>
html, body {
width: 100%;
height: 100%;
margin: 0;
font-family: Candara, Calibri, Segoe, Segoe UI, Optima, Arial, sans-serif;
}
body {
display: flex;
justify-content: center;
align-items: center;
}
h1 {
font-size: 4rem;
color: white;
-webkit-background-clip: text;
background-clip: text;
-webkit-text-fill-color: transparent;
-moz-text-fill-color: transparent;
background-image: linear-gradient(135deg,#0e73cc 1.93%,#624bbb 14.86%,#ff455d 48.09%,#f35815 77.82%,#f2b600 97.3%);
}
</style>
<h1>This is working!</h1>
Now it’s time to build and publish this Docker image to our ACR. Start by building it:
docker build -t demo-container .
You’re now ready to publish the Docker image. But before doing this, you need to set up Docker authentication.
In the example above, the command to set up the Docker authentication via the Azure CLI is:
az acr login --name acrdemo42
In this case, replace the name (acrdemo42) with the chosen name of your ACR instance. Note that direct authentication using the Docker client is only possible if the admin user has been enabled. This is disabled by default and should remain so for security reasons. If you want to enable it, you can find the option in the Azure Portal’s Access keys menu.
Once you’re authenticated, tag the local image and push it to the ACR instance. Use the demo-container name chosen above and the ACR named acrdemo42, which is available at acrdemo42.azurecr.io.
docker image tag demo-container:latest acrdemo42.azurecr.io/demo-container:v1
docker push acrdemo42.azurecr.io/demo-container:v1
In the example above, you appended :v1 as a tag for the image. In many cases, it also makes sense to use other tags like :next to denote an image’s version in relation to other published images. These tags are like Git branches, providing a reference to the changes associated with the tag. Publishing new images causes these relative tags to change, whereas tags like v1 are static, always pointing to the same image independent of any new uploads.
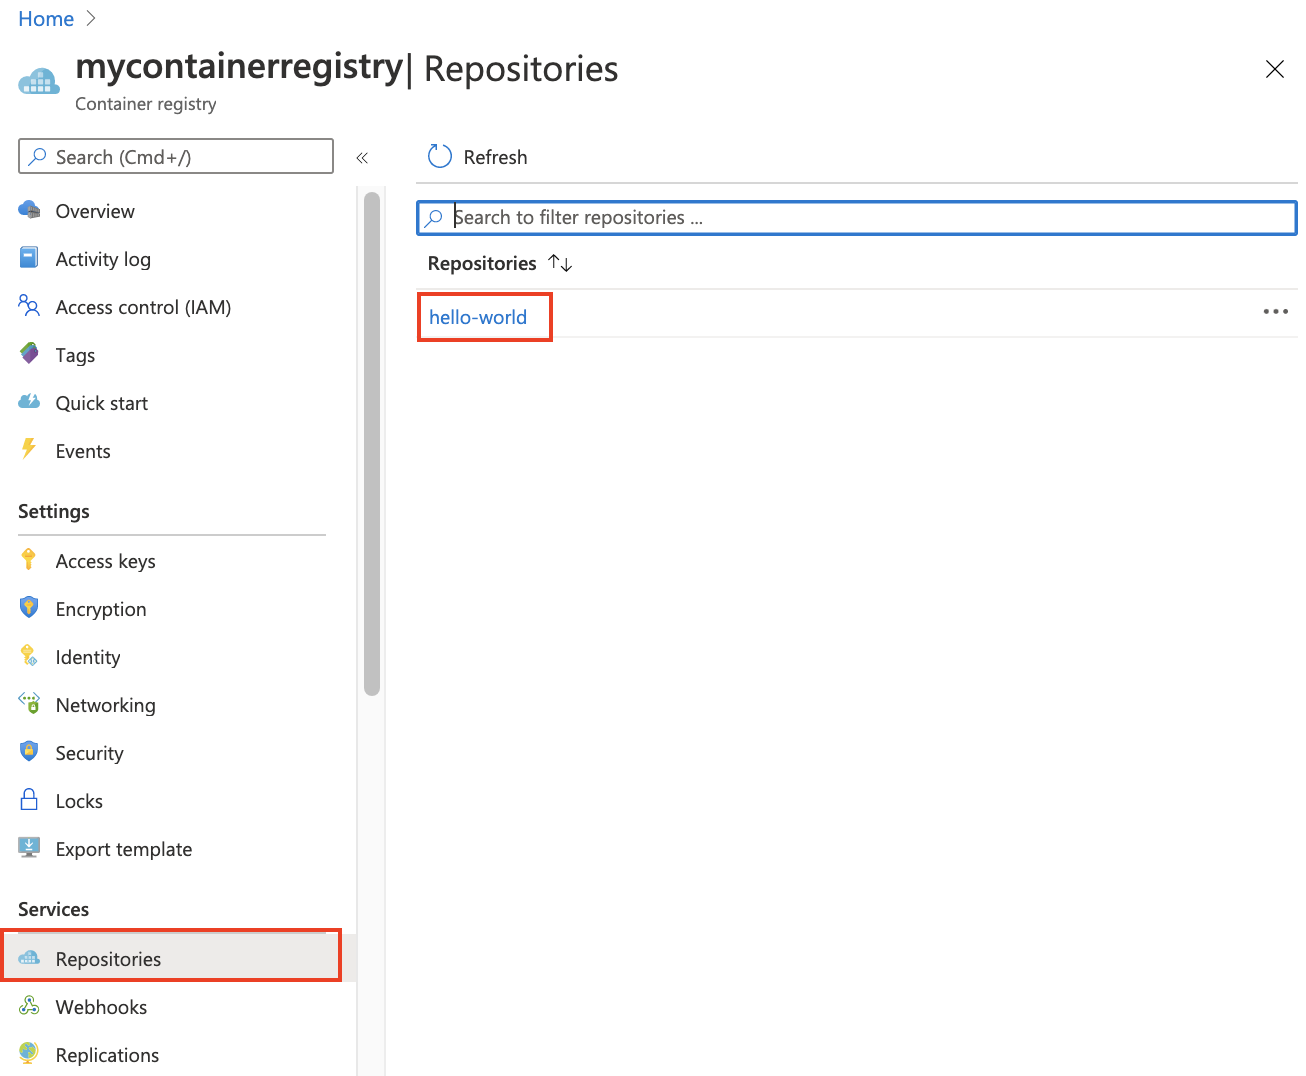
On the Repositories view of the ACR in the Azure Portal, the available information should have changed:
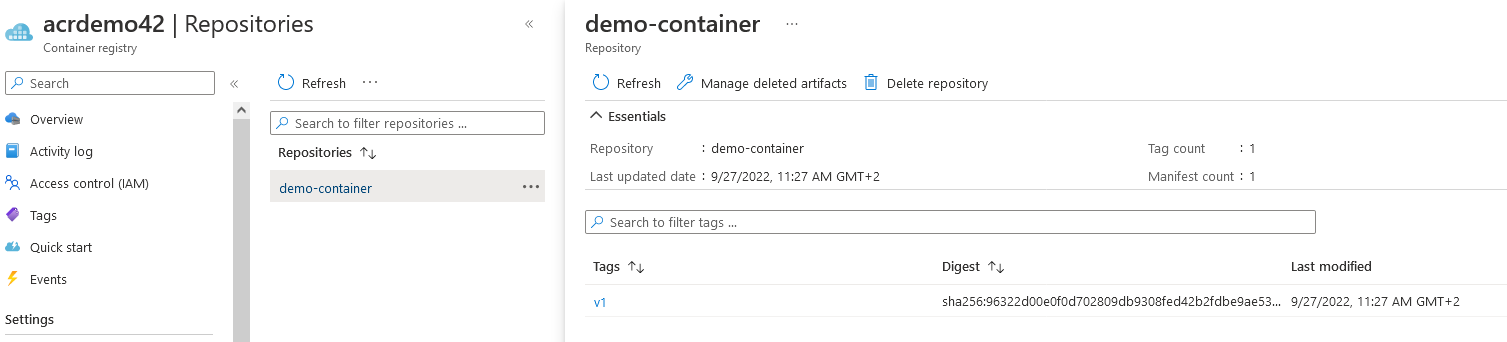 Fig. 6: Information about the demo-container from the Repositories view
Once published, you can docker pull and docker run the image on a local machine:
docker run -p 8080:8080 acrdemo42.azurecr.io/demo-container:v1
You should find the website defined above at http://localhost:8080.
So far, you’ve been using the node:16-alpine base image. The concept of base images is tied closely to layers. Having many layers may improve push performance, as unchanged layers will not need to be pushed. However, they will degrade pull performance. As a rule of thumb, you should have between 5 and 10 layers to reuse the cache without having to work too hard on pulling and decompressing.
Additionally, it is important to minimize your Docker image sizes, as multiple large files will not only waste significant bandwidth, but also increase startup time. Try to minimize the size of your image by removing unnecessary code or assets. The easiest way to do this is to choose a smaller base image. Alpine variants of popular images (such as the Node.js one above) are usually ideal. The downside of alpine images is they usually lack more advanced Linux tools. They also use musl instead of libc, leading to subtle bugs.